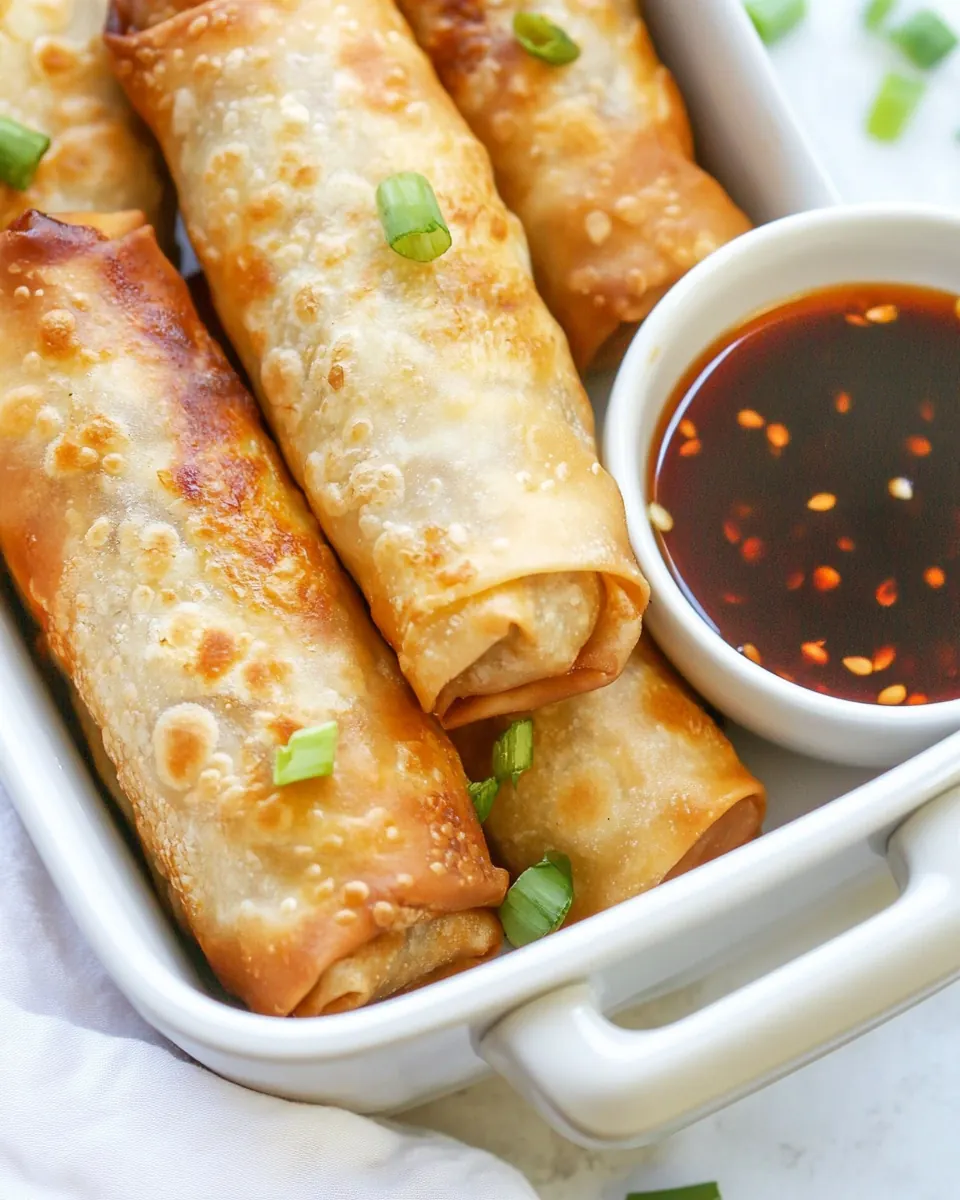
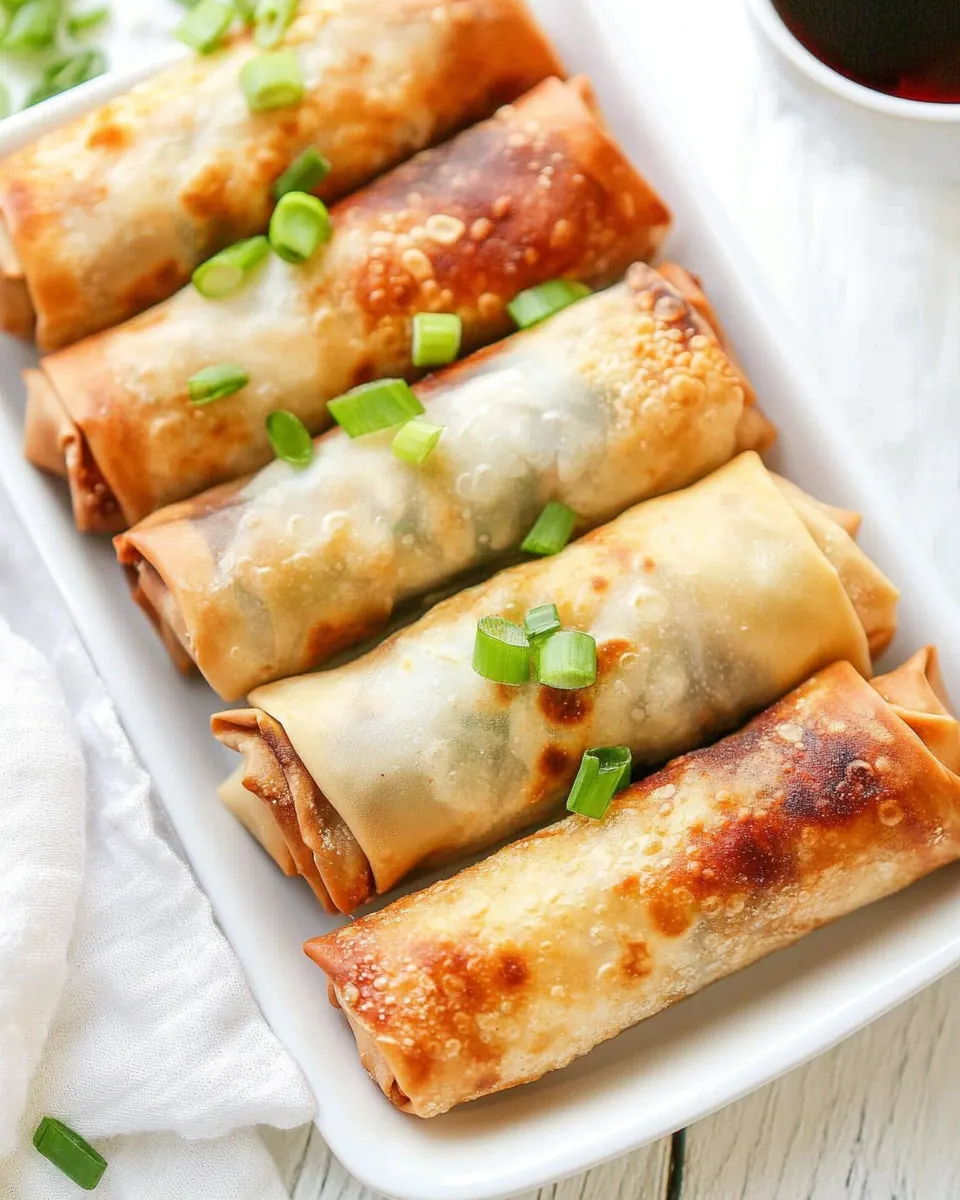
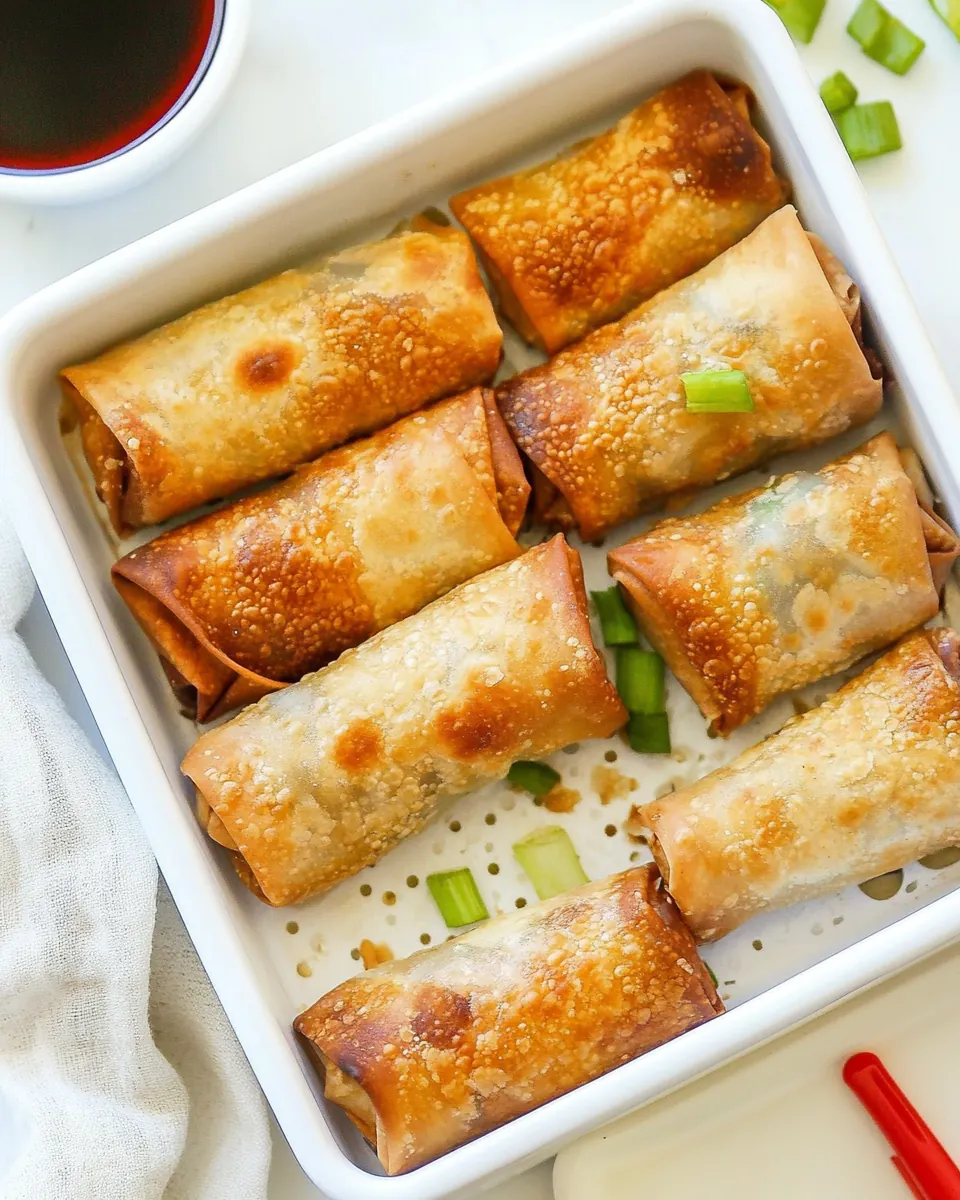
Air Fryer Spring Rolls
Air Fryer Spring Rolls are a recipe I turn to when I want something crisp, bright, and a little bit nostalgic. I first learned to love them at a weekend market where a vendor rolled each one by hand and crisped them until the wrappers sang with a delicate crunch. Ever since, I look for ways to recreate that crunchy exterior while keeping the filling juicy and well seasoned, and the Air Fryer Spring Rolls are my shortcut to that balance.
There is a comfort in the rhythm of assembling these rolls, the way the filling cools and the wrappers fold neatly around it. I remember a rainy afternoon spent wrapping with a friend, trading stories while we sealed each edge with a quick brush of egg wash. When they came out of the air fryer, the oil-sheen on the surface flashed under the kitchen light and the first bite released steam and a soft snap, bringing everyone to the table.
Recipe Snapshot
25 mins
15 mins
10 mins
Easy
200 kcal
Asian
Keto, Gluten-Free
Appetizers
Skillet, Air Fryer, Parchment paper
Why We Love This Air Fryer Spring Rolls
Crisp without deep frying
I love that these Air Fryer Spring Rolls give you that satisfying crunch without submerging them in oil. The air fryer gives consistent heat all around, so the wrapper becomes lacy and golden while using a fraction of the fat from traditional frying, which makes it easier to serve these more often.
Quick assembly and flexible filling
These rolls come together quickly, and the filling is forgiving. I often chop ingredients a little smaller to help them bind and cool faster. Because the recipe centers on a simple stir fry, you get layers of texture from the soft filling to the crisp wrapper, and it adapts to what you have on hand.
Balanced savory flavors
The combination of shrimp, cabbage, garlic, and a touch of oyster sauce creates a savory profile that is bright without overpowering. I appreciate how the scallion adds a fresh lift, while the white pepper introduces a soft warmth. These elements play well together, so each bite feels balanced.
Great for entertaining and weeknights
Whether I am prepping for friends or making something casual for dinner, these rolls are crowd pleasing. You can assemble them ahead of time and air fry just before serving, which helps keep the filling from becoming soggy. They reheat well in the air fryer, too, which is perfect for leftovers.
Controlled texture and reliability
I turn to this method when I want predictable results. The air fryer reduces the risk of uneven frying, and sealing with an egg wash helps the wrappers stay closed and form a neat edge. For anyone who wants dependable crispness with minimal fuss, this technique delivers.
Key Ingredients for Air Fryer Spring Rolls
These ingredients are the foundation of a spring roll that balances crunchy wrapper with a savory, slightly sweet filling. The players are simple yet purposeful, each adding texture, seasoning, or structure so the final roll is cohesive and satisfying.
- 120 g cabbage, finely sliced: Finely sliced to provide a delicate crunchy texture and mild sweetness that balances richer fillings; helps retain moisture during cooking and distributes evenly throughout the roll.
- 2 tablespoons oil: Used to lightly coat the filling and pan surfaces to promote even browning in the air fryer; contributes subtle richness and prevents sticking without overpowering other flavors.
- 2 cloves garlic, minced: Mince to release pungent aromatics that deepen overall flavor; gently sautée with oil to bloom fragrance and blend with other savory components for a cohesive filling.
- 60 g shrimp, cut into small pieces: Cut into small pieces to ensure even distribution and bite-sized morsels; offers a sweet, briny protein element that pairs well with the vegetables and adds texture contrast.
- 1 stalk scallion, cut into rings: Cut into rings to add fresh, sharp oniony notes and a slight crunch; stirs into the filling near the end of cooking to preserve brightness and color.
- 1 teaspoon oyster sauce: Measured to add concentrated umami and a touch of sweetness; mix into the filling sparingly to enhance savory depth without overwhelming delicate ingredients.
- salt, to taste: Added sparingly to adjust overall seasoning and balance flavors; tastes gradually as you combine ingredients to avoid over-salting and maintain harmony.
- 3 dashes ground white pepper: Sprinkled lightly to provide a warm, subtle heat and aromatic edge; enhances savory components and rounds out the seasoning profile without dominating.
- spring roll pastry: Wrapped around the filling to form crisp, golden envelopes; provides structure for rolling, creates the characteristic flaky exterior when brushed and air fried.
- 1 egg, lightly beaten, for egg wash: Lightly beaten and applied to seams and surfaces to act as an adhesive and promote glossy browning; helps seal the roll and achieve an attractive golden finish.
Directions for Air Fryer Spring Rolls
These directions transform the raw ingredients into perfectly crisp rolls. Read through them so you understand the flow from skillet to wrapper to air fryer, then follow the steps in order for best results. Keep tools and parchment ready before you start assembling.
- In a skillet, heat 1 tablespoon of oil over medium heat. Stir-fry the garlic until aromatic but not browned. Add the shrimp and stir a few times, then add the cabbage and scallions. Stir to combine.: As the oil warms, you will notice a faint shimmer and a soft scent rising, which signals the right moment to add aromatics. This moderate temperature allows the garlic to release its fragrance without scorching, and it gives the shrimp a gentle sear that locks in juices. A common mistake is using too high heat, which burns the garlic and makes it bitter, so adjust the flame so the oil glistens but never smokes. Use a skillet with even heat distribution to avoid hot spots that can overcook parts of the filling.
- Add the oyster sauce, salt, and black pepper. Stir to mix well. (Note: Do not add water—you don’t want a watery filling.) Cook until the vegetables are just wilted but still slightly crisp. Remove from heat and let cool completely.: When the garlic hits the oil you should hear a soft sizzle and smell a warm, savory fragrance; that is the cue to move quickly. Keep the garlic moving so it softens and releases oils without darkening. Browning indicates overcooking, which will introduce a bitter flavor into the filling, so remove from heat if you see any color change. If your garlic cooks too fast, lower the heat and add the next ingredient immediately to cool the pan.
- On a flat surface lined with parchment paper, place about 2 teaspoons of filling onto each wrapper. Roll tightly and seal the edge with egg wash.: The shrimp should sizzle and begin to turn opaque at the edges, a visual signal that it is cooking through. Stir a few times so each piece gets brief contact with the hot pan, then add the sliced cabbage and scallion rings which will release moisture and mingle with the seafood aromas. You will hear a slightly louder sizzle as the vegetables hit the pan; this helps steam them just enough so they remain slightly crisp. Avoid crowding the pan which can steam rather than sear, leading to a soggy filling.
- Brush oil on the bottom of the air fryer basket. Arrange the spring rolls in a single layer. Brush the tops with oil and air fry at 190°C (375°F) for 10 minutes.: At this stage the ingredients should mingle and the pan will emit a layered aroma of seafood and aromatics. Use a spatula to fold the mixture gently so the heat distributes evenly and so the cabbage softens uniformly. You should see the cabbage edges beginning to turn translucent while the shrimp becomes fully opaque. A common oversight is over stirring which can break down textures and make the filling pasty, so stir just enough for an even mix.
- Enjoy warm with your favorite chili sauce for dipping.: When you add the oyster sauce the filling will take on a shiny, slightly sticky sheen and the aroma will deepen into savory umami. Mix it through quickly so each piece is seasoned, then taste as it cools to fine tune the salt. The sauce binds flavors and adds body, which helps the filling feel cohesive inside the wrapper. Avoid adding water here, as noted, because excess moisture will make the rolls soggy in the air fryer.
- Stir to mix well.: After seasoning, the mixture should look glossy and well coated. This is the moment to watch textures closely; the cabbage should be tender yet still have a bit of snap, and the shrimp should be just cooked through. The combined smell will be rich and slightly sweet from the oyster sauce . A frequent mistake is not letting the filling cool enough before wrapping, which can cause steam to accumulate inside the pastry and make it soggy.
- Cook until the vegetables are just wilted but still slightly crisp.: The ideal filling has contrast so aim for cabbagethat yields at the edges but retains a slight tooth. You want the filling to hold shape when scooped. Overcooking removes that pleasant contrast and results in a limp interior that will throw off the texture balance of the finished roll. Keep tasting small bits so you judge doneness by texture, not time alone.
- Remove from heat and let cool completely.: Cooling is essential because hot filling releases steam that can dampen the wrapper during rolling and make the rolls soggy. Spread the mixture thin on a tray if you want it to cool faster. A common error is wrapping while still warm, which traps moisture and ruins the crisp finish. Letting the filling cool also helps flavors settle, making seasoning more accurate.
- On a flat surface lined with parchment paper, place about 2 teaspoons of filling onto each wrapper.: When you portion the filling, the smell should be muted compared to when it was hot, but still savory and inviting. Two teaspoons keeps the rolls neat and prevents overstuffing which causes tearing. Place the filling slightly off center so you can fold the wrapper snugly. Overfilling leads to seams opening in the air fryer and oil pooling around the rolls.
- Roll tightly and seal the edge with egg wash.: As you roll, the wrapper will cling together if you pull it taut and smooth out air pockets, producing a compact cylinder. Brush the edge with the egg wash to glue it closed, and press firmly so the seam adheres. A good seal prevents filling from escaping during cooking and helps achieve that smooth golden rim. If the wrapper is dry, lightly moisten the edge with a dab of water before the egg wash to improve adhesion.
- Brush oil on the bottom of the air fryer basket.: Lightly oiling the basket prevents sticking and promotes even browning on the bottom surface of each roll. You will see a faint sheen where the oil catches the light, which is enough to help crisp the pastry. Avoid pooling oil, which can cause uneven frying and greasy spots on the rolls.
- Arrange the spring rolls in a single layer.: Give each roll breathing room so hot air circulates freely, producing an even, golden crust. Crowding will lead to uneven texture and soft spots where air cannot reach. When arranged properly you should hear a subtle sizzle once the fryer warms, indicating active crisping. If you have a lot, cook in batches rather than stacking them.
- Brush the tops with oil and air fry at 190°C (375°F) for 10 minutes.: The oil on top encourages that glossy golden finish while the set temperature crisps the wrapper without overcooking the filling. In the first few minutes you might smell a warm toasty note as the pastry dehydrates and browns, and by the end the rolls should be uniformly golden. A common pitfall is opening the fryer too often which releases heat and extends cooking time, so check only once near the end for color. If one side looks darker, rotate the basket quickly to even out browning.
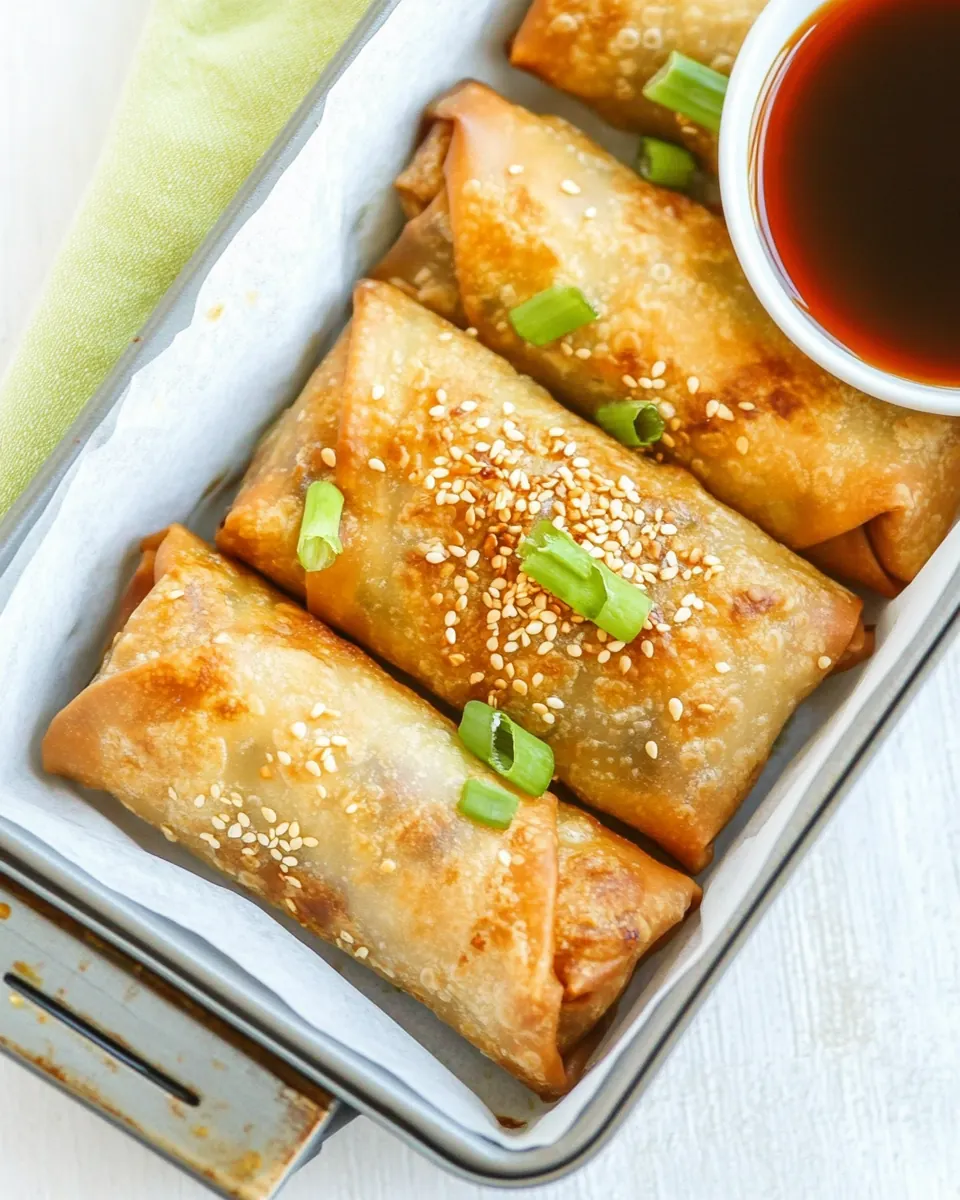
- Enjoy warm with your favorite chili sauce for dipping.: Once they emerge they will offer a hot, steamy interior and a thin crisp shell that cracks pleasantly when bitten. Serve immediately for the best contrast between filling and wrapper. Letting them sit too long will soften the pastry, so plan to serve right away or re-crisp briefly in the air fryer before serving. Be mindful of steam when biting into the first piece, it can be very hot.
Helpful Hints
Below are practical tips I use every time I make Air Fryer Spring Rolls. These focus on timing, texture, and small steps that keep the process smooth from prep to plate.
- Cool the filling fully: Let the filling come to room temperature before wrapping to prevent trapped steam from making the pastry soggy.
- Portion carefully: Use about two teaspoons of filling per wrapper to avoid overstuffing and tearing during rolling and cooking.
- Seal with egg wash: A light brush of egg wash keeps seams closed and gives a golden finish after air frying.
- Oil sparingly: Brush a small amount of oil on top and under the rolls to promote even browning without greasiness.
- Single layer cooking: Arrange rolls in one layer in the air fryer basket for consistent heat circulation and uniform crisping.
- Reheat properly: To refresh leftover rolls, pop them back in the air fryer for two to three minutes to restore crunch rather than microwaving, which makes them limp.
Best Served With
These serving ideas highlight how Air Fryer Spring Rolls work across occasions and pairings. Below I outline complementary sides, sauces, and storage tips to help you present them confidently.
- Classic chili dipping sauce: A bright, vinegary chili sauce cuts through the richness and is a crowd pleaser at casual lunches.
- Light salad for balance: Serve with a crisp green salad to add freshness and contrast in texture and temperature.
- Party platter: Arrange on a warm platter with small bowls of dipping sauces, perfect for game day or appetizers at a gathering.
- Weeknight meal: Pair with steamed rice and a simple vegetable side for an easy weeknight dinner that feels special.
- Storage tips: Cool completely before refrigerating in a single layer on a tray, then transfer to an airtight container. Reheat in the air fryer to restore crispness.
- Seasonal touch: In spring, highlight the fresh scallions and serve with a citrusy dipping sauce to brighten the plate.
FAQ
Conclusion
These Air Fryer Spring Rolls stand out because they combine a delicately seasoned filling with a reliably crisp, low oil exterior. They are approachable to make, easy to adapt, and perfect for sharing at casual gatherings or enjoying as a simple weeknight treat. Give them a try and notice how the air fryer transforms simple wrappers into a crunchy, golden shell that complements the savory filling beautifully. I hope they become a regular in your recipe rotation, bringing crisp texture and bright flavor to your table without the fuss of deep frying.

Air Fryer Spring Rolls
Equipment
- Skillet
- Air Fryer
- Parchment Paper
Ingredients
- 120 g cabbage, finely sliced Finely sliced to provide a delicate crunchy texture and mild sweetness that balances richer fillings; helps retain moisture during cooking and distributes evenly throughout the roll.
- 2 tablespoons oil Used to lightly coat the filling and pan surfaces to promote even browning in the air fryer; contributes subtle richness and prevents sticking without overpowering other flavors.
- 2 cloves garlic, minced Mince to release pungent aromatics that deepen overall flavor; gently sautée with oil to bloom fragrance and blend with other savory components for a cohesive filling.
- 60 g shrimp, cut into small pieces Cut into small pieces to ensure even distribution and bite-sized morsels; offers a sweet, briny protein element that pairs well with the vegetables and adds texture contrast.
- 1 stalk scallion, cut into rings Cut into rings to add fresh, sharp oniony notes and a slight crunch; stirs into the filling near the end of cooking to preserve brightness and color.
- 1 teaspoon oyster sauce Measured to add concentrated umami and a touch of sweetness; mix into the filling sparingly to enhance savory depth without overwhelming delicate ingredients.
- salt, to taste Added sparingly to adjust overall seasoning and balance flavors; tastes gradually as you combine ingredients to avoid over-salting and maintain harmony.
- 3 dashes ground white pepper Sprinkled lightly to provide a warm, subtle heat and aromatic edge; enhances savory components and rounds out the seasoning profile without dominating.
- spring roll pastry Wrapped around the filling to form crisp, golden envelopes; provides structure for rolling, creates the characteristic flaky exterior when brushed and air fried.
- 1 egg, lightly beaten, for egg wash Lightly beaten and applied to seams and surfaces to act as an adhesive and promote glossy browning; helps seal the roll and achieve an attractive golden finish.
Instructions
- In a skillet, heat 1 tablespoon of oil over medium heat. Stir-fry the garlic until aromatic but not browned. Add the shrimp and stir a few times, then add the cabbage and scallions. Stir to combine.: As the oil warms, you will notice a faint shimmer and a soft scent rising, which signals the right moment to add aromatics. This moderate temperature allows the garlic to release its fragrance without scorching, and it gives the shrimp a gentle sear that locks in juices. A common mistake is using too high heat, which burns the garlic and makes it bitter, so adjust the flame so the oil glistens but never smokes. Use a skillet with even heat distribution to avoid hot spots that can overcook parts of the filling.
- Add the oyster sauce, salt, and black pepper. Stir to mix well. (Note: Do not add water—you don’t want a watery filling.) Cook until the vegetables are just wilted but still slightly crisp. Remove from heat and let cool completely.: When the garlic hits the oil you should hear a soft sizzle and smell a warm, savory fragrance; that is the cue to move quickly. Keep the garlic moving so it softens and releases oils without darkening. Browning indicates overcooking, which will introduce a bitter flavor into the filling, so remove from heat if you see any color change. If your garlic cooks too fast, lower the heat and add the next ingredient immediately to cool the pan.
- On a flat surface lined with parchment paper, place about 2 teaspoons of filling onto each wrapper. Roll tightly and seal the edge with egg wash.: The shrimp should sizzle and begin to turn opaque at the edges, a visual signal that it is cooking through. Stir a few times so each piece gets brief contact with the hot pan, then add the sliced cabbage and scallion rings which will release moisture and mingle with the seafood aromas. You will hear a slightly louder sizzle as the vegetables hit the pan; this helps steam them just enough so they remain slightly crisp. Avoid crowding the pan which can steam rather than sear, leading to a soggy filling.
- Brush oil on the bottom of the air fryer basket. Arrange the spring rolls in a single layer. Brush the tops with oil and air fry at 190°C (375°F) for 10 minutes.: At this stage the ingredients should mingle and the pan will emit a layered aroma of seafood and aromatics. Use a spatula to fold the mixture gently so the heat distributes evenly and so the cabbage softens uniformly. You should see the cabbage edges beginning to turn translucent while the shrimp becomes fully opaque. A common oversight is over stirring which can break down textures and make the filling pasty, so stir just enough for an even mix.
- Enjoy warm with your favorite chili sauce for dipping.: When you add the oyster sauce the filling will take on a shiny, slightly sticky sheen and the aroma will deepen into savory umami. Mix it through quickly so each piece is seasoned, then taste as it cools to fine tune the salt. The sauce binds flavors and adds body, which helps the filling feel cohesive inside the wrapper. Avoid adding water here, as noted, because excess moisture will make the rolls soggy in the air fryer.
- Stir to mix well.: After seasoning, the mixture should look glossy and well coated. This is the moment to watch textures closely; the cabbage should be tender yet still have a bit of snap, and the shrimp should be just cooked through. The combined smell will be rich and slightly sweet from the oyster sauce . A frequent mistake is not letting the filling cool enough before wrapping, which can cause steam to accumulate inside the pastry and make it soggy.
- Cook until the vegetables are just wilted but still slightly crisp.: The ideal filling has contrast so aim for cabbagethat yields at the edges but retains a slight tooth. You want the filling to hold shape when scooped. Overcooking removes that pleasant contrast and results in a limp interior that will throw off the texture balance of the finished roll. Keep tasting small bits so you judge doneness by texture, not time alone.
- Remove from heat and let cool completely.: Cooling is essential because hot filling releases steam that can dampen the wrapper during rolling and make the rolls soggy. Spread the mixture thin on a tray if you want it to cool faster. A common error is wrapping while still warm, which traps moisture and ruins the crisp finish. Letting the filling cool also helps flavors settle, making seasoning more accurate.
- On a flat surface lined with parchment paper, place about 2 teaspoons of filling onto each wrapper.: When you portion the filling, the smell should be muted compared to when it was hot, but still savory and inviting. Two teaspoons keeps the rolls neat and prevents overstuffing which causes tearing. Place the filling slightly off center so you can fold the wrapper snugly. Overfilling leads to seams opening in the air fryer and oil pooling around the rolls.
- Roll tightly and seal the edge with egg wash.: As you roll, the wrapper will cling together if you pull it taut and smooth out air pockets, producing a compact cylinder. Brush the edge with the egg wash to glue it closed, and press firmly so the seam adheres. A good seal prevents filling from escaping during cooking and helps achieve that smooth golden rim. If the wrapper is dry, lightly moisten the edge with a dab of water before the egg wash to improve adhesion.
- Brush oil on the bottom of the air fryer basket.: Lightly oiling the basket prevents sticking and promotes even browning on the bottom surface of each roll. You will see a faint sheen where the oil catches the light, which is enough to help crisp the pastry. Avoid pooling oil, which can cause uneven frying and greasy spots on the rolls.
- Arrange the spring rolls in a single layer.: Give each roll breathing room so hot air circulates freely, producing an even, golden crust. Crowding will lead to uneven texture and soft spots where air cannot reach. When arranged properly you should hear a subtle sizzle once the fryer warms, indicating active crisping. If you have a lot, cook in batches rather than stacking them.
- Brush the tops with oil and air fry at 190°C (375°F) for 10 minutes.: The oil on top encourages that glossy golden finish while the set temperature crisps the wrapper without overcooking the filling. In the first few minutes you might smell a warm toasty note as the pastry dehydrates and browns, and by the end the rolls should be uniformly golden. A common pitfall is opening the fryer too often which releases heat and extends cooking time, so check only once near the end for color. If one side looks darker, rotate the basket quickly to even out browning.
- Enjoy warm with your favorite chili sauce for dipping.: Once they emerge they will offer a hot, steamy interior and a thin crisp shell that cracks pleasantly when bitten. Serve immediately for the best contrast between filling and wrapper. Letting them sit too long will soften the pastry, so plan to serve right away or re-crisp briefly in the air fryer before serving. Be mindful of steam when biting into the first piece, it can be very hot.
Notes
- Cool the filling fully: Let the filling come to room temperature before wrapping to prevent trapped steam from making the pastry soggy.
- Portion carefully: Use about two teaspoons of filling per wrapper to avoid overstuffing and tearing during rolling and cooking.
- Seal with egg wash: A light brush of egg wash keeps seams closed and gives a golden finish after air frying.
- Oil sparingly: Brush a small amount of oil on top and under the rolls to promote even browning without greasiness.
- Single layer cooking: Arrange rolls in one layer in the air fryer basket for consistent heat circulation and uniform crisping.
- Reheat properly: To refresh leftover rolls, pop them back in the air fryer for two to three minutes to restore crunch rather than microwaving, which makes them limp.