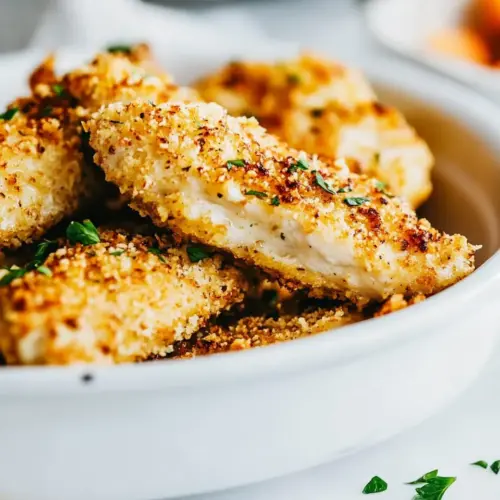
Garlic Parmesan Chicken Tenders
Garlic Parmesan Chicken Tenders are the kind of dish I turn to when I need comfort food that still feels a little clever. The first time I made them, I was racing home from a long day and wanted something quick, crunchy, and satisfying, with a garlicky punch and that flaky, nutty hit of freshly grated Parmesan cheese. These tenders felt like the solution, simple enough to throw together, but impressive enough to serve to friends who expect a little flair.
I remember laying out the bowls and thinking about rhythm, how coating each piece creates a tactile little ritual. Dredging the chicken through flour, then a garlicky oil, then a panko and Parmesan mix felt like a tiny ceremony that promised golden, crackly results. While they baked, my kitchen filled with the scent of garlic, warm oil, and toasted panko, and I could tell it would be worth the few extra minutes of care.
Weeknights now often feature these tenders because they balance ease and texture. The kids call them crunchy chicken and reach for the dipping sauce, while grownups linger over the savory Parmesan notes. I like that they adapt to different moods, pairing with a bright salad, a pile of roasted vegetables, or simply a stack of napkins and a big platter.
Recipe Snapshot
25 mins
10 mins
15 mins
Medium
350 kcal
American
Keto, Gluten-Free
Dinner
Utopia Kitchen Cooking Knives, Microplane Grater, Nordic Wave Baking Sheet
Why This Garlic Parmesan Chicken Tenders Is a Winner
Crunchy, not greasy
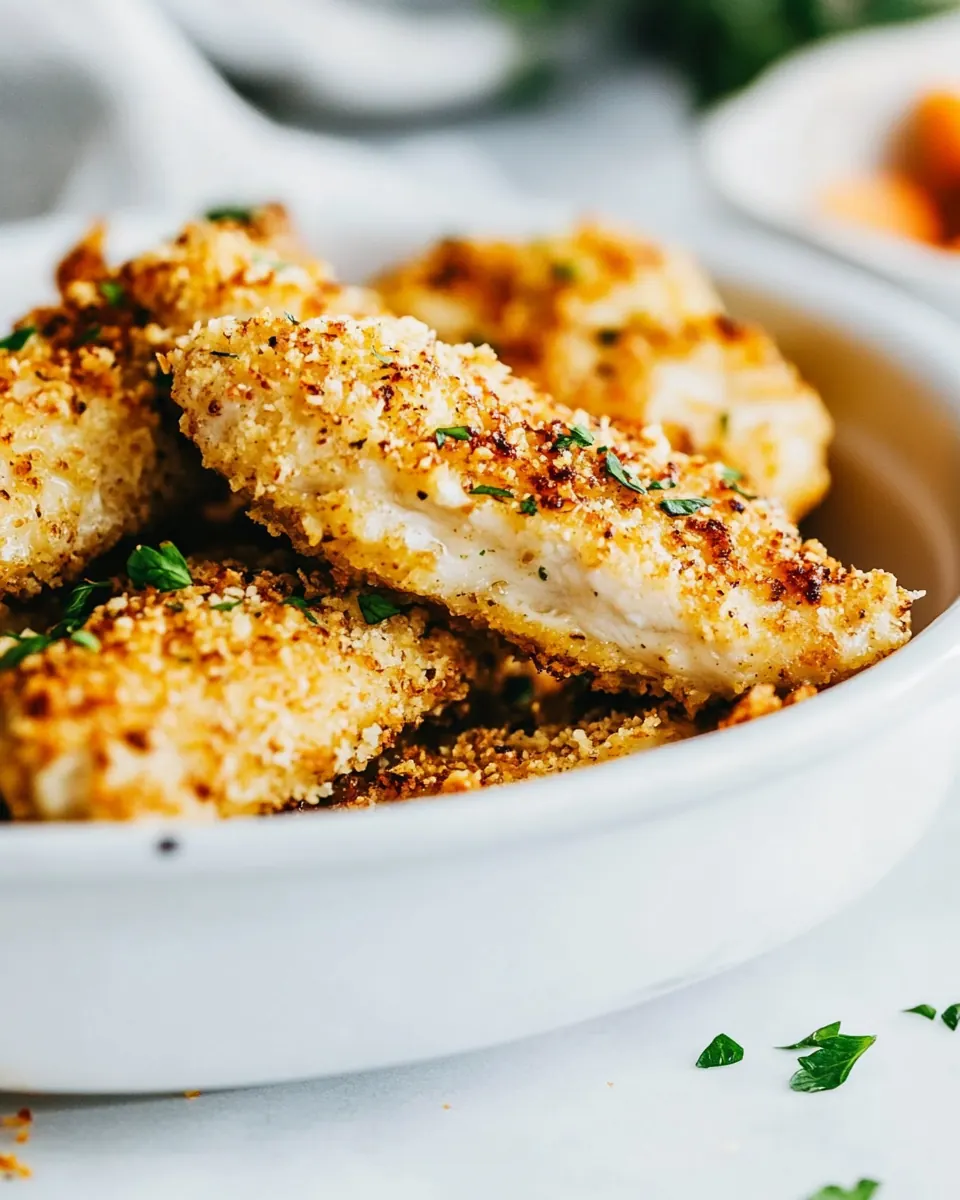
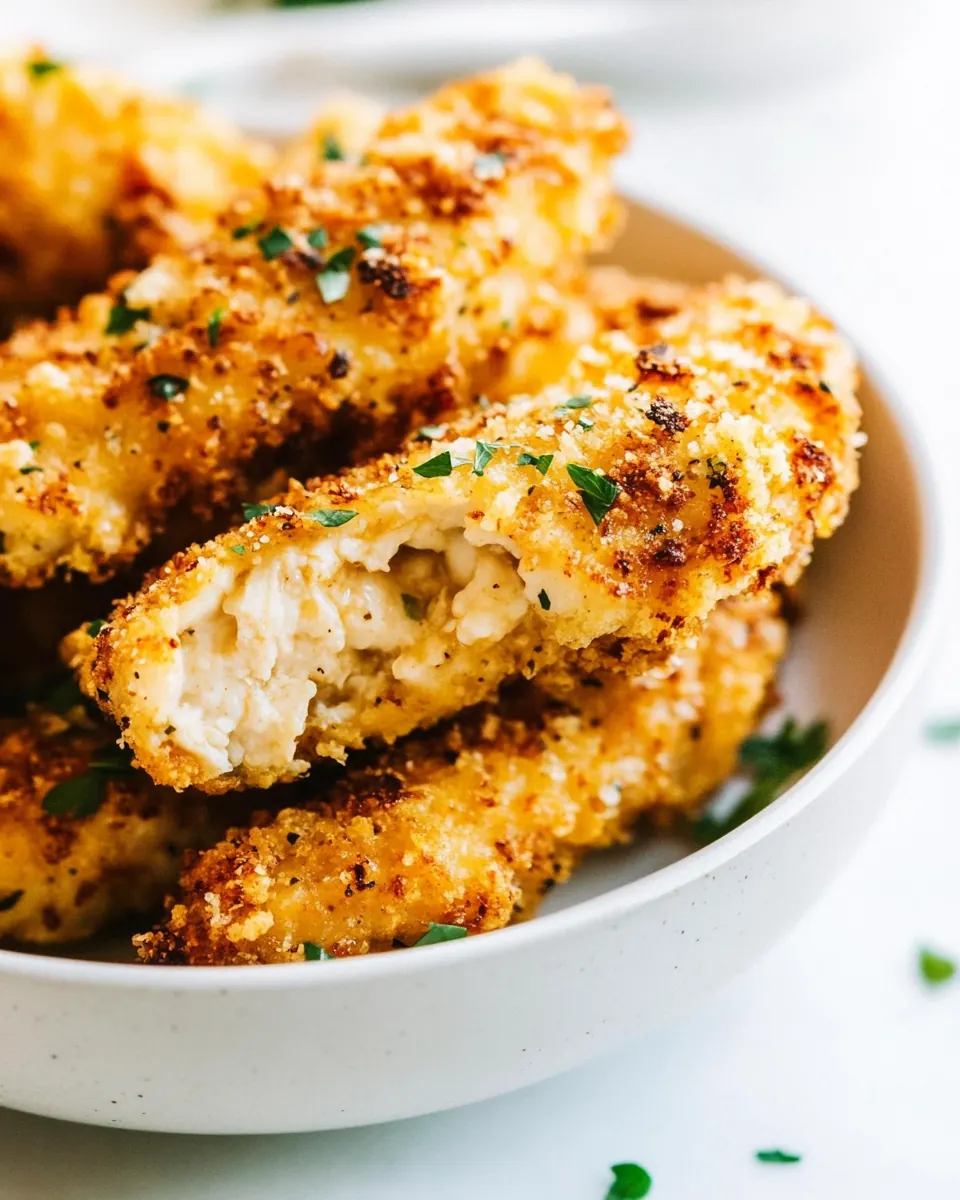
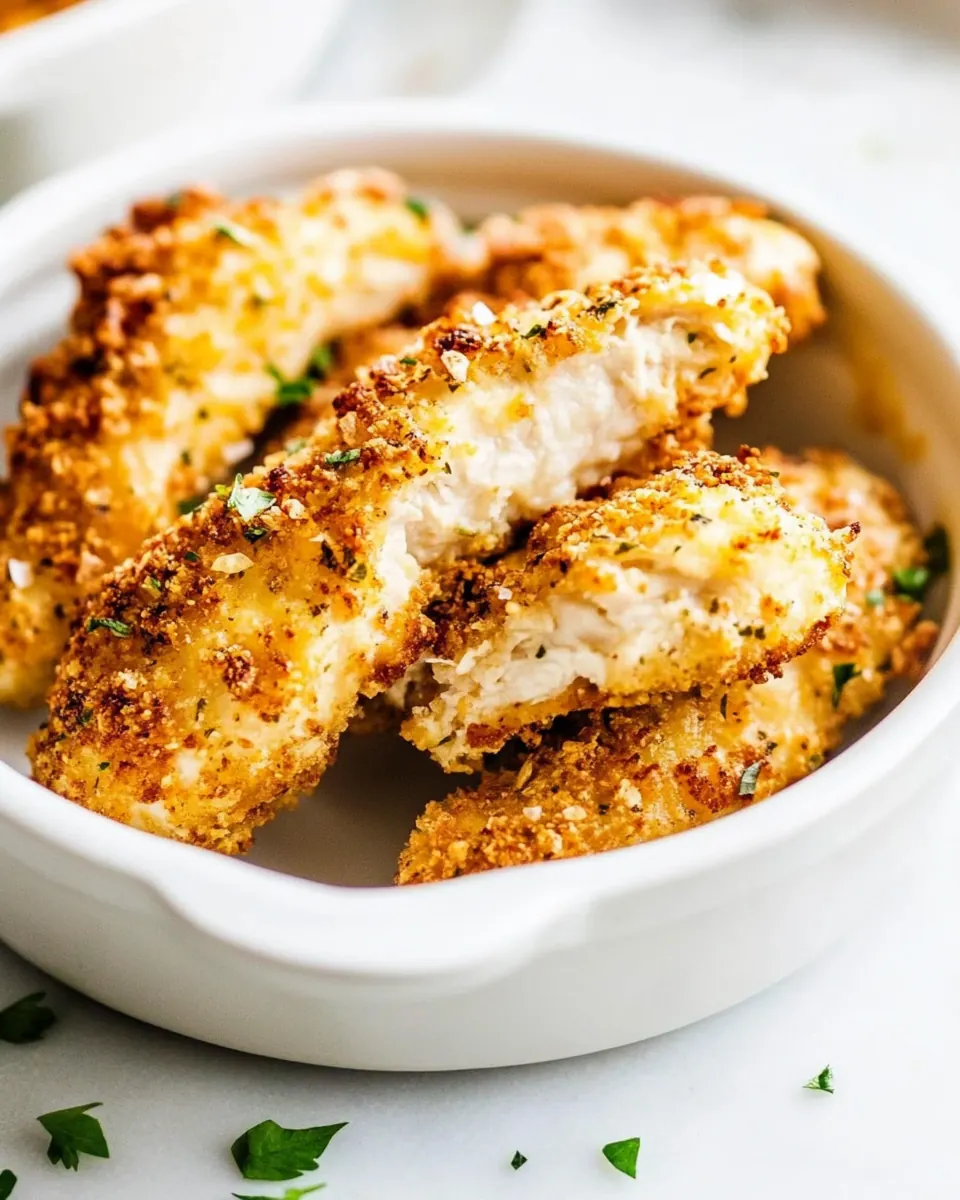
I love how Garlic Parmesan Chicken Tenders deliver a satisfying crunch without feeling heavy. Using Panko and baking instead of deep frying keeps the exterior crisp while avoiding that oily mouthfeel. When you bite into them the texture contrast between the crisp crust and juicy chicken is exactly what I aim for when I want something both light and indulgent.
Big garlic and cheesy flavor
The combination of minced garlic in the oil and freshly grated Parmesan cheese folded into the crumbs makes these tenders sing. I find that garlic infused into the oil carries through the coating, and the Parmesan adds savory depth and a nutty finish that keeps people going back for another piece. It is an easy way to elevate simple chicken without complicated steps.
Quick and weeknight friendly
From trimming to the oven these take very little time. I appreciate that you can prep the bowls in minutes, pop the tray into the oven, and still have time to set a table or steam a vegetable. It fits perfectly into busy evenings when I want homemade food but not a full evening in the kitchen.
Kid approved and crowd ready
My family always asks for seconds, and these tenders travel well for gatherings. They are easy to double or triple, and everyone can dip and pick at their own pace. The simple ingredients mean you can make a large tray without stress, which is exactly what I need for casual get togethers.
Flexible and forgiving
These tenders are forgiving if your coating is a little patchy or your oven runs hot. I like a little flexibility in recipes, and this one lets you tweak oil amount or bake time without losing its soul. That forgiving nature makes it a reliable go to whenever I want a dependable, tasty result.
What to Gather for Garlic Parmesan Chicken Tenders
These ingredients are straightforward and purposeful. The core philosophy here is texture plus flavor. The chicken brings the protein and moistness, white flour helps the coating stick, and a combination of oil, garlic, and dried herbs infuse each bite. Panko and freshly grated Parmesan cheese create that perfect, airy crunch and savory finish.
- 1 1/4 pounds chicken tenders boneless skinless: Provide lean protein and the primary base of the dish, offering tender, juicy texture when cooked properly; season and cook evenly to ensure safe internal temperature and best flavor.
- 1/2 cup white flour: Create a light dry coating that helps other seasonings and panko adhere to the chicken; sift or shake off excess for a crispier final crust and even browning during frying or baking.
- Salt and Pepper: Season the flour and meat for balanced taste and to enhance natural flavors; adjust amounts to preference and sprinkle evenly for consistent seasoning throughout the tenders.
- 6 tablespoons olive oil or melted butter: Add fat for frying or sautéing to promote golden browning, crisp exterior, and moist interior; choose oil for higher smoke point or melted butter for richer flavor and slight browning.
- 3 teaspoons minced garlic: Impart aromatic pungency and savory depth when sautéed or mixed into coatings, enhancing overall flavor profile; use freshly minced garlic for the brightest, most vibrant taste.
- 1 teaspoon dried basil: Provide herbal, slightly sweet, and peppery notes that complement garlic and cheese; sprinkle into the breading mixture to add Mediterranean-inspired aroma and complexity.
- 1/4 teaspoon paprika: Contribute subtle smoky warmth and color to the breading mix, accentuating the savory profile; use sparingly to avoid overpowering other seasonings while enhancing visual appeal.
- 1 cup Panko: Deliver a light, airy crunch that forms the main crispy exterior of the tenders; mix with Parmesan and seasonings for texture contrast and satisfying bite.
- 2/3 cup Parmesan cheese freshly grated: Offer salty, nutty, umami-rich flavor that deepens the savory profile and helps bind the panko crust; grate fresh for best melt-in and flavor throughout the coating.
- Famous Fry Sauce: Provide a creamy, tangy accompaniment for serving that complements the crispy tenders and adds moisture and flavor contrast; use as a dipping sauce to elevate each bite.
Preparation Steps for Garlic Parmesan Chicken Tenders
These steps guide you from trimming to the oven and finishing with a perfect internal temperature. Read them in order, and keep an eye on visual cues like golden browning and fragrant toasting as you go. Small adjustments in timing help you hit that juicy interior and crunchy exterior.
- Trim the fat from the tenders.: The smell of fresh chicken is mild and almost sweet when you remove excess fat, and trimming helps the pieces sit flat on the sheet for even baking. This step prevents uneven cooking and avoids chewy bits, which can distract from the tender texture. A common mistake is trimming too little, leaving uneven pieces that cook at different rates, so take a careful pass with a sharp knife and lay the tenders flat to check for any membrane or fat to remove.
- Preheat the oven to 400 degrees F.: Warm air circulating at this temperature encourages rapid browning of the Panko crust while keeping the inside juicy. You will notice a faint warmth in the kitchen as the oven reaches temperature, and that consistent heat is why the exterior crisps without drying the chicken . One error to avoid is skipping the preheat, which can lead to pale, soggy crusts, so always wait until the oven signals ready before loading the tray.
- Set out three bowls. Fill one with the white flour, about 1/4 teaspoon pepper, & about 1/2 teaspoon salt. Stir.: The tactile act of arranging three bowls creates a rhythm that helps you coat each piece evenly. The seasoned flour dries the surface slightly, enabling the oil to cling, which leads to a more cohesive crust. If you skip proper seasoning here, the interior can taste underseasoned, so measure the salt and pepper and mix thoroughly to distribute flavors.
- Fill the next bowl with the olive oil or butter and minced garlic. Stir.: The aroma of minced garlic in warm oil is instantly savory and inviting, and mixing it with oil ensures the flavor disperses across every tender. This step also moisturizes the flour coated chicken , allowing the Panko to adhere. A frequent slip up is using cold oil straight from the fridge which reduces adhesion; bring solid butter to melted state or room temperature oil so it blends smoothly with the garlic.
- Place the basil, paprika, Panko, and parmesan cheese in the last. Stir.: When you stir the dry mix, you will detect a faint cheesy aroma from the freshly grated Parmesan cheese combining with the herb notes of basil and the warm color of paprika. This dry mix determines the final texture and browning, so tossing until uniform ensures each bite has the same balance. A mistake is packing the crumbs too densely which can produce a heavy crust, so keep it airy and evenly combined.
- Place the tenders in the flour mixture, then the garlic oil, then the panko mixture making sure to evenly and thoroughly coat each piece.: As you work, you will feel the transformation from slick chicken to textured, crumb covered pieces. The sequence creates layers that adhere, and the contrast of dry flour to oily coating to flaky crumbs is what produces a durable crust. Watch for spots left bare, which can lead to uneven browning; press gently so the crumbs cling but avoid compacting them into a dense shell.
- Place the tenders on the sheet and then place in the oven.: Laying the tenders with space around them allows hot air to circulate and toast the coating uniformly. You should hear a faint sizzle if the oil pools slightly, and visually the crumbs start to set almost immediately. Crowding the sheet is a common misstep that causes steaming instead of crisping, so give each piece breathing room and choose a single layer for best results.
- Cook for 15 minutes and then flip the tenders and cook for another 5-8 minutes or until the internal temperature of the chicken reaches 165 degrees F.: As the tenders bake, you will notice the crust deepen to a golden brown and the smell become richly garlicky and nutty from the Parmesan . Flipping ensures both sides brown evenly and prevents one side from burning. Avoid the mistake of skipping the flip, which can yield one side overly browned while the other remains pale; also use an instant read thermometer to confirm the internal temperature reaches 165 degrees F so the chicken is safe and juicy.
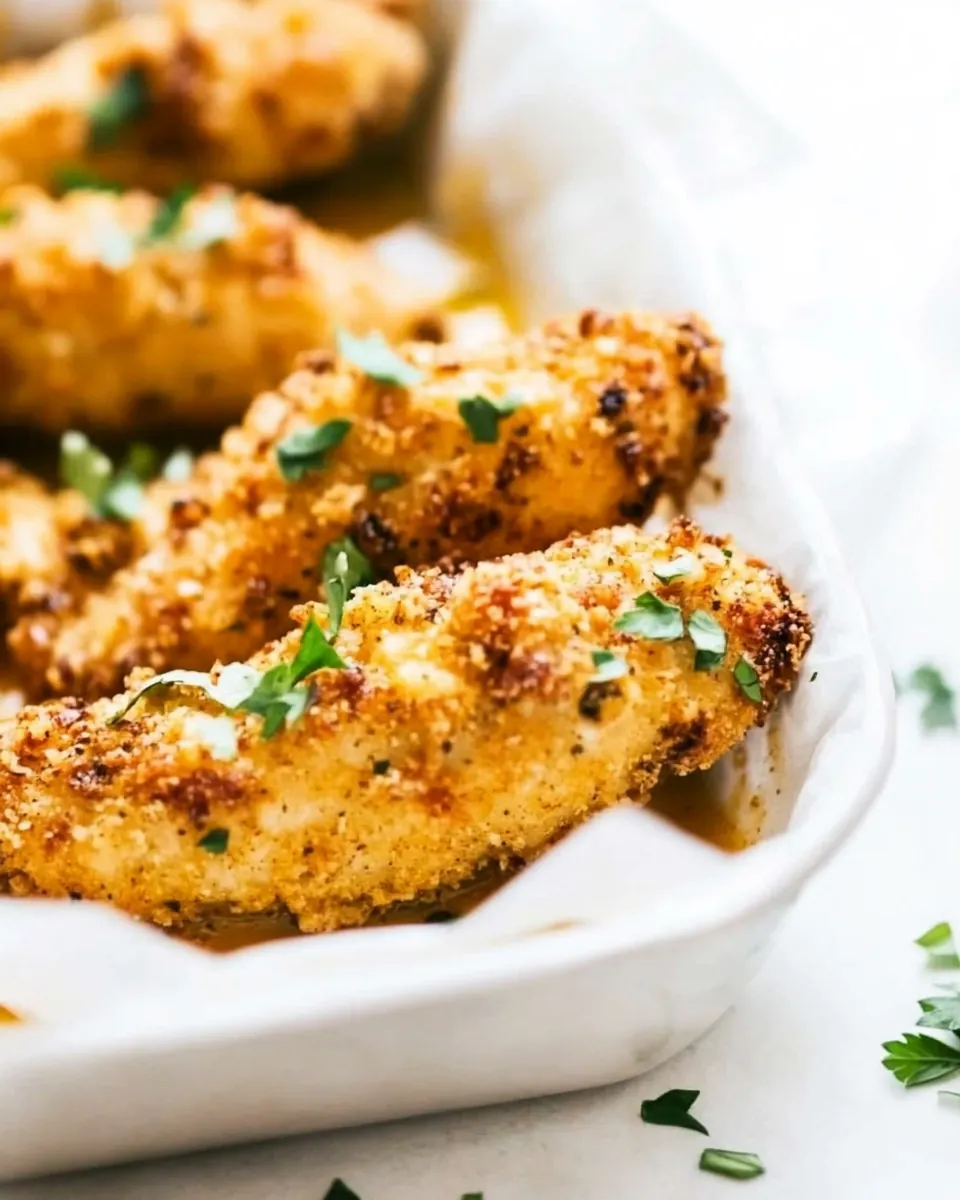
- Remove and enjoy immediately with the dipping sauce!: The final moments are sensory deluxe, the crust crisp and warm, steam carrying the scent of baked garlic and cheese. Serving right away maintains that contrast between crunchy exterior and tender interior, and the dipping sauce adds a cooling or tangy counterpoint. A trap I warn against is letting them sit too long which softens the crust, so plate quickly and encourage immediate digging in.
Ways to Customize
These ideas let you tweak the savory profile while keeping the method intact. Small swaps change the mood of the dish without complicating the process.
- Swap the oil Use melted butter in place of olive oil for a richer, slightly browned flavor in the crust.
- Extra garlic kick Add an extra teaspoon of minced garlic to the oil if you prefer a more pronounced garlic aroma.
- Make it herby Increase dried basil or add a pinch more to deepen the herbaceous note in the panko mixture.
- Crispier crust Use a light spray of oil on the sheet or the tops of the tenders before baking to promote even crisping.
- Cheese forward Stir in a tablespoon more freshly grated Parmesan cheese if you love a cheesier finish and a saltier crust.
- Bolder color and warmth Increase the paprika slightly for more visual appeal and a touch of warm flavor without changing the technique.
Serving This Garlic Parmesan Chicken Tenders
These tenders are versatile, and the way you present them sets the mood of the meal. Whether casual family night or a small gathering, they fit right in.
- Family dinner Serve alongside steamed vegetables and a simple green salad for an easy, balanced weeknight meal.
- Appetizer platter Arrange on a large board with small bowls of the Famous Fry Sauce for dipping to create a shareable starter.
- Lunch option Turn a couple of tenders into a sandwich with a crisp lettuce leaf and extra sauce for a handheld midday treat.
- Party food Keep warm in a low oven and offer toothpicks for guests to pick at, making them perfect for casual entertaining.
- Storage tips Refrigerate in an airtight container for up to three days, then re crisp in a hot oven to revive the crust before serving.
- Seasonal pairing In spring and summer, pair with a bright citrus slaw, and in cooler months pair with roasted root vegetables for a heartier plate.
FAQ
Conclusion
What makes this recipe special is the marriage of crunchy panko and nutty Parmesan with garlicky depth, producing tenders that are both simple and full flavored. Try these Garlic Parmesan Chicken Tenders when you want a quick, crowd pleasing meal that still feels homemade and thoughtful. They come together with minimal fuss, deliver great texture, and invite everyone to gather around the table. Give them a go on a busy weeknight or for casual entertaining, and enjoy the praise that comes with a perfectly crisp, savory bite.
Garlic Parmesan Chicken Tenders
Equipment
- Utopia Kitchen Cooking Knives
- Microplane Grater
- Nordic Wave Baking Sheet
Ingredients
- 1 1/4 pounds chicken tenders boneless skinless Provide lean protein and the primary base of the dish, offering tender, juicy texture when cooked properly; season and cook evenly to ensure safe internal temperature and best flavor.
- 1/2 cup white flour Create a light dry coating that helps other seasonings and panko adhere to the chicken; sift or shake off excess for a crispier final crust and even browning during frying or baking.
- Salt and Pepper Season the flour and meat for balanced taste and to enhance natural flavors; adjust amounts to preference and sprinkle evenly for consistent seasoning throughout the tenders.
- 6 tablespoons olive oil or melted butter Add fat for frying or sautéing to promote golden browning, crisp exterior, and moist interior; choose oil for higher smoke point or melted butter for richer flavor and slight browning.
- 3 teaspoons minced garlic Impart aromatic pungency and savory depth when sautéed or mixed into coatings, enhancing overall flavor profile; use freshly minced garlic for the brightest, most vibrant taste.
- 1 teaspoon dried basil Provide herbal, slightly sweet, and peppery notes that complement garlic and cheese; sprinkle into the breading mixture to add Mediterranean-inspired aroma and complexity.
- 1/4 teaspoon paprika Contribute subtle smoky warmth and color to the breading mix, accentuating the savory profile; use sparingly to avoid overpowering other seasonings while enhancing visual appeal.
- 1 cup Panko Deliver a light, airy crunch that forms the main crispy exterior of the tenders; mix with Parmesan and seasonings for texture contrast and satisfying bite.
- 2/3 cup Parmesan cheese freshly grated Offer salty, nutty, umami-rich flavor that deepens the savory profile and helps bind the panko crust; grate fresh for best melt-in and flavor throughout the coating.
- Famous Fry Sauce Provide a creamy, tangy accompaniment for serving that complements the crispy tenders and adds moisture and flavor contrast; use as a dipping sauce to elevate each bite.
Instructions
- Trim the fat from the tenders.: The smell of fresh chicken is mild and almost sweet when you remove excess fat, and trimming helps the pieces sit flat on the sheet for even baking. This step prevents uneven cooking and avoids chewy bits, which can distract from the tender texture. A common mistake is trimming too little, leaving uneven pieces that cook at different rates, so take a careful pass with a sharp knife and lay the tenders flat to check for any membrane or fat to remove.
- Preheat the oven to 400 degrees F.: Warm air circulating at this temperature encourages rapid browning of the Panko crust while keeping the inside juicy. You will notice a faint warmth in the kitchen as the oven reaches temperature, and that consistent heat is why the exterior crisps without drying the chicken . One error to avoid is skipping the preheat, which can lead to pale, soggy crusts, so always wait until the oven signals ready before loading the tray.
- Set out three bowls. Fill one with the white flour, about 1/4 teaspoon pepper, & about 1/2 teaspoon salt. Stir.: The tactile act of arranging three bowls creates a rhythm that helps you coat each piece evenly. The seasoned flour dries the surface slightly, enabling the oil to cling, which leads to a more cohesive crust. If you skip proper seasoning here, the interior can taste underseasoned, so measure the salt and pepper and mix thoroughly to distribute flavors.
- Fill the next bowl with the olive oil or butter and minced garlic. Stir.: The aroma of minced garlic in warm oil is instantly savory and inviting, and mixing it with oil ensures the flavor disperses across every tender. This step also moisturizes the flour coated chicken , allowing the Panko to adhere. A frequent slip up is using cold oil straight from the fridge which reduces adhesion; bring solid butter to melted state or room temperature oil so it blends smoothly with the garlic.
- Place the basil, paprika, Panko, and parmesan cheese in the last. Stir.: When you stir the dry mix, you will detect a faint cheesy aroma from the freshly grated Parmesan cheese combining with the herb notes of basil and the warm color of paprika. This dry mix determines the final texture and browning, so tossing until uniform ensures each bite has the same balance. A mistake is packing the crumbs too densely which can produce a heavy crust, so keep it airy and evenly combined.
- Place the tenders in the flour mixture, then the garlic oil, then the panko mixture making sure to evenly and thoroughly coat each piece.: As you work, you will feel the transformation from slick chicken to textured, crumb covered pieces. The sequence creates layers that adhere, and the contrast of dry flour to oily coating to flaky crumbs is what produces a durable crust. Watch for spots left bare, which can lead to uneven browning; press gently so the crumbs cling but avoid compacting them into a dense shell.
- Place the tenders on the sheet and then place in the oven.: Laying the tenders with space around them allows hot air to circulate and toast the coating uniformly. You should hear a faint sizzle if the oil pools slightly, and visually the crumbs start to set almost immediately. Crowding the sheet is a common misstep that causes steaming instead of crisping, so give each piece breathing room and choose a single layer for best results.
- Cook for 15 minutes and then flip the tenders and cook for another 5-8 minutes or until the internal temperature of the chicken reaches 165 degrees F.: As the tenders bake, you will notice the crust deepen to a golden brown and the smell become richly garlicky and nutty from the Parmesan . Flipping ensures both sides brown evenly and prevents one side from burning. Avoid the mistake of skipping the flip, which can yield one side overly browned while the other remains pale; also use an instant read thermometer to confirm the internal temperature reaches 165 degrees F so the chicken is safe and juicy.
- Remove and enjoy immediately with the dipping sauce!: The final moments are sensory deluxe, the crust crisp and warm, steam carrying the scent of baked garlic and cheese. Serving right away maintains that contrast between crunchy exterior and tender interior, and the dipping sauce adds a cooling or tangy counterpoint. A trap I warn against is letting them sit too long which softens the crust, so plate quickly and encourage immediate digging in.
Notes
- Swap the oil Use melted butter in place of olive oil for a richer, slightly browned flavor in the crust.
- Extra garlic kick Add an extra teaspoon of minced garlic to the oil if you prefer a more pronounced garlic aroma.
- Make it herby Increase dried basil or add a pinch more to deepen the herbaceous note in the panko mixture.
- Crispier crust Use a light spray of oil on the sheet or the tops of the tenders before baking to promote even crisping.
- Cheese forward Stir in a tablespoon more freshly grated Parmesan cheese if you love a cheesier finish and a saltier crust.
- Bolder color and warmth Increase the paprika slightly for more visual appeal and a touch of warm flavor without changing the technique.