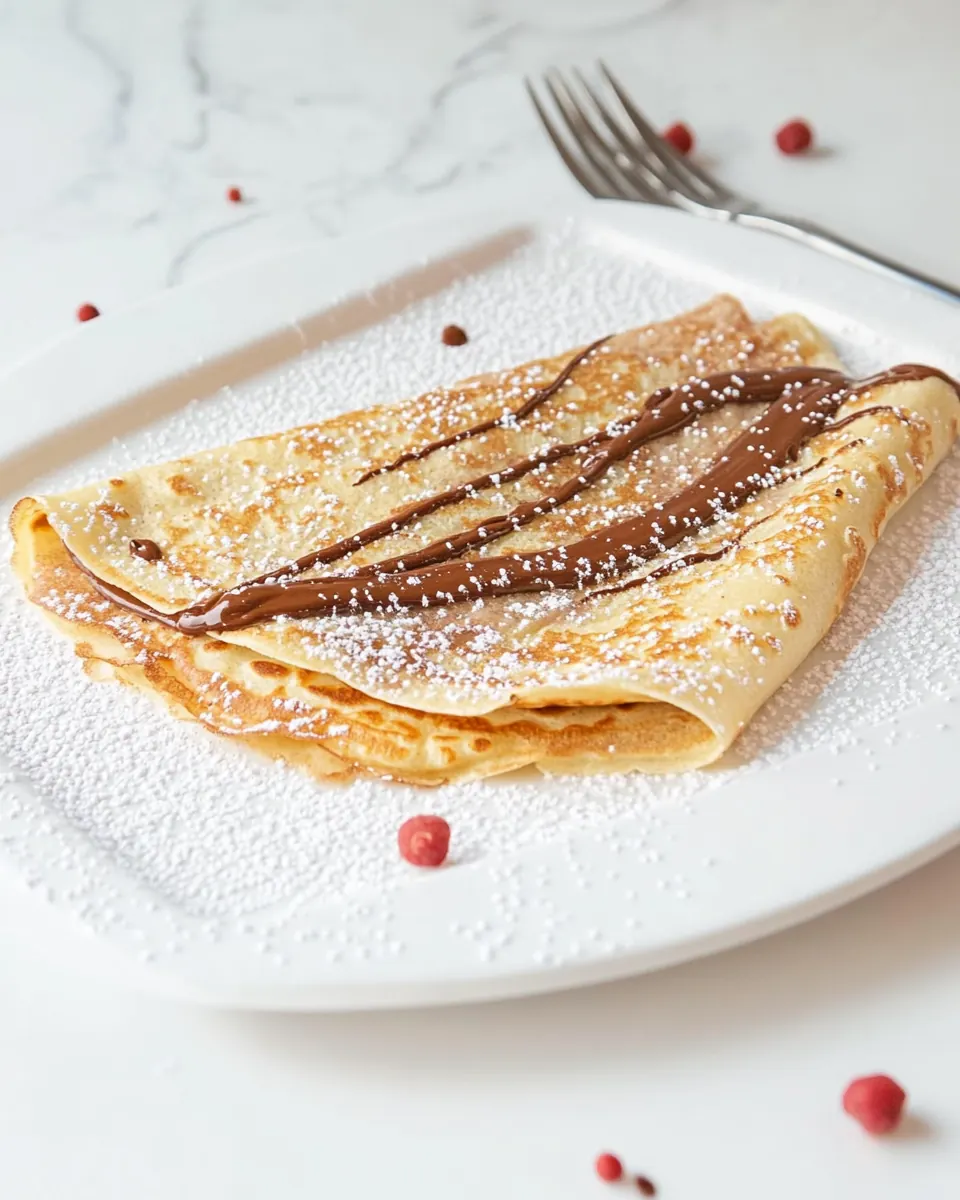
Nutella Crepes
Nutella Crepes have been my go to when I want something impressively simple yet totally indulgent, and the first time I made them I knew they would become a staple. I remember a rainy afternoon when I pulled a chilled batter from the fridge, slipped a warm, thin round onto the skillet, and watched the surface change from glossy to laced with tiny bubbles. The moment I spread Nutella onto a still warm crepe and folded it, the kitchen filled with a warm, toasty aroma that felt like comfort on a plate.
I teach myself patience with these, because the batter needs a little rest to relax, and that quiet hour always becomes a gift. While the batter chills, I slice Fresh bananas, sliced (optional) and Fresh strawberries, sliced (optional), and set out parchment squares to keep the stack pristine. There is a playful rhythm to making crepes, an almost meditative swirl of batter, the soft hiss as it hits the skillet, the quick flip that yields a golden surface. Each fold reveals the glossy ribbon of Nutella, and sharing them with friends turns a simple snack into a moment.
Over time I’ve learned tiny tricks that make a big difference, like brushing the pan lightly with unsalted butter, melted and watching how a thin sheen helps the batter spread evenly. Kids and adults both gravitate toward the rich, chocolate hazelnut spread, but the fresh fruit keeps the bite bright and lively. I love that these crepes are flexible, fitting a weekday treat or a weekend gathering, and they always draw conversation. If you want something elegant without fuss, these crepes deliver every time.
Recipe Snapshot
1 hr 20 mins
20 mins
60 mins
Medium
200 kcal
French
Gluten-Free, Low FODMAP
Breakfast
Blender, Nonstick skillet, Spatula, Measuring cups, Parchment paper
Why You’ll Love This Nutella Crepes
They taste like a special treat, every time
I always reach for Nutella Crepes when I want something that feels special without hours of work. The thin, lacy texture lets the Nutella shine, and when paired with Fresh bananas, sliced (optional) or Fresh strawberries, sliced (optional), each bite balances richness and brightness. I love that they look fancy but come together quickly once the batter is chilled.
Simple pantry ingredients, maximum impact
Most of the ingredients are staples, and that makes this recipe incredibly accessible. I often have all-purpose flour, milk, eggs, and granulated sugar on hand, so I can make these on a whim. The list is short, and each player has a clear job: structure from all-purpose flour, silkiness from milk, lift from eggs, and flavor from vanilla extract and unsalted butter, melted.
Great for gatherings and flexible serving
I often double the batch for company because Nutella Crepes scale well. You can prepare a stack ahead and rewarm them gently, or let guests assemble their own with spreads and fruit. That interactive element makes them a hit at brunches or casual parties, and they travel well if you need to bring a dessert to a friend.
Technique elevates the result
The chilling step and the thin batter are small efforts that reward you with delicate crepes every time. I value those quiet techniques because they keep texture light and prevent tearing while flipping. Once you master the swirl and the flip, the rest becomes second nature and the outcome is always reliable.
Kid friendly and crowd pleasing
Children adore watching the crepe form in the pan, and letting them spread Nutella is an easy win. I also appreciate that the recipe can be customized with fruit, which makes it feel a touch healthier and adds pleasant color. For casual mornings or festive occasions, these crepes are a dependable favorite.
Shopping List for Nutella Crepes

The ingredients for Nutella Crepes are straightforward and harmonious. I think of this list as a trio of roles: the batter bones, the flavor enhancers, and the finishing touches. When the components are fresh and properly measured, they produce a batter that spreads thin and cooks to delicate golden edges.
- 2 1/2 cups milk: Provide rich liquid that creates a smooth batter; helps hydrate flour and dissolve sugar while contributing tenderness and a slight milky flavor to the crepes.
- 2 cups all-purpose flour: Form the structural base of the batter; when combined with liquid and eggs it creates gluten that gives crepes their delicate yet cohesive texture.
- 1/4 cup granulated sugar: Add subtle sweetness to the batter; helps balance flavors and promotes light browning on the crepe surface during cooking.
- 1/4 teaspoon fine sea salt: Enhance overall flavor by adding a mild savory contrast; helps balance sweetness and can slightly strengthen gluten development when mixed into the batter.
- 4 tablespoons unsalted butter, melted: Introduce fat that contributes to tenderness and richness; melted butter improves mouthfeel and prevents sticking during cooking.
- 2 teaspoons vanilla extract: Contribute aromatic flavor and depth; vanilla rounds out sweetness and adds a warm, familiar note to the finished crepes.
- 4 large eggs: Provide structure, emulsification, and lift to the batter; eggs bind ingredients, add protein for stability, and yield a tender, pliable crepe.
- Nutella for spreading: Supply a creamy, chocolaty filling or spread; used post-cooking to add rich flavor, sweetness, and a smooth texture for spreading on crepes.
- Fresh bananas, sliced () (optional): Offer fresh, fruity sweetness and a soft texture when sliced; used as an optional topping to add brightness and complement the chocolate spread.
- Fresh strawberries, sliced () (optional): Provide juicy, tart-sweet contrast when sliced; used optionally to add color, acidity, and a fresh flavor that pairs well with chocolate.
How to Assemble Nutella Crepes

Assembling these crepes is a rhythmic process that rewards attention to detail. I like to set everything up before heating the pan so I can move fluidly from batter to skillet to plate. Follow the steps and tune in to the sensory cues described below to know when each crepe is perfectly done.
- Blend milk, flour, sugar, salt, butter, vanilla, and eggs in a blender until smooth. Chill the batter for 1 hour.: The moment the blender begins to whirl you will hear a steady, even hum, and the batter should appear glossy and free of lumps, almost like heavy cream. This smooth texture is crucial because it ensures the batter will spread thinly and cook evenly without tearing. One common mistake here is overblending at high speed for too long, which can create excess foam that leads to uneven cooking; pulse until smooth and then stop. Smell the faint warmth of vanilla and butter lift from the pitcher, and scrape down the sides once so all the flour is incorporated. If you detect small bits of flour, a quick additional pulse will fix it. The right consistency is pourable yet slightly viscous, not watery, so it coats a spoon when lifted.
- Prepare parchment paper squares to separate cooked crêpes. Heat a nonstick skillet over medium heat.: Cooling the batter calms any bubbles created in blending and allows the flour to hydrate fully, resulting in more tender crepes with fewer tears. The surface will look slightly thicker after chilling, and the scent will mellow while flavors meld. A typical error is skipping this rest, which can cause fragile, springy crepes that shrink when cooking. I place the bowl in the coldest part of the refrigerator, and I sometimes cover it with plastic wrap to keep it from picking up other aromas. If you are short on time, a 30 minute rest helps, but an hour gives the best texture and easier handling at the skillet.
- Lightly butter the skillet, pour 1/4 cup of batter, and swirl to coat. Cook until golden, flip, and cook the other side. Stack crêpes with parchment paper in between.: Laying out parchment squares prevents sticking as you stack each warm crepe, and it preserves the delicate surface when you handle the stack. The crepes will steam slightly as they cool, so the parchment helps avoid sogginess and makes it simple to reheat single portions. One pitfall is using wax paper instead of parchment, which can stick or transfer wax; always use parchment or lightly dusted plates. Arrange your work station with a stack plate and the parchment ready, so each crepe moves off the pan smoothly without crowding.
- Spread Nutella on each crêpe, add fresh fruit if desired, fold into triangles, and serve with optional powdered sugar and whipped cream.: A medium setting yields a steady sizzle that delivers golden color without burning; you want consistent, even heat across the surface. You will hear a soft, consistent hiss as the batter hits the pan, and small bubbles will form before the edges begin to lift, signaling readiness to flip. If the pan is too hot, the crepe will brown immediately and may crisp too fast, so lower the heat if you see dark spots appearing quickly. I test with a teaspoon of batter first to confirm the temperature, then adjust as needed. The ideal pan warmth produces a gentle fragrance of caramelizing batter and even bronzing across the surface.
- Lightly butter the skillet, pour 1/4 cup of batter, and swirl to coat: As you pour, you will see the batter spread in a thin, circular sheet, and the surface will move from shiny to matte as it cooks. Use the swirl to pull the batter into a nearly translucent layer; the edges will thin and crisp slightly, creating delicate lacy rims. Avoid adding too much butter, which can fry rather than gently brown the crepe; a light brush or a folded paper towel with butter does the job. Watch for small holes and tiny bubbles across the surface, they indicate the center is cooking. If the batter pools or is too thick in places, lift and swirl more quickly next time to achieve an even coat.
- Cook until golden, flip, and cook the other side: Listen for a subtle change from a soft sizzle to a slightly firmer sound as the bottom sets. Visually, the first side should be pale gold with lacy edges before you flip; use a thin spatula to loosen and flip confidently in one swift motion to keep the crepe intact. The second side needs far less time, often just a few seconds to set and finish with a light tan. A common error is flipping too soon, which can cause tearing; wait until the edges lift away from the pan. After flipping, the aroma will become richer and you may notice a mild caramel scent as the sugars brown.
- Stack crêpes with parchment paper in between: As you transfer each cooked crepe to the prepared plate, place a parchment square between layers to prevent sticking and to make serving individual crepes effortless. The stack will retain warmth, and the parchment keeps surfaces pristine for filling. Avoid stacking too many without parchment, which can cause tearing when you separate them. If you plan to reheat, the parchment also helps you lift single crepes for gentle warming in a skillet or microwave.
- Spread Nutella on each crêpe: Apply Nutella while the crepe is still warm so the spread softens and glides across the surface, creating a glossy ribbon that melds with the crepe. The warm contrast enhances the nutty, chocolate flavor. Use just enough to coat thinly; too much filling overwhelms the structure and makes folding messy. If your Nutella is firm, warm it briefly in a bowl over hot water so it becomes easy to spread without becoming runny. You will feel the texture become silky under the knife or offset spatula as it warms slightly from the crepe.
- Add fresh fruit if desired: Scatter slices of Fresh bananas, sliced (optional) or Fresh strawberries, sliced (optional) across the spread to introduce bright acidity and natural sweetness. The fruit provides contrasting textures, with juicy strawberry bursts or creamy banana slices pairing beautifully with the rich spread. Slice just before assembling to keep fruit from weeping onto the crepe and making it soggy. If you add too much fruit, the crepe can become hard to fold neatly, so aim for a modest layer for balance.
- Fold into triangles, and serve with optional powdered sugar and whipped cream: Folding reveals the ribbon of Nutella and makes the crepe easy to eat. The final presentation is about contrast, so a dusting of powdered sugar or a dollop of whipped cream lends a bright finish both visually and on the palate. If serving later, keep the folded crepes warm in a low oven on a tray with parchment. One mistake is overdecorating, which can hide the crepe's delicate texture; keep garnishes simple to let the flavors sing.
Making Adjustments
These adjustments help you tailor Nutella Crepes to your taste and schedule. I often tweak texture, fillings, and serving style based on the occasion, and small swaps yield big differences.
- Lighten the batter by using a touch less flour and a bit more milk for a more tender, lace like crepe that feels delicate on the tongue.
- Richer crepes happen when you use whole milk and the full measure of unsalted butter, melted, which deepens browning and mouthfeel.
- Make ahead by preparing the batter and chilling it overnight; this deepens flavor and makes morning assembly effortless.
- Fruit variations let you change the flavor profile: add more Fresh strawberries, sliced (optional) for brightness or extra Fresh bananas, sliced (optional) for a creamier bite.
- Temperature control is key; if crepes are browning too fast, lower the heat slightly and test with a small batter drop until the pan responds evenly.
What Complements This Nutella Crepes
Serving Nutella Crepes is all about balance and occasion. These crepes fit casual weekend breakfasts, festive brunches, or sweet finishes to a light meal. I recommend thinking about texture contrasts and complementary flavors when planning sides and beverages.
- Simple fruit platter with extra Fresh strawberries, sliced (optional) and Fresh bananas, sliced (optional) for guests to customize their crepes.
- Whipped cream or a dusting of powdered sugar for a classic, elevated finish that brightens the rich chocolate hazelnut spread.
- Warm coffee or tea to balance the sweetness and provide warmth, perfect for leisurely mornings or brunch gatherings.
- Make ahead strategy by preparing the batter the night before and cooking crepes just before serving, keeping them warm on a tray with parchment to separate layers.
- Occasions such as casual brunches, birthdays, or Ramadan mornings when a sweet, shareable dish is appreciated because crepes are easy to portion and pass around.
- Storage tips: refrigerate cooled crepes separated by parchment for up to two days, and rewarm gently in a skillet or microwave, adding fresh fruit after reheating.
- Seasonal pairings work well: use more berries in summer for brightness, or add sliced bananas year round for creamy contrast.
FAQ
Conclusion
Nutella Crepes are special because they combine a delicate, lacy crepe with rich, glossy chocolate hazelnut spread and bright fresh fruit for contrast. Give them a try when you want a crowd pleasing brunch or a relaxed dessert that feels elegant without fuss. The simple technique and short ingredient list make them approachable, and once you get the swirl and flip down, they become an effortless favorite that always brings smiles.

Nutella Crepes
Equipment
- Blender
- nonstick skillet
- Spatula
- Measuring Cups
- Parchment Paper
Ingredients
- 2 1/2 cups milk Provide rich liquid that creates a smooth batter; helps hydrate flour and dissolve sugar while contributing tenderness and a slight milky flavor to the crepes.
- 2 cups all-purpose flour Form the structural base of the batter; when combined with liquid and eggs it creates gluten that gives crepes their delicate yet cohesive texture.
- 1/4 cup granulated sugar Add subtle sweetness to the batter; helps balance flavors and promotes light browning on the crepe surface during cooking.
- 1/4 teaspoon fine sea salt Enhance overall flavor by adding a mild savory contrast; helps balance sweetness and can slightly strengthen gluten development when mixed into the batter.
- 4 tablespoons unsalted butter, melted Introduce fat that contributes to tenderness and richness; melted butter improves mouthfeel and prevents sticking during cooking.
- 2 teaspoons vanilla extract Contribute aromatic flavor and depth; vanilla rounds out sweetness and adds a warm, familiar note to the finished crepes.
- 4 large eggs Provide structure, emulsification, and lift to the batter; eggs bind ingredients, add protein for stability, and yield a tender, pliable crepe.
- Nutella for spreading Supply a creamy, chocolaty filling or spread; used post-cooking to add rich flavor, sweetness, and a smooth texture for spreading on crepes.
- Fresh bananas, sliced (optional) Offer fresh, fruity sweetness and a soft texture when sliced; used as an optional topping to add brightness and complement the chocolate spread.
- Fresh strawberries, sliced (optional) Provide juicy, tart-sweet contrast when sliced; used optionally to add color, acidity, and a fresh flavor that pairs well with chocolate.
Instructions
- Blend milk, flour, sugar, salt, butter, vanilla, and eggs in a blender until smooth. Chill the batter for 1 hour.: The moment the blender begins to whirl you will hear a steady, even hum, and the batter should appear glossy and free of lumps, almost like heavy cream. This smooth texture is crucial because it ensures the batter will spread thinly and cook evenly without tearing. One common mistake here is overblending at high speed for too long, which can create excess foam that leads to uneven cooking; pulse until smooth and then stop. Smell the faint warmth of vanilla and butter lift from the pitcher, and scrape down the sides once so all the flour is incorporated. If you detect small bits of flour, a quick additional pulse will fix it. The right consistency is pourable yet slightly viscous, not watery, so it coats a spoon when lifted.
- Prepare parchment paper squares to separate cooked crêpes. Heat a nonstick skillet over medium heat.: Cooling the batter calms any bubbles created in blending and allows the flour to hydrate fully, resulting in more tender crepes with fewer tears. The surface will look slightly thicker after chilling, and the scent will mellow while flavors meld. A typical error is skipping this rest, which can cause fragile, springy crepes that shrink when cooking. I place the bowl in the coldest part of the refrigerator, and I sometimes cover it with plastic wrap to keep it from picking up other aromas. If you are short on time, a 30 minute rest helps, but an hour gives the best texture and easier handling at the skillet.
- Lightly butter the skillet, pour 1/4 cup of batter, and swirl to coat. Cook until golden, flip, and cook the other side. Stack crêpes with parchment paper in between.: Laying out parchment squares prevents sticking as you stack each warm crepe, and it preserves the delicate surface when you handle the stack. The crepes will steam slightly as they cool, so the parchment helps avoid sogginess and makes it simple to reheat single portions. One pitfall is using wax paper instead of parchment, which can stick or transfer wax; always use parchment or lightly dusted plates. Arrange your work station with a stack plate and the parchment ready, so each crepe moves off the pan smoothly without crowding.
- Spread Nutella on each crêpe, add fresh fruit if desired, fold into triangles, and serve with optional powdered sugar and whipped cream.: A medium setting yields a steady sizzle that delivers golden color without burning; you want consistent, even heat across the surface. You will hear a soft, consistent hiss as the batter hits the pan, and small bubbles will form before the edges begin to lift, signaling readiness to flip. If the pan is too hot, the crepe will brown immediately and may crisp too fast, so lower the heat if you see dark spots appearing quickly. I test with a teaspoon of batter first to confirm the temperature, then adjust as needed. The ideal pan warmth produces a gentle fragrance of caramelizing batter and even bronzing across the surface.
- Lightly butter the skillet, pour 1/4 cup of batter, and swirl to coat: As you pour, you will see the batter spread in a thin, circular sheet, and the surface will move from shiny to matte as it cooks. Use the swirl to pull the batter into a nearly translucent layer; the edges will thin and crisp slightly, creating delicate lacy rims. Avoid adding too much butter, which can fry rather than gently brown the crepe; a light brush or a folded paper towel with butter does the job. Watch for small holes and tiny bubbles across the surface, they indicate the center is cooking. If the batter pools or is too thick in places, lift and swirl more quickly next time to achieve an even coat.
- Cook until golden, flip, and cook the other side: Listen for a subtle change from a soft sizzle to a slightly firmer sound as the bottom sets. Visually, the first side should be pale gold with lacy edges before you flip; use a thin spatula to loosen and flip confidently in one swift motion to keep the crepe intact. The second side needs far less time, often just a few seconds to set and finish with a light tan. A common error is flipping too soon, which can cause tearing; wait until the edges lift away from the pan. After flipping, the aroma will become richer and you may notice a mild caramel scent as the sugars brown.
- Stack crêpes with parchment paper in between: As you transfer each cooked crepe to the prepared plate, place a parchment square between layers to prevent sticking and to make serving individual crepes effortless. The stack will retain warmth, and the parchment keeps surfaces pristine for filling. Avoid stacking too many without parchment, which can cause tearing when you separate them. If you plan to reheat, the parchment also helps you lift single crepes for gentle warming in a skillet or microwave.
- Spread Nutella on each crêpe: Apply Nutella while the crepe is still warm so the spread softens and glides across the surface, creating a glossy ribbon that melds with the crepe. The warm contrast enhances the nutty, chocolate flavor. Use just enough to coat thinly; too much filling overwhelms the structure and makes folding messy. If your Nutella is firm, warm it briefly in a bowl over hot water so it becomes easy to spread without becoming runny. You will feel the texture become silky under the knife or offset spatula as it warms slightly from the crepe.
- Add fresh fruit if desired: Scatter slices of Fresh bananas, sliced (optional) or Fresh strawberries, sliced (optional) across the spread to introduce bright acidity and natural sweetness. The fruit provides contrasting textures, with juicy strawberry bursts or creamy banana slices pairing beautifully with the rich spread. Slice just before assembling to keep fruit from weeping onto the crepe and making it soggy. If you add too much fruit, the crepe can become hard to fold neatly, so aim for a modest layer for balance.
- Fold into triangles, and serve with optional powdered sugar and whipped cream: Folding reveals the ribbon of Nutella and makes the crepe easy to eat. The final presentation is about contrast, so a dusting of powdered sugar or a dollop of whipped cream lends a bright finish both visually and on the palate. If serving later, keep the folded crepes warm in a low oven on a tray with parchment. One mistake is overdecorating, which can hide the crepe's delicate texture; keep garnishes simple to let the flavors sing.
Notes
- Lighten the batter by using a touch less flour and a bit more milk for a more tender, lace like crepe that feels delicate on the tongue.
- Richer crepes happen when you use whole milk and the full measure of unsalted butter, melted, which deepens browning and mouthfeel.
- Make ahead by preparing the batter and chilling it overnight; this deepens flavor and makes morning assembly effortless.
- Fruit variations let you change the flavor profile: add more Fresh strawberries, sliced (optional) for brightness or extra Fresh bananas, sliced (optional) for a creamier bite.
- Temperature control is key; if crepes are browning too fast, lower the heat slightly and test with a small batter drop until the pan responds evenly.