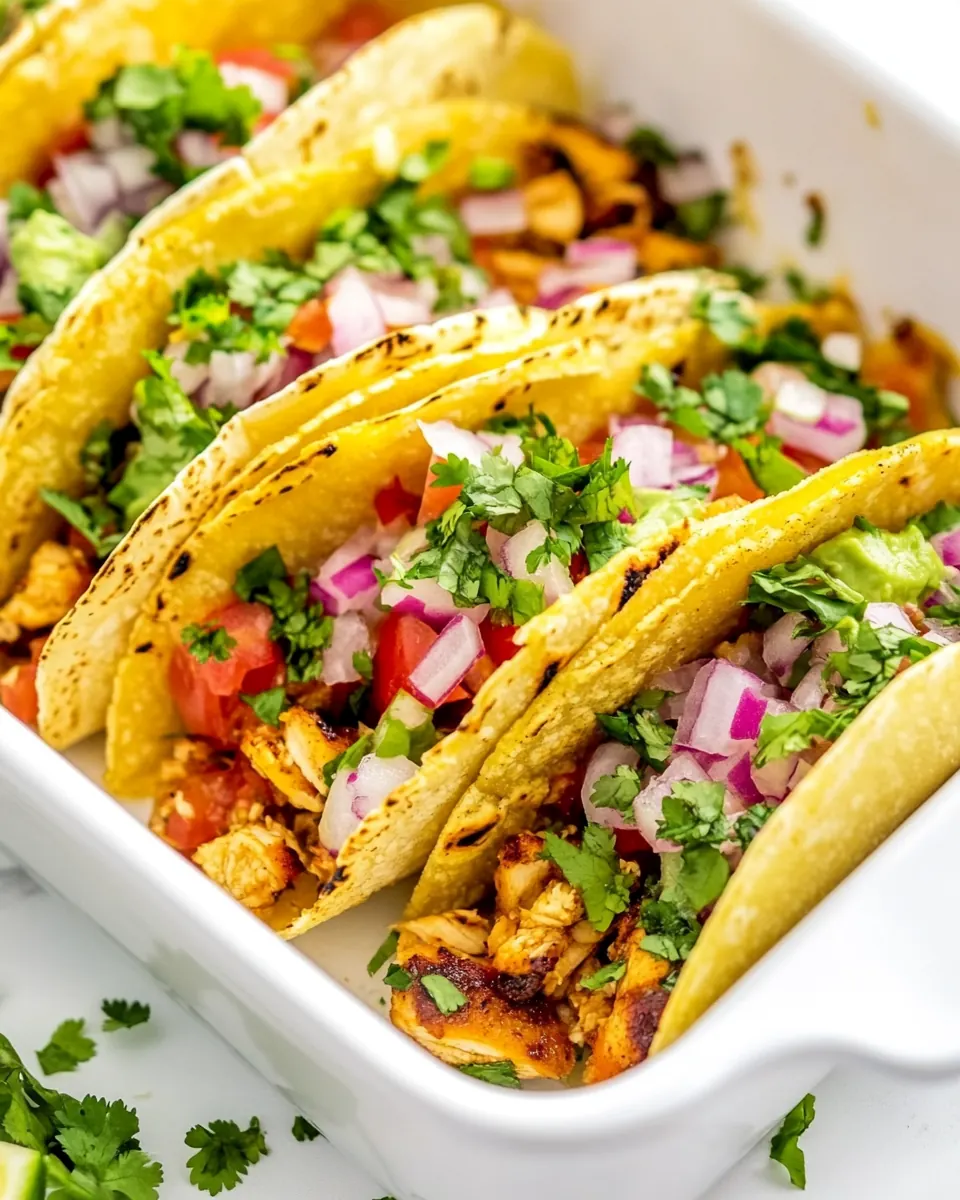
Baked Chicken Tacos
Baked Chicken Tacos have been my go to when I want something that feels festive but comes together with very little fuss. The first time I made them I was juggling work emails and a hungry crowd, and these tacos rescued the evening without drama. I remember the warm, savory aroma of sautéed onion and garlic filling the kitchen while the crispy shells waited like little boats for the cheesy, spiced chicken to arrive.
Over the years I have adjusted small things based on what I had on hand, and every tweak seemed to make the dish friendlier to weeknight chaos. What I love about Baked Chicken Tacos is how forgiving they are; they welcome store bought shortcuts and still taste homemade. I often keep a jar of tomato paste and a roasted chicken on hand for nights when time is tight, and the result feels celebratory enough for guests yet practical for family dinners.
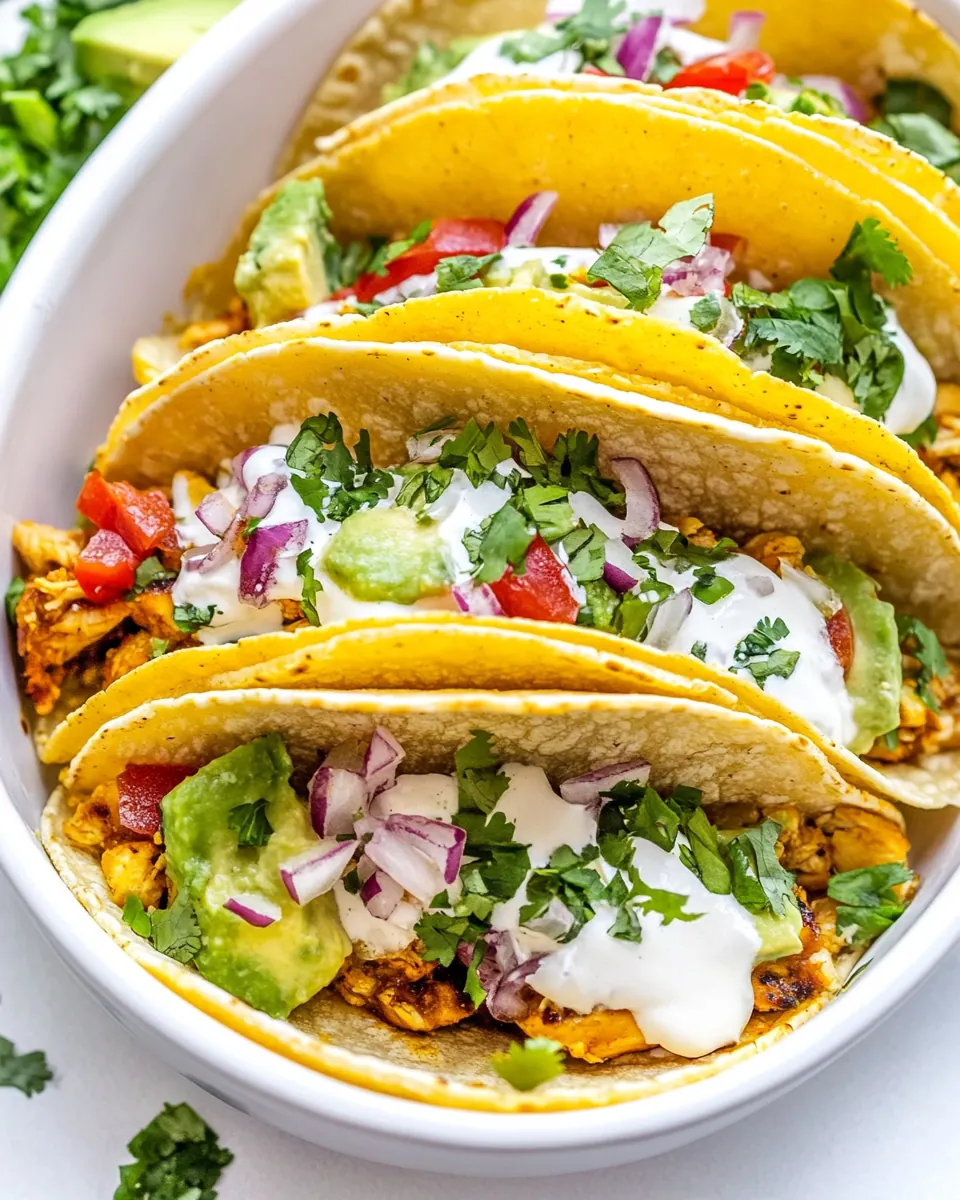
These tacos are also a texture party, from the softly spiced, shredded chicken to the bubbling, golden cheese on top and the satisfying crunch of the hard shells. I’ve served them at casual potlucks and quiet weeknight suppers, and they perform each time. The toppings let everyone personalize their plate, which is one of my favorite things about this recipe. After one bite you’ll see why I keep this version in heavy rotation.
Recipe Snapshot
30 mins
10 mins
20 mins
Easy
350 kcal
Mexican
Keto, Gluten-Free
Dinner
Skillet, Oven, 9 by 13 inch baking dish
Why This Baked Chicken Tacos Works
They are effortless to assemble
I love that Baked Chicken Tacos need minimal hands on time. Once the filling is warmed and seasoned, you simply load shells, top with cheese, and bake. That simple flow makes it ideal when I am prepping sides or entertaining and want a reliable main.
Speed without compromise
Using pre cooked shredded chicken means the dish comes together fast, but it does not skimp on flavor. A short sauté with onion, garlic, and spices builds depth quickly. I find this method gives the filling a fresh cooked brightness you would not expect from a quick weeknight meal.
Great crowd pleaser
I always bring Baked Chicken Tacos to gatherings because they are universally loved. The hard shells and melted cheese deliver familiar comfort while toppings let guests customize. They are easy to transport and reheat, which is a practical win when I am hosting.
Flexible and forgiving
One reason I keep returning to this recipe is its adaptability. You can stretch the filling, vary toppings, or use different cheeses and still land on a winning plate. That versatility has saved many nights when my fridge was less than perfectly stocked.
Balanced flavors and textures
The spice mix of cumin, oregano, and chili powder complements the savory tomato paste and tender chicken. Combined with crunchy shells and melty cheese, each bite hits multiple pleasing notes. I find that contrast is what keeps everyone reaching for seconds.
Main Ingredients for Baked Chicken Tacos
These ingredients work as a compact team to create big flavor. The key players are the seasoned shredded chicken, aromatic sautéed onion and garlic, and the bind of tomato paste with a splash of water to create a saucy coating. The hard shells and melting cheese provide crunchy and gooey textures, while simple toppings brighten the finished tacos.
- 2 tablespoons extra virgin olive oil: Enhance flavor and prevent sticking by sautéing other aromatics; extra virgin olive oil adds a fruity, slightly peppery base and helps carry spices throughout the filling. Use moderate heat to avoid burning and maintain healthy fats in the dish.
- 1 medium yellow onion, chopped finely: Provide a sweet, savory backbone when softened; finely chopped yellow onion sweats down to release sugars and moisture that meld with spices and chicken. Cook until translucent to build depth without overpowering the other flavors.
- 4 medium garlic cloves, minced: Introduce pungent, aromatic heat when minced and cooked briefly; garlic brightens the mixture and complements the onion and spices. Add toward the end of sautéing to retain its aroma without becoming bitter.
- 1 1/2 teaspoons ground cumin: Contribute warm, earthy notes to the filling; ground cumin adds a smoky, slightly citrusy depth that pairs well with poultry and Mexican-style seasonings. Use measured amounts to balance other spices without dominating the profile.
- 1 1/2 teaspoons dried oregano: Add herbal, slightly minty undertones; dried oregano lends savory complexity and helps mimic classic taco-seasoning blends. Rehydrate in the cooking liquid to release its flavor into the sauce.
- 1 teaspoon chili powder: Bring mild heat and rounded chili flavor; chili powder contributes color and a traditional taco spice character that ties other seasonings together. Adjust quantity to control overall spiciness.
- 1 teaspoon salt: Season and enhance all flavors uniformly; salt brightens ingredients and helps extract moisture from the onion and tomato paste for better integration. Taste as you go to avoid over-salting.
- 1/2 teaspoon freshly ground black pepper: Provide sharp, warming contrast and enhance savory notes; freshly ground black pepper contributes subtle heat and complexity when added during cooking. Grind fresh for maximum aroma and flavor impact.
- 3 cups cooked shredded chicken (such as Rotisserie chicken): Supply tender protein and base texture for the tacos; cooked shredded chicken offers convenience and soaks up seasonings, making it the primary hearty component. Use rotisserie or leftover chicken for best flavor and minimal prep.
- 2 tablespoons tomato paste: Thicken and deepen the sauce with concentrated tomato richness; tomato paste adds umami and body that helps bind the filling and intensify color. Cook briefly with spices to remove rawness and integrate flavors.
- 1/4 cup water: Adjust sauce consistency and help distribute seasonings; water loosens the tomato paste to create a cohesive filling without diluting flavor excessively. Add gradually until desired moisture is reached for easy taco assembly.
- 12 to 14 hard taco shells: Provide a crunchy vessel for the filling and present a classic taco texture; hard taco shells must be filled carefully to avoid breaking and can be warmed for better crunch. Serve upright or in a rack to keep fillings contained.
- 2 cups shredded Monterey Jack or Cheddar cheese: Melt into the filling and create a gooey, savory topping; shredded Monterey Jack or Cheddar cheese contributes creaminess and a pleasant browned crust when baked. Use a blend or single variety depending on desired melt and flavor.
- chopped tomatoes, lettuce, minced red onion, sour cream, salsa, avocado, chopped cilantro and jalapeño: Finish tacos with fresh, contrasting garnishes; chopped tomatoes, lettuce, minced red onion, sour cream, salsa, avocado, chopped cilantro and jalapeño add brightness, acidity, creaminess, herbaceousness, and heat. Arrange assorted toppings so diners can customize each taco to taste.
Cooking Method for Baked Chicken Tacos

These instructions walk you through warming and seasoning the filling, assembling the shells in a baking dish, and finishing with a quick bake to melt the cheese. Read each step to catch sensory cues and avoid common pitfalls. The process is straightforward but benefits from attention to texture and timing.
- Preheat the oven to 400 degrees F.: As you set the oven, notice the faint hum as it powers up and the warm rush when you open the door to check the racks. Preheating ensures the cheese melts quickly and the shells warm uniformly, preventing the filling from cooling them down. If you skip preheating the oven you may end up with uneven cheese melt and soggy shells, so make sure it reaches temperature before baking.
- In a large skillet on medium heat, add the oil. Once hot, add the onion and cook until softened and starting to brown, about 3 to 5 minutes, stirring occasionally. Stir in the garlic and cook for 30 seconds, stirring constantly. Add the cumin, oregano, chili powder, salt, and black pepper, and cook for 30 seconds, stirring constantly. Add the chicken, tomato paste, and water. Cook until the chicken is warm throughout, about 2 minutes, stirring constantly.: When the oil shimmers, it signals the right temperature to begin. You should hear a soft sizzle when the chopped onion hits the pan; that sound means caramelization is starting. This step unlocks sweetness in the onion which balances the spices. A common mistake is overheating the oil until it smokes, which will impart a bitter taste, so keep the heat moderate.
- Divide the chicken mixture between the hard taco shells (about 3 to 4 tablespoons per taco; you will have room for 12 to 14 tacos) and place the tacos upright in a 9 by 13-inch baking dish. Sprinkle the cheese on top of the chicken in each taco.: As the onion softens you will see edges go translucent and then take on a pale golden color, release a gentle sweet smell, and the pan will click softly as moisture evaporates. This subtle browning adds complexity and depth to the filling. Stir occasionally to promote even color, and avoid leaving the onion in one spot or it may burn.
- Bake until the cheese is melted, about 10 minutes.: The moment you add minced garlic the aroma intensifies, bright and pungent. Cook just until fragrant and avoid browning, because burnt garlic tastes acrid. Keep the spoon moving so the garlic releases its flavor evenly without scorching.
- Garnish the tacos with any toppings you like. Serve immediately.: Adding the dried spices to the hot oil helps bloom their flavors and perfumes the pan with a warm, earthy scent. You may notice the spices darken slightly and the aroma deepen; this means they are awakening. Cook briefly so they do not burn, as burned spices become bitter and would spoil the filling.
- Add the chicken, tomato paste, and water: When the shredded chicken hits the skillet the mixture will hiss softly and steam, releasing savory juices. The tomato paste will thicken, and the small amount of water loosens it into a glossy coating that clings to the chicken . Stir frequently so the sauce distributes and the chicken warms evenly, ensuring each shred is seasoned. If the mixture appears dry, add a splash more water cautiously; too much will make it soupy.
- Cook until the chicken is warm throughout, about 2 minutes, stirring constantly: You will feel the warmth radiating from the skillet and see steam rise as the chicken reaches temperature. This brief heating melds the flavors while preserving moisture. Overcooking will dry the chicken , so watch closely and remove from heat once evenly warm.
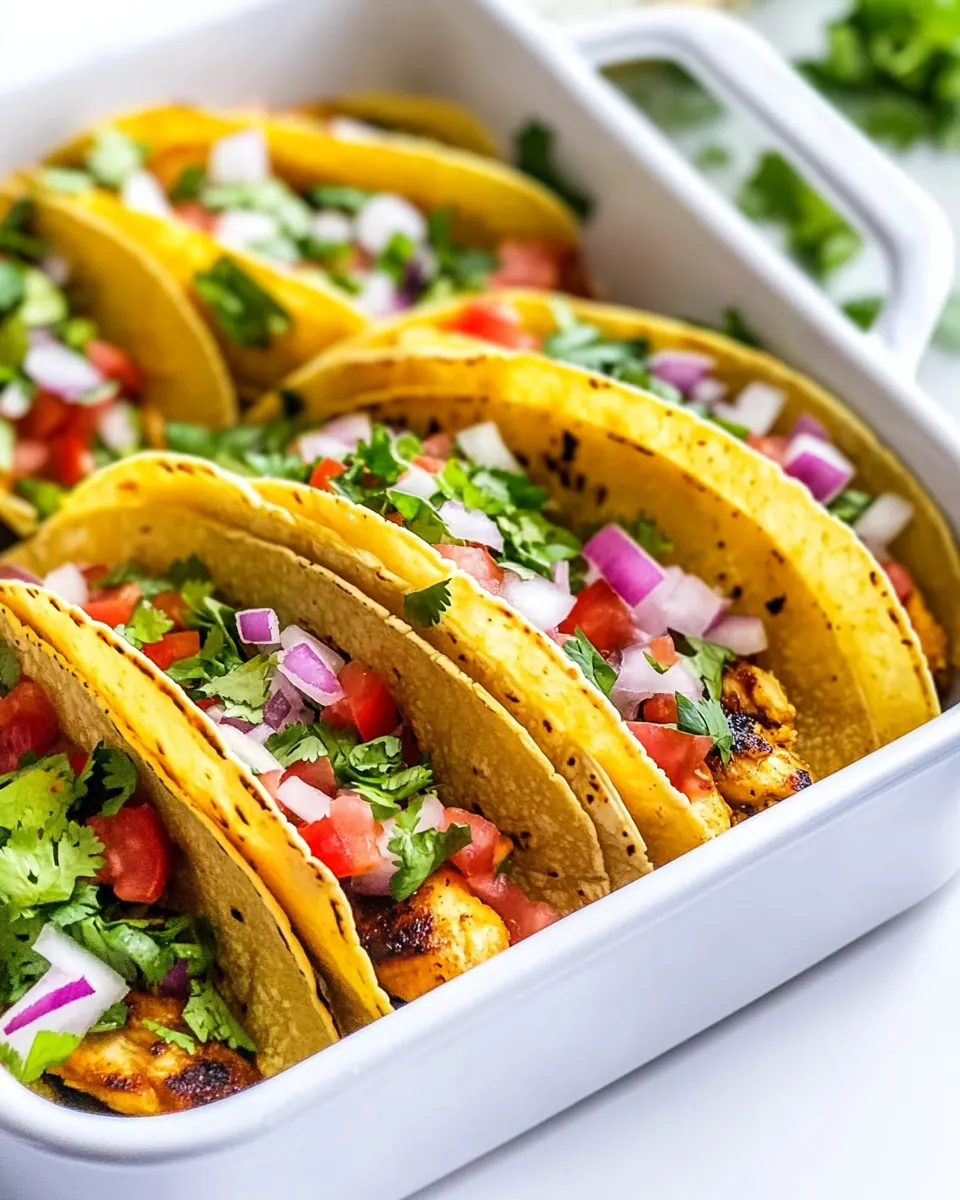
- Divide the chicken mixture between the hard taco shells (about 3 to 4 tablespoons per taco; you will have room for 12 to 14 tacos) and place the tacos upright in a 9 by 13-inch baking dish: As you portion the filling, notice how the saucy coating clings to the chicken , giving each spoonful a sheen. Arranging shells upright prevents spills and ensures even heat around each taco. Avoid overstuffing because it can crack the shells and cause topping spillage in the oven.
- Sprinkle the cheese on top of the chicken in each taco: As the shredded cheese lands on top it creates a blanket that will melt into the filling. Freshly shredded cheese melts more smoothly and browns attractively. Pack the cheese evenly to ensure consistent melt; uneven distribution leads to some tacos with no golden top and others overloaded.
- Bake until the cheese is melted, about 10 minutes: In the oven you will hear a quiet bubbling and smell a toasty, slightly caramelized dairy scent as the cheese transforms. The edges may take on a light golden hue, which signals readiness. Keep an eye on them because leaving them too long can make the shells brittle and the cheese oily.
- Garnish the tacos with any toppings you like: Fresh toppings add crisp contrast and bright notes, from cool lettuce to tangy tomato and creamy avocado . Assemble immediately to keep the shells crunchy and enjoy the contrast of textures. A common slip is adding watery toppings too early, which can soften the shells, so garnish just before serving.
- Serve immediately: These tacos taste best hot from the oven when the cheese is gooey and the shells are still crisp. As they sit the shells will slowly absorb moisture and soften; serve promptly for the ideal textural experience. If you must hold them briefly, keep them warm in a low oven, but expect a slight loss of crunch.
Helpful Hints
I like to keep these tips close when I make Baked Chicken Tacos so the outcome is consistent and enjoyable. Below are practical pointers I have learned from repeated testing, from assembly to toppings and reheating.
- Warm the chicken: Heating the shredded chicken in the skillet with spices ensures it soaks up flavor and does not cool the shells once assembled. Cold filling can make shells soggy, so aim for a steamy, evenly warmed mix.
- Evenly chop the onion: Small, uniform pieces of onion cook at the same rate and provide consistent texture. Large chunks can remain undercooked, and uneven bites will affect mouthfeel.
- Toast spices briefly: Blooming the ground cumin and chili powder in hot oil for just a few seconds releases their oils and intensifies aroma. Do not skip this quick step, but do not let them burn either.
- Portion carefully: Use a measured scoop so each taco holds the same amount of filling, which helps them bake evenly and prevents overstuffing that can break shells.
- Prep toppings in advance: Chop tomato, shred lettuce, and slice avocado before baking so guests can customize without delay. This keeps the service smooth and the tacos crisp.
- Choose the right cheese: Monterey Jack melts softer and milder, Cheddar offers sharper flavor. Grate fresh for best melt and texture, avoiding pre shredded mixes when possible.
- Keep shells upright: A snug baking dish holds shells upright and prevents filling from spilling, creating tidy, evenly heated tacos.
- Watch bake time: Ten minutes is usually perfect to melt cheese without drying the chicken or over crisping the shells, so set a timer and check early.
- Fresh cilantro brightens: A sprinkle of chopped cilantro at the end adds fresh herbal brightness that contrasts the warm, savory filling.
- Leftovers reheat well: Reheat briefly in a hot oven to refresh crispness, but expect a slight loss of crunch compared with fresh from the oven.
Serving Ideas for Baked Chicken Tacos
These tacos can anchor many kinds of meals, from casual weeknight dinners to celebratory spreads. Below are serving suggestions and pairing ideas to elevate your plate depending on the occasion.
- Casual family dinner: Serve Baked Chicken Tacos with a simple side of rice and a tossed salad so everyone can customize their tacos and portion according to appetite.
- Party or potluck: Arrange the tacos on a platter with bowls of toppings like chopped tomatoes, minced red onion, avocado, and sour cream so guests build their own. This encourages interaction and keeps service easy for hosts.
- Lunch option: Offer smaller portions with fresh lime wedges and a light slaw to make the meal feel brighter and lighter for midday eating.
- Occasions such as Ramadan iftar or festive meals: The approachable flavors and make ahead convenience make these suitable for breaking fast, especially when paired with cooling sides like a cucumber salad and yogurt based dips.
- Seasonal pairings: In warmer months, focus on fresh toppings like diced tomato and cilantro. In cooler months add heartier sides such as a warm bean salad to round out the meal.
- Storage tips: Keep filling and shells separate when storing. Refrigerate the filling in an airtight container for up to three days. Reheat the filling thoroughly and assemble right before serving to retain crunch.
- Plating for guests: Serve the tacos upright in a baking dish placed on a wooden board, with small bowls of toppings nearby to create a casual, buffet style presentation that invites people to help themselves.
- Kid friendly: Offer milder toppings like shredded lettuce and mild cheese while keeping spicier options on the side so kids can enjoy a version tailored to them.
- Seasonal beverage pairings: Pair with a crisp non alcoholic iced tea or a citrusy agua fresca for a bright contrast to the warm, savory filling.
- Garnish ideas: Freshly chopped cilantro and a squeeze of lime bring finishing brightness that balances the richness of the cheese and chicken.
FAQ
Conclusion
Baked Chicken Tacos stand out because they combine speedy assembly with comforting, layered flavors and a delightful mix of textures. They are approachable enough for a busy weeknight, yet satisfying enough to share with guests. Give them a try when you want a fuss free meal that still feels thoughtful and fun. I hope this recipe becomes one of your reliable weeknight heroes, bringing ease and good flavor to your table.
Baked Chicken Tacos
Equipment
- Skillet
- Oven
- 9 by 13 inch baking dish
Ingredients
- 2 tablespoons extra virgin olive oil Enhance flavor and prevent sticking by sautéing other aromatics; extra virgin olive oil adds a fruity, slightly peppery base and helps carry spices throughout the filling. Use moderate heat to avoid burning and maintain healthy fats in the dish.
- 1 medium yellow onion, chopped finely Provide a sweet, savory backbone when softened; finely chopped yellow onion sweats down to release sugars and moisture that meld with spices and chicken. Cook until translucent to build depth without overpowering the other flavors.
- 4 medium garlic cloves, minced Introduce pungent, aromatic heat when minced and cooked briefly; garlic brightens the mixture and complements the onion and spices. Add toward the end of sautéing to retain its aroma without becoming bitter.
- 1 1/2 teaspoons ground cumin Contribute warm, earthy notes to the filling; ground cumin adds a smoky, slightly citrusy depth that pairs well with poultry and Mexican-style seasonings. Use measured amounts to balance other spices without dominating the profile.
- 1 1/2 teaspoons dried oregano Add herbal, slightly minty undertones; dried oregano lends savory complexity and helps mimic classic taco-seasoning blends. Rehydrate in the cooking liquid to release its flavor into the sauce.
- 1 teaspoon chili powder Bring mild heat and rounded chili flavor; chili powder contributes color and a traditional taco spice character that ties other seasonings together. Adjust quantity to control overall spiciness.
- 1 teaspoon salt Season and enhance all flavors uniformly; salt brightens ingredients and helps extract moisture from the onion and tomato paste for better integration. Taste as you go to avoid over-salting.
- 1/2 teaspoon freshly ground black pepper Provide sharp, warming contrast and enhance savory notes; freshly ground black pepper contributes subtle heat and complexity when added during cooking. Grind fresh for maximum aroma and flavor impact.
- 3 cups cooked shredded chicken (such as Rotisserie chicken) Supply tender protein and base texture for the tacos; cooked shredded chicken offers convenience and soaks up seasonings, making it the primary hearty component. Use rotisserie or leftover chicken for best flavor and minimal prep.
- 2 tablespoons tomato paste Thicken and deepen the sauce with concentrated tomato richness; tomato paste adds umami and body that helps bind the filling and intensify color. Cook briefly with spices to remove rawness and integrate flavors.
- 1/4 cup water Adjust sauce consistency and help distribute seasonings; water loosens the tomato paste to create a cohesive filling without diluting flavor excessively. Add gradually until desired moisture is reached for easy taco assembly.
- 12 to 14 hard taco shells Provide a crunchy vessel for the filling and present a classic taco texture; hard taco shells must be filled carefully to avoid breaking and can be warmed for better crunch. Serve upright or in a rack to keep fillings contained.
- 2 cups shredded Monterey Jack or Cheddar cheese Melt into the filling and create a gooey, savory topping; shredded Monterey Jack or Cheddar cheese contributes creaminess and a pleasant browned crust when baked. Use a blend or single variety depending on desired melt and flavor.
- chopped tomatoes, lettuce, minced red onion, sour cream, salsa, avocado, chopped cilantro and jalapeño Finish tacos with fresh, contrasting garnishes; chopped tomatoes, lettuce, minced red onion, sour cream, salsa, avocado, chopped cilantro and jalapeño add brightness, acidity, creaminess, herbaceousness, and heat. Arrange assorted toppings so diners can customize each taco to taste.
Instructions
- Preheat the oven to 400 degrees F.: As you set the oven, notice the faint hum as it powers up and the warm rush when you open the door to check the racks. Preheating ensures the cheese melts quickly and the shells warm uniformly, preventing the filling from cooling them down. If you skip preheating the oven you may end up with uneven cheese melt and soggy shells, so make sure it reaches temperature before baking.
- In a large skillet on medium heat, add the oil. Once hot, add the onion and cook until softened and starting to brown, about 3 to 5 minutes, stirring occasionally. Stir in the garlic and cook for 30 seconds, stirring constantly. Add the cumin, oregano, chili powder, salt, and black pepper, and cook for 30 seconds, stirring constantly. Add the chicken, tomato paste, and water. Cook until the chicken is warm throughout, about 2 minutes, stirring constantly.: When the oil shimmers, it signals the right temperature to begin. You should hear a soft sizzle when the chopped onion hits the pan; that sound means caramelization is starting. This step unlocks sweetness in the onion which balances the spices. A common mistake is overheating the oil until it smokes, which will impart a bitter taste, so keep the heat moderate.
- Divide the chicken mixture between the hard taco shells (about 3 to 4 tablespoons per taco; you will have room for 12 to 14 tacos) and place the tacos upright in a 9 by 13-inch baking dish. Sprinkle the cheese on top of the chicken in each taco.: As the onion softens you will see edges go translucent and then take on a pale golden color, release a gentle sweet smell, and the pan will click softly as moisture evaporates. This subtle browning adds complexity and depth to the filling. Stir occasionally to promote even color, and avoid leaving the onion in one spot or it may burn.
- Bake until the cheese is melted, about 10 minutes.: The moment you add minced garlic the aroma intensifies, bright and pungent. Cook just until fragrant and avoid browning, because burnt garlic tastes acrid. Keep the spoon moving so the garlic releases its flavor evenly without scorching.
- Garnish the tacos with any toppings you like. Serve immediately.: Adding the dried spices to the hot oil helps bloom their flavors and perfumes the pan with a warm, earthy scent. You may notice the spices darken slightly and the aroma deepen; this means they are awakening. Cook briefly so they do not burn, as burned spices become bitter and would spoil the filling.
- Add the chicken, tomato paste, and water: When the shredded chicken hits the skillet the mixture will hiss softly and steam, releasing savory juices. The tomato paste will thicken, and the small amount of water loosens it into a glossy coating that clings to the chicken . Stir frequently so the sauce distributes and the chicken warms evenly, ensuring each shred is seasoned. If the mixture appears dry, add a splash more water cautiously; too much will make it soupy.
- Cook until the chicken is warm throughout, about 2 minutes, stirring constantly: You will feel the warmth radiating from the skillet and see steam rise as the chicken reaches temperature. This brief heating melds the flavors while preserving moisture. Overcooking will dry the chicken , so watch closely and remove from heat once evenly warm.
- Divide the chicken mixture between the hard taco shells (about 3 to 4 tablespoons per taco; you will have room for 12 to 14 tacos) and place the tacos upright in a 9 by 13-inch baking dish: As you portion the filling, notice how the saucy coating clings to the chicken , giving each spoonful a sheen. Arranging shells upright prevents spills and ensures even heat around each taco. Avoid overstuffing because it can crack the shells and cause topping spillage in the oven.
- Sprinkle the cheese on top of the chicken in each taco: As the shredded cheese lands on top it creates a blanket that will melt into the filling. Freshly shredded cheese melts more smoothly and browns attractively. Pack the cheese evenly to ensure consistent melt; uneven distribution leads to some tacos with no golden top and others overloaded.
- Bake until the cheese is melted, about 10 minutes: In the oven you will hear a quiet bubbling and smell a toasty, slightly caramelized dairy scent as the cheese transforms. The edges may take on a light golden hue, which signals readiness. Keep an eye on them because leaving them too long can make the shells brittle and the cheese oily.
- Garnish the tacos with any toppings you like: Fresh toppings add crisp contrast and bright notes, from cool lettuce to tangy tomato and creamy avocado . Assemble immediately to keep the shells crunchy and enjoy the contrast of textures. A common slip is adding watery toppings too early, which can soften the shells, so garnish just before serving.
- Serve immediately: These tacos taste best hot from the oven when the cheese is gooey and the shells are still crisp. As they sit the shells will slowly absorb moisture and soften; serve promptly for the ideal textural experience. If you must hold them briefly, keep them warm in a low oven, but expect a slight loss of crunch.
Notes
- Warm the chicken: Heating the shredded chicken in the skillet with spices ensures it soaks up flavor and does not cool the shells once assembled. Cold filling can make shells soggy, so aim for a steamy, evenly warmed mix.
- Evenly chop the onion: Small, uniform pieces of onion cook at the same rate and provide consistent texture. Large chunks can remain undercooked, and uneven bites will affect mouthfeel.
- Toast spices briefly: Blooming the ground cumin and chili powder in hot oil for just a few seconds releases their oils and intensifies aroma. Do not skip this quick step, but do not let them burn either.
- Portion carefully: Use a measured scoop so each taco holds the same amount of filling, which helps them bake evenly and prevents overstuffing that can break shells.
- Prep toppings in advance: Chop tomato, shred lettuce, and slice avocado before baking so guests can customize without delay. This keeps the service smooth and the tacos crisp.
- Choose the right cheese: Monterey Jack melts softer and milder, Cheddar offers sharper flavor. Grate fresh for best melt and texture, avoiding pre shredded mixes when possible.
- Keep shells upright: A snug baking dish holds shells upright and prevents filling from spilling, creating tidy, evenly heated tacos.
- Watch bake time: Ten minutes is usually perfect to melt cheese without drying the chicken or over crisping the shells, so set a timer and check early.
- Fresh cilantro brightens: A sprinkle of chopped cilantro at the end adds fresh herbal brightness that contrasts the warm, savory filling.
- Leftovers reheat well: Reheat briefly in a hot oven to refresh crispness, but expect a slight loss of crunch compared with fresh from the oven.