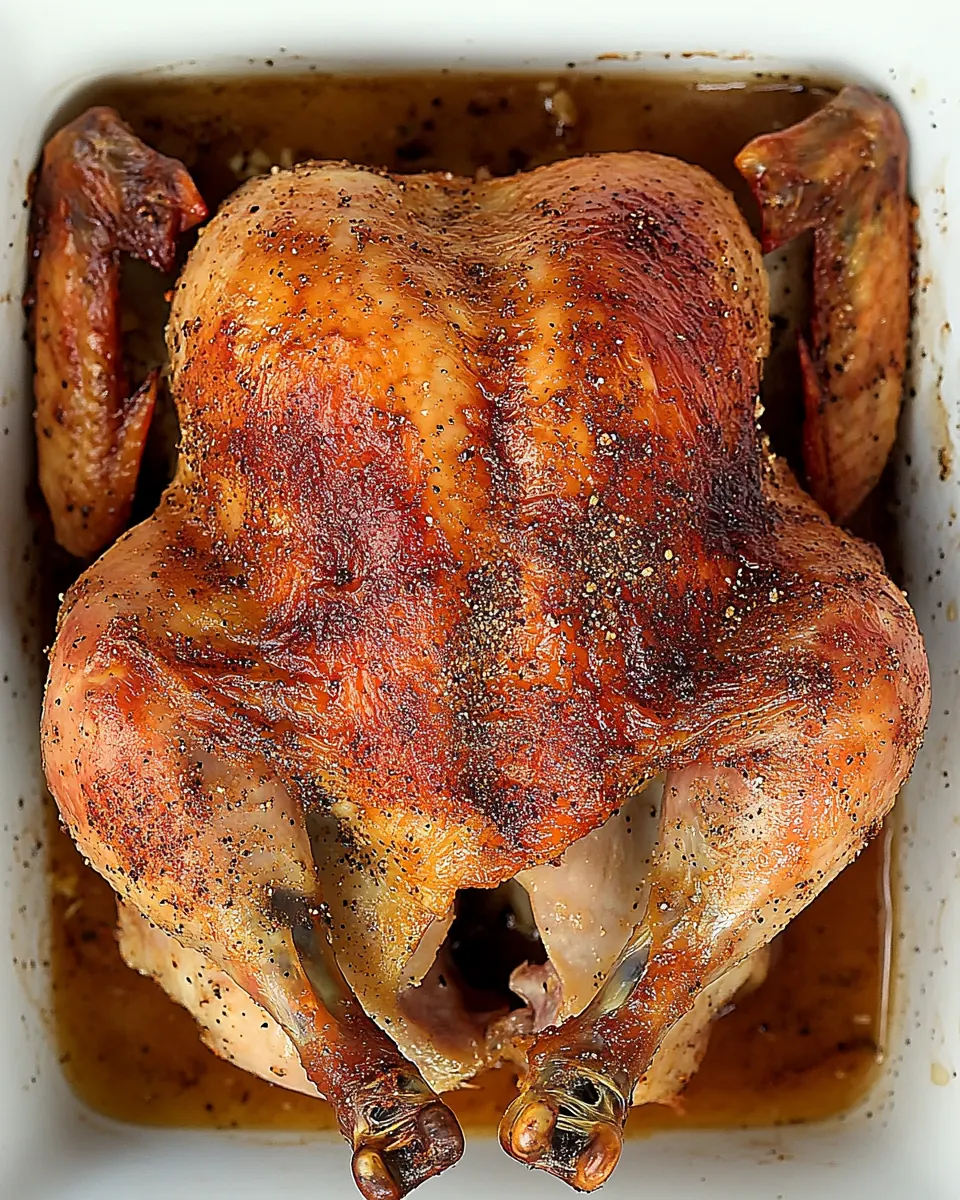
Simple Roast Chicken Recipe
Simple Roast Chicken Recipe has been my go to for cozy family dinners since I first learned to roast a whole bird on a cramped college apartment baking sheet. I still remember the first time the skin turned properly golden and crackly, the apartment filling with the aroma of toasted herbs and hot fat, and how proud I felt slicing into a juicy cavity of meat that tasted like effort and comfort combined. That first success changed how I think about weeknight cooking, because a single whole bird can feed a household, make lunches for days, and create stock that becomes the backbone of soups.
Over the years I refined what I do before the chicken hits the oven, and I learned to trust a thermometer more than any timer. I favor simple seasonings and a confident roast temperature to coax crunch from the skin while keeping the meat succulent. The technique is forgiving, so I’ve used it for birthdays, quiet Sundays, and when friends drop by unexpectedly. I love how a straightforward method can feel celebratory without a ton of fuss, and how the leftover bones promise another meal in the form of stock.
Recipe Snapshot
1 hr 35 mins
5 mins
90 mins
Medium
400 kcal
American
Keto, Paleo
Dinner
Skillet or baking dish or other appropriate pan, Instant Read Thermometer
Why You Need This Simple Roast Chicken Recipe
It is reliable
I count on this Simple Roast Chicken Recipe because it produces consistent results, even when life is busy. The method, with a hot oven and a quick oil rub, gives repeatable crisp skin and evenly cooked meat. I explain why I rely on the technique, and how a little focus at the start repays you with easy carving and minimal cleanup.
Minimal ingredients, maximum flavor
This roast shines with just a few items. Using a sturdy oil and a bold seasoning concentrate the chicken‘s natural flavor, rather than hiding it. I often say that restraint is a flavor tactic, and here it lets the bird sing. The seasoning penetrates the skin while the oil helps create that sought after color and texture.
Flexible and practical
I love that you can scale this for a weeknight dinner or a small gathering. The timing rule of thumb makes it simple to plan, and the leftovers are incredibly useful. You can slice it for sandwiches, toss meat into salads, or save the carcass for a rich stock. That adaptability is why this recipe has a regular spot in my rotation.
Great learning recipe
Roasting a whole bird teaches essential skills, like checking temperature and resting meat. I enjoy watching cooks gain confidence as they hear the sizzle, notice the skin color, and learn to read an instant read thermometer. Those moments build competence that carries into other recipes.
Comfort that travels beyond the plate
There is ritual here, from patting the chicken dry to carving and sharing. I often serve this when I want dinner to feel like an event without stress. The aromas and the act of pulling apart a warm bird create memories, which is why this roast keeps coming back to my table.
What’s In This Simple Roast Chicken Recipe
The philosophy behind these ingredients is simple harmony. A whole chicken is the centerpiece, and the small supporting cast works to amplify its natural juices and texture. Olive oil promotes browning and crisp skin, while a concentrated seasoning gives a focused savory lift. Each player has a clear job, and together they create a roast that is straightforward yet impressive.
- 1 (4-5) pound whole chicken: Provide the main protein and structure for the dish, yielding juicy meat and crisp skin when roasted properly, and its cavity can hold aromatics for added flavor.
- 1 tablespoon olive oil: Coat the chicken skin to promote even browning and help seasonings adhere; olive oil also contributes a subtle fruity flavor and helps prevent drying during roasting.
- 1 teaspoon Tone House Seasoning: Season the chicken with balanced savory flavors and mild saltiness to enhance natural taste; Tone House Seasoning provides a convenient blend of herbs and spices that complements roasted poultry.
Making Simple Roast Chicken Recipe
These steps will walk you from room temperature bird to a rested, carve ready roast. The technique is straightforward, but I like to guide you through sensory cues so you know when it is right. Keep a thermometer handy and trust the visual signs as much as the clock.
- Prep. Preheat the oven to 425º F. Arrange the oven rack to the bottom 1/3 of the oven. Pat the chicken dry with paper towels, place the chicken into a skillet or pan, and truss (if trussing).: You will notice a warm, slightly metallic scent as the oven climbs to 425º F , and the air will begin to feel like it is ready to transform the skin. Patting the chicken dry removes surface moisture, so the skin will sizzle immediately on contact with heat, which is essential for a crisp finish. Placing the bird in a skillet or baking dish gives stable heat conduction and allows juices to collect for basting or sauce if you like. Trussing keeps the legs and wings tucked so the bird cooks evenly, and it also helps maintain an elegant shape for carving. One common mistake is overcrowding the pan, which steams the bird instead of roasting it, so give the bird room. If you do not truss, expect the wings and legs to brown faster; check those areas for early color so they do not burn.
- Season the chicken. Rub the olive oil over the whole chicken. Sprinkle with the seasoning and press into the chicken.: At this stage the texture changes under your fingers as the olive oil smooths the surface and helps the Tone House Seasoning adhere. Press the seasoning into the skin so the flavors sit close to where the heat will coax them into fragrant oils. You should smell a faint olive aroma and a hint of the seasoning's herbs or spices. This tactile step also seals the skin slightly, encouraging a golden crust. A common error is applying seasoning only in large clumps, which creates uneven flavor; aim for an even, gentle press.
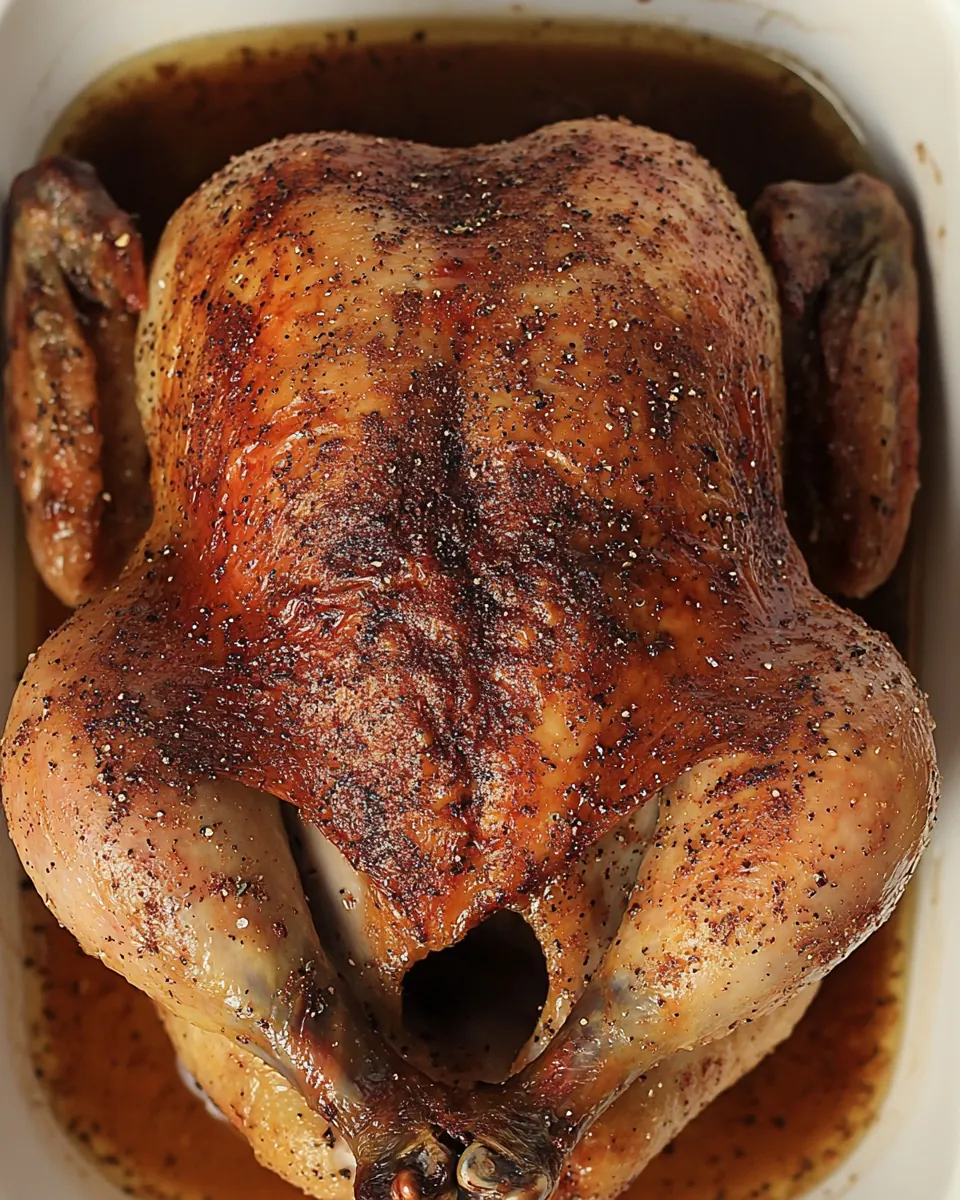
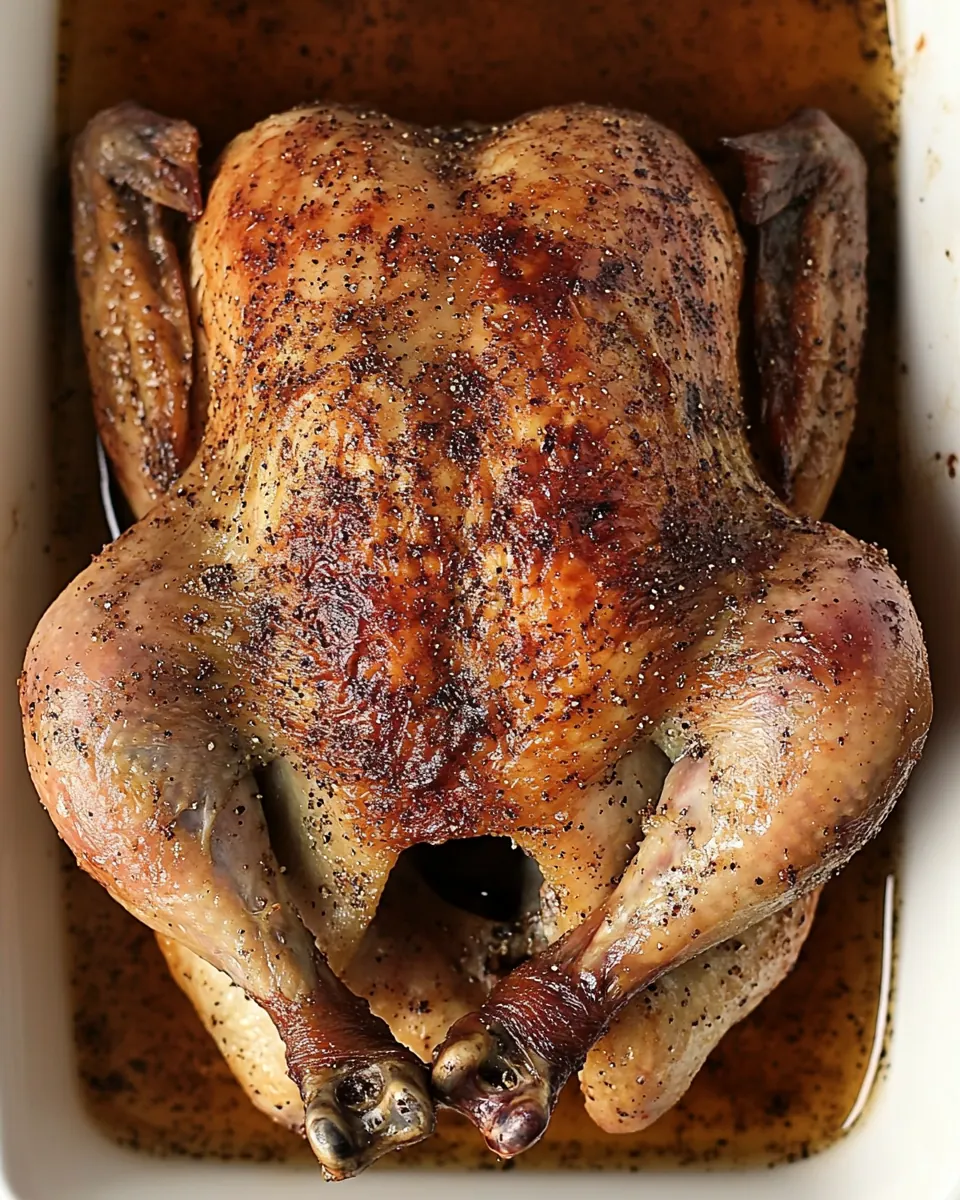
- Roast the chicken. Place the chicken into the preheated oven and roast for 15 minutes per pound, until the chicken is crispy, golden, and registers 165º F when checked with an instant-read thermometer.: When the bird first hits the hot oven you will hear the initial sizzle as moisture vaporizes and fat begins to render. Over the next hour to hour and a half the skin will shift from pale to deep golden, and you may notice a nutty aroma as the proteins and sugars brown. The 15 minutes per pound guideline is a reliable planning tool, but the true sign of doneness is an internal temperature of 165º F in the thickest part of the thigh and breast using an instant-read thermometer. Insert the probe without touching bone for an accurate read. A troubleshooting tip is to tent with foil if the skin is darkening too quickly; this prevents burning while allowing the interior to finish. A typical mistake is relying solely on visual cues, which can be misleading if the oven runs hot or cool.
- Rest. Remove the chicken from the oven, tent with foil, and rest for 10 minutes before slicing and serving.: Resting is when the meat redistributes its juices, so you will notice the sizzling slows and the surface cools to a pleasant warmth. Tent it lightly with foil so it does not sweat and lose that crispness, while still preserving heat. After 10 minutes the meat firms slightly and is much easier to carve without losing a puddle of juices on the cutting board. If you slice too soon the juices run out, resulting in drier slices, so patience here pays off. A mistake to avoid is wrapping the bird tightly, which traps steam and softens the skin; keep the tent loose.
Ways to Adapt This Recipe

This Simple Roast Chicken Recipe is a canvas for small swaps that change the final flavor and use. Below are focused adaptations and practical notes to tailor the roast to your pantry and occasion.
- Use different seasonings, press alternative blends into the skin to highlight citrus, herb, or smoky profiles, but keep the oil base so the skin crisps reliably.
- Adjust the oven rack, moving it slightly higher will speed browning for a deeper crust, while lower placement tempers the surface color for longer cooks.
- Truss or do not truss, trussing creates an attractive shape and even cook, while leaving the bird untrussed can shorten cook time slightly for the breast meat; watch darker areas for fast browning.
- Rest longer for juicier slices, a 10 to 15 minute rest yields better carved slices, especially if you plan to serve guests or make sandwiches from leftovers.
- Plan for leftovers, carve extra and refrigerate in an airtight container for up to four days, or freeze portions for longer storage and later use in soups or casseroles.
Serving This Simple Roast Chicken Recipe
This roast is versatile for many occasions, from casual family dinners to small celebrations. Below are serving ideas and storage guidance presented as a list so you can pick what fits your meal plan.
- Family dinner, carve the chicken on a large board and serve with simple sides like roasted vegetables or a green salad for a balanced meal.
- Lunches, slice leftover meat thin and layer it into sandwiches or wraps with crisp greens for an easy next day meal.
- Special occasions, present the whole bird on a platter with warmed gravy or pan juices spooned over for an impressive centerpiece.
- Storage, cool carved meat before placing it in an airtight container, and refrigerate for up to four days to keep it safe and moist.
- Freezing, freeze carved portions in a freezer safe container for up to six months, and thaw in the refrigerator before reheating gently to preserve texture.
FAQ
Conclusion
This Simple Roast Chicken Recipe stands out for its straightforward technique and reliably satisfying results. The combination of a hot roast, light oil, and a bold seasoning yields crisp skin and juicy meat, making it perfect for both everyday meals and small gatherings. Give it a try when you want an uncomplicated, comforting main that scales easily and leaves you with versatile leftovers. I hope it becomes a favorite in your kitchen, bringing the ease of a pantry friendly roast and the warmth of shared meals.
Simple Roast Chicken Recipe
Equipment
- Skillet or baking dish or other appropriate pan
- Instant read thermometer
Ingredients
- 1 (4-5) pound whole chicken Provide the main protein and structure for the dish, yielding juicy meat and crisp skin when roasted properly, and its cavity can hold aromatics for added flavor.
- 1 tablespoon olive oil Coat the chicken skin to promote even browning and help seasonings adhere; olive oil also contributes a subtle fruity flavor and helps prevent drying during roasting.
- 1 teaspoon Tone House Seasoning Season the chicken with balanced savory flavors and mild saltiness to enhance natural taste; Tone House Seasoning provides a convenient blend of herbs and spices that complements roasted poultry.
Instructions
- Prep. Preheat the oven to 425º F. Arrange the oven rack to the bottom 1/3 of the oven. Pat the chicken dry with paper towels, place the chicken into a skillet or pan, and truss (if trussing).: You will notice a warm, slightly metallic scent as the oven climbs to 425º F , and the air will begin to feel like it is ready to transform the skin. Patting the chicken dry removes surface moisture, so the skin will sizzle immediately on contact with heat, which is essential for a crisp finish. Placing the bird in a skillet or baking dish gives stable heat conduction and allows juices to collect for basting or sauce if you like. Trussing keeps the legs and wings tucked so the bird cooks evenly, and it also helps maintain an elegant shape for carving. One common mistake is overcrowding the pan, which steams the bird instead of roasting it, so give the bird room. If you do not truss, expect the wings and legs to brown faster; check those areas for early color so they do not burn.
- Season the chicken. Rub the olive oil over the whole chicken. Sprinkle with the seasoning and press into the chicken.: At this stage the texture changes under your fingers as the olive oil smooths the surface and helps the Tone House Seasoning adhere. Press the seasoning into the skin so the flavors sit close to where the heat will coax them into fragrant oils. You should smell a faint olive aroma and a hint of the seasoning's herbs or spices. This tactile step also seals the skin slightly, encouraging a golden crust. A common error is applying seasoning only in large clumps, which creates uneven flavor; aim for an even, gentle press.
- Roast the chicken. Place the chicken into the preheated oven and roast for 15 minutes per pound, until the chicken is crispy, golden, and registers 165º F when checked with an instant-read thermometer.: When the bird first hits the hot oven you will hear the initial sizzle as moisture vaporizes and fat begins to render. Over the next hour to hour and a half the skin will shift from pale to deep golden, and you may notice a nutty aroma as the proteins and sugars brown. The 15 minutes per pound guideline is a reliable planning tool, but the true sign of doneness is an internal temperature of 165º F in the thickest part of the thigh and breast using an instant-read thermometer. Insert the probe without touching bone for an accurate read. A troubleshooting tip is to tent with foil if the skin is darkening too quickly; this prevents burning while allowing the interior to finish. A typical mistake is relying solely on visual cues, which can be misleading if the oven runs hot or cool.
- Rest. Remove the chicken from the oven, tent with foil, and rest for 10 minutes before slicing and serving.: Resting is when the meat redistributes its juices, so you will notice the sizzling slows and the surface cools to a pleasant warmth. Tent it lightly with foil so it does not sweat and lose that crispness, while still preserving heat. After 10 minutes the meat firms slightly and is much easier to carve without losing a puddle of juices on the cutting board. If you slice too soon the juices run out, resulting in drier slices, so patience here pays off. A mistake to avoid is wrapping the bird tightly, which traps steam and softens the skin; keep the tent loose.
Notes
- Use different seasonings, press alternative blends into the skin to highlight citrus, herb, or smoky profiles, but keep the oil base so the skin crisps reliably.
- Adjust the oven rack, moving it slightly higher will speed browning for a deeper crust, while lower placement tempers the surface color for longer cooks.
- Truss or do not truss, trussing creates an attractive shape and even cook, while leaving the bird untrussed can shorten cook time slightly for the breast meat; watch darker areas for fast browning.
- Rest longer for juicier slices, a 10 to 15 minute rest yields better carved slices, especially if you plan to serve guests or make sandwiches from leftovers.
- Plan for leftovers, carve extra and refrigerate in an airtight container for up to four days, or freeze portions for longer storage and later use in soups or casseroles.