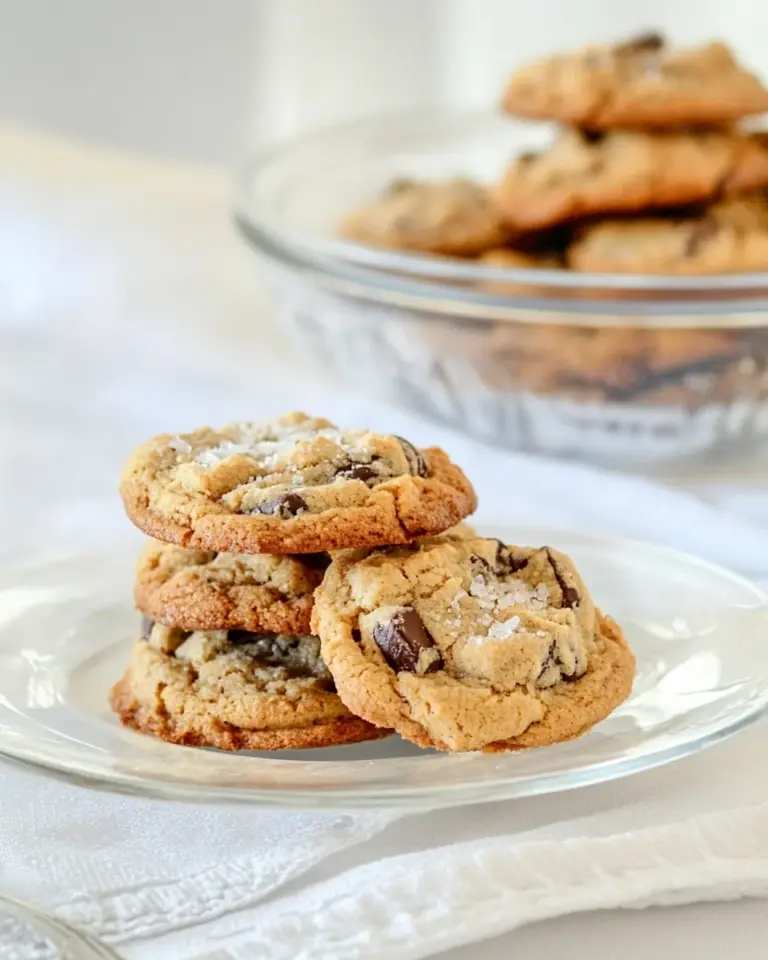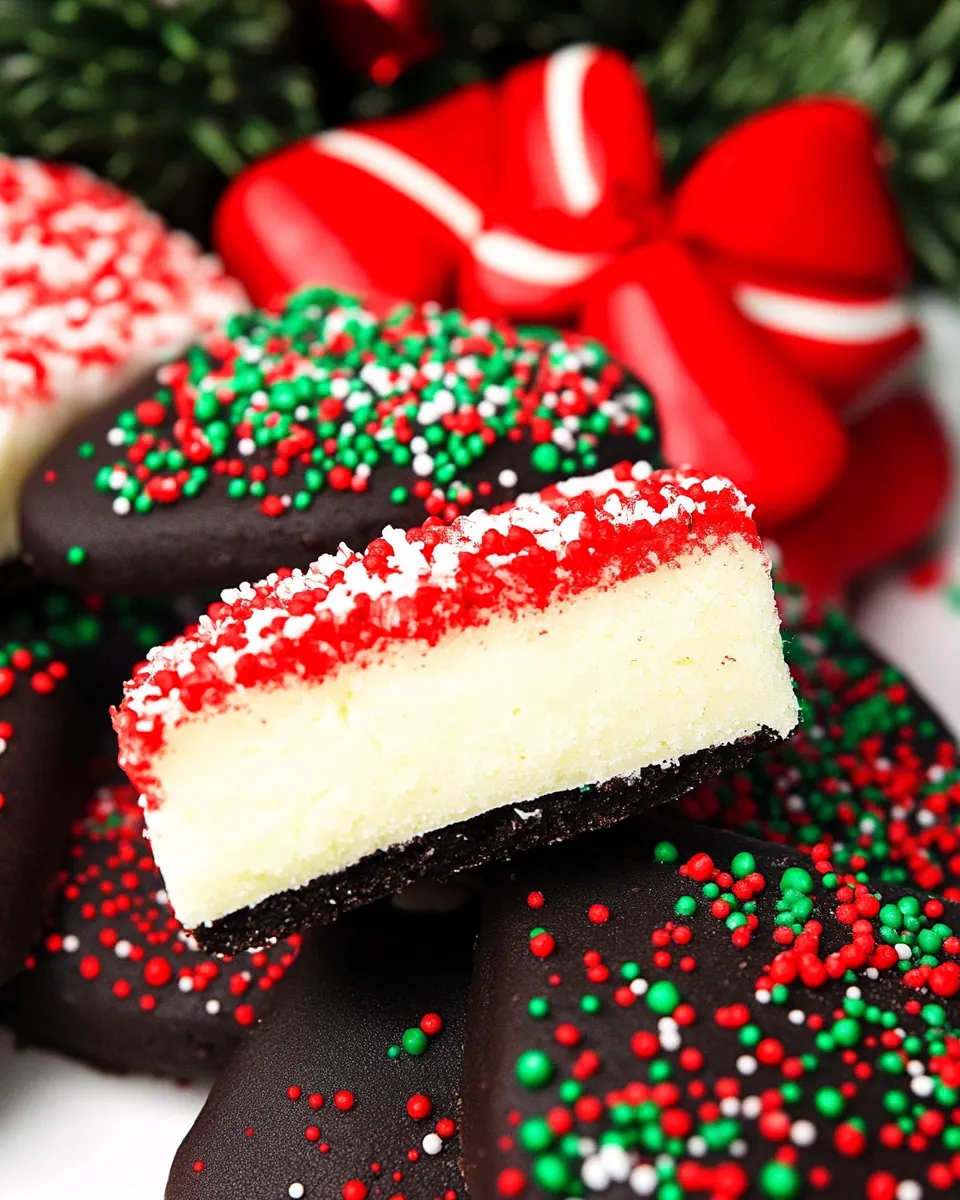
Peppermint Shortbread Cookies
Peppermint Shortbread Cookies have been my seasonal anchor for years, the one recipe I reach for when the house needs that crisp, minty cheer only holiday baking can deliver.
My first batch came from a late night when snow muffled the street and I wanted something simple yet festive to bring to a neighbor gathering. I remember the dough feeling silkier than I expected under my hands, the scent of butter and powdered sugar mingling with a whisper of vanilla extract. Rolling the two colored logs side by side felt oddly therapeutic, like arranging ornaments on a tiny edible tree. When the chocolate set and the candy cane shards sparkled on top, I knew this cookie would be a repeat star in my holiday rotation.
Since then, I tweak the procedure slightly every year, learning how chilling time and slice thickness affect texture, or how the bite of crushed peppermint elevates an otherwise gentle shortbread. I often bake a double batch to share, and I love watching friends debate whether the green or red cookie tastes more festive. There is comfort in the rhythm of creaming butter, folding in flour, and waiting for that first tray to come out of the oven, edges pale and centers just set. These moments, and the recipes that create them, are what keep me baking through the long winter nights.
Recipe Snapshot
28 mins
10 mins
18 mins
Medium
150 kcal
American
Gluten-Free, Low FODMAP
Desserts
Mixing Bowls, Electric Hand mixer or Stand mixer, Cookie Sheets
Why This Peppermint Shortbread Cookies Is a Winner
I love the clean, buttery base
The simplicity of the Peppermint Shortbread Cookies is its brilliance. A foundation of soft, room temperature butter and sifted all purpose flour gives a tender, melt in your mouth crumb that lets the peppermint shine without competing flavors. I find the shortbread texture is forgiving, so even when life gets busy, you still end up with a cookie that feels homemade and elevated.
Festive visual pop with minimal fuss
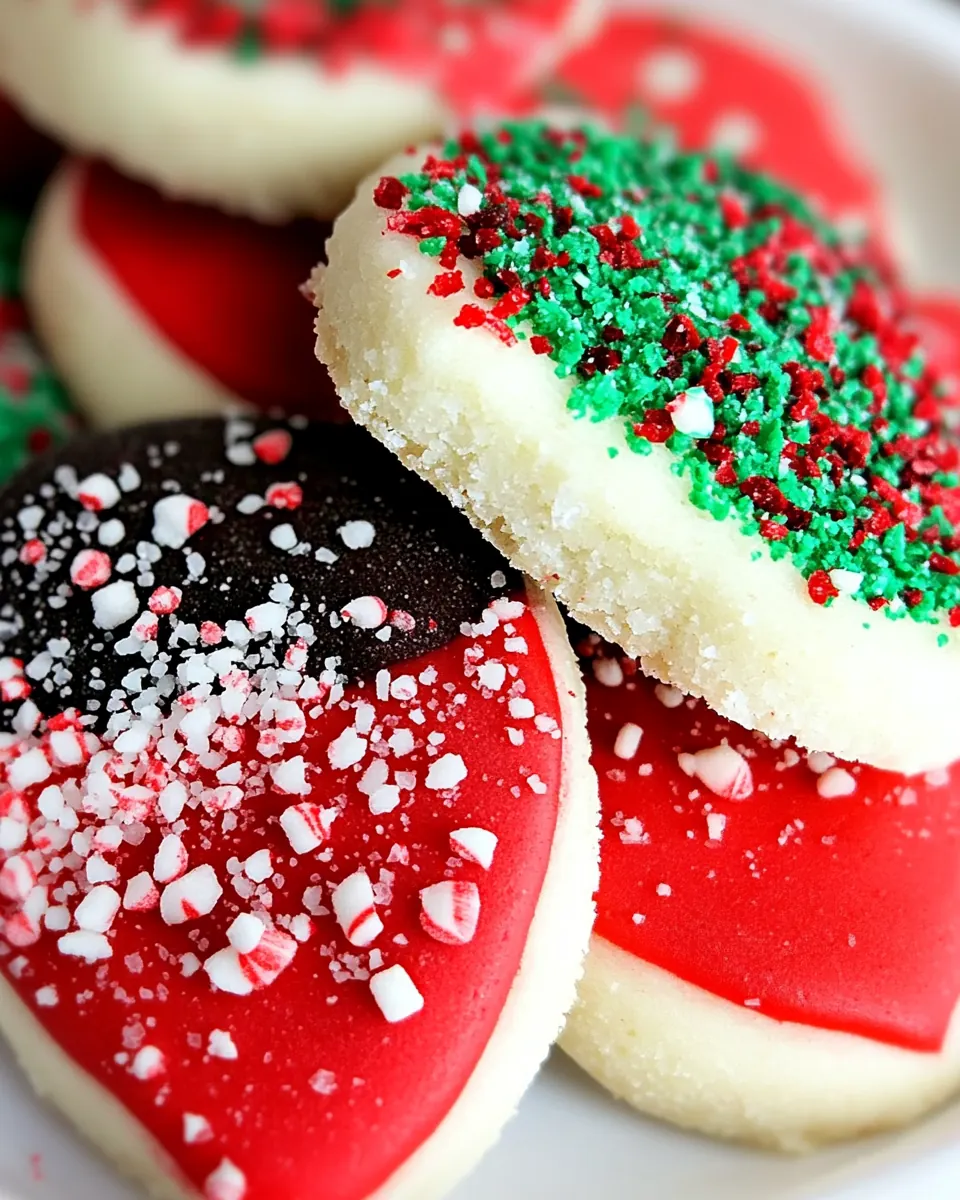
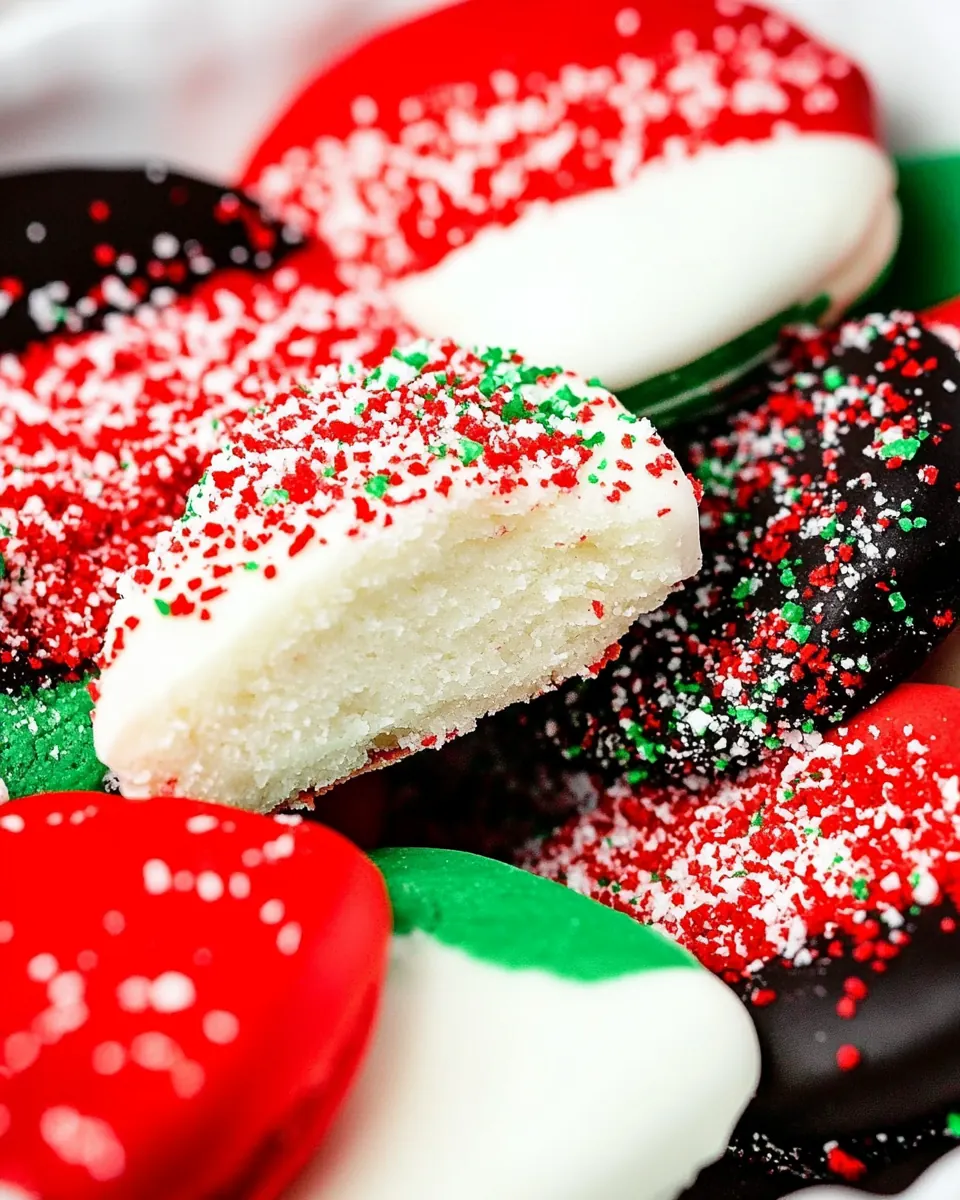
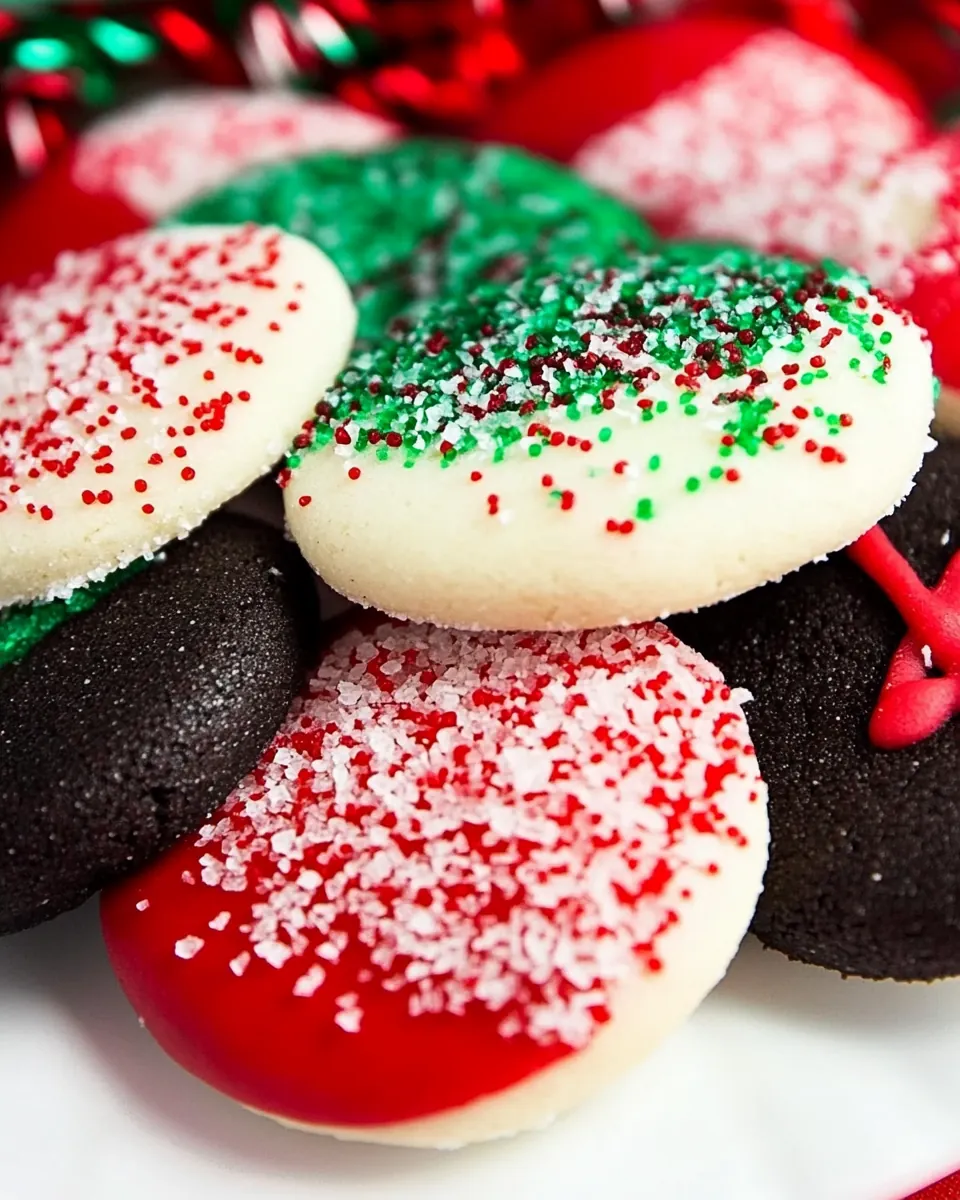
The two tone red and green doughs are showstoppers, yet they do not require fancy equipment. I like how a simple touch of gel food coloring transforms familiar dough into something celebratory. The sliced logs create uniform rounds that look professional, and the sprinkle of crushed candy canes adds sparkle and crunch that guests always praise.
Chocolate and peppermint is a perfect marriage
Dipping half the cookie in melted semi-sweet chocolate chips adds a glossy counterpoint to the crumbly shortbread. The contrast of textures engages every bite, and the chocolate mellows the peppermint while adding richness. I often pause after dipping just to admire how the chocolate sets and the candy cane bits cling, like edible confetti.
Make ahead friendly
I appreciate recipes that reward planning, and these cookies absolutely do. Chilling the logs for at least four hours tightens the dough and concentrates flavors, so you can prepare a day ahead. I often slice and freeze portions, then bake straight from frozen for fresh cookies on demand, keeping holiday stress low.
Great for gifting and gatherings
These cookies travel well, stack neatly, and pair beautifully with a hot drink or a holiday platter. I always wrap a few in parchment and tie with twine for neighbors, because the combination of scent, color, and crunch feels like passing along a little celebration.
Recipe Ingredients for Peppermint Shortbread Cookies
These ingredients are intentionally simple, chosen to produce a delicate, tender shortbread that carries peppermint and chocolate without overpowering them. The key players are the butter for richness and texture, the sifted all purpose flour for structure, and the crushed candy canes for a lively crunchy finish. Each component does a precise job, balancing fat, sweetness, and flavor so the cookie remains buttery rather than cloying.
- 1 cup (225 g) unsalted butter softened to room temperature: Soften to room temperature to ensure even creaming and easy incorporation into the dough; contributes rich flavor and tender crumb by providing fat that coats flour proteins and limits gluten development.
- 3/4 cup (90 g) powdered sugar: Sift or gently whisk to remove lumps and then cream with butter to add fine sweetness and a delicate, melt-in-the-mouth texture to the shortbread while keeping it light.
- 1 teaspoon vanilla extract: Add for aromatic depth and to enhance the butter's flavor; provides a familiar sweet–vanilla note that balances the peppermint and chocolate elements in the cookies.
- 2 1/4 cups (270 g) all-purpose flour: Whisk in gradually to form the dough and provide structure; all-purpose flour supplies the starch and protein needed for a tender but slightly crumbly shortbread texture.
- 1/2 teaspoon salt: Blend into the dry ingredients to control and balance sweetness, and to enhance the other flavors; salt strengthens flavor contrast and subtly improves the overall taste.
- 1/2 teaspoon red food coloring: Drop in small amounts for festive color and visual appeal; red food coloring imparts a holiday look without altering flavor, allowing the peppermint and chocolate to remain prominent.
- 1/2 teaspoon green food coloring: Add sparingly to create a green tint for a holiday palette; green food coloring offers visual contrast and complements the red for a classic peppermint cookie appearance.
- 1 1/2 cups semi-sweet chocolate chips: Melt or fold in for rich chocolate flavor and textural pockets; semi–sweet chocolate chips provide sweetness and slight bitterness that pairs well with peppermint and buttery shortbread.
- 1/2 cup crushed candy canes: Sprinkle or fold in at the end to provide crunchy texture and intense peppermint flavor; crushed candy canes add crystalline crunch and a bright, cooling finish to each bite.
Making This Peppermint Shortbread Cookies
I love the measured rhythm of baking these cookies, from creaming the butter to chilling the colored logs. Below I expand each step with sensory cues, troubleshooting, and why each choice matters so your batch turns out reliably festive.
- In the bowl of a stand mixer fitted with the paddle attachment, beat the butter and powdered sugar on high speed until light and fluffy. Add the vanilla extract and salt and mix: The room will fill with a rich, sweet aroma as the butter and powdered sugar aerate, creating a pale, billowy mixture that looks almost whipped. You should hear a steady motor hum and see the texture transform from glossy to lighter and mousse like, which is the visual cue that the air pockets are forming and will yield a tender shortbread. This step matters because those tiny air pockets help the cookies have lift without losing their delicate crumb. If you rush it, the ingredients will not incorporate smoothly, resulting in pockets of uncreamed fat and uneven texture. One common mistake to avoid is using butter that is too warm, which will make the mixture greasy rather than fluffy.
- Mix in the flour until just combined, then divide the dough into two equal portions.: As you fold in the all purpose flour , the dough will take on a slightly thicker, pliable feel that pulls away from the bowl in soft ribbons. Aim for just combined so you preserve tenderness, you want no visible streaks of flour yet avoid overworking which develops gluten and toughens the dough. The reason for splitting the dough is to create two colorways, and dividing evenly ensures uniform log sizes for consistent baking. A typical pitfall here is overmixing, which will result in denser cookies rather than the melt in your mouth texture you expect.
- Add about 1/2 teaspoon of red gel food coloring to one portion and 1/2 teaspoon of green gel coloring to the other portion and mix until the dough is uniformly colored.: As you stir the gel food coloring in, watch the dough gradually take on a saturated hue. Use a spatula to scrape the bowl and ensure complete color distribution so there are no streaks. Uniform coloring is important for the visual appeal of the sliced rounds. One troubleshooting tip is to add coloring incrementally if you want to deepen the shade, because gel is potent and a little extra goes a long way. An error to avoid is using liquid food colorings, which can change the dough hydration and make the texture slack.
- Roll each color into a 5-6” log that is about 2” in diameter, then wrap in plastic wrap and place into the fridge to chill for at least 4 hours.: Rolling gives you smooth, even logs that slice cleanly, and the chilled dough firms so slices hold their shape in the oven. You should feel the dough cool as it rests, and the surface will tighten slightly under the wrap. This chilling step is crucial to prevent spreading and to make cutting neat circles, because warm dough will smear and lose its clean edges. Avoid the mistake of slicing immediately after mixing, which yields misshapen cookies and uneven bake.
- Preheat the oven to 325°F (160°C) or 140°C if using a fan oven. Line three half-sheet baking pans with parchment paper and set aside.: The kitchen will warm and a faint dry heat will help set your expectations for the bake. Preheating ensures even oven spring and predictable timing, while parchment protects the bottoms and makes transfer effortless. Choosing the correct temperature avoids overbrowning; the lower heat respects the pale shortbread color. A common oversight is not preheating fully, which produces unevenly baked cookies.
- Slice the chilled dough logs into 1/4-1/2” thick slices, then place onto the prepared baking sheets leaving at least 2” between the cookies.: You will hear a faint, satisfying snap as the chilled dough yields to the knife, and the slices should have clean edges and a smooth surface. Spacing matters so edges do not touch as they expand slightly, and consistent thickness ensures even baking. If slices vary widely in thickness, some will bake faster and others remain underdone, so try to keep them uniform. One common mistake is using a dull knife, which tears rather than cleanly slicing the logs.
- Bake in the preheated oven for 15-18 minutes, or until the cookies are slightly puffed and no longer glossy on top. Allow to cool completely.: During baking the kitchen fills with a warm, buttery scent and the cookies will transform from shiny to matte, with tiny edges barely tinged yet centers still pale. That change from glossy to matte is your cue that the sugars have set and the shortbread has baked through without browning. This technique keeps the interior tender while ensuring the cookie does not dry out. A mistake to avoid is overbaking; even a few extra minutes will steal moisture and make the cookies brittle rather than melt in your mouth.
- Melt the chocolate chips in 30 second increments in the microwave, mixing well after each 30 second increment.: The chocolate will soften into a glossy, velvety pool as you stir, and gentle bursts prevent scorch. The sound is minimal, just soft bubbling if you overheat, which is why frequent stirring is essential. Melted chocolate creates a smooth coating that contrasts the crumbly shortbread, and tempering it slightly by stirring off heat gives a stable shine. Avoid overheating, which can make the chocolate grainy or seize, rendering it unusable for dipping.
- Dip half the cookie into the melted chocolate, then return to the parchment baking sheet. Sprinkle each chocolate-dipped cookie with crushed candy canes.: When you dip, the chocolate should coat cleanly and set into a glossy layer that catches the light. Immediately sprinkling with crushed candy canes ensures the shards adhere before the chocolate firms, adding bright color and crisp texture. This step elevates both flavor and presentation, with peppermint shards giving a pleasant crack against the tender base. One troubleshooting note is to work quickly; if the chocolate cools and thickens, the coating will be uneven and the candy will not stick well.
- Allow chocolate to harden before serving, 10 minutes in the fridge or 2 hours on the counter.: You will feel the satisfaction of a firm snap when the chocolate has set, and the peppermint aroma will be most noticeable once the cookies settle. Chilling is faster and gives a clean, crisp finish, while room temperature setting is gentle and avoids condensation. Don’t rush this step as soft chocolate will smear during packaging or serving. A common mistake is stacking cookies before the coating sets, which ruins the finish and presentation.
How to Switch It Up
I like offering small variations so the cookies can suit different tastes or occasions. These suggestions keep the core method intact while allowing creativity, whether you want more texture, different colors, or a slightly different finish for gifting.
- Swap color intensity: Increase gel food coloring in tiny increments until you reach a shade you love, testing a small pinch first to avoid over coloring.
- Alternate chocolate finishes: Use tempered chocolate if you want a particularly glossy, snap worthy coating for a professional look that holds at room temperature.
- Vary candy crunch: Use a mix of finely crushed and coarsely broken candy canes to add layered texture, sprinkling the larger pieces last to preserve their shape.
- Make sandwich cookies: Spread a thin layer of melted chocolate between two slices to create a peppermint sandwich cookie for an elegant presentation.
- Freeze dough logs: Wrap and freeze the logs for up to one month, then slice and bake from frozen for fresh cookies on demand.
Perfect Pairings for Peppermint Shortbread Cookies
These cookies pair beautifully with warm beverages and festive spreads, and they travel well for parties and gift boxes. Below I list serving suggestions, storage advice, and occasions where these cookies truly shine.
- Warm drinks: Serve with a cup of hot cocoa or a peppermint tea to echo the minty notes and provide a cozy contrast to the crisp cookie texture.
- Holiday platters: Arrange alongside other small sweets for a dessert board, balancing softer treats with the shortbread’s crunchy peppermint finish.
- Gift boxes: Layer cookies between sheets of parchment in a decorative tin, and they will travel well for neighbor or colleague gifts.
- Occasions: Ideal for Christmas parties, winter cookie exchanges, or as a homemade hostess gift during holiday visits.
- Storage tips: Keep in an airtight container at room temperature for up to five days, or freeze baked cookies in a single layer for longer storage. If storing with other treats, separate with parchment to preserve the chocolate finish.
- Plating: For a festive display, alternate red and green cookies on a tray and scatter a few extra crushed candy canes around for sparkle.
FAQ
Conclusion
What makes these cookies special is the elegant simplicity of buttery shortbread elevated by peppermint and a chocolate finish. They are festive, easy to prepare, and perfect for sharing or gifting during the holiday season. Give them a try this winter, and you will likely find them becoming a recurring tradition, bringing both color and comforting flavor to your celebrations.
Peppermint Shortbread Cookies
Equipment
- Mixing Bowls
- Electric Hand mixer or Stand mixer
- Cookie Sheets
Ingredients
- 1 cup (225 g) unsalted butter softened to room temperature Soften to room temperature to ensure even creaming and easy incorporation into the dough; contributes rich flavor and tender crumb by providing fat that coats flour proteins and limits gluten development.
- 3/4 cup (90 g) powdered sugar Sift or gently whisk to remove lumps and then cream with butter to add fine sweetness and a delicate, melt-in-the-mouth texture to the shortbread while keeping it light.
- 1 teaspoon vanilla extract Add for aromatic depth and to enhance the butter's flavor; provides a familiar sweet-vanilla note that balances the peppermint and chocolate elements in the cookies.
- 2 1/4 cups (270 g) all-purpose flour Whisk in gradually to form the dough and provide structure; all-purpose flour supplies the starch and protein needed for a tender but slightly crumbly shortbread texture.
- 1/2 teaspoon salt Blend into the dry ingredients to control and balance sweetness, and to enhance the other flavors; salt strengthens flavor contrast and subtly improves the overall taste.
- 1/2 teaspoon red food coloring Drop in small amounts for festive color and visual appeal; red food coloring imparts a holiday look without altering flavor, allowing the peppermint and chocolate to remain prominent.
- 1/2 teaspoon green food coloring Add sparingly to create a green tint for a holiday palette; green food coloring offers visual contrast and complements the red for a classic peppermint cookie appearance.
- 1 1/2 cups semi-sweet chocolate chips Melt or fold in for rich chocolate flavor and textural pockets; semi-sweet chocolate chips provide sweetness and slight bitterness that pairs well with peppermint and buttery shortbread.
- 1/2 cup crushed candy canes Sprinkle or fold in at the end to provide crunchy texture and intense peppermint flavor; crushed candy canes add crystalline crunch and a bright, cooling finish to each bite.
Instructions
- In the bowl of a stand mixer fitted with the paddle attachment, beat the butter and powdered sugar on high speed until light and fluffy. Add the vanilla extract and salt and mix: The room will fill with a rich, sweet aroma as the butter and powdered sugar aerate, creating a pale, billowy mixture that looks almost whipped. You should hear a steady motor hum and see the texture transform from glossy to lighter and mousse like, which is the visual cue that the air pockets are forming and will yield a tender shortbread. This step matters because those tiny air pockets help the cookies have lift without losing their delicate crumb. If you rush it, the ingredients will not incorporate smoothly, resulting in pockets of uncreamed fat and uneven texture. One common mistake to avoid is using butter that is too warm, which will make the mixture greasy rather than fluffy.
- Mix in the flour until just combined, then divide the dough into two equal portions.: As you fold in the all purpose flour , the dough will take on a slightly thicker, pliable feel that pulls away from the bowl in soft ribbons. Aim for just combined so you preserve tenderness, you want no visible streaks of flour yet avoid overworking which develops gluten and toughens the dough. The reason for splitting the dough is to create two colorways, and dividing evenly ensures uniform log sizes for consistent baking. A typical pitfall here is overmixing, which will result in denser cookies rather than the melt in your mouth texture you expect.
- Add about 1/2 teaspoon of red gel food coloring to one portion and 1/2 teaspoon of green gel coloring to the other portion and mix until the dough is uniformly colored.: As you stir the gel food coloring in, watch the dough gradually take on a saturated hue. Use a spatula to scrape the bowl and ensure complete color distribution so there are no streaks. Uniform coloring is important for the visual appeal of the sliced rounds. One troubleshooting tip is to add coloring incrementally if you want to deepen the shade, because gel is potent and a little extra goes a long way. An error to avoid is using liquid food colorings, which can change the dough hydration and make the texture slack.
- Roll each color into a 5-6” log that is about 2” in diameter, then wrap in plastic wrap and place into the fridge to chill for at least 4 hours.: Rolling gives you smooth, even logs that slice cleanly, and the chilled dough firms so slices hold their shape in the oven. You should feel the dough cool as it rests, and the surface will tighten slightly under the wrap. This chilling step is crucial to prevent spreading and to make cutting neat circles, because warm dough will smear and lose its clean edges. Avoid the mistake of slicing immediately after mixing, which yields misshapen cookies and uneven bake.
- Preheat the oven to 325°F (160°C) or 140°C if using a fan oven. Line three half-sheet baking pans with parchment paper and set aside.: The kitchen will warm and a faint dry heat will help set your expectations for the bake. Preheating ensures even oven spring and predictable timing, while parchment protects the bottoms and makes transfer effortless. Choosing the correct temperature avoids overbrowning; the lower heat respects the pale shortbread color. A common oversight is not preheating fully, which produces unevenly baked cookies.
- Slice the chilled dough logs into 1/4-1/2” thick slices, then place onto the prepared baking sheets leaving at least 2” between the cookies.: You will hear a faint, satisfying snap as the chilled dough yields to the knife, and the slices should have clean edges and a smooth surface. Spacing matters so edges do not touch as they expand slightly, and consistent thickness ensures even baking. If slices vary widely in thickness, some will bake faster and others remain underdone, so try to keep them uniform. One common mistake is using a dull knife, which tears rather than cleanly slicing the logs.
- Bake in the preheated oven for 15-18 minutes, or until the cookies are slightly puffed and no longer glossy on top. Allow to cool completely.: During baking the kitchen fills with a warm, buttery scent and the cookies will transform from shiny to matte, with tiny edges barely tinged yet centers still pale. That change from glossy to matte is your cue that the sugars have set and the shortbread has baked through without browning. This technique keeps the interior tender while ensuring the cookie does not dry out. A mistake to avoid is overbaking; even a few extra minutes will steal moisture and make the cookies brittle rather than melt in your mouth.
- Melt the chocolate chips in 30 second increments in the microwave, mixing well after each 30 second increment.: The chocolate will soften into a glossy, velvety pool as you stir, and gentle bursts prevent scorch. The sound is minimal, just soft bubbling if you overheat, which is why frequent stirring is essential. Melted chocolate creates a smooth coating that contrasts the crumbly shortbread, and tempering it slightly by stirring off heat gives a stable shine. Avoid overheating, which can make the chocolate grainy or seize, rendering it unusable for dipping.
- Dip half the cookie into the melted chocolate, then return to the parchment baking sheet. Sprinkle each chocolate-dipped cookie with crushed candy canes.: When you dip, the chocolate should coat cleanly and set into a glossy layer that catches the light. Immediately sprinkling with crushed candy canes ensures the shards adhere before the chocolate firms, adding bright color and crisp texture. This step elevates both flavor and presentation, with peppermint shards giving a pleasant crack against the tender base. One troubleshooting note is to work quickly; if the chocolate cools and thickens, the coating will be uneven and the candy will not stick well.
- Allow chocolate to harden before serving, 10 minutes in the fridge or 2 hours on the counter.: You will feel the satisfaction of a firm snap when the chocolate has set, and the peppermint aroma will be most noticeable once the cookies settle. Chilling is faster and gives a clean, crisp finish, while room temperature setting is gentle and avoids condensation. Don’t rush this step as soft chocolate will smear during packaging or serving. A common mistake is stacking cookies before the coating sets, which ruins the finish and presentation.
Notes
- Swap color intensity: Increase gel food coloring in tiny increments until you reach a shade you love, testing a small pinch first to avoid over coloring.
- Alternate chocolate finishes: Use tempered chocolate if you want a particularly glossy, snap worthy coating for a professional look that holds at room temperature.
- Vary candy crunch: Use a mix of finely crushed and coarsely broken candy canes to add layered texture, sprinkling the larger pieces last to preserve their shape.
- Make sandwich cookies: Spread a thin layer of melted chocolate between two slices to create a peppermint sandwich cookie for an elegant presentation.
- Freeze dough logs: Wrap and freeze the logs for up to one month, then slice and bake from frozen for fresh cookies on demand.