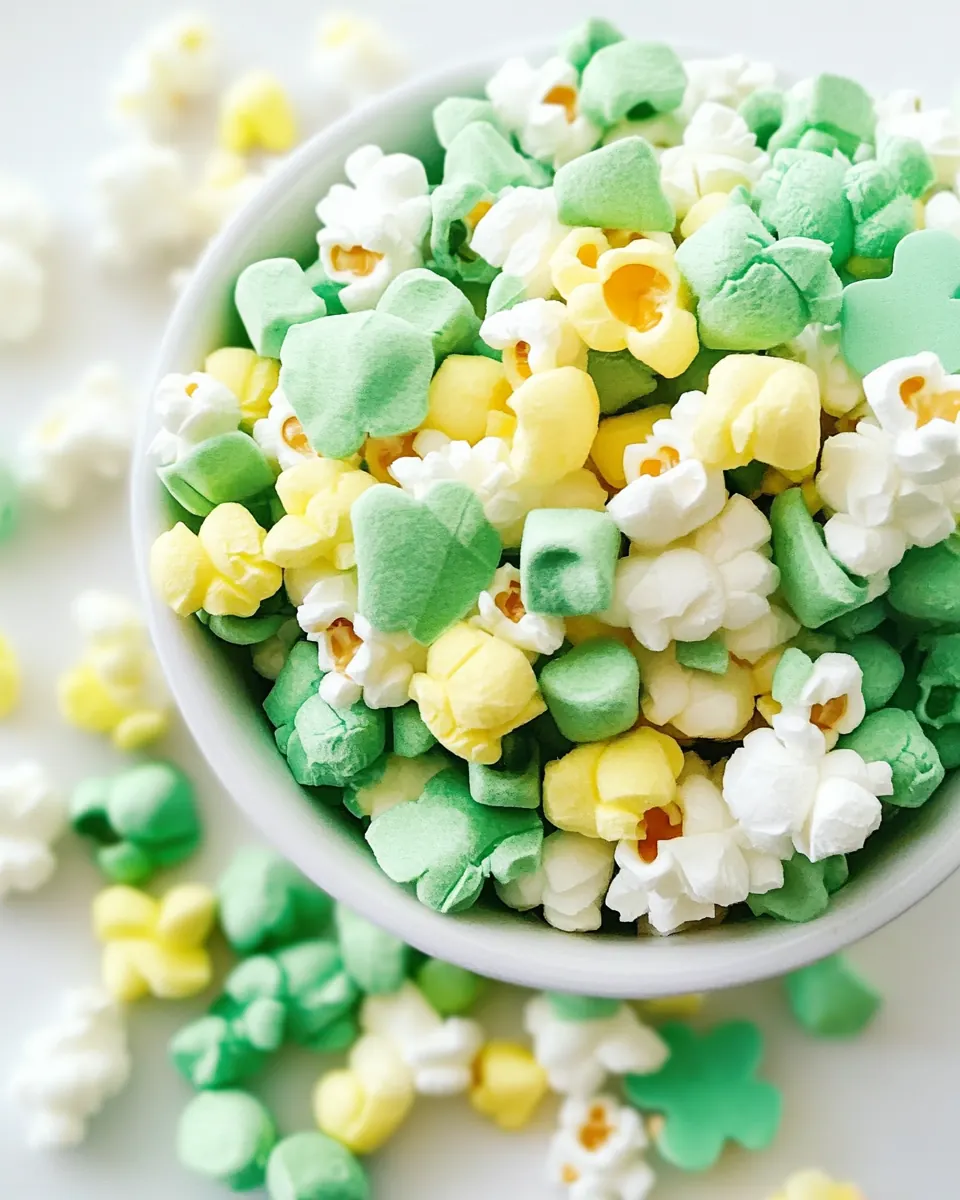
St. Patricks Day Popcorn
St. Patricks Day Popcorn has been my favorite crunchy, festive snack to pull out whenever friends drop by during March, and I still remember the first time I tossed together the colorful bits and felt like a kid again.
That night, I had a mismatched bowl of snacks and a last minute craving for something playful to celebrate. I grabbed a big bag of popcorn, melted some white chocolate chips, and started separating the green candies with an odd, silly focus. The result was a sweet salty cluster that made everyone grin, and from then on I made it every year.
Over time I tweaked the balance so the crunchy pretzel M&M’s and little cereal marshmallows hold up without getting lost in the chocolate. I like serving this straight from a sheet pan, broken into rustic pieces, because it feels casual and inviting. It’s easy to scale, and the textures are what make people come back for more.
Recipe Snapshot
21 mins
20 mins
1 mins
Easy
150 kcal
American
Gluten-Free, Low FODMAP
Desserts
Large sheet pan (15 x 21), Parchment paper or aluminum foil or a silicone baking mat, Very large bowl, Microwave safe bowl, Spatula
What We Adore About This St. Patricks Day Popcorn
Bold festive color with minimal fuss
I love how St. Patricks Day Popcorn transforms plain popcorn into something celebratory with almost no effort. A handful of green candies and sprinkles instantly signals the holiday, yet the base is simple enough that I can make a tray in a spare 20 minutes while chatting with guests.
Textural play that keeps people reaching in
The mix of airy popcorn, crunchy M&M’s, and chewy Lucky Charms marshmallows gives every bite a different sensation. When I dig in I love the way the chocolate sets around the pieces, making clusters that break with a satisfying snap on the first bite, and a tender chew from the marshmallows on the second.
Kid friendly and crowd pleasing
Families flock to this snack because it’s colorful and sweet without being complicated. I’ve served it to picky eaters and to grown ups who appreciate a nostalgic treat. The simplicity means you can involve little helpers to sort the green candies, and they feel proud of their contribution.
Customizable and forgiving
I’ve swapped candy combinations, tried different chocolate melts, and adjusted sprinkles depending on what I have on hand. The recipe is forgiving, so if your chocolate gets a touch thick you can gently warm it again, or if your popcorn is lightly salted, you can skip adding extra. That flexibility makes me reach for this recipe when I want something quick but impressive.
Great for parties and gifting
Because it stores well for a day or two, I often press it into small bags for party favors. People love the homemade touch, and the bold green theme always starts conversations. It’s one of those snacks that looks special even though it’s made from pantry staples.
Recipe Ingredients for St. Patricks Day Popcorn

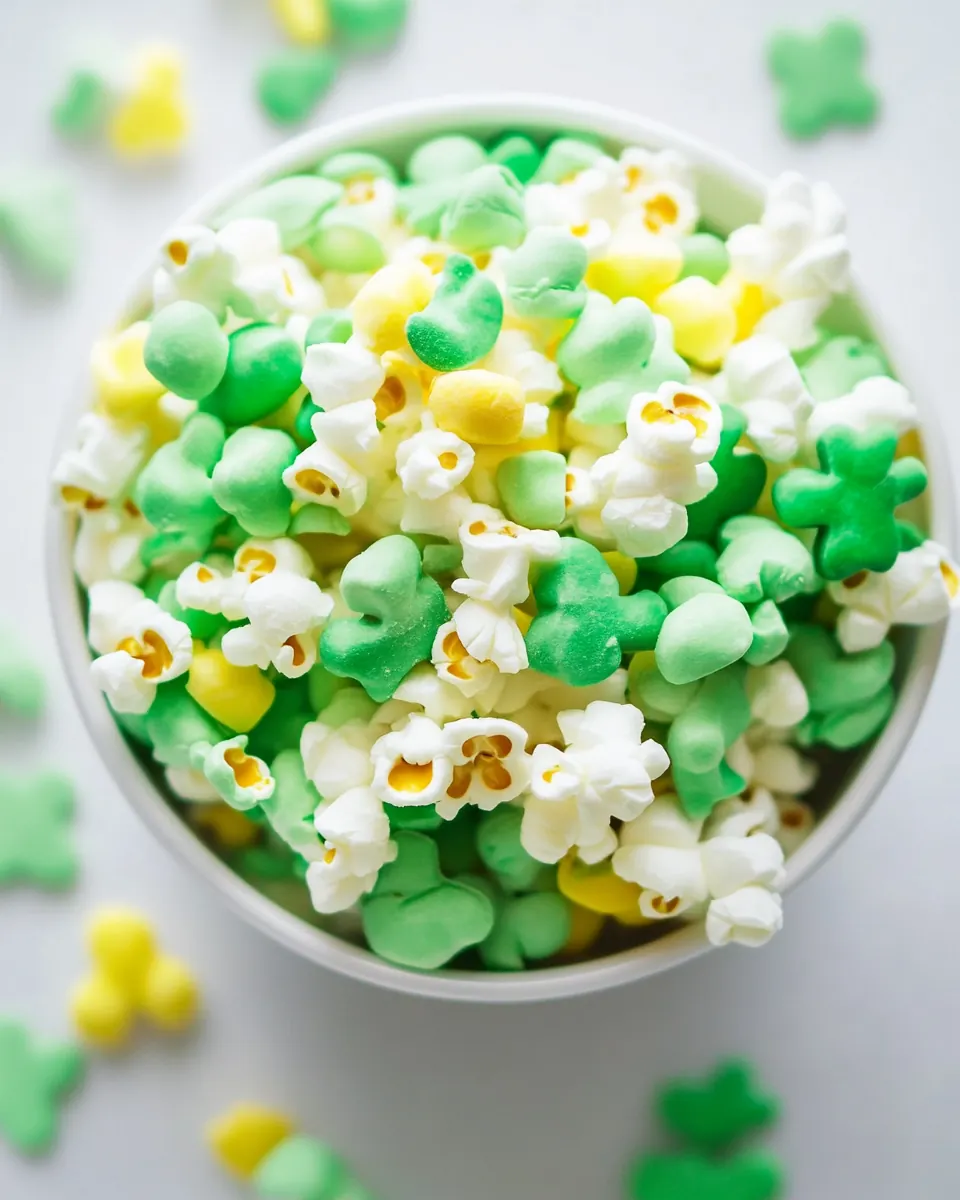
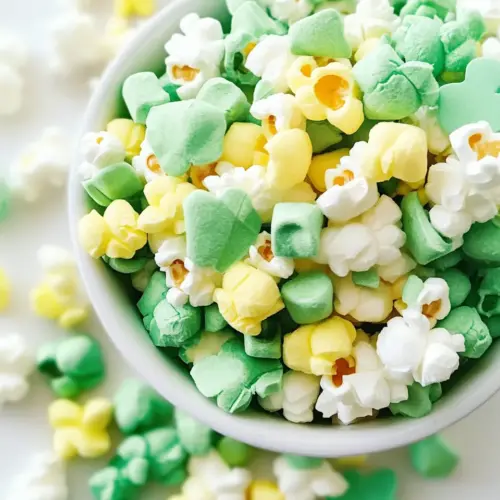
These ingredients are thoughtfully simple so each element can shine. The base of popcorn provides a light canvas, while melted white chocolate chips bind the mix and add sweetness. The various M&M’s and Lucky Charms marshmallows offer distinct textures and green color pops that create the celebratory vibe.
- 10 cups popped popcorn unbuttered, see note 1: Provide a crisp, airy base for the snack and deliver volume without added fat; ensure kernels are fully popped and cooled before mixing to maintain crunch and prevent melting of coatings.
- 2 cups white chocolate chips or white chocolate melts: Melt smoothly into a creamy coating that helps bind sweet elements together; temper gently with low heat to avoid scorching and achieve an even, glossy finish over the popcorn.
- 1 1/2 teaspoons vegetable oil or canola oil: Add gloss and improve flow when combined with melted chocolate, helping achieve a pourable consistency; use sparingly to prevent an oily texture while ensuring smooth coverage.
- 1/2 cup M&M’s pull out the greens, see note 2: Contribute colorful candy bursts and chewy texture while reinforcing the St. Patrick’s Day theme by using only green pieces; gently fold in to preserve shape and avoid excessive color transfer.
- 1/2 cup pretzel M&M’s or crunchy cookie M&M’s, pull out the greens: Introduce a salty-crunch contrast with a sturdier candy shell or pretzel crunch, enhancing textural variety; remove green pieces first to keep color balance consistent throughout the mix.
- 1/3 cup miniature M&M’s pull out the greens: Provide small, crunchy pops of color that fill gaps between larger candies and add visual interest; sprinkle evenly for distributed flavor and bite-sized texture without overwhelming the mixture.
- 1 cup Lucky Charms marshmallows see note 3: Add soft, marshmallow sweetness and iconic cereal charm that complements the popcorn’s crunch; tear or chop larger marshmallows if needed so they distribute evenly and cling to the coated popcorn.
- 1 to 2 tablespoons green sprinkles (optional): Deliver a festive finishing touch of color and delicate texture when sprinkled sparingly; apply after coating to ensure sprinkles remain visible and retain their crunchy bite.
How to Prepare St. Patricks Day Popcorn

This recipe is approachable and fun, and the steps focus on melting, coating, and setting. I walk you through each action so your clusters come out glossy and crisp, and you can relax and enjoy the process as you build texture and color.
- Line an extra-large sheet pan with foil, parchment paper, or a silicone liner. Set aside. In a very large bowl, measure and add the popped popcorn. Separate out all the green M&M’s and marshmallows from the cereal. Measure and set aside.: The cool metal or parchment provides a nonstick surface where clusters can set without sticking; you will feel the slight chill of the pan as you spread the mixture and the pan helps the chocolate firm faster. Listen for the quiet clicking of chocolate covered pieces settling as you arrange them, and watch for any pools of chocolate that might cause a few pieces to glue together into overly large clusters. A common mistake is skipping the liner which can make cleanup hard, so take the minute to prep properly.
- Place the white chocolate chips and oil in a microwave-safe bowl. Microwave in bursts of 30 seconds, stirring between each burst until chocolate is melted and smooth. Be patient to avoid burning the chocolate. Once smooth and fully melted, use a spatula to scrape it out and over the popcorn. Working quickly, toss together to coat in the white chocolate.: When you add the popcorn to a very large bowl, you give room to toss and coat evenly; the airy kernels will puff and rustle as you move them, and you should be able to see pockets where chocolate will cling for coverage. This step matters so the coating is distributed rather than concentrated, and a typical error is using a bowl that is too small which leads to messy, uneven coating.
- Immediately add in all the M&M’s and the Lucky Charms marshmallows. Toss again to coat in the chocolate. Dump mixture onto prepared pan, space in one layer, and immediately sprinkle with sprinkles (if using).: Sorting the green M&M’s and Lucky Charms marshmallows ensures the color pops are visible and not hidden inside clusters; your fingers will feel the smooth candy surfaces and the tiny marshmallow shapes, and this careful selection helps the final look. Take your time to remove greens as needed, and avoid rushing which can mix colors and reduce the holiday impact.
- Let the popcorn harden at room temperature or in the fridge until it becomes solid. Once solid, break it into pieces and enjoy!: Combining the white chocolate chips and vegetable oil before heating allows the chocolate to melt into a shiny emulsion, producing a pourable texture. You will see the white chips glossy and slightly thinned after stirring, and the aroma is sweet and vanilla like. Overheating is a common pitfall, so heat in controlled bursts to prevent graininess or burning.
- Microwave in bursts of 30 seconds, stirring between each burst until chocolate is melted and smooth: Gentle, pulsed heating prevents scorching and gives you a smooth, silky chocolate; you will notice the chips gradually soften, then become glossy and uniform as you stir. The sound is the occasional scrape of your spatula against the bowl, and the texture should be completely lump free. If chocolate looks grainy, pause and whisk to redistribute heat, because overheating leads to a ruined batch.
- Use a spatula to scrape melted chocolate over the popcorn: Pouring the melted white chocolate chips over the popcorn in ribbons allows you to control coverage so clusters form without drowning the kernels; you will hear the quiet patter as chocolate lands and see the popcorn become streaked with white gloss. This technique matters to create both coated pieces and lighter clusters, and a frequent mistake is pouring all chocolate in one spot which leads to globs instead of even coating.
- Working quickly, toss together to coat in the white chocolate: Once the chocolate hits the bowl, toss while the coating is still warm so it spreads and clings; your hands or a spatula will feel the shift from loose kernels to tacky pieces. The smell will be sweeter now, and movement is key so the chocolate envelopes many pieces rather than just sitting on top. If you wait too long and the chocolate firms, you will end up with patchy clusters.
- Immediately add in all the M&M’s and the Lucky Charms marshmallows: Adding the candies while the chocolate is still tacky helps them stick without sinking, producing a balanced distribution of green and textures. As you fold them in, notice the bright colors and how the marshmallows nestle into pockets, and be mindful not to overmix which can crush delicate pieces. A common error is adding the mix when the chocolate is cold, which prevents adhesion and causes toppings to fall out later.
- Dump mixture onto prepared pan, space in one layer, and immediately sprinkle with sprinkles: Spreading the coated clusters on the lined pan lets them cool evenly; visually you will see glossy islands form and tiny beads of chocolate set along edges. Sprinkle immediately so the tiny green accents stick to warm chocolate, and resist pressing down which can flatten the appealing texture. If you pile them too high you will trap steam and end up with soggy spots, so keep a single layer.
- Let the popcorn harden at room temperature or in the fridge until it becomes solid: Allowing clusters to set undisturbed yields a crisp snap and prevents smudging; at room temperature the chocolate firms in about 20 to 30 minutes, while the fridge speeds this without changing texture much. You will notice the gloss fade to a matte finish as it sets and the pieces separate cleanly. Avoid trying to break them too early because warm chocolate can smear and make an oily mess.
- Once solid, break it into pieces and enjoy: After the chocolate is fully set you can crack the sheet into rustic shards; the sound is a satisfying snap and the aroma is sweet with a hint of salty popcorn . Serve immediately for best texture, and store leftovers in an airtight container at room temperature for a day or two. A common misstep is storing while slightly warm which can create condensation and soggy clusters.
How to Switch It Up
There are playful ways to vary St. Patricks Day Popcorn without losing the festive spirit. Below are tips I’ve gathered from testing batches and serving them at gatherings, so you can adapt texture, color, and presentation with confidence.
- Swap chocolate type Try using different white chocolate melts formulated for coating, they often produce a smoother finish and set firmer than standard chips.
- Vary candy mix Combine plain, miniature, and pretzel M&M’s to get a mosaic of sizes and textures that still reads green when assembled.
- Control sweetness If you prefer less sweetness, use the pretzel M&M’s more heavily to add salty notes that contrast the white chocolate.
- Make bite sized portions Press the mixture into a lined mini muffin tin before it sets to create uniform, easy to grab cups for parties.
- Gift presentation Portion clusters into cellophane bags and tie with green ribbon for quick party favors that look polished.
What to Serve Alongside St. Patricks Day Popcorn
This snack pairs well with casual gatherings and festive moments, and you can style it several ways depending on the occasion. Below I describe serving ideas, occasions, and storage in detail, so you can plan a spread that feels thoughtful and cohesive.
- Casual party bowl Serve the popcorn in a large communal bowl surrounded by small scoops so guests can help themselves, perfect for a March get together or game night.
- Kids table Place smaller bowls of the popcorn at a kids table with napkins and paper cups, as the colorful pieces are great for little hands and party friendly.
- Movie night snack Offer alongside plain salted popcorn and a few savory nibbles so family members can mix sweet and salty options during a cozy movie evening.
- Gifting Package in cellophane with a ribbon for neighbor gifts or classroom treats, labeling with a short note about storage and best by one to two days.
- Storage tips Keep in an airtight container at room temperature and avoid refrigeration which can introduce moisture; for best texture enjoy within one to two days.
- Occasions This works for St Patricks Day parties, school celebrations, or anytime you want a quick festive tray that is easy to scale up for a crowd.
FAQ
Conclusion
St. Patricks Day Popcorn stands out because it transforms humble popcorn into a festive, textural treat that is quick to make and easy to scale. I encourage you to try this recipe the next time you want a playful snack for guests or a colorful addition to a holiday spread. It’s forgiving, fast, and reliably cheerful, perfect for sharing or packaging as a simple homemade gift.
St. Patricks Day Popcorn
Equipment
- Large sheet pan (15" x 21")
- Parchment paper or aluminum foil or a silicone baking mat
- Very large bowl
- Microwave-safe Bowl
- Spatula
Ingredients
- 10 cups popped popcorn unbuttered, see note 1 Provide a crisp, airy base for the snack and deliver volume without added fat; ensure kernels are fully popped and cooled before mixing to maintain crunch and prevent melting of coatings.
- 2 cups white chocolate chips or white chocolate melts Melt smoothly into a creamy coating that helps bind sweet elements together; temper gently with low heat to avoid scorching and achieve an even, glossy finish over the popcorn.
- 1 -1/2 teaspoons vegetable oil or canola oil Add gloss and improve flow when combined with melted chocolate, helping achieve a pourable consistency; use sparingly to prevent an oily texture while ensuring smooth coverage.
- 1/2 cup M&M’s pull out the greens, see note 2 Contribute colorful candy bursts and chewy texture while reinforcing the St. Patrick’s Day theme by using only green pieces; gently fold in to preserve shape and avoid excessive color transfer.
- 1/2 cup pretzel M&M’s or crunchy cookie M&M’s, pull out the greens Introduce a salty-crunch contrast with a sturdier candy shell or pretzel crunch, enhancing textural variety; remove green pieces first to keep color balance consistent throughout the mix.
- 1/3 cup miniature M&M’s pull out the greens Provide small, crunchy pops of color that fill gaps between larger candies and add visual interest; sprinkle evenly for distributed flavor and bite-sized texture without overwhelming the mixture.
- 1 cup Lucky Charms marshmallows see note 3 Add soft, marshmallow sweetness and iconic cereal charm that complements the popcorn’s crunch; tear or chop larger marshmallows if needed so they distribute evenly and cling to the coated popcorn.
- 1 to 2 tablespoons green sprinkles optional Deliver a festive finishing touch of color and delicate texture when sprinkled sparingly; apply after coating to ensure sprinkles remain visible and retain their crunchy bite.
Instructions
- Line an extra-large sheet pan with foil, parchment paper, or a silicone liner. Set aside. In a very large bowl, measure and add the popped popcorn. Separate out all the green M&M’s and marshmallows from the cereal. Measure and set aside.: The cool metal or parchment provides a nonstick surface where clusters can set without sticking; you will feel the slight chill of the pan as you spread the mixture and the pan helps the chocolate firm faster. Listen for the quiet clicking of chocolate covered pieces settling as you arrange them, and watch for any pools of chocolate that might cause a few pieces to glue together into overly large clusters. A common mistake is skipping the liner which can make cleanup hard, so take the minute to prep properly.
- Place the white chocolate chips and oil in a microwave-safe bowl. Microwave in bursts of 30 seconds, stirring between each burst until chocolate is melted and smooth. Be patient to avoid burning the chocolate. Once smooth and fully melted, use a spatula to scrape it out and over the popcorn. Working quickly, toss together to coat in the white chocolate.: When you add the popcorn to a very large bowl, you give room to toss and coat evenly; the airy kernels will puff and rustle as you move them, and you should be able to see pockets where chocolate will cling for coverage. This step matters so the coating is distributed rather than concentrated, and a typical error is using a bowl that is too small which leads to messy, uneven coating.
- Immediately add in all the M&M’s and the Lucky Charms marshmallows. Toss again to coat in the chocolate. Dump mixture onto prepared pan, space in one layer, and immediately sprinkle with sprinkles (if using).: Sorting the green M&M’s and Lucky Charms marshmallows ensures the color pops are visible and not hidden inside clusters; your fingers will feel the smooth candy surfaces and the tiny marshmallow shapes, and this careful selection helps the final look. Take your time to remove greens as needed, and avoid rushing which can mix colors and reduce the holiday impact.
- Let the popcorn harden at room temperature or in the fridge until it becomes solid. Once solid, break it into pieces and enjoy!: Combining the white chocolate chips and vegetable oil before heating allows the chocolate to melt into a shiny emulsion, producing a pourable texture. You will see the white chips glossy and slightly thinned after stirring, and the aroma is sweet and vanilla like. Overheating is a common pitfall, so heat in controlled bursts to prevent graininess or burning.
- Microwave in bursts of 30 seconds, stirring between each burst until chocolate is melted and smooth: Gentle, pulsed heating prevents scorching and gives you a smooth, silky chocolate; you will notice the chips gradually soften, then become glossy and uniform as you stir. The sound is the occasional scrape of your spatula against the bowl, and the texture should be completely lump free. If chocolate looks grainy, pause and whisk to redistribute heat, because overheating leads to a ruined batch.
- Use a spatula to scrape melted chocolate over the popcorn: Pouring the melted white chocolate chips over the popcorn in ribbons allows you to control coverage so clusters form without drowning the kernels; you will hear the quiet patter as chocolate lands and see the popcorn become streaked with white gloss. This technique matters to create both coated pieces and lighter clusters, and a frequent mistake is pouring all chocolate in one spot which leads to globs instead of even coating.
- Working quickly, toss together to coat in the white chocolate: Once the chocolate hits the bowl, toss while the coating is still warm so it spreads and clings; your hands or a spatula will feel the shift from loose kernels to tacky pieces. The smell will be sweeter now, and movement is key so the chocolate envelopes many pieces rather than just sitting on top. If you wait too long and the chocolate firms, you will end up with patchy clusters.
- Immediately add in all the M&M’s and the Lucky Charms marshmallows: Adding the candies while the chocolate is still tacky helps them stick without sinking, producing a balanced distribution of green and textures. As you fold them in, notice the bright colors and how the marshmallows nestle into pockets, and be mindful not to overmix which can crush delicate pieces. A common error is adding the mix when the chocolate is cold, which prevents adhesion and causes toppings to fall out later.
- Dump mixture onto prepared pan, space in one layer, and immediately sprinkle with sprinkles: Spreading the coated clusters on the lined pan lets them cool evenly; visually you will see glossy islands form and tiny beads of chocolate set along edges. Sprinkle immediately so the tiny green accents stick to warm chocolate, and resist pressing down which can flatten the appealing texture. If you pile them too high you will trap steam and end up with soggy spots, so keep a single layer.
- Let the popcorn harden at room temperature or in the fridge until it becomes solid: Allowing clusters to set undisturbed yields a crisp snap and prevents smudging; at room temperature the chocolate firms in about 20 to 30 minutes, while the fridge speeds this without changing texture much. You will notice the gloss fade to a matte finish as it sets and the pieces separate cleanly. Avoid trying to break them too early because warm chocolate can smear and make an oily mess.
- Once solid, break it into pieces and enjoy: After the chocolate is fully set you can crack the sheet into rustic shards; the sound is a satisfying snap and the aroma is sweet with a hint of salty popcorn . Serve immediately for best texture, and store leftovers in an airtight container at room temperature for a day or two. A common misstep is storing while slightly warm which can create condensation and soggy clusters.
Notes
- Swap chocolate type Try using different white chocolate melts formulated for coating, they often produce a smoother finish and set firmer than standard chips.
- Vary candy mix Combine plain, miniature, and pretzel M&M’s to get a mosaic of sizes and textures that still reads green when assembled.
- Control sweetness If you prefer less sweetness, use the pretzel M&M’s more heavily to add salty notes that contrast the white chocolate.
- Make bite sized portions Press the mixture into a lined mini muffin tin before it sets to create uniform, easy to grab cups for parties.
- Gift presentation Portion clusters into cellophane bags and tie with green ribbon for quick party favors that look polished.