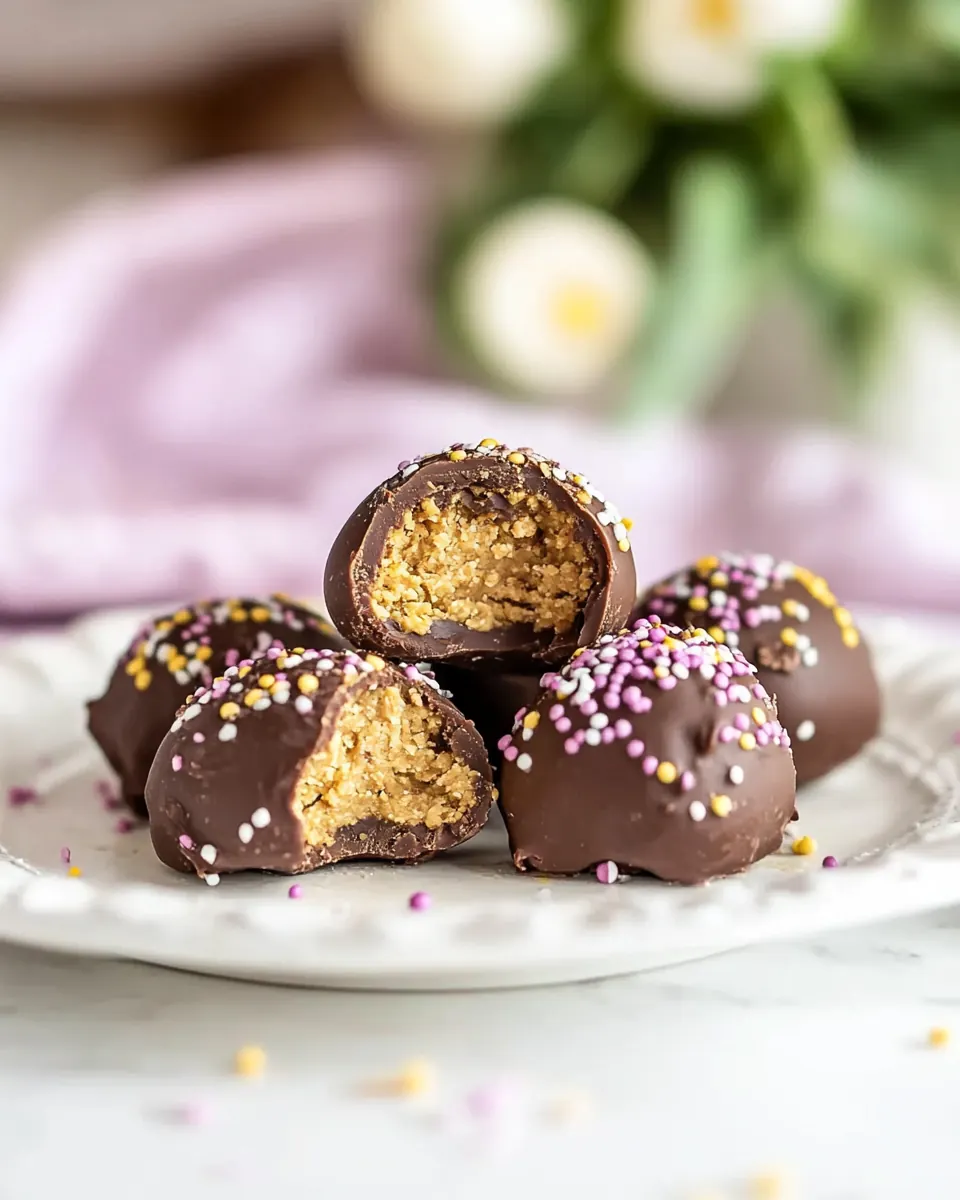
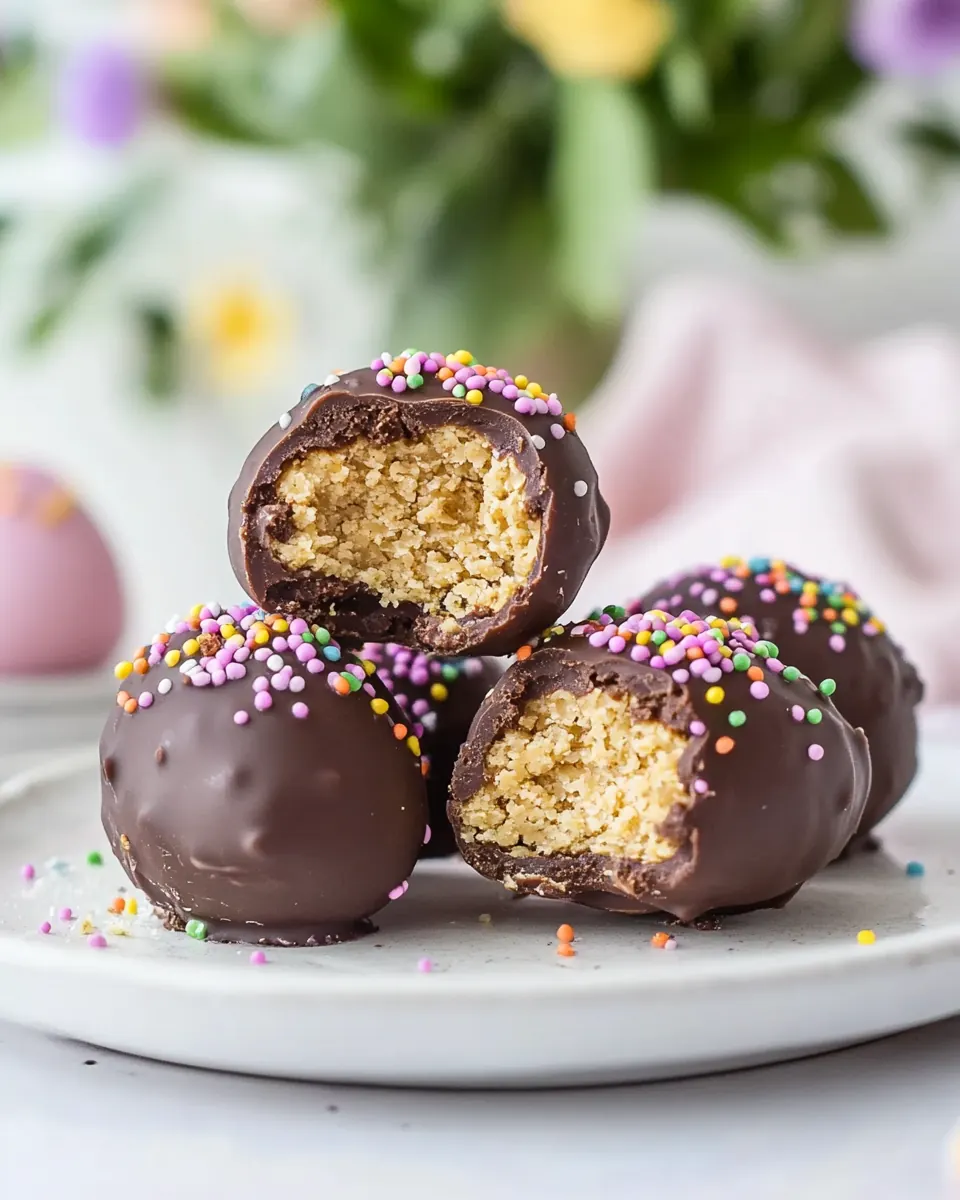
Peanut Butter Eggs
Peanut Butter Eggs have been one of my easiest go to treats when I want something nostalgic, sweet, and perfectly snackable. The very first time I made these I was trying to recreate a childhood classic after finding a jar of chunky peanut butter at the back of my pantry, and the result felt like a small celebration; the combination of creamy peanut butter and glossy chocolate immediately brought me back to holiday cookie exchanges and late night nibbling sessions.
Over the years I have tweaked the texture and size so they are simple to make with kids or for a last minute gift. I remember a rainy afternoon when my neighbor and I turned this into an assembly line, forming the little ovals while swapping stories, and by the time the chocolate set we had a tray of treats that tasted like effort and love, but took almost no fuss. I always keep my pantry staples stocked so these come together during an afternoon break or a sudden craving.
Recipe Snapshot
31 mins
30 mins
1 mins
Easy
150 kcal
American
Gluten-Free, Vegan
Desserts
Microwave, Large bowl, Cookie scoop, Fork, Baking sheet, Parchment paper
Why This Peanut Butter Eggs Is So Good
Simple, nostalgic comfort
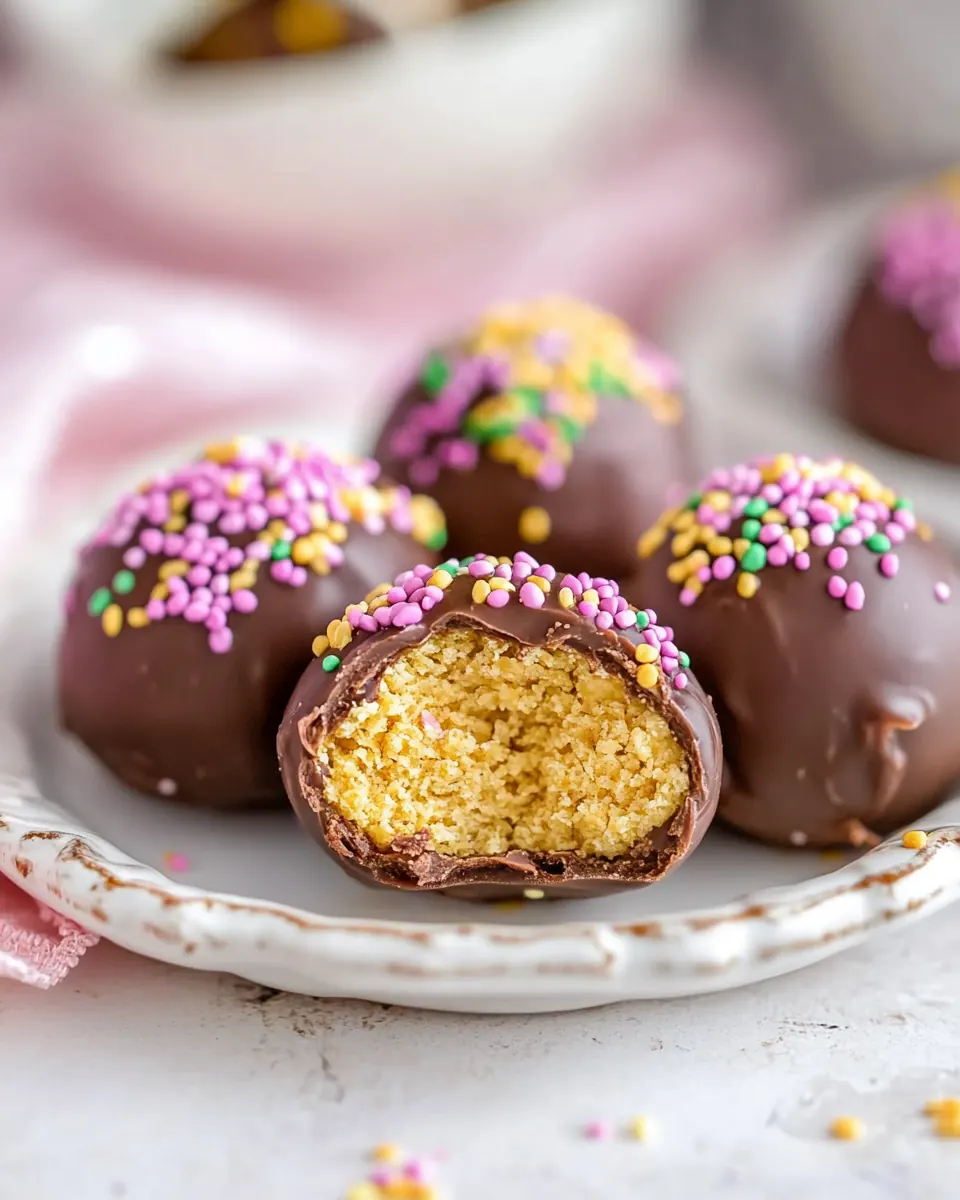
I love how Peanut Butter Eggs tap into childhood memories yet feel grown up enough to gift. The texture of the peanut butter center balances sweet and salty, and when coated in chocolate they feel indulgent without being complicated.
Fast and approachable
We can make these with just a few pantry staples in about an hour, most of which is chill time. That makes them perfect when you want a quick sweet without long baking sessions, and I often enlist a helper to measure and roll the centers.
Customizable for texture and crunch
Because the recipe calls for optional Rice Krispies, you can choose a smooth, fudgy bite or add cereal for a light crunch. I often switch between creamy and chunky peanut butter depending on the mouthfeel I want, and each choice produces a slightly different but equally delicious outcome.
Great for gifting and make ahead
These travel well, and after coating they can be packed into boxes or stored in the fridge for days, which makes them ideal for holiday plates and care packages. I like that you can freeze extras and thaw them for guests or last minute celebrations.
Kid friendly and hands on
One of my favorite reasons to make Peanut Butter Eggs is how easy they are to share the process with children. Rolling, dipping, and sprinkling makes for a fun activity, and it teaches simple kitchen skills without any dangerous steps. Plus, they always feel proud handing out the finished treats.
Everything You Need for Peanut Butter Eggs
The ingredient list here is short and purposeful. Each item plays a clear role; the peanut butter provides the rich, nutty base, powdered sugar firms up the centers to make them scoopable, and the chocolate coating adds the glossy finish and snap. Optional add ins like Rice Krispies cereal introduce texture, while a touch of vanilla extract lifts the flavor. Together they create a balanced little confection that is easy to assemble.
- 1/4 cups salted butter melted: Melted and salted to add richness and a smooth mouthfeel; helps bind the peanut butter and powdered sugar while providing a slightly savory balance to the sweetness. Adds moisture so the filling holds together and can be shaped into eggs without crumbling. Contributes a glossy finish when mixed thoroughly and can be adjusted for firmness by chilling briefly.
- 1 cup peanut butter chunky or creamy: Creamy or chunky to supply the primary peanut flavor and creamy texture; supplies fat and protein that create the classic peanut butter filling. Works as the structural base that combines with melted butter and powdered sugar to form a pliable dough-like mixture. Chunky style adds occasional crunch and textural contrast when desired.
- 1 tsp vanilla extract: A small amount to enhance and round out the overall flavor profile; brings warm, aromatic notes that lift the peanut butter and chocolate. Helps balance sweetness and adds a subtle depth that makes the filling taste more complex. Easily incorporated into the mixture for even distribution of flavor.
- 1 1/2 cups powdered sugar: Finely ground to sweeten and stiffen the filling; absorbs excess moisture from the butter and peanut butter to create a moldable consistency for shaping into eggs. Provides smooth texture when sifted and mixed well, preventing graininess in the finished candies. Quantity controls sweetness and firmness, so adjust slightly if using alternative sweeteners.
- 1 1/2 cups Rice Krispies cereal (optional): Optional for added crunch and lightness; folded in to introduce a crisp, airy texture that contrasts with the dense peanut filling. Can be omitted for a smoother, more traditional peanut butter egg or included to create bite and visual interest. Best added just before shaping to preserve its crispness.
- 1 cup melting chocolates or chocolate chips: Melted to coat the shaped peanut butter eggs and provide a hard, glossy exterior; contributes rich chocolate flavor and seals in moisture. Can be tempered or gently melted for a smooth finish, and poured or dipped for full coverage. Sets firm to offer a satisfying snap when bitten.
- 1 tsp coconut oil if needed: Used sparingly to thin the melted chocolate for a smoother coating and shinier finish; aids in preventing chocolate from seizing and improves pourability. Adds a hint of additional fat that helps the coating set evenly, especially if chocolate chips are used. Optional and only needed if chocolate appears too thick after melting.
- sprinkles for garnish: Sprinkles to add colorful visual appeal and a festive touch when garnishing the chocolate-coated eggs; provides minimal additional texture but enhances presentation. Best applied while the coating is still wet so they adhere properly and remain evenly distributed. Choose small decorations to avoid overpowering the bite-sized candy.
How to Cook Peanut Butter Eggs
These steps are approachable and welcoming, and I like to narrate them as though I’m standing right beside you in the kitchen. Pull out a bowl, a scoop, and a baking sheet, and we will assemble, chill, and coat these little eggs with confidence.
- In a large bowl, melt peanut butter and butter together for 1 minute. Stir to incorporate together.: The aroma of warm peanut butter and melted butter is immediate and comforting, with a nutty, slightly toasted note. As they melt, stir gently so the mixture becomes glossy and evenly combined, which signals it is ready for the next ingredient. If lumps remain, take an extra few seconds to stir, because a smooth base ensures the powdered sugar mixes in evenly. A common mistake is overheating, which can make the fats separate, so microwave in short bursts and stir between each interval.
- Stir in vanilla then powdered sugar, and optionally Rice Krispies. The mixture will seem dry but should hold together when you form it into shapes. This is where you can really get the kids involved.: You will notice the scent brighten when you add vanilla extract , and as the powdered sugar is worked in, the texture shifts from silky to a stiffer, dough like consistency. If using Rice Krispies cereal , fold them in lightly to preserve their crunch, and stop when the mixture holds together when pressed. This stage determines the final mouthfeel, so if it seems too wet add a touch more powdered sugar , but avoid over drying. A typical error is adding the cereal too vigorously, which can crush it and lose the desired texture.
- Using a 3-tablespoon cookie scoop, measure out and form 10 even eggs. Or for smaller eggs, use a 2 teaspoon cookie scoop and form 24 eggs. Place onto a parchment (or wax) paper-lined baking sheet. Freeze for 10 minutes.: As you portion the mixture you will feel its pliable texture, and shaping into ovals should be tactile and quick. If the mixture sticks to your hands, chill it briefly or lightly grease your palms to make forming easier. Consistent sizes ensure even coating later, and a 3 tablespoon scoop yields ten generously sized eggs, while smaller scoops make more. Avoid packing the centers too tightly, because overly dense filling can be heavy when coated in chocolate .
- While peanut butter eggs are chilling, melt chocolate in a microwave on low heat, stirring every 30 seconds or so. Dip each egg into chocolate to cover completely. Remove the egg with a fork, and tap along the edge of the bowl allowing excess chocolate to drip back into the bowl through the prongs.: Arrange the shaped eggs with space between them so the coating step is easier and they do not stick together once chilled. The parchment provides a nonstick surface and collects any drips, making cleanup simple. When you put them in the freezer for chilling, watch for condensation if you move them too quickly between temperatures. A common slip is crowding the sheet, which leads to uneven chilling.
- Place back onto parchment paper and sprinkle with any desired toppings. Repeat until all eggs are covered in chocolate. Refrigerate for 5 minutes or until the chocolate has hardened.: The cold steals some of the tackiness from the centers, making them firm enough to dip without losing shape. You will notice the centers turn slightly firmer and less shiny as they chill, which is the cue to move to the melting stage. If you skip this step, the chocolate may sink into the filling or create misshapen shells, so resist impatience.
- Wrap up to give away as gifts, serve or store in the fridge for up to 5 days.: As the chocolate softens you will see it become silky and glossy, and frequent stirring prevents scorching and encourages even melt. If needed, add the measured coconut oil to thin the coating for smoother dipping. Overheating is the most common pitfall here, which can make the chocolate seize and grainy, so melt gently and stop while a few small unmelted bits remain, stirring them until smooth with residual heat.
- Dip each egg into chocolate to cover completely: When you dip, the sound is subtle as the chocolate envelopes the center, leaving a smooth mirror like sheen. Use a fork to lift each egg and tap to let excess chocolate fall back into the bowl, creating a thin even shell. Work quickly but carefully, because prolonged handling warms the center and can distort the shape. A frequent error is dipping under cold chocolate which causes a thick, clumpy coating instead of a smooth finish.
- Remove the egg with a fork and tap along the edge of the bowl allowing excess chocolate to drip back into the bowl through the prongs: The tapping action removes extra coating and helps form a delicate, even shell that crisps when set. You will often hear the gentle drip and see the chocolate fall back, a good sign you have the right viscosity. If too much chocolate runs off, it may be too thin and need chilling, and if little moves it may be too thick and need a touch of coconut oil . Avoid aggressive tapping which can dent the surface.
- Place back onto parchment paper and sprinkle with any desired toppings: As the eggs rest, the glossy surface will begin to dull slightly, then firm up into a satisfying snap. Adding sprinkles or other garnishes at this moment ensures they adhere before the chocolate sets. Be mindful not to overcrowd the sheet so air can circulate and the shell sets uniformly. A common oversight is waiting until the chocolate is fully hardened to add sprinkles, which prevents them from sticking.
- Repeat until all eggs are covered in chocolate: Keep a rhythm and a steady hand as you continue, and you will notice your technique improve after the first few. Maintaining even melt temperature for the chocolate and consistent firmness in the centers ensures uniform results across the batch. If the chocolate cools and thickens mid process, gently rewarm it in short bursts to restore a smooth coating.
- Refrigerate for 5 minutes or until the chocolate has hardened: The fridge helps the shell set quickly and keeps the centers stable, and you will see the sheen turn into a firm surface. Once the chocolate is set, they are ready to handle for packaging or serving. Avoid leaving them in the fridge for extended periods that might draw moisture and dull the finish.
- Wrap up to give away as gifts serve or store in the fridge for up to 5 days: Properly wrapped, these keep their texture and flavor for several days in the refrigerator, and freezing can extend their life further. Label and stack them gently to prevent cracking the shells. A frequent mistake is storing them at room temperature in warm conditions which can soften the centers and bloom the chocolate .
Making Adjustments
These tweaks will help you control texture, sweetness, and presentation so your batch of Peanut Butter Eggs matches your taste and needs. Adjustments are simple and can make a big difference.
- Choose texture: Use creamy peanut butter for a silky center, or chunky for added crunch; the choice changes mouthfeel but not the basic method.
- Manage sweetness: If you prefer less sweet treats, slightly reduce the powdered sugar by a few tablespoons and test the binding; be careful not to make the mixture too loose.
- Control coating thickness: Add a teaspoon of coconut oil to the chocolate if it is too thick, which helps create a thinner, glossier shell.
- Make them crunchy: Stir in the Rice Krispies cereal gently to keep maximum airiness, which lightens the centers without impacting flavor.
- Freeze for longer storage: Fully set and chilled eggs can be frozen in a single layer then transferred to a freezer bag for up to several months; thaw in the fridge overnight.
Accompaniments for Peanut Butter Eggs
These little treats pair well with simple beverages and make delightful additions to party plates, gift boxes, and holiday dessert tables. Below are serving suggestions and storage ideas to help you present them beautifully for different occasions.
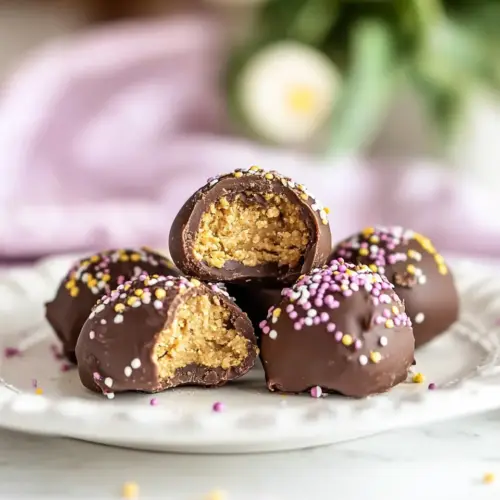
- Casual snacking: Serve a small plate of Peanut Butter Eggs alongside coffee for an afternoon pick me up, arranging three to five per plate for easy sharing.
- Party platter: Combine with other no bake sweets on a platter, spacing each piece so the glossy chocolate shows, and use decorative liners for visual appeal.
- Gifting: Place in a small box with parchment, add a ribbon, and include a label; they travel well for holiday giving and make thoughtful homemade presents.
- Storage: Keep in the refrigerator for up to five days for best texture, or freeze layered between parchment for longer storage and thaw overnight in the fridge before serving.
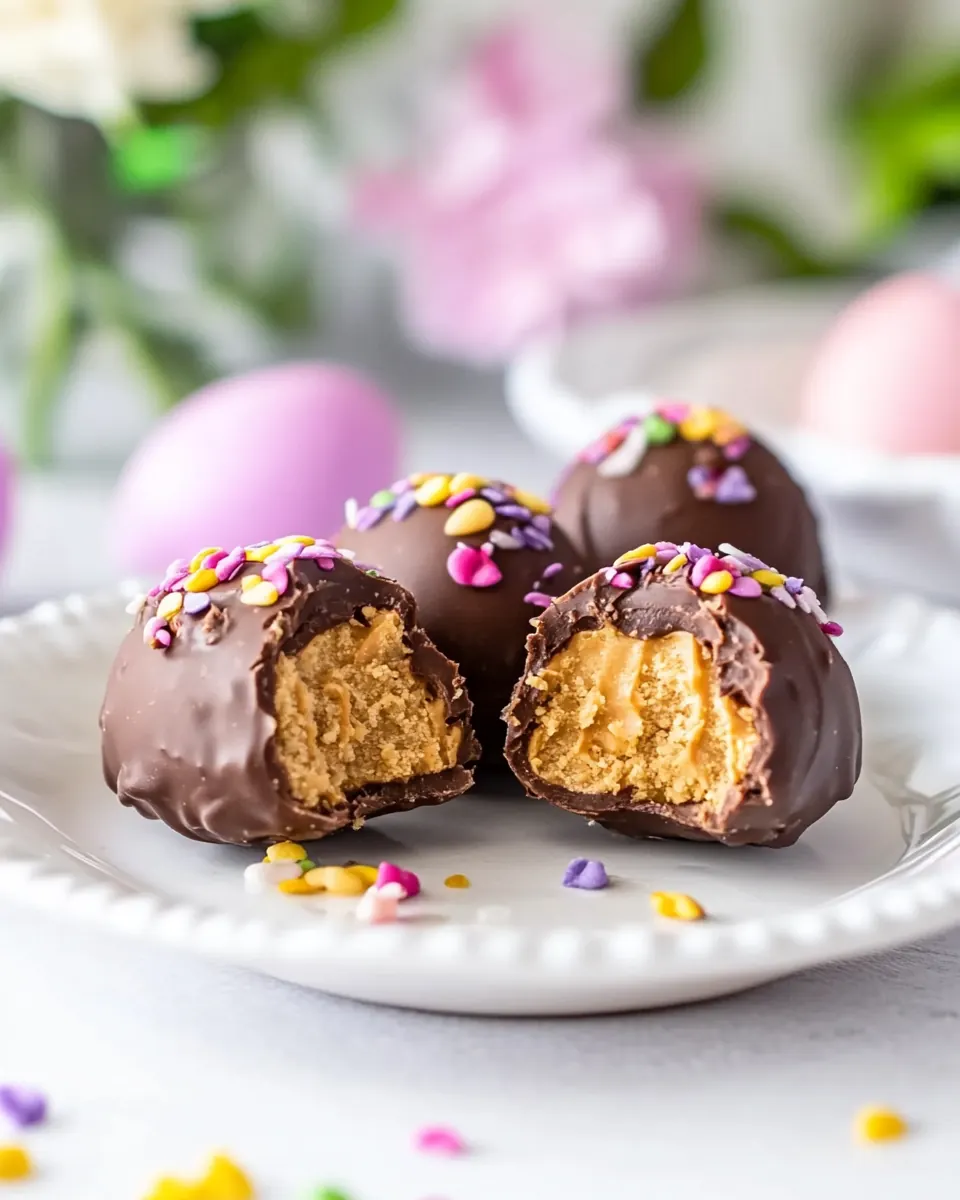
- Occasions: These suit spring gatherings and Easter themed treats, but they are equally welcome at potlucks and casual get togethers because they are handheld and shareable.
- Seasonal pairing: In warmer months serve chilled to maintain a firm center, while in cooler weather you can let them sit briefly at room temperature for a softer bite.
FAQ
Conclusion
What makes these Peanut Butter Eggs so special is their combination of quick, kid friendly assembly and the deeply satisfying contrast of nutty centers and glossy chocolate shells. They come together with simple pantry ingredients, and the process of forming, chilling, and dipping is both comforting and fun. I hope you give them a try for a holiday platter, a thoughtful homemade gift, or just a weekend treat; once you make a batch you will have a reliable recipe to return to whenever you want a small, handmade indulgence.
Peanut Butter Eggs
Equipment
- Microwave
- Large Bowl
- Cookie Scoop
- Fork
- Baking Sheet
- Parchment Paper
Ingredients
- 1/4 cups salted butter melted Melted and salted to add richness and a smooth mouthfeel; helps bind the peanut butter and powdered sugar while providing a slightly savory balance to the sweetness. Adds moisture so the filling holds together and can be shaped into eggs without crumbling. Contributes a glossy finish when mixed thoroughly and can be adjusted for firmness by chilling briefly.
- 1 cup peanut butter chunky or creamy Creamy or chunky to supply the primary peanut flavor and creamy texture; supplies fat and protein that create the classic peanut butter filling. Works as the structural base that combines with melted butter and powdered sugar to form a pliable dough-like mixture. Chunky style adds occasional crunch and textural contrast when desired.
- 1 tsp vanilla extract A small amount to enhance and round out the overall flavor profile; brings warm, aromatic notes that lift the peanut butter and chocolate. Helps balance sweetness and adds a subtle depth that makes the filling taste more complex. Easily incorporated into the mixture for even distribution of flavor.
- 1 1/2 cups powdered sugar Finely ground to sweeten and stiffen the filling; absorbs excess moisture from the butter and peanut butter to create a moldable consistency for shaping into eggs. Provides smooth texture when sifted and mixed well, preventing graininess in the finished candies. Quantity controls sweetness and firmness, so adjust slightly if using alternative sweeteners.
- 1 1/2 cups Rice Krispies cereal optional Optional for added crunch and lightness; folded in to introduce a crisp, airy texture that contrasts with the dense peanut filling. Can be omitted for a smoother, more traditional peanut butter egg or included to create bite and visual interest. Best added just before shaping to preserve its crispness.
- 1 cup melting chocolates or chocolate chips Melted to coat the shaped peanut butter eggs and provide a hard, glossy exterior; contributes rich chocolate flavor and seals in moisture. Can be tempered or gently melted for a smooth finish, and poured or dipped for full coverage. Sets firm to offer a satisfying snap when bitten.
- 1 tsp coconut oil if needed Used sparingly to thin the melted chocolate for a smoother coating and shinier finish; aids in preventing chocolate from seizing and improves pourability. Adds a hint of additional fat that helps the coating set evenly, especially if chocolate chips are used. Optional and only needed if chocolate appears too thick after melting.
- sprinkles for garnish Sprinkles to add colorful visual appeal and a festive touch when garnishing the chocolate-coated eggs; provides minimal additional texture but enhances presentation. Best applied while the coating is still wet so they adhere properly and remain evenly distributed. Choose small decorations to avoid overpowering the bite-sized candy.
Instructions
- In a large bowl, melt peanut butter and butter together for 1 minute. Stir to incorporate together.: The aroma of warm peanut butter and melted butter is immediate and comforting, with a nutty, slightly toasted note. As they melt, stir gently so the mixture becomes glossy and evenly combined, which signals it is ready for the next ingredient. If lumps remain, take an extra few seconds to stir, because a smooth base ensures the powdered sugar mixes in evenly. A common mistake is overheating, which can make the fats separate, so microwave in short bursts and stir between each interval.
- Stir in vanilla then powdered sugar, and optionally Rice Krispies. The mixture will seem dry but should hold together when you form it into shapes. This is where you can really get the kids involved.: You will notice the scent brighten when you add vanilla extract , and as the powdered sugar is worked in, the texture shifts from silky to a stiffer, dough like consistency. If using Rice Krispies cereal , fold them in lightly to preserve their crunch, and stop when the mixture holds together when pressed. This stage determines the final mouthfeel, so if it seems too wet add a touch more powdered sugar , but avoid over drying. A typical error is adding the cereal too vigorously, which can crush it and lose the desired texture.
- Using a 3-tablespoon cookie scoop, measure out and form 10 even eggs. Or for smaller eggs, use a 2 teaspoon cookie scoop and form 24 eggs. Place onto a parchment (or wax) paper-lined baking sheet. Freeze for 10 minutes.: As you portion the mixture you will feel its pliable texture, and shaping into ovals should be tactile and quick. If the mixture sticks to your hands, chill it briefly or lightly grease your palms to make forming easier. Consistent sizes ensure even coating later, and a 3 tablespoon scoop yields ten generously sized eggs, while smaller scoops make more. Avoid packing the centers too tightly, because overly dense filling can be heavy when coated in chocolate .
- While peanut butter eggs are chilling, melt chocolate in a microwave on low heat, stirring every 30 seconds or so. Dip each egg into chocolate to cover completely. Remove the egg with a fork, and tap along the edge of the bowl allowing excess chocolate to drip back into the bowl through the prongs.: Arrange the shaped eggs with space between them so the coating step is easier and they do not stick together once chilled. The parchment provides a nonstick surface and collects any drips, making cleanup simple. When you put them in the freezer for chilling, watch for condensation if you move them too quickly between temperatures. A common slip is crowding the sheet, which leads to uneven chilling.
- Place back onto parchment paper and sprinkle with any desired toppings. Repeat until all eggs are covered in chocolate. Refrigerate for 5 minutes or until the chocolate has hardened.: The cold steals some of the tackiness from the centers, making them firm enough to dip without losing shape. You will notice the centers turn slightly firmer and less shiny as they chill, which is the cue to move to the melting stage. If you skip this step, the chocolate may sink into the filling or create misshapen shells, so resist impatience.
- Wrap up to give away as gifts, serve or store in the fridge for up to 5 days.: As the chocolate softens you will see it become silky and glossy, and frequent stirring prevents scorching and encourages even melt. If needed, add the measured coconut oil to thin the coating for smoother dipping. Overheating is the most common pitfall here, which can make the chocolate seize and grainy, so melt gently and stop while a few small unmelted bits remain, stirring them until smooth with residual heat.
- Dip each egg into chocolate to cover completely: When you dip, the sound is subtle as the chocolate envelopes the center, leaving a smooth mirror like sheen. Use a fork to lift each egg and tap to let excess chocolate fall back into the bowl, creating a thin even shell. Work quickly but carefully, because prolonged handling warms the center and can distort the shape. A frequent error is dipping under cold chocolate which causes a thick, clumpy coating instead of a smooth finish.
- Remove the egg with a fork and tap along the edge of the bowl allowing excess chocolate to drip back into the bowl through the prongs: The tapping action removes extra coating and helps form a delicate, even shell that crisps when set. You will often hear the gentle drip and see the chocolate fall back, a good sign you have the right viscosity. If too much chocolate runs off, it may be too thin and need chilling, and if little moves it may be too thick and need a touch of coconut oil . Avoid aggressive tapping which can dent the surface.
- Place back onto parchment paper and sprinkle with any desired toppings: As the eggs rest, the glossy surface will begin to dull slightly, then firm up into a satisfying snap. Adding sprinkles or other garnishes at this moment ensures they adhere before the chocolate sets. Be mindful not to overcrowd the sheet so air can circulate and the shell sets uniformly. A common oversight is waiting until the chocolate is fully hardened to add sprinkles, which prevents them from sticking.
- Repeat until all eggs are covered in chocolate: Keep a rhythm and a steady hand as you continue, and you will notice your technique improve after the first few. Maintaining even melt temperature for the chocolate and consistent firmness in the centers ensures uniform results across the batch. If the chocolate cools and thickens mid process, gently rewarm it in short bursts to restore a smooth coating.
- Refrigerate for 5 minutes or until the chocolate has hardened: The fridge helps the shell set quickly and keeps the centers stable, and you will see the sheen turn into a firm surface. Once the chocolate is set, they are ready to handle for packaging or serving. Avoid leaving them in the fridge for extended periods that might draw moisture and dull the finish.
- Wrap up to give away as gifts serve or store in the fridge for up to 5 days: Properly wrapped, these keep their texture and flavor for several days in the refrigerator, and freezing can extend their life further. Label and stack them gently to prevent cracking the shells. A frequent mistake is storing them at room temperature in warm conditions which can soften the centers and bloom the chocolate .
Notes
- Choose texture: Use creamy peanut butter for a silky center, or chunky for added crunch; the choice changes mouthfeel but not the basic method.
- Manage sweetness: If you prefer less sweet treats, slightly reduce the powdered sugar by a few tablespoons and test the binding; be careful not to make the mixture too loose.
- Control coating thickness: Add a teaspoon of coconut oil to the chocolate if it is too thick, which helps create a thinner, glossier shell.
- Make them crunchy: Stir in the Rice Krispies cereal gently to keep maximum airiness, which lightens the centers without impacting flavor.
- Freeze for longer storage: Fully set and chilled eggs can be frozen in a single layer then transferred to a freezer bag for up to several months; thaw in the fridge overnight.