Peanut Butter Chess Pie
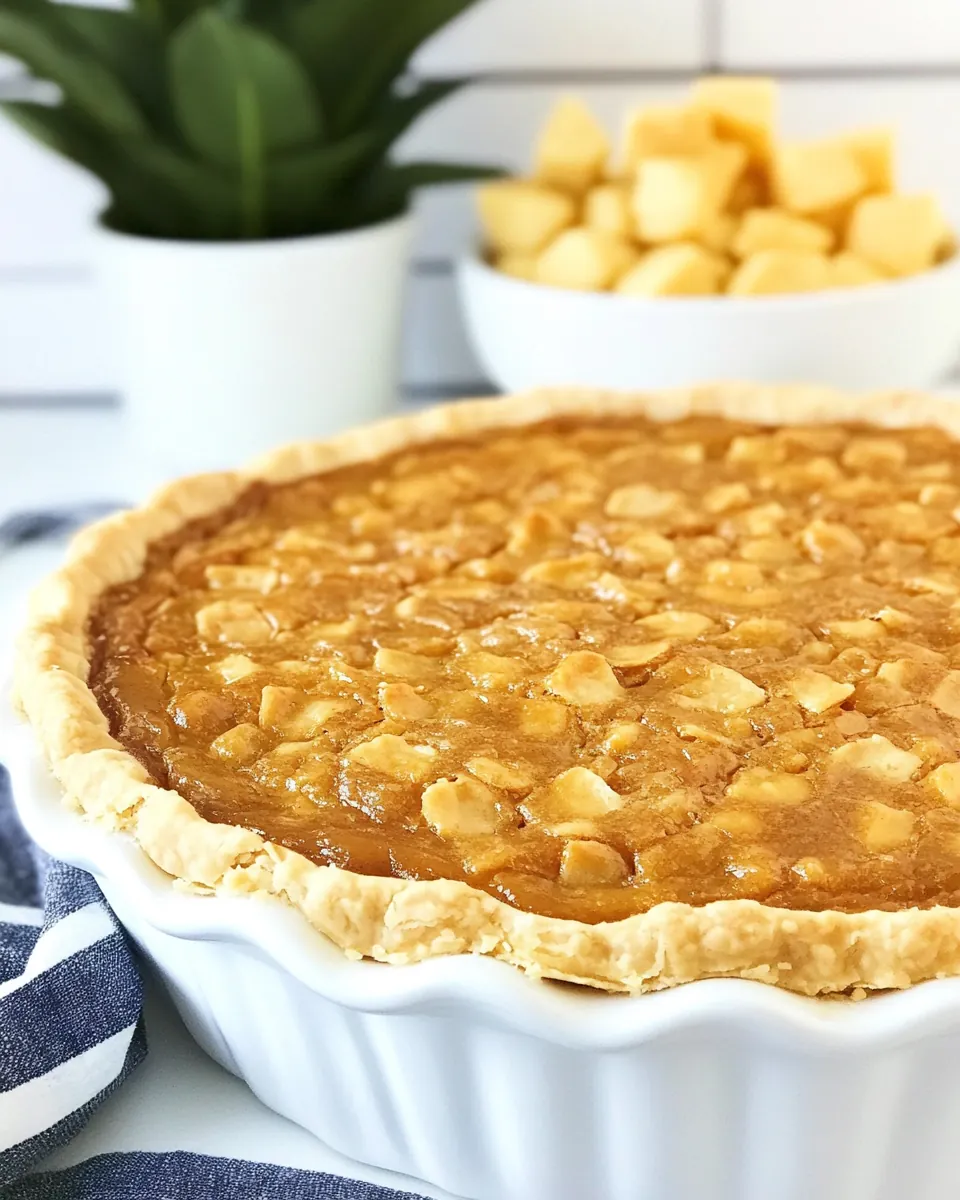
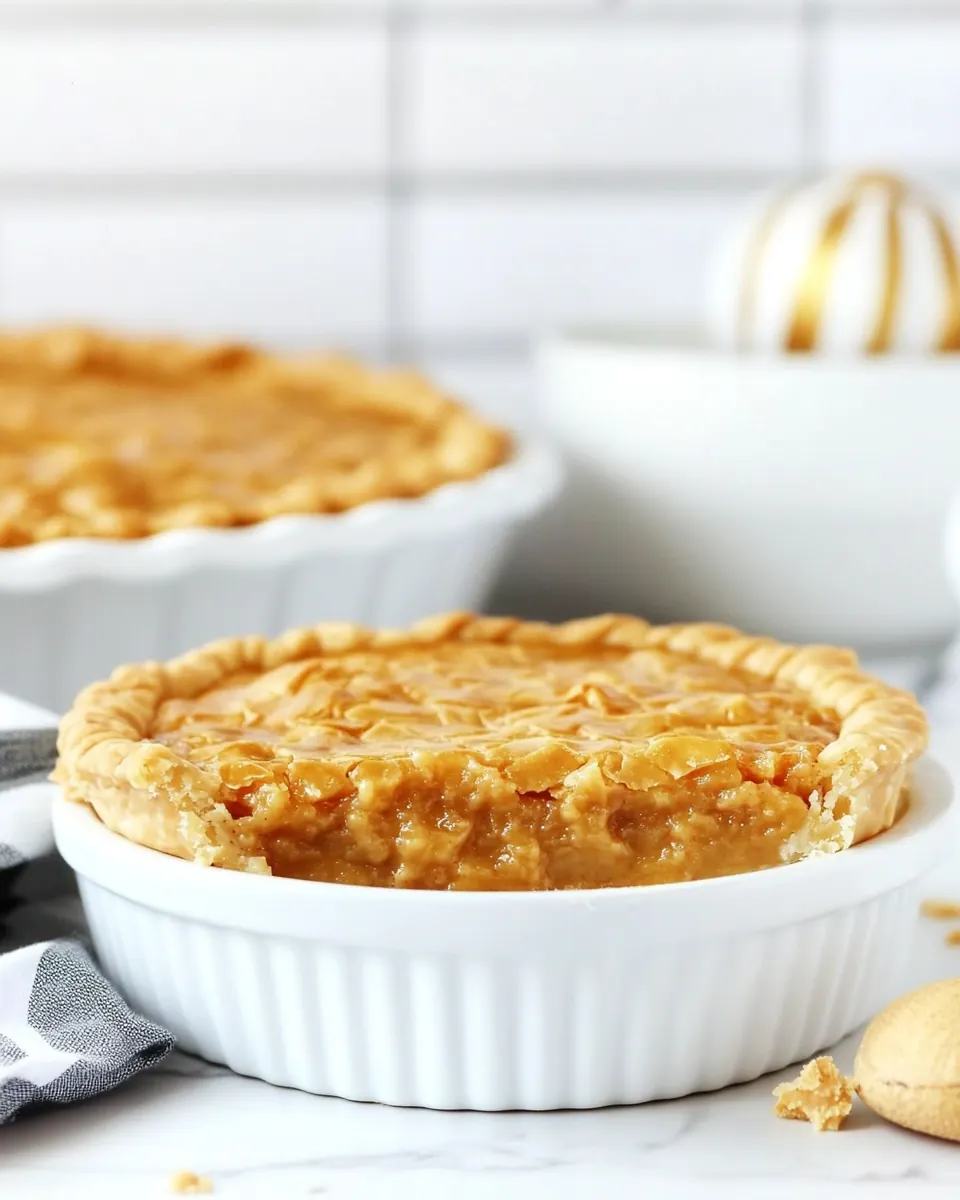
Peanut Butter Chess Pie is the sort of dessert I reach for when I want something both homey and a little nostalgic. The first time I baked one I remember the buttery aroma filling the kitchen, the sound of the oven door closing, and the way everyone paused mid conversation when a warm slice was placed on the table. It instantly felt like a celebration without any fuss. I love that this recipe transforms a handful of pantry staples into a silky, slightly jiggle center with a crisp, golden crust.
Over the years I have adapted the method to keep things simple but soulful. Sometimes I swap a store bought crust for a quick homemade one, other times I whisk everything by hand and let the pie rest on the counter while we talk. There is a comforting rhythm to stirring the melted butter into creamy peanut butter, cracking eggs and whisking in sugar, a cadence that always calms me. This version keeps the flavors focused, letting the rich peanut taste shine alongside the classic custardy feel of a chess pie.
Recipe Snapshot
60 mins
20 mins
40 mins
Medium
350 kcal
American
Gluten-Free, Low FODMAP
Desserts
9 inch pie plate, Oven, Whisk, Mixing bowl, Spatula
Why Try This Peanut Butter Chess Pie
Rich, nostalgic flavor
I adore how Peanut Butter Chess Pie delivers a deep, nutty richness in each bite. The combination of melted butter and creamy peanut butter creates a dense, satisfying mouthfeel that reminds me of childhood treats, yet feels grown up enough for dinner guests. I often catch myself savoring the aroma before I even slice it.
Minimal ingredients, maximum impact
One reason I keep this recipe on rotation is how few components it needs. With staples like eggs, sugar, and a simple pie crust, you can pull together something special without a long shopping list. That simplicity makes it accessible on busy evenings or for last minute baking urges.
Textural contrast
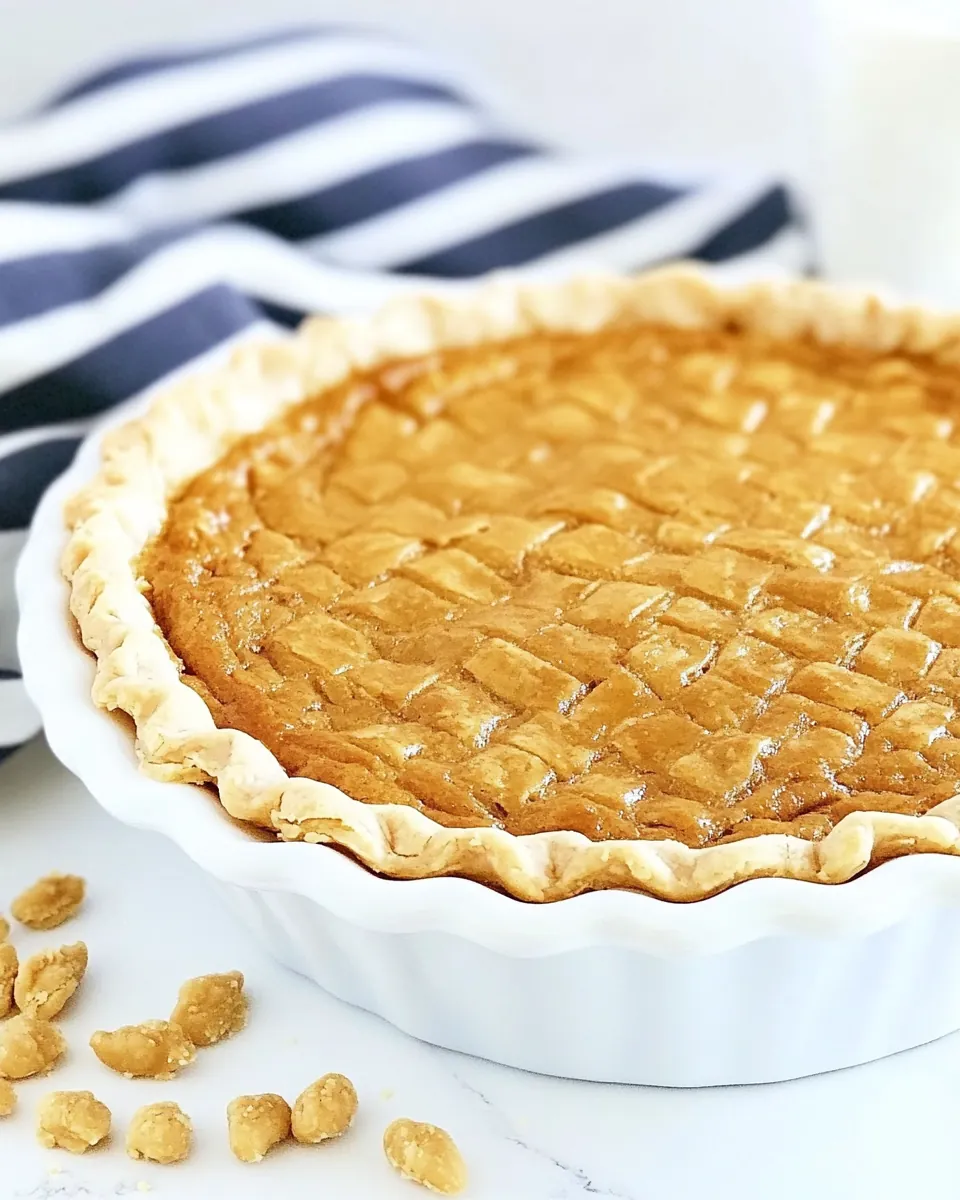
The textural play between a crisp pie crust and a velvety, slightly jiggly filling is one of my favorite parts. When baked properly, the edges brown and flake while the center holds a custardy softness. I find that small touches, like chilling the crust before filling, really enhance that contrast.
Flexible and forgiving
I value recipes that tolerate small mistakes, and this one does. If the peanut butter is a bit firm, a quick warm up fixes it. If the pie jiggles a little in the center after baking, it will set as it cools. That forgiving nature makes me confident to serve it when friends drop by unexpectedly.
Perfect for sharing
Finally, Peanut Butter Chess Pie is inherently social. It slices into generous wedges that invite conversation, and it pairs beautifully with a scoop of ice cream or a dollop of whipped cream. I like bringing it to potlucks because it travels well, and people always ask for the recipe.
Everything You Need for Peanut Butter Chess Pie
These ingredients combine simple pantry staples into something greater than the sum of its parts. The key players are the pie crust which gives a delicate, flaky base, the melted butter and creamy peanut butter that build the pie’s rich backbone, and the eggs and sugar which set the custard. Little additions like cornmeal and a touch of flour give structure, while an acid such as vinegar brightens the flavor and keeps the filling from tasting flat.
- 1 pie crust from scratch or from a refrigerated pack of two: Provide a flaky, buttery base that holds the pie filling and adds texture; can be made from scratch for a tender, homemade crust or used from a refrigerated two-pack for convenience and consistency. Chill briefly before rolling to prevent shrinking and blind-bake if recipe instructions call for a partially cooked shell to avoid a soggy bottom.
- 1/2 cup unsalted butter, melted: Contribute rich flavor and smooth mouthfeel when melted, helping to bind the filling ingredients and add tenderness to the custard. Use unsalted butter to control overall salt level, and melt gently to avoid separating or burning.
- 1/2 cup creamy peanut butter (regular no-stir peanut butter): Lend a creamy peanut flavor and additional fat that enriches the custard, contributing both taste and structure; regular no-stir creamy peanut butter incorporates evenly into the filling. Stir thoroughly to ensure a uniform texture and prevent pockets of oil or clumps in the batter.
- 4 large eggs: Provide structure, leavening, and emulsification for the custard filling by setting when baked; yolks add richness while whites help stabilize the texture. Beat or whisk as directed to combine yolks and whites evenly for a smooth, cohesive filling.
- 1 1/2 cups granulated sugar: Sweeten the custard and help create a glossy, slightly chewy texture when combined with eggs and baked; granulated sugar also contributes to browning and caramelization on the surface. Measure accurately and dissolve into the wet ingredients for an even consistency.
- 2 tablespoons cornmeal: Add a subtle grainy texture and a slight nutty flavor that helps thicken and stabilize the filling, absorbing some moisture to reduce runniness. Sprinkle or whisk into the dry ingredients to distribute evenly and prevent clumping.
- 1 tablespoon all-purpose flour: Act as a mild thickening agent that gives body to the custard and helps prevent separation, producing a firmer set once baked. Combine with the other dry ingredients so it disperses evenly throughout the filling.
- 1 tablespoon white vinegar or white distilled vinegar, or lemon juice in a pinch: Provide a small amount of acid to balance sweetness and brighten flavors while helping to tenderize the custard slightly; white vinegar or lemon juice can both serve this role. Use sparingly to avoid imparting a noticeable tang, adding just enough to enhance overall flavor.
- 1 tablespoon vanilla extract: Impart warm, aromatic flavor that complements the peanut butter and rounds out the dessert; vanilla also enhances perceived sweetness. Add at the end of mixing to preserve its volatile aroma compounds for the best flavor impact.
Step by Step Guide for Peanut Butter Chess Pie
Baking this pie is straightforward but rewarding. I will walk you through each action with sensory cues, why each technique matters, and common pitfalls to avoid so your result is reliably delicious every time.
- Preheat oven to 350°F.: You should notice the oven steadily warming as it approaches 350°F , with a faint dry heat and the smell of warmed metal. Preheating ensures even baking so the crust and filling cook in harmony. If you skip preheating, the filling can set unevenly and the crust may not crisp properly. A common mistake is placing the pie in a cold oven which leads to a soggy bottom and a crust that fails to brown.
- Place pie crust in 9” pie plate and crimp edges as desired. Chill until ready to fill.: The cool, flaky pie crust should press easily into the plate; you will feel the dough give and hear a soft thud as it settles. Crimping creates a sealed rim that helps the crust keep its shape during baking, and chilling it afterward prevents shrinkage. Avoid overworking the dough, which can make it tough, and make sure the crust is evenly thick to prevent thin, burnt spots.
- Whisk together butter and peanut butter. If the peanut butter is too stiff to whisk, microwave it for about 20-30 seconds.: Cooling the shaped crust in the fridge introduces a calm, cold firmness, and I often run a fingertip along the edge to check. Chilling helps prevent the crust from collapsing when the wet filling is added. If you skip this, the dough may slump and create uneven edges. A common error is filling a warm crust, which can cause soggy spots and lost flake.
- Whisk in eggs, sugar, cornmeal, flour, vinegar, and vanilla. Pour into prepared pie shell.: As you whisk the warmed butter into creamy peanut butter , the mixture becomes glossy and velvety; you can hear the whisk and see the emulsion form. This step builds the filling's rich base and ensures even distribution of fat for a smooth texture. If the peanut butter is too stiff, microwave for about 20 to 30 seconds to loosen it. Avoid overheating which can separate oils and change texture, and avoid under mixing which leaves lumps.
- Bake for 35-45 minutes, until crust is browned and top of pie is browned. It will still jiggle slightly in the middle. Mine took 40 minutes. Cool completely before cutting.: When you add the eggs and sugar , the mixture becomes lighter and slightly aerated, with a pale sheen. The dry cornmeal and flour absorb moisture and thicken the batter, while the vinegar and vanilla extract layer brightness and aroma. Whisk until smooth and uniform; the filling should pour easily but hold together. If you under-whisk, pockets of dry ingredients remain; over-whisking eggs can incorporate too much air, causing cracks or a souffle like rise that falls.
- Serve with whipped cream or ice cream, or chocolate sauce.: As the filling slides into the chilled pie crust , it fills the plate in a glossy sheen, settling without bubbles. Pour gently to avoid splashing on the crust edges, and smooth the top with a spatula if needed. This careful pour helps the filling bake evenly. A frequent mistake is overfilling which can spill and burn on the oven floor, so leave a little headroom if your crust rim is high.
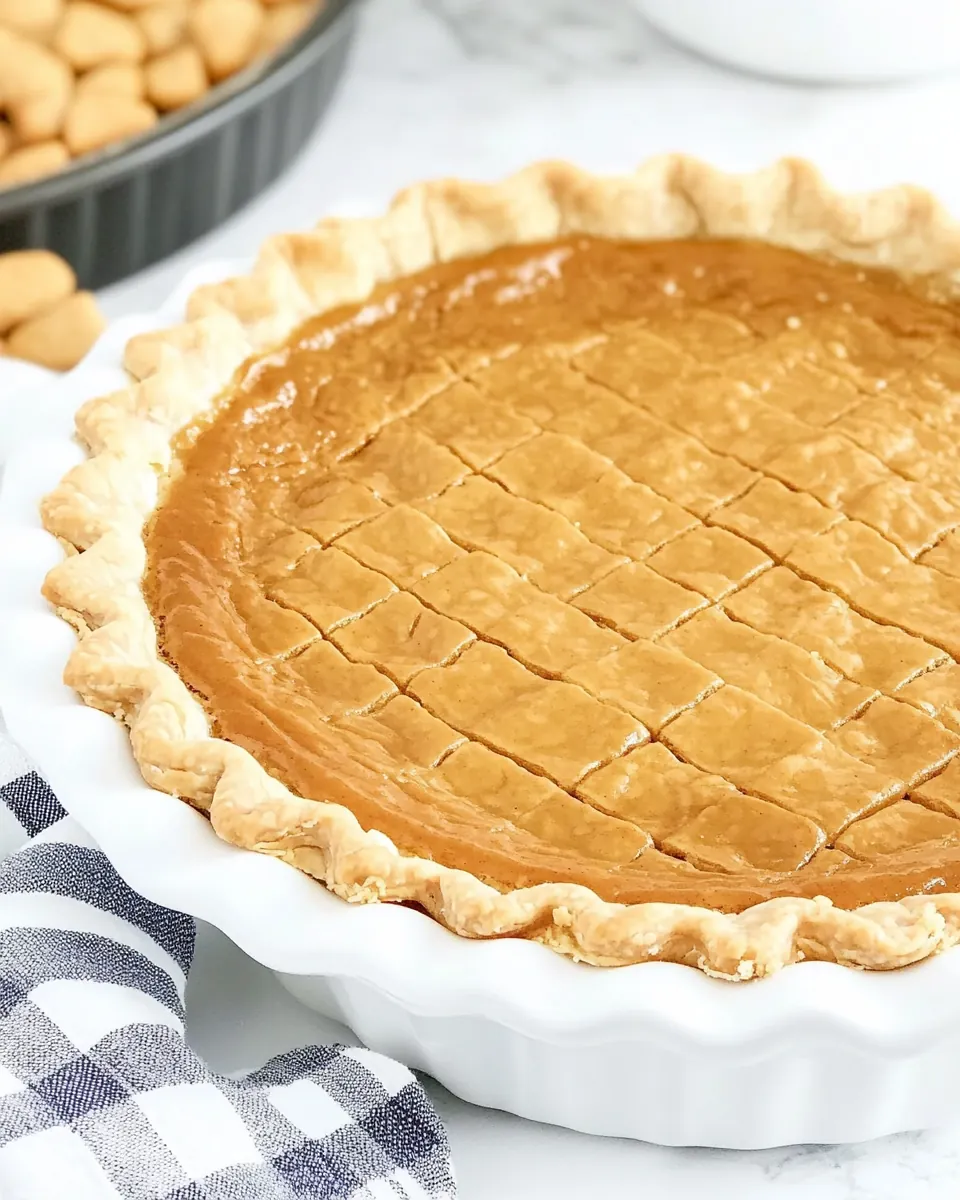
- Bake for 35 to 45 minutes, until crust is browned and top of pie is browned: During baking you will notice the crust turning a warm golden brown and the filling gaining a deeper color on top. The kitchen fills with a roasted, nutty aroma and small bubbles may appear around the edge. Baking at the correct temperature fosters even setting while encouraging a nicely colored top. If you bake too long the filling can overcook and crack, and too short will leave a runny center. Check at about 35 minutes for visual cues and for a slight jiggle in the center.
- It will still jiggle slightly in the middle: When the center has a gentle wobble, the residual heat will finish the set as it cools. The texture should be custardy, not watery; the slight jiggle signals proper doneness. Cutting too soon while it is very loose results in a messy slice, whereas waiting too long could make the filling dry and cakey. A common pitfall is mistaking complete stillness for doneness, which leads to overbaking.
- Mine took 40 minutes: In my oven the pie usually needs about 40 minutes, which gives a nicely browned top and set edges while preserving a tender center. Oven variability means your time might differ slightly, so treat this as a guideline. Relying only on time without checking visual cues can lead to over or underdone results, so use both time and appearance.
- Cool completely before cutting: Cooling brings a hush to the kitchen and the pie firms up, making clean slices possible. The filling finishes setting and the crust settles into a crisp texture as it loses steam. Cutting too soon creates slumping and oozing, while proper cooling yields neat wedges. A common error is impatience; allow sufficient time for the pie to reach room temperature or slightly cooler before serving.
- Serve with whipped cream or ice cream, or chocolate sauce: A scoop of cold ice cream or a dollop of whipped cream creates a temperature contrast and adds creaminess, while a drizzle of chocolate sauce amplifies sweetness and richness. The combination of hot and cold, or creamy and nutty, makes each bite more interesting. Avoid heavy garnishes that overwhelm the peanut flavor, and be mindful of garnishes that could make slices soggy if left on too long.
Ways to Customize
This pie welcomes small personal touches that enhance flavor and presentation. Below are practical ideas to adapt texture, sweetness, and appearance while keeping the essential character intact.
- Switch the crust Use a homemade crust for a flakier base or a store bought crust for convenience, both yield a lovely contrast to the silky filling.
- Adjust sweetness Reduce the sugar by a few tablespoons if you prefer a less sweet finish, which will let the peanut butter taste shine more clearly.
- Serve temperature Try it warm with a scoop of cold ice cream for contrast, or fully cooled for firmer slices that present beautifully on a dessert plate.
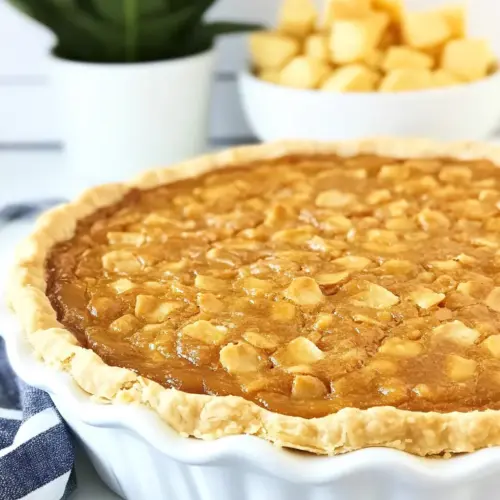
- Texture boost Add a sprinkle of toasted chopped peanuts on top right before serving for crunch and visual appeal, but do not bake them on top as they can burn.
- Flavor lift A small splash of additional vanilla extract or a tiny pinch of salt can deepen the overall flavor profile if your peanut butter is on the sweeter side.
Perfect Pairings for Peanut Butter Chess Pie
This pie pairs beautifully with simple accompaniments and suits many occasions. Below I outline pairing ideas, serving styles, storage tips, and seasonal suggestions to help you present the pie with confidence.
- Classic scoop Serve a warm slice with a scoop of vanilla ice cream to create a pleasing temperature contrast and creamy addition that complements the nutty filling.
- Whipped cream finish A lightly sweetened whipped cream adds airiness that offsets the density of the pie, making each forkful feel lighter.
- Chocolate drizzle A thin ribbon of chocolate sauce adds richness and pairs nicely with the peanut base, turning the pie into a more decadent dessert for special occasions.
- Casual gatherings Bring this pie to potlucks or family dinners; it travels well and slices into generous wedges for sharing, making it ideal for celebrations or relaxed weekends.
- Seasonal pairing This pie works all year long, but I particularly enjoy it during cooler months when richer desserts feel comforting; pair with warm beverages for a cozy finish.
- Storage tips Cover and refrigerate leftover slices to keep the custard firm and the crust from becoming soggy. Reheat briefly if you prefer it warm, but avoid prolonged heat which can change texture.
- Presentation Garnish with a light dusting of powdered sugar or a few whole peanuts for an inviting finish that signals flavor without overcomplicating the plate.
FAQ
Conclusion
Peanut Butter Chess Pie stands out for its rich peanut flavor, comforting custard texture, and simple ingredient list. It manages to feel both nostalgic and sophisticated, making it a reliable choice for family dinners or casual gatherings. I encourage you to give it a try, savor the aroma as it bakes, and enjoy how such humble ingredients come together to create something memorable. Share it with friends, and let the nostalgic, nutty goodness bring everyone to the table.
Peanut Butter Chess Pie
Equipment
- 9-inch pie plate
- Oven
- Whisk
- Mixing Bowl
- Spatula
Ingredients
- 1 pie crust from scratch or from a refrigerated pack of two Provide a flaky, buttery base that holds the pie filling and adds texture; can be made from scratch for a tender, homemade crust or used from a refrigerated two-pack for convenience and consistency. Chill briefly before rolling to prevent shrinking and blind-bake if recipe instructions call for a partially cooked shell to avoid a soggy bottom.
- 1/2 cup unsalted butter, melted Contribute rich flavor and smooth mouthfeel when melted, helping to bind the filling ingredients and add tenderness to the custard. Use unsalted butter to control overall salt level, and melt gently to avoid separating or burning.
- 1/2 cup creamy peanut butter (regular no-stir peanut butter) Lend a creamy peanut flavor and additional fat that enriches the custard, contributing both taste and structure; regular no-stir creamy peanut butter incorporates evenly into the filling. Stir thoroughly to ensure a uniform texture and prevent pockets of oil or clumps in the batter.
- 4 large eggs Provide structure, leavening, and emulsification for the custard filling by setting when baked; yolks add richness while whites help stabilize the texture. Beat or whisk as directed to combine yolks and whites evenly for a smooth, cohesive filling.
- 1 1/2 cups granulated sugar Sweeten the custard and help create a glossy, slightly chewy texture when combined with eggs and baked; granulated sugar also contributes to browning and caramelization on the surface. Measure accurately and dissolve into the wet ingredients for an even consistency.
- 2 tablespoons cornmeal Add a subtle grainy texture and a slight nutty flavor that helps thicken and stabilize the filling, absorbing some moisture to reduce runniness. Sprinkle or whisk into the dry ingredients to distribute evenly and prevent clumping.
- 1 tablespoon all-purpose flour Act as a mild thickening agent that gives body to the custard and helps prevent separation, producing a firmer set once baked. Combine with the other dry ingredients so it disperses evenly throughout the filling.
- 1 tablespoon white vinegar or white distilled vinegar, or lemon juice in a pinch Provide a small amount of acid to balance sweetness and brighten flavors while helping to tenderize the custard slightly; white vinegar or lemon juice can both serve this role. Use sparingly to avoid imparting a noticeable tang, adding just enough to enhance overall flavor.
- 1 tablespoon vanilla extract Impart warm, aromatic flavor that complements the peanut butter and rounds out the dessert; vanilla also enhances perceived sweetness. Add at the end of mixing to preserve its volatile aroma compounds for the best flavor impact.
Instructions
- Preheat oven to 350°F.: You should notice the oven steadily warming as it approaches 350°F , with a faint dry heat and the smell of warmed metal. Preheating ensures even baking so the crust and filling cook in harmony. If you skip preheating, the filling can set unevenly and the crust may not crisp properly. A common mistake is placing the pie in a cold oven which leads to a soggy bottom and a crust that fails to brown.
- Place pie crust in 9” pie plate and crimp edges as desired. Chill until ready to fill.: The cool, flaky pie crust should press easily into the plate; you will feel the dough give and hear a soft thud as it settles. Crimping creates a sealed rim that helps the crust keep its shape during baking, and chilling it afterward prevents shrinkage. Avoid overworking the dough, which can make it tough, and make sure the crust is evenly thick to prevent thin, burnt spots.
- Whisk together butter and peanut butter. If the peanut butter is too stiff to whisk, microwave it for about 20-30 seconds.: Cooling the shaped crust in the fridge introduces a calm, cold firmness, and I often run a fingertip along the edge to check. Chilling helps prevent the crust from collapsing when the wet filling is added. If you skip this, the dough may slump and create uneven edges. A common error is filling a warm crust, which can cause soggy spots and lost flake.
- Whisk in eggs, sugar, cornmeal, flour, vinegar, and vanilla. Pour into prepared pie shell.: As you whisk the warmed butter into creamy peanut butter , the mixture becomes glossy and velvety; you can hear the whisk and see the emulsion form. This step builds the filling's rich base and ensures even distribution of fat for a smooth texture. If the peanut butter is too stiff, microwave for about 20 to 30 seconds to loosen it. Avoid overheating which can separate oils and change texture, and avoid under mixing which leaves lumps.
- Bake for 35-45 minutes, until crust is browned and top of pie is browned. It will still jiggle slightly in the middle. Mine took 40 minutes. Cool completely before cutting.: When you add the eggs and sugar , the mixture becomes lighter and slightly aerated, with a pale sheen. The dry cornmeal and flour absorb moisture and thicken the batter, while the vinegar and vanilla extract layer brightness and aroma. Whisk until smooth and uniform; the filling should pour easily but hold together. If you under-whisk, pockets of dry ingredients remain; over-whisking eggs can incorporate too much air, causing cracks or a souffle like rise that falls.
- Serve with whipped cream or ice cream, or chocolate sauce.: As the filling slides into the chilled pie crust , it fills the plate in a glossy sheen, settling without bubbles. Pour gently to avoid splashing on the crust edges, and smooth the top with a spatula if needed. This careful pour helps the filling bake evenly. A frequent mistake is overfilling which can spill and burn on the oven floor, so leave a little headroom if your crust rim is high.
- Bake for 35 to 45 minutes, until crust is browned and top of pie is browned: During baking you will notice the crust turning a warm golden brown and the filling gaining a deeper color on top. The kitchen fills with a roasted, nutty aroma and small bubbles may appear around the edge. Baking at the correct temperature fosters even setting while encouraging a nicely colored top. If you bake too long the filling can overcook and crack, and too short will leave a runny center. Check at about 35 minutes for visual cues and for a slight jiggle in the center.
- It will still jiggle slightly in the middle: When the center has a gentle wobble, the residual heat will finish the set as it cools. The texture should be custardy, not watery; the slight jiggle signals proper doneness. Cutting too soon while it is very loose results in a messy slice, whereas waiting too long could make the filling dry and cakey. A common pitfall is mistaking complete stillness for doneness, which leads to overbaking.
- Mine took 40 minutes: In my oven the pie usually needs about 40 minutes, which gives a nicely browned top and set edges while preserving a tender center. Oven variability means your time might differ slightly, so treat this as a guideline. Relying only on time without checking visual cues can lead to over or underdone results, so use both time and appearance.
- Cool completely before cutting: Cooling brings a hush to the kitchen and the pie firms up, making clean slices possible. The filling finishes setting and the crust settles into a crisp texture as it loses steam. Cutting too soon creates slumping and oozing, while proper cooling yields neat wedges. A common error is impatience; allow sufficient time for the pie to reach room temperature or slightly cooler before serving.
- Serve with whipped cream or ice cream, or chocolate sauce: A scoop of cold ice cream or a dollop of whipped cream creates a temperature contrast and adds creaminess, while a drizzle of chocolate sauce amplifies sweetness and richness. The combination of hot and cold, or creamy and nutty, makes each bite more interesting. Avoid heavy garnishes that overwhelm the peanut flavor, and be mindful of garnishes that could make slices soggy if left on too long.
Notes
- Switch the crust Use a homemade crust for a flakier base or a store bought crust for convenience, both yield a lovely contrast to the silky filling.
- Adjust sweetness Reduce the sugar by a few tablespoons if you prefer a less sweet finish, which will let the peanut butter taste shine more clearly.
- Serve temperature Try it warm with a scoop of cold ice cream for contrast, or fully cooled for firmer slices that present beautifully on a dessert plate.
- Texture boost Add a sprinkle of toasted chopped peanuts on top right before serving for crunch and visual appeal, but do not bake them on top as they can burn.
- Flavor lift A small splash of additional vanilla extract or a tiny pinch of salt can deepen the overall flavor profile if your peanut butter is on the sweeter side.