Roast Acorn Squash
Roast Acorn Squash has been a seasonal staple in my kitchen for years, the recipe I reach for when the air turns crisp and the calendar slides into fall. I remember the first time I roasted an acorn squash, skittish about whether the flesh would caramelize or stay starchy, and how that first sweet, nutty bite changed my view of a humble winter vegetable. From that moment on, simple preparations like this one became my go to for cozy dinners and relaxed weekend meals.
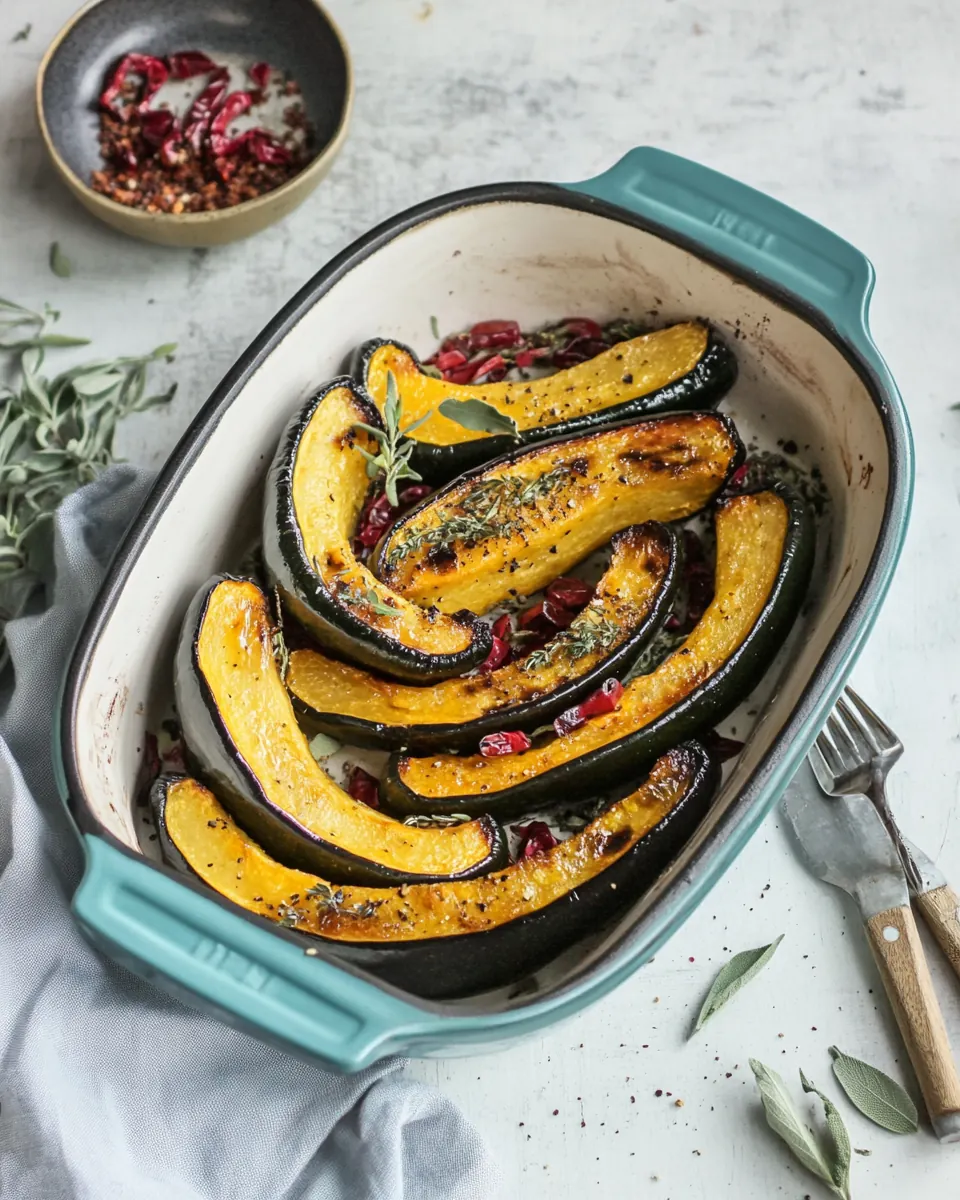
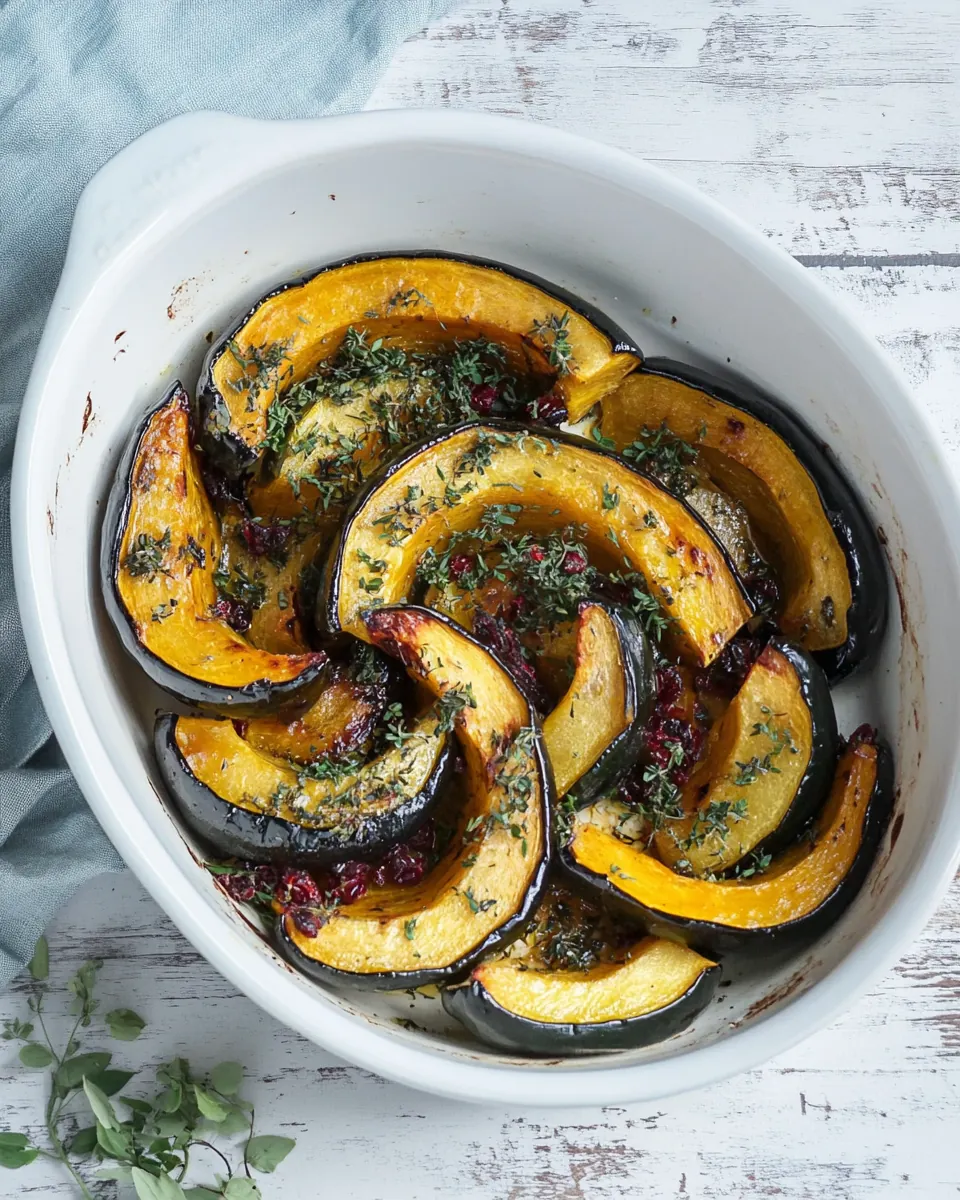
The ritual is part of the joy for me. I love how a single acorn squash turns into golden wedges that smell faintly of toasted nuts as they roast, and how a drizzle of maple syrup glazes the surface into something almost candylike without being cloying. Friends who claim they are not squash people often come away surprised, and I like to think it is the contrast between the crisp edges and the tender interior that wins them over. I’ve learned a few small tricks along the way that make every batch reliably excellent, and those are the things I want to share with you as we go through this straightforward method.
Recipe Snapshot
52 mins
2 mins
50 mins
Medium
150 kcal
American
Vegan, Gluten-Free
Side Dishes
Baking sheet, Parchment paper, Chef’s knife, Spoon
Why You Need This Roast Acorn Squash
Simple, honest flavors
I love how Roast Acorn Squash relies on a handful of ingredients to deliver a big payoff. The natural sweetness of the acorn squash deepens as it roasts, and a touch of maple syrup elevates the caramel notes without overwhelming the squash. There is a purity to this dish that feels intentional, not fussy.
Textures that surprise
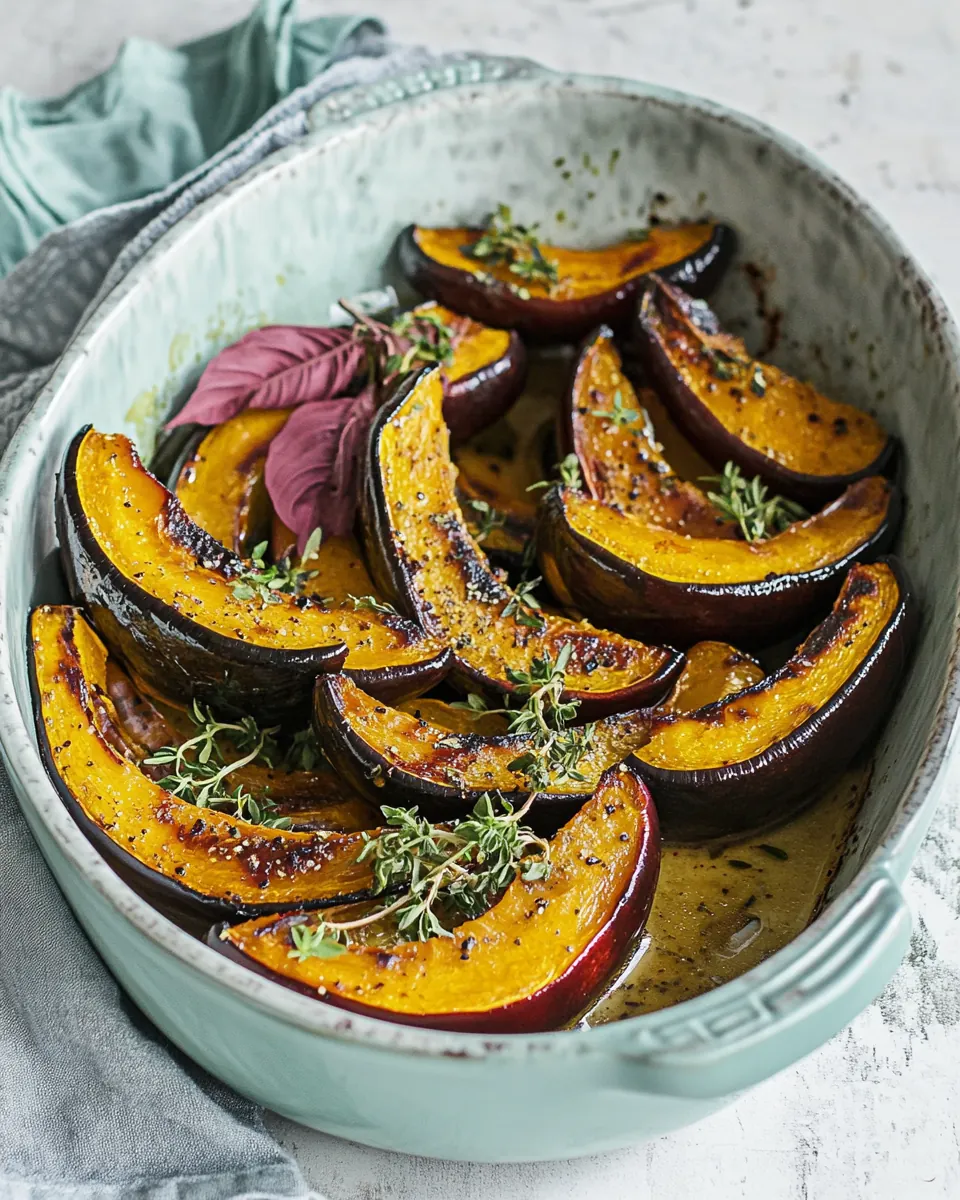
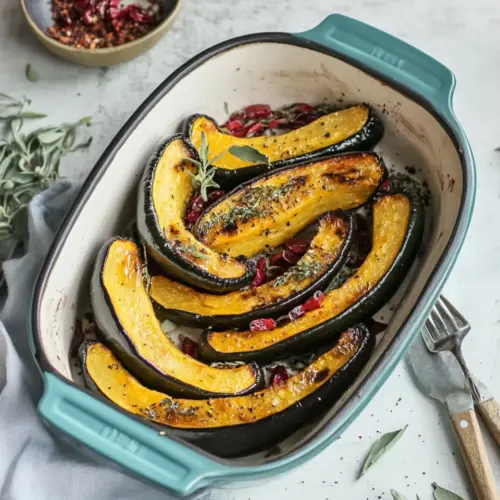
The texture contrast is a major reason I keep making this. Crispy, slightly charred edges give way to creamy, tender centers. When you bite in, you get a satisfying mix of crisp and smooth, and that interplay makes the dish feel more complex than the simple ingredient list would suggest.
Versatile and approachable
I often serve Roast Acorn Squash as a side for busy weeknights, yet it is elegant enough for guests. It complements roasted proteins and grain bowls, and it travels well onto potluck tables. I like that it scales easily, so whether I cook for two or four, the results are dependable.
Seasonal comfort
There is something comforting about peeling back a warm wedge of roasted squash on a cool evening. The aroma alone signals home cooking and slow afternoons, which is why I return to this recipe during the fall. It pairs perfectly with root vegetables and leafy greens, and it helps anchor menus around seasonal produce.
Beginner friendly
If you are new to roasting vegetables, this recipe is forgiving. The steps are straightforward, and small mistakes rarely ruin the outcome. I like to remind people that turning the oven temperature up slightly or letting the squash roast a bit longer creates deeper caramelization, so it’s easy to tweak to your taste.
Ingredients Required for Roast Acorn Squash
These ingredients are intentionally few so the natural character of the squash can shine. The acorn squash provides sweet, nutty flesh that becomes tender in the oven. Olive oil encourages browning and crisp edges, while a dash of kosher salt lifts the flavors. Finally, a drizzle of maple syrup brings a gentle sweetness to finish the wedges, creating a balance between savory and sweet.
- 1 acorn squash: Halve and seed to expose sweet, nutty flesh that becomes tender when roasted; provides the dish’s main body and visual appeal. Brush with oil and syrup so the interior caramelizes and develops deeper flavor during baking.
- 2 tablespoons olive oil: Coats the squash to promote even browning and crisped edges while preventing sticking; carries fat-soluble flavor compounds and helps heat transfer. Use sparingly and distribute evenly for a glossy finish and enhanced mouthfeel.
- 1/2 teaspoon kosher salt: Season to enhance and balance sweetness, drawing out the natural flavors of the roasted squash; helps elevate savory notes and tame excessive sweetness. Sprinkle evenly over cut surfaces before roasting to ensure uniform seasoning throughout.
- 2 tablespoons maple syrup: Drizzles a sweet glaze that caramelizes on the surface, complementing the squash’s natural sweetness and adding a sticky, flavorful finish. Combine with oil to create a glossy coating that promotes Maillard browning and visual appeal.
Putting Together Roast Acorn Squash
Bringing this dish together is uncomplicated, and I like to move with intention rather than rush. Below you will find step by step directions rewritten into a richly detailed guide so you can follow along with confidence and sense when each stage is done.
- Preheat oven to 400 degrees and line a baking sheet with parchment paper.: You will notice the warm hum of the oven as it reaches 400 degrees , and that preheated air is what gives the exterior of the squash a chance to crisp quickly. The parchment paper prevents sticking and simplifies cleanup, and it also promotes even browning by keeping the squash slightly lifted from the metal. A common mistake is not waiting for the oven to fully preheat, which yields a pale, softer edge rather than a golden one. If your oven runs hot or cool, an oven thermometer helps you adjust so the temperature is accurate; visual cues like a faint browning after the first 20 minutes indicate you are on track.
- Cut acorn squash length wise in half, then into wedges.: You will hear a firm, clean sound as the knife sinks through the tough skin into the dense flesh, and the halved squash reveals a pocket of seeds to scoop out. Cutting length wise creates larger, elegant wedges that hold shape while roasting. A common pitfall is using a dull knife, which makes the job harder and more dangerous; stabilize the squash on a flat end and use a heavy chef's knife for control. Look for even thickness across wedges so they cook uniformly; irregular pieces will result in some overly soft and some underdone portions.
- Place the squash wedges on a baking sheet, drizzle with olive oil and sprinkle with salt.: As you drizzle the olive oil , the wedges take on a faint sheen, and the salt crystals cling to the surface. Toss gently so each piece is coated, ensuring the oil reaches the cut faces where browning will occur. The oil is what encourages that sizzling edge in the oven, while the salt enhances the squash's natural sweetness. Avoid overcoating, which can lead to soggy edges; a light, even film is ideal. If you see pooled oil on the sheet, blot a bit with paper towel to keep the wedges from steaming instead of roasting.
- Bake for 30 minutes.: During this initial roast, the kitchen fills with toasty, nutty aromas as the squash begins to soften and its surface darkens. You may hear a gentle hiss as moisture evaporates, and the edges will gradually take on a deeper color. This stage is about developing texture and flavor, not finishing the squash, so expect tender but still slightly resistant flesh. A typical mistake is opening the oven too often to check, which drops the temperature and prolongs cooking; instead, use the oven light and give the full 30 minutes for reliable results.
- Drizzle the squash with maple syrup and toss to coat.: When you drizzle the maple syrup , you will notice a glossy, amber sheen forming on the wedges. Tossing ensures the syrup clings to the ridged surfaces and seeps into pockets, balancing savory notes with sweet. This addition before the final roast allows the sugars to caramelize slightly rather than burning into a hard glaze. A common error is adding too much syrup, which can cause burning or an overly sticky finish; use the stated amount and distribute it evenly for a delicate glaze.
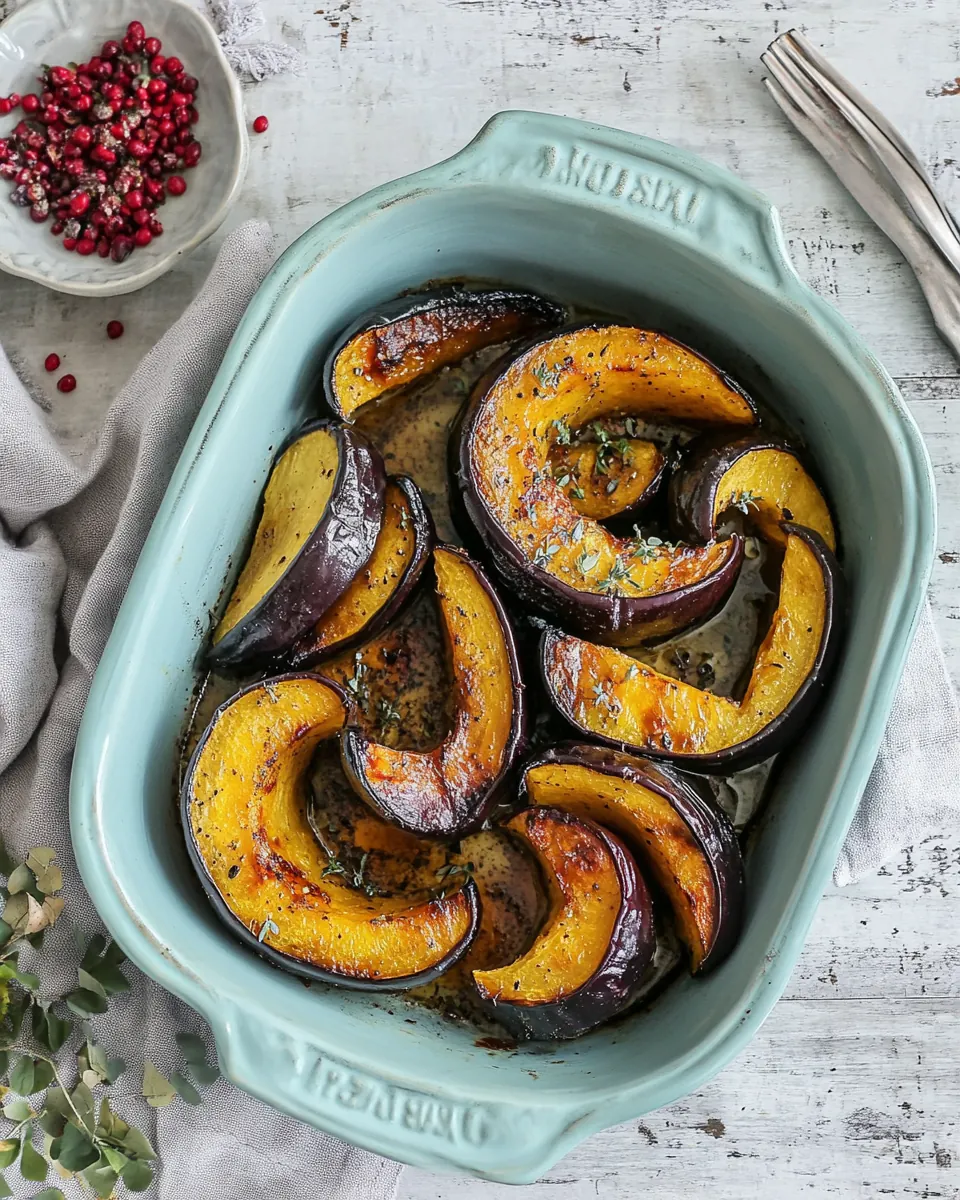
- Bake for an additional 20 minutes or until tender.: In this final roast the aromas deepen further, and you should see edges that are golden to lightly charred, which adds complexity to the flavor. The flesh becomes easily pierced with a fork, and the surface may show small bubbles where the syrup has caramelized. This phase is about reaching the perfect tender interior while securing crisp edges, so test with a fork for doneness. A mistake to avoid is removing the squash too early; underdone pieces will be starchy and lack the desired sweetness that develops with longer roasting.
- Serve.: The first forkful offers a warm mix of textures and flavors, with crisped margins and silky centers buoyed by a hint of maple syrup and seasoning. Serve the wedges warm for the best mouth feel, and notice how the aroma lingers on the plate. A typical oversight is letting the squash sit too long before serving, which leads to softened edges and a less vibrant presentation; aim to plate right away for the most appealing contrast.
Ways to Customize
You can personalize this simple roast in small ways without changing the core technique. Here are practical ideas to nudge the flavors toward savory, sweet, or aromatic depending on your mood and the menu.
- Add warming spices: Sprinkle a small pinch of cinnamon or nutmeg on the wedges before the final roast to amplify the squash‘s natural sweetness and add autumnal depth.
- Boost umami: Finish with a light dusting of crushed toasted nuts on the plated wedges to introduce crunch and a savory contrast to the sweet glaze.
- Switch the oil: Use a neutral oil if you prefer less fruitiness than olive oil provides, which will let the maple notes shine more clearly.
- Adjust sweetness: Reduce the maple syrup by half if you prefer a subtler sweetness, or swap for a milder syrup for a different flavor profile.
- Scale easily: Double the quantities and use two baking sheets arranged on separate racks to cook larger batches without crowding the pan.
Great Combinations for Roast Acorn Squash
This squash pairs beautifully with a variety of sides and settings, making it useful from weeknight dinners to festive fall gatherings. Below are ideas for serving, storage, seasonal pairings, and occasions where Roast Acorn Squash truly shines.
- Simple weeknight plate: Serve wedges alongside roasted grains or a simple green salad for a balanced, comforting dinner that is easy to assemble.
- Holiday side: Feature the squash on holiday tables where its warm flavors complement roasted mains and offer a vegetarian friendly option.
- Ramadan or special occasions: Use as part of a shared iftar spread where roasted vegetables lend warmth and substance after fasting.
- Seasonal pairings: Pair with other fall produce like roasted root vegetables and braised greens to create a cohesive autumn menu.
- Storage tips: Refrigerate leftovers in an airtight container for up to four days, and reheat briefly in a hot oven to revive crisp edges.
- Presentation ideas: Serve the wedges on a warm platter with a drizzle of reserved maple syrup and a few grinds of coarse salt for an attractive finish.
FAQ
Conclusion
Roast Acorn Squash stands out for its simplicity, seasonal flavor, and pleasing textural contrast that transforms a humble squash into a memorable side. The combination of olive oil, kosher salt, and a touch of maple syrup creates a balance of savory and sweet that feels both comforting and refined. I encourage you to give it a try on a cool evening, whether as part of a weeknight dinner or a holiday spread, and enjoy how effortless roasting can yield such satisfying results.
Roast Acorn Squash
Equipment
- Baking Sheet
- Parchment Paper
- Chef's Knife
- Spoon
Ingredients
- 1 acorn squash Halve and seed to expose sweet, nutty flesh that becomes tender when roasted; provides the dish’s main body and visual appeal. Brush with oil and syrup so the interior caramelizes and develops deeper flavor during baking.
- 2 tablespoons olive oil Coats the squash to promote even browning and crisped edges while preventing sticking; carries fat-soluble flavor compounds and helps heat transfer. Use sparingly and distribute evenly for a glossy finish and enhanced mouthfeel.
- 1/2 teaspoon kosher salt Season to enhance and balance sweetness, drawing out the natural flavors of the roasted squash; helps elevate savory notes and tame excessive sweetness. Sprinkle evenly over cut surfaces before roasting to ensure uniform seasoning throughout.
- 2 tablespoons maple syrup Drizzles a sweet glaze that caramelizes on the surface, complementing the squash’s natural sweetness and adding a sticky, flavorful finish. Combine with oil to create a glossy coating that promotes Maillard browning and visual appeal.
Instructions
- Preheat oven to 400 degrees and line a baking sheet with parchment paper.: You will notice the warm hum of the oven as it reaches 400 degrees , and that preheated air is what gives the exterior of the squash a chance to crisp quickly. The parchment paper prevents sticking and simplifies cleanup, and it also promotes even browning by keeping the squash slightly lifted from the metal. A common mistake is not waiting for the oven to fully preheat, which yields a pale, softer edge rather than a golden one. If your oven runs hot or cool, an oven thermometer helps you adjust so the temperature is accurate; visual cues like a faint browning after the first 20 minutes indicate you are on track.
- Cut acorn squash length wise in half, then into wedges.: You will hear a firm, clean sound as the knife sinks through the tough skin into the dense flesh, and the halved squash reveals a pocket of seeds to scoop out. Cutting length wise creates larger, elegant wedges that hold shape while roasting. A common pitfall is using a dull knife, which makes the job harder and more dangerous; stabilize the squash on a flat end and use a heavy chef's knife for control. Look for even thickness across wedges so they cook uniformly; irregular pieces will result in some overly soft and some underdone portions.
- Place the squash wedges on a baking sheet, drizzle with olive oil and sprinkle with salt.: As you drizzle the olive oil , the wedges take on a faint sheen, and the salt crystals cling to the surface. Toss gently so each piece is coated, ensuring the oil reaches the cut faces where browning will occur. The oil is what encourages that sizzling edge in the oven, while the salt enhances the squash's natural sweetness. Avoid overcoating, which can lead to soggy edges; a light, even film is ideal. If you see pooled oil on the sheet, blot a bit with paper towel to keep the wedges from steaming instead of roasting.
- Bake for 30 minutes.: During this initial roast, the kitchen fills with toasty, nutty aromas as the squash begins to soften and its surface darkens. You may hear a gentle hiss as moisture evaporates, and the edges will gradually take on a deeper color. This stage is about developing texture and flavor, not finishing the squash, so expect tender but still slightly resistant flesh. A typical mistake is opening the oven too often to check, which drops the temperature and prolongs cooking; instead, use the oven light and give the full 30 minutes for reliable results.
- Drizzle the squash with maple syrup and toss to coat.: When you drizzle the maple syrup , you will notice a glossy, amber sheen forming on the wedges. Tossing ensures the syrup clings to the ridged surfaces and seeps into pockets, balancing savory notes with sweet. This addition before the final roast allows the sugars to caramelize slightly rather than burning into a hard glaze. A common error is adding too much syrup, which can cause burning or an overly sticky finish; use the stated amount and distribute it evenly for a delicate glaze.
- Bake for an additional 20 minutes or until tender.: In this final roast the aromas deepen further, and you should see edges that are golden to lightly charred, which adds complexity to the flavor. The flesh becomes easily pierced with a fork, and the surface may show small bubbles where the syrup has caramelized. This phase is about reaching the perfect tender interior while securing crisp edges, so test with a fork for doneness. A mistake to avoid is removing the squash too early; underdone pieces will be starchy and lack the desired sweetness that develops with longer roasting.
- Serve.: The first forkful offers a warm mix of textures and flavors, with crisped margins and silky centers buoyed by a hint of maple syrup and seasoning. Serve the wedges warm for the best mouth feel, and notice how the aroma lingers on the plate. A typical oversight is letting the squash sit too long before serving, which leads to softened edges and a less vibrant presentation; aim to plate right away for the most appealing contrast.
Notes
- Add warming spices: Sprinkle a small pinch of cinnamon or nutmeg on the wedges before the final roast to amplify the squash's natural sweetness and add autumnal depth.
- Boost umami: Finish with a light dusting of crushed toasted nuts on the plated wedges to introduce crunch and a savory contrast to the sweet glaze.
- Switch the oil: Use a neutral oil if you prefer less fruitiness than olive oil provides, which will let the maple notes shine more clearly.
- Adjust sweetness: Reduce the maple syrup by half if you prefer a subtler sweetness, or swap for a milder syrup for a different flavor profile.
- Scale easily: Double the quantities and use two baking sheets arranged on separate racks to cook larger batches without crowding the pan.