Roast Garlic In The Oven
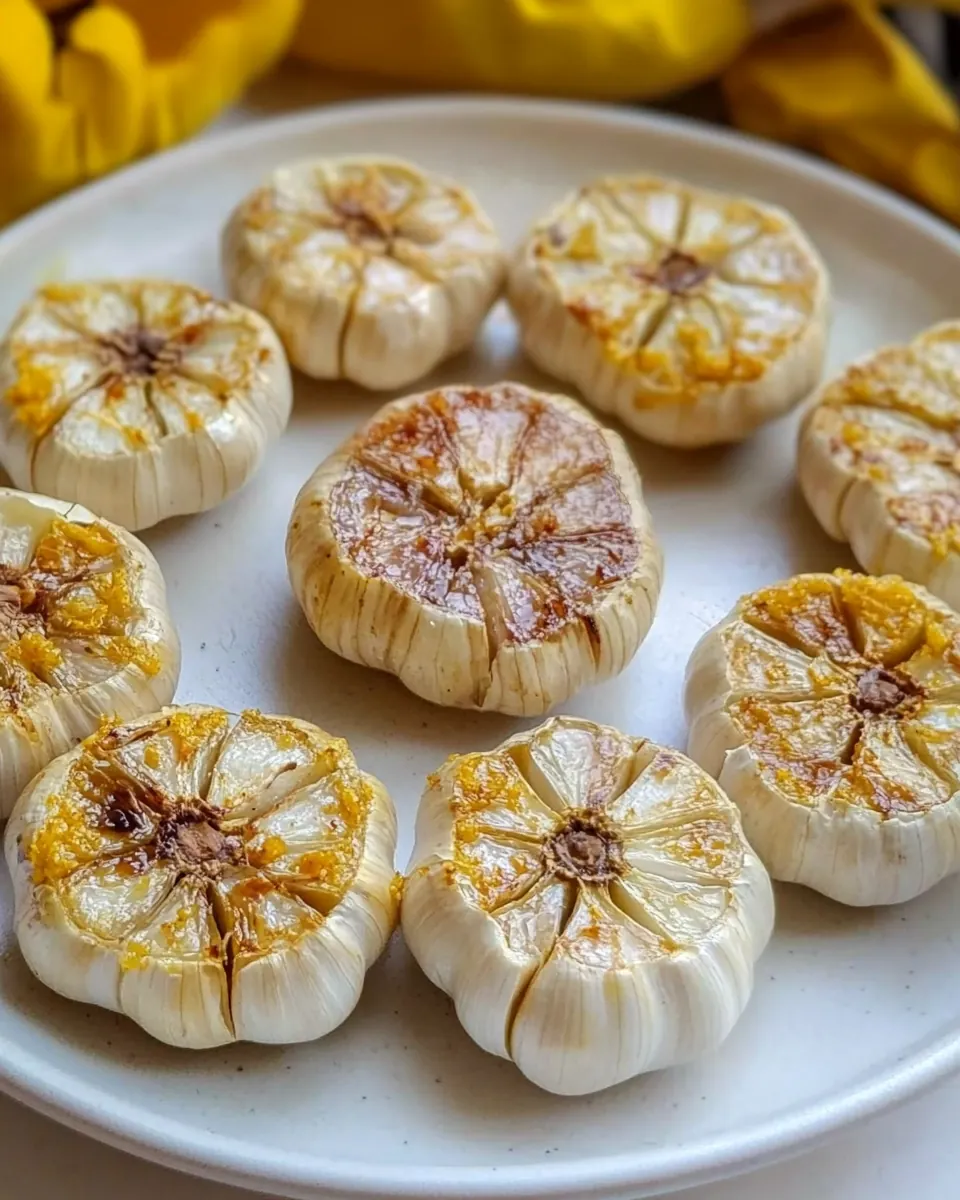
Roast Garlic In The Oven is one of those small kitchen rituals I turn to when I want to lift an ordinary meal into something soulful and rich. The very first time I roasted garlic I remember the house filling with a warm, nutty aroma that felt like a soft blanket; I kept peeking into the oven as if I were watching a slow, quiet miracle. I love how a few simple garlic heads transform into silky, spreadable jewels that add depth to nearly anything I toss them into.
On a rain-damp evening, I pulled a tray from the oven and handed a warm clove to a friend, who spread it on a bit of warm bread and sighed aloud. We ate in companionable silence, the tiny moment becoming the memory of the meal. That’s why I keep this technique in my back pocket: it’s small, dependable, and it makes food feel like care. Over time I learned subtle tweaks that coax the best texture and flavor from each garlic head, and now I rarely buy minced jars because the fresh roasted version is so much better.
Recipe Snapshot
45 mins
5 mins
40 mins
Medium
70 kcal
Mediterranean
Vegan, Gluten-Free
Side Dishes
Oven, Sharp knife, Tinfoil, Baking sheet, Pastry brush
The Appeal of This Roast Garlic In The Oven
Deep, mellow flavor
I find that when you roast garlic, the sulfuric bite mellows into a sweet, nutty profile that layers beautifully into recipes. I love adding a spoonful to mashed vegetables because it blends smoothly and never overpowers.
Versatility
We can spread roasted garlic on toast, fold it into sauces, or mash it with butter. It works equally well as a finishing touch for simple weeknight dinners and as a finishing flourish for weekend feasts.
Minimal effort, big payoff
This recipe asks for a small investment of time, and yet the payoff is massive. I enjoy the calm of prepping the heads, knowing the oven will do most of the work while I tidy up or prep other components.
Longer shelf life and convenience
Once roasted, garlic keeps for several days refrigerated, which means I can scoop out a clove as needed. I often make a double batch and refrigerate a jar for quick flavor boosts across the week.
Kid friendly and approachable
Even picky eaters often respond well to the mild sweetness of roasted garlic. I’ve seen kids who refuse raw garlic happily spread it on bread, which makes me smile every time.
What You Need for Roast Garlic In The Oven
These ingredients are intentionally simple. The philosophy here is purity, letting the garlic shine while the olive oil helps conduct heat and lock in moisture. With just two key players, the chemistry is easy: the fat from the olive oil softens and caramelizes the cloves so they turn creamy without drying out.
- 3 heads of garlic: Peel and separate cloves, then roast to develop a sweet, mellow flavor and creamy texture that enriches spreads and sauces; roasting also reduces raw sharpness and brings out caramelized notes that complement savory dishes.
- 1 tablespoon olive oil: Drizzle over garlic before roasting to promote even browning and prevent drying; olive oil aids heat transfer, enhances mouthfeel, and adds a subtle fruity richness that balances the garlic’s caramelized sweetness.
Step by Step Guide for Roast Garlic In The Oven
These steps are straightforward but worth following closely. I will walk you through sensory cues so you can recognize when the garlic is perfectly done. Take your time with each stage and enjoy the little rewards of aromatic progress as the oven works its magic.
- Preheat the oven to 350°F.: When the oven warms, you will notice a faint metallic hum from the heating elements and a steady rise in temperature on your oven gauge. Preheating ensures the garlic roasts evenly, encouraging those slow caramelization reactions that create a sweet, nutty flavor. A common mistake is skipping this step, which can lead to uneven roasting where some cloves are tender while others remain firm. Give the oven time to reach 350°F so heat flows consistently around the package.
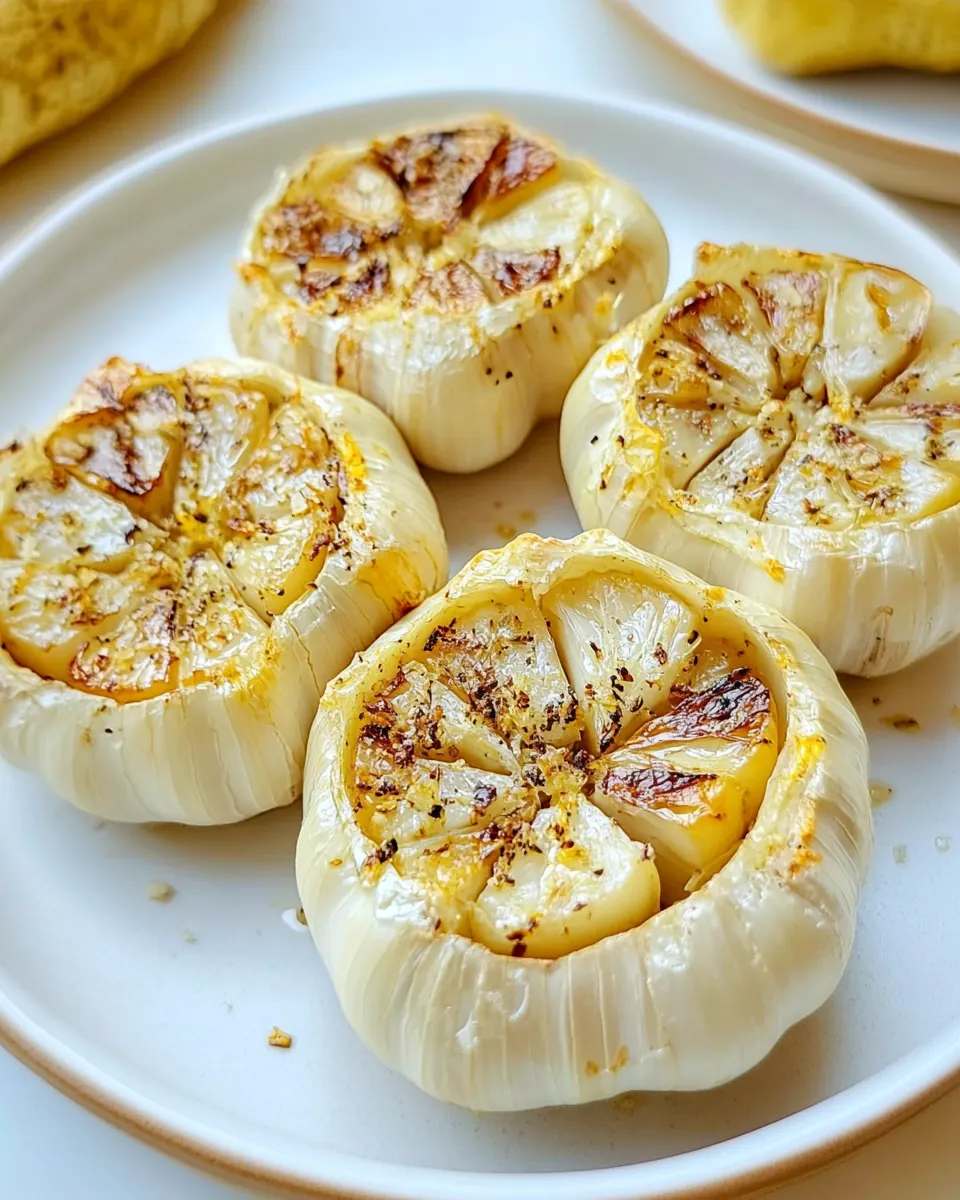
- Use a sharp knife to cut the tops off the garlic heads to expose all the cloves.: As you slice the top off each garlic head, you will see the individual cloves packed in their papery skins. The exposed tips will brown and soften more readily than intact heads because the heat hits the cut surfaces directly, allowing flavor to concentrate. Be careful with your knife, and slice straight across so the cloves remain mostly intact. A frequent misstep is cutting too deeply, which can break the bulb apart and let cloves scatter inside the foil package.
- Place the garlic heads on a piece of tinfoil and brush olive oil onto the garlic cloves until they are completely coated.: As you brush the olive oil , the cloves take on a glossy sheen that hints at the richness to come. The oil promotes even browning and protects the exposed surfaces from drying out, creating the soft, buttery texture you want. Smell the olive oil meet the raw garlic ; the aroma will be grassy and sharp at first, but that sharpness will mellow dramatically during roasting. A slip here is undercoating, which can result in tough edges rather than silkiness.
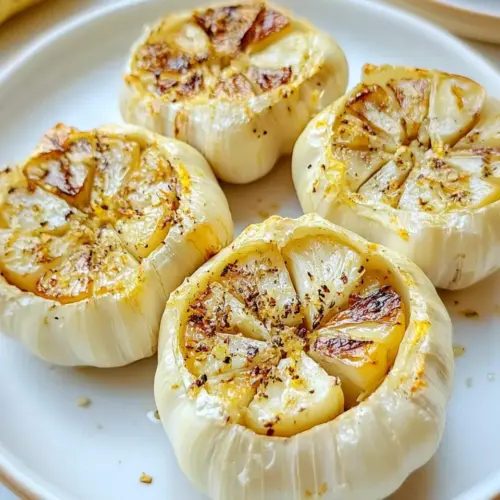
- Wrap the tinfoil tightly around the garlic heads to make a little package, and then place the garlic in the middle of the oven. Roast for 30 to 40 minutes, or until you can feel the garlic is completely soft.: Wrapping seals in steam and concentrates the heat, so the cloves bake gently rather than scorching. You should feel a slight warmth through the foil after a few minutes in the oven, and when you eventually open the packet, a cloud of sweet, roasted perfume will billow out. The package should be snug but not crushed, giving the cloves room to swell as they soften. Avoid leaving gaps in the foil or wrapping too loosely, which wastes steam and can yield uneven results.
- Place the garlic in the middle of the oven: Positioning the packet centrally ensures balanced heat exposure, so the top and bottom roast at the same pace. In the course of cooking, listen for the faint settling and occasional soft pop as moisture shifts inside the head. If you place the packet too close to the top element, the outsides can brown prematurely before the core softens, so middle rack placement is the safest bet. Make sure the packet sits on a small baking sheet in case any oil leaks; that makes cleanup easier and prevents burning on the oven floor.
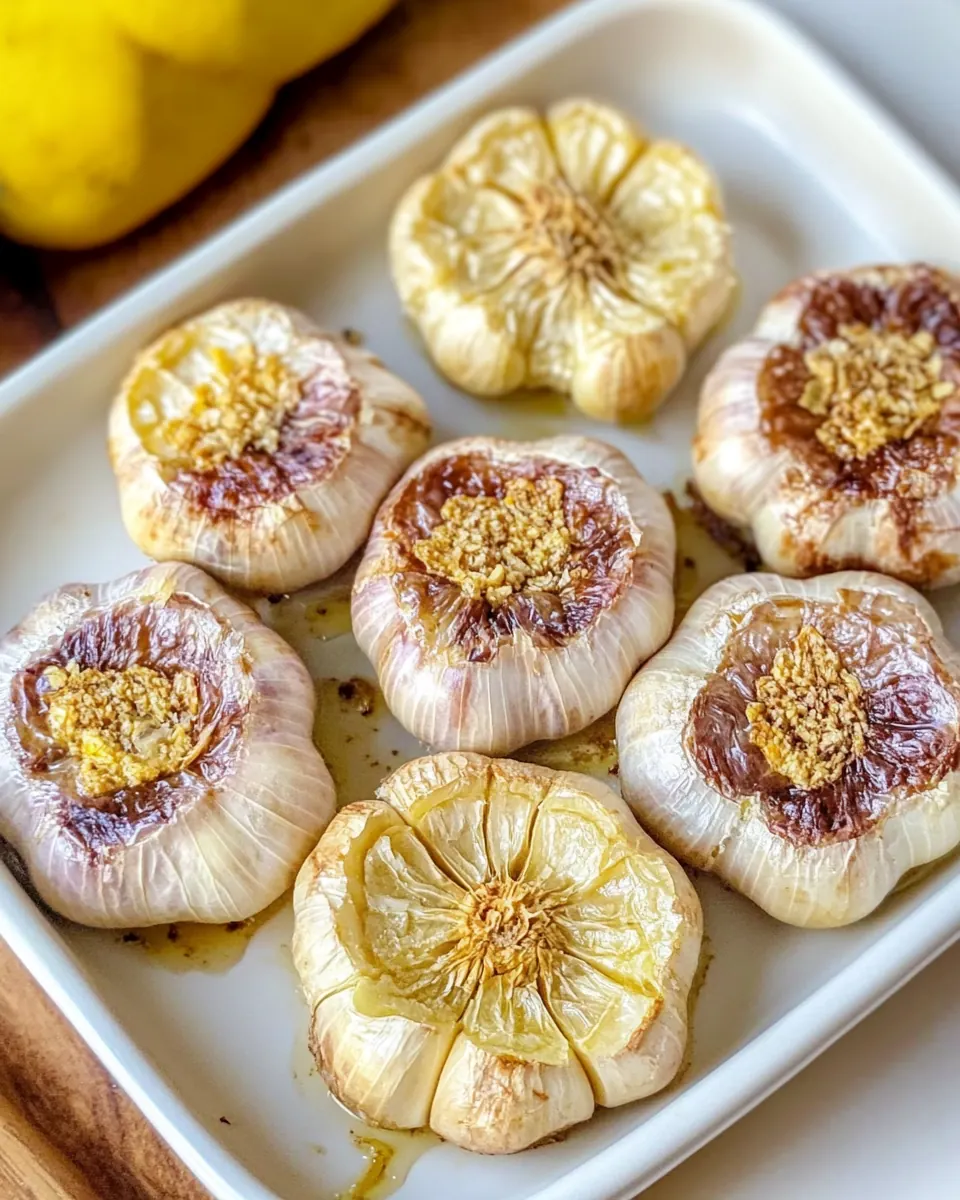
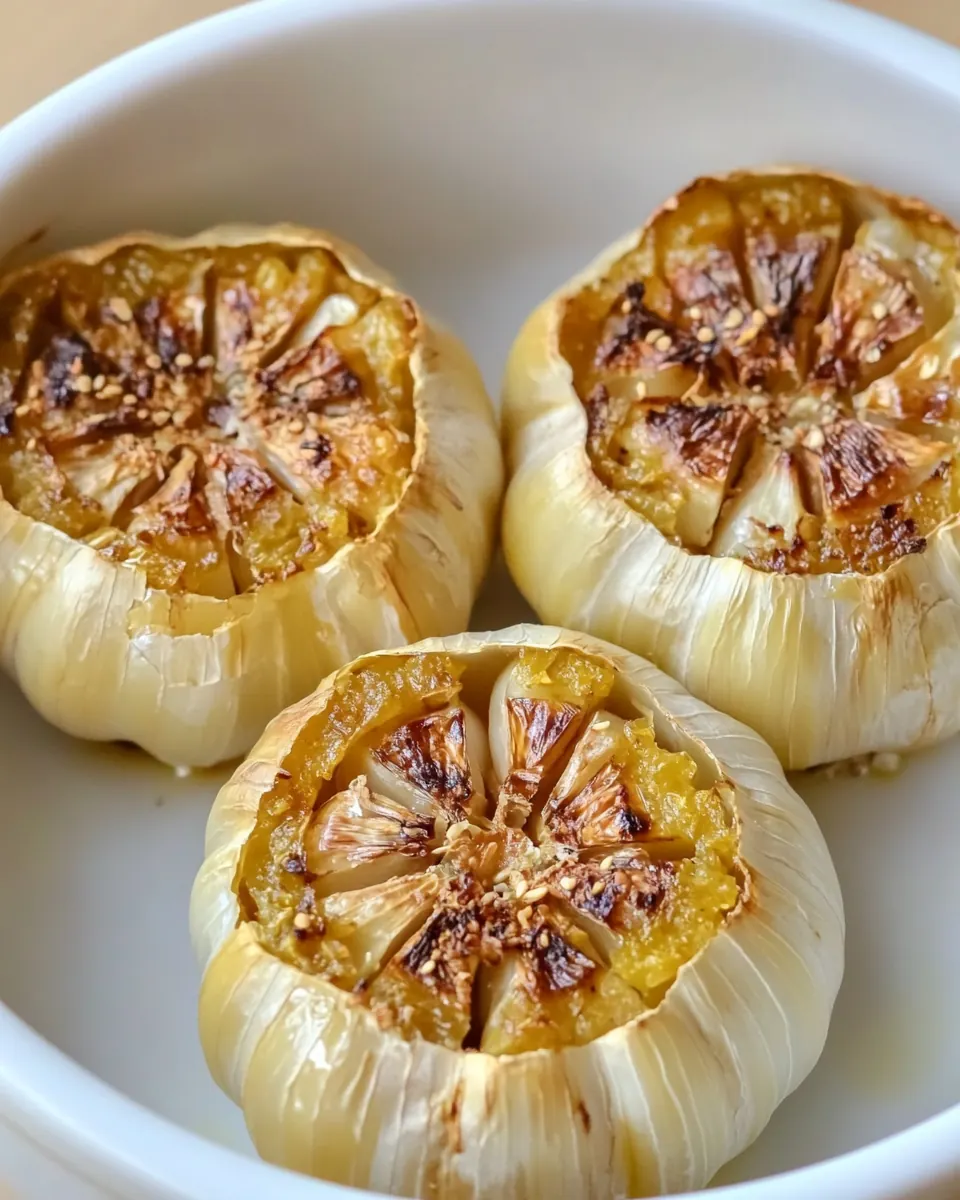
- Roast for 30 to 40 minutes, or until you can feel the garlic is completely soft: Around the 30 minute mark begin checking for softness; a gentle squeeze through the foil should reveal tender cloves that yield like butter. The aroma will grow deeper, sweet, and nutty as roasted sugars develop, and the cloves should release easily from their skins. If you test prematurely, the cloves may still be firm and underdeveloped, resulting in a sharper, less harmonious flavor. Allow the garlic to reach that soft, squeezable stage for the best texture and spreadability.
Helpful Notes about Roast Garlic In The Oven
I like to think of these notes as the small refinements that turn a good roast into a flawless one. Below are practical tips and considerations I have gathered over many batches, written so you can adapt them to your kitchen and taste.
- Room temperature heads Ensure your garlic heads are at room temperature before roasting for more even heat penetration and consistent caramelization across cloves.
- Oil coverage matters Brush enough olive oil so each exposed clove shines; this prevents drying and promotes that silky texture you are aiming for.
- Foil technique Wrap the packet snugly but leave a bit of space inside for steam to circulate, which helps the cloves cook uniformly without collapsing.
- Batch roasting If you roast multiple heads, arrange them evenly on the tray so air circulates freely around each packet for consistent results.
- Cooling pause Let the heads rest five to ten minutes after roasting so the juices redistribute, making the cloves easier to remove without falling apart.
What to Serve With Roast Garlic In The Oven
Roasted garlic is an adaptable flavor enhancer that pairs well with many dishes. Below I outline ideas for serving, seasonal contexts, and storage suggestions so you can plan meals around this humble yet transformative ingredient.
- Spread on warm bread Slather roasted garlic on crusty slices as a simple appetizer or snack for casual gatherings and cozy nights.
- Stir into mashed vegetables Fold roasted garlic into mashed potatoes or root vegetables to elevate weeknight sides into something special, perfect for family dinners.
- Blend into sauces Whisk roasted garlic into pan sauces or vinaigrettes to add a smooth, mellow base for proteins and roasted vegetables at dinner.
- Use as a condiment Spoon roasted garlic into jars with oil and refrigerate for easy dollops on sandwiches, bowls, or grain salads during Ramadan or everyday meals.
- Seasonal pairing In cooler months, think of roasted garlic as a comfort booster for soups and stews; in warmer months, mix into chilled dips and dressings for grilled vegetables.
- Storage tips Refrigerate roasted garlic in an airtight jar for up to one week, or freeze small portions in an ice cube tray for long term use in winter recipes.
FAQ
Conclusion
Roasted garlic stands out because it transforms ordinary garlic into a sweet, silky, and deeply savory ingredient that lifts many dishes. Give this approach a try, and you will quickly understand why I reach for roasted cloves so often; they add warmth and depth with minimal fuss. Whether you smear it on bread, stir it into a sauce, or fold it into mashed vegetables, roasted garlic brings a comforting richness that feels both simple and indulgent. Make a batch, keep some in the fridge, and let those mellow cloves become a small kitchen secret you rely on again and again.
Roast Garlic In The Oven
Equipment
- Oven
- Sharp Knife
- Tinfoil
- Baking Sheet
- Pastry Brush
Ingredients
- 3 heads of garlic Peel and separate cloves, then roast to develop a sweet, mellow flavor and creamy texture that enriches spreads and sauces; roasting also reduces raw sharpness and brings out caramelized notes that complement savory dishes.
- 1 tablespoon olive oil Drizzle over garlic before roasting to promote even browning and prevent drying; olive oil aids heat transfer, enhances mouthfeel, and adds a subtle fruity richness that balances the garlic’s caramelized sweetness.
Instructions
- Preheat the oven to 350°F.: When the oven warms, you will notice a faint metallic hum from the heating elements and a steady rise in temperature on your oven gauge. Preheating ensures the garlic roasts evenly, encouraging those slow caramelization reactions that create a sweet, nutty flavor. A common mistake is skipping this step, which can lead to uneven roasting where some cloves are tender while others remain firm. Give the oven time to reach 350°F so heat flows consistently around the package.
- Use a sharp knife to cut the tops off the garlic heads to expose all the cloves.: As you slice the top off each garlic head, you will see the individual cloves packed in their papery skins. The exposed tips will brown and soften more readily than intact heads because the heat hits the cut surfaces directly, allowing flavor to concentrate. Be careful with your knife, and slice straight across so the cloves remain mostly intact. A frequent misstep is cutting too deeply, which can break the bulb apart and let cloves scatter inside the foil package.
- Place the garlic heads on a piece of tinfoil and brush olive oil onto the garlic cloves until they are completely coated.: As you brush the olive oil , the cloves take on a glossy sheen that hints at the richness to come. The oil promotes even browning and protects the exposed surfaces from drying out, creating the soft, buttery texture you want. Smell the olive oil meet the raw garlic ; the aroma will be grassy and sharp at first, but that sharpness will mellow dramatically during roasting. A slip here is undercoating, which can result in tough edges rather than silkiness.
- Wrap the tinfoil tightly around the garlic heads to make a little package, and then place the garlic in the middle of the oven. Roast for 30 to 40 minutes, or until you can feel the garlic is completely soft.: Wrapping seals in steam and concentrates the heat, so the cloves bake gently rather than scorching. You should feel a slight warmth through the foil after a few minutes in the oven, and when you eventually open the packet, a cloud of sweet, roasted perfume will billow out. The package should be snug but not crushed, giving the cloves room to swell as they soften. Avoid leaving gaps in the foil or wrapping too loosely, which wastes steam and can yield uneven results.
- Place the garlic in the middle of the oven: Positioning the packet centrally ensures balanced heat exposure, so the top and bottom roast at the same pace. In the course of cooking, listen for the faint settling and occasional soft pop as moisture shifts inside the head. If you place the packet too close to the top element, the outsides can brown prematurely before the core softens, so middle rack placement is the safest bet. Make sure the packet sits on a small baking sheet in case any oil leaks; that makes cleanup easier and prevents burning on the oven floor.
- Roast for 30 to 40 minutes, or until you can feel the garlic is completely soft: Around the 30 minute mark begin checking for softness; a gentle squeeze through the foil should reveal tender cloves that yield like butter. The aroma will grow deeper, sweet, and nutty as roasted sugars develop, and the cloves should release easily from their skins. If you test prematurely, the cloves may still be firm and underdeveloped, resulting in a sharper, less harmonious flavor. Allow the garlic to reach that soft, squeezable stage for the best texture and spreadability.
Notes
- Room temperature heads Ensure your garlic heads are at room temperature before roasting for more even heat penetration and consistent caramelization across cloves.
- Oil coverage matters Brush enough olive oil so each exposed clove shines; this prevents drying and promotes that silky texture you are aiming for.
- Foil technique Wrap the packet snugly but leave a bit of space inside for steam to circulate, which helps the cloves cook uniformly without collapsing.
- Batch roasting If you roast multiple heads, arrange them evenly on the tray so air circulates freely around each packet for consistent results.
- Cooling pause Let the heads rest five to ten minutes after roasting so the juices redistribute, making the cloves easier to remove without falling apart.