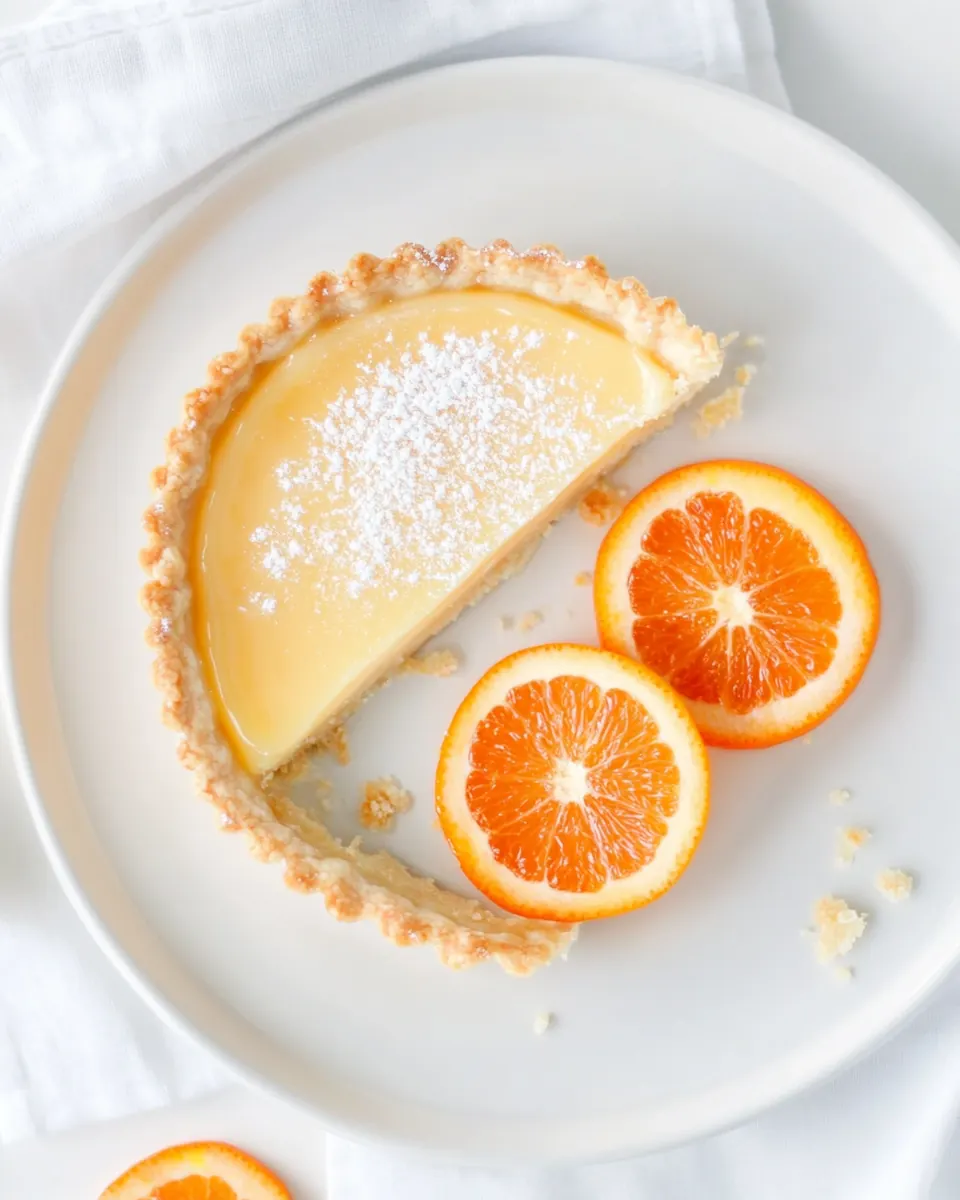
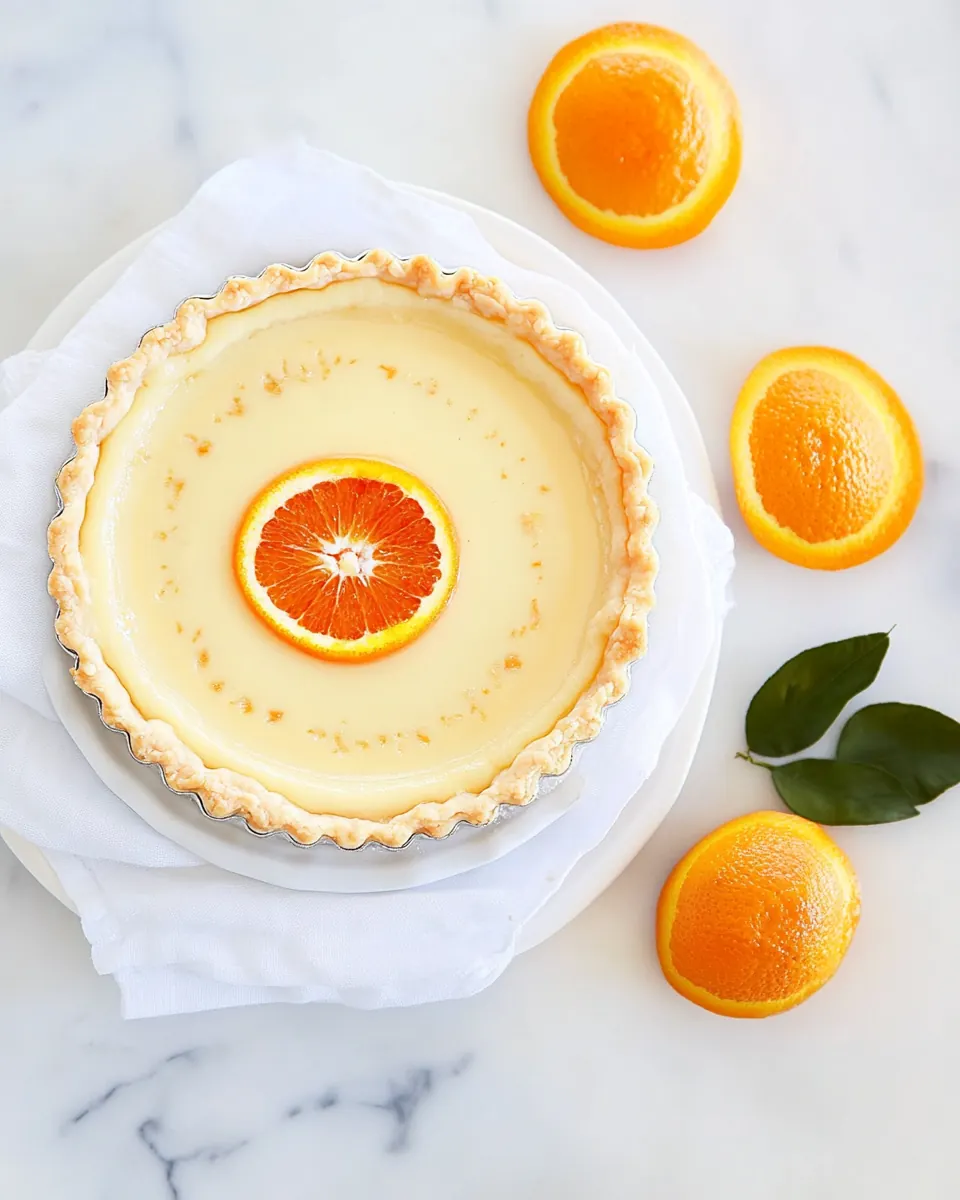
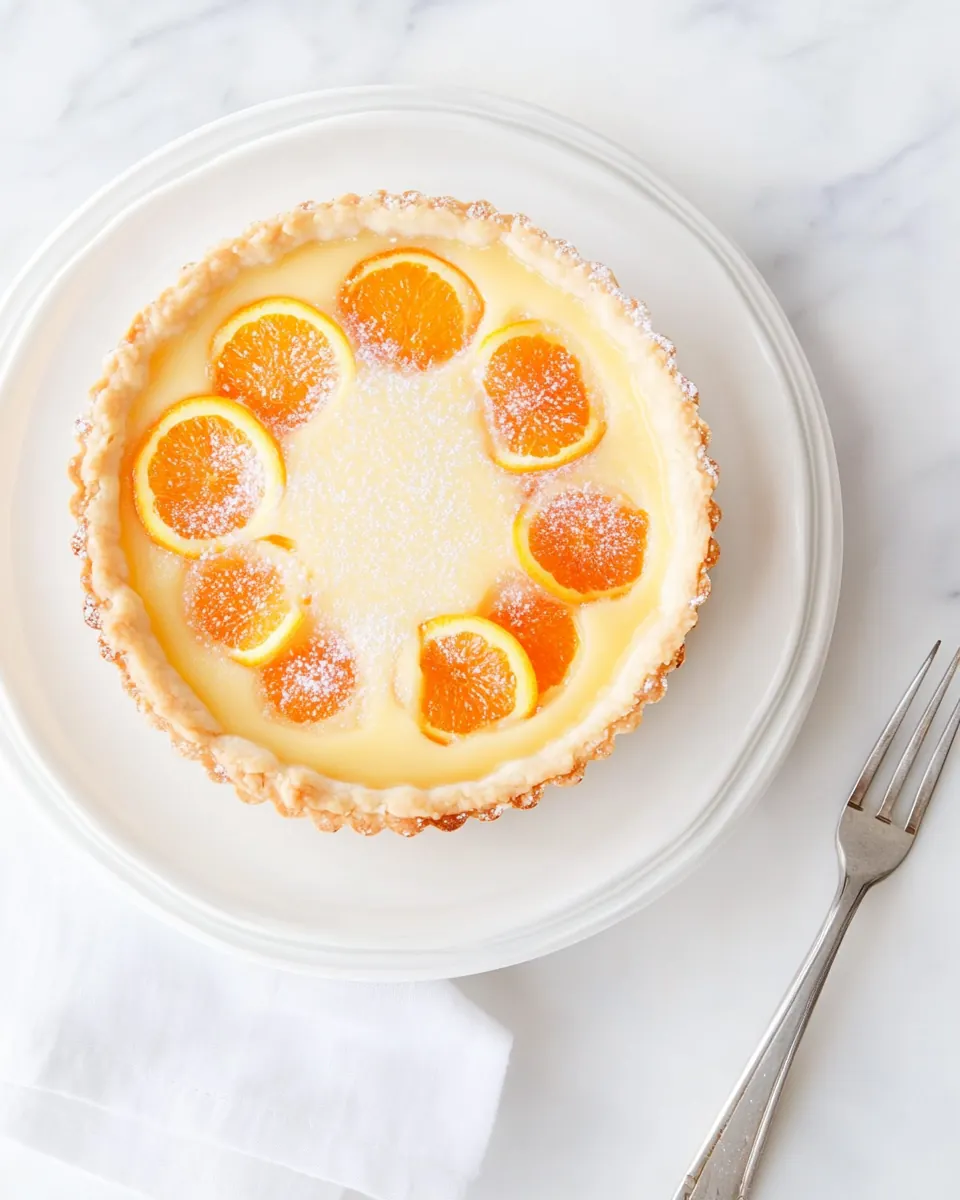
Orange Blossom Almond Cream Tart
Orange Blossom Almond Cream Tart is the small, fragrant tart I turn to when I want something elegant yet utterly unfussy for two. The first time I made it, I remember the way the kitchen filled with the bright, citrusy perfume of fresh orange and the delicate floral lift of orange blossom water, and how those notes danced with the warm, toasty nuttiness of almond. I was making it for a quiet anniversary dinner at home, and the tart felt like a tiny, gilded celebration that did not demand a lot of fuss.
That batch taught me a few things about balance and patience. The crust must be handled gently so the texture stays tender, and the filling needs slow, steady heat so the eggs thicken without scrambling. I love how the sweetness is tempered by a little tang from the freshly squeezed orange juice, and how a whisper of almond extract rounds everything into something that tastes luxurious but clean. When I slice it, the filling should hold its shape yet look glossy and inviting.
Making this tart feels like a short ritual I give myself, a moment to slow down and enjoy a small piece of beauty. It is also forgiving, so I often pull it together on a weeknight if I want a little lift after dinner. The recipe is scaled for two, which is perfect for sharing, or for savoring over a couple of evenings. I pair it with a cup of tea or a light coffee and call it dessert, and friends always ask for the recipe.
Recipe Snapshot
55 mins
30 mins
25 mins
Medium
350 kcal
American
Gluten-Free, Low FODMAP
Desserts
Mixing bowl, Pastry cutter, Rolling pin, 6 or 7 inch tart pan with removable bottom, Parchment paper, Pie weights or dried beans, Wire rack, Blender or food processor, Medium saucepan
What You’ll Enjoy About This Orange Blossom Almond Cream Tart
Compact Luxury
I adore how this tart feels indulgent without being fussy. With just a few ingredients, the Orange Blossom Almond Cream Tart presents like a patisserie treat. The texture contrast between the flaky crust and the velvety almond orange filling makes each bite feel deliberate and special, and I find that you get a lot of wow for relatively little effort.
Bright, Layered Flavor
What stands out to me is the layering of citrus and floral notes. The freshly squeezed orange juice gives an immediate brightness, while the orange zest and the subtle orange blossom water add depth and complexity. The almond flour and a touch of almond extract introduce a rounded, nutty backbone so the tart never feels one dimensional.
Perfectly Sized
Scaling this for two makes it a go to for intimate meals. I like that you can make the whole thing and still have leftovers for the next day. It is the right size for a romantic dinner or a small celebratory moment, and I appreciate that it does not require an army of ingredients or equipment.
Textural Harmony
The contrast between the tender, buttery crust and the smooth, glossy filling is exactly why I return to this recipe. When the crust is cold and flaky and the filling is set but still slightly jiggly, you know you have succeeded. That balance is the cornerstone of what makes this tart memorable.
Approachable Technique
Even if you do not bake often, the methods here are straightforward. I like that the recipe tolerates slight variations, like a quick food processor pulse for the dough or a careful whisking over medium low heat for the filling. The techniques teach you precision without demanding perfection, which is freeing and empowering in the kitchen.
Orange Blossom Almond Cream Tart Ingredients
These ingredients are chosen to create a delicate balance of texture and flavor. The crust relies on a small amount of all purpose flour and cold unsalted butter to yield a tender, flaky shell. The filling uses whole eggs for structure, granulated sugar for sweetness, and brightening elements like freshly squeezed orange juice and orange zest. A touch of orange blossom water and almond extract brings the floral and nutty character, while extra butter enriches the custard to a silky finish.
- 1/2 cup all-purpose flour: Provide structure and a tender crumb to the tart crust, balancing moisture and gluten development while creating a neutral base for other flavors.
- 2 tablespoons almond flour: Impart a delicate nutty flavor and tender texture to the crust, enhancing almond notes without overpowering the dough's consistency.
- 3 tablespoons powdered sugar: Add light sweetness and contribute to a finer, more delicate crumb in the crust while helping tenderize the dough for a melt-in-the-mouth finish.
- 1/4 teaspoon kosher salt: Enhance overall flavor by seasoning the dough and balancing sweetness; assist in controlling gluten formation for a flakier crust.
- 1/4 cup cold unsalted butter, cut into cubes: Incorporate rich fat and create flaky layers in the crust; cold cubes help maintain pockets of butter that produce a tender, buttery texture when baked.
- 1 2 tablespoons ice water, as needed: Provide necessary hydration to bring the dough together, used sparingly to prevent a tough crust while allowing for easy handling and rolling.
- 2 large eggs: Bind the filling and add richness, promoting emulsion and structure as it cooks; eggs help thicken the almond–orange custard filling.
- 1/3 cup granulated sugar: Sweeten the filling, balancing citrus and floral notes while affecting texture and caramelization for a slightly glossy, set custard.
- 1/4 cup freshly squeezed orange juice (from 1 orange): Contribute bright citrus acidity and fresh orange flavor to the filling, helping to balance sweetness and activate the floral components.
- 1 teaspoon finely grated orange zest: Deliver concentrated citrus oils and aroma to the filling, intensifying orange flavor and providing aromatic lift without additional liquid.
- pinch salt: Enhance and balance flavors by adding a small amount of seasoning to the filling, sharpening sweetness and supporting the citrus notes.
- 1/2 teaspoon orange blossom water: Introduce a floral, slightly sweet aromatic note that complements orange and almond, deepening the fragrance and complexity of the filling.
- 1/4 teaspoon almond extract: Add a concentrated nutty aroma to complement the almond flour and filling, reinforcing the overall almond profile with a hint of depth.
- 1/2 cup (1 stick) cold butter, cut into cubes: Create richness and a silky texture in the filling when incorporated cold and cubed, contributing to a smooth, creamy mouthfeel once baked.
- candied orange slices*, for garnish () (optional): Provide an optional decorative and flavorful garnish that adds visual appeal and a sweet, chewy-citrus bite if placed atop the finished tart.
Orange Blossom Almond Cream Tart Instructions
These instructions are written to guide you gently through each stage, from the initial dough to the glossy, set filling. I like to move methodically, letting the crust chill when it needs to and giving the custard the slow heat it prefers. Keep a watchful eye during the cooking and don t rush the chilling so the tart has time to fully develop texture and flavor.
- For crust, whisk together flour, powdered sugar, and salt in a bowl. Add butter cubes and cut into flour mixture with a pastry cutter until butter is broken up into pea-sized chunks. Alternatively, you can pulse briefly in the bowl of a food processor. Sprinkle over 1 tablespoon of ice water and mix with a fork until just incorporated. Add more water just as needed until dough comes together in a crumbly, shaggy mass. Turn out onto a piece of plastic wrap and gather into a ball. Wrap tightly and refrigerate for at least 30 minutes.: The moment you mix these dry elements you ll notice a faint sweet scent from the powdered sugar and the flour will look uniformly pale and fine, which signals a balanced base. I whisk just until everything is evenly distributed so no pockets of sugar or salt remain, because inconsistent distribution can create uneven flavor pockets. A common misstep is overmixing with force which can warm the ingredients and start gluten development, so handle the bowl with gentle, brisk strokes instead.
- On a lightly floured surface, roll out crust into a round approximately 8 inches in diameter. Gently ease crust into a 6 or 7-inch tart pan with removable bottom or tart ring positioned on a parchment-lined baking sheet. Trim edges with kitchen shears or by rolling over the edges with a rolling pin. Dock bottom of crust with a fork. Place crust in freezer for 30 minutes.: As you work the cold butter into the dry mix, watch for small, pea sized bits; these will create pockets of flakiness as they melt in the oven. The texture should look crumbly, with visible butter pieces, and you should feel the coolness under your fingertips. If you press too hard or let the butter soften, it will incorporate fully and you ll lose that flaky quality, so stop when you see the peas.
- Preheat oven to 350 degrees F. Line crust with crumpled parchment paper or a paper coffee filter. Fill with pie weights (you can also use dried rice or beans). Bake for 15 minutes or until set, then remove pie weights and parchment and return to oven for 10 to 15 minutes more, or until lightly golden brown in color. Remove from oven and let cool on a wire rack.: Using a food processor saves time and gives control, but pulse in very short bursts to avoid overheating the butter . It should still resemble coarse crumbs with some pea sized bits remaining. If you run the processor too long the dough will clump together and become tough, so pulse in one second bursts and check frequently.
- For filling, combine eggs, sugar, orange juice, and orange zest in a blender or food processor. Mix until smooth and sugar is dissolved.: The first splash of ice cold water helps the soggy bits bind without melting the butter, and you ll see the mixture begin to hold together in a shaggy mass. Use a fork to lift and fold rather than knead, keeping the texture loose. Adding water in a measured, gradual way prevents over hydrating the dough, which would make it sticky and hard to roll.
- Pour mixture into a medium saucepan. Wash out blender or food processor canister (you’ll use it again later and don’t want any raw eggs in there). Whisk egg and orange mixture over medium-low heat, until thickened and just beginning to bubble, whisking regularly to prevent scalding.: Add another teaspoon at a time only if the dough still looks dry, stopping as soon as it holds. The right moisture yields a dough that clumps when pinched but is not wet, ensuring a tender crust after baking. A frequent error is adding too much water, which can produce a dense, chewy crust instead of a delicate one.
- Pour thickened mixture back into clean blender or food processor. Add orange blossom water and almond extract and mix to combine. Add butter cubes and blend until thick, shiny, and completely smooth. Pour into baked and cooled crust. Refrigerate until set, at least 1 hour or overnight. Garnish with candied orange slices, if desired, before slicing and serving.: When you form the dough into a ball you should feel a cool, slightly tacky surface, never sticky. Wrapping it tightly seals in moisture and keeps it chilled, which is essential for maintaining butter pockets. If the dough seems warm, pop it back into the fridge briefly before rolling to preserve flakiness.
- Wrap tightly and refrigerate for at least 30 minutes: Chilling allows the butter to firm up and the flour to hydrate, which improves rollability and prevents shrinkage during baking. I treat this pause as a good time to prepare the filling ingredients so nothing goes to waste. Skipping this rest will often result in a dough that tears or shrinks dramatically when baked.
- On a lightly floured surface, roll out crust into a round approximately 8 inches in diameter: Rolling should be done with even pressure, turning the dough frequently so it remains circular and does not stick. The surface should feel cool and slightly powdered from the flour, and the edges should be slightly thinner than the center to avoid thick rims. If the dough resists or cracks, return it to the fridge for five to ten minutes to relax.
- Gently ease crust into a 6 or 7 inch tart pan with removable bottom or tart ring positioned on a parchment lined baking sheet: When you lift the dough into the pan do so slowly, coaxing it rather than stretching, so the edges fit snugly without tearing. The removable bottom makes it easier to unmold the tart later, and the parchment lined sheet protects against spills. Stretching the dough to force fit will cause shrinkage during baking.
- Trim edges with kitchen shears or by rolling over the edges with a rolling pin: Neat edges create a clean presentation and even baking. Trimming with shears gives a precise look while rolling over the edges with a pin compresses them for uniformity. Be careful not to compress the rim too much which can lead to uneven thickness and collapsed edges.
- Dock bottom of crust with a fork: Docking prevents large air pockets from forming during blind baking, producing an even, flat base. You should see small perforations across the bottom; they do not need to be dense, just enough to allow steam to escape. Forgetting to dock often leads to bubbling and an uneven shell.
- Place crust in freezer for 30 minutes: Freezing firms the butter and relaxes gluten, which helps the crust hold shape when it hits the hot oven. You will feel the crust go cold and harder, which is good. Skipping this chilling step can result in a crust that slumps or shrinks when baked.
- Preheat oven to 350 degrees F: Let the oven fully come to temperature so the crust starts to set immediately on contact, promoting flakiness and preventing soggy bottoms. I always use an oven thermometer to confirm true heat, because even small temperature differences change how quickly the butter melts. Putting the tart into a not fully preheated oven often yields an underbaked, greasy crust.
- Line crust with crumpled parchment paper or a paper coffee filter: This protective layer keeps pie weights from making direct contact and helps the crust bake evenly. The crumpled shape conforms to the shell, so it sits snugly without shifting. Using nothing or a flat sheet will allow the weights to slide and expose parts of the crust to over browning.
- Fill with pie weights (you can also use dried rice or beans): Weights hold the crust s shape and prevent bubbling. You should hear a quiet, comforting settling as they press into the parchment. If you use rice or beans, reserve them for baking only and not for food reuse, since they absorb moisture and can become unusable.
- Bake for 15 minutes or until set, then remove pie weights and parchment and return to oven for 10 to 15 minutes more, or until lightly golden brown in color: The first bake firms the structure, and the second browns the exposed crust to a gentle, nutty color. Watch for a warm golden hue rather than deep brown, which indicates proper baking without dryness. Leaving the crust too long will make it brittle and overly crisp.
- Remove from oven and let cool on a wire rack: Cooling on a rack prevents steam from condensing under the crust, which keeps it crisp. The shell should feel firm to the touch and cool sufficiently before filling so the custard does not melt it. Filling a hot crust is a common error that results in a soggy base.
- For filling, combine eggs, sugar, orange juice, and orange zest in a blender or food processor: Once blended, the mixture will look homogenous and slightly frothy, and you should smell a bright citrus perfume. The blender dissolves the sugar quickly and ensures even texture, which leads to a smooth custard. If the sugar is not fully dissolved you may notice a grainy texture after cooking.
- Mix until smooth and sugar is dissolved: The surface should be glossy and free of sugar crystals, which indicates readiness to cook. Smoothness here prevents grainy spots in the finished custard. If you detect grit, blend a little longer until it is gone.
- Pour mixture into a medium saucepan: As the liquid moves into the pan you ll notice its pale orange color and citrus aroma intensify. A medium saucepan keeps heat consistent and helps you control the gentle simmer needed next. Using a pan that is too large thins the mixture and can cause it to cook unevenly.
- Wash out blender or food processor canister (you ll use it again later and don t want any raw eggs in there): Cleaning this now is both safe and practical, preventing cross contamination when you return the cooked custard to blend with other ingredients. A quick rinse and dry is usually sufficient. Skipping this risks reintroducing raw egg to finished components.
- Whisk egg and orange mixture over medium low heat, until thickened and just beginning to bubble, whisking regularly to prevent scalding: As you whisk you ll see the liquid thicken and coat the back of a spoon, and a few tiny bubbles will appear at the edges, which signals the right moment to stop. The smell becomes richer, with cooked egg notes marrying the citrus. Overheating will scramble the eggs, producing a curdled texture instead of a smooth custard, so keep the heat gentle and whisk steadily.
- Pour thickened mixture back into clean blender or food processor: Transferring to the blender returns the mixture to a silky state and allows you to emulsify in cold butter without overcooking. The warm mixture will steam slightly when transferred, and blending will bring back a glossy sheen. If the mixture is too hot when you add cold ingredients, you may separate the emulsion, so allow a brief cooldown if needed.
- Add orange blossom water and almond extract and mix to combine: These aromatic ingredients are powerful, and they infuse the custard with floral and nutty notes. A short pulse blends them evenly, and you should smell the fragrance immediately. Be careful not to overdo them because they can overpower the delicate citrus base.
- Add butter cubes and blend until thick shiny and completely smooth: Incorporating cold butter in the blender creates an emulsion that yields a rich, glossy custard. The texture should become thick and velvety, with a sheen that reflects light. If the butter melts completely and the mixture looks oily, it likely got too warm during blending, which can affect set and mouthfeel.
- Pour into baked and cooled crust: As you pour, the filling should flow like thick cream and settle smoothly without tearing the crust. You ll notice the tart taking on an inviting, glossy surface. Pour carefully to avoid sloshing over the edges which creates a mess and uneven baking.
- Refrigerate until set, at least 1 hour or overnight: Chilling lets the custard firm and flavors meld, producing a sliceable tart with a clean cut. Overnight chilling deepens the flavor and texture, though an hour will yield a perfectly enjoyable tart. Do not try to rush this by freezing, which can alter texture and clarity.
- Garnish with candied orange slices if desired before slicing and serving: The candied slices add visual drama and a chewy, concentrated citrus bite. Arrange them just before serving so they remain glossy and fresh looking. Preparing them too far ahead can make them sticky or overly dry.
Ways to Adapt This Recipe

This short intro explains how simple swaps and small technique shifts can change the tart s profile without losing its essence. Below are practical, tested adaptations you can use to suit dietary needs, flavor preferences, or the tools you have on hand.
- Use a food processor for the crust if you prefer speed and consistent texture, but pulse in short bursts to keep the butter cold and pea sized.
- Make mini tarts using a muffin tin by dividing dough into six cups and adjusting bake time until crusts are lightly golden.
- Swap almond flour proportions slightly for texture changes, keeping the total dry weight similar so the dough behaves predictably.
- Prepare the filling a day ahead to let the flavors meld, keeping it chilled until you are ready to rewarm briefly to blend with butter.
- Garnish simply with a few candied orange slices or leave the top plain for a cleaner, minimalist presentation.
- Scale the recipe carefully by maintaining ingredient ratios, especially eggs to liquid, to preserve set and texture.
What to Serve Alongside Orange Blossom Almond Cream Tart
This tart is versatile enough for different occasions, and the right accompaniments heighten the experience. Below are suggestions for pairings, occasions, storage, and seasonal fits to make serving effortless and stylish.
- Light tea or coffee, served warm, creates a classic pairing where the tart s citrus and almond notes shine.
- Fresh berries on the side add a bright pop of acidity and color, complementing the orange flavors without overwhelming them.
- Whipped cream lightly sweetened and flavored with a hint of orange zest provides a soft contrast to the dense custard.
- Serve for intimate dinners like anniversaries or date nights where the small size feels right for two people.
- Holiday brunch is an excellent occasion for this tart, especially in spring when citrus is lively and seasonal.
- To store, keep refrigerated in an airtight container for up to three days, letting it come to just above fridge temperature before serving for best flavor.
- Seasonal pairing—in spring, pair with light floral teas and fresh citrus fruits to echo the tart s aroma and keep the menu feeling fresh.
- Presentation tip—slice with a hot, dry knife for clean edges, wiping between cuts so each slice looks pristine.
- Occasion suggestion—this tart works beautifully as a simple dessert for a small dinner party, or a refined treat for two after a quiet meal.
- Make ahead strategy—bake the shell a day ahead and store, then prepare the filling the day you plan to serve for maximum freshness.
FAQ
Conclusion
This tart is special because it balances bright citrus, floral perfume, and nutty richness in a compact, elegant dessert. I encourage you to try the recipe because it offers bakery level flavor with home kitchen simplicity, and it s perfectly sized for two. Making it can be a small ritual that rewards patience, and I find few things are as satisfying as slicing into a glossy, set tart and sharing it with someone special.

Orange Blossom Almond Cream Tart
Equipment
- Mixing Bowl
- Pastry Cutter
- Rolling Pin
- 6 or 7 inch tart pan with removable bottom
- Parchment Paper
- Pie weights or dried beans
- Wire Rack
- Blender or food processor
- Medium Saucepan
Ingredients
- 1/2 cup all-purpose flour Provide structure and a tender crumb to the tart crust, balancing moisture and gluten development while creating a neutral base for other flavors.
- 2 tablespoons almond flour Impart a delicate nutty flavor and tender texture to the crust, enhancing almond notes without overpowering the dough's consistency.
- 3 tablespoons powdered sugar Add light sweetness and contribute to a finer, more delicate crumb in the crust while helping tenderize the dough for a melt-in-the-mouth finish.
- 1/4 teaspoon kosher salt Enhance overall flavor by seasoning the dough and balancing sweetness; assist in controlling gluten formation for a flakier crust.
- 1/4 cup cold unsalted butter, cut into cubes Incorporate rich fat and create flaky layers in the crust; cold cubes help maintain pockets of butter that produce a tender, buttery texture when baked.
- 1 -2 tablespoons ice water, as needed Provide necessary hydration to bring the dough together, used sparingly to prevent a tough crust while allowing for easy handling and rolling.
- 2 large eggs Bind the filling and add richness, promoting emulsion and structure as it cooks; eggs help thicken the almond-orange custard filling.
- 1/3 cup granulated sugar Sweeten the filling, balancing citrus and floral notes while affecting texture and caramelization for a slightly glossy, set custard.
- 1/4 cup freshly squeezed orange juice (from 1 orange) Contribute bright citrus acidity and fresh orange flavor to the filling, helping to balance sweetness and activate the floral components.
- 1 teaspoon finely grated orange zest Deliver concentrated citrus oils and aroma to the filling, intensifying orange flavor and providing aromatic lift without additional liquid.
- pinch salt Enhance and balance flavors by adding a small amount of seasoning to the filling, sharpening sweetness and supporting the citrus notes.
- 1/2 teaspoon orange blossom water Introduce a floral, slightly sweet aromatic note that complements orange and almond, deepening the fragrance and complexity of the filling.
- 1/4 teaspoon almond extract Add a concentrated nutty aroma to complement the almond flour and filling, reinforcing the overall almond profile with a hint of depth.
- 1/2 cup (1 stick) cold butter, cut into cubes Create richness and a silky texture in the filling when incorporated cold and cubed, contributing to a smooth, creamy mouthfeel once baked.
- candied orange slices*, for garnish (optional) Provide an optional decorative and flavorful garnish that adds visual appeal and a sweet, chewy-citrus bite if placed atop the finished tart.
Instructions
- For crust, whisk together flour, powdered sugar, and salt in a bowl. Add butter cubes and cut into flour mixture with a pastry cutter until butter is broken up into pea-sized chunks. Alternatively, you can pulse briefly in the bowl of a food processor. Sprinkle over 1 tablespoon of ice water and mix with a fork until just incorporated. Add more water just as needed until dough comes together in a crumbly, shaggy mass. Turn out onto a piece of plastic wrap and gather into a ball. Wrap tightly and refrigerate for at least 30 minutes.: The moment you mix these dry elements you ll notice a faint sweet scent from the powdered sugar and the flour will look uniformly pale and fine, which signals a balanced base. I whisk just until everything is evenly distributed so no pockets of sugar or salt remain, because inconsistent distribution can create uneven flavor pockets. A common misstep is overmixing with force which can warm the ingredients and start gluten development, so handle the bowl with gentle, brisk strokes instead.
- On a lightly floured surface, roll out crust into a round approximately 8 inches in diameter. Gently ease crust into a 6 or 7-inch tart pan with removable bottom or tart ring positioned on a parchment-lined baking sheet. Trim edges with kitchen shears or by rolling over the edges with a rolling pin. Dock bottom of crust with a fork. Place crust in freezer for 30 minutes.: As you work the cold butter into the dry mix, watch for small, pea sized bits; these will create pockets of flakiness as they melt in the oven. The texture should look crumbly, with visible butter pieces, and you should feel the coolness under your fingertips. If you press too hard or let the butter soften, it will incorporate fully and you ll lose that flaky quality, so stop when you see the peas.
- Preheat oven to 350 degrees F. Line crust with crumpled parchment paper or a paper coffee filter. Fill with pie weights (you can also use dried rice or beans). Bake for 15 minutes or until set, then remove pie weights and parchment and return to oven for 10 to 15 minutes more, or until lightly golden brown in color. Remove from oven and let cool on a wire rack.: Using a food processor saves time and gives control, but pulse in very short bursts to avoid overheating the butter . It should still resemble coarse crumbs with some pea sized bits remaining. If you run the processor too long the dough will clump together and become tough, so pulse in one second bursts and check frequently.
- For filling, combine eggs, sugar, orange juice, and orange zest in a blender or food processor. Mix until smooth and sugar is dissolved.: The first splash of ice cold water helps the soggy bits bind without melting the butter, and you ll see the mixture begin to hold together in a shaggy mass. Use a fork to lift and fold rather than knead, keeping the texture loose. Adding water in a measured, gradual way prevents over hydrating the dough, which would make it sticky and hard to roll.
- Pour mixture into a medium saucepan. Wash out blender or food processor canister (you’ll use it again later and don’t want any raw eggs in there). Whisk egg and orange mixture over medium-low heat, until thickened and just beginning to bubble, whisking regularly to prevent scalding.: Add another teaspoon at a time only if the dough still looks dry, stopping as soon as it holds. The right moisture yields a dough that clumps when pinched but is not wet, ensuring a tender crust after baking. A frequent error is adding too much water, which can produce a dense, chewy crust instead of a delicate one.
- Pour thickened mixture back into clean blender or food processor. Add orange blossom water and almond extract and mix to combine. Add butter cubes and blend until thick, shiny, and completely smooth. Pour into baked and cooled crust. Refrigerate until set, at least 1 hour or overnight. Garnish with candied orange slices, if desired, before slicing and serving.: When you form the dough into a ball you should feel a cool, slightly tacky surface, never sticky. Wrapping it tightly seals in moisture and keeps it chilled, which is essential for maintaining butter pockets. If the dough seems warm, pop it back into the fridge briefly before rolling to preserve flakiness.
- Wrap tightly and refrigerate for at least 30 minutes: Chilling allows the butter to firm up and the flour to hydrate, which improves rollability and prevents shrinkage during baking. I treat this pause as a good time to prepare the filling ingredients so nothing goes to waste. Skipping this rest will often result in a dough that tears or shrinks dramatically when baked.
- On a lightly floured surface, roll out crust into a round approximately 8 inches in diameter: Rolling should be done with even pressure, turning the dough frequently so it remains circular and does not stick. The surface should feel cool and slightly powdered from the flour, and the edges should be slightly thinner than the center to avoid thick rims. If the dough resists or cracks, return it to the fridge for five to ten minutes to relax.
- Gently ease crust into a 6 or 7 inch tart pan with removable bottom or tart ring positioned on a parchment lined baking sheet: When you lift the dough into the pan do so slowly, coaxing it rather than stretching, so the edges fit snugly without tearing. The removable bottom makes it easier to unmold the tart later, and the parchment lined sheet protects against spills. Stretching the dough to force fit will cause shrinkage during baking.
- Trim edges with kitchen shears or by rolling over the edges with a rolling pin: Neat edges create a clean presentation and even baking. Trimming with shears gives a precise look while rolling over the edges with a pin compresses them for uniformity. Be careful not to compress the rim too much which can lead to uneven thickness and collapsed edges.
- Dock bottom of crust with a fork: Docking prevents large air pockets from forming during blind baking, producing an even, flat base. You should see small perforations across the bottom; they do not need to be dense, just enough to allow steam to escape. Forgetting to dock often leads to bubbling and an uneven shell.
- Place crust in freezer for 30 minutes: Freezing firms the butter and relaxes gluten, which helps the crust hold shape when it hits the hot oven. You will feel the crust go cold and harder, which is good. Skipping this chilling step can result in a crust that slumps or shrinks when baked.
- Preheat oven to 350 degrees F: Let the oven fully come to temperature so the crust starts to set immediately on contact, promoting flakiness and preventing soggy bottoms. I always use an oven thermometer to confirm true heat, because even small temperature differences change how quickly the butter melts. Putting the tart into a not fully preheated oven often yields an underbaked, greasy crust.
- Line crust with crumpled parchment paper or a paper coffee filter: This protective layer keeps pie weights from making direct contact and helps the crust bake evenly. The crumpled shape conforms to the shell, so it sits snugly without shifting. Using nothing or a flat sheet will allow the weights to slide and expose parts of the crust to over browning.
- Fill with pie weights (you can also use dried rice or beans): Weights hold the crust s shape and prevent bubbling. You should hear a quiet, comforting settling as they press into the parchment. If you use rice or beans, reserve them for baking only and not for food reuse, since they absorb moisture and can become unusable.
- Bake for 15 minutes or until set, then remove pie weights and parchment and return to oven for 10 to 15 minutes more, or until lightly golden brown in color: The first bake firms the structure, and the second browns the exposed crust to a gentle, nutty color. Watch for a warm golden hue rather than deep brown, which indicates proper baking without dryness. Leaving the crust too long will make it brittle and overly crisp.
- Remove from oven and let cool on a wire rack: Cooling on a rack prevents steam from condensing under the crust, which keeps it crisp. The shell should feel firm to the touch and cool sufficiently before filling so the custard does not melt it. Filling a hot crust is a common error that results in a soggy base.
- For filling, combine eggs, sugar, orange juice, and orange zest in a blender or food processor: Once blended, the mixture will look homogenous and slightly frothy, and you should smell a bright citrus perfume. The blender dissolves the sugar quickly and ensures even texture, which leads to a smooth custard. If the sugar is not fully dissolved you may notice a grainy texture after cooking.
- Mix until smooth and sugar is dissolved: The surface should be glossy and free of sugar crystals, which indicates readiness to cook. Smoothness here prevents grainy spots in the finished custard. If you detect grit, blend a little longer until it is gone.
- Pour mixture into a medium saucepan: As the liquid moves into the pan you ll notice its pale orange color and citrus aroma intensify. A medium saucepan keeps heat consistent and helps you control the gentle simmer needed next. Using a pan that is too large thins the mixture and can cause it to cook unevenly.
- Wash out blender or food processor canister (you ll use it again later and don t want any raw eggs in there): Cleaning this now is both safe and practical, preventing cross contamination when you return the cooked custard to blend with other ingredients. A quick rinse and dry is usually sufficient. Skipping this risks reintroducing raw egg to finished components.
- Whisk egg and orange mixture over medium low heat, until thickened and just beginning to bubble, whisking regularly to prevent scalding: As you whisk you ll see the liquid thicken and coat the back of a spoon, and a few tiny bubbles will appear at the edges, which signals the right moment to stop. The smell becomes richer, with cooked egg notes marrying the citrus. Overheating will scramble the eggs, producing a curdled texture instead of a smooth custard, so keep the heat gentle and whisk steadily.
- Pour thickened mixture back into clean blender or food processor: Transferring to the blender returns the mixture to a silky state and allows you to emulsify in cold butter without overcooking. The warm mixture will steam slightly when transferred, and blending will bring back a glossy sheen. If the mixture is too hot when you add cold ingredients, you may separate the emulsion, so allow a brief cooldown if needed.
- Add orange blossom water and almond extract and mix to combine: These aromatic ingredients are powerful, and they infuse the custard with floral and nutty notes. A short pulse blends them evenly, and you should smell the fragrance immediately. Be careful not to overdo them because they can overpower the delicate citrus base.
- Add butter cubes and blend until thick shiny and completely smooth: Incorporating cold butter in the blender creates an emulsion that yields a rich, glossy custard. The texture should become thick and velvety, with a sheen that reflects light. If the butter melts completely and the mixture looks oily, it likely got too warm during blending, which can affect set and mouthfeel.
- Pour into baked and cooled crust: As you pour, the filling should flow like thick cream and settle smoothly without tearing the crust. You ll notice the tart taking on an inviting, glossy surface. Pour carefully to avoid sloshing over the edges which creates a mess and uneven baking.
- Refrigerate until set, at least 1 hour or overnight: Chilling lets the custard firm and flavors meld, producing a sliceable tart with a clean cut. Overnight chilling deepens the flavor and texture, though an hour will yield a perfectly enjoyable tart. Do not try to rush this by freezing, which can alter texture and clarity.
- Garnish with candied orange slices if desired before slicing and serving: The candied slices add visual drama and a chewy, concentrated citrus bite. Arrange them just before serving so they remain glossy and fresh looking. Preparing them too far ahead can make them sticky or overly dry.
Notes
- Use a food processor for the crust if you prefer speed and consistent texture, but pulse in short bursts to keep the butter cold and pea sized.
- Make mini tarts using a muffin tin by dividing dough into six cups and adjusting bake time until crusts are lightly golden.
- Swap almond flour proportions slightly for texture changes, keeping the total dry weight similar so the dough behaves predictably.
- Prepare the filling a day ahead to let the flavors meld, keeping it chilled until you are ready to rewarm briefly to blend with butter.
- Garnish simply with a few candied orange slices or leave the top plain for a cleaner, minimalist presentation.
- Scale the recipe carefully by maintaining ingredient ratios, especially eggs to liquid, to preserve set and texture.