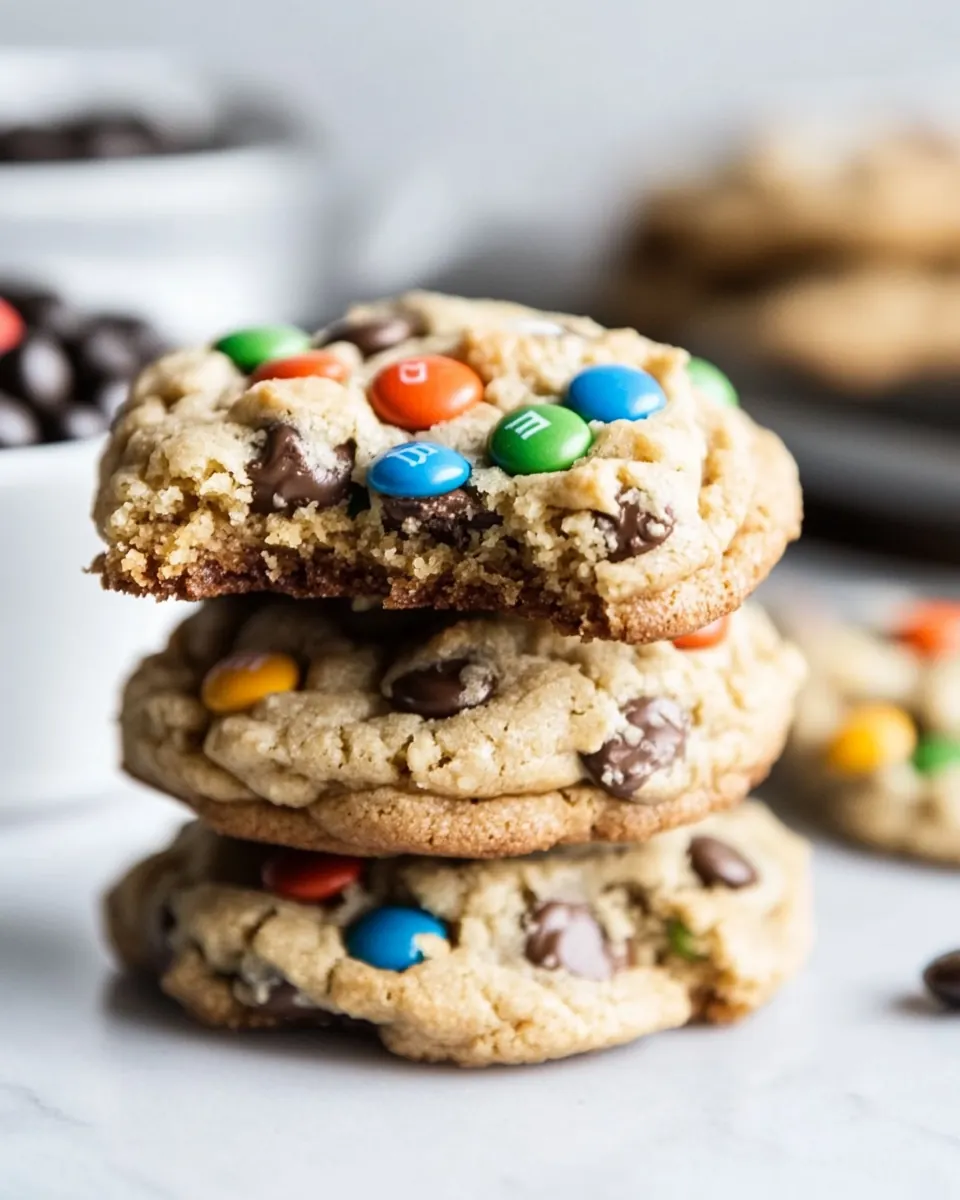
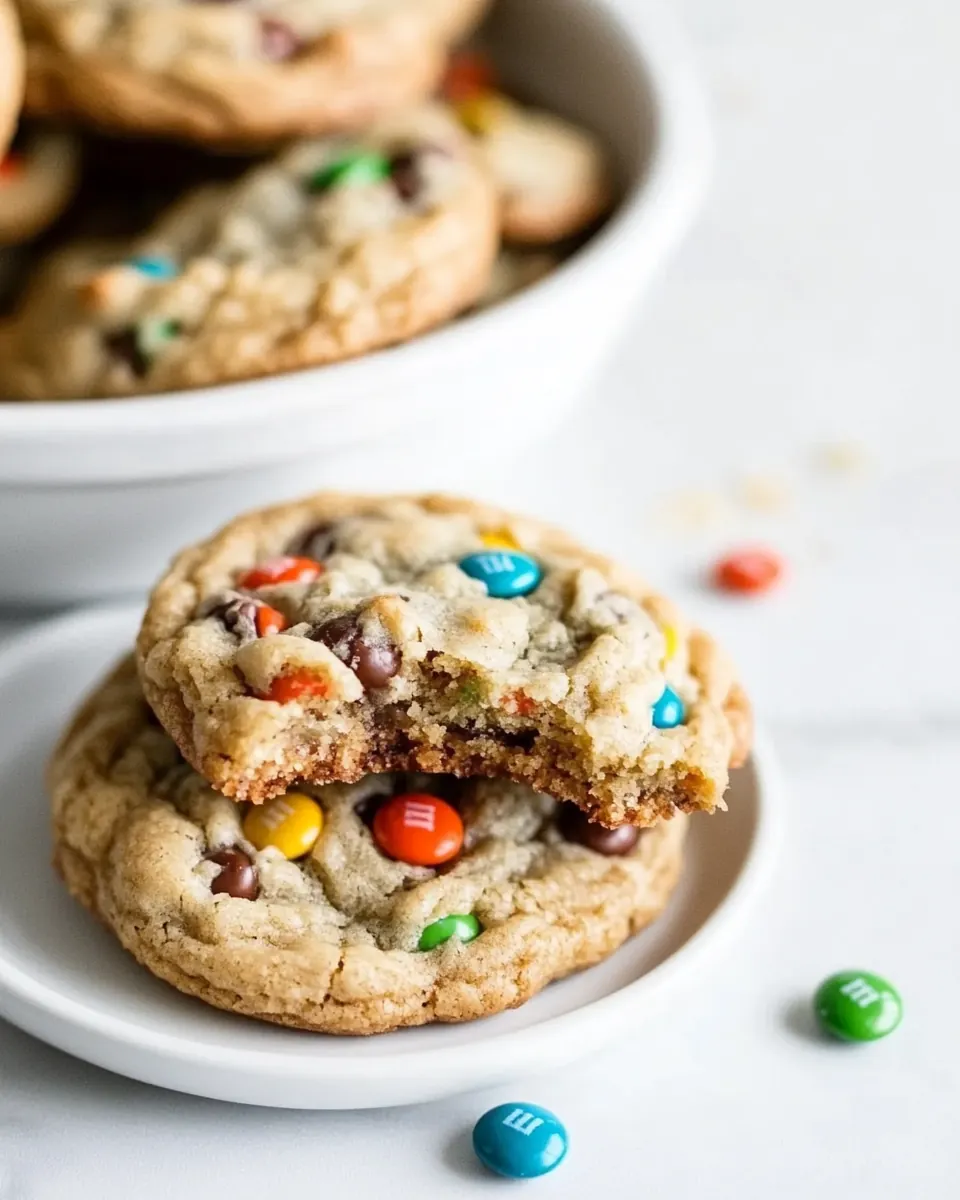
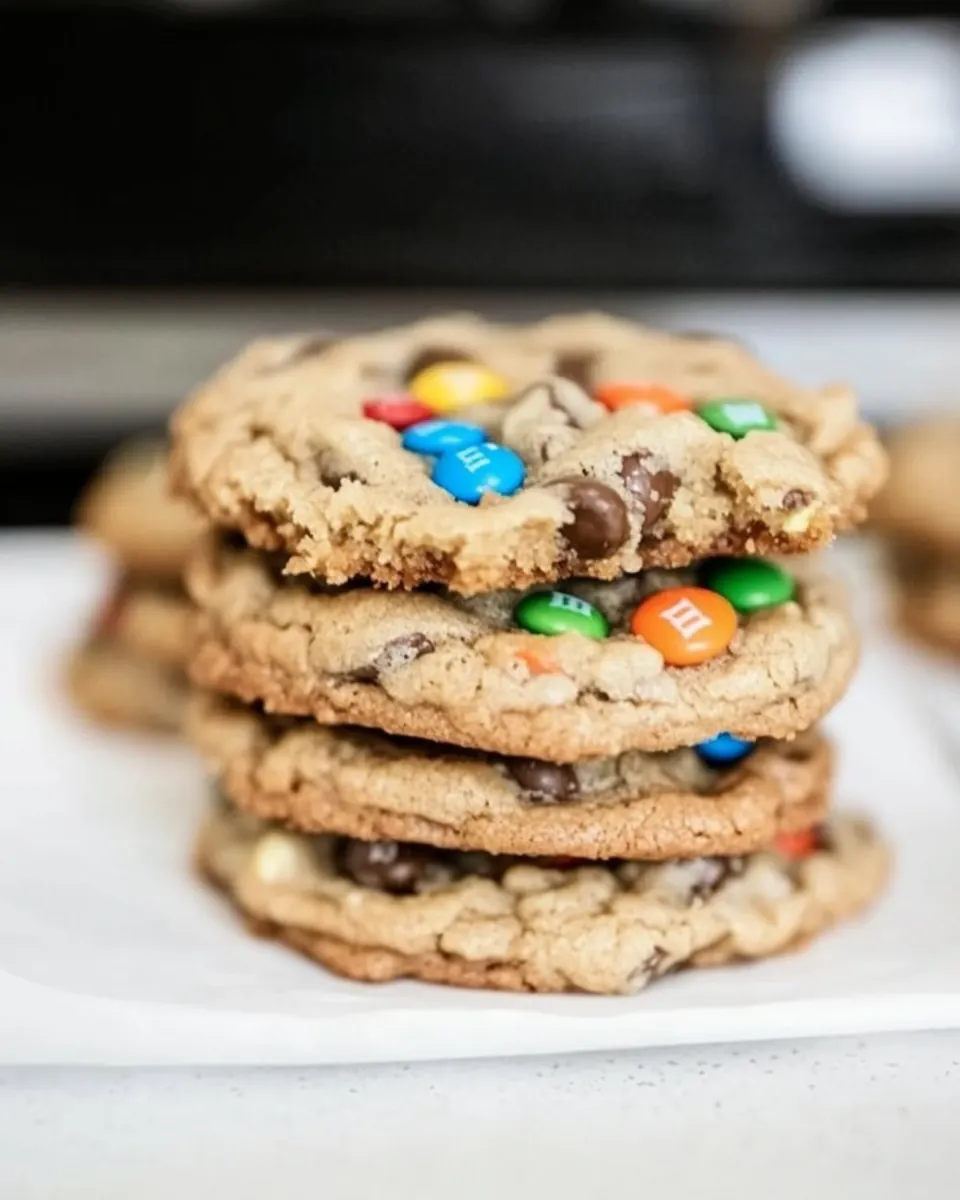
M M Cookies
M M Cookies started as a small experiment on a rainy afternoon when I wanted something nostalgic, colorful, and deeply comforting. I remember pulling out a worn recipe card from my drawer, the edges smudged from years of chocolate fingerprints, and thinking I could put my own spin on a classic cookie everyone seems to love. That first batch filled my kitchen with a warm, buttery scent that made me pause and smile, and the sound of cookies settling and tapping the tray became a tiny, satisfying rhythm that I still chase.
Over the years, I refined the dough until it felt like second nature to me, swapping a few things and learning how each change affected texture and spread. What I love most about these cookies is how forgiving they are: the dough holds up to mixing, the candy pockets stay cheerful after baking, and each bite balances crisp edges with a soft, slightly chewy center. Friends started asking for the recipe, and I began bringing trays to gatherings because they vanish faster than I expect.
Recipe Snapshot
33 mins
15 mins
18 mins
Medium
250 kcal
American
Gluten-Free, Low FODMAP
Desserts
Stand mixer, Paddle attachment, Mixing bowls, Rubber spatula, Cookie scoop, Baking sheet, Cooling rack, Oven
The Magic of This M M Cookies
Classic comfort with a playful twist
I adore how M M Cookies manage to be both familiar and fun. The combination of butter and sugars creates a base that tastes like childhood, while the colorful candies add a joyful pop. I find that this contrast keeps people coming back for seconds, and I often catch myself sneaking one from the cooling rack before guests arrive.
Texture you can count on
When I want cookies that deliver consistent edges and soft middles, these work every time. The trick is in the mixing, and I personally prefer beating the butter and sugars until they are airy, which gives the final cookie a tender crumb. That technique matters because it controls spread and chew, and I love that it results in a cookie that is crisp around the rim, yet yielding at the center.
Great for making ahead and gifting
One reason I recommend this recipe for holidays and parties is how well the dough and baked cookies freeze. I often prepare dough in advance, so I can bake fresh batches on short notice. It keeps flavor and texture, and this flexibility makes the recipe perfect for planning, last minute hosting, or giving as a cheerful edible gift.
Customizable and crowd pleasing
I appreciate recipes that let me tailor textures and add-ins, and M M Cookies do exactly that. You can adjust the mix-ins to suit preferences, and the recipe scales well across trays without losing its character. I frequently swap the kinds of chips or candies depending on who I am baking for, and the result is always warmly received.
Simple techniques, big payoff
Finally, this recipe thrives on straightforward techniques that any home baker can master. I like to explain the ‘why’ behind each step when I teach friends, because understanding those small moves makes the results repeatable. The method gives a reliably delicious cookie with very little drama, which is precisely why I keep coming back to it.
What to Gather for M M Cookies
These ingredients come together with a single goal, to create a cookie that is buttery, tender, and studded with candy and chocolate. The core players are the butter and sugars for structure and flavor, the eggs and vanilla for moisture and aroma, and the flour and leaveners for texture. The mix ins add contrast and pockets of sweetness so each bite is interesting.
- 2 sticks softened unsalted butter: Soften and cream to provide a rich, tender base and incorporate air for lightness; contributes fat that yields moist, chewy cookies and helps carry flavors throughout the dough.
- 3/4 cups sugar: Sweeten and balance texture by dissolving into the butter to create structure and moderate spread; adds crispness to edges when caramelized during baking.
- 3/4 cup packed light brown sugar: Add deep, caramel-like sweetness and moisture while enhancing chewiness; packs into the batter to help maintain a soft interior and complex flavor.
- 2 large eggs: Bind and leaven while adding moisture and richness; whisk into the batter to emulsify fats and dry ingredients, contributing to a stable yet tender crumb.
- 1 tablespoons vanilla: Flavour and aroma enhancer that rounds out the overall taste profile; stir in to lift sweetness and complement the chocolate and nut elements in the cookies.
- 2 1/2 cups All Purpose Flour: Structure and bulk provider that forms the dough matrix; combine with liquids and leaveners to develop just enough gluten for chew without toughness.
- 1 1/2 teaspoons baking powder: Lighten and tenderize by producing fine gas bubbles that lift the cookies; measure carefully to ensure proper rise and avoid off flavors.
- 1 teaspoon baking soda: React with acidic components to create additional lift and a finer crumb; use sparingly to control spread and texture in the finished cookies.
- 1 teaspoons ea salt: Enhance and balance flavors while controlling yeast-like reactions; distribute evenly to heighten sweetness and suppress bitterness from chocolate.
- 1 cups semi-sweet chocolate chips or chunks: Provide concentrated chocolate flavor and pockets of melted richness; fold into dough to create gooey bites and textural contrast throughout the cookies.
- 1 cup white chocolate chips or chunks: Contribute creamy sweetness and occasional melting pockets that brighten the cookie; mix with other chips for varied texture and visual contrast.
- 1 cup candy covered chocolates: Add vibrant color, texture, and crunchy candy bursts that create playful bites; scatter into dough to introduce sweetness and chew distinct from chips.
- 1 cup peanut butter chips: Introduce nutty, savory-sweet flavor and creamy pockets that complement chocolate; fold in to add soft, peanut-rich morsels and extra richness.
- 1 cup chopped walnuts: Offer crunchy texture and earthy, toasty flavor that balances sweetness; chop and incorporate for bite variation and a pleasant nutty finish.
Directions for M M Cookies
I like to walk through these steps slowly the first time, paying attention to texture and sound. Baking cookies is as much about intuition as it is about precision, and I often rely on sensory cues to know when I am on track. Below, each instruction from the original directions is preserved as the core step, followed by detailed, sensory driven guidance, troubleshooting, and explanation.
- Preheat the oven to 350°.: As you heat the oven, notice the subtle change in the kitchen air as warmth builds, and listen for that tiny, steady hum that tells you the elements are engaged. A properly preheated oven ensures even spread and predictable browning, so wait until it reaches temperature before baking. If the oven is underheated the cookies will spread differently and remain pale, and if it is too hot they will brown too fast and stay doughy inside. Avoid opening the oven door repeatedly, as this will drop the temperature and affect how the cookies set.
- Add the butter and sugars to a stand mixer with the paddle attachment and mix on medium to high speed for 5-7 minutes or until light and fluffy.: You will hear the mixer gain a lighter, airy rhythm as the butter and sugar transform from a dull mass into a pale, ribbon like mixture, and visually you should see volume increase and the mixture become smoother. This aeration is crucial because it traps tiny air pockets that help create a tender crumb and controlled spread. A common mistake is not creaming long enough which leads to dense cookies, or creaming too long which can over soften the butter and cause excessive spread during baking.
- Add 1 egg at a time until combined, and then add in the vanilla.: After introducing the eggs , the batter will turn glossy and slightly loose, with a richer aroma from the vanilla . Adding eggs one at a time helps maintain an emulsion and prevents the mixture from separating. If the mixture looks curdled, don’t panic; continue mixing gently and the texture will come back together as the flour is added. Avoid adding cold eggs directly from the fridge as they can tighten the butter and cause lumps.
- In a separate bowl mix together the flour, baking powder, baking soda, and salt. Then add it to the mixer on low speed in 3 batches until mixed in. Stop the mixer in between, adding the flour to scrape the sides.: Combining the dry flour and leaveners first ensures even distribution of lift agents, and adding them in three portions prevents overworking the dough. The sound will change to a deeper, quieter hum as the dry ingredients incorporate, and the dough will thicken noticeably. Scraping the bowl is important to avoid pockets of unmixed flour, and overmixing once the flour is added can develop too much gluten, making the cookies tough. If you see streaks of flour, stop and fold lightly instead of continuing high speed mixing.
- Remove the bowl and fold the chocolate chips, candy, peanut butter chips, and walnuts with a rubber spatula until completely mixed in.: When you fold in the semi sweet chocolate chips , white chocolate chips , candy covered chocolates , peanut butter chips , and chopped walnuts , you will feel a change from silky dough to one dotted with texture. Folding preserves the air you incorporated earlier and prevents the mix ins from breaking apart, which keeps the candies colorful and the chips intact. A common issue is using a mixer at this stage, which will pulverize the mix ins and change the visual and textural result, so always fold by hand.
- Using a 1/4 cup scooper (#16 scoop), scoop out the dough onto cookie sheet trays 4 to 5 inches apart from one another to allow them to spread out. It will take 3 sheet trays to get to 18 cookies.: As you portion the dough, you can feel the weight of each scoop and see the dough mound neatly. Leaving space between scoops is essential because the cookies will spread and create layered edges. If they are placed too closely they will merge into one large cookie, and if you underspace them you will lose the crisp rims that contrast with the soft center. If your dough seems overly warm and sticky, chill the scoops briefly to retain shape during the initial bake.
- Bake in the oven for 16-18 minutes or until there is a light brown edge around the outside.: During baking, watch for the telltale signs: the edges will deepen to a golden brown and the center will look set but still slightly soft, and the kitchen will fill with a toasty, chocolate forward aroma. This visual cue ensures a tender center with crisp edges, and pulling them at the right moment prevents overbaked dryness. A frequent error is leaving them in too long; they will continue to set as they cool, so err on the side of slightly underbaked if you prefer a chewy interior.
- Cool to room temperature on a rack and serve.: Moving the cookies to a rack lets air circulate so the bottoms do not become soggy, and you will feel the contrast between warm centers and crisped edges as they set. Cooling also helps flavors meld and the mix ins to firm slightly, which improves texture when you bite in. If you stack them while hot they can steam and lose their crispness, so allow adequate cooling time. A tip to avoid is storing them while still warm in a sealed container, which traps moisture and softens the cookies prematurely.
Substitutions and Tips

I often share quick, practical tips that help home bakers adapt this recipe confidently. Below are focused suggestions that highlight simple swaps and baking techniques, each starting with a bolded phrase to draw attention to the key idea.
- Make Ahead Freedom Prepare the dough up to two days in advance and keep it chilled so you can bake fresh batches whenever you want, which is especially handy for parties.
- Freezing Options Both scooped raw dough and fully baked cookies freeze well for up to three months when wrapped tightly, allowing you to enjoy freshly baked cookies on demand.
- Sugar Balance Combining granulated and light brown sugar creates the ideal texture and flavor, but you can use all light brown sugar if you prefer a chewier, more caramel forward result.
- Gentle Mixing Fold in chips and candies by hand to prevent them from breaking and to preserve the colorful look and varied texture in each cookie.
- Tray Strategy Bake six large cookies per tray for even spacing, and if you want smaller cookies simply scoop less dough and adjust baking time downward slightly.
- Don’t Flatten Resist the urge to press the dough before baking, they will flatten naturally in the oven and create layered, moist interiors.
What Complements This M M Cookies
These cookies are versatile for many occasions, from casual snacking to festive dessert tables. Below I outline thoughtful serving ideas, storage strategies, and pairing suggestions to match moods and gatherings.
- Snack and School Lunch Pack individual cookies in small containers or wrap them for a cheerful school or work snack, they travel well and stay satisfying at room temperature for several days.
- Party Platter Arrange on a large platter with varied sizes so guests can sample; the colorful candies make them visually appealing for birthdays and celebrations.
- Gift Packaging Wrap stacked cookies in parchment and place them in a decorated box or tin for an easy, homemade gift that stays fresh when stored properly.
- Occasion Pairings These cookies work for casual gatherings, holiday cookie exchanges, and dessert tables during Ramadan if serving after evening meals; they are comfortable across many settings.
- Storage Tips Keep at room temperature in an airtight bag for up to five days, refrigerate up to seven days, or freeze for up to three months to preserve freshness and texture.
- Seasonal Adaptations Use seasonal colored candy covered chocolates to match holidays or events, they instantly change the mood without altering the recipe’s performance.
FAQ
Conclusion
What makes these cookies special is their dependable combination of buttery dough and joyful mix ins, creating a cookie that is both comforting and playful. I hope you give this recipe a try, whether you bake a tray for a casual afternoon treat or prepare dozens for a party, because they have a way of bringing people together. Share them with friends, tweak the mix ins to make them your own, and enjoy the simple pleasure of warm cookies right from the oven. Happy baking, and may your kitchen smell wonderfully of butter and chocolate.
M M Cookies
Equipment
- Stand mixer
- Paddle attachment
- Mixing Bowls
- Rubber spatula
- Cookie Scoop
- Baking Sheet
- Cooling rack
- Oven
Ingredients
- 2 sticks softened unsalted butter Soften and cream to provide a rich, tender base and incorporate air for lightness; contributes fat that yields moist, chewy cookies and helps carry flavors throughout the dough.
- 3/4 cups sugar Sweeten and balance texture by dissolving into the butter to create structure and moderate spread; adds crispness to edges when caramelized during baking.
- 3/4 cup packed light brown sugar Add deep, caramel-like sweetness and moisture while enhancing chewiness; packs into the batter to help maintain a soft interior and complex flavor.
- 2 large eggs Bind and leaven while adding moisture and richness; whisk into the batter to emulsify fats and dry ingredients, contributing to a stable yet tender crumb.
- 1 tablespoons vanilla Flavour and aroma enhancer that rounds out the overall taste profile; stir in to lift sweetness and complement the chocolate and nut elements in the cookies.
- 2 1/2 cups All Purpose Flour Structure and bulk provider that forms the dough matrix; combine with liquids and leaveners to develop just enough gluten for chew without toughness.
- 1 1/2 teaspoons baking powder Lighten and tenderize by producing fine gas bubbles that lift the cookies; measure carefully to ensure proper rise and avoid off flavors.
- 1 teaspoon baking soda React with acidic components to create additional lift and a finer crumb; use sparingly to control spread and texture in the finished cookies.
- 1 teaspoons ea salt Enhance and balance flavors while controlling yeast-like reactions; distribute evenly to heighten sweetness and suppress bitterness from chocolate.
- 1 cups semi-sweet chocolate chips or chunks Provide concentrated chocolate flavor and pockets of melted richness; fold into dough to create gooey bites and textural contrast throughout the cookies.
- 1 cup white chocolate chips or chunks Contribute creamy sweetness and occasional melting pockets that brighten the cookie; mix with other chips for varied texture and visual contrast.
- 1 cup candy covered chocolates Add vibrant color, texture, and crunchy candy bursts that create playful bites; scatter into dough to introduce sweetness and chew distinct from chips.
- 1 cup peanut butter chips Introduce nutty, savory-sweet flavor and creamy pockets that complement chocolate; fold in to add soft, peanut-rich morsels and extra richness.
- 1 cup chopped walnuts Offer crunchy texture and earthy, toasty flavor that balances sweetness; chop and incorporate for bite variation and a pleasant nutty finish.
Instructions
- Preheat the oven to 350°.: As you heat the oven, notice the subtle change in the kitchen air as warmth builds, and listen for that tiny, steady hum that tells you the elements are engaged. A properly preheated oven ensures even spread and predictable browning, so wait until it reaches temperature before baking. If the oven is underheated the cookies will spread differently and remain pale, and if it is too hot they will brown too fast and stay doughy inside. Avoid opening the oven door repeatedly, as this will drop the temperature and affect how the cookies set.
- Add the butter and sugars to a stand mixer with the paddle attachment and mix on medium to high speed for 5-7 minutes or until light and fluffy.: You will hear the mixer gain a lighter, airy rhythm as the butter and sugar transform from a dull mass into a pale, ribbon like mixture, and visually you should see volume increase and the mixture become smoother. This aeration is crucial because it traps tiny air pockets that help create a tender crumb and controlled spread. A common mistake is not creaming long enough which leads to dense cookies, or creaming too long which can over soften the butter and cause excessive spread during baking.
- Add 1 egg at a time until combined, and then add in the vanilla.: After introducing the eggs , the batter will turn glossy and slightly loose, with a richer aroma from the vanilla . Adding eggs one at a time helps maintain an emulsion and prevents the mixture from separating. If the mixture looks curdled, don’t panic; continue mixing gently and the texture will come back together as the flour is added. Avoid adding cold eggs directly from the fridge as they can tighten the butter and cause lumps.
- In a separate bowl mix together the flour, baking powder, baking soda, and salt. Then add it to the mixer on low speed in 3 batches until mixed in. Stop the mixer in between, adding the flour to scrape the sides.: Combining the dry flour and leaveners first ensures even distribution of lift agents, and adding them in three portions prevents overworking the dough. The sound will change to a deeper, quieter hum as the dry ingredients incorporate, and the dough will thicken noticeably. Scraping the bowl is important to avoid pockets of unmixed flour, and overmixing once the flour is added can develop too much gluten, making the cookies tough. If you see streaks of flour, stop and fold lightly instead of continuing high speed mixing.
- Remove the bowl and fold the chocolate chips, candy, peanut butter chips, and walnuts with a rubber spatula until completely mixed in.: When you fold in the semi sweet chocolate chips , white chocolate chips , candy covered chocolates , peanut butter chips , and chopped walnuts , you will feel a change from silky dough to one dotted with texture. Folding preserves the air you incorporated earlier and prevents the mix ins from breaking apart, which keeps the candies colorful and the chips intact. A common issue is using a mixer at this stage, which will pulverize the mix ins and change the visual and textural result, so always fold by hand.
- Using a 1/4 cup scooper (#16 scoop), scoop out the dough onto cookie sheet trays 4 to 5 inches apart from one another to allow them to spread out. It will take 3 sheet trays to get to 18 cookies.: As you portion the dough, you can feel the weight of each scoop and see the dough mound neatly. Leaving space between scoops is essential because the cookies will spread and create layered edges. If they are placed too closely they will merge into one large cookie, and if you underspace them you will lose the crisp rims that contrast with the soft center. If your dough seems overly warm and sticky, chill the scoops briefly to retain shape during the initial bake.
- Bake in the oven for 16-18 minutes or until there is a light brown edge around the outside.: During baking, watch for the telltale signs: the edges will deepen to a golden brown and the center will look set but still slightly soft, and the kitchen will fill with a toasty, chocolate forward aroma. This visual cue ensures a tender center with crisp edges, and pulling them at the right moment prevents overbaked dryness. A frequent error is leaving them in too long; they will continue to set as they cool, so err on the side of slightly underbaked if you prefer a chewy interior.
- Cool to room temperature on a rack and serve.: Moving the cookies to a rack lets air circulate so the bottoms do not become soggy, and you will feel the contrast between warm centers and crisped edges as they set. Cooling also helps flavors meld and the mix ins to firm slightly, which improves texture when you bite in. If you stack them while hot they can steam and lose their crispness, so allow adequate cooling time. A tip to avoid is storing them while still warm in a sealed container, which traps moisture and softens the cookies prematurely.
Notes
- Make Ahead Freedom Prepare the dough up to two days in advance and keep it chilled so you can bake fresh batches whenever you want, which is especially handy for parties.
- Freezing Options Both scooped raw dough and fully baked cookies freeze well for up to three months when wrapped tightly, allowing you to enjoy freshly baked cookies on demand.
- Sugar Balance Combining granulated and light brown sugar creates the ideal texture and flavor, but you can use all light brown sugar if you prefer a chewier, more caramel forward result.
- Gentle Mixing Fold in chips and candies by hand to prevent them from breaking and to preserve the colorful look and varied texture in each cookie.
- Tray Strategy Bake six large cookies per tray for even spacing, and if you want smaller cookies simply scoop less dough and adjust baking time downward slightly.
- Don’t Flatten Resist the urge to press the dough before baking, they will flatten naturally in the oven and create layered, moist interiors.