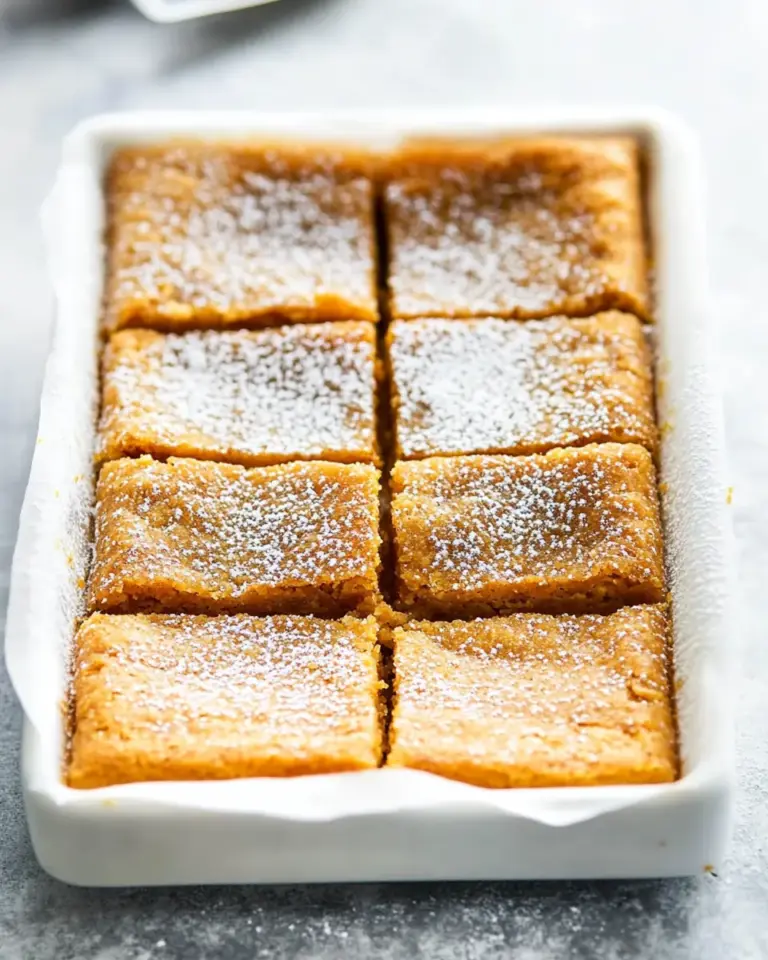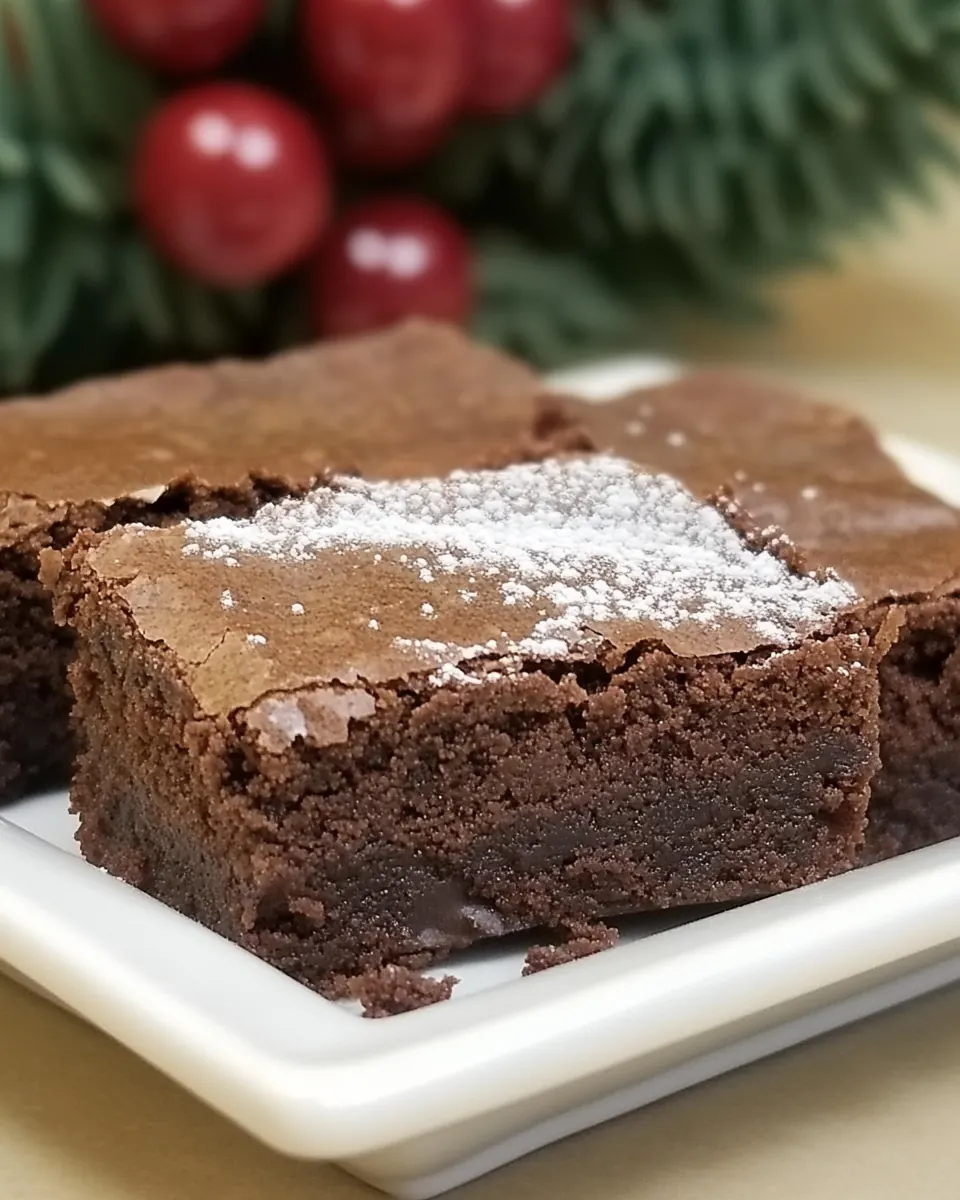
One Bowl Fudgy Brownies
One Bowl Fudgy Brownies are the kind of dessert that makes me smile on grey days and celebrates small victories on busy evenings.
I remember the first time I made these, juggling groceries and a toddler, thinking I had no business trying a dessert that seemed fancy. The recipe proved to be the opposite, arriving like a calm, dependable friend. The texture surprised me; the center stayed soft and moist while the edges offered a slightly firmer chew. That contrast has a way of turning a quick sweet bite into a moment worth savoring.
Because everything goes into one bowl, the process felt playful rather than fussy. I loved stirring warm, glossy chocolate and butter together and watching the aroma change from sharp cocoa to deep, warm chocolate, which made the kitchen feel cozy in seconds. Each time I bite into a square I recall the sound of a cake tester pulling up a few moist crumbs, the dusting of sugar on the bottom that adds a subtle crunch, and the satisfaction of having made something that feeds both comfort and celebration.
Recipe Snapshot
60 mins
15 mins
45 mins
Medium
200 kcal
American
Gluten-Free, Low FODMAP
Desserts
Mixing bowl, Microwave safe bowl, 8 inch square baking pan, Aluminum foil, Whisk, Spatula
The Best Thing About This One Bowl Fudgy Brownies
Simple process, stunning results
I adore how One Bowl Fudgy Brownies streamline dessert into a handful of steps, yet deliver a rich outcome. With minimal equipment and one bowl to wash, these brownies are ideal for busy evenings when you still want to serve something impressive. The technique concentrates flavor quickly, so you get a deep chocolate profile without fuss.
Perfect fudgy texture every time
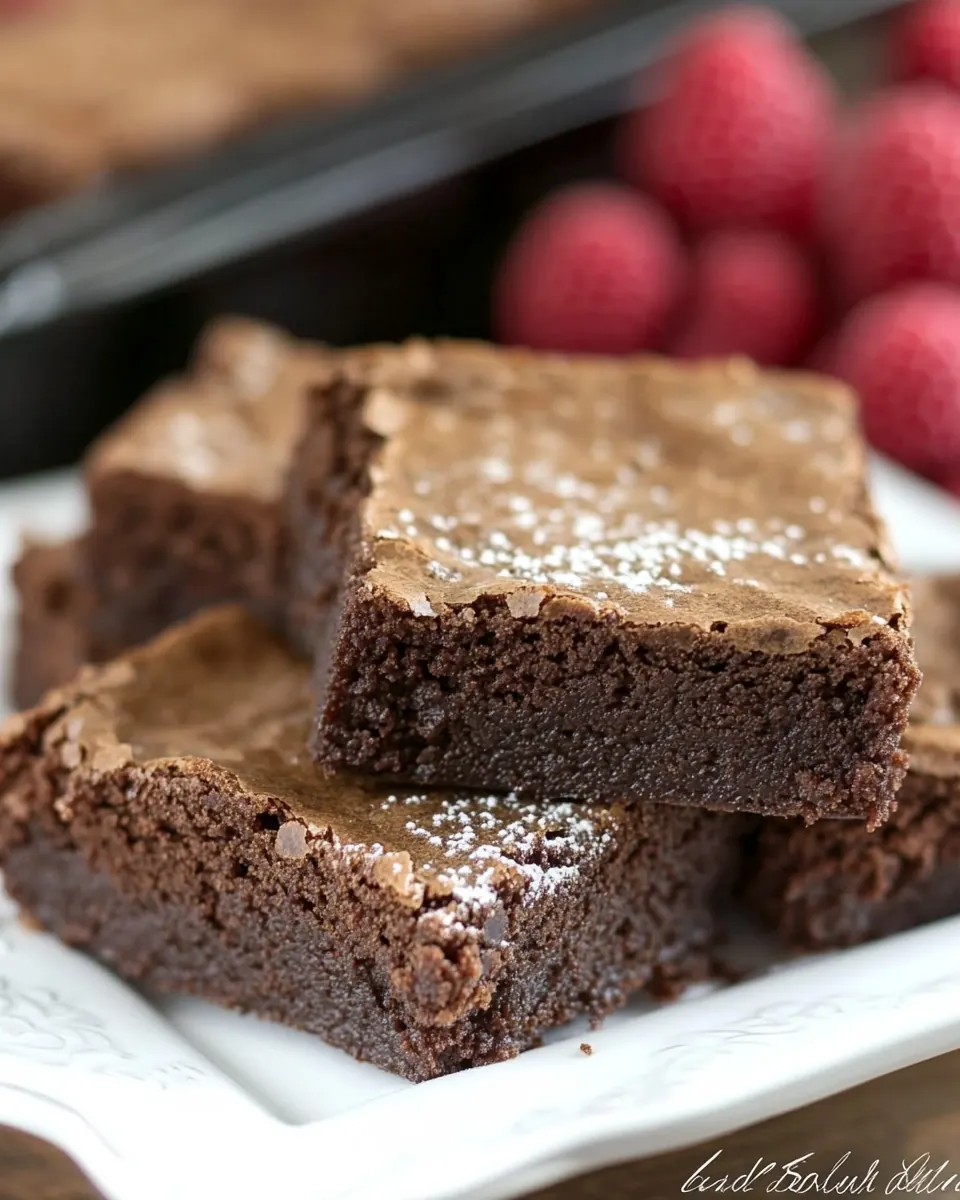
The balance of butter, chocolate, eggs, and just enough flour creates that dense, fudgy crumb I chase in a brownie. I’ve found this ratio yields a moist interior that clings to your fork, while the top forms a slightly crackly, thin crust. That contrast is what keeps me coming back, it feels indulgent without being cake heavy.
Adaptable to small and large gatherings
I often make these for last minute get togethers because they scale easily, and they travel well. The sturdy squares stack in a tin and arrive still tasting fresh. They’re casual enough for a picnic, and they dress up nicely for dinner when served on a pretty plate.
Comforting aromas and memories
There is something instantly comforting about the smell of melted chocolate and butter filling the house. That scent becomes a signal for warm conversation and relaxed moments. Personally, I associate these brownies with evenings when the world slows down enough to enjoy a simple treat.
Reliable technique for home bakers
Because the method is straightforward, it’s forgiving for beginner bakers yet satisfying for those who know their way around a kitchen. When you follow the cues, like the tester showing a few moist crumbs, you consistently avoid overbaking. I love recipes that teach you to feel the outcome instead of just count minutes.
What to Buy for One Bowl Fudgy Brownies
For these One Bowl Fudgy Brownies, the ingredients are intentionally few and focused, each playing a clear role. The butter and chocolate form the rich base, the sugar sweetens while encouraging that thin crackly top, and the eggs provide structure and silkiness. A modest amount of flour and a pinch of salt keep the brownies grounded, highlighting the chocolate without weighing it down.
- 1/2 cup butter, plus more for pan: Provide richness and moisture while helping to create a tender, fudgy crumb; melt gently to combine with chocolate and sugar for a glossy batter that sets as it cools.
- 8 ounces semi-sweet chocolate, chopped: Contribute intense cocoa flavor and silky texture when melted and folded into the batter; chop to ensure even melting and to incorporate deep chocolate notes throughout the brownies.
- 1 1/2 cups sugar: Add sweetness and structure by dissolving into the eggs and melted chocolate; help balance bitterness from the chocolate while contributing to the crust formation on top when baked.
- 4 large eggs: Bind the ingredients together and introduce steam for lift while maintaining a dense, fudgy interior; beat briefly with sugar to aerate slightly and create a cohesive batter.
- 1 teaspoon vanilla: Enhance and round out the chocolate flavor with warm, aromatic notes; stir into the batter to amplify sweetness perception and deepen overall taste.
- 3/4 cup flour: Provide just enough structure and body to hold the brownies together without making them cakey; sift or fold gently to avoid developing gluten that would toughen the texture.
- 1/2 teaspoon salt: Balance the sweetness and intensify the chocolate flavor while strengthening gluten slightly; measure carefully to avoid over-salting, which can overpower the dessert.
Recipe Directions for One Bowl Fudgy Brownies
These directions guide you through a comforting, tactile baking experience. Pay attention to sensory cues like gloss, warmth, and the feel of the batter, as those indicators help you hit the perfect fudgy texture. Gather everything nearby because the rhythm of melting, mixing, and baking is smooth when you are organized.
- Preheat the oven to 350º. Line an 8" square baking pan with nonstick foil, leaving a 1" overhang on two sides. Set aside.: You will notice the kitchen gradually warming as the oven reaches 350º , and that anticipatory scent of heat makes baking feel ceremonial. A properly preheated oven ensures even rise and consistent baking, so resist the urge to slide the pan in too early. A common mistake is misreading the dial, leading to uneven edges and a center that takes longer to set. Confirm the temperature with an oven thermometer if yours runs hot or cool.
- Place butter and chocolate in a microwave-safe bowl and microwave gently until butter and chocolate are melted (30 seconds x 3, stirring in between sessions).: The cool foil feels metallic in your hands as you press it snugly against the pan, creating an easy lift for the finished brownies. This setup helps with even edges and makes removal effortless later. Skipping the overhang makes extracting the brownies harder and risks breaking squares. Make sure the foil is smooth to avoid weird creases in the crust.
- Let cool to room temperature.: Giving yourself a moment to step back is practical, you’ll appreciate being calm when the chocolate is hot. Leaving the lined pan at the ready keeps your workflow efficient and prevents last minute scrambles. Forgetting this step can force you to hurry and risk splashing hot chocolate mixture, so prepare the pan early.
- Stir sugar into chocolate till combined.: As the chocolate warms you will see it go from rigid flecks to a glossy pool, and the smell deepens into a warm, cocoa richness that fills the room. Stirring between bursts helps the heat distribute evenly and prevents scorching, which tastes bitter. The main pitfall is overheating, which can make the chocolate seize and grainy. Use short bursts and gentle stirring to maintain a silky texture.
- Whisk in eggs one at a time, then vanilla.: Cooling feels counterintuitive but it’s crucial, you will avoid scrambling the eggs when they meet a temperate mixture. During this pause the sheen on the chocolate settles, and the aroma mellows. Too hot and the eggs will cook on contact, leading to lumps and an uneven batter. Aim for a warm but not hot bowl by resting it on the counter for a few minutes.
- Fold in flour and salt.: When you stir in the sugar the texture shifts subtly, becoming thicker and glossy, and the spoon drags a slow trail through the mass. This helps the sugar begin to dissolve and contributes to a crackly top when baked. If you don’t mix it well you might notice a slight graininess in the finished brownies. Ensure the sugar is fully incorporated without overbeating.
- Bake until a cake tester comes out of the center with just a few moist crumbs, 40-45 min. Cool completely on the rack.: Incorporating eggs one by one creates cohesive structure and a silky batter, and you can sense the mixture lighten slightly as air is folded in. Adding vanilla at the end brightens the whole bowl. A common error is adding eggs while the chocolate is too warm, which can cook the egg and produce small cooked bits. Take your time and whisk fully between additions.
- Lift the brownies out of the pan using the foil. Cut into 2-inch squares. May dip bottoms in granulated sugar to stack.: As you fold the flour and salt you’ll notice the batter thicken and lose some of its shine, moving toward a dense ribbon when lifted. Gentle folding preserves that fudgy density, while overmixing introduces air and yields a cakier result. Avoid aggressive stirring and stop once you see no streaks of flour.
- Bake until a cake tester comes out of the center with just a few moist crumbs, 40 to 45 min.: During baking, the top will form a thin, crackly shell and the aroma will intensify into deep, toasty chocolate notes. The edges will slightly pull away from the pan, and the center should still feel soft when pressed gently. Rely on the cake tester cue because oven temperatures vary. Overbaking dries them out, so check at 40 minutes and then in small intervals if needed.
- Cool completely on the rack.: Cooling lets the crumb set and the flavors meld, and as the pan cools the scent becomes less hot and more rounded. Cutting into warm brownies often yields gooey, misshapen pieces; patience rewards you with clean squares. A rushed cut can make the squares collapse, so allow ample time before lifting out.
- Lift the brownies out of the pan using the foil.: The foil overhang makes this satisfying, you gently pull the block up and admire the clean edges. This method prevents scraping and preserves the bottom texture. If you try to pry out the brownies without foil you risk breaking them or scratching the pan. Use the foil to transfer the whole slab to a cutting board for precise slicing.
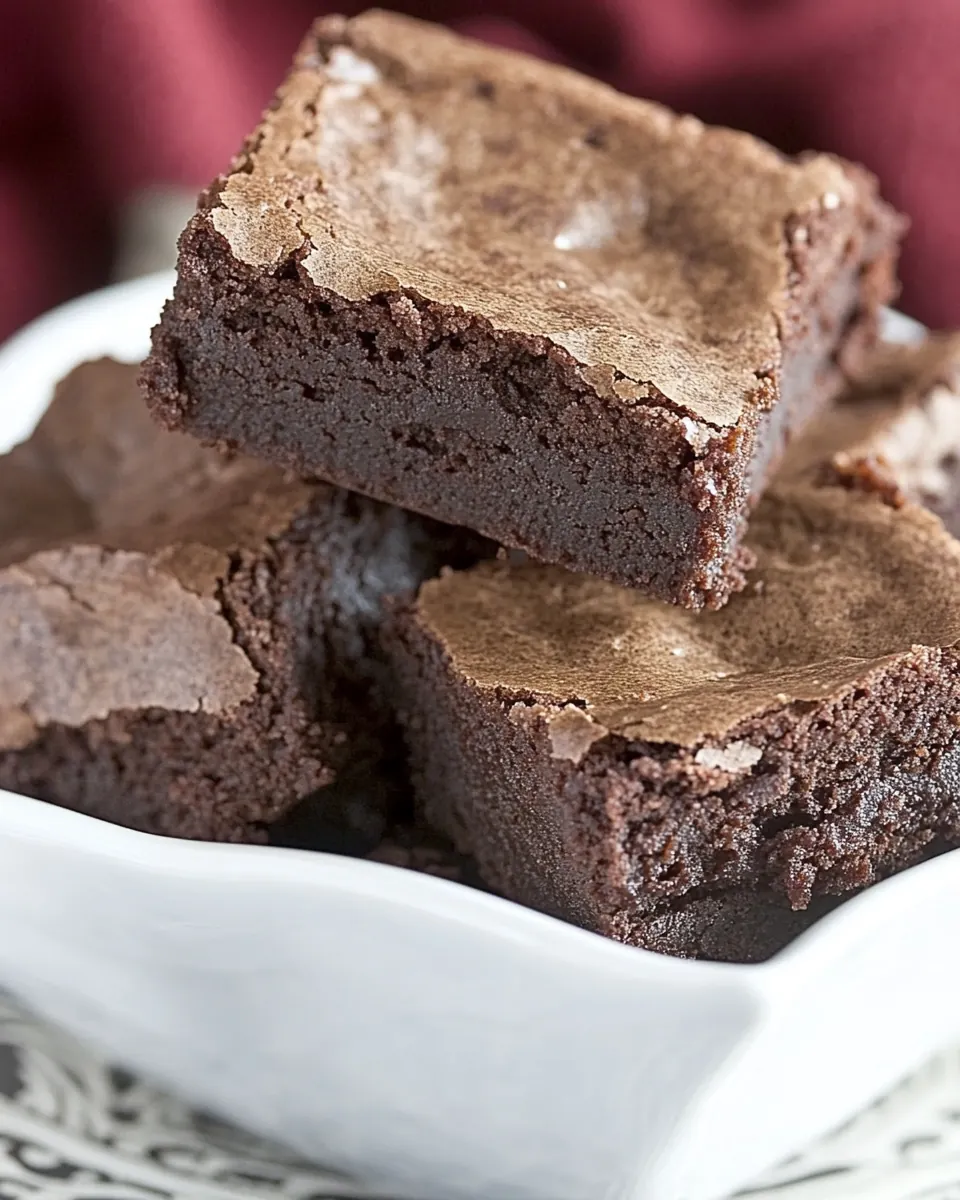
- Cut into 2-inch squares.: A sharp knife gives neat, even pieces and the sound of clean slicing is oddly gratifying. Wiping the blade between cuts maintains tidy edges. If you cut too soon the squares will smoosh, and if your knife is dull you will tear the crust. For polished presentation, use a sharp chef’s knife and steady strokes.
- May dip bottoms in granulated sugar to stack.: Rolling the bottoms in sugar adds a playful texture and helps prevent sticking when stacking. The sugar catches on the bottom and gives a faint glitter that looks appealing. Skip this step if you prefer a simple finish, or be mindful that sugary bottoms can flake. Press gently to avoid crumbling the edges.
How to Switch It Up

I enjoy tweaking desserts in small, thoughtful ways to suit mood and occasion. These ideas keep the core texture of One Bowl Fudgy Brownies while offering variety for serving and presentation. Below are practical, tested variations you can try.
- Add nuts by folding in toasted walnuts or pecans after the batter is mixed for crunch and contrast.
- Swirl in a spread by dolloping a few spoonfuls of a compatible spread on top before baking and swirling with a knife for visual interest.
- Top with sea salt by sprinkling flaky salt right after the brownies come out for a sweet salty finish.
- Make mini portions by using a muffin tin lined with foil or paper to create individual brownie cups, adjusting bake time slightly.
- Dust with cocoa or powdered sugar for a simple elegant finish just before serving to elevate presentation.
Pairing Suggestions for One Bowl Fudgy Brownies
These brownies are flexible companions at many tables, from casual afternoons to festive gatherings. Think about texture, temperature, and balance when choosing what to serve alongside them. Below I outline serving ideas, storage tips, and occasions where these squares shine.
- Casual snack Serve a few squares on a small plate for an afternoon treat with coffee or tea, they pair well with warm, not overly bold beverages.
- After dinner dessert Offer a single square with a light scoop of something chilled for contrast; the dense brownie balances creamy, cold elements nicely.
- Party platter Stack trimmed squares neatly on a tray, use the granulated sugar bottom trick to prevent sticking when stacking for celebrations or potlucks.
- Gift box Wrap a few in parchment and a ribbon for a homemade gift, the brownies travel well and feel thoughtful for birthdays or thank yous.
- Storage Keep the brownies in an airtight container at room temperature for up to three days, or freeze the uncut slab wrapped tightly for longer storage and slice from partially thawed.
- Seasonal tips These work year round, but in colder months their warm chocolate scent adds a cozy note, while in warmer months chilled brownies can be a refreshing twist.
FAQ
Conclusion
What makes these brownies special is the combination of deep chocolate flavor and a reliably fudgy texture from a simple, one bowl method. They take modest effort and yield a dessert that feels both comforting and a little celebratory. Give them a try on a busy evening or whenever you want a chocolate fix that impresses without drama. Share a square with someone and enjoy the small, sweet moment.
One Bowl Fudgy Brownies
Equipment
- Mixing Bowl
- Microwave-safe Bowl
- 8-inch square baking pan
- Aluminum Foil
- Whisk
- Spatula
Ingredients
- 1/2 cup butter, plus more for pan Provide richness and moisture while helping to create a tender, fudgy crumb; melt gently to combine with chocolate and sugar for a glossy batter that sets as it cools.
- 8 ounces semi-sweet chocolate, chopped Contribute intense cocoa flavor and silky texture when melted and folded into the batter; chop to ensure even melting and to incorporate deep chocolate notes throughout the brownies.
- 1 1/2 cups sugar Add sweetness and structure by dissolving into the eggs and melted chocolate; help balance bitterness from the chocolate while contributing to the crust formation on top when baked.
- 4 large eggs Bind the ingredients together and introduce steam for lift while maintaining a dense, fudgy interior; beat briefly with sugar to aerate slightly and create a cohesive batter.
- 1 teaspoon vanilla Enhance and round out the chocolate flavor with warm, aromatic notes; stir into the batter to amplify sweetness perception and deepen overall taste.
- 3/4 cup flour Provide just enough structure and body to hold the brownies together without making them cakey; sift or fold gently to avoid developing gluten that would toughen the texture.
- 1/2 teaspoon salt Balance the sweetness and intensify the chocolate flavor while strengthening gluten slightly; measure carefully to avoid over-salting, which can overpower the dessert.
Instructions
- Preheat the oven to 350º. Line an 8" square baking pan with nonstick foil, leaving a 1" overhang on two sides. Set aside.: You will notice the kitchen gradually warming as the oven reaches 350º , and that anticipatory scent of heat makes baking feel ceremonial. A properly preheated oven ensures even rise and consistent baking, so resist the urge to slide the pan in too early. A common mistake is misreading the dial, leading to uneven edges and a center that takes longer to set. Confirm the temperature with an oven thermometer if yours runs hot or cool.
- Place butter and chocolate in a microwave-safe bowl and microwave gently until butter and chocolate are melted (30 seconds x 3, stirring in between sessions).: The cool foil feels metallic in your hands as you press it snugly against the pan, creating an easy lift for the finished brownies. This setup helps with even edges and makes removal effortless later. Skipping the overhang makes extracting the brownies harder and risks breaking squares. Make sure the foil is smooth to avoid weird creases in the crust.
- Let cool to room temperature.: Giving yourself a moment to step back is practical, you’ll appreciate being calm when the chocolate is hot. Leaving the lined pan at the ready keeps your workflow efficient and prevents last minute scrambles. Forgetting this step can force you to hurry and risk splashing hot chocolate mixture, so prepare the pan early.
- Stir sugar into chocolate till combined.: As the chocolate warms you will see it go from rigid flecks to a glossy pool, and the smell deepens into a warm, cocoa richness that fills the room. Stirring between bursts helps the heat distribute evenly and prevents scorching, which tastes bitter. The main pitfall is overheating, which can make the chocolate seize and grainy. Use short bursts and gentle stirring to maintain a silky texture.
- Whisk in eggs one at a time, then vanilla.: Cooling feels counterintuitive but it’s crucial, you will avoid scrambling the eggs when they meet a temperate mixture. During this pause the sheen on the chocolate settles, and the aroma mellows. Too hot and the eggs will cook on contact, leading to lumps and an uneven batter. Aim for a warm but not hot bowl by resting it on the counter for a few minutes.
- Fold in flour and salt.: When you stir in the sugar the texture shifts subtly, becoming thicker and glossy, and the spoon drags a slow trail through the mass. This helps the sugar begin to dissolve and contributes to a crackly top when baked. If you don’t mix it well you might notice a slight graininess in the finished brownies. Ensure the sugar is fully incorporated without overbeating.
- Bake until a cake tester comes out of the center with just a few moist crumbs, 40-45 min. Cool completely on the rack.: Incorporating eggs one by one creates cohesive structure and a silky batter, and you can sense the mixture lighten slightly as air is folded in. Adding vanilla at the end brightens the whole bowl. A common error is adding eggs while the chocolate is too warm, which can cook the egg and produce small cooked bits. Take your time and whisk fully between additions.
- Lift the brownies out of the pan using the foil. Cut into 2-inch squares. May dip bottoms in granulated sugar to stack.: As you fold the flour and salt you’ll notice the batter thicken and lose some of its shine, moving toward a dense ribbon when lifted. Gentle folding preserves that fudgy density, while overmixing introduces air and yields a cakier result. Avoid aggressive stirring and stop once you see no streaks of flour.
- Bake until a cake tester comes out of the center with just a few moist crumbs, 40 to 45 min.: During baking, the top will form a thin, crackly shell and the aroma will intensify into deep, toasty chocolate notes. The edges will slightly pull away from the pan, and the center should still feel soft when pressed gently. Rely on the cake tester cue because oven temperatures vary. Overbaking dries them out, so check at 40 minutes and then in small intervals if needed.
- Cool completely on the rack.: Cooling lets the crumb set and the flavors meld, and as the pan cools the scent becomes less hot and more rounded. Cutting into warm brownies often yields gooey, misshapen pieces; patience rewards you with clean squares. A rushed cut can make the squares collapse, so allow ample time before lifting out.
- Lift the brownies out of the pan using the foil.: The foil overhang makes this satisfying, you gently pull the block up and admire the clean edges. This method prevents scraping and preserves the bottom texture. If you try to pry out the brownies without foil you risk breaking them or scratching the pan. Use the foil to transfer the whole slab to a cutting board for precise slicing.
- Cut into 2-inch squares.: A sharp knife gives neat, even pieces and the sound of clean slicing is oddly gratifying. Wiping the blade between cuts maintains tidy edges. If you cut too soon the squares will smoosh, and if your knife is dull you will tear the crust. For polished presentation, use a sharp chef’s knife and steady strokes.
- May dip bottoms in granulated sugar to stack.: Rolling the bottoms in sugar adds a playful texture and helps prevent sticking when stacking. The sugar catches on the bottom and gives a faint glitter that looks appealing. Skip this step if you prefer a simple finish, or be mindful that sugary bottoms can flake. Press gently to avoid crumbling the edges.
Notes
- Add nuts by folding in toasted walnuts or pecans after the batter is mixed for crunch and contrast.
- Swirl in a spread by dolloping a few spoonfuls of a compatible spread on top before baking and swirling with a knife for visual interest.
- Top with sea salt by sprinkling flaky salt right after the brownies come out for a sweet salty finish.
- Make mini portions by using a muffin tin lined with foil or paper to create individual brownie cups, adjusting bake time slightly.
- Dust with cocoa or powdered sugar for a simple elegant finish just before serving to elevate presentation.