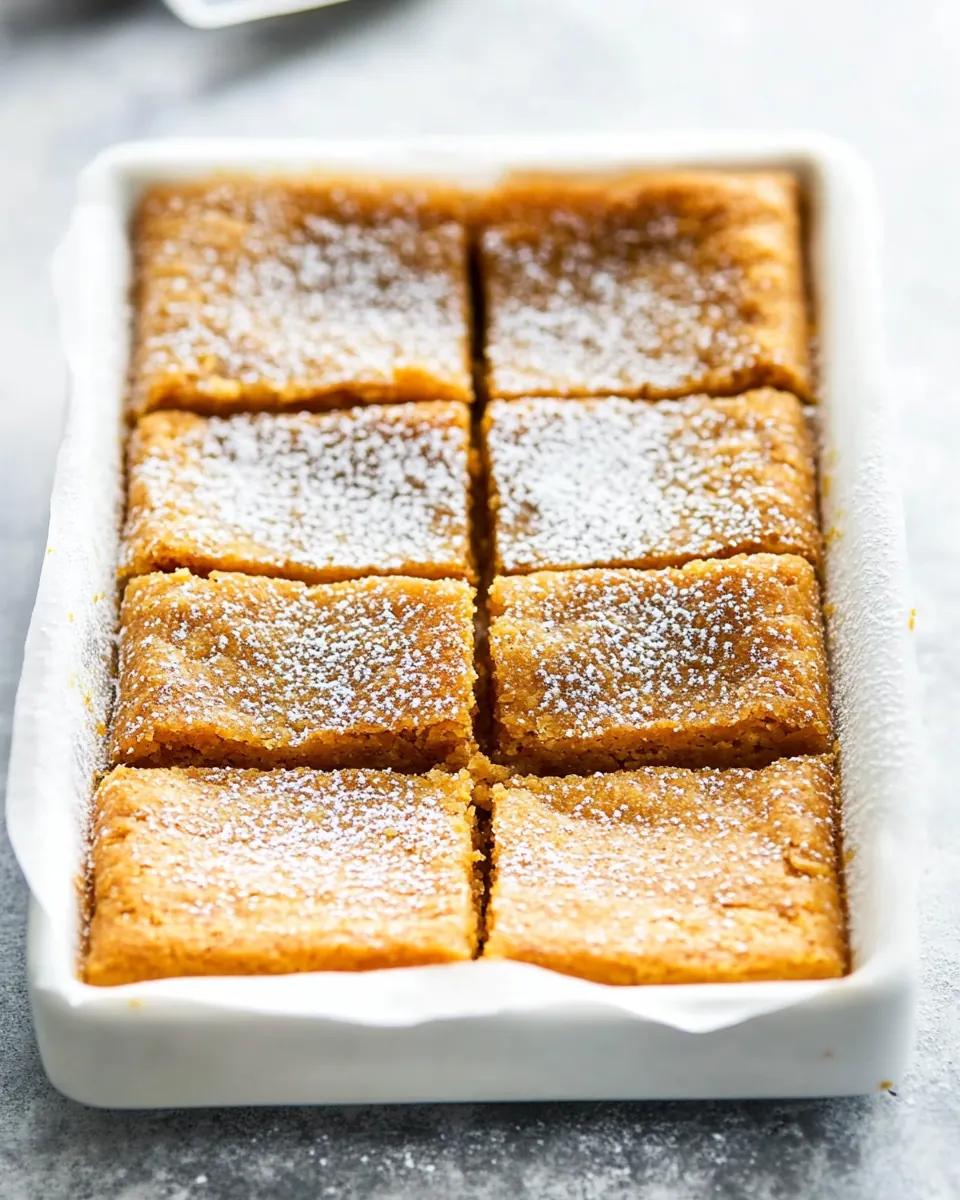
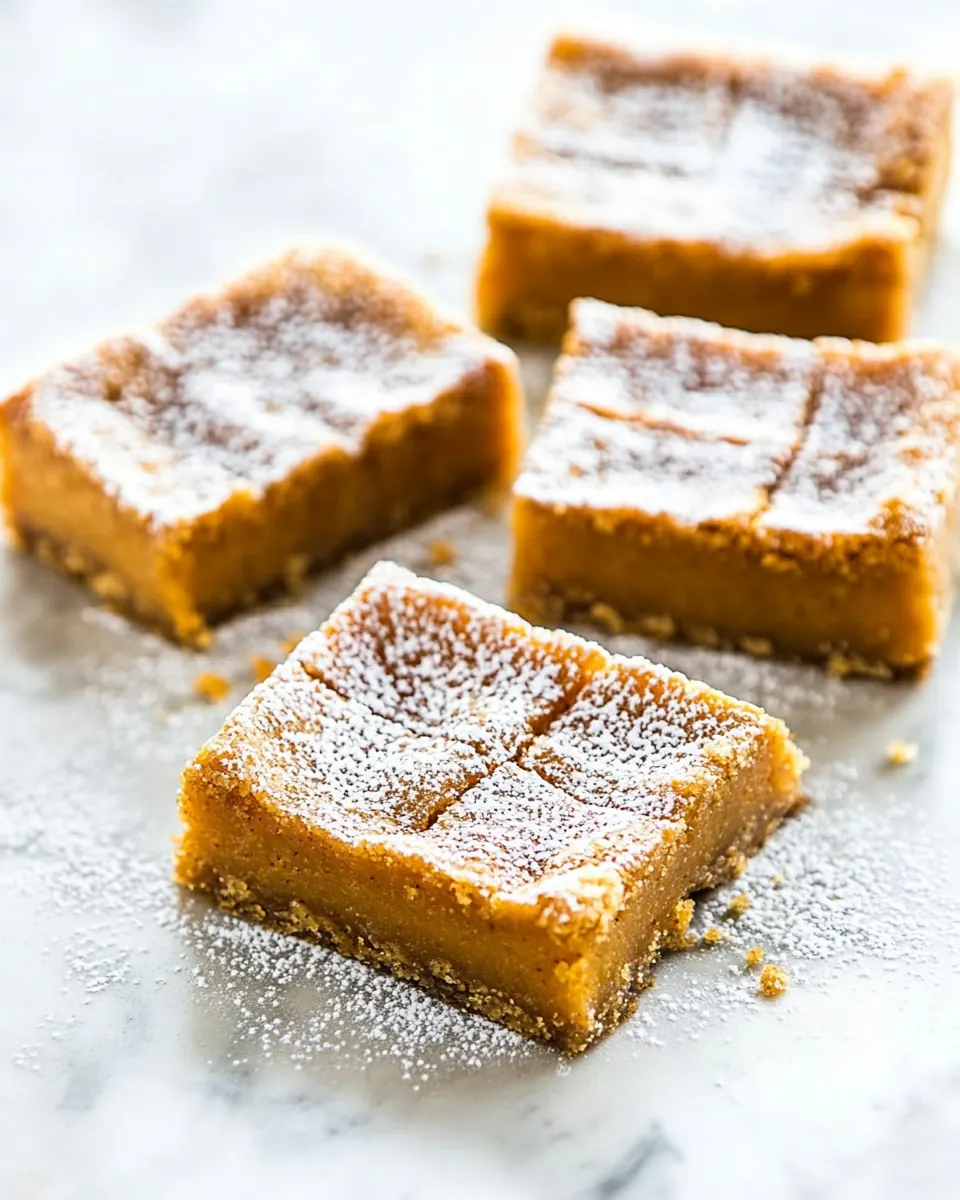
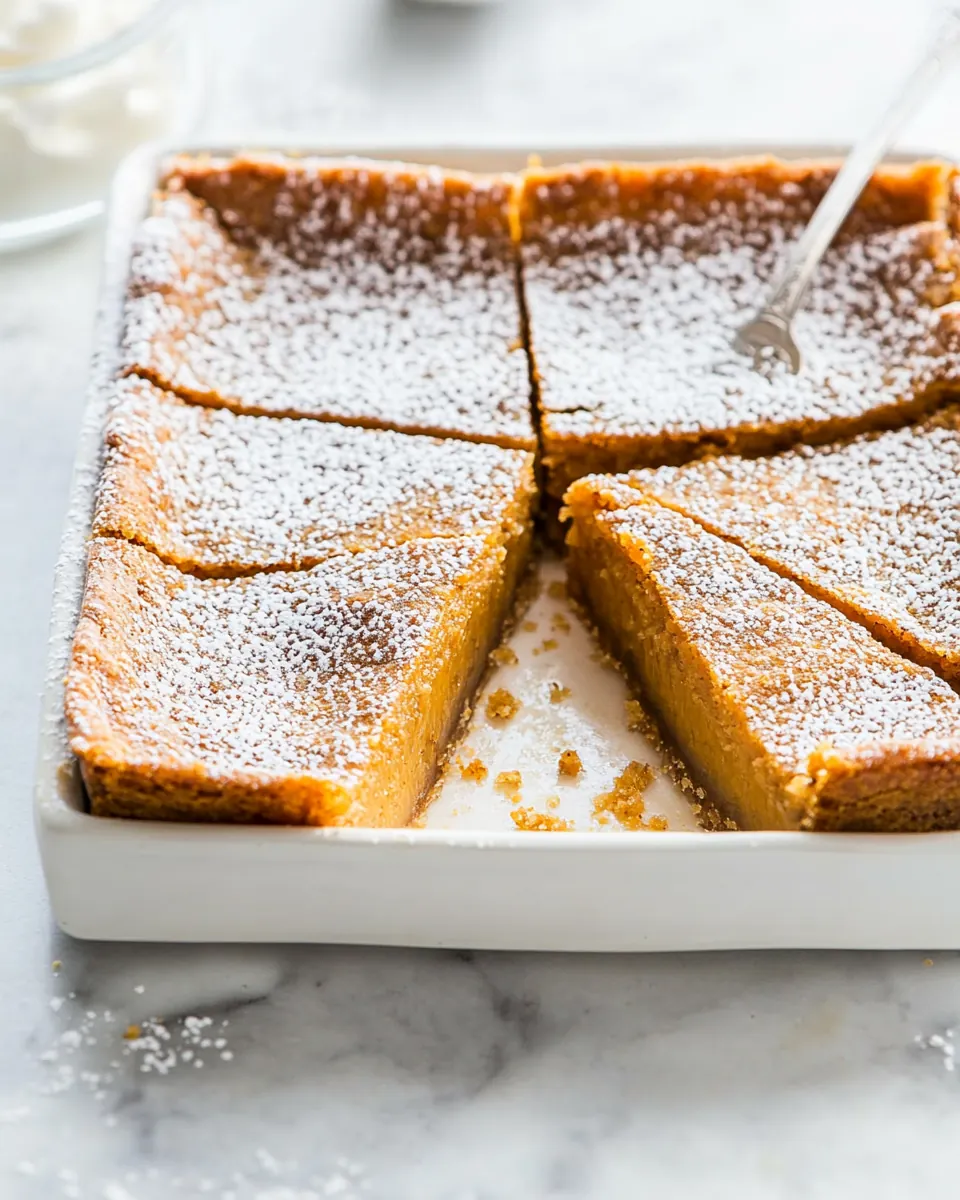
Pumpkin Chess Pie Bars
Pumpkin Chess Pie Bars came into my kitchen on a blustery October afternoon when I wanted something that felt like a cross between a classic chess pie and a portable pumpkin treat. I remember pulling out an old pan and thinking about how the spice mix and the custardy filling would mingle with a crisp cookie crumb base. The first bite felt cozy, slightly nostalgic, and unexpectedly bright because of a tiny splash of lemon.
Over the years I’ve made Pumpkin Chess Pie Bars for small gatherings and large potlucks, tweaking the sugar balance and the crust until it hit that sweet spot of tender, creamy filling and a sturdy, buttery base. I love handing a warm square to a friend who says they do not usually eat pumpkin, and then watching their expression change as they realize how rich and almost custardlike the texture is. It has become my quiet celebration dessert for the season when I want something impressive but not fussy.
What I enjoy most about Pumpkin Chess Pie Bars is how forgiving they are. The filling puffs and settles like a cloud, but the little jiggle in the center is the sign of success, not failure. I often make it the day before so the flavors meld and the bars slice cleanly. They travel well, store happily in the refrigerator, and are an easy way to bring a homemade touch to a holiday table without hours of hands on work.
Recipe Snapshot
1 hr 20 mins
20 mins
60 mins
Medium
200 kcal
American
Gluten-Free, Low FODMAP
Desserts
8-by-8 or 9-by-9 baking pan, Parchment paper, Food processor, Wire rack, Mixing bowls, Whisk
The Best Thing About This Pumpkin Chess Pie Bars
Comforting Texture with a Clean Finish
I adore how Pumpkin Chess Pie Bars marry a silky custardlike filling with a crisp, buttery base. The contrast in textures keeps every bite interesting. The filling sets just enough to slice neatly, but retains a tender, creamy mouthfeel, which is why I reach for this recipe when I want dessert that feels both rustic and refined.
Simple Ingredients, Big Flavor
One of the reasons I keep making this recipe is its honesty. The list is straightforward, and each element plays a clear role. pumpkin brings earthiness and color, spices layer in warmth, and butter and sugars create that glossy, caramellike finish. I rarely need special shopping runs, and that makes this a reliable go to.
Great for Gatherings and Prep Ahead
I’ve learned to appreciate recipes that travel well, and these bars do just that. They hold up in a cooler or on a dessert table, and they actually slice more cleanly after chilling. I usually make them the day before serving, which frees up time the day of a party and reduces last minute stress.
Versatile Serving Options
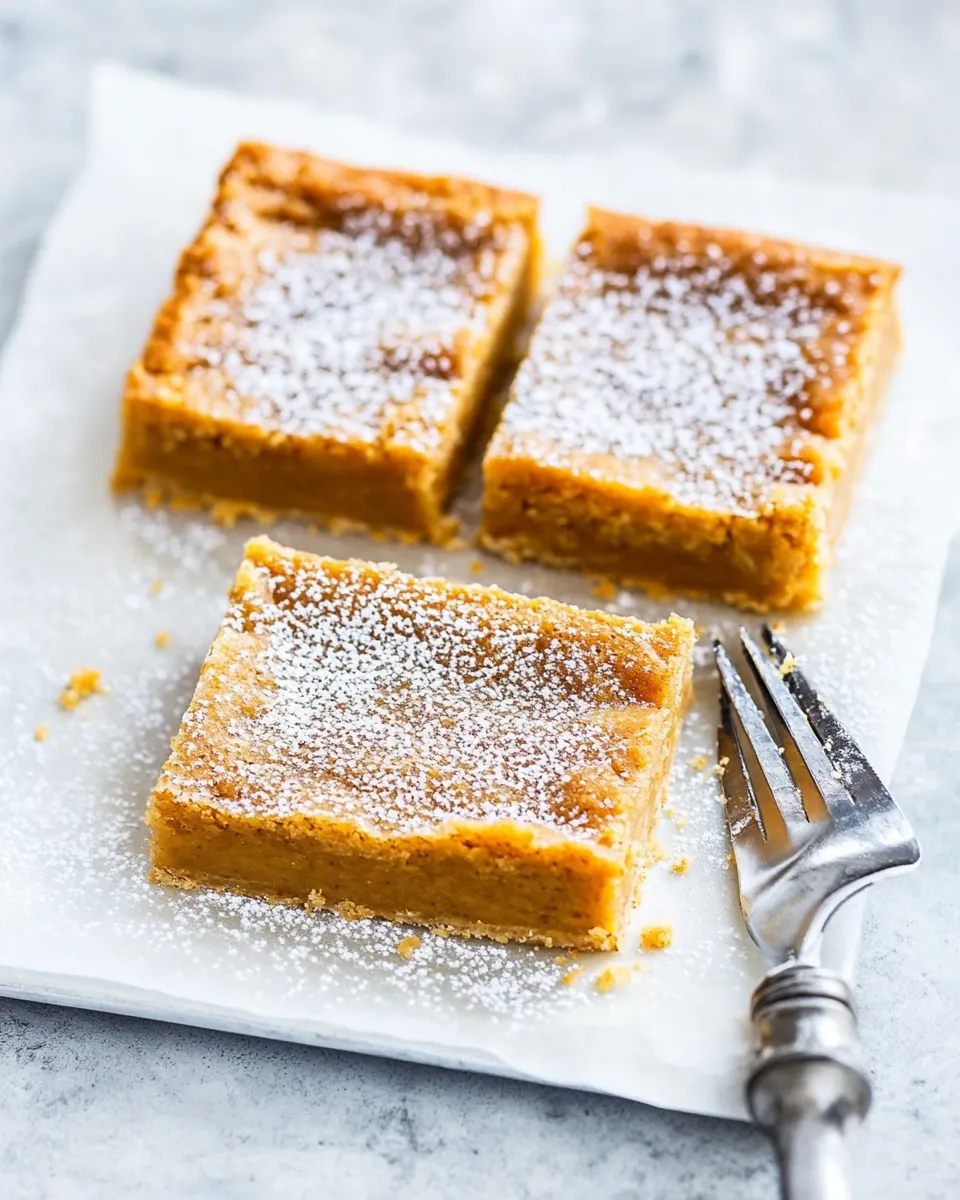
What stands out is how easy it is to dress them up. A light dusting of powdered sugar or a dollop of whipped cream transforms a simple square into something festive. I often use them as an alternative to a full pie when I want portion control without sacrificing presence.
Forgiving Technique for Home Bakers
Finally, this recipe is wonderfully forgiving. The filling can be slightly jiggly and still turn out perfect after resting. I’ve had batches that looked too soft straight from the oven and ended up being the best ones after cooling. That forgiving nature gives me confidence to experiment without fear of ruining the dessert.
What to Gather for Pumpkin Chess Pie Bars
These ingredients are built around a few key players that do the heavy lifting: a crunchy, buttery crumb base and a custardy, spiced pumpkin filling. Together they balance texture and flavor, with the starches and eggs in the filling creating that set, custardlike quality, while the crust offers structure and a buttery contrast. The spices are deliberately modest so the pumpkin can sing, and small touches like lemon juice brighten the whole bar.
- 1 1/2 cups vanilla wafer or graham cracker crumbs (about 8 ounces): Provide crumbly base texture and subtle sweetness when combined with butter; use finely crushed to form an even crust that holds the pie bars together during baking.
- 1 tablespoon brown sugar: Add a hint of caramel-like sweetness and help balance flavors; sprinkle into the crust mixture to deepen overall taste complexity.
- 1/2 teaspoon kosher salt: Enhance overall flavor balance and bring out sweetness; dissolve into the crust mix to ensure the base is seasoned and not bland.
- 5 tablespoons unsalted butter, melted: Bind the crumbs into a cohesive crust and add richness; pour melted butter over crumbs and press firmly into the pan for a stable foundation.
- 1 cup granulated sugar: Deliver primary sweetness for the filling and help with caramelization; mix thoroughly with other sugars and eggs to create a smooth custard.
- 1 cup packed light brown sugar: Contribute moist, caramel notes and deepen flavor complexity; beat into the filling to provide richness and structure.
- 2 tablespoons all purpose flour: Thicken the filling slightly and stabilize the custard; whisk into the sugar mixture to prevent the filling from becoming too runny.
- 1 tablespoon cornmeal: Introduce a subtle gritty texture and traditional corn flavor; stir into the filling to add body and a hint of crunch.
- 1 teaspoon kosher salt: Enhance seasoning and balance sweetness within the filling; incorporate with sugars to ensure even distribution of savory contrast.
- 1/2 teaspoon ground cinnamon: Provide warm aromatic spice and complement pumpkin flavor; measure precisely and blend into the filling for consistent warmth.
- 1/4 teaspoon ground ginger: Add a fragrant, slightly sweet spice that complements pumpkin and autumn flavors; mix with other spices for balanced spiciness.
- 1/8 teaspoon ground cloves: Contribute a warm, bitter-sweet note that deepens the spice profile; use sparingly to avoid overpowering the filling.
- 4 large eggs, lightly beaten: Incorporate air and structure into the custard while promoting a smooth texture; beat lightly and combine with the wet ingredients for even set.
- 1 cup pumpkin puree (not pumpkin pie filling): Provide pumpkin flavor and moisture while keeping texture smooth; fold into the custard mixture to infuse seasonal character.
- 1/2 cup whole milk: Lighten the filling slightly and add creaminess; stir in to adjust consistency and support a custard-like texture.
- 1 tablespoon lemon juice: Introduce a touch of acidity to brighten flavors and balance sweetness; add to the filling to lift and enhance the overall taste.
- 1 teaspoon vanilla extract: Bring floral and sweet aromatics that round out flavors; add to the filling for depth and to enhance the pumpkin spices.
- 6 tablespoons unsalted butter, melted and slightly cooled: Enrich the filling with butterfat and create a glossy, rich finish; pour in melted and slightly cooled butter to improve texture and mouthfeel.
- powdered sugar, for dusting () (optional): Provide optional finishing sweetness and a delicate visual dusting; sprinkle sifted powdered sugar over cooled bars before serving.
Preparation Steps for Pumpkin Chess Pie Bars
These directions will guide you from crust to finished bars in a friendly, approachable way. Expect a few sensory cues to tell you when things are right, and give yourself permission to trust the visual and tactile signs described below. Keep an eye on bubbling and a gentle jiggle in the center as you near the finish.
- Preheat oven to 350 degrees F. Line an 8-by-8-inch or 9-by-9-inch baking pan with parchment paper, lightly buttering the underside of the parchment as needed so it sticks to the pan and doesn’t slide around. You can also use a standard 9-inch pie pan or springform pan.: The moment you set the oven to 350 degrees F , you will begin to smell a faint warmth in the kitchen that indicates stable baking conditions. A properly preheated oven ensures even rise and predictable setting of the custard. I can tell the oven is ready when my thermometer reaches the target and the air feels consistently warm when I open the door briefly. A common mistake is putting the pan into a cold oven, which leads to uneven baking and a watery center. If your oven runs hot or cold, use an oven thermometer to adjust, and line your pan with parchment so removal is simple.
- Pulse cookies in a food processor until finely ground. Add salt, brown sugar, and melted butter and pulse or stir until evenly moistened. Press firmly into the bottom of prepared pan. (Tip: use a smooth rubber spatula to press the crust firmly and evenly into the bottom of the pan).: Pressing parchment into the pan gives you neat edges and makes lifting the bars effortless after cooling. The butter helps the parchment adhere, preventing it from sliding when you press the crumb crust in. If the parchment slips while you work, the crust can become uneven, so take the extra moment to secure it. I find the tactile feedback of the parchment against the pan reassuring because it prevents sticking and ensures clean removal.
- Bake crust for 8 to 10 minutes or until just set. Remove from oven and place on a wire rack; let cool completely.: As you pulse the vanilla wafer or graham cracker crumbs, listen for the even, quick rhythm that indicates a fine, sandy texture. A uniformly fine crumb helps the crust pack tightly, yielding a sturdy base that will hold the custard. Overprocessing to a powder can make the crust too dense, while leaving large chunks can cause crumbling when sliced. If you do not have a processor, place the cookies in a heavy zip top bag and crush with a rolling pin until you reach a sandlike consistency.
- To prepare filling, whisk sugar, brown sugar, flour, cornmeal, salt, cinnamon, ginger, and cloves in a bowl until evenly incorporated.: When you add the melted butter to the crumbs with brown sugar and salt , the mixture should glisten slightly and clump together when pressed. This sheen signals proper binding. If the crumbs remain dry, add the butter a teaspoon at a time until the mixture holds. A common pitfall is adding too much butter, which leaves the crust greasy and loose. Mix just until even, then move to pressing.
- In a bowl, whisk eggs together with pumpkin. Sprinkle over dry ingredients and stir until completely incorporated. Stir in milk and vanilla, followed by lemon juice. Stir in melted butter.: The act of pressing the crumb mixture into the pan creates surface tension that helps the bars hold together when sliced. Use a smooth rubber spatula or the bottom of a measuring cup to apply steady, even pressure until the crust is compact and level. You want it firm enough to be structural, but not so compact that it becomes rock hard after baking. Uneven pressing can lead to thin spots that crumble when cut.
- Pour filling into cooled crust. Depending on the size and depth of your pan, you may have extra batter. Take care not to fill your pan more than 3/4 of the way full as it will rise slightly when baking.: As the crust bakes, it will take on a light golden color and a toasty aroma. The brief bake helps the crumb solidify and crisp slightly, which keeps the filling from soaking in. Remove it when it is just set, not deeply browned, because prolonged baking can dry it out. A common mistake is overbaking the crust, which makes the base brittle and less pleasurable texturally. Let it cool completely on a wire rack so it firms without trapping steam.
- Bake for 50 to 60 minutes or until top is golden, slightly puffed, and covered with small bubbles. The center will still be slightly jiggly at this point, like firm jello. If it still seems too liquidy, bake it a bit longer. Note that if you are using a standard depth pie pan, your filling will be thinner and will take less time overall to bake. Start checking after about 40 minutes if that is the case. The good news is chess pie is pretty darn hard to overbake, so if you’re unsure, give it a few more minutes.: When you whisk these dry components together, you are creating an even flavor and texture base so every bite tastes consistent. The cornmeal gives a subtle tooth and helps absorb moisture, while the flour stabilizes. Whisk until the color is uniform and there are no clumps of brown sugar. Missing this step can leave pockets of undissolved sugar or uneven spice concentration, which will show up as textural or flavor surprises in the finished filling.
- Remove from oven to a wire rack and let cool to room temperature, 1 to 2 hours. Serve, or cover and refrigerate for up to 2 days. Let come to room temperature before serving, dusted with powdered sugar (if desired).: The first wet mix should be glossy and homogenous, with the deep color of pumpkin and ribbons of beaten egg blending smoothly. This step ensures the custard sets evenly and creates that silk like mouthfeel. If the eggs are not evenly mixed, you risk pockets of cooked yolk or uneven texture. Beat until the mixture is smooth and slightly aerated, but not frothy.
- Sprinkle over dry ingredients and stir until completely incorporated.: Once you combine the wet and dry, you should notice the mixture coming together into a thick batter that is richly scented with spice. Stir gently until no streaks remain and the batter is uniform in color, which assures that every slice will have balanced flavor. Overmixing is not a major concern here, but be mindful to integrate fully so there are no concentrated pockets of dry ingredients that can feel gritty.
- Stir in milk and vanilla, followed by lemon juice.: Adding milk softens the batter and produces a silkier custard. The vanilla rounds the edges of the sugars and spices, while the lemon juice adds a surprising brightness that keeps the dessert from tasting flat. Mix gently until the batter feels smooth and slightly pourable. If the mixture seems too thick, a splash more milk can help; if too thin, ensure your measurements were accurate.
- Stir in melted butter.: When the slightly cooled melted butter is folded in, the batter takes on a glossy sheen that will translate to a tender, rich finish after baking. Melting also activates the butter's fat to coat proteins and starches, creating a silkier custard. If the butter is too hot it may cook the eggs prematurely, so always cool slightly before adding. Folding in gently keeps the texture smooth and integrated.
- Pour filling into cooled crust.: Pouring into a completely cooled crust prevents the filling from sliding or seeping unevenly, and helps the custard begin to set predictably in the oven. Watch as the batter fills the pan, and avoid overfilling so the bars have room to puff slightly. If the pan is overfilled, the filling can bubble over and disrupt baking. Aim to fill no more than three quarters full to allow for rise.
- Depending on the size and depth of your pan, you may have extra batter.: Different pans yield different thicknesses, and a standard depth pie pan will give a thinner layer that bakes faster. If you have extra batter, you can bake a small ramekin to test doneness or use it for a small sample. The visual cue to watch for is top color and small, even bubbles forming across the surface.
- Take care not to fill your pan more than 3/4 of the way full as it will rise slightly when baking.: Leaving headroom prevents spills and gives the filling space to expand. During baking the filling puffs and then settles, so that initial rise is expected. Overfilling often leads to a messy oven and uneven bake, so err on the side of a little less batter if unsure.
- Bake for 50 to 60 minutes or until top is golden, slightly puffed, and covered with small bubbles.: As the bars bake, the kitchen will fill with warm spice and sugar aromas, and you will hear a faint pop as small bubbles form and gently subside. The center should still be a little jiggly, similar to firm jelly, which is the cue that it will finish setting as it cools. A common mistake is removing it too early when the center is very liquid, but the bars are forgiving; if too soft, return to the oven in five minute increments.
- The center will still be slightly jiggly at this point, like firm jello.: That wobble is the hallmark of a properly baked custard bar. As it cools, the structure tightens and the texture becomes creamy. If the center is wave like liquid, continue to bake a bit longer. Remember that ovens vary, so rely on the jiggle more than time alone.
- If it still seems too liquidy, bake it a bit longer.: Add time in small increments and watch for the edges to set first and the center to thicken. Overbaking will dry out the filling, so probe cautiously; the final goal is a slight jiggle that will firm up with cooling. Avoid opening the oven frequently, which can prolong the baking and cause uneven texture.
- Note that if you are using a standard depth pie pan, your filling will be thinner and will take less time overall to bake.: In a shallower pan, heat reaches the center faster, so start checking around forty minutes. The thinner fill means a quicker set, and you will notice a faster transition from glossy to set. Using the correct pan depth as instructed ensures timing guidance stays accurate.
- Start checking after about 40 minutes if that is the case.: Begin by observing the color and jiggle, then test gently with a toothpick or by a slight shake of the pan. If the toothpick comes out mostly clean with a few moist crumbs, it is done. A raw batter on the toothpick means more time is needed.
- The good news is chess pie is pretty darn hard to overbake, so if you’re unsure, give it a few more minutes.: Because of the sugar rich custard, the texture tolerates extra minutes without becoming chalky, but be mindful that extended baking can reduce creaminess. If you go long, allow adequate cooling time to improve texture and slicing.
- Remove from oven to a wire rack and let cool to room temperature, 1 to 2 hours.: Cooling is when the bars finish setting, and you will notice the center firm up and the top lose its jiggle. The aroma will settle into a more concentrated pumpkin and spice note. Resist cutting too soon, because warm bars are more likely to crumble. Letting them rest produces tidy slices and a balanced texture.
- Serve, or cover and refrigerate for up to 2 days.: Chilled bars slice neatly and the flavors continue to meld in the fridge. If refrigerating, cover to prevent drying and to avoid absorbing other fridge aromas. When ready to serve, let them come to room temperature to regain some softness, and dust with powdered sugar if desired for a pretty finish.
- Let come to room temperature before serving, dusted with powdered sugar (if desired).: Bringing them back to room temperature revives creaminess and reveals the full flavor profile. A light dusting of powdered sugar adds visual contrast and a hint of extra sweetness, but omit if serving with a richer accompaniment. The final texture should be creamy and smooth with a firm, buttery base.
Recipe Variations about Pumpkin Chess Pie Bars
These variations are meant to be practical and simple, letting you adapt texture and flavor without changing the character of the bars. Each tip highlights a small swap or technique I have used to tailor sweetness, spice level, or presentation.
- Swap cookie crumbs: Try all graham cracker crumbs or combine half vanilla wafer and half graham to alter sweetness and crunch. Adjust the amount of butter slightly if using drier crumbs so the crust still binds well.
- Adjust spice intensity: Increase the cinnamon by an extra quarter teaspoon for a warmer profile, or reduce the cloves if you prefer a milder spice presence. Taste balance is key because spices concentrate as the bars bake.
- Make ahead strategy: Bake the day before and refrigerate. Bringing the bars to room temperature before serving retains creaminess while offering cleaner slices for transport and display.
- Presentation upgrade: Dust with powdered sugar just before serving or top with a small swirl of whipped cream to add a light, elegant finish that contrasts the dense filling.
- Pan choice tip: Use the 8 by 8 pan for taller bars and a longer bake time, or a 9 by 9 pan for a thinner filling and faster baking. Adjust your checking times accordingly to avoid over or under baking.
Side Dish Ideas for Pumpkin Chess Pie Bars
These serving ideas aim to help you pair the bars with complementary flavors and choose occasions where they shine. Think about texture contrasts and seasonal contexts to make the most of each square. They are versatile on a dessert table and travel well for gatherings.
- Light coffee pairing: Serve a warm or room temperature bar with a small cup of medium roast coffee for morning or brunch occasions; the coffee’s bitterness balances the sugar and spices perfectly.
- Whipped cream accompaniment: A dollop of softly whipped cream adds a cooling, airy contrast to the custardy richness and makes the portion feel more indulgent for dessert after a holiday meal.
- Holiday dessert table: Include these bars as an alternative to whole pies during Thanksgiving or fall gatherings; their portability and individual portions make them ideal for buffet style service.
- Storage tip: Store covered in the refrigerator for up to two days, and allow to come to room temperature before serving to recover creaminess. For longer storage, freeze wrapped tightly and thaw overnight in the fridge.
- Seasonal pairing: These bars shine in fall and early winter when squash and spice flavors are in season. Serve them alongside spiced beverages or after a hearty, comfort style dinner.
- Occasion suggestion: Bring them to potlucks or family gatherings where you want something that slices cleanly and travels without losing texture, offering an elegant homemade touch with minimal fuss.
FAQ
Conclusion
What makes these Pumpkin Chess Pie Bars special is the way a silky, spiced pumpkin custard meets a buttery, sturdy crumb base to create a dessert that is both comforting and elegant. Give them a try when you want a seasonal treat that slices neatly, travels well, and satisfies a crowd without complicated technique. They are forgiving, flavorful, and an excellent option for holiday tables, potlucks, or a cozy night in with friends.

Pumpkin Chess Pie Bars
Equipment
- 8-by-8 or 9-by-9 baking pan
- Parchment Paper
- Food Processor
- Wire Rack
- Mixing Bowls
- Whisk
Ingredients
- 1 1/2 cups vanilla wafer or graham cracker crumbs (about 8 ounces) Provide crumbly base texture and subtle sweetness when combined with butter; use finely crushed to form an even crust that holds the pie bars together during baking.
- 1 tablespoon brown sugar Add a hint of caramel-like sweetness and help balance flavors; sprinkle into the crust mixture to deepen overall taste complexity.
- 1/2 teaspoon kosher salt Enhance overall flavor balance and bring out sweetness; dissolve into the crust mix to ensure the base is seasoned and not bland.
- 5 tablespoons unsalted butter, melted Bind the crumbs into a cohesive crust and add richness; pour melted butter over crumbs and press firmly into the pan for a stable foundation.
- 1 cup granulated sugar Deliver primary sweetness for the filling and help with caramelization; mix thoroughly with other sugars and eggs to create a smooth custard.
- 1 cup packed light brown sugar Contribute moist, caramel notes and deepen flavor complexity; beat into the filling to provide richness and structure.
- 2 tablespoons all purpose flour Thicken the filling slightly and stabilize the custard; whisk into the sugar mixture to prevent the filling from becoming too runny.
- 1 tablespoon cornmeal Introduce a subtle gritty texture and traditional corn flavor; stir into the filling to add body and a hint of crunch.
- 1 teaspoon kosher salt Enhance seasoning and balance sweetness within the filling; incorporate with sugars to ensure even distribution of savory contrast.
- 1/2 teaspoon ground cinnamon Provide warm aromatic spice and complement pumpkin flavor; measure precisely and blend into the filling for consistent warmth.
- 1/4 teaspoon ground ginger Add a fragrant, slightly sweet spice that complements pumpkin and autumn flavors; mix with other spices for balanced spiciness.
- 1/8 teaspoon ground cloves Contribute a warm, bitter-sweet note that deepens the spice profile; use sparingly to avoid overpowering the filling.
- 4 large eggs, lightly beaten Incorporate air and structure into the custard while promoting a smooth texture; beat lightly and combine with the wet ingredients for even set.
- 1 cup pumpkin puree (not pumpkin pie filling) Provide pumpkin flavor and moisture while keeping texture smooth; fold into the custard mixture to infuse seasonal character.
- 1/2 cup whole milk Lighten the filling slightly and add creaminess; stir in to adjust consistency and support a custard-like texture.
- 1 tablespoon lemon juice Introduce a touch of acidity to brighten flavors and balance sweetness; add to the filling to lift and enhance the overall taste.
- 1 teaspoon vanilla extract Bring floral and sweet aromatics that round out flavors; add to the filling for depth and to enhance the pumpkin spices.
- 6 tablespoons unsalted butter, melted and slightly cooled Enrich the filling with butterfat and create a glossy, rich finish; pour in melted and slightly cooled butter to improve texture and mouthfeel.
- powdered sugar, for dusting (optional) Provide optional finishing sweetness and a delicate visual dusting; sprinkle sifted powdered sugar over cooled bars before serving.
Instructions
- Preheat oven to 350 degrees F. Line an 8-by-8-inch or 9-by-9-inch baking pan with parchment paper, lightly buttering the underside of the parchment as needed so it sticks to the pan and doesn’t slide around. You can also use a standard 9-inch pie pan or springform pan.: The moment you set the oven to 350 degrees F , you will begin to smell a faint warmth in the kitchen that indicates stable baking conditions. A properly preheated oven ensures even rise and predictable setting of the custard. I can tell the oven is ready when my thermometer reaches the target and the air feels consistently warm when I open the door briefly. A common mistake is putting the pan into a cold oven, which leads to uneven baking and a watery center. If your oven runs hot or cold, use an oven thermometer to adjust, and line your pan with parchment so removal is simple.
- Pulse cookies in a food processor until finely ground. Add salt, brown sugar, and melted butter and pulse or stir until evenly moistened. Press firmly into the bottom of prepared pan. (Tip: use a smooth rubber spatula to press the crust firmly and evenly into the bottom of the pan).: Pressing parchment into the pan gives you neat edges and makes lifting the bars effortless after cooling. The butter helps the parchment adhere, preventing it from sliding when you press the crumb crust in. If the parchment slips while you work, the crust can become uneven, so take the extra moment to secure it. I find the tactile feedback of the parchment against the pan reassuring because it prevents sticking and ensures clean removal.
- Bake crust for 8 to 10 minutes or until just set. Remove from oven and place on a wire rack; let cool completely.: As you pulse the vanilla wafer or graham cracker crumbs, listen for the even, quick rhythm that indicates a fine, sandy texture. A uniformly fine crumb helps the crust pack tightly, yielding a sturdy base that will hold the custard. Overprocessing to a powder can make the crust too dense, while leaving large chunks can cause crumbling when sliced. If you do not have a processor, place the cookies in a heavy zip top bag and crush with a rolling pin until you reach a sandlike consistency.
- To prepare filling, whisk sugar, brown sugar, flour, cornmeal, salt, cinnamon, ginger, and cloves in a bowl until evenly incorporated.: When you add the melted butter to the crumbs with brown sugar and salt , the mixture should glisten slightly and clump together when pressed. This sheen signals proper binding. If the crumbs remain dry, add the butter a teaspoon at a time until the mixture holds. A common pitfall is adding too much butter, which leaves the crust greasy and loose. Mix just until even, then move to pressing.
- In a bowl, whisk eggs together with pumpkin. Sprinkle over dry ingredients and stir until completely incorporated. Stir in milk and vanilla, followed by lemon juice. Stir in melted butter.: The act of pressing the crumb mixture into the pan creates surface tension that helps the bars hold together when sliced. Use a smooth rubber spatula or the bottom of a measuring cup to apply steady, even pressure until the crust is compact and level. You want it firm enough to be structural, but not so compact that it becomes rock hard after baking. Uneven pressing can lead to thin spots that crumble when cut.
- Pour filling into cooled crust. Depending on the size and depth of your pan, you may have extra batter. Take care not to fill your pan more than 3/4 of the way full as it will rise slightly when baking.: As the crust bakes, it will take on a light golden color and a toasty aroma. The brief bake helps the crumb solidify and crisp slightly, which keeps the filling from soaking in. Remove it when it is just set, not deeply browned, because prolonged baking can dry it out. A common mistake is overbaking the crust, which makes the base brittle and less pleasurable texturally. Let it cool completely on a wire rack so it firms without trapping steam.
- Bake for 50 to 60 minutes or until top is golden, slightly puffed, and covered with small bubbles. The center will still be slightly jiggly at this point, like firm jello. If it still seems too liquidy, bake it a bit longer. Note that if you are using a standard depth pie pan, your filling will be thinner and will take less time overall to bake. Start checking after about 40 minutes if that is the case. The good news is chess pie is pretty darn hard to overbake, so if you’re unsure, give it a few more minutes.: When you whisk these dry components together, you are creating an even flavor and texture base so every bite tastes consistent. The cornmeal gives a subtle tooth and helps absorb moisture, while the flour stabilizes. Whisk until the color is uniform and there are no clumps of brown sugar. Missing this step can leave pockets of undissolved sugar or uneven spice concentration, which will show up as textural or flavor surprises in the finished filling.
- Remove from oven to a wire rack and let cool to room temperature, 1 to 2 hours. Serve, or cover and refrigerate for up to 2 days. Let come to room temperature before serving, dusted with powdered sugar (if desired).: The first wet mix should be glossy and homogenous, with the deep color of pumpkin and ribbons of beaten egg blending smoothly. This step ensures the custard sets evenly and creates that silk like mouthfeel. If the eggs are not evenly mixed, you risk pockets of cooked yolk or uneven texture. Beat until the mixture is smooth and slightly aerated, but not frothy.
- Sprinkle over dry ingredients and stir until completely incorporated.: Once you combine the wet and dry, you should notice the mixture coming together into a thick batter that is richly scented with spice. Stir gently until no streaks remain and the batter is uniform in color, which assures that every slice will have balanced flavor. Overmixing is not a major concern here, but be mindful to integrate fully so there are no concentrated pockets of dry ingredients that can feel gritty.
- Stir in milk and vanilla, followed by lemon juice.: Adding milk softens the batter and produces a silkier custard. The vanilla rounds the edges of the sugars and spices, while the lemon juice adds a surprising brightness that keeps the dessert from tasting flat. Mix gently until the batter feels smooth and slightly pourable. If the mixture seems too thick, a splash more milk can help; if too thin, ensure your measurements were accurate.
- Stir in melted butter.: When the slightly cooled melted butter is folded in, the batter takes on a glossy sheen that will translate to a tender, rich finish after baking. Melting also activates the butter's fat to coat proteins and starches, creating a silkier custard. If the butter is too hot it may cook the eggs prematurely, so always cool slightly before adding. Folding in gently keeps the texture smooth and integrated.
- Pour filling into cooled crust.: Pouring into a completely cooled crust prevents the filling from sliding or seeping unevenly, and helps the custard begin to set predictably in the oven. Watch as the batter fills the pan, and avoid overfilling so the bars have room to puff slightly. If the pan is overfilled, the filling can bubble over and disrupt baking. Aim to fill no more than three quarters full to allow for rise.
- Depending on the size and depth of your pan, you may have extra batter.: Different pans yield different thicknesses, and a standard depth pie pan will give a thinner layer that bakes faster. If you have extra batter, you can bake a small ramekin to test doneness or use it for a small sample. The visual cue to watch for is top color and small, even bubbles forming across the surface.
- Take care not to fill your pan more than 3/4 of the way full as it will rise slightly when baking.: Leaving headroom prevents spills and gives the filling space to expand. During baking the filling puffs and then settles, so that initial rise is expected. Overfilling often leads to a messy oven and uneven bake, so err on the side of a little less batter if unsure.
- Bake for 50 to 60 minutes or until top is golden, slightly puffed, and covered with small bubbles.: As the bars bake, the kitchen will fill with warm spice and sugar aromas, and you will hear a faint pop as small bubbles form and gently subside. The center should still be a little jiggly, similar to firm jelly, which is the cue that it will finish setting as it cools. A common mistake is removing it too early when the center is very liquid, but the bars are forgiving; if too soft, return to the oven in five minute increments.
- The center will still be slightly jiggly at this point, like firm jello.: That wobble is the hallmark of a properly baked custard bar. As it cools, the structure tightens and the texture becomes creamy. If the center is wave like liquid, continue to bake a bit longer. Remember that ovens vary, so rely on the jiggle more than time alone.
- If it still seems too liquidy, bake it a bit longer.: Add time in small increments and watch for the edges to set first and the center to thicken. Overbaking will dry out the filling, so probe cautiously; the final goal is a slight jiggle that will firm up with cooling. Avoid opening the oven frequently, which can prolong the baking and cause uneven texture.
- Note that if you are using a standard depth pie pan, your filling will be thinner and will take less time overall to bake.: In a shallower pan, heat reaches the center faster, so start checking around forty minutes. The thinner fill means a quicker set, and you will notice a faster transition from glossy to set. Using the correct pan depth as instructed ensures timing guidance stays accurate.
- Start checking after about 40 minutes if that is the case.: Begin by observing the color and jiggle, then test gently with a toothpick or by a slight shake of the pan. If the toothpick comes out mostly clean with a few moist crumbs, it is done. A raw batter on the toothpick means more time is needed.
- The good news is chess pie is pretty darn hard to overbake, so if you’re unsure, give it a few more minutes.: Because of the sugar rich custard, the texture tolerates extra minutes without becoming chalky, but be mindful that extended baking can reduce creaminess. If you go long, allow adequate cooling time to improve texture and slicing.
- Remove from oven to a wire rack and let cool to room temperature, 1 to 2 hours.: Cooling is when the bars finish setting, and you will notice the center firm up and the top lose its jiggle. The aroma will settle into a more concentrated pumpkin and spice note. Resist cutting too soon, because warm bars are more likely to crumble. Letting them rest produces tidy slices and a balanced texture.
- Serve, or cover and refrigerate for up to 2 days.: Chilled bars slice neatly and the flavors continue to meld in the fridge. If refrigerating, cover to prevent drying and to avoid absorbing other fridge aromas. When ready to serve, let them come to room temperature to regain some softness, and dust with powdered sugar if desired for a pretty finish.
- Let come to room temperature before serving, dusted with powdered sugar (if desired).: Bringing them back to room temperature revives creaminess and reveals the full flavor profile. A light dusting of powdered sugar adds visual contrast and a hint of extra sweetness, but omit if serving with a richer accompaniment. The final texture should be creamy and smooth with a firm, buttery base.
Notes
- Swap cookie crumbs: Try all graham cracker crumbs or combine half vanilla wafer and half graham to alter sweetness and crunch. Adjust the amount of butter slightly if using drier crumbs so the crust still binds well.
- Adjust spice intensity: Increase the cinnamon by an extra quarter teaspoon for a warmer profile, or reduce the cloves if you prefer a milder spice presence. Taste balance is key because spices concentrate as the bars bake.
- Make ahead strategy: Bake the day before and refrigerate. Bringing the bars to room temperature before serving retains creaminess while offering cleaner slices for transport and display.
- Presentation upgrade: Dust with powdered sugar just before serving or top with a small swirl of whipped cream to add a light, elegant finish that contrasts the dense filling.
- Pan choice tip: Use the 8 by 8 pan for taller bars and a longer bake time, or a 9 by 9 pan for a thinner filling and faster baking. Adjust your checking times accordingly to avoid over or under baking.