Lemon Posset
Lemon Posset arrived in my life during a humid summer when I was craving something utterly simple yet luxuriously creamy. I remember standing at my small kitchen counter with a saucepan and a handful of lemons, feeling oddly hopeful that three ingredients could produce something memorable. As I heated the cream, the tiny bubbles formed at the edge and released a faint sweet dairy aroma that promised comfort. When the lemon juice folded into the warm cream, the scent brightened the room, pulling me back to sunny mornings and bakery windows.
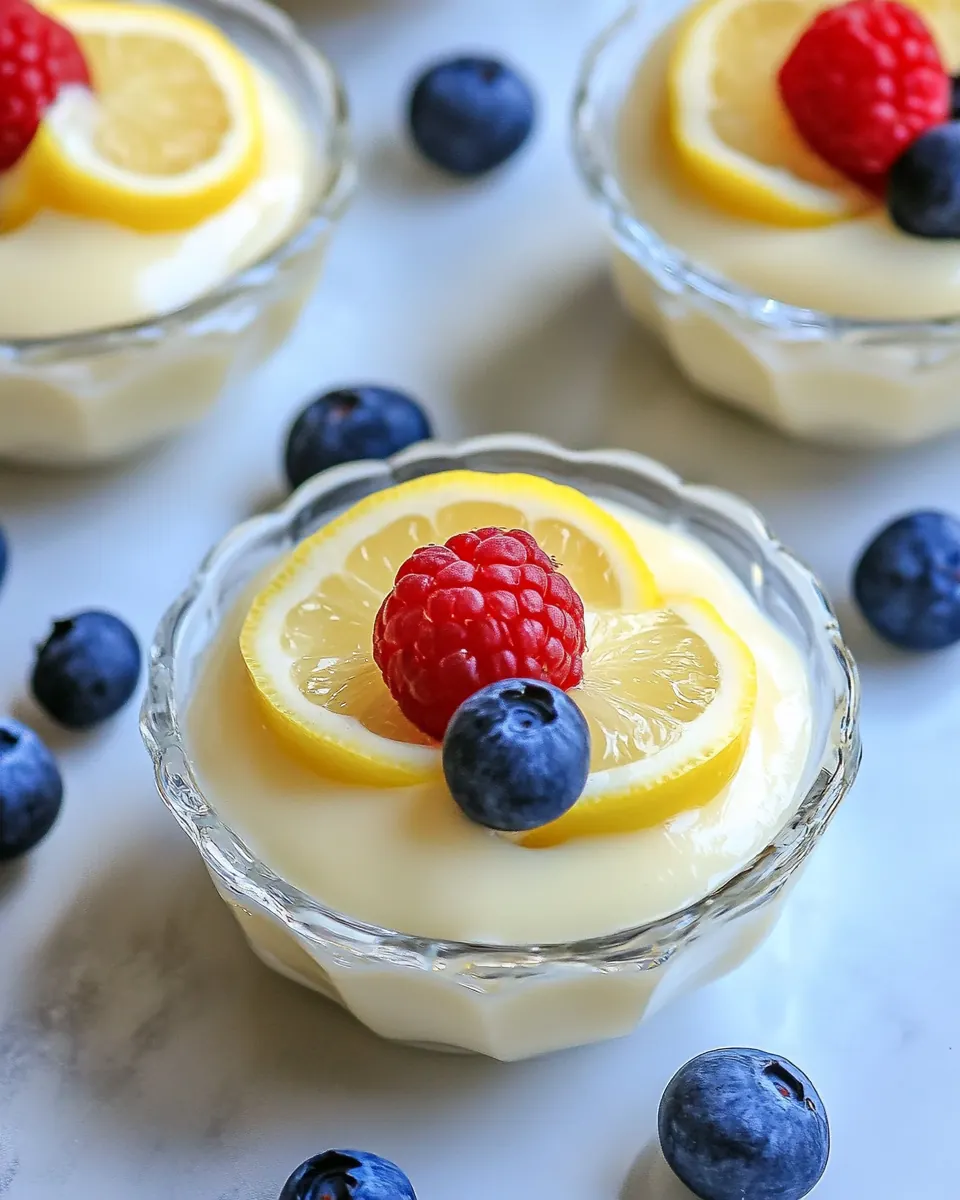
That first spoonful is a memory I return to when I need an easy dessert that still feels special. The texture is silkier than pudding, denser than custard, and it sits on the tongue like a hush of lemony light. I like to serve it in small glasses when guests arrive, because it feels indulgent without being fussy. On a quiet evening I’ll top it with a single berry, while at a lively dinner I’ll set out a bowl of lemon slices and let everyone personalize their portion.
Recipe Snapshot
15 mins
8 mins
7 mins
Easy
210 kcal
American
Gluten-Free, Low FODMAP
Desserts
Small saucepan, Fine mesh sieve, Measuring cup with pouring lip, Ramekins
Why This Lemon Posset Shines
Ultra simple, maximum impact
I love how Lemon Posset turns three pantry items into something that tastes like effort was involved, even when it wasn’t. The formula is forgiving, so you can focus on technique rather than worrying about fiddly steps. I find that this simplicity makes it an ideal go to when you want a dessert that still feels homemade and deliberate.
Silky texture without eggs
One thing that always surprises people is how lush the texture is, even though there are no eggs or gelatin. Using heavy whipping cream and proper simmering creates a naturally thickened, velvety finish. I appreciate that it’s egg free, because it keeps the flavor clean and the technique straightforward.
Bright and refreshing flavor
The brightness from fresh lemon juice cuts through the richness, giving you a balanced bite every time. I like to tell people that it feels like sunshine in a spoon, but not cloying, because the acidity sharpens the cream. When I use freshly squeezed lemon, the aroma alone lifts the whole dessert.
Make ahead friendly
I always plan this for gatherings because Lemon Posset benefits from chilling. It sets up reliably in the fridge, so you can prepare it hours in advance and free up oven or stovetop time during the event. That reliability is a game changer for hosting, and it reduces last minute kitchen stress.
Flexible presentation
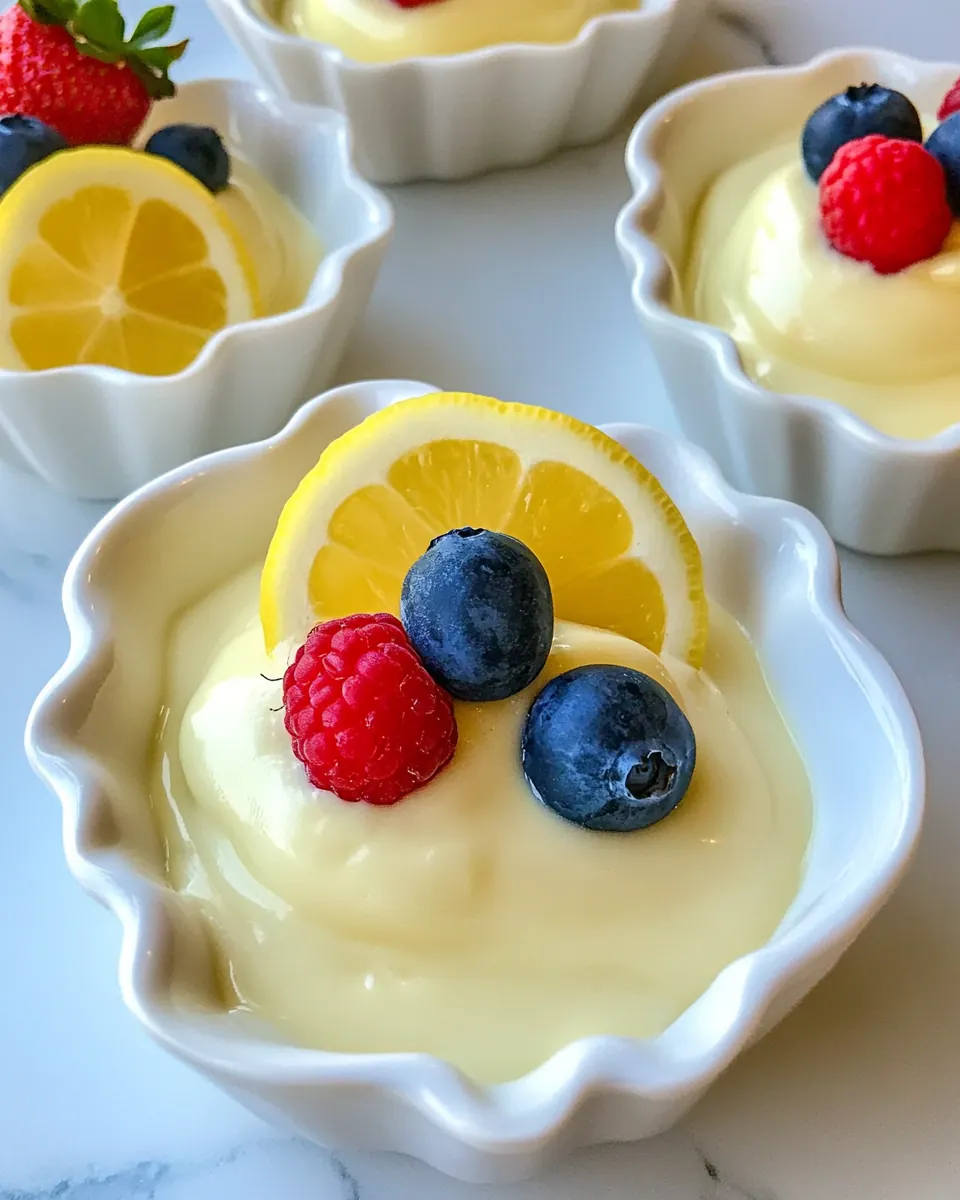
Whether I spoon it into ramekins, small glasses, or hollowed lemon halves, the result feels elegant. It adapts to the occasion, from casual weeknight treats to a small celebration. The neutral base invites whatever garnish you prefer, and that creative freedom is something I always come back to.
Ingredients You’ll Need for Lemon Posset
These ingredients are intentionally few but purposeful. The success of Lemon Posset depends on the fat content in the heavy whipping cream, the sweet balance from granulated sugar, and the brightness of real lemon juice. Together they create a simple emulsion that sets as it cools, producing a dessert that is both rich and refreshingly tart. Each item plays a clear role, and there is no filler here.
- 2 cups heavy whipping cream: Heat and enrich the dessert by contributing a smooth, creamy base that sets when cooled; simmer gently to allow the cream to thicken and blend with sugar and lemon, creating the posset’s silky texture and rich mouthfeel.
- 2/3 cup granulated sugar: Provide sweetness and structure by dissolving into the warm cream to balance the lemon’s acidity; stir until fully melted to help the mixture set and achieve a delicate, properly sweetened finish.
- 5 tbsp lemon juice, from about 3 lemons: Brighten and acidify the mixture to curdle and set the cream, creating the characteristic tangy flavor and slightly firm texture; squeeze fresh lemon juice for the best aromatic citrus notes and natural acidity.
- Lemon slice or berries, for serving (optional): Garnish and enhance presentation with a fresh citrus slice or bright berries to add color, optional texture and a hint of freshness that complements the rich, tangy posset without altering its set consistency.
Recipe Steps for Lemon Posset
These steps are simple but precise, and I like to move deliberately when making Lemon Posset. Take your time to notice aromas and texture changes, because those cues tell you when to move to the next stage. Keep a timer handy and a fine mesh sieve ready for a smooth finish.
- Boil– In a small saucepan, heat the cream and sugar, stirring to dissolve the sugar. Bring to a boil, then adjust the heat so it doesn’t boil over and keep it at a medium boil for 5 minutes.: As the cream warms, you’ll notice a sweet dairy scent rising and tiny bubbles forming along the edges, which signals that the sugar is dissolving and the mixture is concentrating; this slow, steady simmer allows the cream to slightly thicken and develop depth without scorching, and it also helps evaporate a bit of water so the posset can set; a good sensory cue is a steady ring of small bubbles plus a faint caramel undertone at the rim, and you should hear a gentle rolling simmer rather than violent popping; the reason this matters is that the controlled boil changes the cream’s structure so it becomes naturally thick when acid is added later; a common mistake is letting the pot roar which can cause boil over and uneven cooking, so reduce heat as soon as the boil starts; if the mixture develops a burnt smell, discard and start over to avoid an off flavor.
- Add lemon– Remove the pan from the heat and stir in the lemon juice, then set aside to cool for 15 minutes. Strain the mixture through a fine mesh sieve set over a large measuring cup with a pouring lip.: The second you add the bright lemon juice you will notice the aroma lift and the mixture begin to thicken slightly, the acid interacts with the warmed cream creating the silky body that defines posset; letting it cool for fifteen minutes tempers the heat so you can strain without steam buildup, and straining through a fine mesh removes any coagulated bits and seeds for a perfectly smooth texture; pay attention to the way the mixture pours, it should be viscous yet pourable, and the color will be a pale creamy lemon; a typical error is skipping the sieve which can leave grainy or lumpy bits in the finished dessert, so always strain carefully and scrape the pot to capture all the flavor.
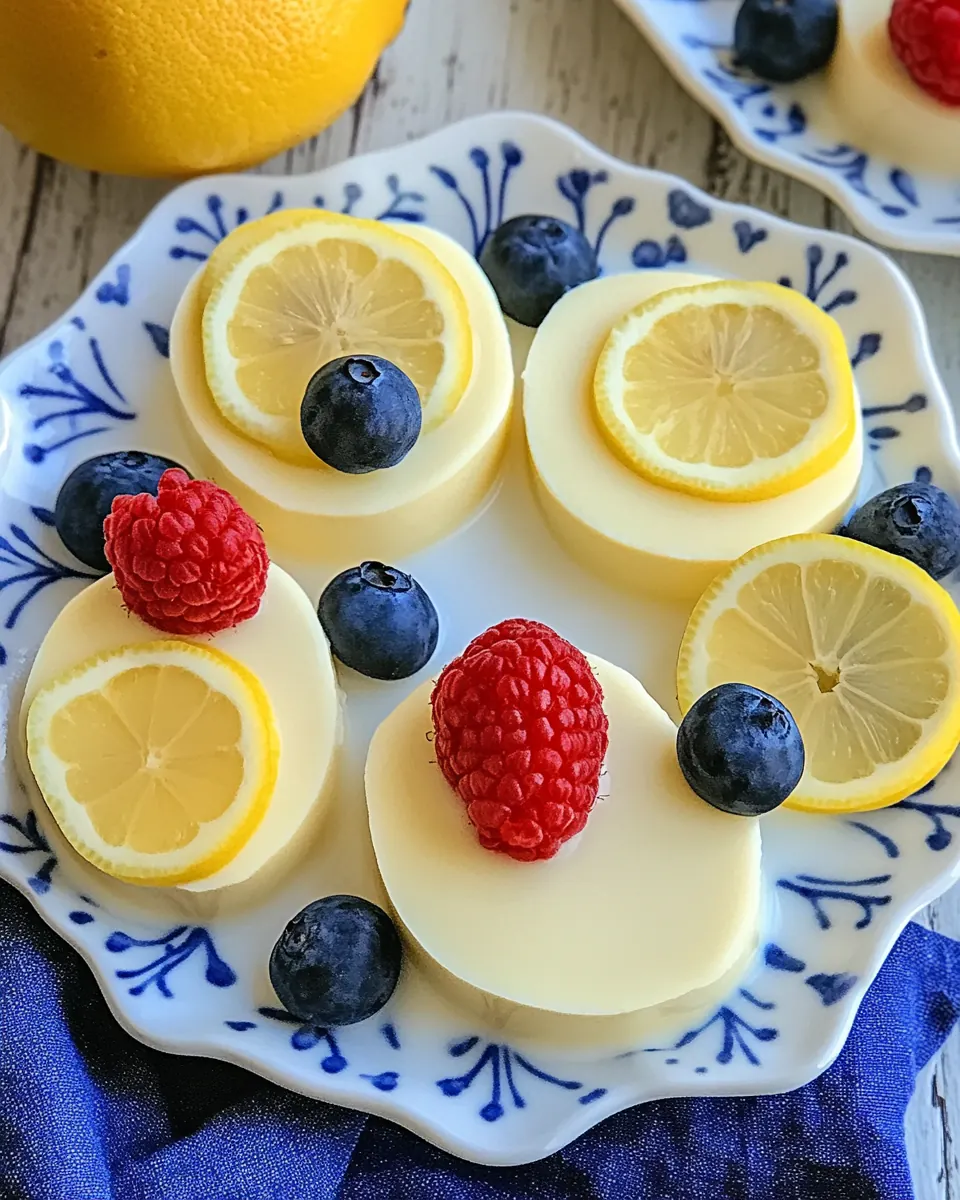
- Fill– Divide the mixture between 6 ramekins or between 10-12 lemon halves if you prefer to serve it that way. Fill your serving cups about 3/4” full so it sets up properly.: As you fill the dishes, notice the way the liquid settles into a glossy surface that will dull slightly as it cools; filling to a consistent level ensures even setting and an attractive presentation; if using lemon halves, the bright shells add charm and a hint of extra citrus aroma, but watch for minor drips while pouring to keep the edges clean; the importance here is portion control, because overfilling will prevent a proper set and underfilling can yield an overly firm center; a common slip is rushing and spilling, so pour slowly and use a measuring cup with a lip for control.
- Refrigerate for at least 2 hours or until fully set, then top with whipped cream if desired, along with a lemon slice or berries for garnish.: The refrigerator’s coolness gradually firms the custard, and during this time the texture tightens into a dense, spoonable set with a delicate sheen; you’ll recognize readiness when the surface no longer jiggles and a spoon leaves a clean trail; chilling also allows the flavors to meld so the lemon sharpness becomes integrated with the rich cream; avoid placing the possets near strong smelling foods in the fridge, cover them loosely if possible to prevent odor absorption; a typical error is checking too early, which can lead to a runny center, so be patient and give it the full two hours or more if your fridge is very cold.
Variations to Try
I enjoy experimenting with small twists to keep Lemon Posset interesting. The base is so pure that gentle additions or different presentations can change the mood without overshadowing the core flavor. Below are ideas I’ve tested and serve often.
- Use citrus zest Add a teaspoon of finely grated lemon zest to the strained mixture for a more aromatic finish, taking care to remove any bitter white pith when zesting.
- Serve in lemon cups Hollow out lemon halves and spoon the posset into them for a rustic, impressive presentation that boosts the citrus aroma.
- Top with fresh berries A few raspberries or blueberries provide a sweet tart contrast and a pop of color that pairs well with the creamy texture.
- Swap presentation vessels Try small glasses, espresso cups, or porcelain ramekins to change portion size and how the dessert reads on the table.
- Make ahead for ease Prepare up to three days in advance and keep covered in the fridge to save time when hosting.
Serving Suggestions
Lemon Posset is elegant enough for celebrations yet relaxed enough for weeknight endings. It pairs well with light, fresh accompaniments and is a natural fit for spring and summer gatherings. Below are serving ideas, occasions, and storage suggestions to help you plan.
- Portioning Serve the posset in small ramekins or cups for a refined dessert course, or use lemon halves for a playful, seasonal presentation.
- Garnishes Top with a thin lemon slice or a few berries to add color and a textural contrast without masking the main flavor.
- Occasions This dessert is perfect for spring brunch, light dinner parties, Ramadan if you want a gentle sweet, or any celebration where you want a small, elegant treat.
- Pairings Complement with delicate tea or espresso, and consider serving fresh fruit salad on the side for a fuller dessert spread.
- Storage Once set, cover with plastic wrap to prevent odor absorption, and store in the refrigerator for up to three days for best texture and flavor retention.
- Transporting If you need to transport, use a shallow box, keep possets level, and secure the lid to prevent tipping; chilled possets travel best in a cooler.
- Seasonal notes In spring and early summer, the bright citrus pairs well with light floral decorations and fresh berries, making it a seasonal favorite.
FAQ
Conclusion
Lemon Posset is special because it transforms three simple ingredients into a silky, bright dessert that feels both luxurious and effortless. Give it a try when you want a make ahead sweet that is elegant without fuss. I promise the clean lemon flavor and creamy texture are crowd pleasers, and once you taste that first spoonful you’ll find yourself making it again for small gatherings and quiet evenings alike.

Lemon Posset
Equipment
- Small Saucepan
- Fine mesh sieve
- Measuring cup with pouring lip
- Ramekins
Ingredients
- 2 cups heavy whipping cream Heat and enrich the dessert by contributing a smooth, creamy base that sets when cooled; simmer gently to allow the cream to thicken and blend with sugar and lemon, creating the posset’s silky texture and rich mouthfeel.
- 2/3 cup granulated sugar Provide sweetness and structure by dissolving into the warm cream to balance the lemon’s acidity; stir until fully melted to help the mixture set and achieve a delicate, properly sweetened finish.
- 5 tbsp lemon juice, from about 3 lemons Brighten and acidify the mixture to curdle and set the cream, creating the characteristic tangy flavor and slightly firm texture; squeeze fresh lemon juice for the best aromatic citrus notes and natural acidity.
- Lemon slice or berries, optional for serving Garnish and enhance presentation with a fresh citrus slice or bright berries to add color, optional texture and a hint of freshness that complements the rich, tangy posset without altering its set consistency.
Instructions
- Boil– In a small saucepan, heat the cream and sugar, stirring to dissolve the sugar. Bring to a boil, then adjust the heat so it doesn’t boil over and keep it at a medium boil for 5 minutes.: As the cream warms, you’ll notice a sweet dairy scent rising and tiny bubbles forming along the edges, which signals that the sugar is dissolving and the mixture is concentrating; this slow, steady simmer allows the cream to slightly thicken and develop depth without scorching, and it also helps evaporate a bit of water so the posset can set; a good sensory cue is a steady ring of small bubbles plus a faint caramel undertone at the rim, and you should hear a gentle rolling simmer rather than violent popping; the reason this matters is that the controlled boil changes the cream’s structure so it becomes naturally thick when acid is added later; a common mistake is letting the pot roar which can cause boil over and uneven cooking, so reduce heat as soon as the boil starts; if the mixture develops a burnt smell, discard and start over to avoid an off flavor.
- Add lemon– Remove the pan from the heat and stir in the lemon juice, then set aside to cool for 15 minutes. Strain the mixture through a fine mesh sieve set over a large measuring cup with a pouring lip.: The second you add the bright lemon juice you will notice the aroma lift and the mixture begin to thicken slightly, the acid interacts with the warmed cream creating the silky body that defines posset; letting it cool for fifteen minutes tempers the heat so you can strain without steam buildup, and straining through a fine mesh removes any coagulated bits and seeds for a perfectly smooth texture; pay attention to the way the mixture pours, it should be viscous yet pourable, and the color will be a pale creamy lemon; a typical error is skipping the sieve which can leave grainy or lumpy bits in the finished dessert, so always strain carefully and scrape the pot to capture all the flavor.
- Fill– Divide the mixture between 6 ramekins or between 10-12 lemon halves if you prefer to serve it that way. Fill your serving cups about 3/4” full so it sets up properly.: As you fill the dishes, notice the way the liquid settles into a glossy surface that will dull slightly as it cools; filling to a consistent level ensures even setting and an attractive presentation; if using lemon halves, the bright shells add charm and a hint of extra citrus aroma, but watch for minor drips while pouring to keep the edges clean; the importance here is portion control, because overfilling will prevent a proper set and underfilling can yield an overly firm center; a common slip is rushing and spilling, so pour slowly and use a measuring cup with a lip for control.
- Refrigerate for at least 2 hours or until fully set, then top with whipped cream if desired, along with a lemon slice or berries for garnish.: The refrigerator’s coolness gradually firms the custard, and during this time the texture tightens into a dense, spoonable set with a delicate sheen; you’ll recognize readiness when the surface no longer jiggles and a spoon leaves a clean trail; chilling also allows the flavors to meld so the lemon sharpness becomes integrated with the rich cream; avoid placing the possets near strong smelling foods in the fridge, cover them loosely if possible to prevent odor absorption; a typical error is checking too early, which can lead to a runny center, so be patient and give it the full two hours or more if your fridge is very cold.
Notes
- Use citrus zest Add a teaspoon of finely grated lemon zest to the strained mixture for a more aromatic finish, taking care to remove any bitter white pith when zesting.
- Serve in lemon cups Hollow out lemon halves and spoon the posset into them for a rustic, impressive presentation that boosts the citrus aroma.
- Top with fresh berries A few raspberries or blueberries provide a sweet tart contrast and a pop of color that pairs well with the creamy texture.
- Swap presentation vessels Try small glasses, espresso cups, or porcelain ramekins to change portion size and how the dessert reads on the table.
- Make ahead for ease Prepare up to three days in advance and keep covered in the fridge to save time when hosting.