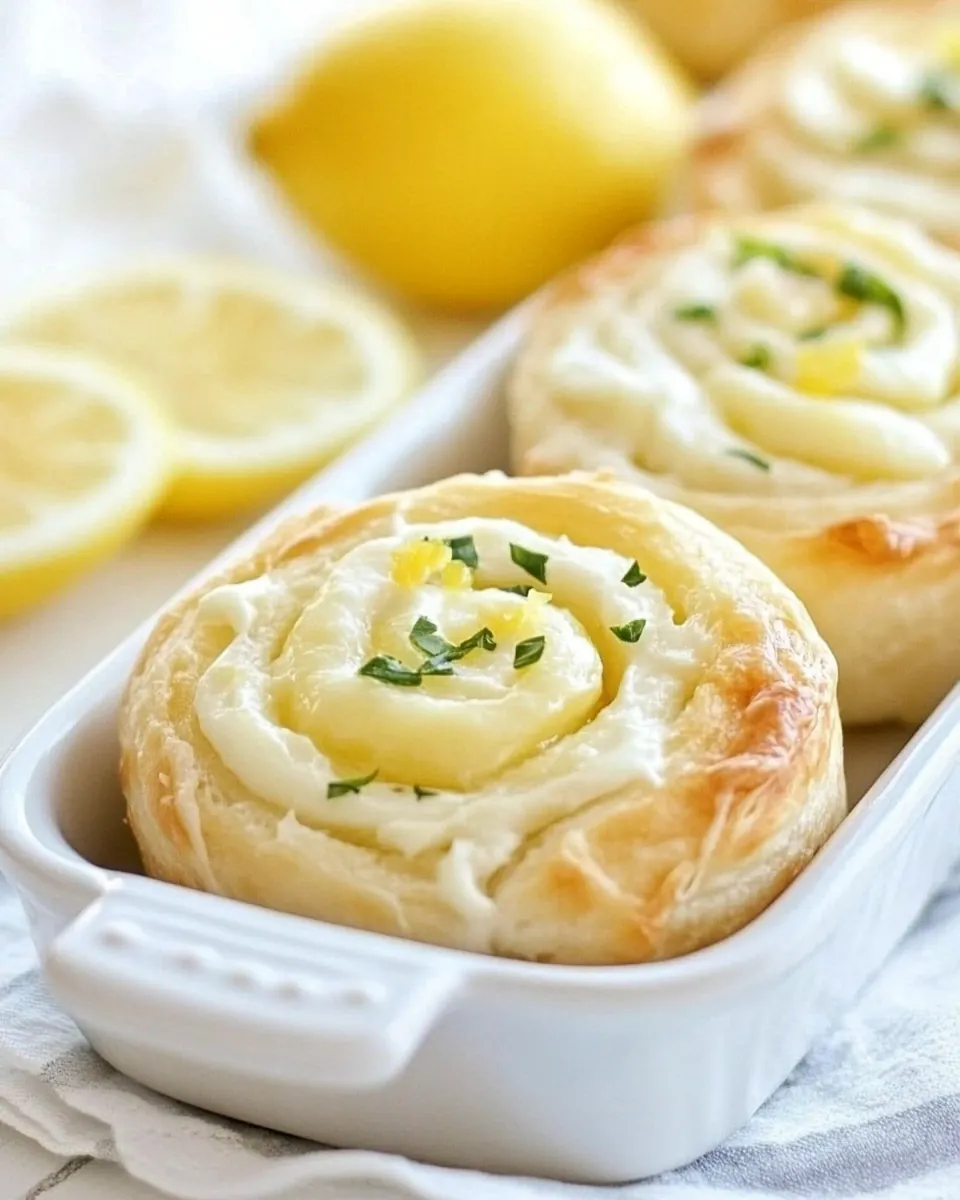
Lemon Cream Cheese Pinwheels
Lemon Cream Cheese Pinwheels started showing up at my family brunches years ago, and the moment I bit into one I understood why they became a staple. I remember the first time I tried to make them, flour dusted across my hands, the kitchen filled with the bright scent of lemon and the soft tang of cream cheese. That first batch taught me that small, simple techniques make a huge difference in texture and presentation.
Every holiday or casual get together since then, I’ve tweaked fillings and icings, learning to trust the dough and to pay attention to little visual cues. The best part about Lemon Cream Cheese Pinwheels is how approachable they are, yet they look like you spent hours. Guests always ask for the recipe, and I love telling them how easy it is to adapt the flavors while keeping the same comforting structure of a soft roll with a creamy center and a bright, glossy drizzle.
Recipe Snapshot
37 mins
15 mins
22 mins
Easy
200 kcal
American
Gluten-Free, Low FODMAP
Desserts
8-inch round cake pan, Microwavable bowl, Knife, Mixing spoon
The Magic of This Lemon Cream Cheese Pinwheels
They are irresistibly shareable
I love how Lemon Cream Cheese Pinwheels automatically become the gathering focal point. The spiral shape invites people to reach in, and the balance between the soft crescent dough and the tangy cream cheese filling means every bite is familiar and exciting at once.
Simple ingredients, big payoff
We are using pantry friendly items like refrigerated crescent dinner rolls, cream cheese, and jarred lemon curd. That keeps the prep stress free, while letting the flavors shine. I especially appreciate how the lemon curd lifts the whole bite so you do not need elaborate components to impress.
Great for timing and stress
I often reach for this recipe when I want something fast but memorable. From the time you unroll the dough to when the glaze sets, the process moves quickly, so you get gorgeous results without a marathon in the kitchen. That makes it ideal for morning celebrations or last minute guests.
Textures that sing together
The contrast between pillowy dough, silky cream cheese filling, and a glossy citrus drizzle gives a satisfying mouthfeel. I love the way the edges bake up slightly golden while the centers stay tender, and how the icing adds a light snap on top.
Kid approved and versatile
These rolls please picky eaters and grown ups alike. I have brought them to potlucks, and they vanish first. You can also double the batch without much extra effort, which is why I keep the components on hand during busy seasons.
What You Need for Lemon Cream Cheese Pinwheels
These ingredients are straightforward yet purposeful. The refrigerated crescent dinner rolls act as the tender base, the cream cheese brings richness and tang, and the lemon curd supplies bright, citrusy sweetness. The glaze ingredients finish the rolls with a smooth sheen that complements the soft interior. Together they create a balanced, approachable pastry that relies on texture and bright flavor rather than complexity.
- 1 can, 12 oz Pillsbury™ Grands!™ Big & Flaky refrigerated crescent dinner rolls: Provides a buttery, flaky dough base that yields large crescent strips ideal for rolling; unroll and press seams to form a single sheet for even baking and golden texture.
- 4 oz half 8-oz package cream cheese: Adds a rich, creamy filling component that contributes tanginess and smooth structure; soften to room temperature for easy spreading and stable consistency when combined with sugar and vanilla.
- 2 tablespoons granulated sugar: Sweetens and balances the tang of cream cheese and lemon curd while helping create a slightly firmer filling; dissolve into softened cream cheese for uniform sweetness and spreadability.
- 1/4 teaspoon vanilla extract: Enhances aroma and flavor by adding warm, sweet vanilla notes that round out the filling; stir into the cream cheese mixture to build depth without overpowering the lemon.
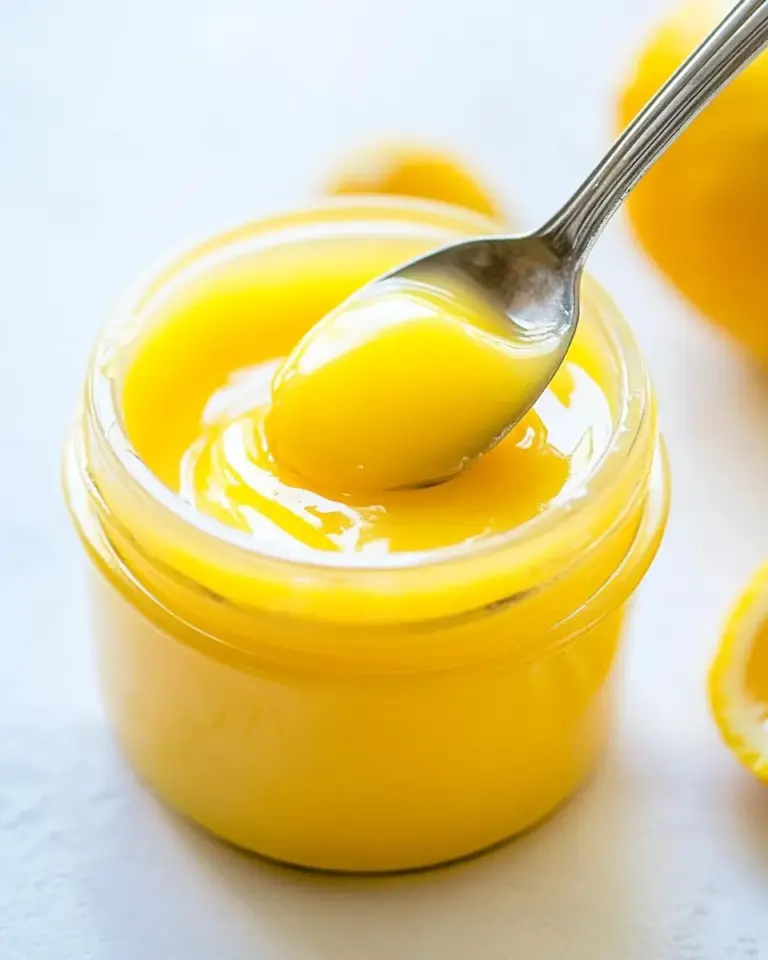
- 1/2 cup lemon curd: Delivers concentrated lemon flavor and moisture, providing the bright, fruity center of the pinwheels; spread evenly over the dough layer for bold citrus taste and glossy appearance after baking.
- 1/2 cup powdered sugar: Creates a smooth, sweet glaze that tames tartness and adds a delicate finish; whisk with lemon juice and water to achieve a pourable consistency for drizzling over cooled pinwheels.
- 1 teaspoon lemon juice: Introduces fresh acidity to brighten the glaze and balance sweetness; combine with powdered sugar and water to adjust tang and thinning for desired drip consistency.
- 1 teaspoon water: Thins the glaze to a pourable consistency and helps achieve a smooth, shiny finish; add gradually to powdered sugar and lemon juice until desired texture is reached.
Recipe Directions for Lemon Cream Cheese Pinwheels
These directions will guide you step by step from dough to glossy finish, and I will walk you through the sensory cues that signal success. Work with confidence, and remember small gestures matter, such as sealing edges and spreading fillings thinly. Keep your workspace organized so you can move smoothly between rolling and baking.
- Heat oven to 350°F. Lightly spray 8-inch round cake pan with cooking spray.: As the oven warms you will notice a gentle hum and the light preheat glow through the window, which sets the scene for even baking. Preheating ensures the temperature is stable the moment the rolls go in, promoting consistent rise and an evenly golden top. If you skip preheating, the dough may bake unevenly and the texture can become dense in spots. A common oversight is relying on an oven light alone, so use a reliable oven thermometer if your oven runs hot or cold.
- Unroll dough; separate into 4 rectangles. Pinch perforations to seal.: The thin, barely detectable sheen of spray helps the rolls release cleanly after baking, and you will appreciate the tidy slices that come out whole. Even coverage prevents sticking at the bottom, which preserves the soft underside texture. Too much spray can make the base greasy, so a light, even mist is best. If the pan is over sprayed, blot excess with a paper towel before arranging the rolls.
- In small microwavable bowl, microwave cream cheese on High 30 seconds. Stir in granulated sugar and vanilla until smooth. Divide cream cheese mixture among rectangles; spread in thin layer to within 1/4 inch of 1 long edge of each rectangle. Divide lemon curd among rectangles; gently spread over cream cheese mixture.: The dough will be cool and slightly tacky to the touch, and as you unroll it you will hear a soft, stretching sound as layers relax. Separating into rectangles and pinching the perforations to seal creates a continuous surface for spreading fillings, which prevents leakage. If you leave the perforations open, filling can seep into gaps and cause uneven baking. Work gently to avoid compressing the layers, which reduces flakiness.
- Starting with opposite long side of clean edge, roll up each rectangle into long tube, pinching clean edge closed. Cut each tube into 4 equal slices. Place slices cut side up and 1 inch apart in pan.: Pinching creates a smooth edge that holds the filling in place while baking, ensuring the pinwheel shape stays intact and the roll slices look uniform. The sealed seam will prevent curd from escaping and making the pan sticky. Forgetting to seal can result in spills and a less tidy presentation. Use a light but firm pinch so you do not tear the dough.
- Bake 20 to 22 minutes or until top is golden brown. Meanwhile, beat icing ingredients until smooth.: After heating, the cream cheese will become soft and slightly glossy, which makes it easy to stir into a smooth consistency. The warmth mellows tang and helps it incorporate with the sugar and vanilla. If you overheat it, the cheese can become separated and watery, so monitor closely. Stir thoroughly to ensure there are no cold lumps before adding other ingredients.
- Drizzle icing over warm rolls.: Stirring will create a velvety, homogeneous filling, and you will see the sugar dissolve into the cream cheese , leaving no grit. This smoothness is crucial for an even spread, and it helps the filling bake to a pleasant pudding like set. Under stirring leaves grainy texture, which is noticeable against the soft dough. Take the extra 30 to 60 seconds to ensure everything is fully combined.
- Divide cream cheese mixture among rectangles; spread in thin layer to within 1/4 inch of 1 long edge of each rectangle: Spreading creates an even cushion for the lemon curd and prevents bulk in the center that would make rolling difficult. Leaving a 1 4 inch border ensures you can roll and seal without pushing filling out the seam. If the layer is too thick, the rolls will be harder to slice and may not bake through at the same rate. Use the back of a spoon or an offset spatula for a smooth, even layer.
- Divide lemon curd among rectangles; gently spread over cream cheese mixture: When you spread the lemon curd it should shimmer slightly and hold its shape, adding pockets of vibrant citrus within each spiral. The curd should be spread gently to avoid pushing the creamy layer out of place. Overworking the curd can tear the dough or create lumps, so a light touch preserves the swirls and texture. If your curd is too stiff, let it soften briefly at room temperature for easier spreading.
- Starting with opposite long side of clean edge, roll up each rectangle into long tube, pinching clean edge closed: As you roll, you will feel the dough compress slightly and the spiral pattern will form. Pinching the clean edge seals the tube so the slices hold their shape and bake with tidy spirals. Rolling too tightly can compress the layers and make the interior dense, while rolling too loosely causes the slices to unfurl during baking. Aim for a snug roll that still has a bit of loft.
- Cut each tube into 4 equal slices: Cutting reveals the pinwheel spiral, and the exposed layers show the contrast between dough and filling. A sharp knife or unflavored dental floss can yield neat cuts without squashing the tube. Pressing too hard will flatten the rolls, altering the final texture. To keep slices uniform, measure lightly or mark the tube before slicing.
- Place slices cut side up and 1 inch apart in pan: Arranging with space allows heat to circulate so the bottoms cook and the sides brown slightly, creating that appealing golden rim. You will hear a soft settling sound as the cut sides rest in the pan. Crowding the pan leads to steamed edges instead of gently crisped sides, which changes the mouthfeel. Give each slice room to expand without touching.
- Bake 20 to 22 minutes or until top is golden brown: The oven will transform the soft dough into a golden, tender roll, and you will notice a fragrant citrus and baked dough aroma as it nears completion. The top should be evenly golden and slightly puffed, a clear signal they're ready. Leaving them in too long dries the interior, while removing them too early leaves raw doughy spots. If the tops brown too quickly, tent loosely with foil for the remaining minutes.
- Meanwhile, beat icing ingredients until smooth: While the rolls bake you will blend the powdered sugar , lemon juice , and water into a glossy, spreadable glaze. The mixture should fall in a steady ribbon when lifted with a spoon, indicating the right consistency for drizzling. If it is too thick the drizzle will clump, and if too thin it will run off the rolls. Adjust with tiny amounts of water or more powdered sugar to reach the desired texture.
- Drizzle icing over warm rolls: The warm surface accepts the glaze and it will set to a satin finish, creating a sweet, slightly tangy coating that brightens the bites. The contrast between warm roll and cool icing is pleasant in the mouth and gives a polished look. Pouring too much glaze can pool at the bottoms, so drizzle in a controlled motion. Allow the rolls to cool slightly so the icing adheres without melting away.
Ways to Adapt This Recipe

These adaptations help you tweak flavor, texture, or timing while keeping the heart of the recipe intact. Each suggestion starts with a short highlight so you can scan options quickly, then I expand on how to implement it and what to expect.
- Swap the citrus intensity, if you want a subtler lemon presence use a lighter hand with the lemon curd and increase the vanilla extract slightly for a creamier note without losing brightness.
- Save time with premade components, the recipe already uses refrigerated crescent dinner rolls, and you can buy high quality jarred lemon curd to skip making curd from scratch while keeping a fresh flavor profile.
- Adjust sweetness for adults, reduce the granulated sugar in the filling or cut back on the powdered sugar in the icing if you prefer less sweetness, tasting as you mix to reach the right balance.
- Make ahead and warm, you can assemble and refrigerate the unbaked rolls for a few hours then bake when needed, but allow the dough to sit at room temperature for a short time before baking so it bakes evenly.
- Turn them into a party tray, double or triple the batch and use rectangular pans to bake multiple rows, keeping the same spacing to ensure consistent browning and texture across the tray.
- Control icing texture, if your glaze looks too runny add a tablespoon more powdered sugar at a time until it reaches a pipeable ribbon consistency for prettier drizzles.
Great Combinations for Lemon Cream Cheese Pinwheels
These serving ideas show how to present Lemon Cream Cheese Pinwheels for different occasions, and how to pair them with complementary items. I focus on balance so the bright citrus does not overpower other components. Each suggestion includes practical notes for timing and storage.
- Brunch spread essentials, serve the pinwheels alongside fruit platters and a selection of teas or coffee for a morning gathering, allowing the citrus to cut through richer items on the table.
- Afternoon tea pairing, place them with small finger sandwiches and mild cheeses so the lemon flavor remains the star without clashing with savory notes.
- Party appetizer setup, arrange on a tiered stand for visual appeal at showers or celebrations, and keep extra glaze in a squeeze bottle for quick touch ups before serving.
- Holiday breakfast, these are lovely for a festive morning like spring celebrations, offering a light sweet option that pairs well with citrusy mimosas or coffee for guests.
- Storage and make ahead, store cooled rolls in an airtight container for up to two days at room temperature, or refrigerate for up to four days and warm gently before serving to refresh the texture.
- Seasonal serving, in spring pair with fresh berries and lightly whipped cream to echo the bright flavors of the rolls, keeping the plate colorful and fresh.
FAQ
Conclusion
These Lemon Cream Cheese Pinwheels stand out because they pair simple, accessible ingredients with bright citrus and a luscious creamy center to create a memorable bite. Give them a try when you want a quick yet impressive treat for brunch or a gathering, they are forgiving to make and easy to scale up. Enjoy the process of rolling, baking, and sharing these warm, glossy pinwheels with friends or family, and notice how such modest steps yield a very satisfying result.
Lemon Cream Cheese Pinwheels
Equipment
- 8-inch round cake pan
- Microwavable bowl
- Knife
- Mixing Spoon
Ingredients
- 1 can, 12 oz Pillsbury™ Grands!™ Big & Flaky refrigerated crescent dinner rolls Provides a buttery, flaky dough base that yields large crescent strips ideal for rolling; unroll and press seams to form a single sheet for even baking and golden texture.
- 4 oz half 8-oz package cream cheese Adds a rich, creamy filling component that contributes tanginess and smooth structure; soften to room temperature for easy spreading and stable consistency when combined with sugar and vanilla.
- 2 tablespoons granulated sugar Sweetens and balances the tang of cream cheese and lemon curd while helping create a slightly firmer filling; dissolve into softened cream cheese for uniform sweetness and spreadability.
- 1/4 teaspoon vanilla extract Enhances aroma and flavor by adding warm, sweet vanilla notes that round out the filling; stir into the cream cheese mixture to build depth without overpowering the lemon.
- 1/2 cup lemon curd Delivers concentrated lemon flavor and moisture, providing the bright, fruity center of the pinwheels; spread evenly over the dough layer for bold citrus taste and glossy appearance after baking.
- 1/2 cup powdered sugar Creates a smooth, sweet glaze that tames tartness and adds a delicate finish; whisk with lemon juice and water to achieve a pourable consistency for drizzling over cooled pinwheels.
- 1 teaspoon lemon juice Introduces fresh acidity to brighten the glaze and balance sweetness; combine with powdered sugar and water to adjust tang and thinning for desired drip consistency.
- 1 teaspoon water Thins the glaze to a pourable consistency and helps achieve a smooth, shiny finish; add gradually to powdered sugar and lemon juice until desired texture is reached.
Instructions
- Heat oven to 350°F. Lightly spray 8-inch round cake pan with cooking spray.: As the oven warms you will notice a gentle hum and the light preheat glow through the window, which sets the scene for even baking. Preheating ensures the temperature is stable the moment the rolls go in, promoting consistent rise and an evenly golden top. If you skip preheating, the dough may bake unevenly and the texture can become dense in spots. A common oversight is relying on an oven light alone, so use a reliable oven thermometer if your oven runs hot or cold.
- Unroll dough; separate into 4 rectangles. Pinch perforations to seal.: The thin, barely detectable sheen of spray helps the rolls release cleanly after baking, and you will appreciate the tidy slices that come out whole. Even coverage prevents sticking at the bottom, which preserves the soft underside texture. Too much spray can make the base greasy, so a light, even mist is best. If the pan is over sprayed, blot excess with a paper towel before arranging the rolls.
- In small microwavable bowl, microwave cream cheese on High 30 seconds. Stir in granulated sugar and vanilla until smooth. Divide cream cheese mixture among rectangles; spread in thin layer to within 1/4 inch of 1 long edge of each rectangle. Divide lemon curd among rectangles; gently spread over cream cheese mixture.: The dough will be cool and slightly tacky to the touch, and as you unroll it you will hear a soft, stretching sound as layers relax. Separating into rectangles and pinching the perforations to seal creates a continuous surface for spreading fillings, which prevents leakage. If you leave the perforations open, filling can seep into gaps and cause uneven baking. Work gently to avoid compressing the layers, which reduces flakiness.
- Starting with opposite long side of clean edge, roll up each rectangle into long tube, pinching clean edge closed. Cut each tube into 4 equal slices. Place slices cut side up and 1 inch apart in pan.: Pinching creates a smooth edge that holds the filling in place while baking, ensuring the pinwheel shape stays intact and the roll slices look uniform. The sealed seam will prevent curd from escaping and making the pan sticky. Forgetting to seal can result in spills and a less tidy presentation. Use a light but firm pinch so you do not tear the dough.
- Bake 20 to 22 minutes or until top is golden brown. Meanwhile, beat icing ingredients until smooth.: After heating, the cream cheese will become soft and slightly glossy, which makes it easy to stir into a smooth consistency. The warmth mellows tang and helps it incorporate with the sugar and vanilla. If you overheat it, the cheese can become separated and watery, so monitor closely. Stir thoroughly to ensure there are no cold lumps before adding other ingredients.
- Drizzle icing over warm rolls.: Stirring will create a velvety, homogeneous filling, and you will see the sugar dissolve into the cream cheese , leaving no grit. This smoothness is crucial for an even spread, and it helps the filling bake to a pleasant pudding like set. Under stirring leaves grainy texture, which is noticeable against the soft dough. Take the extra 30 to 60 seconds to ensure everything is fully combined.
- Divide cream cheese mixture among rectangles; spread in thin layer to within 1/4 inch of 1 long edge of each rectangle: Spreading creates an even cushion for the lemon curd and prevents bulk in the center that would make rolling difficult. Leaving a 1 4 inch border ensures you can roll and seal without pushing filling out the seam. If the layer is too thick, the rolls will be harder to slice and may not bake through at the same rate. Use the back of a spoon or an offset spatula for a smooth, even layer.
- Divide lemon curd among rectangles; gently spread over cream cheese mixture: When you spread the lemon curd it should shimmer slightly and hold its shape, adding pockets of vibrant citrus within each spiral. The curd should be spread gently to avoid pushing the creamy layer out of place. Overworking the curd can tear the dough or create lumps, so a light touch preserves the swirls and texture. If your curd is too stiff, let it soften briefly at room temperature for easier spreading.
- Starting with opposite long side of clean edge, roll up each rectangle into long tube, pinching clean edge closed: As you roll, you will feel the dough compress slightly and the spiral pattern will form. Pinching the clean edge seals the tube so the slices hold their shape and bake with tidy spirals. Rolling too tightly can compress the layers and make the interior dense, while rolling too loosely causes the slices to unfurl during baking. Aim for a snug roll that still has a bit of loft.
- Cut each tube into 4 equal slices: Cutting reveals the pinwheel spiral, and the exposed layers show the contrast between dough and filling. A sharp knife or unflavored dental floss can yield neat cuts without squashing the tube. Pressing too hard will flatten the rolls, altering the final texture. To keep slices uniform, measure lightly or mark the tube before slicing.
- Place slices cut side up and 1 inch apart in pan: Arranging with space allows heat to circulate so the bottoms cook and the sides brown slightly, creating that appealing golden rim. You will hear a soft settling sound as the cut sides rest in the pan. Crowding the pan leads to steamed edges instead of gently crisped sides, which changes the mouthfeel. Give each slice room to expand without touching.
- Bake 20 to 22 minutes or until top is golden brown: The oven will transform the soft dough into a golden, tender roll, and you will notice a fragrant citrus and baked dough aroma as it nears completion. The top should be evenly golden and slightly puffed, a clear signal they're ready. Leaving them in too long dries the interior, while removing them too early leaves raw doughy spots. If the tops brown too quickly, tent loosely with foil for the remaining minutes.
- Meanwhile, beat icing ingredients until smooth: While the rolls bake you will blend the powdered sugar , lemon juice , and water into a glossy, spreadable glaze. The mixture should fall in a steady ribbon when lifted with a spoon, indicating the right consistency for drizzling. If it is too thick the drizzle will clump, and if too thin it will run off the rolls. Adjust with tiny amounts of water or more powdered sugar to reach the desired texture.
- Drizzle icing over warm rolls: The warm surface accepts the glaze and it will set to a satin finish, creating a sweet, slightly tangy coating that brightens the bites. The contrast between warm roll and cool icing is pleasant in the mouth and gives a polished look. Pouring too much glaze can pool at the bottoms, so drizzle in a controlled motion. Allow the rolls to cool slightly so the icing adheres without melting away.
Notes
- Swap the citrus intensity, if you want a subtler lemon presence use a lighter hand with the lemon curd and increase the vanilla extract slightly for a creamier note without losing brightness.
- Save time with premade components, the recipe already uses refrigerated crescent dinner rolls, and you can buy high quality jarred lemon curd to skip making curd from scratch while keeping a fresh flavor profile.
- Adjust sweetness for adults, reduce the granulated sugar in the filling or cut back on the powdered sugar in the icing if you prefer less sweetness, tasting as you mix to reach the right balance.
- Make ahead and warm, you can assemble and refrigerate the unbaked rolls for a few hours then bake when needed, but allow the dough to sit at room temperature for a short time before baking so it bakes evenly.
- Turn them into a party tray, double or triple the batch and use rectangular pans to bake multiple rows, keeping the same spacing to ensure consistent browning and texture across the tray.
- Control icing texture, if your glaze looks too runny add a tablespoon more powdered sugar at a time until it reaches a pipeable ribbon consistency for prettier drizzles.