Vanilla Ice Cream Recipe
Vanilla Ice Cream Recipe has been one of my favorite simple comforts since I learned to watch the pot and listen for the tiniest sigh of steam while stirring. I remember the first time I coaxed a custard into silky smoothness, feeling a quiet pride as the aroma of warm vanilla extract and cream filled the kitchen. That moment taught me that patience and attention make all the difference, and I still return to this recipe when I want something reliably comforting.
Over the years, this Vanilla Ice Cream Recipe has been the canvas for summer afternoons, last minute desserts, and quiet late night scoops after long days. I like to tell the story of the batch I made for a neighborhood potluck, where the texture won compliments and the kids fought over the last scoop. Each time I churn, I focus on small details like chilling the custard thoroughly and straining it well, habits that turned an ordinary recipe into a dependable favorite.
Recipe Snapshot
40 mins
30 mins
10 mins
Easy
250 kcal
American
Gluten-Free, Low FODMAP
Desserts
Medium sauce pot, Cooking thermometer, Fine mesh strainer, 2 quart storage container, Ice cream maker
What Sets This Vanilla Ice Cream Recipe Apart
Silky, Classic Flavor
I love how this Vanilla Ice Cream Recipe delivers a true, creamy vanilla profile without fuss. Using real vanilla extract and a custard base made with egg yolks and dairy gives a deep, rounded flavor and a luxurious mouthfeel that scoops hold, instead of melting into thin sweetness. You’ll notice a rich aroma on the first stir, and that aroma carries through to every bite, making it feel handcrafted.
Reliable Texture Every Time
What keeps me coming back to this approach is the dependable, scoopable texture. The combination of higher fat heavy cream and the stabilizing effect of the cooked egg yolks gives the ice cream body and resistance to iciness. When I chill the custard until it’s cold, the churning locks air and creates a creamy structure that freezes firm but scoopable.
Flexible and Approachable
I appreciate that this recipe is forgiving for cooks at any level. The steps are straightforward, and small adjustments in chilling time or churn time let me tweak the final mouthfeel easily. If I have guests, I can make the base ahead and churn when needed. For a quick workaround, the no machine method in the notes is a helpful fallback, so you are never blocked from making ice cream.
Great for Memories and Moments
One of the reasons I adore this Vanilla Ice Cream Recipe is the way it anchors memories. It fits simple family dinners, celebratory desserts, and casual weekend rituals. The scent of vanilla extract and the chill of a freshly churned bowl hit that comfort note every time. I often pair it with warm fruit or cookies to make it feel festive without extra fuss.
Technique Builds Confidence
This recipe also teaches good technique, like tempering egg yolks into warm dairy and straining the custard for a silky finish. Those small skills transfer to other custards and sauces, so every time you make this ice cream, you improve as a cook. I find that sharing those tips with friends makes them more excited to try home made frozen desserts.
Ingredient List for Vanilla Ice Cream Recipe
These ingredients are intentionally minimal, each playing a distinct role to create a rich, velvety ice cream. The dairy gives body and creaminess, the egg yolks create a custard base that carries flavor and stabilizes texture, and the granulated sugar balances sweetness while affecting freezing point. Vanilla extract is the aromatic star, and a pinch of salt sharpens the overall profile.
- 2 cups heavy cream: Provide a rich, creamy base and contribute to the velvety mouthfeel of the ice cream; heavy cream brings necessary fat that enhances flavor and texture. Use chilled cream for a smoother churn and to help stabilize air incorporation during freezing. When combined with milk and eggs, heavy cream creates a luxurious body and prevents iciness in the final product.
- 1 1/2 cup s2% milk: Offer a lighter dairy component that balances richness while adding body to the custard; 2% milk supplies water content and natural sugars. Incorporate milk with cream to achieve a scoopable consistency and to moderate the overall fat level. Ensure milk is fresh and cold to maintain a stable emulsion during heating and cooling steps.
- 3/4 cup granulated sugar: Sweeten the custard base and aid in melting point depression, which keeps the ice cream scoopable; granulated sugar dissolves during heating to create a smooth texture. Adjust sugar carefully for desired sweetness and freezing properties, since sugar also affects firmness. Dissolve sugar fully into the milk and cream to avoid grittiness in the finished ice cream.
- 7 egg yolks: Enrich and thicken the custard while adding a rich, custardy flavor; egg yolks act as natural emulsifiers and stabilizers, creating a creamy, smooth texture. Temper yolks with warm dairy to prevent curdling, then gently cook to the proper temperature to achieve a safe, pourable custard that coats the back of a spoon. Properly cooked yolks ensure body without a cooked eggy taste.
- 1 tablespoon vanilla extract: Impart aromatic vanilla flavor and round out the sweetness; vanilla extract provides the classic flavor profile associated with vanilla ice cream. Add vanilla after removing the custard from heat to preserve its delicate aroma and prevent loss of volatile compounds. Use high-quality extract for a clean, pronounced vanilla character.
- 1/2 teaspoons ea salt: Enhance and balance overall flavor by subtly elevating sweetness and reducing flatness; salt rounds out the profile and accentuates other flavors. Dissolve salt into the dairy mixture so it integrates evenly throughout the custard. Use measured amounts to avoid detectable saltiness while improving depth and complexity.
Recipe Directions for Vanilla Ice Cream Recipe
These directions lead you through the custard method, which creates a rich and stable base for churning. I like to take my time with each step, listening and watching for visual cues rather than rushing by the clock. Below I expand each direction into detailed guidance so you can master texture, aroma, and flavor.
- Set a medium-sized sauce pot over medium heat. Clip a cooking thermometer to the side of the pot.: The aroma when the pot warms is subtle, a faint steaminess that signals the dairy will heat gently. Use medium heat so the mixture warms evenly without scorching, and clip a cooking thermometer to the side for accurate monitoring. You should hear a soft simmer start, not a violent boil, which helps dissolve sugar and bring warmth without curdling. The reason this gentle approach matters is it preserves the smoothness of the dairy, preventing proteins from tightening too fast and creating grainy texture. A common mistake is cranking the heat, which leads to hotspots and possible scalding of the milk and cream.
- Add the heavy cream, milk, and sugar. Stir and warm until all the sugar has dissolved into the cream mixture.: As you pour in the heavy cream and the fixed spacing 1 1/2 cup 2% milk , the mixture looks glossy and slightly viscous. Stir continuously to dissolve the granulated sugar , feeling the graininess disappear as the sugar integrates. This stage smells like warm cream and sugar, comforting and mellow. Stirring evenly ensures uniform heat distribution, which prevents localized overcooking and helps the sugar dissolve fully. If you stop stirring, the sugar can settle and cause uneven sweetness or burning at the pot bottom.
- Whisk in the egg yolks, one at a time, to make sure it is fully incorporated before adding the next one. Once all the egg yolks are well combined, stir and watch the temperature. Once it reaches 165-170 degrees F, remove from heat. Then stir in the vanilla extract and salt.: When you start adding the egg yolks , do it one at a time while whisking constantly. The custard will feel silkier as yolks blend in. If you add yolks too quickly, you risk scrambling them, which creates small cooked bits. Use a tempering motion by slowly incorporating warm dairy into the yolks before returning them to the pot to avoid curdling. The sound is quiet now, with occasional tiny bubbles, and the color deepens toward a custardy yellow. If the mixture thickens too fast, reduce heat slightly to maintain control.
- Set a fine mesh strainer (sieve) over a 2 quart storage container. Pour and strain the ice cream mixture into the container, to remove any cooked egg particles. Cover and refrigerate until the mixture is COLD. (The colder the mixture is when you add it to the ice cream maker, the better the texture will be. Sometimes I make the mixture the night before I need it.): The temperature window is crucial, the custard will thicken and coat the back of a spoon. At this point you notice steam and a fragrant, warm sweetness in the air. Removing from heat at the advised temperature preserves silkiness without scrambling the eggs. Stir in the vanilla extract and salt immediately so the flavors marry while the custard cools. A frequent error is overheating past 170 degrees F, which risks curdling and a grainy texture, requiring straining and possibly more chilling to recover.
- Pour the cold ice cream mix into a 1.5-2 quart ice cream maker. Churn the ice cream for 25 minutes, or according to the settings on your machine.: Pouring the hot custard through a fine mesh captures any tiny cooked egg particles, leaving a glossy, smooth liquid. The act of straining also aerates slightly and releases a warm, rounded scent of vanilla extract . Cover the container and refrigerate until the mixture is cold, because chilling helps the fats firm and the flavors meld, which improves the final texture when churned. A common mistake is skipping the chill, which leads to poor incorporation of air in the ice cream maker and a denser, icier result.
- Move the ice cream back to a clean storage container. Cover and freeze until ready to serve.: As you transfer the chilled custard, you will see it move like thick silk into the churn. Churn for about 25 minutes or according to your machine, watching as the mixture transforms into soft, billowy ice cream. The sound is rhythmic, and the texture evolves from liquid to a thick, spreadable cream that clings to the paddle. This mechanical action incorporates air and freezes small ice crystals, creating the smooth texture you want. Mistakes to avoid here include churning a too-warm mix which prevents proper aeration, or over-churning which can lead to an overly firm or icy finish.
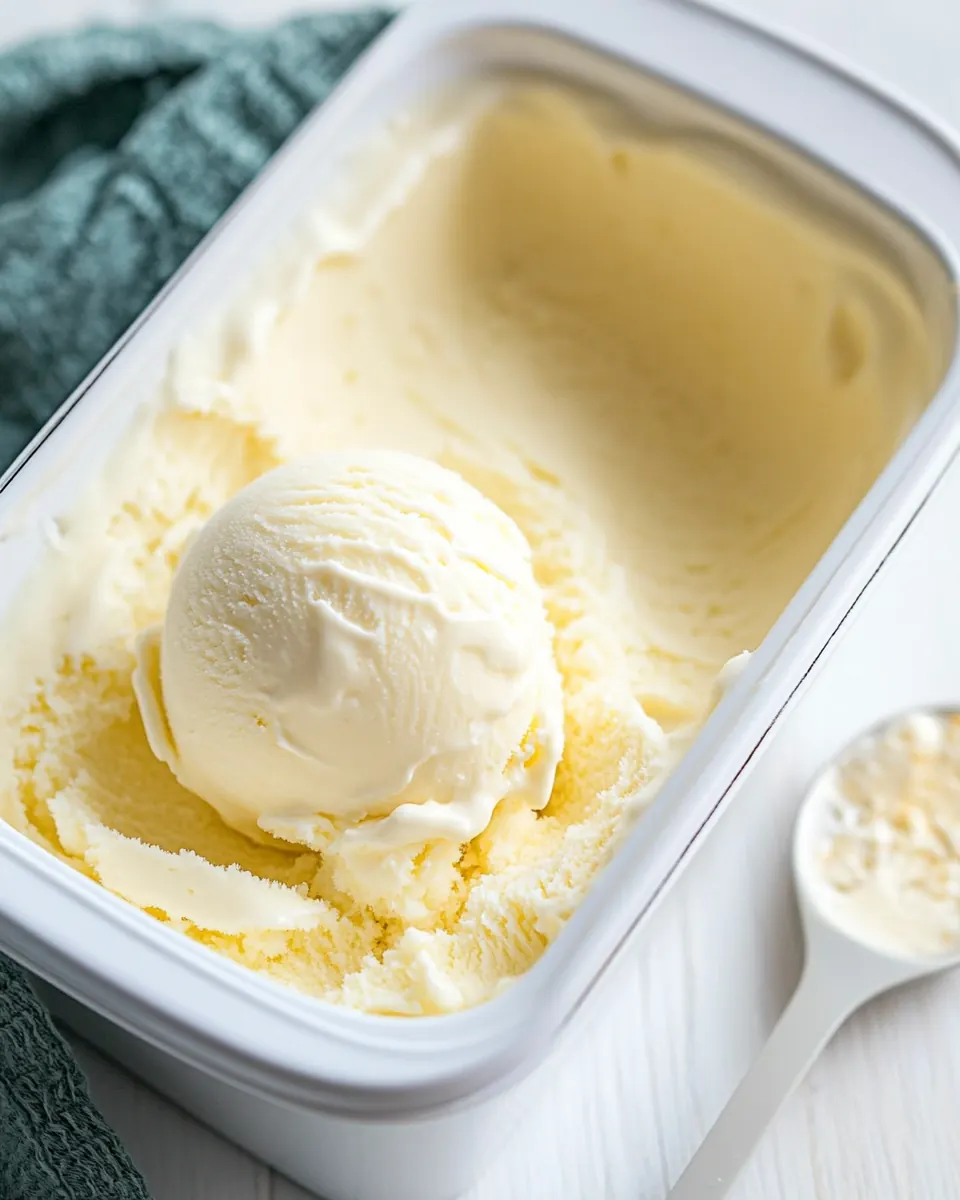
- Move the ice cream back to a clean storage container: After churning, transfer the soft ice cream into a clean container, smoothing the top for even freezing. You will notice a bright, cold aroma and a creamy sheen on the surface. Cover and freeze until fully firm, which allows the interior to stabilize and the texture to set to scoopable hardness. Leaving it uncovered can create freezer burn or ice crystals on the surface, so ensure an airtight seal. If you freeze immediately without smoothing, you might end up with uneven texture due to trapped air pockets.
Tips and Tricks about Vanilla Ice Cream Recipe
Here are practical tips I use most often when I make this ice cream, they focus on texture, flavor, and timing so you get consistent results. Read them and pick the ones that fit your workflow.
- Chill overnight for best texture, when the custard is cold it churns into smaller ice crystals and a smoother finish.
- Whisk slowly when tempering to avoid scrambled egg yolks, add warm dairy gradually to keep the custard uniform.
- Use a fine mesh strainer to catch imperfections, this step ensures a silky mouthfeel without cooked bits.
- Follow machine guidelines for churn time, different makers have distinct paddles and freeze times that affect final density.
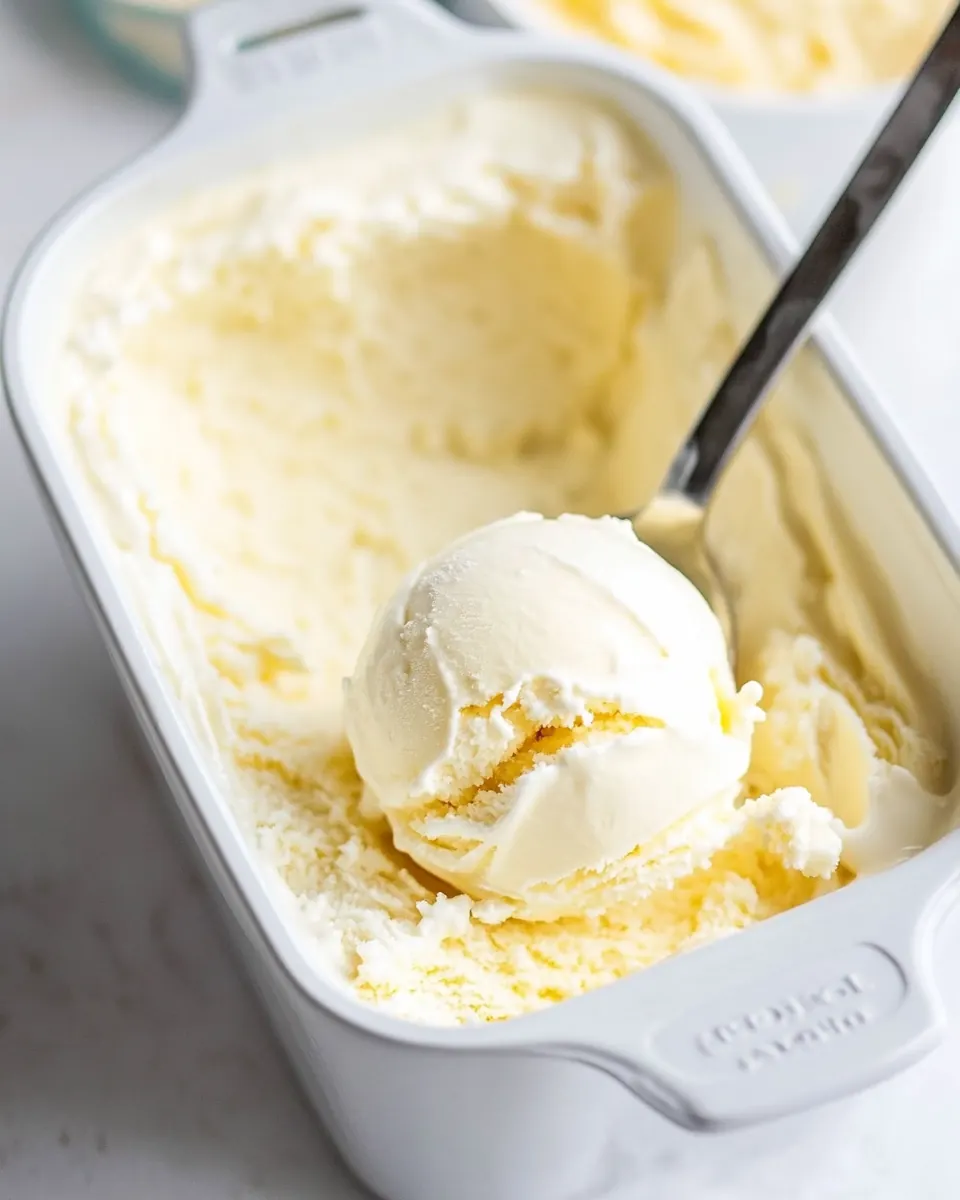
- Freeze in a shallow container to speed up firming and reduce large ice crystal formation, smoothing the surface before sealing helps too.
- Softening tip let the ice cream sit at room temperature for up to 10 minutes before scooping for easier serving and better texture.
What to Serve Alongside Vanilla Ice Cream Recipe
This ice cream pairs beautifully with warm desserts and fresh fruit, and it works across occasions from casual lunches to festive gatherings. I often plan pairings based on season and mood, aiming to complement the creamy vanilla with textures and temperatures that elevate the experience. Below are thoughtful serving ideas and contexts to help you plan.
- Warm fruit compote like berries or stone fruit enhances contrast, the warmth against cold ice cream creates a pleasing temperature interplay.
- Warm baked goods such as cookies or a slice of cake provide a crunchy or spongy counterpoint that pairs naturally with the creamy base.
- Seasonal occasions this recipe is perfect for summer gatherings and backyard dinners, or as a light dessert after a holiday meal.
- Storage tips keep it in an airtight container and press plastic wrap directly onto the surface to avoid crystals, store up to six months as noted.
- Serving styles scoop into chilled bowls for slower melting, or serve immediately with a dusting of grated citrus zest for brightness.
FAQ
Conclusion
This Vanilla Ice Cream Recipe stands out because it combines a classic custard base with careful technique to deliver a truly creamy, scoopable vanilla ice cream. Try it to experience how a few quality ingredients and patient steps yield a dessert that feels both nostalgic and refined. I encourage you to make it for friends or quiet nights at home, and to savor how simple technique transforms ordinary dairy into something special.
Vanilla Ice Cream Recipe
Equipment
- Medium sauce pot
- Cooking thermometer
- Fine-mesh strainer
- 2 quart storage container
- Ice Cream Maker
Ingredients
- 2 cups heavy cream Provide a rich, creamy base and contribute to the velvety mouthfeel of the ice cream; heavy cream brings necessary fat that enhances flavor and texture. Use chilled cream for a smoother churn and to help stabilize air incorporation during freezing. When combined with milk and eggs, heavy cream creates a luxurious body and prevents iciness in the final product.
- 1 1/2 cup s2% milk Offer a lighter dairy component that balances richness while adding body to the custard; 2% milk supplies water content and natural sugars. Incorporate milk with cream to achieve a scoopable consistency and to moderate the overall fat level. Ensure milk is fresh and cold to maintain a stable emulsion during heating and cooling steps.
- 3/4 cup granulated sugar Sweeten the custard base and aid in melting point depression, which keeps the ice cream scoopable; granulated sugar dissolves during heating to create a smooth texture. Adjust sugar carefully for desired sweetness and freezing properties, since sugar also affects firmness. Dissolve sugar fully into the milk and cream to avoid grittiness in the finished ice cream.
- 7 egg yolks Enrich and thicken the custard while adding a rich, custardy flavor; egg yolks act as natural emulsifiers and stabilizers, creating a creamy, smooth texture. Temper yolks with warm dairy to prevent curdling, then gently cook to the proper temperature to achieve a safe, pourable custard that coats the back of a spoon. Properly cooked yolks ensure body without a cooked eggy taste.
- 1 tablespoon vanilla extract Impart aromatic vanilla flavor and round out the sweetness; vanilla extract provides the classic flavor profile associated with vanilla ice cream. Add vanilla after removing the custard from heat to preserve its delicate aroma and prevent loss of volatile compounds. Use high-quality extract for a clean, pronounced vanilla character.
- 1/2 teaspoons ea salt Enhance and balance overall flavor by subtly elevating sweetness and reducing flatness; salt rounds out the profile and accentuates other flavors. Dissolve salt into the dairy mixture so it integrates evenly throughout the custard. Use measured amounts to avoid detectable saltiness while improving depth and complexity.
Instructions
- Set a medium-sized sauce pot over medium heat. Clip a cooking thermometer to the side of the pot.: The aroma when the pot warms is subtle, a faint steaminess that signals the dairy will heat gently. Use medium heat so the mixture warms evenly without scorching, and clip a cooking thermometer to the side for accurate monitoring. You should hear a soft simmer start, not a violent boil, which helps dissolve sugar and bring warmth without curdling. The reason this gentle approach matters is it preserves the smoothness of the dairy, preventing proteins from tightening too fast and creating grainy texture. A common mistake is cranking the heat, which leads to hotspots and possible scalding of the milk and cream.
- Add the heavy cream, milk, and sugar. Stir and warm until all the sugar has dissolved into the cream mixture.: As you pour in the heavy cream and the fixed spacing 1 1/2 cup 2% milk , the mixture looks glossy and slightly viscous. Stir continuously to dissolve the granulated sugar , feeling the graininess disappear as the sugar integrates. This stage smells like warm cream and sugar, comforting and mellow. Stirring evenly ensures uniform heat distribution, which prevents localized overcooking and helps the sugar dissolve fully. If you stop stirring, the sugar can settle and cause uneven sweetness or burning at the pot bottom.
- Whisk in the egg yolks, one at a time, to make sure it is fully incorporated before adding the next one. Once all the egg yolks are well combined, stir and watch the temperature. Once it reaches 165-170 degrees F, remove from heat. Then stir in the vanilla extract and salt.: When you start adding the egg yolks , do it one at a time while whisking constantly. The custard will feel silkier as yolks blend in. If you add yolks too quickly, you risk scrambling them, which creates small cooked bits. Use a tempering motion by slowly incorporating warm dairy into the yolks before returning them to the pot to avoid curdling. The sound is quiet now, with occasional tiny bubbles, and the color deepens toward a custardy yellow. If the mixture thickens too fast, reduce heat slightly to maintain control.
- Set a fine mesh strainer (sieve) over a 2 quart storage container. Pour and strain the ice cream mixture into the container, to remove any cooked egg particles. Cover and refrigerate until the mixture is COLD. (The colder the mixture is when you add it to the ice cream maker, the better the texture will be. Sometimes I make the mixture the night before I need it.): The temperature window is crucial, the custard will thicken and coat the back of a spoon. At this point you notice steam and a fragrant, warm sweetness in the air. Removing from heat at the advised temperature preserves silkiness without scrambling the eggs. Stir in the vanilla extract and salt immediately so the flavors marry while the custard cools. A frequent error is overheating past 170 degrees F, which risks curdling and a grainy texture, requiring straining and possibly more chilling to recover.
- Pour the cold ice cream mix into a 1.5-2 quart ice cream maker. Churn the ice cream for 25 minutes, or according to the settings on your machine.: Pouring the hot custard through a fine mesh captures any tiny cooked egg particles, leaving a glossy, smooth liquid. The act of straining also aerates slightly and releases a warm, rounded scent of vanilla extract . Cover the container and refrigerate until the mixture is cold, because chilling helps the fats firm and the flavors meld, which improves the final texture when churned. A common mistake is skipping the chill, which leads to poor incorporation of air in the ice cream maker and a denser, icier result.
- Move the ice cream back to a clean storage container. Cover and freeze until ready to serve.: As you transfer the chilled custard, you will see it move like thick silk into the churn. Churn for about 25 minutes or according to your machine, watching as the mixture transforms into soft, billowy ice cream. The sound is rhythmic, and the texture evolves from liquid to a thick, spreadable cream that clings to the paddle. This mechanical action incorporates air and freezes small ice crystals, creating the smooth texture you want. Mistakes to avoid here include churning a too-warm mix which prevents proper aeration, or over-churning which can lead to an overly firm or icy finish.
- Move the ice cream back to a clean storage container: After churning, transfer the soft ice cream into a clean container, smoothing the top for even freezing. You will notice a bright, cold aroma and a creamy sheen on the surface. Cover and freeze until fully firm, which allows the interior to stabilize and the texture to set to scoopable hardness. Leaving it uncovered can create freezer burn or ice crystals on the surface, so ensure an airtight seal. If you freeze immediately without smoothing, you might end up with uneven texture due to trapped air pockets.
Notes
- Chill overnight for best texture, when the custard is cold it churns into smaller ice crystals and a smoother finish.
- Whisk slowly when tempering to avoid scrambled egg yolks, add warm dairy gradually to keep the custard uniform.
- Use a fine mesh strainer to catch imperfections, this step ensures a silky mouthfeel without cooked bits.
- Follow machine guidelines for churn time, different makers have distinct paddles and freeze times that affect final density.
- Freeze in a shallow container to speed up firming and reduce large ice crystal formation, smoothing the surface before sealing helps too.
- Softening tip let the ice cream sit at room temperature for up to 10 minutes before scooping for easier serving and better texture.