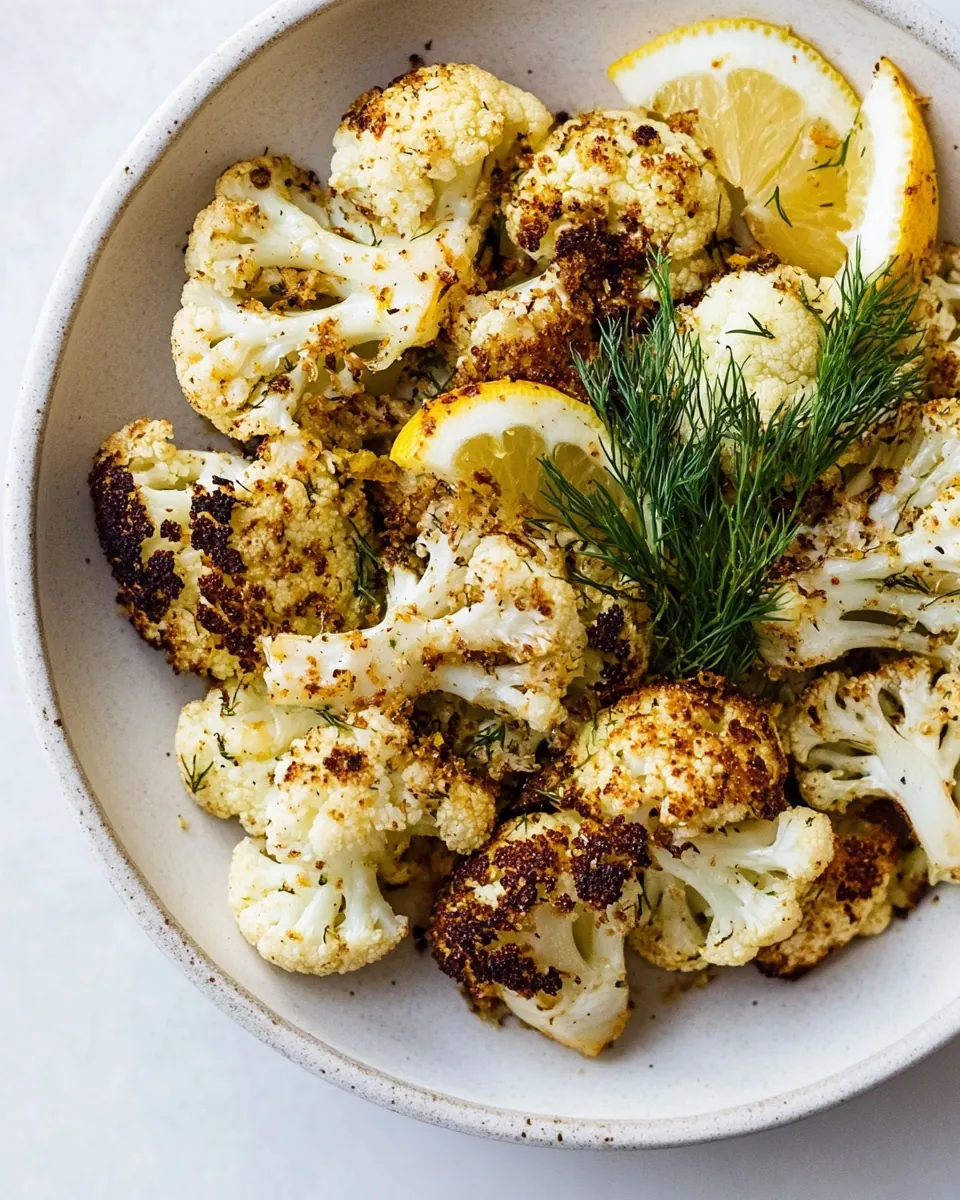
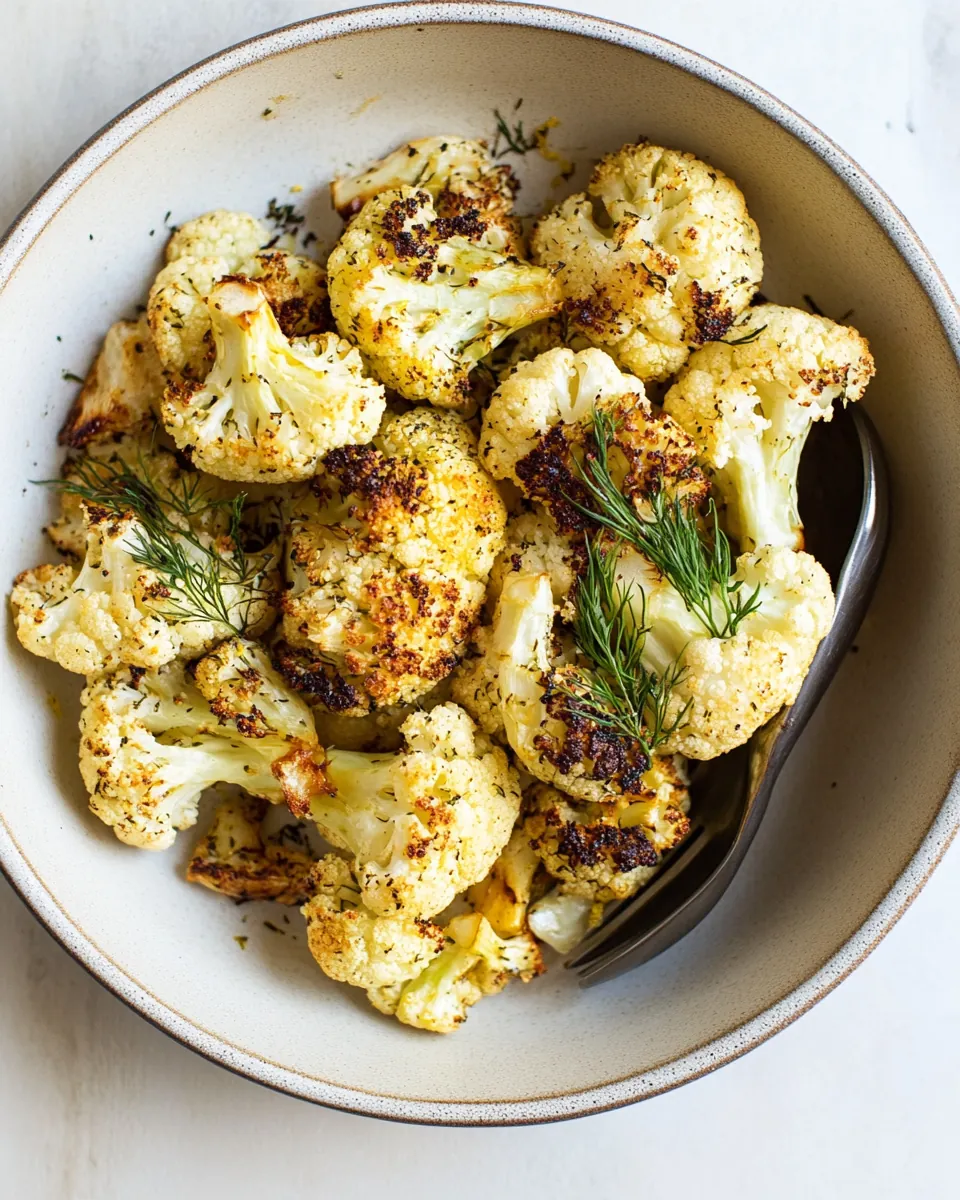
Roasted Lemon and Dill Cauliflower
Roasted Lemon and Dill Cauliflower is one of those simple recipes I turn to when I want something bright, punchy, and unfussy on the table. The first time I made it, I was chasing a citrusy idea that would wake up a plain vegetable, and the result was so lively that I kept stealing bites off the sheet pan while it cooled. This dish feels like sunshine, yet it is grounded by the comforting warmth of roasted cauliflower.
I remember serving Roasted Lemon and Dill Cauliflower at a casual dinner and watching friends reach for seconds as if it were candy. The lemon zest lifts the flavor while the fresh dill adds a soft, herbal note. It never feels fussy, and that balance between zesty and mellow is why I keep this technique in my back pocket. I also love how adaptable it is, it pairs beautifully with many mains and helps a weeknight meal feel special.
Recipe Snapshot
20 mins
5 mins
15 mins
Easy
80 kcal
Mediterranean
Vegan, Gluten-Free
Side Dishes
Rimmed sheet pan, Oven
Why Try This Roasted Lemon and Dill Cauliflower
Bright, fresh flavor that feels gourmet
I love how the combination of lemon zest and dill transforms humble roasted cauliflower. The citrus scent is immediate and inviting, and it brightens every bite without overwhelming the vegetable. When I want to impress without fussing, this flavor pairing always delivers.
Easy to scale and quick to make
We can double or triple this recipe and still roast everything evenly as long as the florets have space. For busy nights, it is a lifesaver because it takes very little hands on time. I often toss it together while I prep a main, and it frees me to work on other parts of the meal.
Texture contrast that keeps you coming back
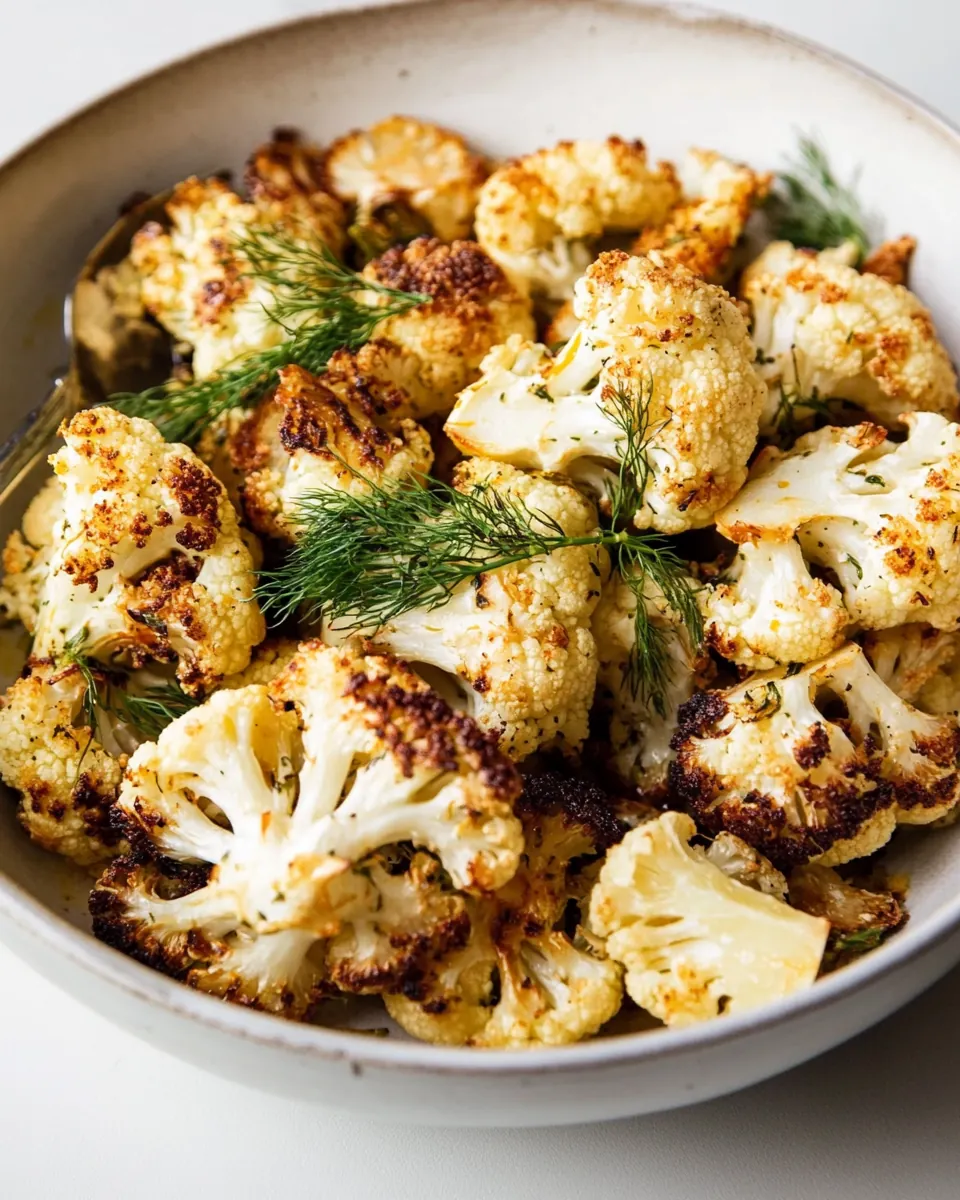
The roast gives the cauliflower edges a caramelized bite, while the interior stays tender and slightly creamy. That contrast makes each bite interesting, and it is one reason this simple side never feels flat. I enjoy how the charred bits add savory depth and a little crunch.
Versatile accompaniment
We can serve this alongside roasted proteins, grain bowls, or as part of a mezze spread. The bright lemon note makes it a natural partner for richer dishes, and the herbaceous dill bridges many cuisines. It is one of those dishes I reach for when I want something that will play well with a range of flavors.
Healthy and satisfying
This recipe delivers on nutrition without sacrificing taste. With just a touch of olive oil, it stays light but satisfying. Whether you are feeding a family or making a health conscious meal for yourself, it feels nourishing and complete.
Main Ingredients for Roasted Lemon and Dill Cauliflower
The philosophy here is simple, use a few focused ingredients that each play a clear role. The cauliflower provides the substantial base and creamy interior, the olive oil carries heat and helps browning, the lemon zest gives bright aromatic lift, the dill offers fresh herbal notes, and the salt amplifies everything. Together they create a balanced, satisfying side that is both aromatic and textural.
- 1 cauliflower head cut into florets, core discarded: Provides the hearty vegetable base and main texture for the dish; florets roast to tender, caramelized edges while the core is discarded to ensure even cooking and bite-sized pieces for serving. Offers a mild, slightly sweet flavor that absorbs lemon and dill, creating a fragrant centerpiece for the recipe.
- 1 tablespoon olive oil: Coats the cauliflower to promote even browning and prevent sticking; olive oil helps crisp the florets in the oven and carries fat-soluble flavors. Contributes a subtle fruity richness that complements lemon zest and fresh herbs during roasting.
- 1 tablespoon lemon zest (no white pith): Brightens and lifts the flavor with concentrated citrus aroma; zest adds essential oils without the bitterness of pith and balances the richness from roasting. Provides tangy, aromatic notes that permeate the florets for a fresh finish.
- 1 tablespoon fresh dill finely chopped: Adds fresh, herbal brightness and a delicate anise-like flavor that complements lemon; finely chopping dill releases aromatic oils and allows even distribution over the cauliflower. Enhances visual appeal with flecks of green and contributes a fragrant counterpoint to the roasted vegetables.
- 1 teaspoon ea salt: Seasons and enhances all other flavors by bringing out natural sweetness and balancing acidity; measured as one teaspoon to avoid over-salting while ensuring the dish is flavorful. Helps the roasted cauliflower and seasonings cohere into a well-rounded final taste.
Instructions for Roasted Lemon and Dill Cauliflower
These directions are straightforward, and with attention to detail you will get a reliably golden, flavored result. Read each step so you know the sensory cues to look for, and keep an eye on the oven since sheet pan roasting can vary. We will walk through the process so you feel confident and in control.
- Preheat oven to 400 degrees F.: The oven should smell neutral and start to warm the air, which helps promote immediate browning when the florets hit the heat. You want a steady, consistent heat so the exterior caramelizes while the interior cooks through. If your oven runs hot or cold, use an oven thermometer to verify the temperature. A common error is not preheating long enough, which can lead to uneven color and texture.
- Place cauliflower florets on a rimmed sheet pan.: When you hear the florets make a faint thud as they hit the pan, you know they are spaced rather than crowded. A rimmed sheet pan catches any juices and prevents spillover, and the rim helps circulate hot air around the pieces. Crowding is a frequent mistake, it causes steaming instead of roasting and results in limp florets.
- Add olive oil, lemon zest, dill and salt. Toss to completely coat florets. Spread in a single layer on sheet pan.: As you toss, notice the sheen of olive oil coating each floret, the fragrant citrus oils released from the lemon zest , and the flecks of chopped dill clinging to the surface. Spreading in a single layer ensures even browning, and the toss helps each bite pick up flavor. If you skip tossing thoroughly, some florets may roast dry and taste under seasoned.
- Roast for 15 minutes, or until golden brown. Watch carefully, as oven cooking times may vary.: Expect the pan to emit a nutty, toasty aroma as the sugars caramelize, and look for golden to deep amber spots on the edges of the florets. You may hear a soft sizzle as moisture escapes and the surface crisps. The reason this timing matters is that a shorter roast leaves the pieces pale and underdeveloped, while too long can char them into bitterness. If you notice smoke or excessive blackening, reduce the oven temperature by 25 degrees and check sooner next time.
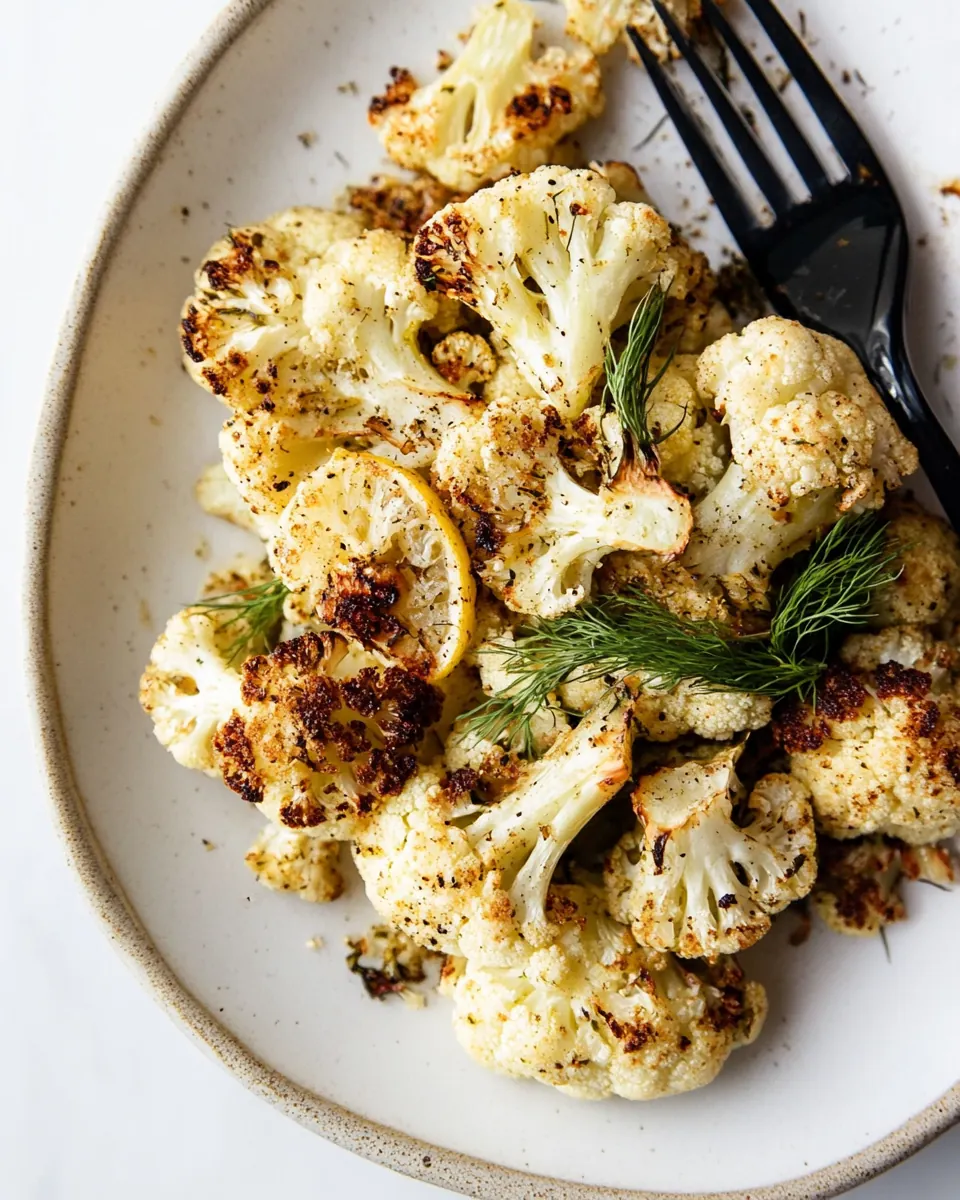
- Remove from oven and serve immediately.: Right out of the oven the surface will be warm and fragrant, and the contrast between the hot roasted edges and the tender centers is at its peak. Serve right away to enjoy the crisp texture and fresh herb aroma. If you let it sit too long on the pan, residual heat will continue cooking and soften the crisp edges, diminishing the contrast.
Substitutions and Tips
This short intro helps you adapt and refine the recipe while keeping the core flavors intact. Below are practical tips and small substitutions that preserve the spirit of the dish while offering flexibility for what you have on hand.
- Oil choice Use a neutral or light fruity olive oil to encourage browning and carry the herb and lemon flavors well without overpowering them.
- Herb swap If you cannot find fresh dill, use a smaller amount of finely chopped fresh herbs like parsley, understanding it will change the flavor profile slightly.
- Zesting tip Zest only the colored part of the lemon to avoid bitter pith, and add it just before roasting to keep the volatile oils fresh.
- Even browning Shake the pan halfway through if needed to encourage even contact and color on all sides, especially if your florets vary in size.
- Serving timing Serve immediately after roasting to preserve the contrast between crispy edges and tender centers, which is central to the eating experience.
Pairing Suggestions for Roasted Lemon and Dill Cauliflower
This dish is versatile and pairs well with many plates across different occasions. Below are ways I like to serve it, including seasonal ideas, storage suggestions, and style cues to help you plan the rest of the meal.
- Casual weeknight dinners Serve alongside grilled or roasted proteins, or tuck the florets into grain bowls for an easy weeknight dinner. The bright lemon and fresh dill lift denser mains and add a lively contrast.
- Holiday side For spring gatherings, present it as a light vegetable side that complements richer mains, the freshness cuts through heavier sauces and balances the plate.
- Lunch bowls Add to warm grain bowls with your choice of cooked grains and a drizzle of extra olive oil, it brings texture and herb-forward brightness to midday meals.
- Storage tips Store leftovers in an airtight container in the refrigerator for up to three days, though the crisp edges will soften. Reheat in a hot oven to restore some of the roasted texture rather than using the microwave.
- Seasonal pairing In spring, pair with fresh salads and light vinaigrettes so the citrus and herb notes harmonize. The dish also complements roasted root vegetables in cooler months.
FAQ
Conclusion
What makes this recipe special is the way a handful of simple ingredients transform ordinary cauliflower into something bright, flavorful, and texturally exciting. Try this recipe because it is fast, adaptable, and reliably delicious, whether you are feeding family or guests. The balance of lemon zest and fresh dill with roasted caramelized edges creates a side that feels thoughtful without being fussy. Give it a go the next time you want a quick vegetable that elevates any meal.

Roasted Lemon and Dill Cauliflower
Equipment
- Rimmed sheet pan
- Oven
Ingredients
- 1 cauliflower head cut into florets, core discarded Provides the hearty vegetable base and main texture for the dish; florets roast to tender, caramelized edges while the core is discarded to ensure even cooking and bite-sized pieces for serving. Offers a mild, slightly sweet flavor that absorbs lemon and dill, creating a fragrant centerpiece for the recipe.
- 1 tablespoon olive oil Coats the cauliflower to promote even browning and prevent sticking; olive oil helps crisp the florets in the oven and carries fat-soluble flavors. Contributes a subtle fruity richness that complements lemon zest and fresh herbs during roasting.
- 1 tablespoon lemon zest (no white pith) Brightens and lifts the flavor with concentrated citrus aroma; zest adds essential oils without the bitterness of pith and balances the richness from roasting. Provides tangy, aromatic notes that permeate the florets for a fresh finish.
- 1 tablespoon fresh dill finely chopped Adds fresh, herbal brightness and a delicate anise-like flavor that complements lemon; finely chopping dill releases aromatic oils and allows even distribution over the cauliflower. Enhances visual appeal with flecks of green and contributes a fragrant counterpoint to the roasted vegetables.
- 1 teaspoon ea salt Seasons and enhances all other flavors by bringing out natural sweetness and balancing acidity; measured as one teaspoon to avoid over-salting while ensuring the dish is flavorful. Helps the roasted cauliflower and seasonings cohere into a well-rounded final taste.
Instructions
- Preheat oven to 400 degrees F.: The oven should smell neutral and start to warm the air, which helps promote immediate browning when the florets hit the heat. You want a steady, consistent heat so the exterior caramelizes while the interior cooks through. If your oven runs hot or cold, use an oven thermometer to verify the temperature. A common error is not preheating long enough, which can lead to uneven color and texture.
- Place cauliflower florets on a rimmed sheet pan.: When you hear the florets make a faint thud as they hit the pan, you know they are spaced rather than crowded. A rimmed sheet pan catches any juices and prevents spillover, and the rim helps circulate hot air around the pieces. Crowding is a frequent mistake, it causes steaming instead of roasting and results in limp florets.
- Add olive oil, lemon zest, dill and salt. Toss to completely coat florets. Spread in a single layer on sheet pan.: As you toss, notice the sheen of olive oil coating each floret, the fragrant citrus oils released from the lemon zest , and the flecks of chopped dill clinging to the surface. Spreading in a single layer ensures even browning, and the toss helps each bite pick up flavor. If you skip tossing thoroughly, some florets may roast dry and taste under seasoned.
- Roast for 15 minutes, or until golden brown. Watch carefully, as oven cooking times may vary.: Expect the pan to emit a nutty, toasty aroma as the sugars caramelize, and look for golden to deep amber spots on the edges of the florets. You may hear a soft sizzle as moisture escapes and the surface crisps. The reason this timing matters is that a shorter roast leaves the pieces pale and underdeveloped, while too long can char them into bitterness. If you notice smoke or excessive blackening, reduce the oven temperature by 25 degrees and check sooner next time.
- Remove from oven and serve immediately.: Right out of the oven the surface will be warm and fragrant, and the contrast between the hot roasted edges and the tender centers is at its peak. Serve right away to enjoy the crisp texture and fresh herb aroma. If you let it sit too long on the pan, residual heat will continue cooking and soften the crisp edges, diminishing the contrast.
Notes
- Oil choice Use a neutral or light fruity olive oil to encourage browning and carry the herb and lemon flavors well without overpowering them.
- Herb swap If you cannot find fresh dill, use a smaller amount of finely chopped fresh herbs like parsley, understanding it will change the flavor profile slightly.
- Zesting tip Zest only the colored part of the lemon to avoid bitter pith, and add it just before roasting to keep the volatile oils fresh.
- Even browning Shake the pan halfway through if needed to encourage even contact and color on all sides, especially if your florets vary in size.
- Serving timing Serve immediately after roasting to preserve the contrast between crispy edges and tender centers, which is central to the eating experience.