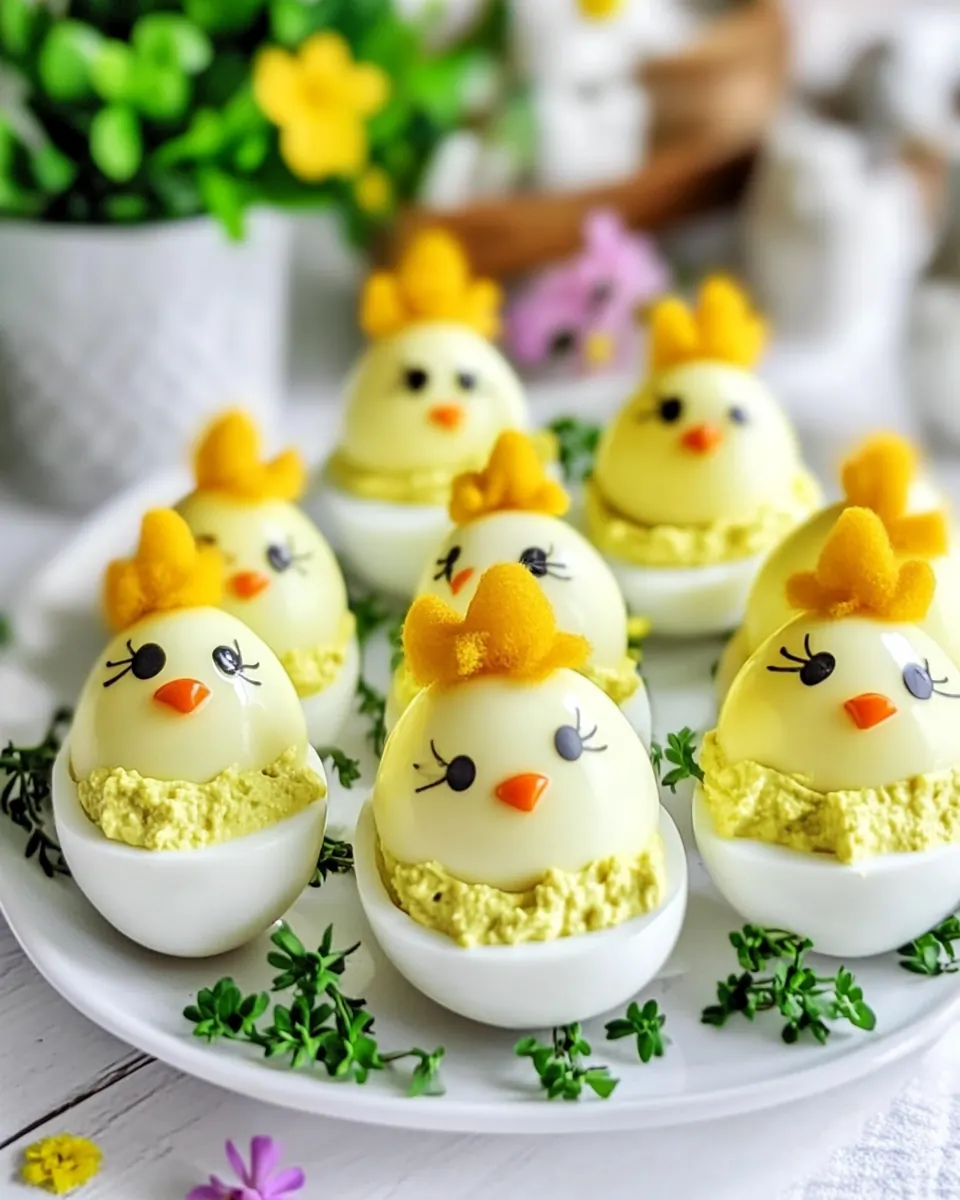
Easter Chick Deviled Eggs
Easter Chick Deviled Eggs are one of those nostalgic recipes that always makes me smile when I bring them to a gathering. The first time I made them I was elbow deep in a messy spring kitchen, humming a tune while I carved tiny carrot beaks and coaxed piped yolk filling into snug white cups. That day a neighbor stopped by, drawn by the laughter and the bright yellow faces, and I realized these playful bites do more than taste good, they start conversations.
Over the years I have tweaked the filling to be creamier and more dependable, learning small tricks along the way that save time and prevent cracked whites. I love how a trio of simple components can transform into a centerpiece, and how decorating them connects me with childhood holidays and culinary craft. If you enjoy little projects that reward you and your guests, these eggs are the kind of recipe you will return to every spring.
Recipe Snapshot
30 mins
18 mins
12 mins
Medium
150 kcal
American
Gluten-Free, Low FODMAP
Appetizers
Mixing bowl, Piping bag, Knife
Why This Easter Chick Deviled Eggs Hits Different
They are irresistibly charming
I adore how the Easter Chick Deviled Eggs instantly add whimsy to a table, turning a plain platter into something playful. The visual appeal matters, and here it invites guests to smile before they even taste one.
Texture and creaminess are balanced
Combining the smoothness of whipped yolks with the tang of herbed cream cheese creates a filling that is lush without being greasy. I find the mayonnaise helps the mixture pipe neatly while the cream cheese adds body and flavor depth.
Simple, reliable technique
There is comfort in the straightforward method. Hard boiling, peeling, filling, and decorating are chores anyone can master, and once you know the visual cues, the results are consistently great. I love that this makes them perfect for both last minute prep and ahead planning.
Customizable without losing charm
While I kept to the classic flavor in this version, the recipe still allows for small swaps to suit taste or what you have on hand, making it flexible for family preferences. I often adjust seasoning and the garnish rhythmically, depending on who will be eating them.
Perfect for spring gatherings
These eggs fit into many holiday spreads, and they travel well when you need to bring a dish. I appreciate how they maintain their look and texture, whether set on a picnic table or a living room coffee table.
Easter Chick Deviled Eggs Shopping List
These ingredients are intentionally simple, and that is part of the charm. Each item plays a clear role: the eggs form the canvas, the yolk mixture provides creamy richness, and the small garnishes give personality and visual contrast. Together they make a snack that feels festive yet familiar.
- 5 hard-boiled eggs (boil for at least 12 minutes): Boiled for at least 12 minutes to achieve a firm yolk perfect for stuffing; provides the base and structure for each deviled egg and adds substantial protein and texture to the appetizer. Peel and halve to expose the yolks, which will be mashed and combined with other creamy ingredients to form the filling. Serves as individual vessels that hold the flavored yolk mixture and decorative toppings for the Easter chick presentation.
- 2 tablespoons mayonnaise: Used to create a smooth, creamy filling by blending with mashed yolks and cream cheese; adds richness and a slight tang that helps bind the filling together. Adjust amount to reach desired creaminess and mouthfeel, and season alongside other ingredients to balance flavor. Helps create a silky texture that makes piping or spooning the filling into egg whites easy and attractive.
- 150 g herbed cream cheese: Softened and mixed into the yolk mixture to contribute herbaceous flavor and a velvety, spreadable consistency; elevates the filling with savory creaminess that contrasts nicely with the firm egg white. Use at room temperature for easy blending and to ensure an even distribution of herbs throughout the filling. Can be adjusted slightly to control firmness of the filling and enhance overall taste profile.
- salt (to taste): Added sparingly to taste to enhance and balance flavors in the yolk filling; helps bring out the subtle tang of cream cheese and richness of the egg yolk without overpowering other seasonings. Start with a pinch and incrementally season while tasting to avoid over-salting. Works with pepper to provide a well-rounded savory profile for the deviled eggs.
- black peppercorns (for decoration): Used as tiny decorative beady eyes for the Easter chick design, providing contrast and a whimsical touch; whole peppercorns offer a crisp texture if accidentally bitten. Place carefully on the piped filling to form facial features and secure lightly so they stay in place during serving. Can be substituted with small edible decorations if preferred for ease of eating.
- a few thin slices of carrot (for decoration): Cut into thin slices to form small beaks or other ornamental details on the chick-shaped deviled eggs, adding color and a subtle vegetal sweetness. Use a small knife or vegetable peeler to create uniformly thin pieces that are easy to arrange and bite-sized for guests. Enhances visual appeal and provides a fresh accent to the creamy filling.
- 1 green onion (for garnish; see substitution tips above): Sliced thinly to provide a fresh, mild onion garnish that complements the creamy filling and adds a pop of green color to the presentation; offers a mild sharpness that brightens the overall flavor. Use the green part for delicate rings or finely chopped as an alternative garnish, and consider substituting with chives for a similar effect if needed. Place sparingly to avoid overpowering the dish while adding visual height and freshness.
Step by Step Guide for Easter Chick Deviled Eggs

This method is approachable and gentle, suited to cooks at any level. Over the next steps I guide you through peeling, filling, and decorating, focusing on sensory cues so you can tell when each stage is right. Keep tools handy, and take a few extra breaths to enjoy the process.
- Peel the eggs and carefully cut a small “cap” off the top. If the eggs don’t sit upright, trim a thin slice (1–2 mm) from the bottom to create a flat base.: You will notice the white has a smooth, porcelain finish when peeling is done correctly, and the little cap should lift without tearing the rim too much. A clean break is satisfying and sets up the chick aesthetic, so peel under cool running water if the membrane clings to the white. The sound here is quiet, a faint scrape as the shell comes away, and you should see a uniform white edge once it is ready. Why this matters, I find, is that an intact rim keeps the filling from spilling, preserving the neat chick silhouette. A common mistake is rushing the peel, which can gouge the white and create uneven edges; if that happens, trim a hairline slice to level the base rather than forcing the cap back on a fractured edge.
- Remove the yolks and mix them in a bowl with mayonnaise and herbed cream cheese until smooth and creamy.: As you scoop the yolks they should be dry and crumbly, a deep yellow that promises richness. When you combine the yolks with the mayonnaise and room temperature herbed cream cheese , the mixture transforms into a velvety paste with a gentle sheen. I usually fold with a fork in slow circles, then press through a sieve or whip briefly to eliminate any granules, which yields a silkier result. The aroma will pick up tang from the cheese and a hint of fat from the mayonnaise , and you will know it is ready when it holds soft peaks and glides off the spoon. If the filling seems lumpy, it likely needs a bit more mixing at room temperature; avoid adding liquid, which thins the mixture and makes piping messy.
- Transfer the filling into a piping bag (or a plastic bag with the tip cut off) and fill the eggs. You can smooth the surface using a damp fingertip.: When you pipe, listen for the soft squeeze and watch the filling settle into the hollow like a plush cushion. The creamy mixture should hold its shape, leaving a little mound that mimics a chick's body. Smoothing with a damp fingertip gives a gentle gloss and removes tiny peaks without deflating the mass, so the surface looks polished. The reason this technique matters is that it creates uniform servings and helps the decoration sit properly. A frequent slip is overfilling; if the filling bulges too much, scrape off the excess and reserve it for another use, rather than forcing it to balance which can cause the caps to topple.
- Create the chicks’ eyes by pressing two black peppercorns into each filled egg.: The peppercorns are tiny anchors that should sit with a quiet click when pressed into the filling. Their dark color provides contrast and personality, and they will retain their shape when you press them in gently. You'll see the filling compress slightly around them, forming natural little dimples. This step matters because stable eyes keep the face expressive and consistent across the platter. Avoid pushing the peppercorns all the way through, which can create holes and allow filling to leak; instead, anchor them shallowly so they remain visible and intact.
- Cut small triangles from the carrot slices and place them as the chicks’ beaks.: Fresh carrots have a crisp snap and a sweet vegetal scent when you slice them. I recommend cutting thin, equilateral triangles so each beak looks deliberate and fits snugly against the filling. Gently press the carrot into the piped filling until it feels secure; you want just enough pressure to hold it without disturbing the shape. This detail matters because the beak completes the face and adds color and texture contrast. A typical error is making the triangles too thick, which can split the filling; if that happens, shave the triangle thinner and try again for a cleaner look.
- Gently place the egg “caps” back on top of the filling.: When you set the caps down they should sit like soft hats, aligning with the rim and revealing the little chick face below. The cap adds a playful element and can be slightly askew for charm, but it should not crush the filling. You will hear a faint, satisfying contact as the pieces meet, and the visual effect is a tiny shell perched on a creamy body. This technique preserves moisture and offers a whimsical presentation, which often delights guests. A common slip is forcing a cracked cap back on; if the cap is broken, use it as a separate garnish rather than trying to conceal a damaged edge.
- Sprinkle finely chopped green onion around the eggs to resemble grass for decoration.: As you scatter the minced green onion , inhale the mild onion scent that lifts the richer flavors. The fine threads of green provide a springlike bed that makes the display look intentional, and the slight crunch contrasts the smooth filling. This garnish matters because it frames the platter visually and gives a fresh note with each bite. Be careful not to pile it directly on top of the eggs, which can hide the faces; instead, arrange it around the base to create that grassy effect.
- Enjoy!: When you finally bite into one, you will experience the cool white, the creamy, tangy filling, and the crisp carrot beak together in a pleasing rhythm. The texture contrast and balanced seasoning should sing, and seeing people smile is the most satisfying part. If someone finds the filling too tangy or too mild, encourage them to try another one with a different balance of filling on your next platter, but avoid making last minute adjustments to every single egg which can overcompensate and flatten the overall taste profile.
Expert Tips about Easter Chick Deviled Eggs
These tips stem from repeated practice and small refinements that make the whole process smoother. A few intentional habits will help you deliver consistent results, whether you are making a dozen or a crowd sized platter.
- Prep your eggs the night before, boil and cool them fully, then refrigerate in water covered; this reduces stress on the day of serving and makes peeling easier.
- Bring the cream cheese to room temperature before mixing so it blends seamlessly with the yolks and mayonnaise, creating a silky filling without lumps.
- Use a small piping tip for better control when filling, which helps keep the facial features centered and tidy on every egg.
- Trim a tiny slice from the egg bottom if needed to make each egg sit upright and prevent toppled chicks on the platter during display or transport.
- Keep garnishes separate until serving to maintain bright color and crisp texture, especially for the green onion grass and carrot beaks.
- Pack securely for travel by using an egg tray or a shallow dish with a snug lid, and place a damp paper towel under the tray to prevent sliding.
Accompaniments for Easter Chick Deviled Eggs
These eggs pair well with a variety of simple platters and seasonal choices. When planning a spread, think about textures and visual contrast, and choose items that complement the creamy filling without overpowering it.
- Fresh vegetable platter, such as crisp carrot sticks and cucumber rounds, offers a crunchy contrast and keeps the plate light for spring gatherings.
- Soft dinner rolls or simple bread provide a neutral base for those who like to pair bites with a light carb, making the plate more satiating for brunch or lunch.
- Seasonal salad tossed with a light vinaigrette balances the richness of the filling, and the acidity helps refresh the palate between bites.
- Herb garnish options like extra chopped green onion or parsley can be provided on the side for guests who want an intensified herbal note.
- Serving occasions include spring brunches, holiday buffets, potlucks, and family gatherings; they are particularly suited to Easter celebrations and casual luncheons.
- Storage tips, keep the assembled eggs chilled and covered for up to 24 hours, and store the filling separately if you expect to transport them to avoid sogginess.
- Seasonal pairings, choose light and bright accompaniments like lemon dressed greens and crisp crudites to echo the spring theme.
FAQ
Conclusion
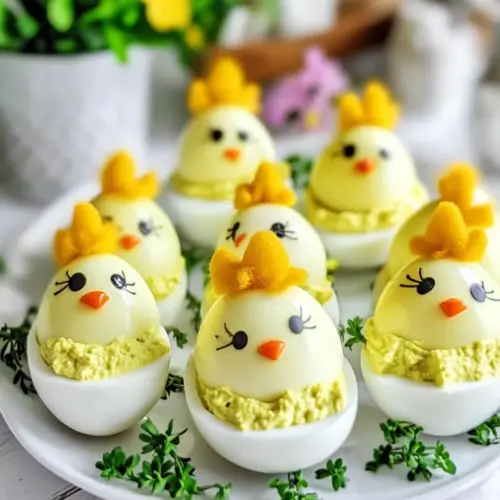
These Easter Chick Deviled Eggs shine because they combine playful presentation with dependable, creamy filling, making them a spring staple that delights both kids and adults. Try them at your next holiday brunch or potluck, and give yourself permission to enjoy the small creative act of shaping tiny faces with peppercorn eyes and carrot beaks. They are an invitation to slow down a bit, smile, and share something made with care and a lighthearted touch.
Easter Chick Deviled Eggs
Equipment
- Mixing Bowl
- Piping Bag
- Knife
Ingredients
- 5 hard-boiled eggs (boil for at least 12 minutes) Boiled for at least 12 minutes to achieve a firm yolk perfect for stuffing; provides the base and structure for each deviled egg and adds substantial protein and texture to the appetizer. Peel and halve to expose the yolks, which will be mashed and combined with other creamy ingredients to form the filling. Serves as individual vessels that hold the flavored yolk mixture and decorative toppings for the Easter chick presentation.
- 2 tablespoons mayonnaise Used to create a smooth, creamy filling by blending with mashed yolks and cream cheese; adds richness and a slight tang that helps bind the filling together. Adjust amount to reach desired creaminess and mouthfeel, and season alongside other ingredients to balance flavor. Helps create a silky texture that makes piping or spooning the filling into egg whites easy and attractive.
- 150 g herbed cream cheese Softened and mixed into the yolk mixture to contribute herbaceous flavor and a velvety, spreadable consistency; elevates the filling with savory creaminess that contrasts nicely with the firm egg white. Use at room temperature for easy blending and to ensure an even distribution of herbs throughout the filling. Can be adjusted slightly to control firmness of the filling and enhance overall taste profile.
- salt (to taste) Added sparingly to taste to enhance and balance flavors in the yolk filling; helps bring out the subtle tang of cream cheese and richness of the egg yolk without overpowering other seasonings. Start with a pinch and incrementally season while tasting to avoid over-salting. Works with pepper to provide a well-rounded savory profile for the deviled eggs.
- black peppercorns (for decoration) Used as tiny decorative beady eyes for the Easter chick design, providing contrast and a whimsical touch; whole peppercorns offer a crisp texture if accidentally bitten. Place carefully on the piped filling to form facial features and secure lightly so they stay in place during serving. Can be substituted with small edible decorations if preferred for ease of eating.
- a few thin slices of carrot (for decoration) Cut into thin slices to form small beaks or other ornamental details on the chick-shaped deviled eggs, adding color and a subtle vegetal sweetness. Use a small knife or vegetable peeler to create uniformly thin pieces that are easy to arrange and bite-sized for guests. Enhances visual appeal and provides a fresh accent to the creamy filling.
- 1 green onion (for garnish; see substitution tips above) Sliced thinly to provide a fresh, mild onion garnish that complements the creamy filling and adds a pop of green color to the presentation; offers a mild sharpness that brightens the overall flavor. Use the green part for delicate rings or finely chopped as an alternative garnish, and consider substituting with chives for a similar effect if needed. Place sparingly to avoid overpowering the dish while adding visual height and freshness.
Instructions
- Peel the eggs and carefully cut a small “cap” off the top. If the eggs don’t sit upright, trim a thin slice (1–2 mm) from the bottom to create a flat base.: You will notice the white has a smooth, porcelain finish when peeling is done correctly, and the little cap should lift without tearing the rim too much. A clean break is satisfying and sets up the chick aesthetic, so peel under cool running water if the membrane clings to the white. The sound here is quiet, a faint scrape as the shell comes away, and you should see a uniform white edge once it is ready. Why this matters, I find, is that an intact rim keeps the filling from spilling, preserving the neat chick silhouette. A common mistake is rushing the peel, which can gouge the white and create uneven edges; if that happens, trim a hairline slice to level the base rather than forcing the cap back on a fractured edge.
- Remove the yolks and mix them in a bowl with mayonnaise and herbed cream cheese until smooth and creamy.: As you scoop the yolks they should be dry and crumbly, a deep yellow that promises richness. When you combine the yolks with the mayonnaise and room temperature herbed cream cheese , the mixture transforms into a velvety paste with a gentle sheen. I usually fold with a fork in slow circles, then press through a sieve or whip briefly to eliminate any granules, which yields a silkier result. The aroma will pick up tang from the cheese and a hint of fat from the mayonnaise , and you will know it is ready when it holds soft peaks and glides off the spoon. If the filling seems lumpy, it likely needs a bit more mixing at room temperature; avoid adding liquid, which thins the mixture and makes piping messy.
- Transfer the filling into a piping bag (or a plastic bag with the tip cut off) and fill the eggs. You can smooth the surface using a damp fingertip.: When you pipe, listen for the soft squeeze and watch the filling settle into the hollow like a plush cushion. The creamy mixture should hold its shape, leaving a little mound that mimics a chick's body. Smoothing with a damp fingertip gives a gentle gloss and removes tiny peaks without deflating the mass, so the surface looks polished. The reason this technique matters is that it creates uniform servings and helps the decoration sit properly. A frequent slip is overfilling; if the filling bulges too much, scrape off the excess and reserve it for another use, rather than forcing it to balance which can cause the caps to topple.
- Create the chicks’ eyes by pressing two black peppercorns into each filled egg.: The peppercorns are tiny anchors that should sit with a quiet click when pressed into the filling. Their dark color provides contrast and personality, and they will retain their shape when you press them in gently. You'll see the filling compress slightly around them, forming natural little dimples. This step matters because stable eyes keep the face expressive and consistent across the platter. Avoid pushing the peppercorns all the way through, which can create holes and allow filling to leak; instead, anchor them shallowly so they remain visible and intact.
- Cut small triangles from the carrot slices and place them as the chicks’ beaks.: Fresh carrots have a crisp snap and a sweet vegetal scent when you slice them. I recommend cutting thin, equilateral triangles so each beak looks deliberate and fits snugly against the filling. Gently press the carrot into the piped filling until it feels secure; you want just enough pressure to hold it without disturbing the shape. This detail matters because the beak completes the face and adds color and texture contrast. A typical error is making the triangles too thick, which can split the filling; if that happens, shave the triangle thinner and try again for a cleaner look.
- Gently place the egg “caps” back on top of the filling.: When you set the caps down they should sit like soft hats, aligning with the rim and revealing the little chick face below. The cap adds a playful element and can be slightly askew for charm, but it should not crush the filling. You will hear a faint, satisfying contact as the pieces meet, and the visual effect is a tiny shell perched on a creamy body. This technique preserves moisture and offers a whimsical presentation, which often delights guests. A common slip is forcing a cracked cap back on; if the cap is broken, use it as a separate garnish rather than trying to conceal a damaged edge.
- Sprinkle finely chopped green onion around the eggs to resemble grass for decoration.: As you scatter the minced green onion , inhale the mild onion scent that lifts the richer flavors. The fine threads of green provide a springlike bed that makes the display look intentional, and the slight crunch contrasts the smooth filling. This garnish matters because it frames the platter visually and gives a fresh note with each bite. Be careful not to pile it directly on top of the eggs, which can hide the faces; instead, arrange it around the base to create that grassy effect.
- Enjoy!: When you finally bite into one, you will experience the cool white, the creamy, tangy filling, and the crisp carrot beak together in a pleasing rhythm. The texture contrast and balanced seasoning should sing, and seeing people smile is the most satisfying part. If someone finds the filling too tangy or too mild, encourage them to try another one with a different balance of filling on your next platter, but avoid making last minute adjustments to every single egg which can overcompensate and flatten the overall taste profile.
Notes
- Prep your eggs the night before, boil and cool them fully, then refrigerate in water covered; this reduces stress on the day of serving and makes peeling easier.
- Bring the cream cheese to room temperature before mixing so it blends seamlessly with the yolks and mayonnaise, creating a silky filling without lumps.
- Use a small piping tip for better control when filling, which helps keep the facial features centered and tidy on every egg.
- Trim a tiny slice from the egg bottom if needed to make each egg sit upright and prevent toppled chicks on the platter during display or transport.
- Keep garnishes separate until serving to maintain bright color and crisp texture, especially for the green onion grass and carrot beaks.
- Pack securely for travel by using an egg tray or a shallow dish with a snug lid, and place a damp paper towel under the tray to prevent sliding.