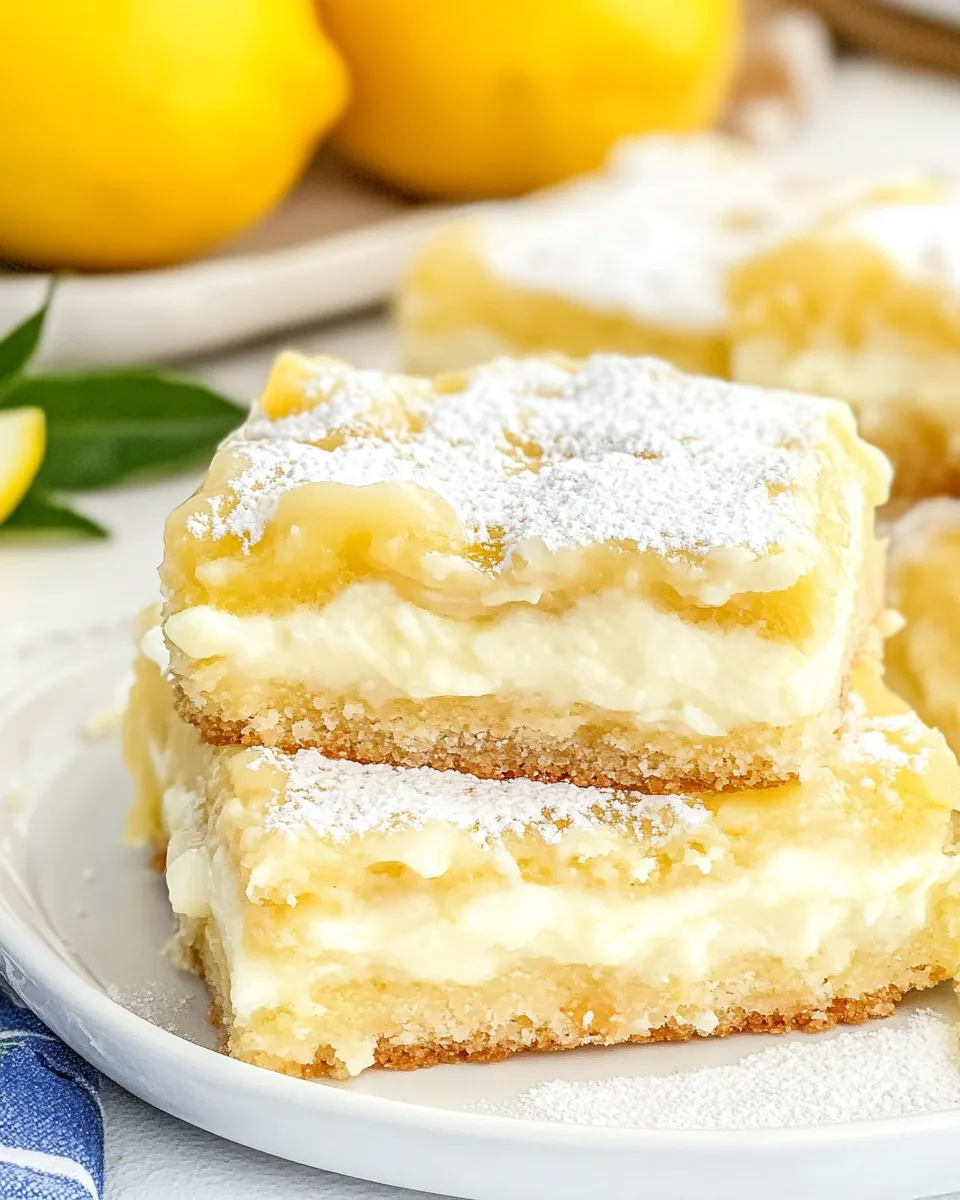
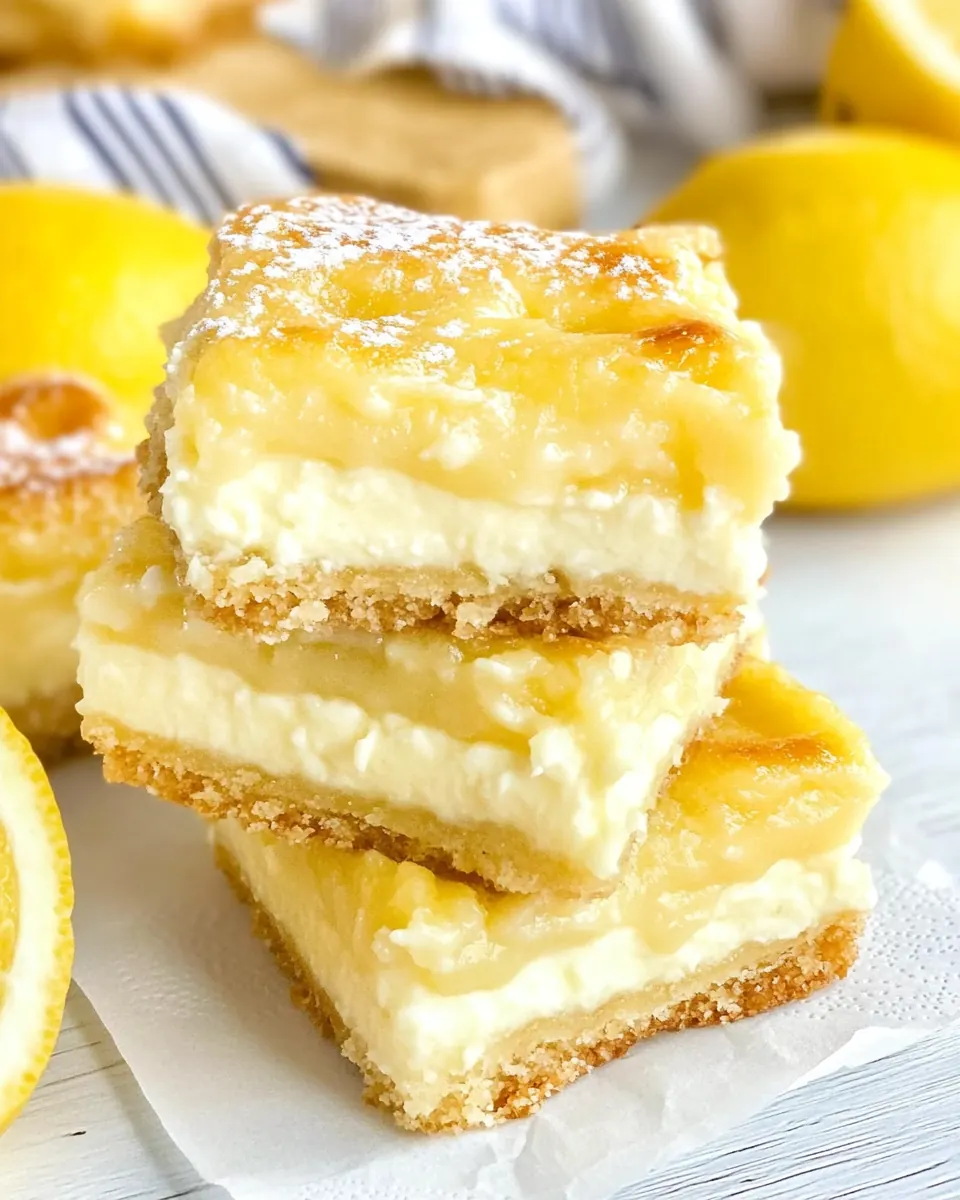
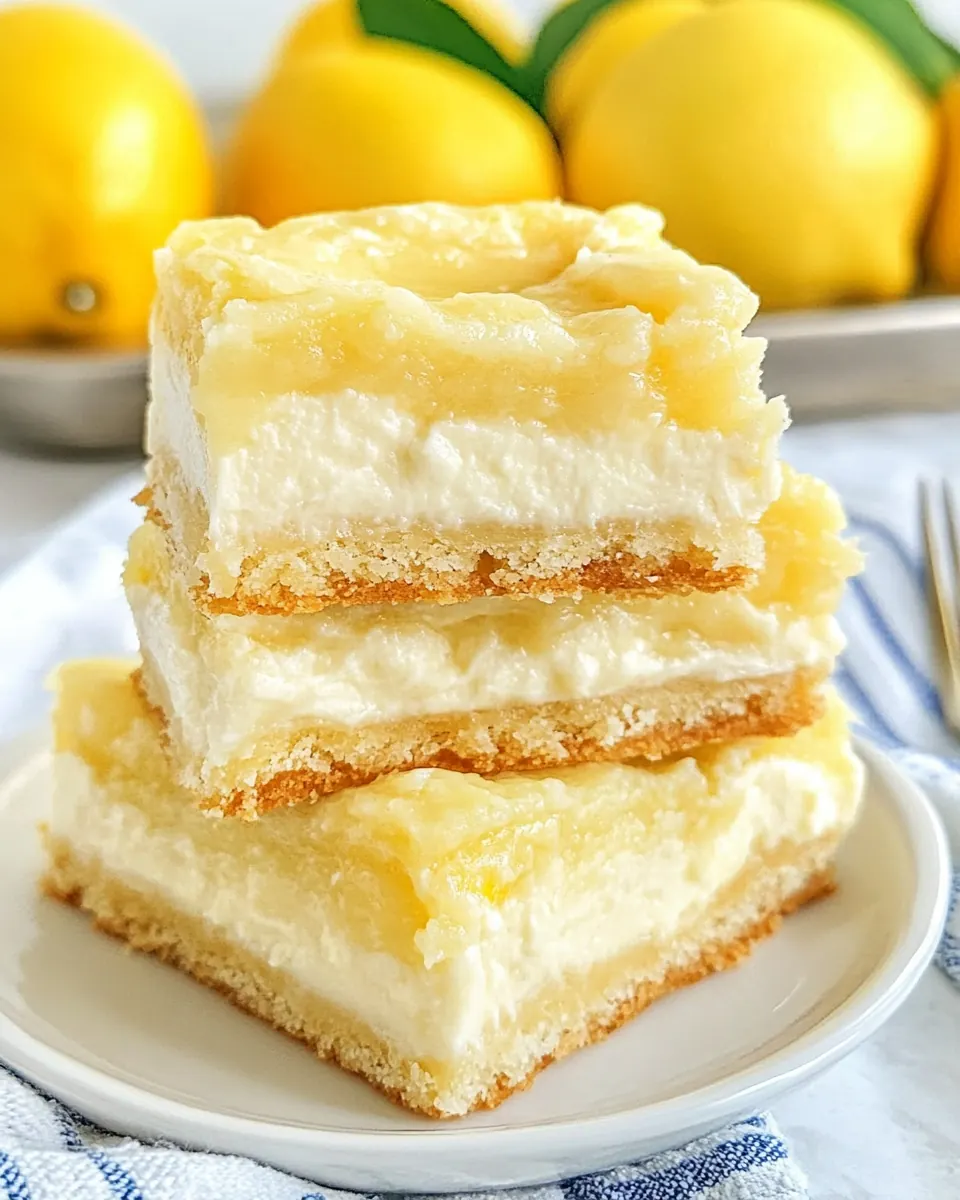
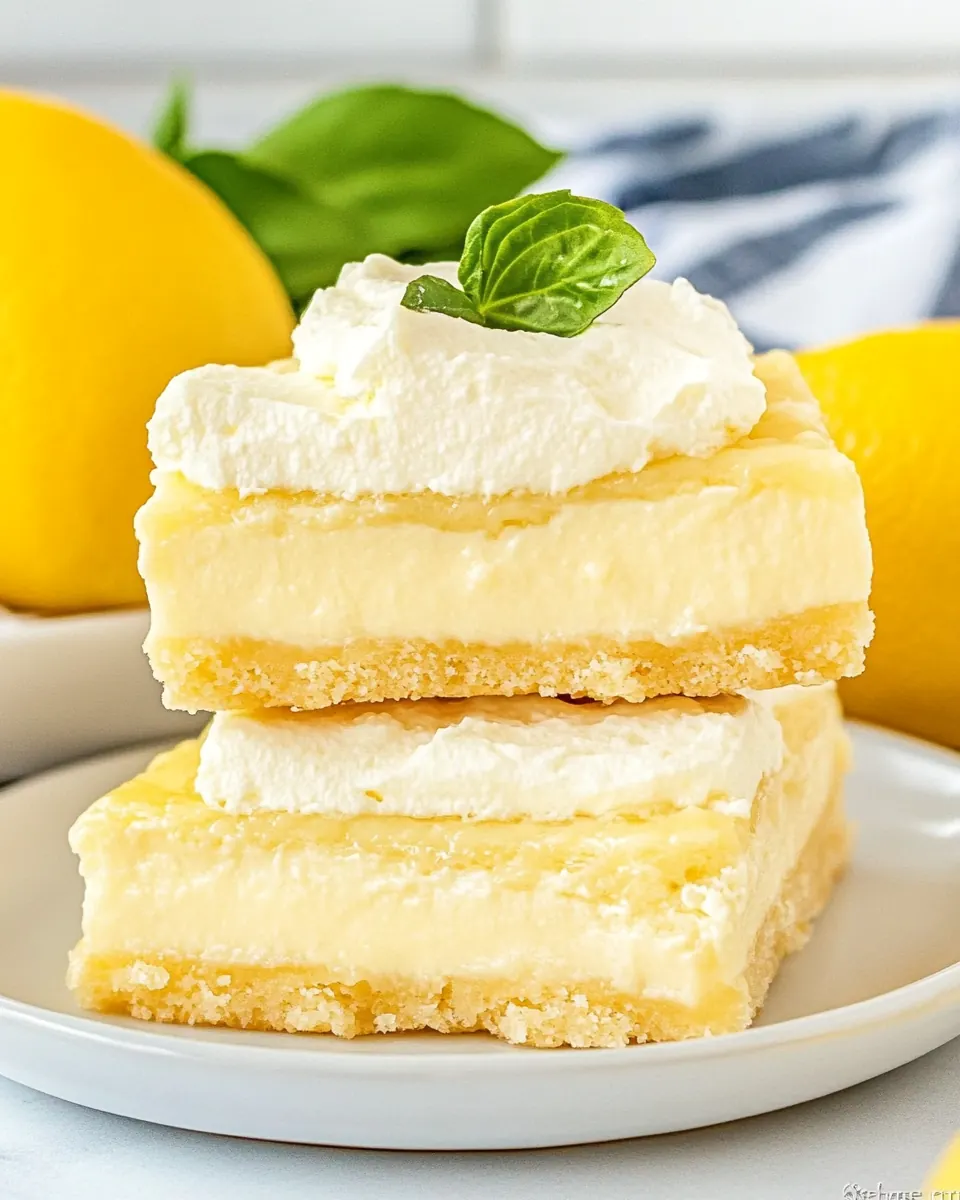
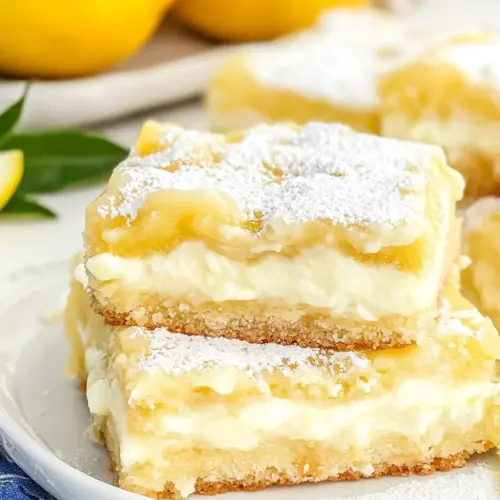
Lemon Cream Cheese Bars
Lemon Cream Cheese Bars have been my go to when I need a bright, comforting tray bake that disappears faster than I can cut it.
Years ago I brought these to a potluck on a sticky summer afternoon, and the way the tang from the lemon lifted the rich, silky cream cheese filling made everyone pause mid conversation. I remember the crust offering a light, flaky counterpoint to the creamy center, and the sugared lemon zest on top adding that tiny crackle that kept people coming back for another piece. That moment taught me how the simplest ingredients can make something memorable.
I often make a double batch for family gatherings, because once the first pan is gone, requests start piling up. What I love most is how forgiving this recipe is, it feels approachable whether I am baking for kids after school or assembling a dessert for a more formal get together. The balance of buttery, citrusy, and creamy keeps it feeling both nostalgic and fresh.
Recipe Snapshot
40 mins
10 mins
30 mins
Medium
220 kcal
American
Gluten-Free, Low FODMAP
Desserts
9×13-inch Cake Pan, 9×13-inch Baking Dish, Mixing Bowls, Hand Mixer, Microplate Zester
Why You’ll Love This Lemon Cream Cheese Bars
Bright, balanced flavor
I adore how lemon cuts through the richness of the cream cheese. The tartness keeps each bite lively, so the dessert never feels too heavy even when served in generous squares. I often find myself reaching for these bars when I want something that feels indulgent, without weighing down the meal.
Simple pantry ingredients
One of the reasons I keep this in rotation is the straightforward ingredient list. With canned crescent dough, cream cheese, a little sugar, and a couple of lemons, you can create something that looks and tastes like you spent far more time on it. I appreciate recipes that reward minimal effort with maximum results, and these bars do exactly that.
Quick assembly, great results
The method moves quickly, which makes this a handy option when I am short on time but want to bring something homemade. Pressing the first layer of dough, whipping the filling, and finishing with a sugared zest topping is efficient, and the 30 minute bake produces a golden, inviting top. I like that you can monitor the color and stop when it reads and looks right to you.
Textural contrast
I love serving these because they offer a pleasing contrast, flaky crust surrounding a lusciously smooth filling, finished with a slight crunchy sugar kiss. That contrast keeps every bite interesting and makes it a crowd pleaser across ages, from kids to grandparents. The visual appeal alone, with the pale filling and golden top, makes it hard to resist.
Flexible and family friendly
Over the years I have adapted small details to suit preferences, and that flexibility is a big part of why I keep going back to them. A touch more lemon for those who want extra zing, or a lightly reduced sugar for a gentler finish, and you still end up with the same comforting profile. In my house, they are the dessert that reliably receives compliments and requests for the recipe.
Lemon Cream Cheese Bars Shopping List
These ingredients form a simple, harmonious team. The canned dough becomes a flaky frame, the cream cheese brings silkiness, and the lemon injects lift. A touch of sugar and butter round things out, creating a dessert that is at once buttery, tangy, and lightly sweet. These are pantry friendly elements that work together to deliver balanced flavor and texture.
- 2 (8-oz) cans crescent rolls, divided: Used as the buttery, flaky dough base and top for the bars, providing structure and a golden, layered crust when baked. Separate cans allow one layer to form the crust and the other to cover the filling, ensuring a balanced pastry-to-filling ratio. Handle gently to maintain the crescent roll layers for a tender texture.
- 2 (8-oz) packages cream cheese, softened: Provides a rich, creamy filling with tang and body, becoming smooth when softened and mixed. Combines with sugar and lemon to create a luscious, spreadable layer that sets during baking and contrasts the flaky crust.
- 2 lemons, juiced and zested, divided: Adds bright citrus flavor and acidity that balances the richness of the cream cheese; zest contributes aromatic oils while juice offers tartness and moisture. Dividing the lemon between filling and glaze ensures both layers carry a fresh lemon character without overpowering sweetness.
- 1/2 cup sugar: Sweetens the cream cheese filling to counter the lemon's acidity and create a balanced dessert flavor profile. Granulated texture dissolves during mixing to yield smoothness and consistent sweetness throughout the bars.
- 1 tsp vanilla extract: Imparts warm, vanilla aroma and rounds out the filling's flavor profile, enhancing the sweetness and complementing the lemon. Small quantity prevents overpowering while lifting the overall taste, contributing to a more complex filling.
- 2 tbsp butter, melted: Adds moist richness and helps brown and seal the top layer when brushed over the dough, contributing a subtle buttery flavor. Melted form ensures even application and helps create a slight sheen and firmer crust after baking.
- 3 tbsp sugar: Used as the finishing sweetener for the lemon glaze or sprinkle, balancing the tart lemon juice and providing a glossy, sweet coating. Dissolves into the juice to form a simple syrup-like glaze that brightens flavor and appearance of the bars.
Cooking Method for Lemon Cream Cheese Bars
These steps are straightforward and satisfying, and they reward attention to small sensory cues. I approach each stage patiently, watching for color, texture, and aroma so the final bars have the right balance of flaky crust and creamy filling. Below I expand each direction into a detailed, helpful step by step.
- Preheat oven to 350ºF. Line a 9×13-inch baking dish with aluminum foil. Lightly spray with cooking spray.: The warm, yeasty smell of the oven coming up to 350ºF signals the start of transformation, and lining the pan with foil creates an easy lift out later. Properly prepping the pan prevents sticking and ensures clean edges when you cut bars. A common mistake is skipping the spray, which can make removal messy; take the extra minute to prepare the dish, and you will be rewarded with tidy squares.
- Press one can of crescent rolls in the bottom of the prepared baking dish. Bake in the preheated oven for 7 minutes.: As the dough warms, you will notice a buttery aroma and the dough beginning to set, edges slightly puffed. This brief bake firms the bottom layer so it holds the filling without becoming soggy. If you underbake here, the crust can stay doughy after the final bake; if you overbake, it may become too crisp. Seven minutes gives a tender, sturdy base.
- In a medium bowl, combine lemon juice, zest of 1 1/2 lemons, cream cheese, 1/2 cup sugar, and vanilla extract. Beat together with an electric hand mixer until smooth.: The mixing produces a glossy, airy filling that smells of citrus and sweet cream. As you beat, scrape the bowl to eliminate streaks and achieve a homogeneous texture. If the cream cheese is not fully softened, you may get small lumps, so room temperature cheese is key for a perfectly smooth result.
- Spread cream cheese mixture over partially baked crescent roll crust.: The contrast is immediate, the pale, velvety filling settling into the golden shell. Use a spatula to smooth it level, ensuring even thickness so each bar bakes uniformly. If you pile it too high in one area, that section may take longer to set, so aim for an even layer for consistent texture across the pan.
- Unroll the second can of crescent roll dough and layer over the cream cheese mixture, gently stretching dough to the edges.: When you place the top layer, you will see the filling peek out slightly at the seams, promising a creamy center. Stretching gently helps the dough meet the pan edges without tearing. Avoid pulling aggressively, which can create thin spots that brown too quickly. Take your time to ease it into place so it seals well.
- Brush the dough with melted butter.: The melted butter adds sheen and promotes even browning; when brushed, the surface takes on a glossy finish that turns golden in the oven. This step also helps the sugar adhere, creating those little crunchy highlights when baked. Brush sparingly and evenly, because excess butter can pool and make the top greasy.
- In a small bowl, combine 3 tablespoons of sugar and the remaining lemon zest. Sprinkle sugar mixture over the melted butter.: The fragrant sugar releases a burst of citrus oil with each sprinkle, and as it bakes it develops tiny crunchy crystals. This topping gives the bars a lively finish, both visually and texturally. Be mindful to distribute the mixture evenly, so it caramelizes uniformly and does not burn in isolated spots.
- Bake for 30 minutes, until golden brown.: As the pan roasts, the kitchen fills with warm, buttery, citrus notes, and the top will turn an even golden color. Look for a lightly browned surface, bubbling edges, and a set filling that no longer jiggles in the center. Overbaking can dry the filling, while underbaking leaves it too soft, so check toward the end and rely on color and a gentle jiggle test.
- Cool the bars for 20 minutes and then refrigerate for an hour.: Cooling lets the filling firm and settle, so when you chill them the texture becomes dense and sliceable. The cooling phase also deepens the flavors as the lemon melds with the cream cheese . Cutting too soon can cause the filling to smear, so patience at this stage ensures tidy, pleasing bars.
- Lift the dessert from the baking dish and transfer to a cutting board. Cut the dessert into bars and enjoy.: Lifting the foil should reveal clean edges, and as you slice you will hear a slight, satisfying give as the knife passes through the tender crust and creamy middle. For neat squares, use a sharp knife and wipe it between cuts. A dull knife or sawing motion can cause uneven edges, so take a steady, single stroke for the best presentation.
Helpful Notes about Lemon Cream Cheese Bars
These notes reflect practical lessons I have learned from making this recipe many times. I keep them short, actionable, and grounded in what actually helps the bars turn out reliably delicious and easy to serve.
- Room temperature cream cheese: Softened cream cheese blends smoothly, preventing lumps and ensuring a silky filling that spreads easily.
- Evenly distribute the sugar and zest: Mixing the topping well and sprinkling it uniformly avoids burnt patches and produces a consistent crunchy finish.
- Prepare the pan carefully: Lining with foil and spraying makes for an easy lift out, leading to neater slicing and less mess for cleanup.
- Watch the bake color: Aim for a golden top, not deep brown, to keep the filling creamy and avoid drying out the crust.
- Chill before slicing: Refrigerating for about an hour firms the filling so you can cut clean squares without smearing.
Serving Options for Lemon Cream Cheese Bars
These bars are versatile on the table, and I like to adapt the serving style to the occasion. Whether casual or slightly dressed up, a few simple presentation notes enhance the experience. Below are many ways I serve them, including storage and pairing suggestions.
- Casual snack style: Serve at room temperature on a simple platter for grab and go snacking during afternoon tea or a school pickup gathering.
- Potluck tray: Chill and cut into uniform squares, arrange on a lined tray, and garnish with a tiny extra sprinkle of lemon zest just before serving for visual appeal.
- After dinner treat: Offer chilled bars with a small dollop of lightly whipped cream or a few fresh lemon slices on the side for an elegant finish.
- Seasonal pairing: These work well year round, but I especially like them for spring and summer events where the citrus feels bright and refreshing.
- Storage tips: Keep stored in an airtight container in the refrigerator for up to four days, the chill helps maintain shape and texture.
- Occasion ideas: Bring them to brunches, baby showers, holiday cookie swaps, or as a portable dessert for picnics, they travel well when chilled.
FAQ
Conclusion
What makes these bars special is the simple harmony of a flaky crust paired with a silky, tangy filling that appeals to a wide audience. They are quick to assemble, forgiving in their technique, and brightened by fresh lemon so each bite feels fresh and balanced. I encourage you to give them a try for your next gathering or a cozy evening at home, because they are the kind of dessert that earns compliments and repeat requests. Enjoy the process and relish how such humble ingredients create something so satisfying.
Lemon Cream Cheese Bars
Equipment
- 9×13-inch Cake Pan
- 9x13-inch Baking Dish
- Mixing Bowls
- Hand Mixer
- Microplate Zester
Ingredients
- 2 (8-oz) cans crescent rolls, divided Used as the buttery, flaky dough base and top for the bars, providing structure and a golden, layered crust when baked. Separate cans allow one layer to form the crust and the other to cover the filling, ensuring a balanced pastry-to-filling ratio. Handle gently to maintain the crescent roll layers for a tender texture.
- 2 (8-oz) packages cream cheese, softened Provides a rich, creamy filling with tang and body, becoming smooth when softened and mixed. Combines with sugar and lemon to create a luscious, spreadable layer that sets during baking and contrasts the flaky crust.
- 2 lemons, juiced and zested, divided Adds bright citrus flavor and acidity that balances the richness of the cream cheese; zest contributes aromatic oils while juice offers tartness and moisture. Dividing the lemon between filling and glaze ensures both layers carry a fresh lemon character without overpowering sweetness.
- 1/2 cup sugar Sweetens the cream cheese filling to counter the lemon's acidity and create a balanced dessert flavor profile. Granulated texture dissolves during mixing to yield smoothness and consistent sweetness throughout the bars.
- 1 tsp vanilla extract Imparts warm, vanilla aroma and rounds out the filling's flavor profile, enhancing the sweetness and complementing the lemon. Small quantity prevents overpowering while lifting the overall taste, contributing to a more complex filling.
- 2 tbsp butter, melted Adds moist richness and helps brown and seal the top layer when brushed over the dough, contributing a subtle buttery flavor. Melted form ensures even application and helps create a slight sheen and firmer crust after baking.
- 3 tbsp sugar Used as the finishing sweetener for the lemon glaze or sprinkle, balancing the tart lemon juice and providing a glossy, sweet coating. Dissolves into the juice to form a simple syrup-like glaze that brightens flavor and appearance of the bars.
Instructions
- Preheat oven to 350ºF. Line a 9×13-inch baking dish with aluminum foil. Lightly spray with cooking spray.: The warm, yeasty smell of the oven coming up to 350ºF signals the start of transformation, and lining the pan with foil creates an easy lift out later. Properly prepping the pan prevents sticking and ensures clean edges when you cut bars. A common mistake is skipping the spray, which can make removal messy; take the extra minute to prepare the dish, and you will be rewarded with tidy squares.
- Press one can of crescent rolls in the bottom of the prepared baking dish. Bake in the preheated oven for 7 minutes.: As the dough warms, you will notice a buttery aroma and the dough beginning to set, edges slightly puffed. This brief bake firms the bottom layer so it holds the filling without becoming soggy. If you underbake here, the crust can stay doughy after the final bake; if you overbake, it may become too crisp. Seven minutes gives a tender, sturdy base.
- In a medium bowl, combine lemon juice, zest of 1 1/2 lemons, cream cheese, 1/2 cup sugar, and vanilla extract. Beat together with an electric hand mixer until smooth.: The mixing produces a glossy, airy filling that smells of citrus and sweet cream. As you beat, scrape the bowl to eliminate streaks and achieve a homogeneous texture. If the cream cheese is not fully softened, you may get small lumps, so room temperature cheese is key for a perfectly smooth result.
- Spread cream cheese mixture over partially baked crescent roll crust.: The contrast is immediate, the pale, velvety filling settling into the golden shell. Use a spatula to smooth it level, ensuring even thickness so each bar bakes uniformly. If you pile it too high in one area, that section may take longer to set, so aim for an even layer for consistent texture across the pan.
- Unroll the second can of crescent roll dough and layer over the cream cheese mixture, gently stretching dough to the edges.: When you place the top layer, you will see the filling peek out slightly at the seams, promising a creamy center. Stretching gently helps the dough meet the pan edges without tearing. Avoid pulling aggressively, which can create thin spots that brown too quickly. Take your time to ease it into place so it seals well.
- Brush the dough with melted butter.: The melted butter adds sheen and promotes even browning; when brushed, the surface takes on a glossy finish that turns golden in the oven. This step also helps the sugar adhere, creating those little crunchy highlights when baked. Brush sparingly and evenly, because excess butter can pool and make the top greasy.
- In a small bowl, combine 3 tablespoons of sugar and the remaining lemon zest. Sprinkle sugar mixture over the melted butter.: The fragrant sugar releases a burst of citrus oil with each sprinkle, and as it bakes it develops tiny crunchy crystals. This topping gives the bars a lively finish, both visually and texturally. Be mindful to distribute the mixture evenly, so it caramelizes uniformly and does not burn in isolated spots.
- Bake for 30 minutes, until golden brown.: As the pan roasts, the kitchen fills with warm, buttery, citrus notes, and the top will turn an even golden color. Look for a lightly browned surface, bubbling edges, and a set filling that no longer jiggles in the center. Overbaking can dry the filling, while underbaking leaves it too soft, so check toward the end and rely on color and a gentle jiggle test.
- Cool the bars for 20 minutes and then refrigerate for an hour.: Cooling lets the filling firm and settle, so when you chill them the texture becomes dense and sliceable. The cooling phase also deepens the flavors as the lemon melds with the cream cheese . Cutting too soon can cause the filling to smear, so patience at this stage ensures tidy, pleasing bars.
- Lift the dessert from the baking dish and transfer to a cutting board. Cut the dessert into bars and enjoy.: Lifting the foil should reveal clean edges, and as you slice you will hear a slight, satisfying give as the knife passes through the tender crust and creamy middle. For neat squares, use a sharp knife and wipe it between cuts. A dull knife or sawing motion can cause uneven edges, so take a steady, single stroke for the best presentation.
Notes
- Room temperature cream cheese: Softened cream cheese blends smoothly, preventing lumps and ensuring a silky filling that spreads easily.
- Evenly distribute the sugar and zest: Mixing the topping well and sprinkling it uniformly avoids burnt patches and produces a consistent crunchy finish.
- Prepare the pan carefully: Lining with foil and spraying makes for an easy lift out, leading to neater slicing and less mess for cleanup.
- Watch the bake color: Aim for a golden top, not deep brown, to keep the filling creamy and avoid drying out the crust.
- Chill before slicing: Refrigerating for about an hour firms the filling so you can cut clean squares without smearing.