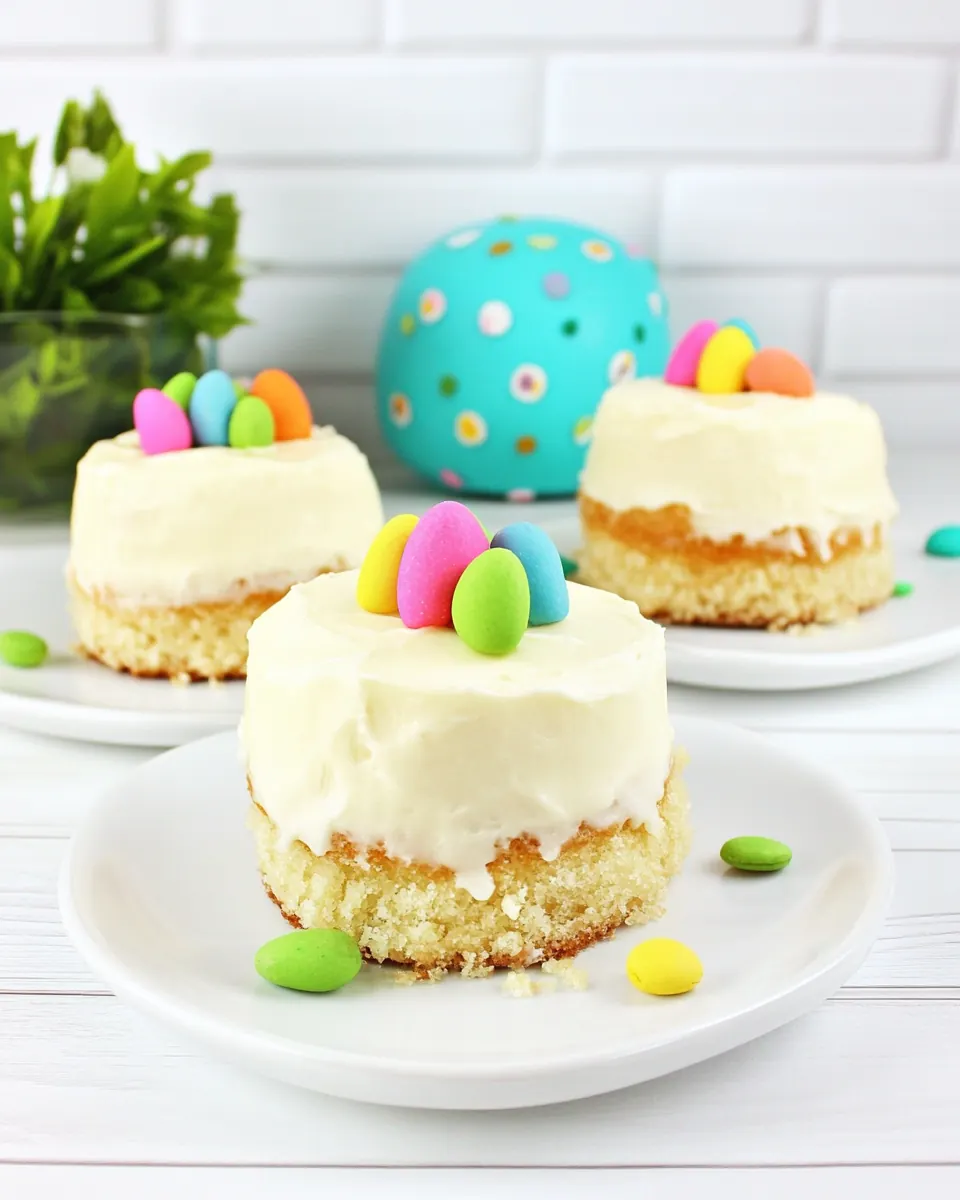
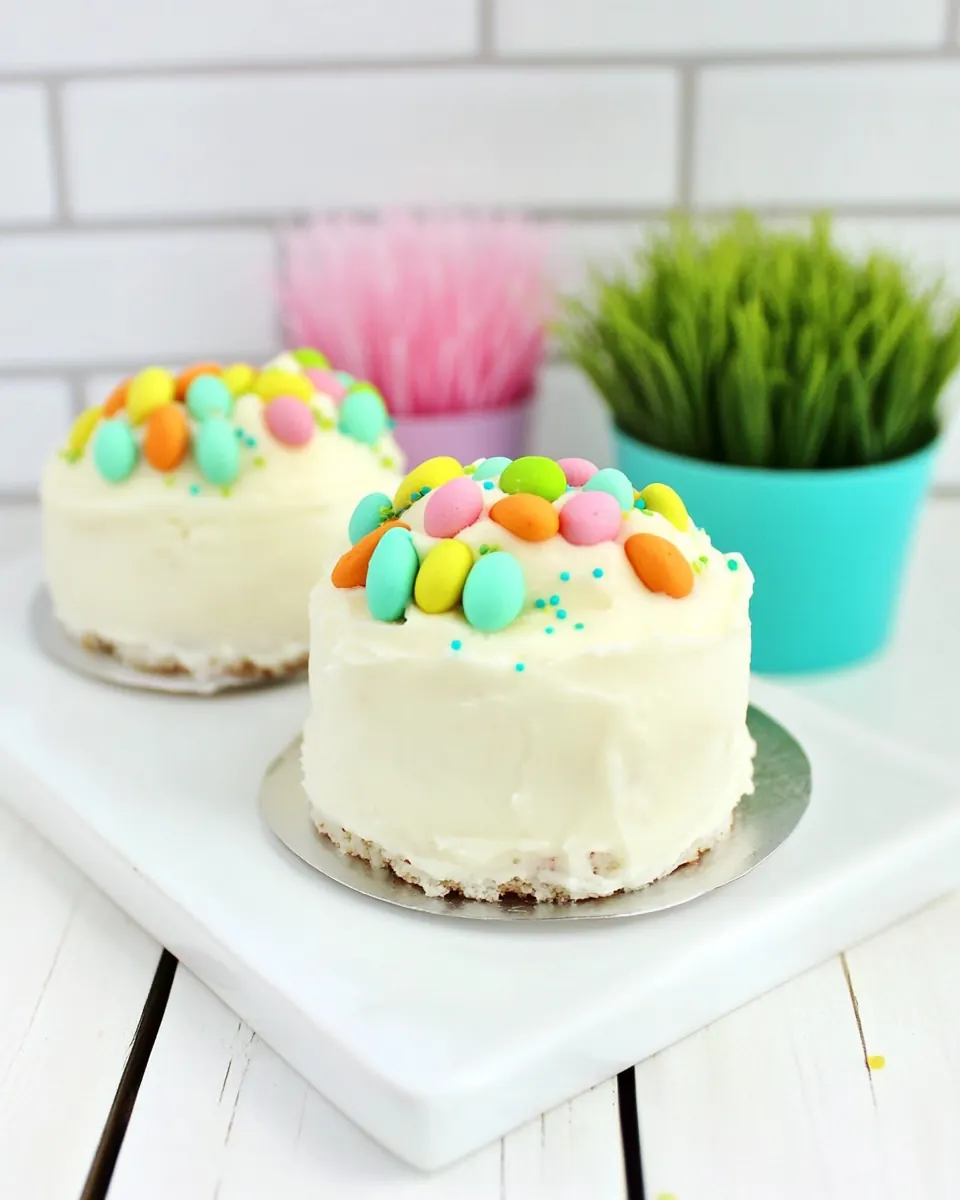
Mini Easter Cakes
Mini Easter Cakes bring back the kind of childhood baking magic that makes you grin before the first bite, and I still get the same thrill every spring when I pull them together. I first made these on a rainy afternoon when I wanted something festive but small scale, and the way the coconut looks like a tiny grassy nest always makes me smile. The combination of soft buttercream, bright preserves, and crunchy candy on top is unexpectedly joyful, and it’s one of those treats I make when I need a quick pick me up for guests or a small family celebration.
My version is intentionally compact, so you can make a few special desserts without committing to a large cake. I love assembling them with a piping bag because it feels satisfying, like decorating little edible ornaments. Over time I learned a few tricks, like tinting the coconut in a sealed bag so the color is even, and how to press the two shell halves gently so nothing squishes out. These small steps keep the presentation neat and make serving effortless.
Recipe Snapshot
10 mins
10 mins
Hard
250 kcal
American
Gluten-Free, Low FODMAP
Desserts
Piping Bags
Why Try This Mini Easter Cakes
Playful presentation that wows
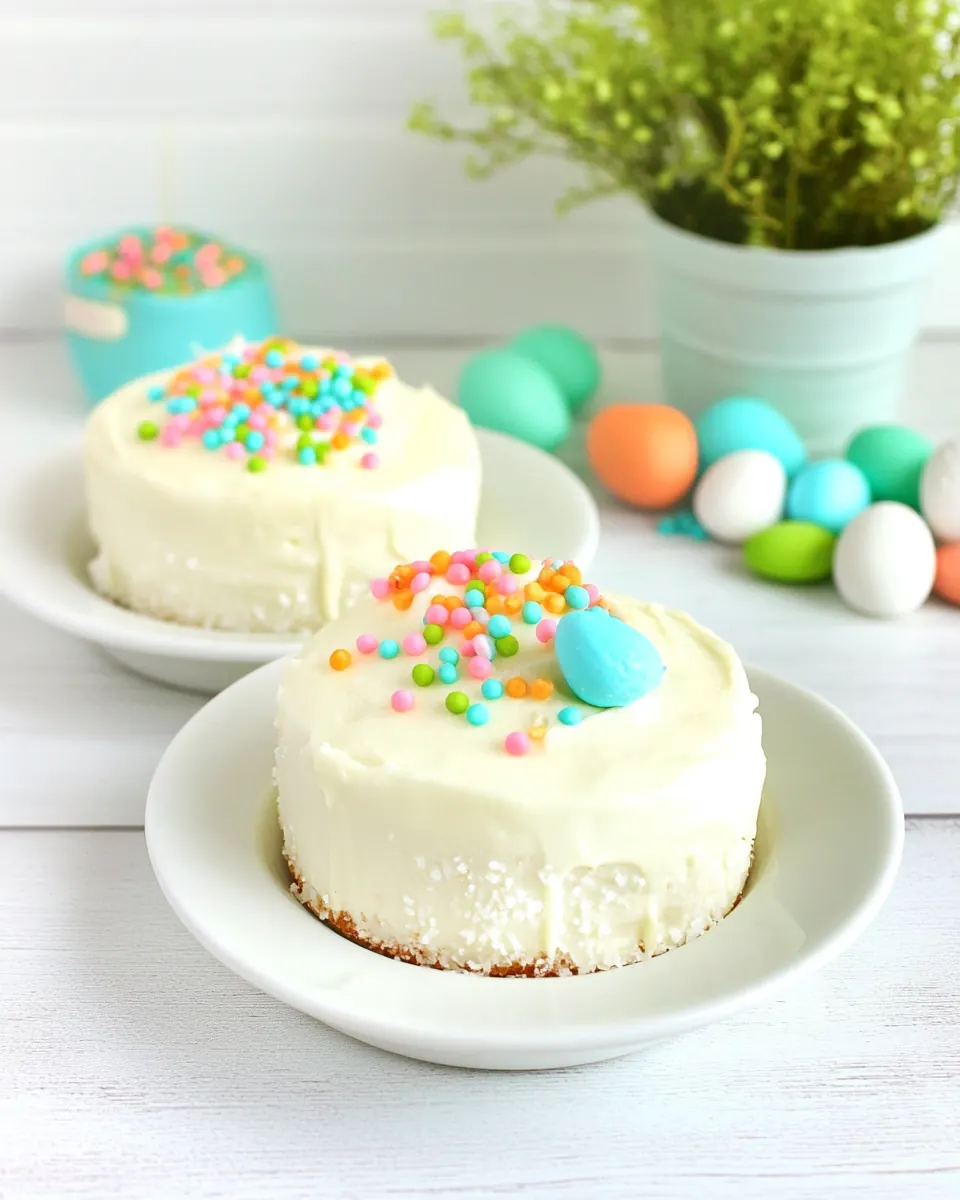
I adore how Mini Easter Cakes transform simple components into something festive. The green shredded coconut resembles fresh grass, so these feel seasonal without elaborate decorating. I’ve served them on a brunch table and watched guests light up at the sight, which is why I keep making them.
Quick to prepare, big on impact
Because these cakes use ready dessert shells and a straightforward buttercream, they come together fast. I value recipes that free up time for conversation, and these let me focus on plating and company rather than being stuck at the oven.
Flexible texture and flavor
I like that the preserves add a fruity burst while the buttercream supplies creamy richness. The shredded coconut brings a subtle chew and visual contrast, so each bite is layered. You can tweak the preserves or candy to match preferences, and I often change candies for color themes.
Kid friendly and nostalgic
These are small, hand sized, and fun to decorate, which makes them perfect for cooking alongside kids. I enjoy handing them a piping bag and seeing their careful designs. It’s a great way to build memories and easy enough that we all feel successful.
Minimal equipment, big results
I appreciate recipes that do not require specialized tools. With just a mixing bowl and a piping bag you can create charming desserts, and that simplicity keeps these accessible whenever I want a festive treat without fuss.
Ingredients You’ll Need for Mini Easter Cakes
I view these ingredients as partners in a small performance. The butter and powdered sugar make a silky buttercream base, while the milk and vanilla tune the texture and flavor. Shredded coconut gives that nest like finish, and a splash of green food coloring brings the seasonal look. Dessert shells and strawberry preserves build the cake body, and egg shaped candy adds the final playful note.
- 1/3 cup butter softened: Softened to room temperature and creamed to create a smooth, rich base that adds moisture and tenderness to the buttercream for spreading on the mini cakes.
- 4 cups powdered sugar: Finely powdered and sifted to provide bulk and structure to the frosting while dissolving easily for a silky, sweet consistency that holds piped shapes.
- 2 tbsp milk up to 6 may be needed to smooth out buttercream: Added gradually to adjust frosting texture, with up to 6 tablespoons available to thin the buttercream to a spreadable, smooth consistency without making it runny.
- 1 tsp vanilla extract: Used sparingly to impart a warm, aromatic vanilla note that balances the sweetness of the frosting and enhances the overall flavor profile of the mini cakes.
- 1/2 cup shredded coconut: Finely shredded to lend a delicate, chewy texture and a light coconut flavor; also used for decorative coating to mimic grass or texture on the cake tops.
- 4 drops green food coloring: Dropped into the coconut or frosting in small amounts to produce a vibrant green hue, creating festive, visually appealing mini cakes without altering flavor.
- 1 tsp water: Combined with food coloring when needed to loosen the dye slightly and help distribute color evenly through the coconut or frosting for uniform tinting.
- 6 dessert shells: Hollowed dessert shells serve as portable cake bases, providing a crisp, sweet vessel to hold filling and frosting while creating individual-sized treats.
- strawberry preserves: Spread into the dessert shells as a fruity filling that contributes moistness, bright flavor contrast, and a sticky element to help other decorations adhere.
- egg shaped candy: Placed on top as a colorful, crunchy garnish that adds a playful, Easter-themed finish and a contrasting texture to the soft cake and frosting.
How to Prepare Mini Easter Cakes

These instructions are friendly and steady, guiding you through tinting, filling, and frosting while I share sensory cues and small troubleshooting notes. Take your time with the buttercream consistency, and let the little details like color distribution and gentle pressing shape the final result.
- Dissolve 4-6 drops of green food coloring into 1 tsp water.: The scent is faint and the liquid will deepen as the dye disperses, creating a concentrated green solution; this step matters because dissolving the dye first prevents clumping and ensures even tinting. You should see the water take on a uniform color with no streaks, which tells you the dye is fully dissolved. A common mistake is adding dye directly to the coconut, which causes uneven patches; dissolve first to avoid that problem.
- Place the coconut into a small resealable bag and drizzle the color water on top.: The coconut will rustle softly as the colored water hits it, and you will notice the flakes darken almost immediately where the liquid landed. This method allows you to gauge how much color each handful receives, which is crucial for uniform appearance. Avoid adding too much liquid at once, because the coconut can clump and feel damp rather than fluffy.
- Seal the bag and knead it well to distribute the green color. Store any leftover coconut in a sealed container or bag.: Massage the bag gently until the coconut is evenly tinted, noticing the texture change as the flakes separate and adopt a consistent hue. Kneading ensures small pockets of color do not remain concentrated, which would show up as blotches on the cakes. If you find clumps, open the bag and spread the coconut on a tray to dry; wet clumps signal over moisturizing during coloring.
- In a mixing bowl, beat butter for 1 minute until smooth.: The colored coconut should sit dry and airy in storage, maintaining its hue and texture; a sealed container protects it from moisture and odors. You’ll want it to stay crisp so it retains that grassy look when applied to the cakes. If it becomes damp in storage, spread it on a sheet to air dry before using it again.
- Add 2 cups of powdered sugar and beat well.: The butter will soften and sounds will change from a thud to a lighter creaming noise as air is incorporated, yielding a pale, silky base. This aeration is vital for a light buttercream, because under beaten butter produces dense frosting. Be careful not to overbeat into a runny state, especially if your kitchen is warm; stop once the butter looks smooth and slightly fluffy.
- Slowly add 2 tbsp milk and vanilla and beat on low and then high.: As you introduce the powdered sugar , the mixture will become thicker and emit a sweet, vanilla undertone if you added extract; the texture should change from buttery to more dough like. This step builds structure, so mix until the sugar is fully integrated and there are no dry pockets. A frequent error is adding the sugar too quickly, which can create dust clouds and uneven mixing; add gradually for best results.
- Add remaining powdered sugar while beating on low and increase speed to medium when incorporated.: When the milk and vanilla hit the bowl you will see the buttercream loosen and glide; starting on low prevents splatter, then increasing speed smooths the texture. The scent turns richer and the frosting becomes creamier, which is a cue you are on the right track. If the mixture separates or looks greasy, stop and fold gently, and reduce speed to regain a cohesive texture.
- Continue to beat on medium and add additional milk, one tablespoon at a time, until the consistency is appropriate for spreading.: The buttercream will thicken again as the second portion of powdered sugar incorporates, and beating first on low ensures a clean mix without sugar dust. When you raise to medium, the frosting should turn glossy and smooth, signaling proper integration. Avoid rushing to high speed too soon, because that can fling sugar and make cleanup harder.
- Place icing into a piping bag and cut a 1/2" opening in the tip.: At medium speed the buttercream becomes supple and shiny; add small amounts of milk until it spreads without collapsing. This is the key to a stable, pipeable frosting, and the right balance keeps shapes defined. A common misstep is adding too much liquid, which results in runny icing that will not hold up on the shells.
- Place 3 dessert shells on 3 separate plates.: Filling the piping bag gives you control, and the small opening produces precise placement; you will feel the bag firm as the icing packs in. The tactile feedback lets you know when to stop filling so the bag is manageable. If the opening is too large, the buttercream will come out too quickly and be harder to control, so keep it modest for neat work.
- Place a small amount of fruit preserves into the cup of each shell.: The shells will sit quietly, ready to receive filling, and arranging them on individual plates prevents tipping while you work. This step maintains order and makes assembly feel like a calm sequence rather than a rush. Avoid stacking shells together, because they can stick and lose shape when pressured.
- Top preserves with buttercream icing and additional jam.: Spoon in the strawberry preserves until you see a glossy, slightly domed center in each shell; the scent brightens the room and the texture provides a juicy counterpoint to the buttercream. A scant amount keeps the balance right between fruit and frosting, while too much can squeeze out at sealing and make the shells soggy.
- Pipe a small amount of buttercream into another dessert cup and place (cup side down) on top. Gently press two halves together.: Pipe a modest layer of buttercream over the preserves and add a touch more jam if you like a concentrated fruit note; the contrast is both visual and flavorful. The buttercream should sit smoothly, not slide, indicating proper consistency. If the buttercream smears or runs, it likely needs a touch more powdered sugar to stabilize.
- Pipe buttercream on the top and outside of the cakes. Spread smooth with a knife.: The sound is a soft compression as the halves meet, and the preserves meld into the buttercream, creating a unified mini cake. Press with a light hand so the filling stays inside; heavy pressure forces the jam out the sides. If you press too firmly, wipe the edges before continuing to preserve a clean look.
- Top mini cake with shredded green coconut and egg-shaped candies.: As you frost, the surface will turn glossy and even, and the knife will leave gentle, controlled strokes, so aim for a consistent finish. This polished exterior is the canvas for the coconut nest. If the buttercream drags or leaves peaks, the consistency may be too stiff, so add a teaspoon of milk to soften it slightly.
- Sprinkle additional coconut around the base of each cake for decoration and serve.: The coconut will nestle on the frosting, creating that grassy effect, and the candies add a cheerful crunch and color contrast. Place the candies gently to avoid sinking. If the candies slide, chill the cakes briefly to firm the buttercream before adding decorations.
- Sprinkle additional coconut around the base of each cake for decoration and serve: A light scattering of coconut at the base frames each mini cake and enhances presentation, with the texture adding a subtle chew at the first bite. Serve soon so the shells remain crisp and the coconut retains its texture. If you store them too long uncovered, the coconut may absorb moisture and lose its freshness.
Making Adjustments
These adjustments help you personalize the recipe while keeping the essential method intact. Use the list below to explore variations in texture, flavor, and presentation without disrupting the structure of the mini cakes.
- Swap or add preserves by choosing a different fruit jam to shift the flavor profile, keeping the same quantity so the balance with the buttercream is preserved.
- Adjust buttercream thickness by adding milk one teaspoon at a time, which prevents over thinning and guarantees a pipeable consistency.
- Color intensity control by dissolving more or fewer drops of food coloring in the water; this lets you match theme colors without saturating the coconut.
- Use different candies to match occasions, selecting light, small pieces so they sit atop the frosting without sinking.
- Make ahead tip by tinting coconut and storing it in an airtight container up to two days, which saves time on the day of assembly.
What to Serve With Mini Easter Cakes
These petite desserts pair well with light beverages and can be presented for many occasions from brunch to holiday gatherings. Below I outline serving ideas, seasonal pairings, and storage notes so you can present them beautifully and keep them tasting fresh.
- Tea or coffee: Serve alongside a mild hot beverage to balance the sweet buttercream and fruity preserves, making this a cozy brunch treat.
- Spring brunch table: Arrange the cakes on a tiered stand with fresh flowers for an Easter or spring themed spread that feels festive and compact.
- Kids parties: Offer them at children centered events, placing them on individual plates so little hands can grab one without disruption.
- Picnic friendly: Pack the cakes in a shallow container with separators to protect decorations, and keep chilled until serving to maintain structure.
- Storage tip: Refrigerate leftovers in a single layer for up to two days to maintain shell crispness, and add candies just before serving to preserve crunch.
- Seasonal pairings: Bright fruit salads and light citrus drinks complement the sweetness, while mint sprigs add a fresh note for spring displays.
FAQ
Conclusion
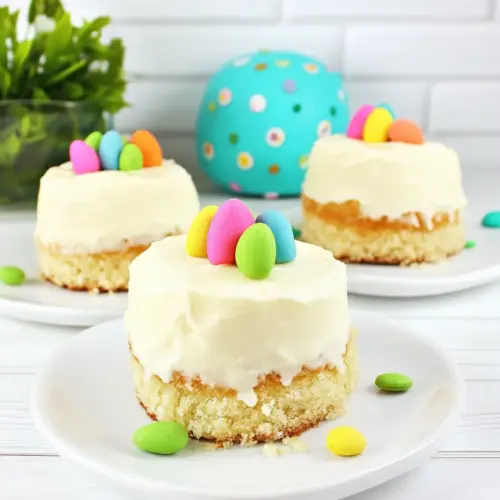
Mini Easter Cakes are charming, compact desserts that combine fluffy buttercream, fruity preserves, and green coconut for a playful springtime presentation. They are fast to assemble, require minimal equipment, and offer a delightful mix of textures that appeal to both kids and adults. Give them a try when you want a small, festive treat that looks special without a huge time commitment. I hope these little cakes bring a smile to your table and become one of your go to holiday sweets.
Mini Easter Cakes
Equipment
- Piping bags
Ingredients
- 1/3 cup butter softened Softened to room temperature and creamed to create a smooth, rich base that adds moisture and tenderness to the buttercream for spreading on the mini cakes.
- 4 cups powdered sugar Finely powdered and sifted to provide bulk and structure to the frosting while dissolving easily for a silky, sweet consistency that holds piped shapes.
- 2 tbsp milk up to 6 may be needed to smooth out buttercream Added gradually to adjust frosting texture, with up to 6 tablespoons available to thin the buttercream to a spreadable, smooth consistency without making it runny.
- 1 tsp vanilla extract Used sparingly to impart a warm, aromatic vanilla note that balances the sweetness of the frosting and enhances the overall flavor profile of the mini cakes.
- 1/2 cup shredded coconut Finely shredded to lend a delicate, chewy texture and a light coconut flavor; also used for decorative coating to mimic grass or texture on the cake tops.
- 4 drops green food coloring Dropped into the coconut or frosting in small amounts to produce a vibrant green hue, creating festive, visually appealing mini cakes without altering flavor.
- 1 tsp water Combined with food coloring when needed to loosen the dye slightly and help distribute color evenly through the coconut or frosting for uniform tinting.
- 6 dessert shells Hollowed dessert shells serve as portable cake bases, providing a crisp, sweet vessel to hold filling and frosting while creating individual-sized treats.
- strawberry preserves Spread into the dessert shells as a fruity filling that contributes moistness, bright flavor contrast, and a sticky element to help other decorations adhere.
- egg shaped candy Placed on top as a colorful, crunchy garnish that adds a playful, Easter-themed finish and a contrasting texture to the soft cake and frosting.
Instructions
- Dissolve 4-6 drops of green food coloring into 1 tsp water.: The scent is faint and the liquid will deepen as the dye disperses, creating a concentrated green solution; this step matters because dissolving the dye first prevents clumping and ensures even tinting. You should see the water take on a uniform color with no streaks, which tells you the dye is fully dissolved. A common mistake is adding dye directly to the coconut, which causes uneven patches; dissolve first to avoid that problem.
- Place the coconut into a small resealable bag and drizzle the color water on top.: The coconut will rustle softly as the colored water hits it, and you will notice the flakes darken almost immediately where the liquid landed. This method allows you to gauge how much color each handful receives, which is crucial for uniform appearance. Avoid adding too much liquid at once, because the coconut can clump and feel damp rather than fluffy.
- Seal the bag and knead it well to distribute the green color. Store any leftover coconut in a sealed container or bag.: Massage the bag gently until the coconut is evenly tinted, noticing the texture change as the flakes separate and adopt a consistent hue. Kneading ensures small pockets of color do not remain concentrated, which would show up as blotches on the cakes. If you find clumps, open the bag and spread the coconut on a tray to dry; wet clumps signal over moisturizing during coloring.
- In a mixing bowl, beat butter for 1 minute until smooth.: The colored coconut should sit dry and airy in storage, maintaining its hue and texture; a sealed container protects it from moisture and odors. You’ll want it to stay crisp so it retains that grassy look when applied to the cakes. If it becomes damp in storage, spread it on a sheet to air dry before using it again.
- Add 2 cups of powdered sugar and beat well.: The butter will soften and sounds will change from a thud to a lighter creaming noise as air is incorporated, yielding a pale, silky base. This aeration is vital for a light buttercream, because under beaten butter produces dense frosting. Be careful not to overbeat into a runny state, especially if your kitchen is warm; stop once the butter looks smooth and slightly fluffy.
- Slowly add 2 tbsp milk and vanilla and beat on low and then high.: As you introduce the powdered sugar , the mixture will become thicker and emit a sweet, vanilla undertone if you added extract; the texture should change from buttery to more dough like. This step builds structure, so mix until the sugar is fully integrated and there are no dry pockets. A frequent error is adding the sugar too quickly, which can create dust clouds and uneven mixing; add gradually for best results.
- Add remaining powdered sugar while beating on low and increase speed to medium when incorporated.: When the milk and vanilla hit the bowl you will see the buttercream loosen and glide; starting on low prevents splatter, then increasing speed smooths the texture. The scent turns richer and the frosting becomes creamier, which is a cue you are on the right track. If the mixture separates or looks greasy, stop and fold gently, and reduce speed to regain a cohesive texture.
- Continue to beat on medium and add additional milk, one tablespoon at a time, until the consistency is appropriate for spreading.: The buttercream will thicken again as the second portion of powdered sugar incorporates, and beating first on low ensures a clean mix without sugar dust. When you raise to medium, the frosting should turn glossy and smooth, signaling proper integration. Avoid rushing to high speed too soon, because that can fling sugar and make cleanup harder.
- Place icing into a piping bag and cut a 1/2" opening in the tip.: At medium speed the buttercream becomes supple and shiny; add small amounts of milk until it spreads without collapsing. This is the key to a stable, pipeable frosting, and the right balance keeps shapes defined. A common misstep is adding too much liquid, which results in runny icing that will not hold up on the shells.
- Place 3 dessert shells on 3 separate plates.: Filling the piping bag gives you control, and the small opening produces precise placement; you will feel the bag firm as the icing packs in. The tactile feedback lets you know when to stop filling so the bag is manageable. If the opening is too large, the buttercream will come out too quickly and be harder to control, so keep it modest for neat work.
- Place a small amount of fruit preserves into the cup of each shell.: The shells will sit quietly, ready to receive filling, and arranging them on individual plates prevents tipping while you work. This step maintains order and makes assembly feel like a calm sequence rather than a rush. Avoid stacking shells together, because they can stick and lose shape when pressured.
- Top preserves with buttercream icing and additional jam.: Spoon in the strawberry preserves until you see a glossy, slightly domed center in each shell; the scent brightens the room and the texture provides a juicy counterpoint to the buttercream. A scant amount keeps the balance right between fruit and frosting, while too much can squeeze out at sealing and make the shells soggy.
- Pipe a small amount of buttercream into another dessert cup and place (cup side down) on top. Gently press two halves together.: Pipe a modest layer of buttercream over the preserves and add a touch more jam if you like a concentrated fruit note; the contrast is both visual and flavorful. The buttercream should sit smoothly, not slide, indicating proper consistency. If the buttercream smears or runs, it likely needs a touch more powdered sugar to stabilize.
- Pipe buttercream on the top and outside of the cakes. Spread smooth with a knife.: The sound is a soft compression as the halves meet, and the preserves meld into the buttercream, creating a unified mini cake. Press with a light hand so the filling stays inside; heavy pressure forces the jam out the sides. If you press too firmly, wipe the edges before continuing to preserve a clean look.
- Top mini cake with shredded green coconut and egg-shaped candies.: As you frost, the surface will turn glossy and even, and the knife will leave gentle, controlled strokes, so aim for a consistent finish. This polished exterior is the canvas for the coconut nest. If the buttercream drags or leaves peaks, the consistency may be too stiff, so add a teaspoon of milk to soften it slightly.
- Sprinkle additional coconut around the base of each cake for decoration and serve.: The coconut will nestle on the frosting, creating that grassy effect, and the candies add a cheerful crunch and color contrast. Place the candies gently to avoid sinking. If the candies slide, chill the cakes briefly to firm the buttercream before adding decorations.
- Sprinkle additional coconut around the base of each cake for decoration and serve: A light scattering of coconut at the base frames each mini cake and enhances presentation, with the texture adding a subtle chew at the first bite. Serve soon so the shells remain crisp and the coconut retains its texture. If you store them too long uncovered, the coconut may absorb moisture and lose its freshness.
Notes
- Swap or add preserves by choosing a different fruit jam to shift the flavor profile, keeping the same quantity so the balance with the buttercream is preserved.
- Adjust buttercream thickness by adding milk one teaspoon at a time, which prevents over thinning and guarantees a pipeable consistency.
- Color intensity control by dissolving more or fewer drops of food coloring in the water; this lets you match theme colors without saturating the coconut.
- Use different candies to match occasions, selecting light, small pieces so they sit atop the frosting without sinking.
- Make ahead tip by tinting coconut and storing it in an airtight container up to two days, which saves time on the day of assembly.