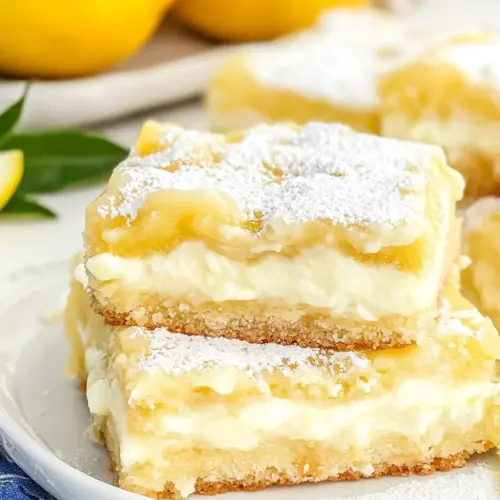
Lemon Cream Cheese Bars
Lemon Cream Cheese Bars are creamy, tangy, and satisfyingly easy to make. These bars pair a flaky crescent roll crust with a silky cream cheese filling brightened by fresh lemon zest and juice. Perfect for potlucks or an easy weeknight dessert, they bake up golden and slice into crowd pleasing squares. Make a pan for guaranteed smiles and repeat requests.
Equipment
- 9×13-inch Cake Pan
- 9x13-inch Baking Dish
- Mixing Bowls
- Hand Mixer
- Microplate Zester
Ingredients
- 2 (8-oz) cans crescent rolls, divided Used as the buttery, flaky dough base and top for the bars, providing structure and a golden, layered crust when baked. Separate cans allow one layer to form the crust and the other to cover the filling, ensuring a balanced pastry-to-filling ratio. Handle gently to maintain the crescent roll layers for a tender texture.
- 2 (8-oz) packages cream cheese, softened Provides a rich, creamy filling with tang and body, becoming smooth when softened and mixed. Combines with sugar and lemon to create a luscious, spreadable layer that sets during baking and contrasts the flaky crust.
- 2 lemons, juiced and zested, divided Adds bright citrus flavor and acidity that balances the richness of the cream cheese; zest contributes aromatic oils while juice offers tartness and moisture. Dividing the lemon between filling and glaze ensures both layers carry a fresh lemon character without overpowering sweetness.
- 1/2 cup sugar Sweetens the cream cheese filling to counter the lemon's acidity and create a balanced dessert flavor profile. Granulated texture dissolves during mixing to yield smoothness and consistent sweetness throughout the bars.
- 1 tsp vanilla extract Imparts warm, vanilla aroma and rounds out the filling's flavor profile, enhancing the sweetness and complementing the lemon. Small quantity prevents overpowering while lifting the overall taste, contributing to a more complex filling.
- 2 tbsp butter, melted Adds moist richness and helps brown and seal the top layer when brushed over the dough, contributing a subtle buttery flavor. Melted form ensures even application and helps create a slight sheen and firmer crust after baking.
- 3 tbsp sugar Used as the finishing sweetener for the lemon glaze or sprinkle, balancing the tart lemon juice and providing a glossy, sweet coating. Dissolves into the juice to form a simple syrup-like glaze that brightens flavor and appearance of the bars.
Instructions
- Preheat oven to 350ºF. Line a 9×13-inch baking dish with aluminum foil. Lightly spray with cooking spray.: The warm, yeasty smell of the oven coming up to 350ºF signals the start of transformation, and lining the pan with foil creates an easy lift out later. Properly prepping the pan prevents sticking and ensures clean edges when you cut bars. A common mistake is skipping the spray, which can make removal messy; take the extra minute to prepare the dish, and you will be rewarded with tidy squares.
- Press one can of crescent rolls in the bottom of the prepared baking dish. Bake in the preheated oven for 7 minutes.: As the dough warms, you will notice a buttery aroma and the dough beginning to set, edges slightly puffed. This brief bake firms the bottom layer so it holds the filling without becoming soggy. If you underbake here, the crust can stay doughy after the final bake; if you overbake, it may become too crisp. Seven minutes gives a tender, sturdy base.
- In a medium bowl, combine lemon juice, zest of 1 1/2 lemons, cream cheese, 1/2 cup sugar, and vanilla extract. Beat together with an electric hand mixer until smooth.: The mixing produces a glossy, airy filling that smells of citrus and sweet cream. As you beat, scrape the bowl to eliminate streaks and achieve a homogeneous texture. If the cream cheese is not fully softened, you may get small lumps, so room temperature cheese is key for a perfectly smooth result.
- Spread cream cheese mixture over partially baked crescent roll crust.: The contrast is immediate, the pale, velvety filling settling into the golden shell. Use a spatula to smooth it level, ensuring even thickness so each bar bakes uniformly. If you pile it too high in one area, that section may take longer to set, so aim for an even layer for consistent texture across the pan.
- Unroll the second can of crescent roll dough and layer over the cream cheese mixture, gently stretching dough to the edges.: When you place the top layer, you will see the filling peek out slightly at the seams, promising a creamy center. Stretching gently helps the dough meet the pan edges without tearing. Avoid pulling aggressively, which can create thin spots that brown too quickly. Take your time to ease it into place so it seals well.
- Brush the dough with melted butter.: The melted butter adds sheen and promotes even browning; when brushed, the surface takes on a glossy finish that turns golden in the oven. This step also helps the sugar adhere, creating those little crunchy highlights when baked. Brush sparingly and evenly, because excess butter can pool and make the top greasy.
- In a small bowl, combine 3 tablespoons of sugar and the remaining lemon zest. Sprinkle sugar mixture over the melted butter.: The fragrant sugar releases a burst of citrus oil with each sprinkle, and as it bakes it develops tiny crunchy crystals. This topping gives the bars a lively finish, both visually and texturally. Be mindful to distribute the mixture evenly, so it caramelizes uniformly and does not burn in isolated spots.
- Bake for 30 minutes, until golden brown.: As the pan roasts, the kitchen fills with warm, buttery, citrus notes, and the top will turn an even golden color. Look for a lightly browned surface, bubbling edges, and a set filling that no longer jiggles in the center. Overbaking can dry the filling, while underbaking leaves it too soft, so check toward the end and rely on color and a gentle jiggle test.
- Cool the bars for 20 minutes and then refrigerate for an hour.: Cooling lets the filling firm and settle, so when you chill them the texture becomes dense and sliceable. The cooling phase also deepens the flavors as the lemon melds with the cream cheese . Cutting too soon can cause the filling to smear, so patience at this stage ensures tidy, pleasing bars.
- Lift the dessert from the baking dish and transfer to a cutting board. Cut the dessert into bars and enjoy.: Lifting the foil should reveal clean edges, and as you slice you will hear a slight, satisfying give as the knife passes through the tender crust and creamy middle. For neat squares, use a sharp knife and wipe it between cuts. A dull knife or sawing motion can cause uneven edges, so take a steady, single stroke for the best presentation.
Notes
- Room temperature cream cheese: Softened cream cheese blends smoothly, preventing lumps and ensuring a silky filling that spreads easily.
- Evenly distribute the sugar and zest: Mixing the topping well and sprinkling it uniformly avoids burnt patches and produces a consistent crunchy finish.
- Prepare the pan carefully: Lining with foil and spraying makes for an easy lift out, leading to neater slicing and less mess for cleanup.
- Watch the bake color: Aim for a golden top, not deep brown, to keep the filling creamy and avoid drying out the crust.
- Chill before slicing: Refrigerating for about an hour firms the filling so you can cut clean squares without smearing.