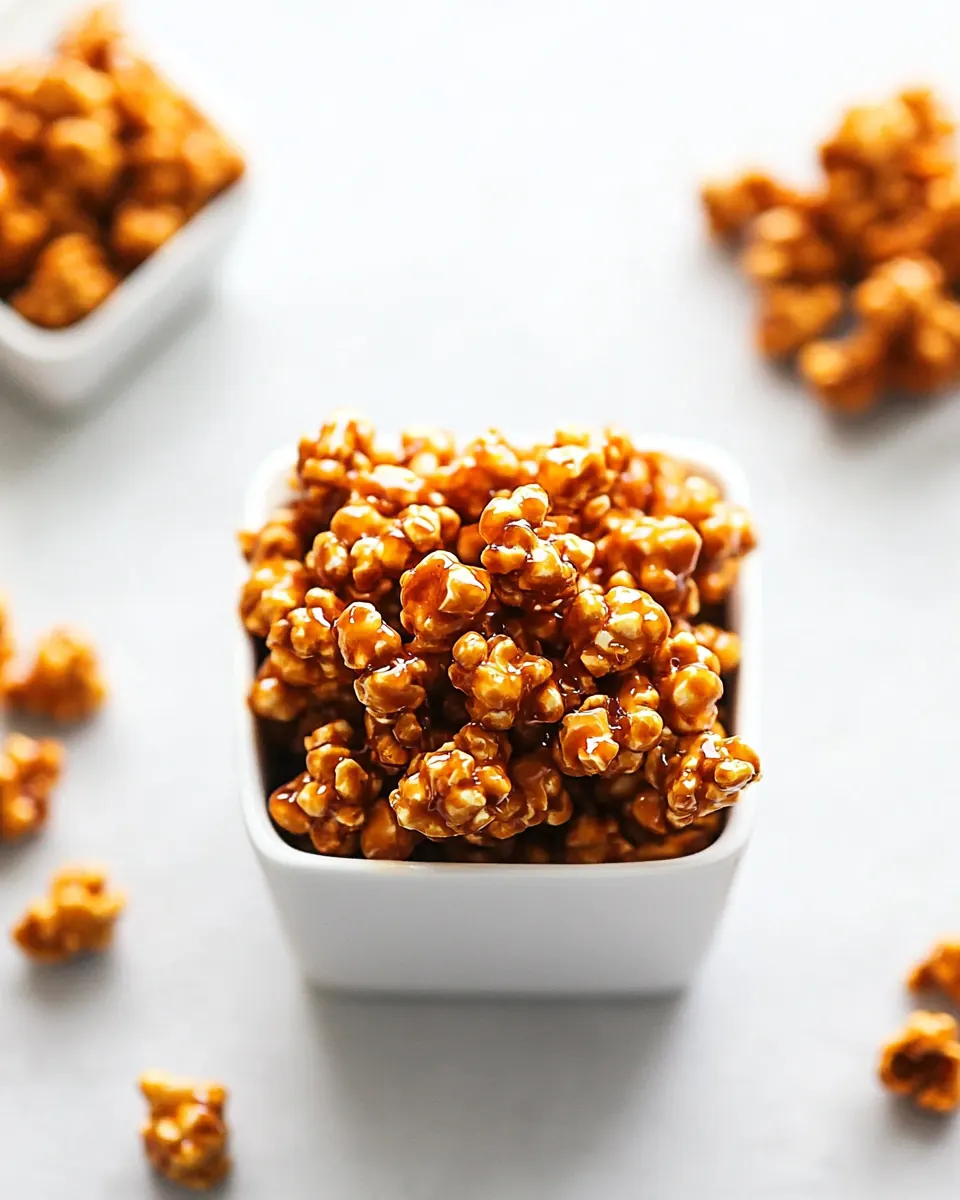
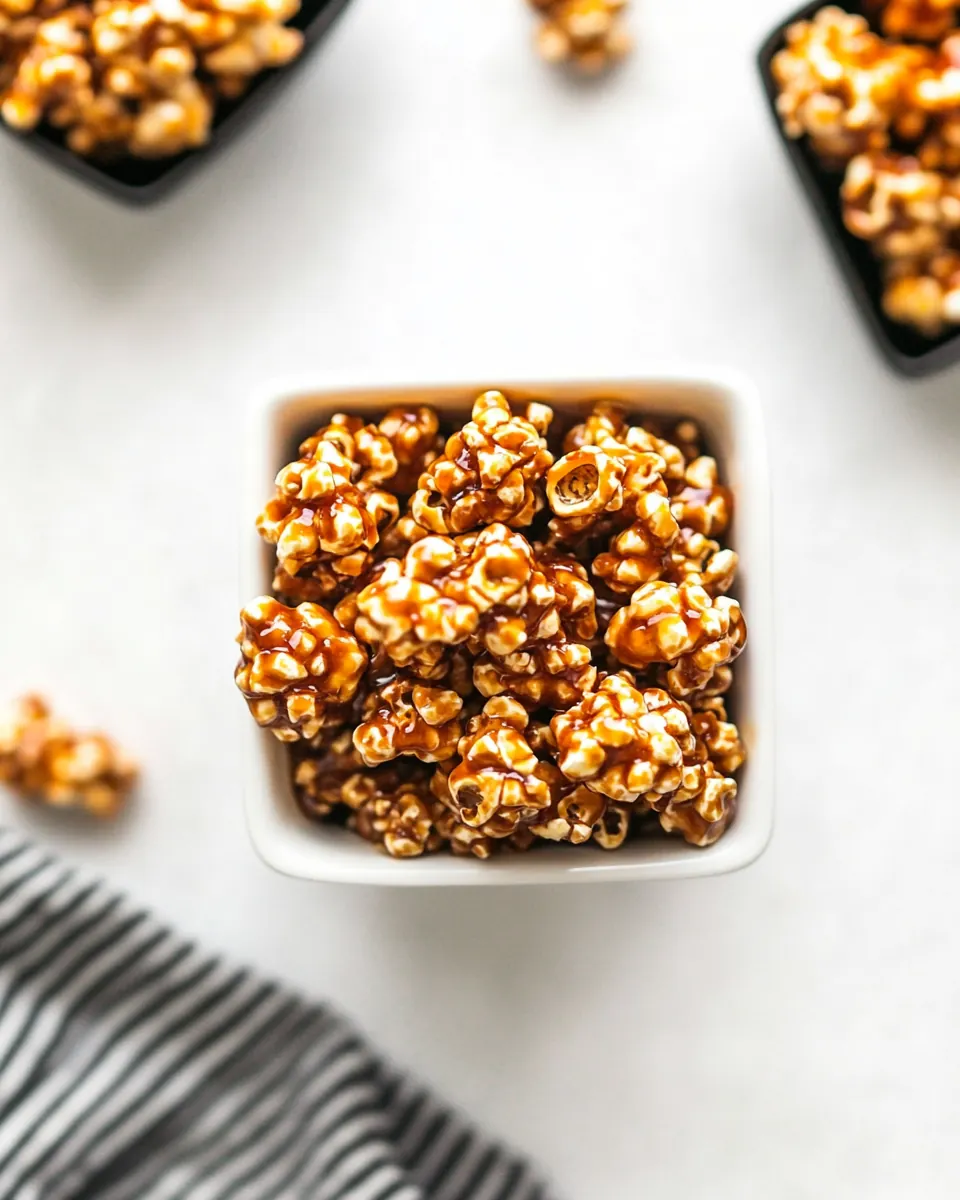
Microwave Caramel Corn
Microwave Caramel Corn is the kind of retro snack that brings me back to cozy nights on the couch and a kid-sized bowl balanced on my knee while I binge an old movie.
My first memory of making Microwave Caramel Corn was a rainy afternoon when I was ten, determined to recreate the crunchy clusters I’d bought at the fair. I remember the kitchen filling with a warm, sweet smell that made the whole house feel like a bakery, while the popcorn hissed softly in the bag. That day I learned to watch the microwave like a hawk, and to rescue any kernels that hadn’t popped yet.
Years later I still make Microwave Caramel Corn when I want something festive but not fussy, for movie nights, casual gifts, or holiday nibbling. I love how a few pantry staples and a microwave transform plain popcorn into glossy, crackly clusters. The method is forgiving, and the payoff is big, with a satisfying crunch and buttery caramel notes that linger. You can make it in a flash, and it stores well in an airtight container, which is perfect when you want to nibble over several sittings. I always end up sharing, because somehow it tastes better passed around.
Recipe Snapshot
21 mins
20 mins
1 mins
Medium
150 kcal
American
Gluten-Free, Low FODMAP
Desserts
Large sheet pan (15″ x 21″), Wax paper, Parchment paper, Foil, Large paper grocery bag
Why This Microwave Caramel Corn Stands Out
Old school comfort, reinvented
I adore how Microwave Caramel Corn channels classic carnival flavors using modern convenience. Instead of standing over a hot stove stirring sugar, you let the microwave do the heavy lifting, and you still get that deep caramel color and rich flavor. I find it’s a brilliant shortcut when I want the nostalgia without the fuss.
Texture that keeps you reaching
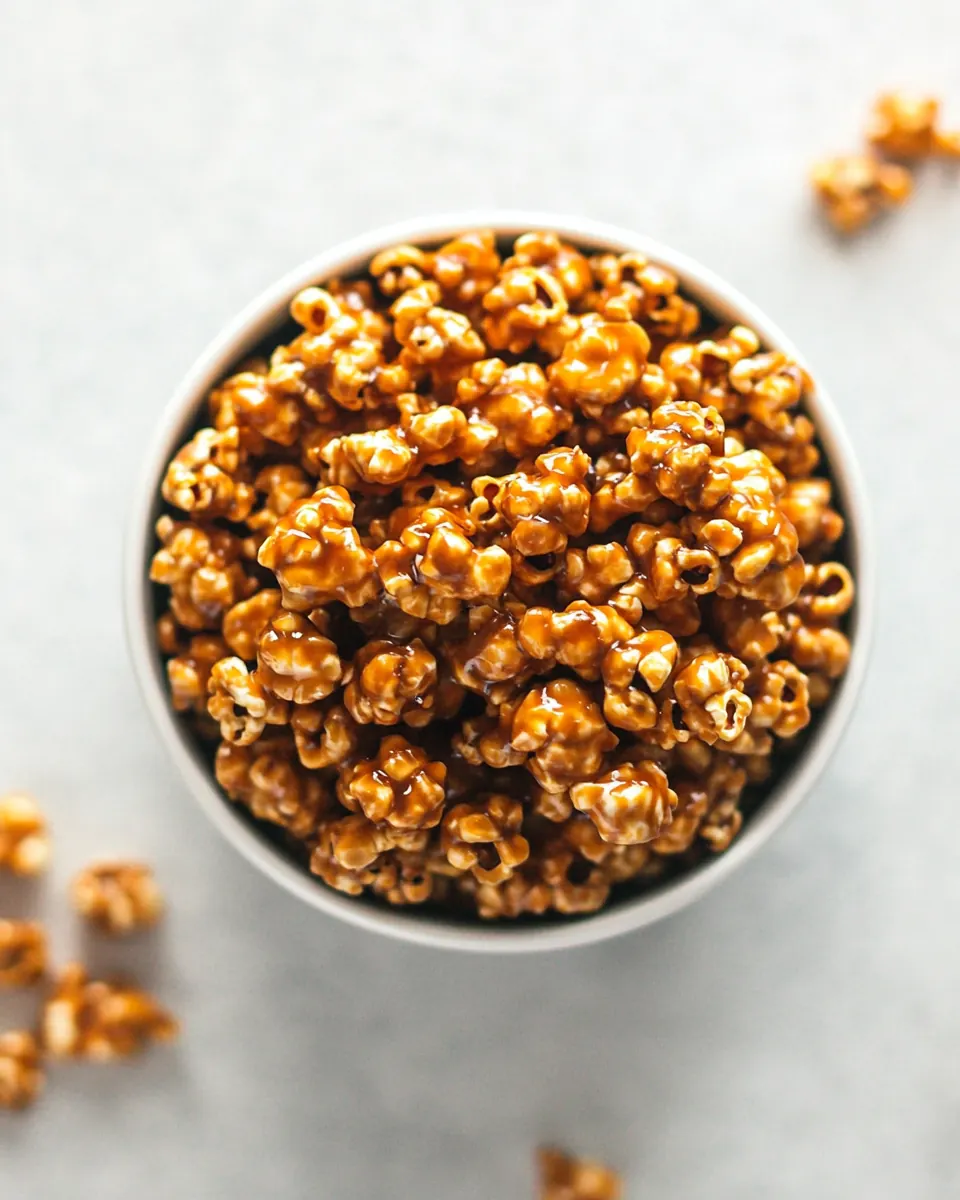
The contrast between airy popcorn and crisp caramel coating is irresistible. When done right, clusters form with glossy coating that crackles pleasingly. I pay close attention to the microwave blasts and the shaking, because that creates even coverage and those coveted clusters.
Minimal ingredients for maximum impact
This recipe shines because it uses simple, pantry-friendly components: butter, corn syrup, light brown sugar, and a touch of salt. Each ingredient has a clear role: the butter gives richness, the corn syrup prevents crystallization, and the brown sugar brings depth. I like that you can make a big batch without a long ingredient list, and that each element is doing real culinary work.
Fast and shareable
I make this when I need a quick gift or a snack for a crowd. The method is fast, and the result scales well. I’ve brought it to potlucks and holiday gatherings, and it always disappears fast. If you want to impress with minimal effort, this is a go to.
Flexible and forgiving
Finally, I appreciate how forgiving the recipe is. If your microwave power varies, you can still adjust with extra one minute blasts and shakes. It’s a recipe that rewards attention but doesn’t punish small mistakes, which makes it great for cooks of all levels.
Recipe Ingredients for Microwave Caramel Corn
These ingredients create a simple chemistry lesson in a bowl. The key players are the popcorn base and a sugar based coating that transforms into caramel with heat. The butter and corn syrup add fat and stability, while the light brown sugar and salt build flavor. The baking soda and vanilla extract are small additions that change texture and aroma, producing a lighter, more aromatic finish. Taken together, they form glossy clusters that stay crisp and deeply flavored.
- 16 cups popped popcorn microwave bags or use 1 cup kernels—see note 2: Provide airy, crunchy base for the snack and determine final volume; popped bags are convenient while using 1 cup kernels yields fresher flavor when popped. Ensure unpopped kernels are removed for an even caramel coating and consider breaking large clusters for uniform texture.
- 8 tablespoons unsalted butter 1/2 cup: Contribute rich, creamy fat that melts into the caramel, promoting smooth texture and glossy finish when combined with sugar and syrup. Measure precisely to balance sweetness and prevent a greasy or overly heavy coating on the popcorn.
- 1/4 cup corn syrup light or dark: Supply sticky sweetness and help control crystallization; corn syrup stabilizes the caramel and keeps it chewy rather than grainy. Choose light for a milder flavor or dark for a deeper molasses note, both creating a glossy, cohesive coating.
- 1 cup light brown sugar lightly packed: Add bulk sweetness and subtle molasses flavor while thickening the caramel; lightly packing preserves intended sweetness and moisture content. Caramelization of brown sugar during cooking develops color and complexity in the final popcorn.
- 1/2 teaspoons salt: Enhance overall flavor by balancing sweetness and adding a savory counterpoint; small amount helps prevent the snack from tasting cloying. Distribute evenly in the caramel mixture to ensure consistent flavor throughout the popcorn.
- 1/2 teaspoon baking soda: Introduce a slight lift and lightness by creating tiny air pockets in the caramel, preventing it from becoming too dense; it also helps the coating set with a tender bite. Stir into the hot caramel carefully to activate and then immediately remove from heat to preserve texture.
- 1 teaspoon vanilla extract: Bring aromatic depth and roundness to the caramel with a warm, fragrant finish; vanilla helps meld flavors and soften any sharp sugary notes. Add off-heat to retain its delicate flavor and prevent evaporation during cooking.
Step by Step Instructions for Microwave Caramel Corn
Let me walk you through the technique with calm focus and sensory cues so each batch turns out glossy and crunchy. The microwave steps build the caramel in stages, and the shaking creates even coverage, so pay attention to the timing and the feel of the coated popcorn as you work.
- Line a very large sheet pan with foil or wax paper and set aside.: When you unfold the lined pan, you should feel a cool, smooth surface ready to receive the hot, sticky popcorn; the foil or wax paper protects the pan and makes cleanup simple. Lining the pan early ensures you can dump the coated popcorn immediately, which helps preserve clusters. If you skip this, the caramel can stick and break apart as you try to spread it. A common mistake is using a pan that is too small, which causes the popcorn to pile and steam, softening the coating; make sure the pan gives enough room for clusters to rest and dry.
- Prepare the popcorn using whatever method you prefer (see note 2). Measure out 16 cups, taking care to remove all unpopped kernels; add to the large paper bag.: The sound of freshly popped popcorn is bright and crisp, and as you transfer it to a paper bag you should sense how light and airy the pieces are. Removing unpopped kernels prevents unpleasant hard bites. Adding the popcorn to a paper bag creates a roomy vessel for tossing with the syrup. Avoid using overly buttered microwave popcorn varieties that carry extra seasonings, they can interfere with the caramel adhesion and flavor. A frequent error is mismeasuring the volume, which can lead to too much or too little coating, so scoop carefully until you hit 16 cups.
- Combine butter, syrup, sugar, and salt in a fairly large bowl. Microwave for 3 minutes, stirring after each minute, to form a thick mixture.: As the mixture warms, you will notice a deepening brown color and a toffee like aroma that fills the kitchen. Stirring every minute ensures the butter and sugar dissolve evenly and prevents hot spots. The texture should become glossy and pourable but viscous, similar to thick honey. If you overcook it, the mixture can darken too far and become brittle rather than chewy; keep an eye on the color and smell to avoid burning. A common pitfall is using a bowl that is too small, which can bubble over when heated, so choose a roomy vessel.
- Combine the baking soda and vanilla in a small bowl. Stir this mixture and pour over the butter, sugar, and syrup mixture; stir to create the foam.: When you add the baking soda and vanilla extract , the mixture will immediately foam and lighten in color, releasing a warm, perfumed scent. This reaction creates tiny air pockets, making the caramel less dense and improving texture. Stir gently to incorporate the foam evenly. The foaming is brief, so work quickly to capture the aeration. A mistake is waiting too long to pour the foam, which reduces its leavening effect and yields a denser coat; have everything ready so you can move fast.
- Quickly pour the foaming mixture over the popcorn, fold the top of the bag over, and shake very well to distribute the syrup over the kernels.: The moment the hot caramel hits the popcorn , you will see a glossy sheen spreading; the sound is a soft rustle as pieces stick together into clusters. Folding and shaking inside the bag helps coat pieces evenly without burning your hands. Work swiftly so the syrup is still fluid enough to spread. A common issue is pouring too slowly, which causes large pools of caramel that coat only a few kernels; a quick, confident pour ensures better distribution.
- Place the bag (with the top folded over) in the microwave and heat on high for 1 minute. Remove and shake well again. Repeat this step (microwave for 1 minute, remove, and shake the bag). Then microwave for 1 minute longer. That will be a total of 3 one-minute microwave blasts, with 2 shakes in between.: Each brief microwave burst further cooks the caramel and helps it adhere firmly to the popcorn; you should smell deepening caramel and see the coating become more cohesive. Removing and shaking repositions pieces so the heat works evenly, reducing sticky clumps. The two shakes are essential, they prevent hot spots and encourage uniformity. Be careful when handling the bag, it will be hot to the touch, so hold it at the folded top. Mistakes here often come from skipping the shakes or microwaving too long at once, which can overcook and harden the caramel prematurely.
- Empty the coated popcorn onto the foil-lined baking sheet. Spread it loosely over the surface, leaving clusters grouped together. Let cool until it firms up and dries. Enjoy!: As you spread the coated popcorn onto the lined pan, you should hear a faint crackle as clusters settle and cool. Leaving clusters grouped preserves that satisfying crunch and pleasing bite. The cooling step allows the caramel to set to a crisp texture and the aroma will be warm and buttery across the kitchen. If you crowd the pan too tightly, steam can soften the coating, so aim for a loose layer. A common error is trying to eat it immediately while it is still tacky; patience yields the best crisp finish.
Tips and Variations
I like to think of these tips as little habits that turn a good batch into a great one. They cover timing, texture, and small technique changes that make the process safer and more consistent.
- Choose neutral popcorn: Plain or lightly salted microwave popcorn yields the cleanest caramel adhesion and flavor, avoiding pre seasoned varieties that can clash with the sugar coating.
- Stir often while microwaving: Stir the sugar and butter mixture each minute to prevent scorching and to create a uniformly glossy caramel that pours smoothly over the popcorn.
- Be quick with baking soda and vanilla: Add the mixture immediately and pour while foamy to create lighter, less dense caramel clusters that have a pleasant crunch.
- Use a roomy paper bag for shaking: A large paper grocery bag gives you the space to toss thoroughly without tearing, and it is heat resistant for the brief microwave blasts.
- Adjust microwave times by power: If your microwave is lower wattage, add a few extra seconds to each minute interval; if it is high wattage, stick to the stated times to avoid overbrowning.
What Complements This Microwave Caramel Corn
Caramel corn is an ideal snack for sharing and pairs well with simple accompaniments and occasions. Below I outline serving ideas, storage suggestions, and situations where it really shines.
- Movie nights and game days: Serve Microwave Caramel Corn in bowls or paper cones for casual grazing while watching films or cheering on a team.
- Party snack tables: Add small glass jars or clear bags for guests to take home as favors, the clusters present beautifully and travel well.
- Holiday gatherings: Offer it alongside warm beverages, its sweet crunch contrasts nicely with hot drinks and seasonal spice blends.
- Storage tips: Keep cooled caramel corn in an airtight container at room temperature for best texture, it will stay crisp for several days when sealed properly.
- Seasonal pairings: For autumn or winter events, serve with spiced apple cider; in warmer months, pair with chilled lemonade for a sweet contrast.
FAQ
Conclusion
Microwave Caramel Corn stands out for turning a few pantry staples into a crunchy, nostalgic snack with minimal effort. Its glossy caramel coating and tender clusters make it perfect for sharing at movie nights, parties, or as a thoughtful homemade gift. Give it a try the next time you want something sweet and simple, and enjoy the warm, buttery aroma that will fill your kitchen as it comes together.
Microwave Caramel Corn
Equipment
- Large sheet pan (15" x 21")
- Wax paper
- Parchment Paper
- Foil
- Large paper grocery bag
Ingredients
- 16 cups popped popcorn microwave bags or use 1 cup kernels—see note 2 Provide airy, crunchy base for the snack and determine final volume; popped bags are convenient while using 1 cup kernels yields fresher flavor when popped. Ensure unpopped kernels are removed for an even caramel coating and consider breaking large clusters for uniform texture.
- 8 tablespoons unsalted butter 1/2 cup Contribute rich, creamy fat that melts into the caramel, promoting smooth texture and glossy finish when combined with sugar and syrup. Measure precisely to balance sweetness and prevent a greasy or overly heavy coating on the popcorn.
- 1/4 cup corn syrup light or dark Supply sticky sweetness and help control crystallization; corn syrup stabilizes the caramel and keeps it chewy rather than grainy. Choose light for a milder flavor or dark for a deeper molasses note, both creating a glossy, cohesive coating.
- 1 cup light brown sugar lightly packed Add bulk sweetness and subtle molasses flavor while thickening the caramel; lightly packing preserves intended sweetness and moisture content. Caramelization of brown sugar during cooking develops color and complexity in the final popcorn.
- 1/2 teaspoons salt Enhance overall flavor by balancing sweetness and adding a savory counterpoint; small amount helps prevent the snack from tasting cloying. Distribute evenly in the caramel mixture to ensure consistent flavor throughout the popcorn.
- 1/2 teaspoon baking soda Introduce a slight lift and lightness by creating tiny air pockets in the caramel, preventing it from becoming too dense; it also helps the coating set with a tender bite. Stir into the hot caramel carefully to activate and then immediately remove from heat to preserve texture.
- 1 teaspoon vanilla extract Bring aromatic depth and roundness to the caramel with a warm, fragrant finish; vanilla helps meld flavors and soften any sharp sugary notes. Add off-heat to retain its delicate flavor and prevent evaporation during cooking.
Instructions
- Line a very large sheet pan with foil or wax paper and set aside.: When you unfold the lined pan, you should feel a cool, smooth surface ready to receive the hot, sticky popcorn; the foil or wax paper protects the pan and makes cleanup simple. Lining the pan early ensures you can dump the coated popcorn immediately, which helps preserve clusters. If you skip this, the caramel can stick and break apart as you try to spread it. A common mistake is using a pan that is too small, which causes the popcorn to pile and steam, softening the coating; make sure the pan gives enough room for clusters to rest and dry.
- Prepare the popcorn using whatever method you prefer (see note 2). Measure out 16 cups, taking care to remove all unpopped kernels; add to the large paper bag.: The sound of freshly popped popcorn is bright and crisp, and as you transfer it to a paper bag you should sense how light and airy the pieces are. Removing unpopped kernels prevents unpleasant hard bites. Adding the popcorn to a paper bag creates a roomy vessel for tossing with the syrup. Avoid using overly buttered microwave popcorn varieties that carry extra seasonings, they can interfere with the caramel adhesion and flavor. A frequent error is mismeasuring the volume, which can lead to too much or too little coating, so scoop carefully until you hit 16 cups.
- Combine butter, syrup, sugar, and salt in a fairly large bowl. Microwave for 3 minutes, stirring after each minute, to form a thick mixture.: As the mixture warms, you will notice a deepening brown color and a toffee like aroma that fills the kitchen. Stirring every minute ensures the butter and sugar dissolve evenly and prevents hot spots. The texture should become glossy and pourable but viscous, similar to thick honey. If you overcook it, the mixture can darken too far and become brittle rather than chewy; keep an eye on the color and smell to avoid burning. A common pitfall is using a bowl that is too small, which can bubble over when heated, so choose a roomy vessel.
- Combine the baking soda and vanilla in a small bowl. Stir this mixture and pour over the butter, sugar, and syrup mixture; stir to create the foam.: When you add the baking soda and vanilla extract , the mixture will immediately foam and lighten in color, releasing a warm, perfumed scent. This reaction creates tiny air pockets, making the caramel less dense and improving texture. Stir gently to incorporate the foam evenly. The foaming is brief, so work quickly to capture the aeration. A mistake is waiting too long to pour the foam, which reduces its leavening effect and yields a denser coat; have everything ready so you can move fast.
- Quickly pour the foaming mixture over the popcorn, fold the top of the bag over, and shake very well to distribute the syrup over the kernels.: The moment the hot caramel hits the popcorn , you will see a glossy sheen spreading; the sound is a soft rustle as pieces stick together into clusters. Folding and shaking inside the bag helps coat pieces evenly without burning your hands. Work swiftly so the syrup is still fluid enough to spread. A common issue is pouring too slowly, which causes large pools of caramel that coat only a few kernels; a quick, confident pour ensures better distribution.
- Place the bag (with the top folded over) in the microwave and heat on high for 1 minute. Remove and shake well again. Repeat this step (microwave for 1 minute, remove, and shake the bag). Then microwave for 1 minute longer. That will be a total of 3 one-minute microwave blasts, with 2 shakes in between.: Each brief microwave burst further cooks the caramel and helps it adhere firmly to the popcorn; you should smell deepening caramel and see the coating become more cohesive. Removing and shaking repositions pieces so the heat works evenly, reducing sticky clumps. The two shakes are essential, they prevent hot spots and encourage uniformity. Be careful when handling the bag, it will be hot to the touch, so hold it at the folded top. Mistakes here often come from skipping the shakes or microwaving too long at once, which can overcook and harden the caramel prematurely.
- Empty the coated popcorn onto the foil-lined baking sheet. Spread it loosely over the surface, leaving clusters grouped together. Let cool until it firms up and dries. Enjoy!: As you spread the coated popcorn onto the lined pan, you should hear a faint crackle as clusters settle and cool. Leaving clusters grouped preserves that satisfying crunch and pleasing bite. The cooling step allows the caramel to set to a crisp texture and the aroma will be warm and buttery across the kitchen. If you crowd the pan too tightly, steam can soften the coating, so aim for a loose layer. A common error is trying to eat it immediately while it is still tacky; patience yields the best crisp finish.
Notes
- Choose neutral popcorn: Plain or lightly salted microwave popcorn yields the cleanest caramel adhesion and flavor, avoiding pre seasoned varieties that can clash with the sugar coating.
- Stir often while microwaving: Stir the sugar and butter mixture each minute to prevent scorching and to create a uniformly glossy caramel that pours smoothly over the popcorn.
- Be quick with baking soda and vanilla: Add the mixture immediately and pour while foamy to create lighter, less dense caramel clusters that have a pleasant crunch.
- Use a roomy paper bag for shaking: A large paper grocery bag gives you the space to toss thoroughly without tearing, and it is heat resistant for the brief microwave blasts.
- Adjust microwave times by power: If your microwave is lower wattage, add a few extra seconds to each minute interval; if it is high wattage, stick to the stated times to avoid overbrowning.