Mummy Hot Dogs
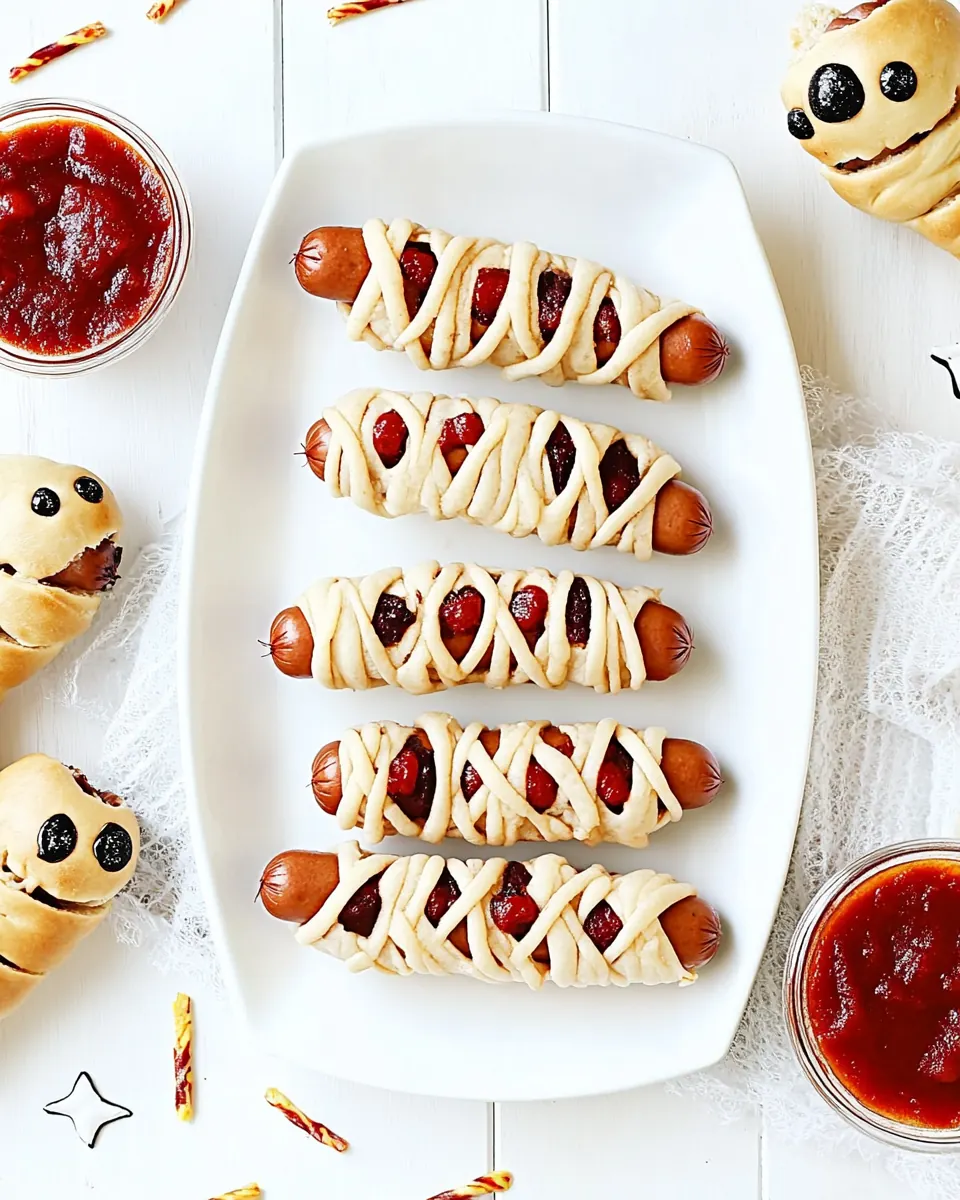
Mummy Hot Dogs are one of those fun, playful snacks I turn to when I want a little mischief in the kitchen with minimal fuss. The first time I made them I was juggling a busy evening and a stack of last minute party prep, so I reached for a simple trick: wrapping savory turkey or beef dogs in thin ribbons of dough to create a spooky, crowd pleasing treat. They were silly, satisfying, and they vanished faster than I could arrange the napkins.
Since that night I’ve made Mummy Hot Dogs for backyard gatherings, a school bake sale, and an impromptu movie night. Each time I tweak tiny things, like stretching the dough a bit more so the strips crinkle just so, or adding playful eyes with a dab of mustard and a dot of olive or cream cheese. I love that they feel festive without being fussy, and they pair perfectly with quick dips that I can prep while the oven heats. Using a homemade pizza dough gives the crust that fresh bakery aroma that always draws people in.
Recipe Snapshot
35 mins
20 mins
15 mins
Medium
250 kcal
American
Keto, Gluten-Free
Dinner
Oven, Baking sheet, Parchment paper, Pizza cutter, Toothpick
What Makes This Mummy Hot Dogs Special
They are irresistibly fun
I adore recipes that make people smile, and Mummy Hot Dogs do just that. The sight of those little wrapped figures makes kids laugh and adults nostalgic. I find that playful presentation instantly lifts the mood at parties, and it is a terrific conversation starter.
Simple, pantry friendly ingredients
These use a handful of items you likely already have or can assemble quickly. With a base of fresh dough and everyday condiments like ketchup and mustard, the recipe is fast to pull together. I appreciate not needing fancy shopping or obscure items when the clock is ticking.
Customizable and forgiving
I love that you can adapt how wrapped or exposed the hot dogs are, and still get great results. Whether you prefer a snug crust or a croissant like flake, the technique works. If a strip tears, just overlap another piece and keep going, this recipe forgives small mistakes.
Great for feeding a crowd
When I host, I often need something that scales without extra fuss. Making a batch of Mummy Hot Dogs lets me feed a group easily, because each portion is handheld and portioned. They are ideal for gatherings where people mingle and nibble, rather than sit down for a formal meal.
Fun finishing touches
The tiny details are where these shine. I enjoy experimenting with eye options from tiny dots of mustard to a cream cheese and chopped olive combo. A themed dip, like a spiderweb of ketchup and mustard, adds drama. These finishing touches elevate a simple snack into a memorable moment.
What Goes Into Mummy Hot Dogs
I believe the best party snacks balance texture and flavor, and the ingredients here do exactly that. The dough gives structure and a golden, chewy exterior, while the hot dogs provide savory satisfaction. Small flavor players like ketchup and mustard add brightness and contrast, and the optional cream cheese or olive bits for eyes bring a touch of creaminess and salt. Together these elements read as familiar, but they feel festive when assembled with a little care.
- 1 recipe homemade pizza dough see instructions below: Provide a soft, elastic base that wraps around the hot dogs to create the signature mummy appearance; prepare according to the included instructions to achieve proper consistency and rise. Allow dough to rest and come to room temperature for easier shaping, and roll into thin strips for wrapping evenly around each sausage.
- 8 each turkey or beef dogs: Offer a lean protein filling that cooks quickly and holds shape when wrapped; choose turkey for a lighter option or beef for a richer flavor. Score or warm slightly before wrapping to ensure even heating and to prevent splitting during baking.
- 1/4 cup ketchup: Add a familiar sweet-tangy glaze used as a dipping sauce or decorative accent for mummy faces; mix or warm slightly if preferred to improve pourability. Spoon or pipe onto finished hot dogs to create facial features or serve on the side for dipping.
- 1 tbsp yellow mustard: Contribute a bright, sharp counterpoint to the ketchup that enhances overall flavor and works well for small decorative details like eyes or mouths. Use sparingly for a pop of acidity and color when decorating the baked mummies.
Putting Together Mummy Hot Dogs
These steps will guide you through assembly, baking, and finishing touches with sensory cues so you know when things are right. I like to move deliberately but playfully when wrapping the hot dogs, and I always keep my eye on the oven so the dough browns evenly.
- Preheat oven to 425 degrees F. Line a baking sheet with parchment paper.: The air warms quickly and you will smell a faint toasty scent as the oven reaches 425 degrees F . Lining the sheet with parchment prevents sticking and helps the underside of the dough brown evenly without burning. I always press the parchment flat so the dough lays smooth, which helps the wrapped dough bake uniformly. A common mistake is not verifying the oven temperature, which can leave the dough pale and doughy, so use an oven thermometer if you are unsure. Expect a gentle hum from the oven and a dry heat that crisps surfaces during baking.
- Make 1/2 the recipe of our pizza dough for these mummy dogs.: Fresh dough should feel soft, slightly tacky, and elastic when you stretch it, and it will give off a faint, yeasty aroma. I mix, knead, and let the dough rest so the gluten relaxes, which makes it simple to roll into strips without snapping back. If the dough is too cold it will tear easily, so let it sit for a few minutes at room temperature after refrigeration. Overworking can make it tough, so stop kneading once it is smooth and slightly springy. You want a dough that bends and yields with a satisfying elasticity.
- Once your pizza dough is made, roll pizza dough into a long rectangle.: As you roll the pizza dough , you should feel it spreading smoothly under the rolling pin and hear a soft whisper as the dough thins. Aim for an even thickness so the strips bake consistently, and dust the surface lightly if it sticks. If parts of the rectangle are noticeably thicker, the dough will take longer to cook there and the strip may remain doughy, so reroll those areas. The edges should be neat so strips will be uniform when cut.
- With a pizza cutter, slice strips about 1/4" wide.: The sound of the pizza cutter gliding through the dough is crisp and satisfying, leaving clean edges that wrap easily. Strips about 1/4" wide make cute, mummy like bandages, and they bake to a golden crisp without overwhelming the hot dog. If strips are too wide they can obscure the sausage, and if they are too narrow they may burn quickly. Keep your cuts steady and even for the best visual effect.
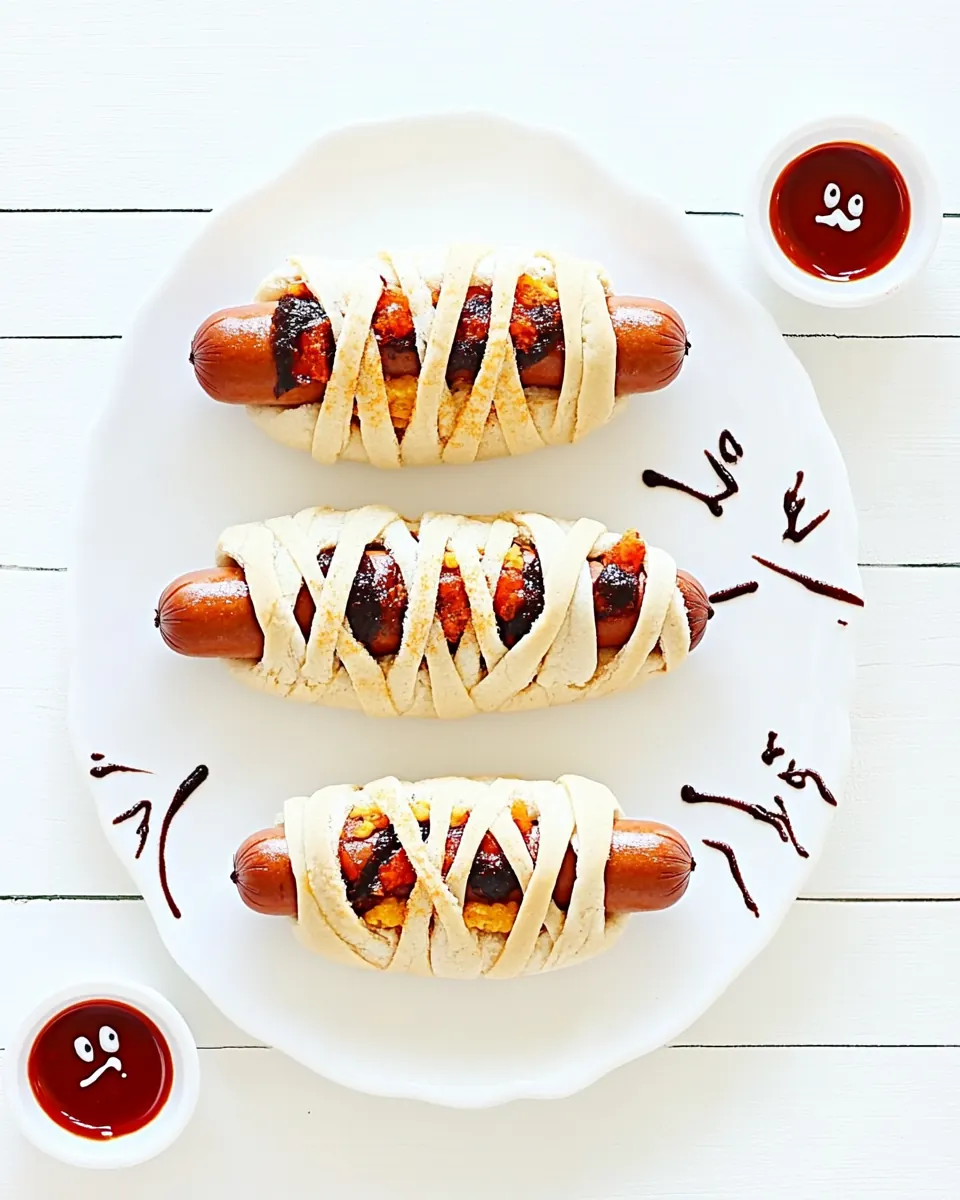
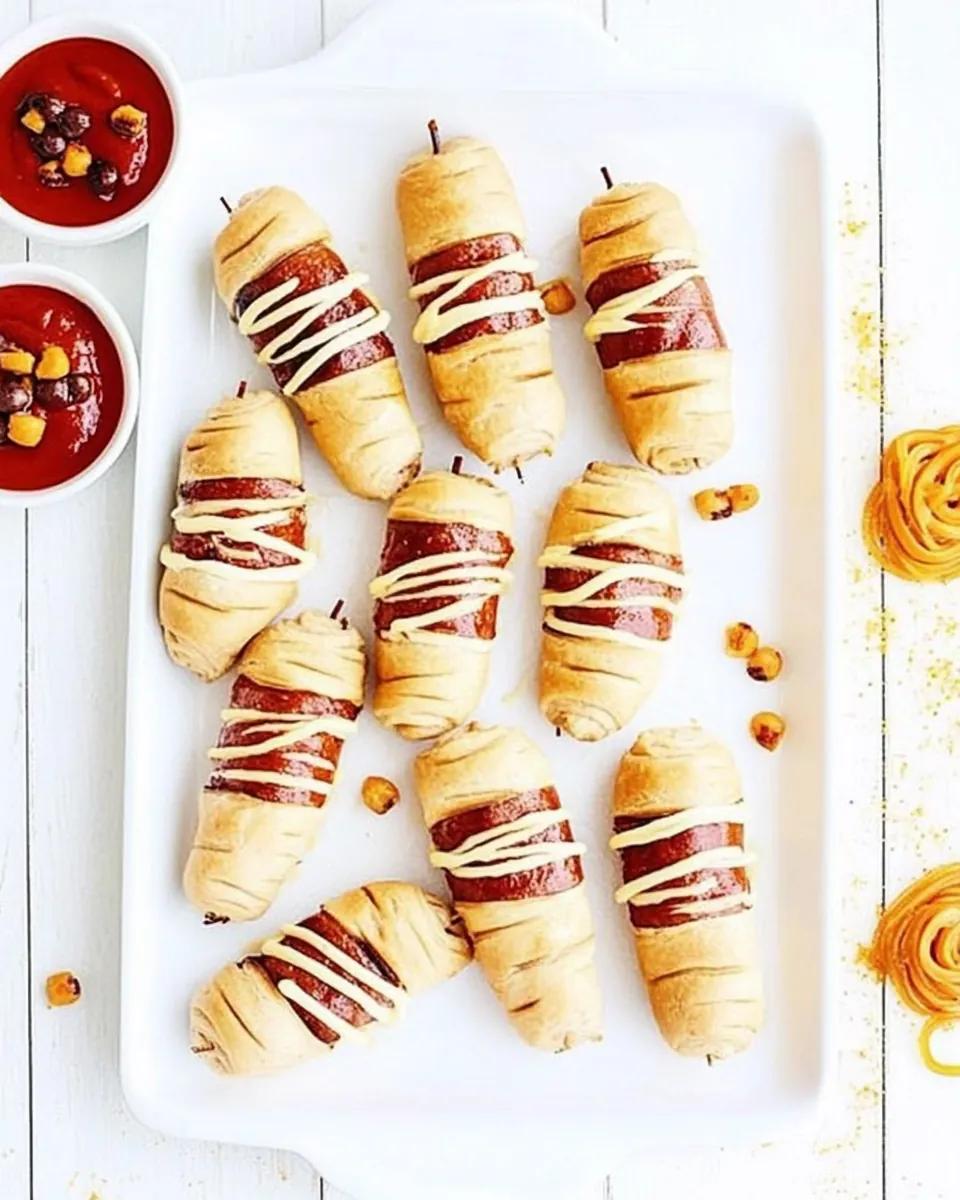
- Wrap the pieces of dough around each hot dog by stretching the dough slightly and letting it overlap and criss-cross. You don't need to completely cover the hot dog. Leave a gap at the top for the 'mummy eyes': When wrapping, you will feel the dough give as it stretches and the strip will cling when overlapped. The overlapping creates texture and little pockets that brown beautifully, releasing a toasty, yeasty scent. Intentionally leave a small gap at the top so the eyes appear, this gap also prevents the sausage from overheating in a sealed pocket. A common error is pulling too hard and tearing the strip, so gently stretch and overlap instead of yanking. The visual of criss crossed strips is part of the charm, and the contrast of darker browned dough against the exposed meaty tip is appealing.
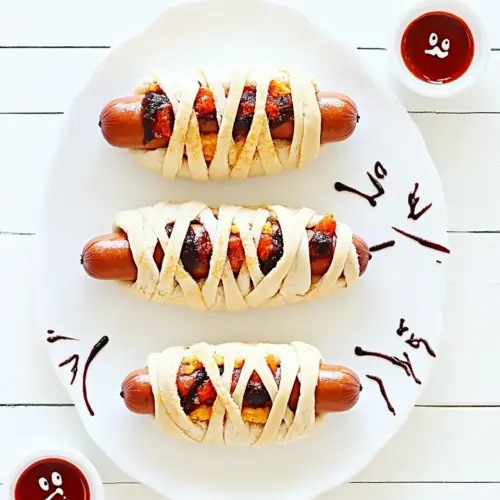
- Place the mummy hot dogs on your baking sheet and bake for 20 minutes. Remove from oven and let cool slightly.: As they bake for about 20 minutes, the kitchen will fill with the warm aroma of baked dough and savory meat. The dough should turn golden brown and feel firm to the touch when done, and the sausages will sizzle slightly at the exposed ends. Letting them cool slightly helps the dough set so the wraps do not unravel when handled. Avoid cutting into them immediately as hot steam can escape and make the interior soggy. A common pitfall is overbaking, which leads to a hard crust, so check for an even golden color rather than relying solely on time.
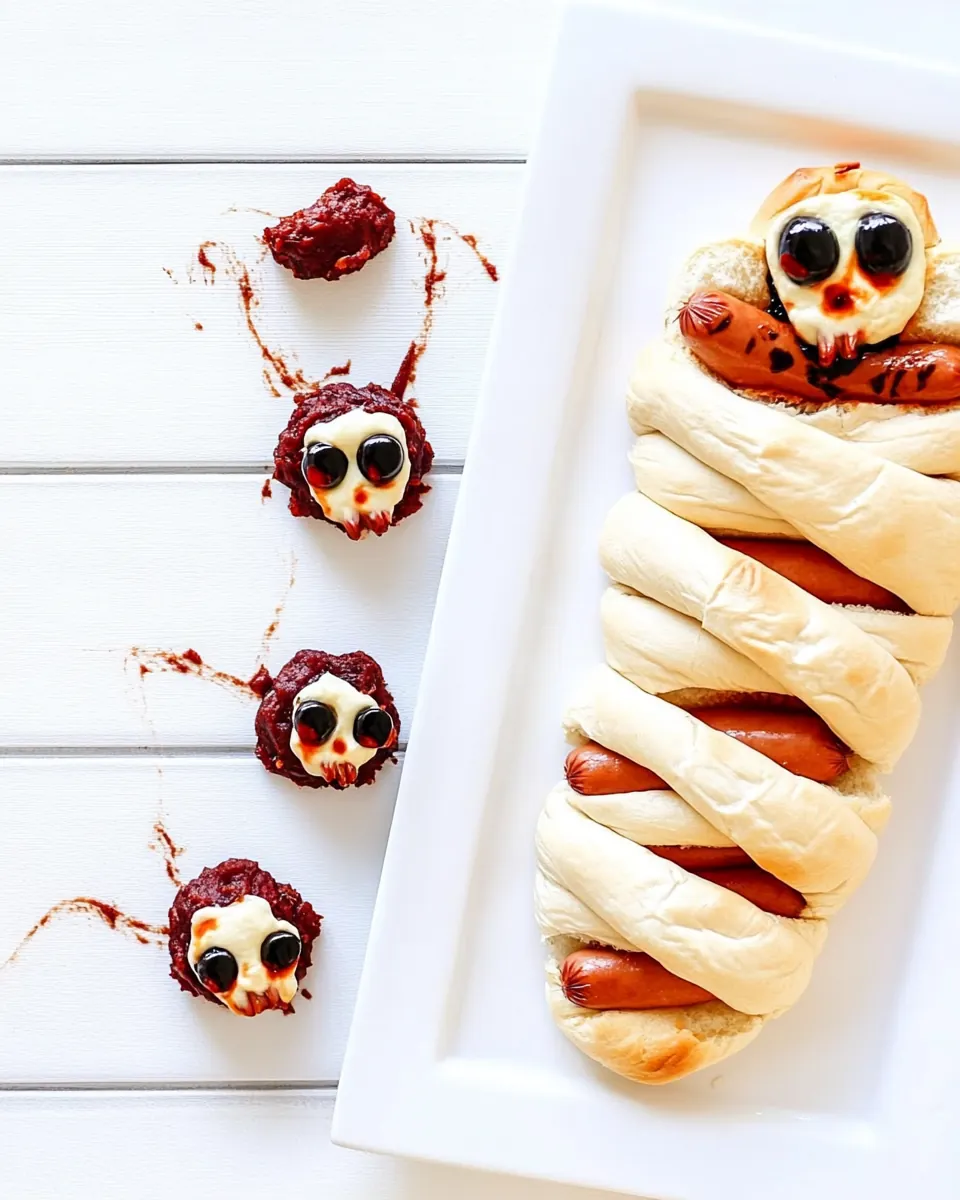
- You can create the eyes a couple of different ways. The first is to squirt just a tiny bit of mustard for each eye. The second is to take a toothpick and place a tiny dollop of cream cheese for each eye and then a piece of chopped olive.: These finishing touches are where personality comes in, and you will notice the contrast of tangy mustard against the rich dough. Using a toothpick to dot tiny amounts of cream cheese gives a creamy base to anchor a chopped olive , which adds a salty pop. If you use straight mustard , squeeze gently to avoid large globs. One mistake is adding too large an eye, which can look disproportionate, so keep the dots small and precise. The tiny details make them playful and snackable.
- Place ketchup in a small bowl. Squirt thin circle rings of mustard on top of the ketchup and then take a toothpick and drag it from the inside of the circles to the outside to create a spider web shape. Serve the mummy hot dogs with the spiderweb ketchup.: When you layer mustard rings on the ketchup surface, surface tension keeps them defined until you drag the toothpick, which creates the web pattern. The mixture will smell bright and tangy, and the visual adds drama to the platter. Keep your motions steady while dragging the toothpick so the lines remain clean. A common oversight is making the rings too thick, which ruins the web effect, so aim for thin, even lines. Place the mummies beside the bowl while slightly warm for the best contrast of textures and temperatures.
Tips and Variations
I like to offer a few easy tweaks that keep Mummy Hot Dogs fresh and fun each time I make them. Below are practical tips and playful variations that I use depending on the crowd and occasion.
- Make ahead: You can shape the mummies and refrigerate them for up to a day before baking. Chilled dough will relax only slightly, so allow five to ten minutes at room temperature before baking for even results.
- Even strips: Use a ruler as a guide when cutting dough strips to keep them uniform, which creates a tidy, professional look on the platter.
- Eye options: Small dots of mustard are fastest, while a tiny cream cheese dollop topped with a chopped olive gives more texture and bite for kids who love details.
- Watch your oven: If your dough browns too fast, tent loosely with foil the last five minutes to prevent overbrowning while the interior finishes cooking.
- Serving style: Arrange on a large platter with the spiderweb ketchup bowl in the center for an eye catching display, and keep napkins handy as these are perfect finger foods.
What to Serve Alongside Mummy Hot Dogs
These handheld treats are perfect for casual gatherings, and the sides you choose can elevate them to a full themed spread. Below are serving ideas, storage tips, and occasion suggestions to amplify the experience.
- Fresh vegetable sticks: Crisp carrot and celery sticks add a refreshing crunch and a contrast to the warm, baked dough.
- Pickle platter: A small array of pickles or pickled veggies cuts through the richness and pairs especially well with turkey or beef dogs.
- Dip station: Offer extra bowls of ketchup and mustard, plus a creamy herb dip if you like, so guests can customize their bites.
- Casual occasions: These are ideal for Halloween parties, family movie nights, or a playful game day spread where handheld snacks rule.
- Storage tips: Store cooled mummies in an airtight container for up to two days. Reheat in a 350 degree F oven until warmed through to refresh the crust.
- Seasonal pairing: Serve during fall gatherings and Halloween themed events to lean into the spooky fun, or anytime you want an easy, festive snack.
FAQ
Conclusion
Mummy Hot Dogs stand out because they turn simple ingredients into a playful, crowd pleasing snack that is both easy and memorable. They are perfect for casual gatherings where hands on presentation adds charm, and they come together quickly with minimal fuss. Give them a try at your next Halloween party or movie night, the combination of golden dough and savory sausages always goes over well. Have fun with the finishing details, and don’t be afraid to make them your own.
Mummy Hot Dogs
Equipment
- Oven
- Baking Sheet
- Parchment Paper
- Pizza Cutter
- Toothpick
Ingredients
- 1 recipe homemade pizza dough see instructions below Provide a soft, elastic base that wraps around the hot dogs to create the signature mummy appearance; prepare according to the included instructions to achieve proper consistency and rise. Allow dough to rest and come to room temperature for easier shaping, and roll into thin strips for wrapping evenly around each sausage.
- 8 each turkey or beef dogs Offer a lean protein filling that cooks quickly and holds shape when wrapped; choose turkey for a lighter option or beef for a richer flavor. Score or warm slightly before wrapping to ensure even heating and to prevent splitting during baking.
- 1/4 cup ketchup Add a familiar sweet-tangy glaze used as a dipping sauce or decorative accent for mummy faces; mix or warm slightly if preferred to improve pourability. Spoon or pipe onto finished hot dogs to create facial features or serve on the side for dipping.
- 1 tbsp yellow mustard Contribute a bright, sharp counterpoint to the ketchup that enhances overall flavor and works well for small decorative details like eyes or mouths. Use sparingly for a pop of acidity and color when decorating the baked mummies.
Instructions
- Preheat oven to 425 degrees F. Line a baking sheet with parchment paper.: The air warms quickly and you will smell a faint toasty scent as the oven reaches 425 degrees F . Lining the sheet with parchment prevents sticking and helps the underside of the dough brown evenly without burning. I always press the parchment flat so the dough lays smooth, which helps the wrapped dough bake uniformly. A common mistake is not verifying the oven temperature, which can leave the dough pale and doughy, so use an oven thermometer if you are unsure. Expect a gentle hum from the oven and a dry heat that crisps surfaces during baking.
- Make 1/2 the recipe of our pizza dough for these mummy dogs.: Fresh dough should feel soft, slightly tacky, and elastic when you stretch it, and it will give off a faint, yeasty aroma. I mix, knead, and let the dough rest so the gluten relaxes, which makes it simple to roll into strips without snapping back. If the dough is too cold it will tear easily, so let it sit for a few minutes at room temperature after refrigeration. Overworking can make it tough, so stop kneading once it is smooth and slightly springy. You want a dough that bends and yields with a satisfying elasticity.
- Once your pizza dough is made, roll pizza dough into a long rectangle.: As you roll the pizza dough , you should feel it spreading smoothly under the rolling pin and hear a soft whisper as the dough thins. Aim for an even thickness so the strips bake consistently, and dust the surface lightly if it sticks. If parts of the rectangle are noticeably thicker, the dough will take longer to cook there and the strip may remain doughy, so reroll those areas. The edges should be neat so strips will be uniform when cut.
- With a pizza cutter, slice strips about 1/4" wide.: The sound of the pizza cutter gliding through the dough is crisp and satisfying, leaving clean edges that wrap easily. Strips about 1/4" wide make cute, mummy like bandages, and they bake to a golden crisp without overwhelming the hot dog. If strips are too wide they can obscure the sausage, and if they are too narrow they may burn quickly. Keep your cuts steady and even for the best visual effect.
- Wrap the pieces of dough around each hot dog by stretching the dough slightly and letting it overlap and criss-cross. You don't need to completely cover the hot dog. Leave a gap at the top for the 'mummy eyes': When wrapping, you will feel the dough give as it stretches and the strip will cling when overlapped. The overlapping creates texture and little pockets that brown beautifully, releasing a toasty, yeasty scent. Intentionally leave a small gap at the top so the eyes appear, this gap also prevents the sausage from overheating in a sealed pocket. A common error is pulling too hard and tearing the strip, so gently stretch and overlap instead of yanking. The visual of criss crossed strips is part of the charm, and the contrast of darker browned dough against the exposed meaty tip is appealing.
- Place the mummy hot dogs on your baking sheet and bake for 20 minutes. Remove from oven and let cool slightly.: As they bake for about 20 minutes, the kitchen will fill with the warm aroma of baked dough and savory meat. The dough should turn golden brown and feel firm to the touch when done, and the sausages will sizzle slightly at the exposed ends. Letting them cool slightly helps the dough set so the wraps do not unravel when handled. Avoid cutting into them immediately as hot steam can escape and make the interior soggy. A common pitfall is overbaking, which leads to a hard crust, so check for an even golden color rather than relying solely on time.
- You can create the eyes a couple of different ways. The first is to squirt just a tiny bit of mustard for each eye. The second is to take a toothpick and place a tiny dollop of cream cheese for each eye and then a piece of chopped olive.: These finishing touches are where personality comes in, and you will notice the contrast of tangy mustard against the rich dough. Using a toothpick to dot tiny amounts of cream cheese gives a creamy base to anchor a chopped olive , which adds a salty pop. If you use straight mustard , squeeze gently to avoid large globs. One mistake is adding too large an eye, which can look disproportionate, so keep the dots small and precise. The tiny details make them playful and snackable.
- Place ketchup in a small bowl. Squirt thin circle rings of mustard on top of the ketchup and then take a toothpick and drag it from the inside of the circles to the outside to create a spider web shape. Serve the mummy hot dogs with the spiderweb ketchup.: When you layer mustard rings on the ketchup surface, surface tension keeps them defined until you drag the toothpick, which creates the web pattern. The mixture will smell bright and tangy, and the visual adds drama to the platter. Keep your motions steady while dragging the toothpick so the lines remain clean. A common oversight is making the rings too thick, which ruins the web effect, so aim for thin, even lines. Place the mummies beside the bowl while slightly warm for the best contrast of textures and temperatures.
Notes
- Make ahead: You can shape the mummies and refrigerate them for up to a day before baking. Chilled dough will relax only slightly, so allow five to ten minutes at room temperature before baking for even results.
- Even strips: Use a ruler as a guide when cutting dough strips to keep them uniform, which creates a tidy, professional look on the platter.
- Eye options: Small dots of mustard are fastest, while a tiny cream cheese dollop topped with a chopped olive gives more texture and bite for kids who love details.
- Watch your oven: If your dough browns too fast, tent loosely with foil the last five minutes to prevent overbrowning while the interior finishes cooking.
- Serving style: Arrange on a large platter with the spiderweb ketchup bowl in the center for an eye catching display, and keep napkins handy as these are perfect finger foods.