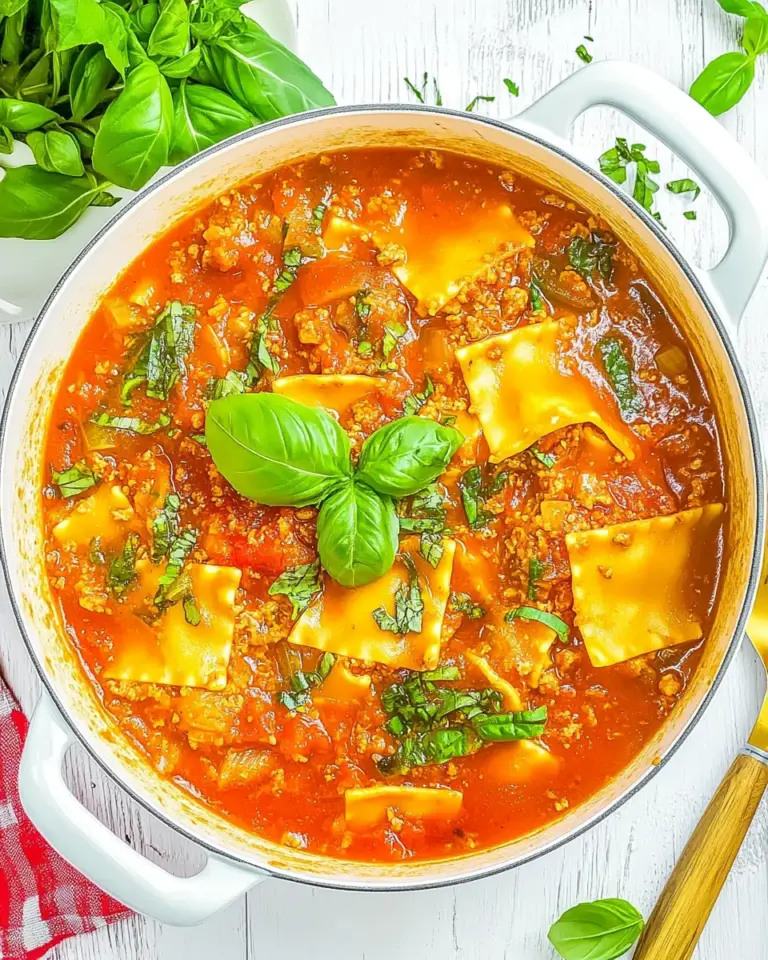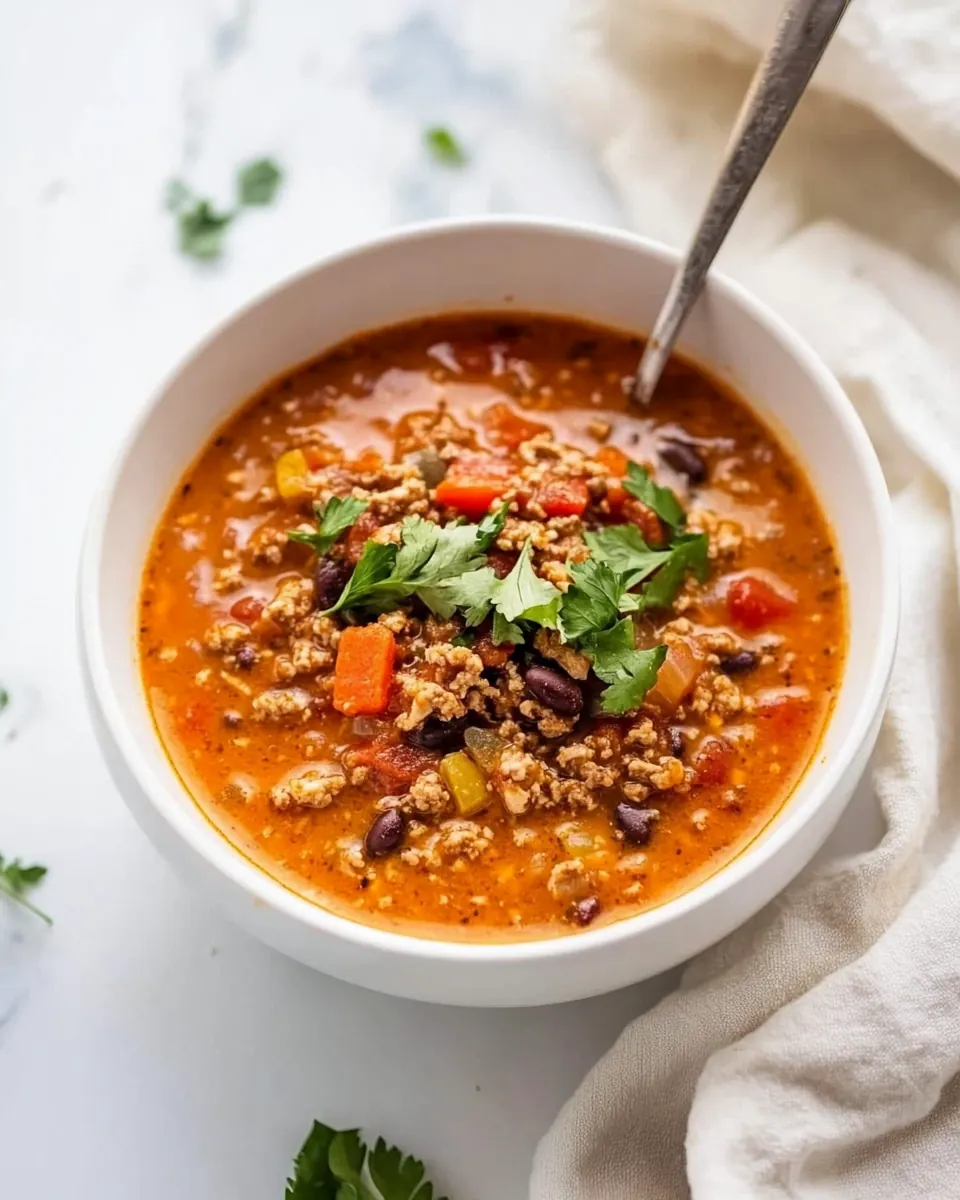
Instant Pot Ground Chicken Chili
Instant Pot Ground Chicken Chili started as a weeknight rescue in my kitchen when a cold snap and a too-busy day collided. I was hankering for something hearty, comforting, and fast, something that would warm up the table and make the whole house smell like home. I reached for the Instant Pot, a trusty shortcut in my arsenal, and a pound of ground chicken sat waiting in the fridge. I wanted chili that felt substantial without being heavy, so I leaned into bright tomatoes, tender beans, and a touch of cream to finish.
That evening taught me how transformative simple techniques can be. Browning the ground chicken with aromatics like garlic and onion builds a base of flavor you can smell from the hallway. As pressure built and the flavors married, the house filled with a warm, smoky scent from the sweet paprika and smoked paprika. When I finally lifted the lid, the chili looked like it had taken hours to make, but it came together in less time than I expected, with a creamy finish from the heavy cream that softened the spices just so.
Over time I tweaked the vegetables and spices to suit my family. I learned when to scrape the bottom so the Instant Pot wouldn’t complain, and when to let the pressure release naturally so the textures stay plush. Each bowl felt like a small celebration on a busy night. Friends started asking for the recipe, and now I love serving it when guests need something cozy without fuss. This version remains my go to when winter rolls in and I want comfort fast.
Recipe Snapshot
40 mins
10 mins
30 mins
Medium
350 kcal
American
Gluten-Free, Low FODMAP
Dinner
Sweet Paprika, Fire Roasted Diced Tomatoes, Instant Pot
What Sets This Instant Pot Ground Chicken Chili Apart
Balanced Comfort Food
I love that Instant Pot Ground Chicken Chili hits comforting notes without feeling heavy. The combination of ground chicken and beans creates satisfying texture and protein, while the tomatoes and stock keep things bright. I often tell people, I did not sacrifice heartiness for speed, the pressure cooking simply intensifies flavors so every spoonful is layered and warm.
Speed without Compromise
Using the Instant Pot means you get deep flavor in a fraction of the time. I appreciate how pressure transforms the aromatics and melds spices quickly, so you get a home cooked aroma and taste even on busy nights. It’s reassuring to know dinner can be both quick and soulful, and this recipe is proof.
Flexible and Family Friendly
This chili is forgiving, and I often tweak spice levels for whoever is at the table. My kids usually prefer milder versions, so I ease up on the crushed red pepper flakes and still get clapping bowls. The texture is universally appealing, with soft beans and tender ground chicken that everyone can enjoy.
One Pot, Minimal Cleanup
One of my favorite reasons to make this is the cleanup simplicity. Everything cooks in the Instant Pot, which means I spend less time washing dishes and more time at the table. If you value efficiency, you will love the minimal fuss and maximum payoff.
Comfort that Travels
I also find it stores beautifully, making it a reliable choice for leftovers or potlucks. The flavors deepen overnight, so the next day the chili often tastes even better. I like to make a double batch when I know I have a hectic week ahead.
Essential Ingredients for Instant Pot Ground Chicken Chili
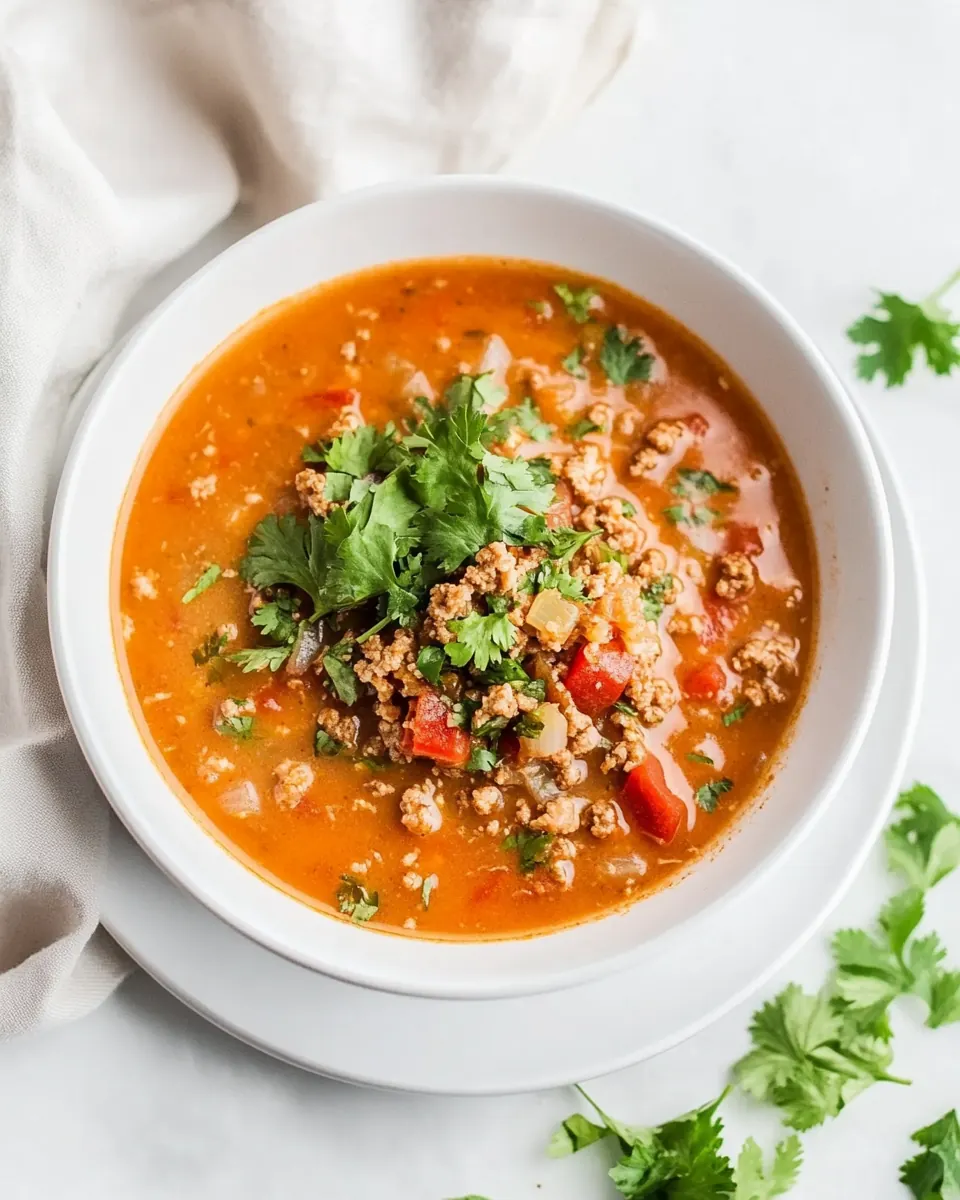
These ingredients work together to create a chili that is both comforting and bright. The base of the dish starts with aromatics and ground chicken, which provide savory depth. Tomatoes, stock, and beans supply body and richness, while the spice blend gives the chili its character. The heavy cream at the end smooths the heat and rounds the palate.
- 1 tablespoon olive oil: Sauté gently in olive oil to build a flavorful base and help soften aromatics; provides a subtle fruity and peppery richness that carries spices throughout the chili. Adds healthy fats that improve mouthfeel and aid in releasing fat-soluble flavors from other ingredients.
- 1 small yellow onion, diced: Sweat finely to release natural sweetness and aromatic depth; diced yellow onion contributes body and savory complexity that balances the acidity of tomatoes. Breaks down during pressure cooking to thicken the chili and meld flavors between vegetables and meat.
- 2 cloves garlic, minced: Mince finely to infuse fragrant, pungent heat and bright aromatics; garlic elevates overall savory depth and pairs well with onion and spices. Releases its oils during sautéing and pressure cooking, contributing subtle sweetness and umami.
- 2 large carrots, peeled and diced: Dice uniformly and cook until tender to add natural sweetness, texture, and slight earthiness; carrots also absorb surrounding flavors while contributing color and nutrients. When softened, they help thicken the chili and provide a pleasant counterpoint to the beans and tomatoes.
- 1 pound ground chicken: Brown briefly to develop savory Maillard flavors and provide the primary protein and texture for the chili; ground chicken offers a lighter, leaner base than beef while soaking up spices and liquids. Breaking it apart ensures even cooking and better integration with vegetables and seasonings.
- 1 cup chicken stock: Pour in to deglaze the pot and create a flavorful cooking liquid; chicken stock adds savory depth and umami that enhances the overall chili profile. Provides necessary liquid for pressure cooking and helps meld spices, tomatoes, and beans into a cohesive stew.
- 2 (14 ounce) cans diced fire roasted tomatoes: Add directly to the pot for acidity, texture, and roasted tomato flavor; fire roasted diced tomatoes contribute charred, smoky notes that complement the chili spices. Their juices also help form the sauce and balance richness from cream and ground chicken.
- 2 (14 ounce) cans great northern beans, drained and rinsed: Rinse and drain before adding to maintain a clean bean flavor and prevent excess starchiness; great northern beans bring creamy texture, fiber, and subtle nuttiness to the chili. Hold their shape during cooking, adding body and making the chili more substantial and satisfying.
- 1 tablespoon chili powder: Sprinkle evenly to provide warm, earthy heat and foundational chili flavor; chili powder is the key seasoning that defines the dish’s profile. Blends with cumin and paprika to create a balanced, aromatic spice base that permeates the chili.
- 1 teaspoon ground cumin: Season to introduce warm, nutty earthiness and to enhance savory notes throughout; ground cumin pairs with chili powder to add depth and a slightly citrusy warmth. Helps round out the flavor profile and supports other spices without overpowering them.
- 1 teaspoon sweet paprika: Dust in to contribute sweet, mildly smoky flavor and vibrant color; sweet paprika offers gentle warmth and visual appeal. Supports the chili’s seasoning balance and complements both the smoked paprika and chili powder.
- 1 teaspoon kosher salt: Season to control overall saltiness and bring out other flavors; kosher salt enhances the savory elements of meat, vegetables, and tomatoes. Proper seasoning ensures spices and aromatics are more pronounced and the dish tastes cohesive.
- 1/2 teaspoon smoked paprika: Add sparingly to introduce a subtle smoky depth without overpowering other flavors; smoked paprika layers smokiness that harmonizes with fire roasted tomatoes. Enhances complexity and gives a barbecue-like nuance to the chili.
- 1/2 teaspoon dried oregano: Sprinkle to add herbaceous, slightly bitter notes and Mediterranean warmth; dried oregano contributes an undercurrent of herbal complexity that pairs well with tomato-based dishes. Helps round out the spice blend and complements earthy beans.
- 1/2 teaspoon crushed red pepper flakes: Include modestly to introduce heat and subtle chili presence; crushed red pepper flakes deliver adjustable spiciness and visual interest. Provides quick bursts of heat that can be balanced with cream or served to taste.
- 1/2 teaspoon black pepper: Season to add sharp, pungent heat and to brighten flavors; freshly ground black pepper gives a warm spiciness that complements other spices. Enhances aroma and provides a final layer of seasoning to the finished chili.
- 1/2 cup heavy cream: Stir in at the end to add luxurious richness, mellow spice heat, and silkiness; heavy cream softens acidity and binds flavors for a smoother finish. Contributes creamy mouthfeel and helps create a comforting, velvety chili sauce.
How to Assemble Instant Pot Ground Chicken Chili
I like to walk through the process as if we are cooking together, slow enough to notice smells and textures but steady enough to respect the clock. The Instant Pot moves quickly once sealed, so a calm, attentive sauté sets you up for success. Below are translated, detailed steps from the original directions to help you get it right.
- Heat the Instant Pot to the 'saute normal' function.: As the pot warms you will hear a quiet hum and feel gentle heat radiating from the base, a signal that the metal insert is ready. This preheat is essential because starting with a hot surface helps the olive oil shimmer and the onion soften without absorbing too much oil. When the surface looks glossy and you can see a faint ripple in the oil, add your aromatics promptly. A common mistake is rushing this step, which can lead to uneven browning or sticking later, so wait for the oil to look alive before adding anything.
- Add the olive oil, onion, garlic, and carrot.: Right away the air fills with the sweet, vegetal scent of onion and the faint pepper of garlic . The carrots give a subtle sugary note that balances acidity later on. Distribute the ingredients evenly so each piece touches the hot surface; you should hear a soft sizzle as they meet the metal. Avoid overcrowding the pot, as crowding causes steaming instead of browning, which dulls flavor development.
- Cook, stirring occasionally, until the vegetables are soft, about 5 minutes.: During these minutes watch the onion turn translucent and the edges of the carrot soften, releasing a mellow, slightly caramelized scent. Stir gently to prevent sticking and ensure even cooking, scraping the bottom now and then to free any bits that cling. If the aromatics start to brown too fast, lower the heat or remove the pot momentarily, because burned pieces will leave bitter notes in your chili.
- Next, add the garlic and ground chicken and cook, stirring occasionally, until the chicken has browned, about 5 minutes.: The moment the ground chicken hits the pot you will notice a different, richer aroma as it sizzles and starts to brown. Break it into small pieces so it caramelizes evenly, creating those fond bits that deepen flavor. When the meat is mostly opaque and has small golden edges, it is ready. A typical error is leaving large clumps that steam rather than brown, robbing the chili of that savory complexity.
- Add the chicken stock and scrape any browned bits from the bottom of the pan.: Pouring in the chicken stock will create an immediate hiss as it loosens the fond, releasing a concentrated, roasted fragrance into the liquid. Use a wooden spoon to scrape the bottom thoroughly, because those browned bits hold layers of flavor and also prevent a burn notice when pressure cooking. Skipping this scraping risks a stuck bottom and a prematurely canceled cook cycle, so be thorough and patient.
- Next add the diced tomatoes, great northern beans, chili powder, cumin, sweet paprika, kosher salt, smoked paprika, dried oregano, crushed red pepper flakes, and black pepper. Stir to combine.: As the tomatoes and spices fold in, the pot will bloom with a complex, layered aroma from the chilies and smoked paprika. Stir until the mixture looks homogeneous and you cannot see separate pockets of spice or tomato. This even distribution ensures each bite is balanced. Beware of dumping spices in one spot, which can create concentrated pockets of heat and bitterness.
- Attach the lid and ensure the valve is in the 'sealing' position.: When you lock the lid and set the valve to sealing , you will notice a small click and a slight change in the airtight feel of the machine. This is crucial because pressure is what concentrates flavors quickly and tenderizes ingredients uniformly. A common oversight is not checking the sealing ring and valve for correct placement, which can lead to incomplete pressurization and uneven results.
- Set the Instant Pot to 'pressure cook manual – high' for 8 minutes.: Once the pot reaches pressure you may hear a steady, low hiss and the floating valve will rise, indicating proper sealing. Pressure cooking at high concentrates the tomato flavors and softens the beans and vegetables without disintegrating them. Resist the urge to shorten the time, because undercooking will leave beans and carrots firmer than intended and the flavors less melded.
- Once the Instant Pot has finished cooking, allow the pressure to release naturally for 5 minutes. Then, release any remaining pressure by switching the valve to the 'venting' position.: Allowing five minutes of natural release lets the liquid settle and prevents violent bubbling when you vent. You will hear a gentle change in the sound as steam trickles; then when you vent, a quick, sharp release follows. A common mistake is immediately venting, which can cause foaming or sputtering of starchy liquids, so give it that quiet interval first.
- Stir in the heavy cream and season with salt and pepper to taste.: Once the pressure is fully released and the lid is off you will see a thick, stew like consistency and a melded aroma of tomatoes, spices, and meat. Adding the heavy cream softens the acidity and yields a silky mouthfeel, making the chili feel luxurious. Stir gently until fully incorporated and taste carefully before adding extra kosher salt or black pepper , because the canned ingredients may already have salted the pot sufficiently.
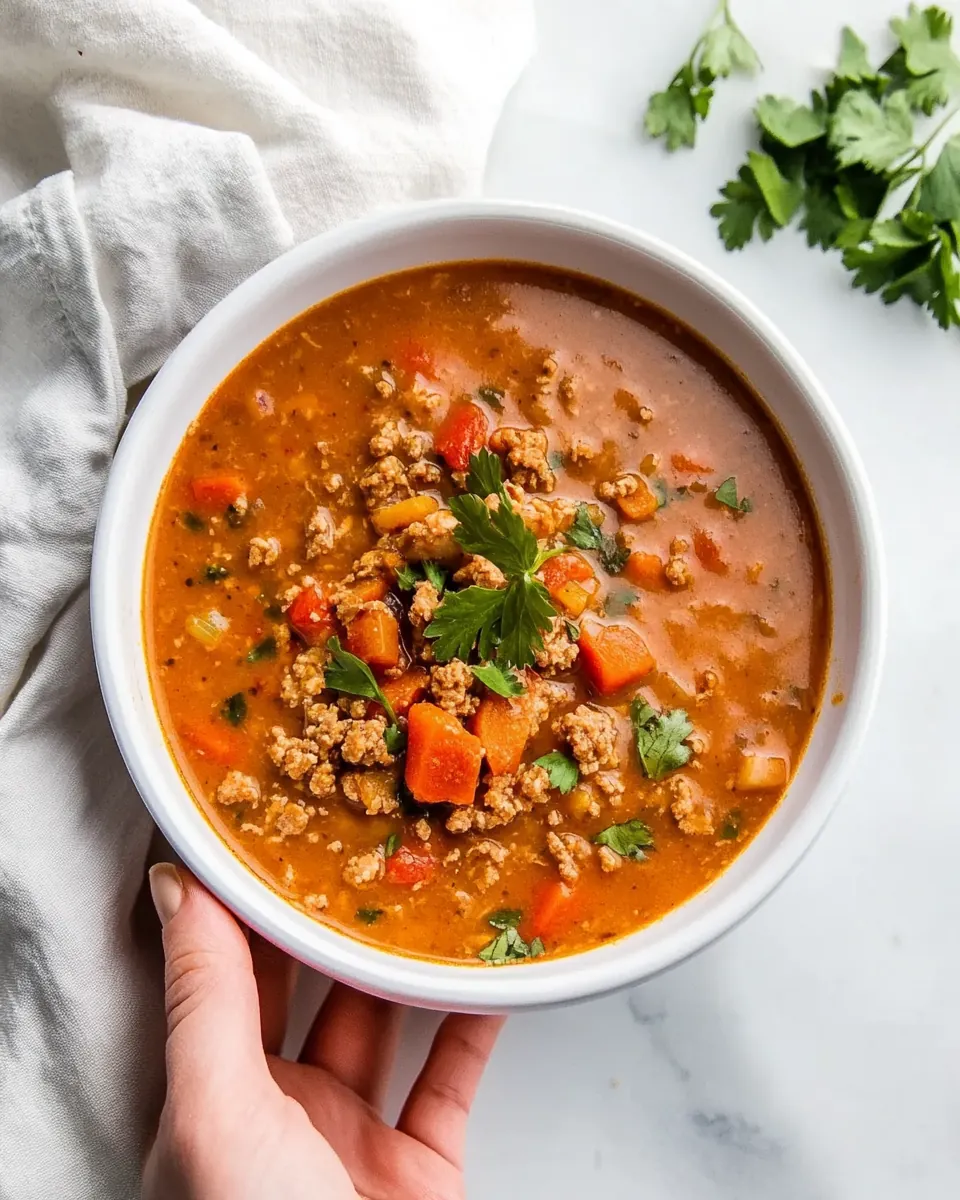
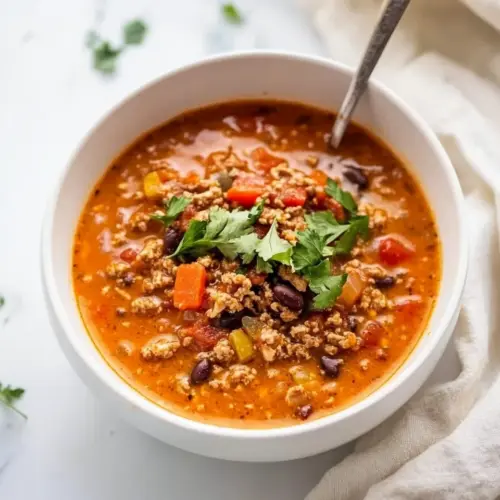
- Enjoy warm, topped with your favorite garnishes. Store any leftover chili in an airtight container in the fridge for up to three days.: The final bowl should steam invitingly, with tender beans and pieces of ground chicken suspended in a rich, slightly creamy broth. Serve hot and notice the layered aromas and texture contrasts. Cool leftovers quickly and refrigerate to maintain freshness; reheat gently to avoid separating the cream component.
Recipe Notes about Instant Pot Ground Chicken Chili
This section compiles practical, experience tested notes to help you get the best bowl every time. I expanded each point into a clear, actionable tip so you can tweak texture, spice level, and seasoning with confidence. These items highlight common pitfalls and small adjustments that make a big difference.
- Check your sealing ring: Before pressure cooking, inspect the Instant Pot sealing ring for proper placement and cleanliness, because a misaligned ring can prevent full pressurization and lead to longer cooking or burn errors.
- Adjust heat to taste: If you prefer less heat, reduce the crushed red pepper flakes by half and add a pinch more smoked paprika for smoky depth without fire, helping you control the final warmth for different palates.
- Use low sodium canned goods if possible: Choosing low sodium diced tomatoes and beans gives you more control over the final salt level so you can season to preference at the end without oversalting.
- Double the batch for easy lunches: This chili freezes and reheats well, so doubling up means you have effortless lunches for the week; just cool quickly and freeze in portioned containers.
- Stir gently after adding cream: To maintain a silky texture, fold the heavy cream in slowly off heat, as vigorous boiling after cream addition can lead to separation and an uneven mouthfeel.
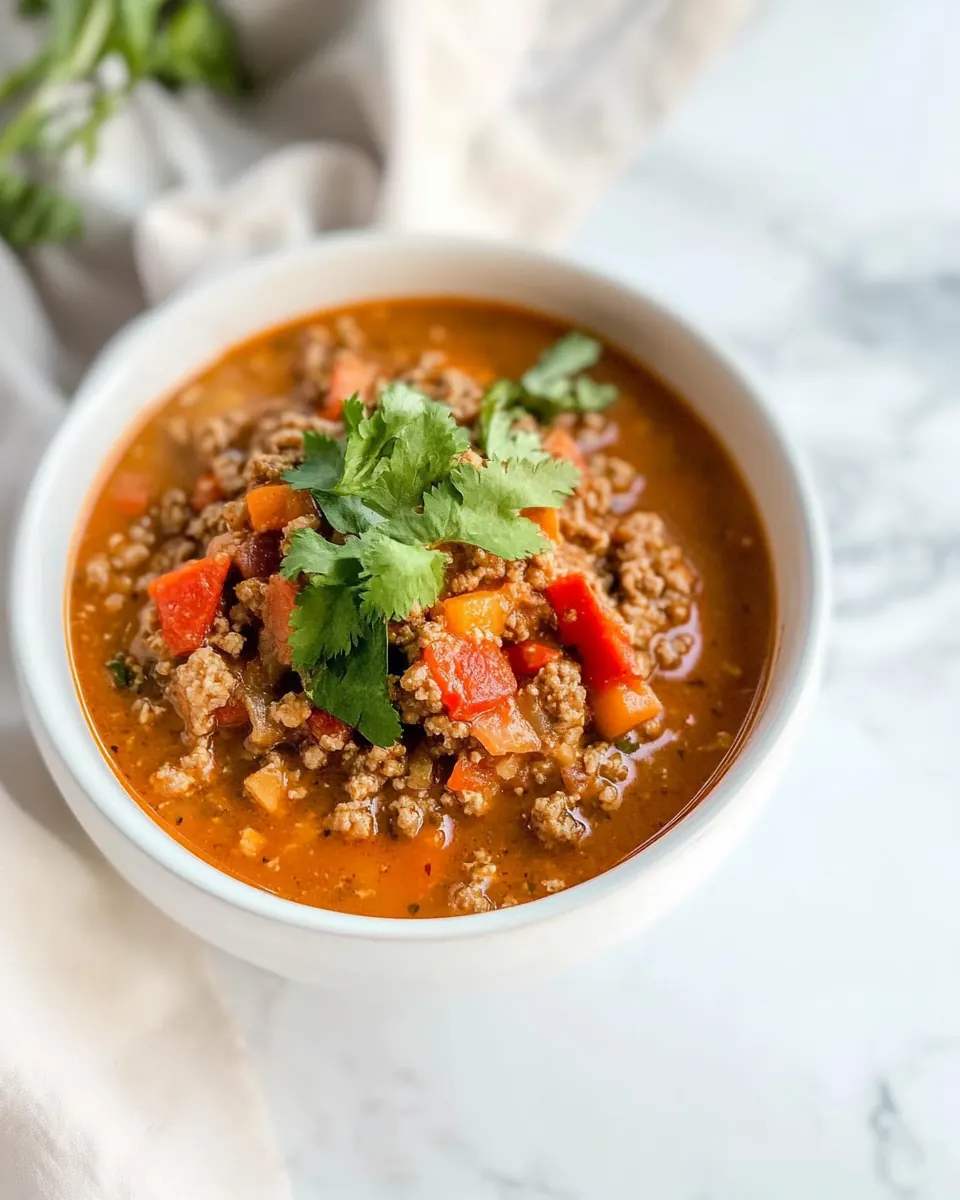
Perfect Matches for Instant Pot Ground Chicken Chili
This chili pairs wonderfully with simple sides and makes for a versatile meal whether you are feeding a casual family dinner or serving guests. Below are thoughtful serving suggestions, storage tips, and occasion pairings so you can present it effortlessly and stylishly.
- Serve with warm bread: A crusty loaf or soft rolls are excellent for soaking up the chili rather than competing with it, and they make the meal feel more substantial for dinner.
- Top with simple garnishes: A dollop of plain yogurt or a sprinkle of fresh herbs can brighten a bowl without adding complexity, enhancing texture and freshness at the table.
- Family friendly meal: This recipe suits weeknight dinners where you need comfort and speed, and you can easily adapt spice levels for children or guests who prefer milder flavors.
- Occasions and seasons: It is particularly satisfying during winter evenings, but it is lovely year round when you want something cozy; it also works well for casual gatherings and potluck style events.
- Storage and reheating: Refrigerate leftovers in airtight containers for up to three days, or freeze in portions. Reheat gently on the stove or microwave until steaming, stirring to reincorporate any separated cream.
- Make ahead advantage: The flavors meld and improve overnight, so preparing it a day ahead can reduce day of stress and deepen the overall taste.
FAQ
Conclusion
This version of Instant Pot Ground Chicken Chili stands out for its balance of speed, comfort, and layered flavor. It gives you rich, smoky, and creamy notes while still being approachable for weeknight cooking. I encourage you to give it a try on a chilly evening, especially when you want something that warms the whole house without a long cook time. Serve it simply, savor the aromas, and notice how a few thoughtful steps transform humble ingredients into a satisfying meal.
Instant Pot Ground Chicken Chili
Equipment
- Sweet Paprika
- Fire Roasted Diced Tomatoes
- Instant Pot
Ingredients
- 1 tablespoon olive oil Sauté gently in olive oil to build a flavorful base and help soften aromatics; provides a subtle fruity and peppery richness that carries spices throughout the chili. Adds healthy fats that improve mouthfeel and aid in releasing fat-soluble flavors from other ingredients.
- 1 small yellow onion, diced Sweat finely to release natural sweetness and aromatic depth; diced yellow onion contributes body and savory complexity that balances the acidity of tomatoes. Breaks down during pressure cooking to thicken the chili and meld flavors between vegetables and meat.
- 2 cloves garlic, minced Mince finely to infuse fragrant, pungent heat and bright aromatics; garlic elevates overall savory depth and pairs well with onion and spices. Releases its oils during sautéing and pressure cooking, contributing subtle sweetness and umami.
- 2 large carrots, peeled and diced Dice uniformly and cook until tender to add natural sweetness, texture, and slight earthiness; carrots also absorb surrounding flavors while contributing color and nutrients. When softened, they help thicken the chili and provide a pleasant counterpoint to the beans and tomatoes.
- 1 pound ground chicken Brown briefly to develop savory Maillard flavors and provide the primary protein and texture for the chili; ground chicken offers a lighter, leaner base than beef while soaking up spices and liquids. Breaking it apart ensures even cooking and better integration with vegetables and seasonings.
- 1 cup chicken stock Pour in to deglaze the pot and create a flavorful cooking liquid; chicken stock adds savory depth and umami that enhances the overall chili profile. Provides necessary liquid for pressure cooking and helps meld spices, tomatoes, and beans into a cohesive stew.
- 2 (14 ounce) cans diced fire roasted tomatoes Add directly to the pot for acidity, texture, and roasted tomato flavor; fire roasted diced tomatoes contribute charred, smoky notes that complement the chili spices. Their juices also help form the sauce and balance richness from cream and ground chicken.
- 2 (14 ounce) cans great northern beans, drained and rinsed Rinse and drain before adding to maintain a clean bean flavor and prevent excess starchiness; great northern beans bring creamy texture, fiber, and subtle nuttiness to the chili. Hold their shape during cooking, adding body and making the chili more substantial and satisfying.
- 1 tablespoon chili powder Sprinkle evenly to provide warm, earthy heat and foundational chili flavor; chili powder is the key seasoning that defines the dish’s profile. Blends with cumin and paprika to create a balanced, aromatic spice base that permeates the chili.
- 1 teaspoon ground cumin Season to introduce warm, nutty earthiness and to enhance savory notes throughout; ground cumin pairs with chili powder to add depth and a slightly citrusy warmth. Helps round out the flavor profile and supports other spices without overpowering them.
- 1 teaspoon sweet paprika Dust in to contribute sweet, mildly smoky flavor and vibrant color; sweet paprika offers gentle warmth and visual appeal. Supports the chili’s seasoning balance and complements both the smoked paprika and chili powder.
- 1 teaspoon kosher salt Season to control overall saltiness and bring out other flavors; kosher salt enhances the savory elements of meat, vegetables, and tomatoes. Proper seasoning ensures spices and aromatics are more pronounced and the dish tastes cohesive.
- 1/2 teaspoon smoked paprika Add sparingly to introduce a subtle smoky depth without overpowering other flavors; smoked paprika layers smokiness that harmonizes with fire roasted tomatoes. Enhances complexity and gives a barbecue-like nuance to the chili.
- 1/2 teaspoon dried oregano Sprinkle to add herbaceous, slightly bitter notes and Mediterranean warmth; dried oregano contributes an undercurrent of herbal complexity that pairs well with tomato-based dishes. Helps round out the spice blend and complements earthy beans.
- 1/2 teaspoon crushed red pepper flakes Include modestly to introduce heat and subtle chili presence; crushed red pepper flakes deliver adjustable spiciness and visual interest. Provides quick bursts of heat that can be balanced with cream or served to taste.
- 1/2 teaspoon black pepper Season to add sharp, pungent heat and to brighten flavors; freshly ground black pepper gives a warm spiciness that complements other spices. Enhances aroma and provides a final layer of seasoning to the finished chili.
- 1/2 cup heavy cream Stir in at the end to add luxurious richness, mellow spice heat, and silkiness; heavy cream softens acidity and binds flavors for a smoother finish. Contributes creamy mouthfeel and helps create a comforting, velvety chili sauce.
Instructions
- Heat the Instant Pot to the 'saute normal' function.: As the pot warms you will hear a quiet hum and feel gentle heat radiating from the base, a signal that the metal insert is ready. This preheat is essential because starting with a hot surface helps the olive oil shimmer and the onion soften without absorbing too much oil. When the surface looks glossy and you can see a faint ripple in the oil, add your aromatics promptly. A common mistake is rushing this step, which can lead to uneven browning or sticking later, so wait for the oil to look alive before adding anything.
- Add the olive oil, onion, garlic, and carrot.: Right away the air fills with the sweet, vegetal scent of onion and the faint pepper of garlic . The carrots give a subtle sugary note that balances acidity later on. Distribute the ingredients evenly so each piece touches the hot surface; you should hear a soft sizzle as they meet the metal. Avoid overcrowding the pot, as crowding causes steaming instead of browning, which dulls flavor development.
- Cook, stirring occasionally, until the vegetables are soft, about 5 minutes.: During these minutes watch the onion turn translucent and the edges of the carrot soften, releasing a mellow, slightly caramelized scent. Stir gently to prevent sticking and ensure even cooking, scraping the bottom now and then to free any bits that cling. If the aromatics start to brown too fast, lower the heat or remove the pot momentarily, because burned pieces will leave bitter notes in your chili.
- Next, add the garlic and ground chicken and cook, stirring occasionally, until the chicken has browned, about 5 minutes.: The moment the ground chicken hits the pot you will notice a different, richer aroma as it sizzles and starts to brown. Break it into small pieces so it caramelizes evenly, creating those fond bits that deepen flavor. When the meat is mostly opaque and has small golden edges, it is ready. A typical error is leaving large clumps that steam rather than brown, robbing the chili of that savory complexity.
- Add the chicken stock and scrape any browned bits from the bottom of the pan.: Pouring in the chicken stock will create an immediate hiss as it loosens the fond, releasing a concentrated, roasted fragrance into the liquid. Use a wooden spoon to scrape the bottom thoroughly, because those browned bits hold layers of flavor and also prevent a burn notice when pressure cooking. Skipping this scraping risks a stuck bottom and a prematurely canceled cook cycle, so be thorough and patient.
- Next add the diced tomatoes, great northern beans, chili powder, cumin, sweet paprika, kosher salt, smoked paprika, dried oregano, crushed red pepper flakes, and black pepper. Stir to combine.: As the tomatoes and spices fold in, the pot will bloom with a complex, layered aroma from the chilies and smoked paprika. Stir until the mixture looks homogeneous and you cannot see separate pockets of spice or tomato. This even distribution ensures each bite is balanced. Beware of dumping spices in one spot, which can create concentrated pockets of heat and bitterness.
- Attach the lid and ensure the valve is in the 'sealing' position.: When you lock the lid and set the valve to sealing , you will notice a small click and a slight change in the airtight feel of the machine. This is crucial because pressure is what concentrates flavors quickly and tenderizes ingredients uniformly. A common oversight is not checking the sealing ring and valve for correct placement, which can lead to incomplete pressurization and uneven results.
- Set the Instant Pot to 'pressure cook manual - high' for 8 minutes.: Once the pot reaches pressure you may hear a steady, low hiss and the floating valve will rise, indicating proper sealing. Pressure cooking at high concentrates the tomato flavors and softens the beans and vegetables without disintegrating them. Resist the urge to shorten the time, because undercooking will leave beans and carrots firmer than intended and the flavors less melded.
- Once the Instant Pot has finished cooking, allow the pressure to release naturally for 5 minutes. Then, release any remaining pressure by switching the valve to the 'venting' position.: Allowing five minutes of natural release lets the liquid settle and prevents violent bubbling when you vent. You will hear a gentle change in the sound as steam trickles; then when you vent, a quick, sharp release follows. A common mistake is immediately venting, which can cause foaming or sputtering of starchy liquids, so give it that quiet interval first.
- Stir in the heavy cream and season with salt and pepper to taste.: Once the pressure is fully released and the lid is off you will see a thick, stew like consistency and a melded aroma of tomatoes, spices, and meat. Adding the heavy cream softens the acidity and yields a silky mouthfeel, making the chili feel luxurious. Stir gently until fully incorporated and taste carefully before adding extra kosher salt or black pepper , because the canned ingredients may already have salted the pot sufficiently.
- Enjoy warm, topped with your favorite garnishes. Store any leftover chili in an airtight container in the fridge for up to three days.: The final bowl should steam invitingly, with tender beans and pieces of ground chicken suspended in a rich, slightly creamy broth. Serve hot and notice the layered aromas and texture contrasts. Cool leftovers quickly and refrigerate to maintain freshness; reheat gently to avoid separating the cream component.
Notes
- Check your sealing ring: Before pressure cooking, inspect the Instant Pot sealing ring for proper placement and cleanliness, because a misaligned ring can prevent full pressurization and lead to longer cooking or burn errors.
- Adjust heat to taste: If you prefer less heat, reduce the crushed red pepper flakes by half and add a pinch more smoked paprika for smoky depth without fire, helping you control the final warmth for different palates.
- Use low sodium canned goods if possible: Choosing low sodium diced tomatoes and beans gives you more control over the final salt level so you can season to preference at the end without oversalting.
- Double the batch for easy lunches: This chili freezes and reheats well, so doubling up means you have effortless lunches for the week; just cool quickly and freeze in portioned containers.
- Stir gently after adding cream: To maintain a silky texture, fold the heavy cream in slowly off heat, as vigorous boiling after cream addition can lead to separation and an uneven mouthfeel.