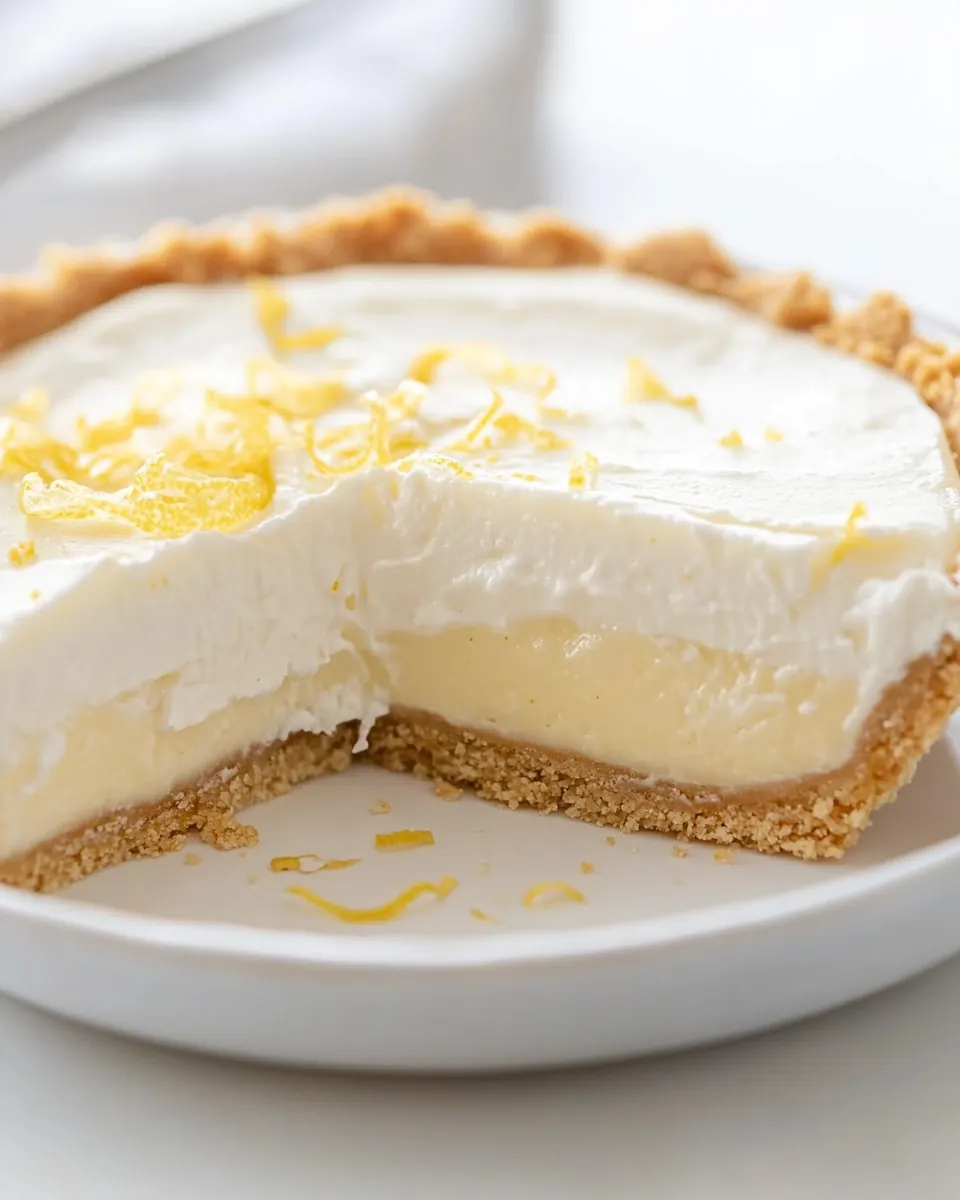
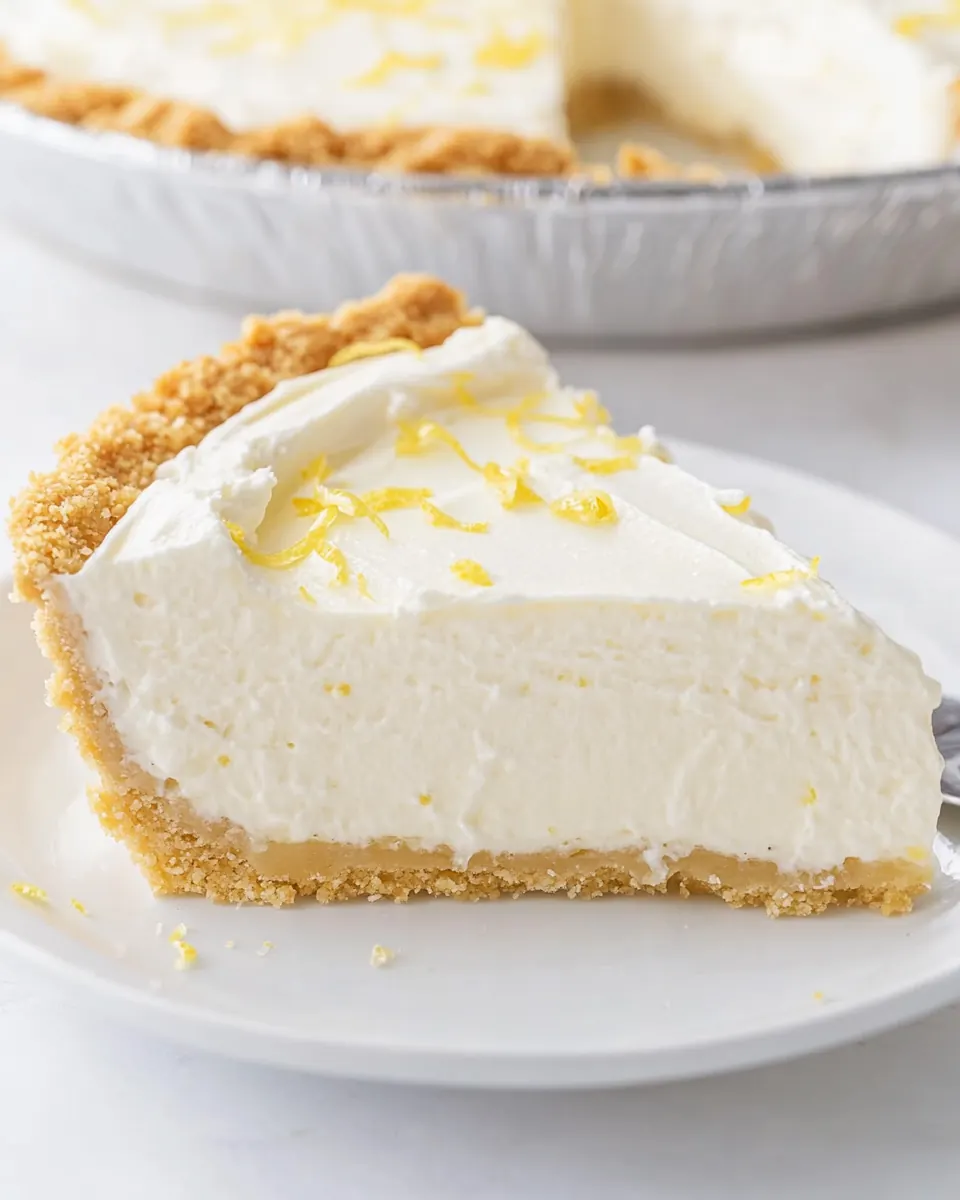
No Bake Lemon Icebox Pie
No Bake Lemon Icebox Pie is one of those recipes I reach for when the heat settles in and everyone wants something bright, cool, and utterly uncomplicated.
My earliest memories of this pie are tied to a sunlit kitchen where my aunt let me press crumbs into the pan, a task I took exceedingly seriously as a kid. I remember the sharp pop of lemon when she zested, the sweet hum of sweetened condensed milk as she poured, and the way the whole kitchen smelled like sunshine. That memory shaped how I make this pie today, because I still love the ritual of assembling something that tastes like summer without turning on the oven.
Over the years I learned small adjustments that made the texture silkier and the crust hold together better, and I like to tell guests that the secret is patience more than technique. The pie is forgiving, which is why it became my go to for impromptu gatherings, potlucks, and lazy weekend desserts. Whenever I want a dessert that feels special but won’t steal the evening, I reach for this recipe.
Recipe Snapshot
20 mins
20 mins
Easy
320 kcal
American
Gluten-Free, Low FODMAP
Desserts
9 inch pie pan, food processor, medium bowl, spatula
Why This No Bake Lemon Icebox Pie Is a Winner
Bright, simple flavor that sings
I love how No Bake Lemon Icebox Pie delivers an immediate burst of citrus without overwhelming the palate. The combination of fresh lemon juice and zest cuts through the richness, making each bite lively and refreshing. It’s the kind of dessert that tastes like it belongs at a sunny table, and I always notice people reach for seconds.
Effortless assembly with big payoff
This pie is charming because it asks for almost no time at the stove, and you still end up with a showstopper. From my experience, the pie rewards clean, simple technique rather than complicated steps. You get creamy filling, a crisp crumb crust, and a cool texture that feels luxurious, all with minimal fuss.
Flexible and forgiving
I often adapt this dessert depending on what I have on hand. The structure is forgiving, so slight variations in zest or chill time do not ruin the result. Because it is a no bake pie, it’s wonderfully forgiving for hot days, last minute guests, or when oven space is at a premium.
Textures that contrast beautifully
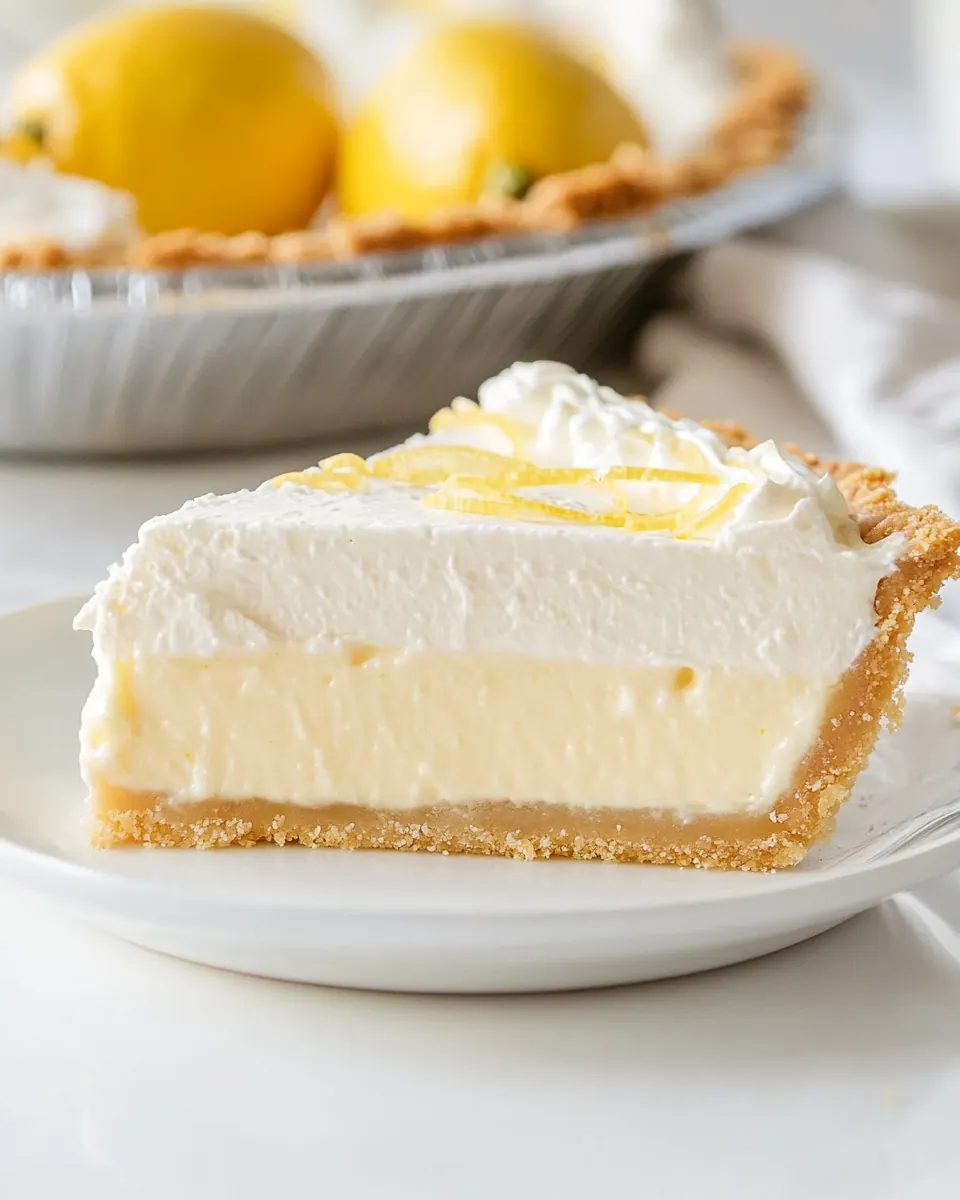
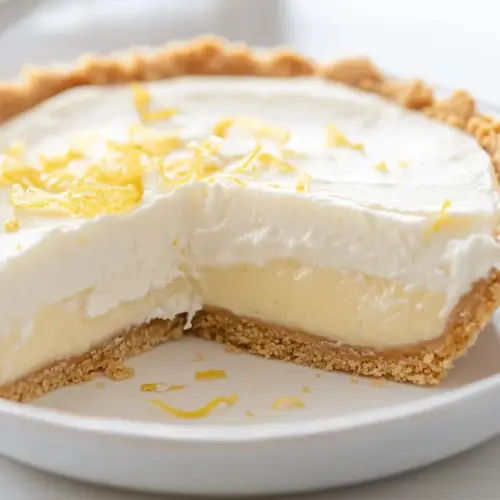
The crunchy graham cracker crust paired with the smooth, tangy filling and the airy whipped topping creates texture contrast that keeps the palate engaged. I enjoy how the crust gives a satisfying snap while the filling dissolves into a silky lemon-sweet finish.
Make ahead friendly
I adore desserts that can be made in advance, and this pie is a champion at that. You can assemble it, freeze or chill it, and serve it later without losing much of its charm. For gatherings, that reliability is priceless to me, because it frees up time for the rest of the meal.
Ingredients Required for No Bake Lemon Icebox Pie
These ingredients are deliberately straightforward, with a few key players carrying most of the flavor. The crust relies on simple pantry staples to provide a crunchy base, while the filling leans on creamy, sweet, and bright elements to create a balanced profile. Each item has a clear role, and together they form a pie that is greater than the sum of its parts.
- 12 whole graham crackers 1 1/2 cups crushed: Crushes into fine crumbs to form the pie crust foundation; combines with melted butter and sugar to bind and provide a crisp, slightly sweet base for the filling. Adds texture and a toasty, slightly nutty flavor that complements the lemon. Can be pressed firmly into a pie dish to create an even, stable shell for chilling.
- 7 tablespoons melted butter: Coats the crushed cracker crumbs to bind the crust and deliver a rich, buttery flavor; melts easily to distribute moisture and help the crust set when chilled. Enhances mouthfeel and prevents the crust from crumbling. Use enough to achieve a cohesive pressable mixture.
- 1/4 cup granulated sugar: Sweetens the crust mixture and balances the lemon tartness in the filling when used; dissolves into the crumbs to provide uniform sweetness. Works with butter to create a nicely browned flavor note in the crust. Measure carefully to avoid an overly sweet base.
- 1/4 teaspoons salt: Balances sweetness and enhances overall flavor by adding subtle saltiness to the crust; helps to brighten and round the other flavors. A small amount is sufficient due to its concentrated effect. Ensures the taste profile is well-rounded rather than flat.
- 8 ounce cream cheese: Softens and adds creaminess to the filling when whipped smooth; contributes a tangy, dairy-rich mouthfeel that stabilizes the pie. Works with powdered sugar and sour cream to create a smooth, spreadable texture. Should be at room temperature for easy blending.
- 14 ounce can sweetened condensed milk: Adds sweetness, creaminess, and body to the filling while helping to create a thick, custard-like consistency without baking. Provides a dense, condensed milk sweetness that balances the citrus acidity. Blends smoothly with cream cheese and lemon juice for a cohesive filling.
- 1/2 cup fresh lemon juice: Delivers bright acidity and citrus flavor that defines the pie’s lemon character; reacts with condensed milk and cream cheese to slightly thicken and set the filling. Fresh juice provides the cleanest, most vibrant taste compared with bottled alternatives. Adjust quantity for desired tartness.
- Zest of 1 lemon: Imparts concentrated citrus aroma and a burst of lemon oil that elevates the overall flavor; finely grated zest enhances aroma without adding extra acidity. Scatters flecks of yellow that signal fresh lemon presence. Use just the outer yellow peel to avoid bitterness from the pith.
- 8 ounce Cool Whip: Lightens and aerates the filling while contributing a sweet, creamy texture; adds volume and a smooth, cloud-like consistency that makes the pie easier to slice. Stabilized whipped topping keeps the filling fluffy when chilled. Fold gently to preserve airiness.
- 1/2 cups sour cream: Contributes tang and silky texture to the filling while balancing sweetness; adds a subtle creamy tartness that complements the lemon. Helps achieve a smooth mouthfeel and slightly more body than using whipped topping alone. Stir in gently to maintain a uniform mixture.
- 1/4 cup powdered sugar: Sweetens and refines the filling texture by dissolving smoothly into the cream cheese and sour cream; helps stabilize and slightly thicken the mixture. Provides a smooth sweet finish without graininess. Sift if needed to avoid lumps when blending into the filling.
Cooking Method for No Bake Lemon Icebox Pie
This recipe is about calm, attentive assembly more than active cooking. The directions guide you through forming a sturdy crust, creating a silky lemon filling, and finishing with a light topping, then letting the freezer do the rest. Below, I expand each instruction into step by step notes that emphasize what you should sense, why the detail matters, and common pitfalls to avoid.
- Set out a 9-inch pie pan and a food processor. Place the graham crackers in the food processor. Lock the lid into place and pulse into a fine crumb. Then add in the melted butter, sugar, and salt. Pulse to combine.: Feel the cool metal of the pie pan as you place it on the counter, and hear the muted clack of the food processor as it settles into place. The reason for these tools is simple, the pan defines the shape while the processor ensures an even crumb texture for the crust, which helps it pack tightly and hold slices. One sensory cue to watch for is the even, sandy look of the crumbs, not large jagged bits. A common mistake here is using a too large pan which will make the crust too thin, or skipping the processor and ending up with uneven crumbs.
- Dump the graham cracker crumble into the pie pan. Use your hands to press it into an even layer over the bottom of the pan and up the sides. Refrigerate until ready to fill.: As the crackers drop in you’ll notice a light, sweet aroma. Pulse until the crumbs sound fine and uniform, a steady, rhythmic chop rather than a long continuous grind. The why is that uniform crumbs pack better and create a compact base, preventing crumbling. If the crumbs feel mealy rather than cohesive when pinched, it usually means they need slightly more butter or more pulsing to break down any remaining chunks.
- Wipe out the food processor bowl. Then add in the cream cheese, sweetened condensed milk, lemon juice and lemon zest. Puree until smooth. Pour/scoop the filling into the pie crust and continue to refrigerate.: The pulsing will change the sound from distinct crunches to a steadier hum, and the crumbs should look like coarse sand. This stage matters because over processing can create dust while under processing leaves big pieces, both of which affect crust integrity. One troubleshooting tip is to scrape the sides if some pieces cling to the bowl, ensuring an even texture.
- In a medium bowl, mix the sour cream and powdered sugar. Stir until smooth. Then fold in the Cool Whip. Spread the topping over the lemon pie filling and place in the freezer for at least 4 hours, undisturbed.: Pouring the warm melted butter will release a richer scent, and the mixture should hold together when pressed between fingers. That tackiness signals it will compact nicely in the pan. The balance of sugar and salt fine tunes flavor, so measure carefully; too much salt will be noticeable, and too little will make the crust taste flat.
- When ready to serve, cut into pieces while frozen. Let each piece sit out at room temperature for 10 minutes, then serve slightly softened. Garnish with lemon slices if desired.: Short pulses until the mixture clumps when pinched is the sensory guide here. Why this matters is because you want enough butter to bind, but not so much that the crust becomes greasy. A common mistake is adding extra butter to compensate for poor packing rather than pressing firmly and evenly.
- Dump the graham cracker crumble into the pie pan: The sound of crumbs landing in the pan is satisfying, and as you spread them notice how they form a layer. Work quickly so the butter does not pool. The reason to transfer promptly is to shape a consistent base and sides for the filling to rest on. If the crumbs are too loose, pressing will be harder and slices may fall apart later.
- Use your hands to press it into an even layer over the bottom of the pan and up the sides: Pressing with the heel of your hand gives a firm, even surface, and you’ll feel the mixture compact under pressure. A neat rim is important because it helps the filling sit neatly and slice cleanly. Press firmly and evenly to avoid gaps that lead to a crumbly crust, and resist the temptation to over press which can make the crust too dense.
- Refrigerate until ready to fill: Chilling tightens the crust and solidifies the butter, creating a crisp edge. You should feel the pan cool under your hands after some time in the fridge, and that cooling is what helps the crust hold its shape when cut. A common mistake is not chilling long enough, which results in a soft base that crumbles when serving.
- Wipe out the food processor bowl: Cleaning the bowl keeps flavors pure and prevents lumps in the filling, and the cool, clean surface helps the cream cheese integrate smoothly. Any residual crumb bits could create texture inconsistencies, so take a moment to ensure it’s clean. A quick wipe prevents the filling from developing unexpected grainy pockets.
- Then add in the cream cheese, sweetened condensed milk, lemon juice and lemon zest: When these go in, the air fills with a tangy, sweet perfume. The softened cream cheese should blend into a luxuriously smooth base while the sweetened condensed milk contributes glossy sweetness. Fresh lemon juice and zest lift the entire mixture, creating a bright aromatic presence. If the cream cheese is still cold, you may get lumps, so always soften it to room temperature first.
- Puree until smooth: As the motor runs, you’ll notice the mixture turn glossy and consistent, with no visible streaks of cream cheese. This smoothness is crucial for a silky mouthfeel and even set. Over processing can incorporate too much air, making the filling less dense, so stop when uniformly smooth. If the texture seems curdled, a gentle scrape and brief additional blending usually rescues it.
- Pour scoop the filling into the pie crust and continue to refrigerate: Pouring should be steady, and you’ll see the filling settle into the crust with a satin sheen. Refrigeration helps it firm slightly before adding the topping, which improves sliceability. If the filling seems too loose, another chill in the freezer for a short burst helps it set without freezing solid.
- In a medium bowl mix the sour cream and powdered sugar: Mixing these yields a smooth, slightly tangy sweet layer that balances the filling. You’ll notice a velvety texture as the sour cream and powdered sugar combine, and this step tempers the sweetness while adding creaminess. Lumpy sugar or cold sour cream can create gritty spots, so ensure both are at compatible temperatures.
- Stir until smooth: The mixture should look even and glossy, free of sugar grains, which indicates it will spread smoothly atop the pie. Why this matters is that a smooth topping gives an elegant finish and melds with the lemon layer beneath. If it seems too thin, a touch more powdered sugar will thicken it, but add cautiously.
- Then fold in the Cool Whip: Folding in Cool Whip introduces air and lightness, creating a cloud like topping. Use gentle lifts to maintain the airy texture, and watch the mixture become pillowy. Over folding will deflate the volume and result in a denser topping, so stop as soon as it looks homogenous.
- Spread the topping over the lemon pie filling and place in the freezer for at least 4 hours undisturbed: The surface should look smooth and slightly firm once chilled. Freezing undisturbed helps the layers set without forming ice crystals or separating. The freezer time is key for sliceability, and a frequent error is moving the pie too soon which causes a sloppy cut.
- When ready to serve cut into pieces while frozen: Cutting while frozen gives the cleanest slices, with defined layers and minimal smearing. Use a sharp knife warmed briefly under hot water for neater edges, wiping between cuts. If you slice too soon, the filling will smear and the crust can crumble.
- Let each piece sit out at room temperature for 10 minutes then serve slightly softened: The short rest lets the filling soften to an ideal texture, where it is creamy but still holds shape. You’ll notice aromas bloom as it warms, and the texture becomes silkier on the tongue. Leaving it out longer can make slices too soft to handle, so timing matters.
- Garnish with lemon slices if desired: A thin lemon slice adds visual freshness and a hint of extra citrus aroma, but is optional. If you use slices, place them just before serving to avoid moisture drawing into the topping. Skipping garnish keeps the presentation minimalist and clean.
Pro Tips and Tweaks
I like to share small tricks that make assembly smoother and the final pie look polished. These tweaks save time and improve texture without changing the spirit of the recipe.
- Crumb consistency Use a food processor to achieve an even, sandy crumb which packs tightly and forms a sturdy crust.
- Butter balance Add the melted butter gradually so the crumbs clump when pinched, ensuring the crust is not greasy.
- Cream cheese temperature Allow the cream cheese to come to room temperature to blend into a perfectly smooth filling.
- Lemon freshness Always use fresh lemon juice and zest for the brightest aroma, which bottled alternatives cannot match.
- Freezer finish Freeze the pie undisturbed for at least four hours to ensure clean slicing and a firm texture.
How to Serve No Bake Lemon Icebox Pie
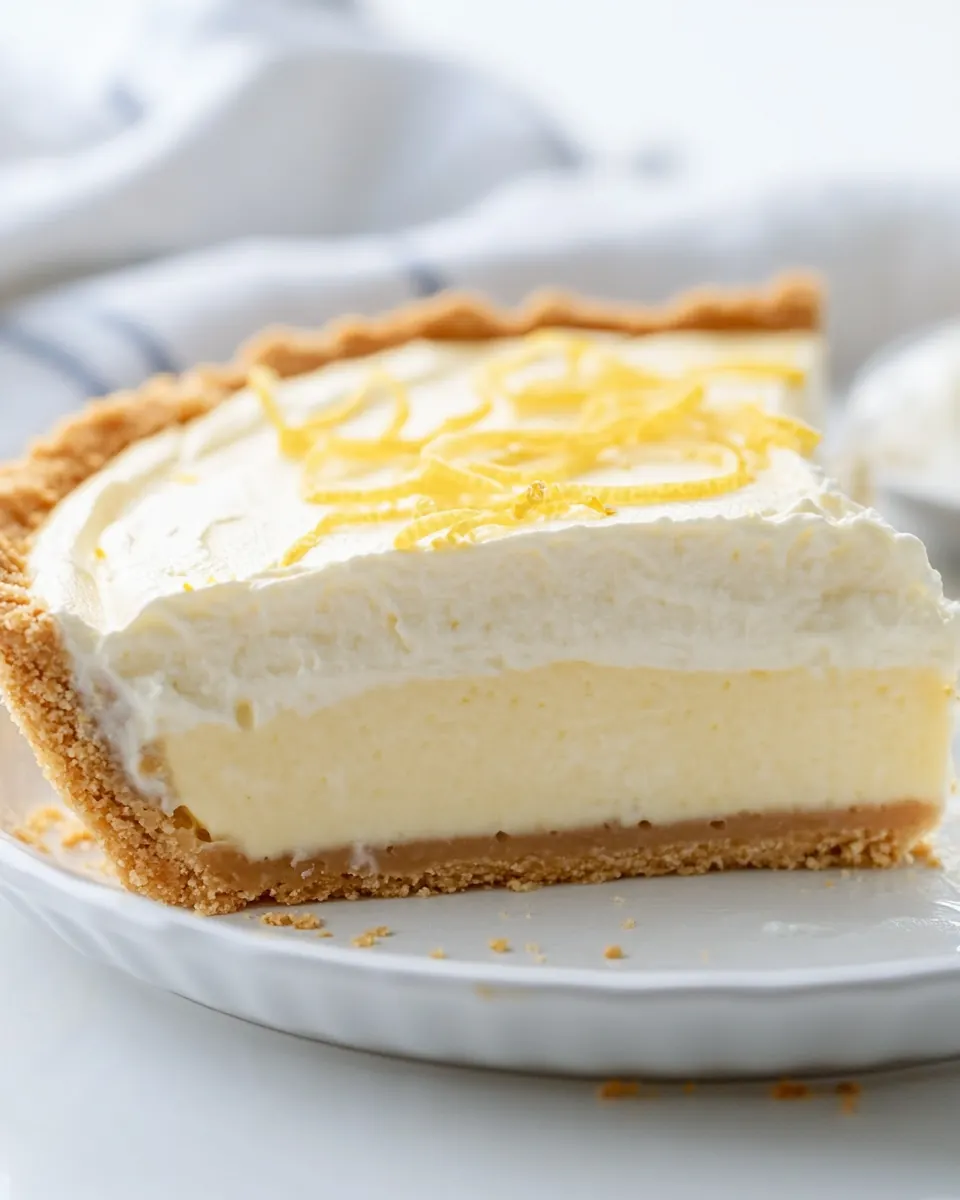
This pie is versatile for casual family dinners, summer potlucks, or holiday tables where you want a cool finish. Serve slightly softened to reveal a silky filling that still holds clean slices. Consider simple garnishes and pairing suggestions that let the lemon shine.
- Serve chilled Present each slice slightly softened after a ten minute rest so the filling is creamy while maintaining structure.
- Garnish simply Add a thin lemon slice or a light dusting of powdered sugar just before serving for a fresh look.
- Occasions Ideal for summer gatherings, potlucks, and holiday buffets when you need a make ahead dessert that travels well.
- Storage Keep the pie wrapped in plastic in the refrigerator for four to five days, or freeze well wrapped for up to three months for longer storage.
- Pairings Serve with light tea, coffee, or a simple fruit salad to complement the citrus without overpowering it.
FAQ
Conclusion
What makes this No Bake Lemon Icebox Pie special is its effortless assembly combined with bright lemon flavor and a satisfyingly crisp crust. Give it a try the next time you want a make ahead dessert that looks and tastes like you spent far more time on it than you actually did. It’s friendly for summer gatherings and reliable for last minute entertaining, so I hope you enjoy this pie as much as I do and that it becomes a staple when you want a fresh, cooling finish to a meal.
No Bake Lemon Icebox Pie
Equipment
- 9-inch pie pan
- Food Processor
- Medium Bowl
- Spatula
Ingredients
- 12 whole graham crackers 1 1/2 cups crushed Crushes into fine crumbs to form the pie crust foundation; combines with melted butter and sugar to bind and provide a crisp, slightly sweet base for the filling. Adds texture and a toasty, slightly nutty flavor that complements the lemon. Can be pressed firmly into a pie dish to create an even, stable shell for chilling.
- 7 tablespoons melted butter Coats the crushed cracker crumbs to bind the crust and deliver a rich, buttery flavor; melts easily to distribute moisture and help the crust set when chilled. Enhances mouthfeel and prevents the crust from crumbling. Use enough to achieve a cohesive pressable mixture.
- 1/4 cup granulated sugar Sweetens the crust mixture and balances the lemon tartness in the filling when used; dissolves into the crumbs to provide uniform sweetness. Works with butter to create a nicely browned flavor note in the crust. Measure carefully to avoid an overly sweet base.
- 1/4 teaspoons salt Balances sweetness and enhances overall flavor by adding subtle saltiness to the crust; helps to brighten and round the other flavors. A small amount is sufficient due to its concentrated effect. Ensures the taste profile is well-rounded rather than flat.
- 8 ounce cream cheese Softens and adds creaminess to the filling when whipped smooth; contributes a tangy, dairy-rich mouthfeel that stabilizes the pie. Works with powdered sugar and sour cream to create a smooth, spreadable texture. Should be at room temperature for easy blending.
- 14 ounce can sweetened condensed milk Adds sweetness, creaminess, and body to the filling while helping to create a thick, custard-like consistency without baking. Provides a dense, condensed milk sweetness that balances the citrus acidity. Blends smoothly with cream cheese and lemon juice for a cohesive filling.
- 1/2 cup fresh lemon juice Delivers bright acidity and citrus flavor that defines the pie’s lemon character; reacts with condensed milk and cream cheese to slightly thicken and set the filling. Fresh juice provides the cleanest, most vibrant taste compared with bottled alternatives. Adjust quantity for desired tartness.
- Zest of 1 lemon Imparts concentrated citrus aroma and a burst of lemon oil that elevates the overall flavor; finely grated zest enhances aroma without adding extra acidity. Scatters flecks of yellow that signal fresh lemon presence. Use just the outer yellow peel to avoid bitterness from the pith.
- 8 ounce Cool Whip Lightens and aerates the filling while contributing a sweet, creamy texture; adds volume and a smooth, cloud-like consistency that makes the pie easier to slice. Stabilized whipped topping keeps the filling fluffy when chilled. Fold gently to preserve airiness.
- 1/2 cups sour cream Contributes tang and silky texture to the filling while balancing sweetness; adds a subtle creamy tartness that complements the lemon. Helps achieve a smooth mouthfeel and slightly more body than using whipped topping alone. Stir in gently to maintain a uniform mixture.
- 1/4 cup powdered sugar Sweetens and refines the filling texture by dissolving smoothly into the cream cheese and sour cream; helps stabilize and slightly thicken the mixture. Provides a smooth sweet finish without graininess. Sift if needed to avoid lumps when blending into the filling.
Instructions
- Set out a 9-inch pie pan and a food processor. Place the graham crackers in the food processor. Lock the lid into place and pulse into a fine crumb. Then add in the melted butter, sugar, and salt. Pulse to combine.: Feel the cool metal of the pie pan as you place it on the counter, and hear the muted clack of the food processor as it settles into place. The reason for these tools is simple, the pan defines the shape while the processor ensures an even crumb texture for the crust, which helps it pack tightly and hold slices. One sensory cue to watch for is the even, sandy look of the crumbs, not large jagged bits. A common mistake here is using a too large pan which will make the crust too thin, or skipping the processor and ending up with uneven crumbs.
- Dump the graham cracker crumble into the pie pan. Use your hands to press it into an even layer over the bottom of the pan and up the sides. Refrigerate until ready to fill.: As the crackers drop in you’ll notice a light, sweet aroma. Pulse until the crumbs sound fine and uniform, a steady, rhythmic chop rather than a long continuous grind. The why is that uniform crumbs pack better and create a compact base, preventing crumbling. If the crumbs feel mealy rather than cohesive when pinched, it usually means they need slightly more butter or more pulsing to break down any remaining chunks.
- Wipe out the food processor bowl. Then add in the cream cheese, sweetened condensed milk, lemon juice and lemon zest. Puree until smooth. Pour/scoop the filling into the pie crust and continue to refrigerate.: The pulsing will change the sound from distinct crunches to a steadier hum, and the crumbs should look like coarse sand. This stage matters because over processing can create dust while under processing leaves big pieces, both of which affect crust integrity. One troubleshooting tip is to scrape the sides if some pieces cling to the bowl, ensuring an even texture.
- In a medium bowl, mix the sour cream and powdered sugar. Stir until smooth. Then fold in the Cool Whip. Spread the topping over the lemon pie filling and place in the freezer for at least 4 hours, undisturbed.: Pouring the warm melted butter will release a richer scent, and the mixture should hold together when pressed between fingers. That tackiness signals it will compact nicely in the pan. The balance of sugar and salt fine tunes flavor, so measure carefully; too much salt will be noticeable, and too little will make the crust taste flat.
- When ready to serve, cut into pieces while frozen. Let each piece sit out at room temperature for 10 minutes, then serve slightly softened. Garnish with lemon slices if desired.: Short pulses until the mixture clumps when pinched is the sensory guide here. Why this matters is because you want enough butter to bind, but not so much that the crust becomes greasy. A common mistake is adding extra butter to compensate for poor packing rather than pressing firmly and evenly.
- Dump the graham cracker crumble into the pie pan: The sound of crumbs landing in the pan is satisfying, and as you spread them notice how they form a layer. Work quickly so the butter does not pool. The reason to transfer promptly is to shape a consistent base and sides for the filling to rest on. If the crumbs are too loose, pressing will be harder and slices may fall apart later.
- Use your hands to press it into an even layer over the bottom of the pan and up the sides: Pressing with the heel of your hand gives a firm, even surface, and you’ll feel the mixture compact under pressure. A neat rim is important because it helps the filling sit neatly and slice cleanly. Press firmly and evenly to avoid gaps that lead to a crumbly crust, and resist the temptation to over press which can make the crust too dense.
- Refrigerate until ready to fill: Chilling tightens the crust and solidifies the butter, creating a crisp edge. You should feel the pan cool under your hands after some time in the fridge, and that cooling is what helps the crust hold its shape when cut. A common mistake is not chilling long enough, which results in a soft base that crumbles when serving.
- Wipe out the food processor bowl: Cleaning the bowl keeps flavors pure and prevents lumps in the filling, and the cool, clean surface helps the cream cheese integrate smoothly. Any residual crumb bits could create texture inconsistencies, so take a moment to ensure it’s clean. A quick wipe prevents the filling from developing unexpected grainy pockets.
- Then add in the cream cheese, sweetened condensed milk, lemon juice and lemon zest: When these go in, the air fills with a tangy, sweet perfume. The softened cream cheese should blend into a luxuriously smooth base while the sweetened condensed milk contributes glossy sweetness. Fresh lemon juice and zest lift the entire mixture, creating a bright aromatic presence. If the cream cheese is still cold, you may get lumps, so always soften it to room temperature first.
- Puree until smooth: As the motor runs, you’ll notice the mixture turn glossy and consistent, with no visible streaks of cream cheese. This smoothness is crucial for a silky mouthfeel and even set. Over processing can incorporate too much air, making the filling less dense, so stop when uniformly smooth. If the texture seems curdled, a gentle scrape and brief additional blending usually rescues it.
- Pour scoop the filling into the pie crust and continue to refrigerate: Pouring should be steady, and you’ll see the filling settle into the crust with a satin sheen. Refrigeration helps it firm slightly before adding the topping, which improves sliceability. If the filling seems too loose, another chill in the freezer for a short burst helps it set without freezing solid.
- In a medium bowl mix the sour cream and powdered sugar: Mixing these yields a smooth, slightly tangy sweet layer that balances the filling. You’ll notice a velvety texture as the sour cream and powdered sugar combine, and this step tempers the sweetness while adding creaminess. Lumpy sugar or cold sour cream can create gritty spots, so ensure both are at compatible temperatures.
- Stir until smooth: The mixture should look even and glossy, free of sugar grains, which indicates it will spread smoothly atop the pie. Why this matters is that a smooth topping gives an elegant finish and melds with the lemon layer beneath. If it seems too thin, a touch more powdered sugar will thicken it, but add cautiously.
- Then fold in the Cool Whip: Folding in Cool Whip introduces air and lightness, creating a cloud like topping. Use gentle lifts to maintain the airy texture, and watch the mixture become pillowy. Over folding will deflate the volume and result in a denser topping, so stop as soon as it looks homogenous.
- Spread the topping over the lemon pie filling and place in the freezer for at least 4 hours undisturbed: The surface should look smooth and slightly firm once chilled. Freezing undisturbed helps the layers set without forming ice crystals or separating. The freezer time is key for sliceability, and a frequent error is moving the pie too soon which causes a sloppy cut.
- When ready to serve cut into pieces while frozen: Cutting while frozen gives the cleanest slices, with defined layers and minimal smearing. Use a sharp knife warmed briefly under hot water for neater edges, wiping between cuts. If you slice too soon, the filling will smear and the crust can crumble.
- Let each piece sit out at room temperature for 10 minutes then serve slightly softened: The short rest lets the filling soften to an ideal texture, where it is creamy but still holds shape. You’ll notice aromas bloom as it warms, and the texture becomes silkier on the tongue. Leaving it out longer can make slices too soft to handle, so timing matters.
- Garnish with lemon slices if desired: A thin lemon slice adds visual freshness and a hint of extra citrus aroma, but is optional. If you use slices, place them just before serving to avoid moisture drawing into the topping. Skipping garnish keeps the presentation minimalist and clean.
Notes
- Crumb consistency Use a food processor to achieve an even, sandy crumb which packs tightly and forms a sturdy crust.
- Butter balance Add the melted butter gradually so the crumbs clump when pinched, ensuring the crust is not greasy.
- Cream cheese temperature Allow the cream cheese to come to room temperature to blend into a perfectly smooth filling.
- Lemon freshness Always use fresh lemon juice and zest for the brightest aroma, which bottled alternatives cannot match.
- Freezer finish Freeze the pie undisturbed for at least four hours to ensure clean slicing and a firm texture.