Instant Pot Creamy Mashed Potatoes
Instant Pot Creamy Mashed Potatoes is the kind of recipe I turn to when I want comfort without a fuss. I still remember the first time I swapped my usual stovetop routine for an Instant Pot method, the house buzzing with steam while I laughed at how smooth the potatoes turned out, practically begging to be smothered in butter. That evening felt like a little triumph, the kind that makes you grin while you spoon a generous helping onto your plate.
There are moments when you want your side dish to feel like a warm hug, and this version of Instant Pot Creamy Mashed Potatoes always delivers. I like to think of it as my short cut to something that tastes like slow Sunday cooking, except it happens in a fraction of the time. The garlic steams with the potatoes so it loses its sharpness and becomes sweet and mellow, which is a small trick that lifts the whole dish.
Over the years I have served these at casual weeknight dinners and busier holiday spreads, and every time people ask for the secret. I usually shrug and tell them there is no secret, just quality ingredients and a little patience at the end while you warm the cream and butter together. That tiny extra step, trust me, is what turns creamy into luxurious.
Recipe Snapshot
22 mins
10 mins
12 mins
Easy
250 kcal
American
Gluten-Free, Low FODMAP
Side Dishes
Instant Pot, Steamer wire rack, Potato ricer, Small saucepan, Tongs
The Beauty of This Instant Pot Creamy Mashed Potatoes
Reliable Speed and Texture
I adore how quickly Instant Pot Creamy Mashed Potatoes brings dinner to the table. The pressure cooker cooks the potatoes evenly so you won’t find stubborn hard centers, and that uniform tenderness makes ricing or mashing effortless. When I use this method, the texture becomes consistently smooth, which saves time and keeps everyone happy, especially on busy nights.
Garlic Infusion Without the Bite
Steaming the garlic with the potatoes is a small technique I swear by. I find the garlic loses the raw sharpness and takes on a silky, sweet quality that blends seamlessly. I like that I can control the flavor without adding raw pungency, and that balance means the potatoes taste indulgent, not aggressive.
Comfort with Fewer Hands
One of the reasons I reach for this recipe is how hands off much of it is. The Instant Pot handles the heavy lifting while I prepare finishing touches like warmed cream and butter. This frees me to set the table or check on other dishes, so the whole meal comes together without me standing over a pot of boiling water.
Simple Ingredients, Big Results
What I love most is how ordinary pantry items become extraordinary when used well. A few tablespoons of butter, a splash of heavy cream, and a dollop of sour cream add richness and silkiness. I often remind friends that technique matters, and with these ingredients the outcome feels restaurant quality at home.
Versatility and Crowd Appeal
I’ve used this recipe for weeknight dinners and scaled it up for family gatherings. It plays nicely with other mains, and you can dress it up at the end with simple garnishes. That flexibility makes it a reliable recipe to keep in your back pocket when you need something satisfying and universally loved.
Shopping List for Instant Pot Creamy Mashed Potatoes
These ingredients are straightforward, but they work together intentionally. The potatoes are the foundation, the garlic provides gentle aromatics, and the fats bring silkiness and mouthfeel. When combined, they create a balanced mashed potato that is rich, fluffy, and comforting.
- 15 pound bag of russet potatoes: Provide a starchy base that yields fluffy, absorbent mashed potatoes; choose russets for their high starch content and low moisture which produce a light, airy texture after pressure cooking. Peel and cut into uniform chunks so they cook evenly in the Instant Pot, and use the full 15-pound quantity as specified for large batches or multiple servings.
- 5 cloves of garlic, peeled: Add a mellow garlic aroma and subtle savory depth when boiled with the potatoes; crush or leave whole cloves to infuse without overpowering the dish. Peel the cloves to ensure even flavor release and easy removal if a milder garlic presence is desired before mashing.
- 1 cup of water: Create the steaming environment in the Instant Pot to ensure even, rapid cooking of the potatoes; add exactly 1 cup of water to generate sufficient steam without diluting flavors. Place the potatoes on a trivet above the water to prevent sogginess while allowing thorough steaming under pressure.
- 1/2 cup unsalted butter: Introduce rich, silky fat that enhances mouthfeel and flavor; use unsalted butter to control overall seasoning and to create a luscious, creamy consistency when incorporated warm into the mashed potatoes. Cut into pieces so it melts quickly into the hot potatoes, yielding an even, glossy finish.
- 1 1/2 cups heavy cream: Provide luxurious creaminess and a velvety texture while boosting richness and flavor; heavy cream helps loosen the mashed potatoes to the desired consistency and adds decadent body. Warm slightly before adding to preserve temperature and prevent cooling the potatoes during mixing.
- 1/2 cup sour cream: Contribute tangy creaminess that brightens flavors and balances the richness of butter and cream; sour cream adds a subtle acidity that enhances overall taste and adds a smooth, slightly tangy finish. Fold in gently at the end to maintain a creamy texture without overworking the potatoes.
- 1 teaspoon salt, plus more to taste: Season the dish to enhance and balance flavors; start with 1 teaspoon of salt in the cooking water or during mashing and adjust to taste to avoid over- or under-seasoning. Reserve additional salt for finishing so diners can tailor seasoning to preference.
Instant Pot Creamy Mashed Potatoes Instructions
I like to think of the instructions like a rhythm, each step building the dish into something warm and memorable. The Instant Pot part is quick and forgiving, while the finishing steps are where you add personality and texture.
- To an instant pot, add the steamer wire rack. Pour in 1 cup of water and the garlic cloves. Add the peeled russet potatoes. Cover the Instant Pot with its lid and turn to 'seal.' Turn the machine to manual and set it to 12 minutes. When it’s done, use the quick release and carefully remove the lid.: The kitchen will fill with a soft hiss as the pressure builds, and that steady sound is your cue that the pot is doing its work. Placing the steamer wire rack keeps the potatoes out of direct contact with standing water , ensuring they steam evenly rather than boil. You want to see full steam at the vent before the cooker reaches pressure, which means the internal environment is correct for tender results. A common error is crowding the pot too tightly, which can slow pressure buildup and cause uneven cooking, so give the potatoes space on the rack.
- Using a pair of tongs, remove the potato, one at a time, and place it in a potato ricer. Push the potato ricer into a bowl. Repeat until you’ve worked through all of the potatoes. Add the garlic cloves to the potato ricer and push those through, too.: As the water warms, the aroma of the garlic will shift from sharp to subtly sweet, a sign that the flavors are marrying. The small volume of water creates steam quickly, preventing the potatoes from sitting in water and becoming waterlogged. If you accidentally add more water, cooking time increases and the texture can become gummy, so measure carefully to maintain the right steam balance.
- Add the butter and heavy cream to a small saucepan and set over medium heat. Warm just until the butter has melted. To the potatoes, add the butter and heavy cream mixture, along with the sour cream and salt.: When you add the prepared potatoes , arrange them so steam can circulate, which promotes consistent tenderness throughout each tuber. You should notice the surface of the potatoes becoming slightly glossy from the steam as they heat. Avoid stacking them too densely because that can lead to uneven centers, which will make ricing or mashing more work later.
- Mix together until combined. Give it a taste and adjust the salt according to your liking.: The lid will lock into place, and you will hear the mechanism click, signaling a sealed environment. This seal traps steam and raises pressure, which cooks the potatoes quickly and uniformly. If the lid is not sealed correctly, the cooker will not come to pressure, resulting in undercooked potatoes; double check the sealing ring and alignment before starting.
- Garnish with melted butter and some fresh chives and lots of black pepper.: Under pressure, the potatoes transform from starchy and firm to tender and yielding, and the 12 minute setting consistently nails the texture for medium to large pieces. You will notice a low hum as the cooker maintains pressure, which means the starches are breaking down evenly. A common pitfall is using a lower time setting for large potatoes, which can leave hard centers, so stick to this duration for reliable results.
- When it’s done, use the quick release and carefully remove the lid: Releasing pressure quickly lets you access the potatoes right away, and you will see a puff of steam as you open the lid, carrying roasted garlic notes. Be careful to tilt the lid away from you to avoid steam burns, and use an oven mitt if needed. If you forget to quick release and instead let pressure drop naturally, the potatoes may become overly saturated, changing the ideal texture for ricing.
- Using a pair of tongs, remove the potato, one at a time, and place it in a potato ricer: Handling the hot potatoes releases a warm, starchy scent that tells you they are perfectly cooked. Pressing through a ricer yields feather light strands that create a fluffy base, and the act of ricing also removes little lumps without overworking the starch. Avoid using a food processor or blender here because those tools can overwork the starch and result in gluey texture, a mistake I have seen many home cooks make.
- Push the potato ricer into a bowl: As the riced potato falls into the bowl, notice the fine, cloudlike texture forming, which is the ideal foundation for smooth mash. The bowl collects the riced potatoes and any small pockets of steam, so use a large enough vessel to avoid spills. One error is starting with too small a bowl, which makes stirring harder and increases the chance of splattering when you add warm dairy.
- Repeat until you’ve worked through all of the potatoes: Progress feels steady as the pile of riced potatoes grows, and you can already imagine the silky finish. Doing this in batches prevents the ricer from clogging and helps maintain a consistent texture throughout. If you rush this step and cram several potatoes at once, you risk uneven ricing and a few unwanted lumps.
- Add the garlic cloves to the potato ricer and push those through, too: When you press the cooked garlic through, it melts into the potatoes with a soft, sweet fragrance that blends seamlessly. This distributes the garlic flavor evenly without loud sharp notes, and its mellow profile becomes a subtle backbone. A common mistake is leaving the garlic whole or chopping it raw and adding it later, which can create harsh pockets of flavor instead of the integrated sweetness you want.
- Add the butter and heavy cream to a small saucepan and set over medium heat: As the butter melts into the heavy cream , the mixture will steam gently and take on a warm, glossy sheen, signaling that it is ready to marry with the potatoes. Warming them together ensures the dairy blends smoothly into the hot riced potatoes, preventing temperature shock that can stiffen the mash. Be careful not to let the mixture boil, because scalding can separate fats and change the silky texture you are aiming for.
- Warm just until the butter has melted: Once the butter has melted, the aroma becomes rich and inviting, and the tiny shimmering fat droplets should be fully incorporated. This step softens the dairy and ensures it disperses evenly through the starch. Overheating here is a risk, as it can alter the flavor and create a slight film on top, so remove from heat as soon as the butter is liquefied.
- To the potatoes, add the butter and heavy cream mixture, along with the sour cream and salt: The moment you add the warmed dairy and sour cream , the bowl fills with a heady creamy scent, and the texture begins to transform from fine strands to a lusciously cohesive mash. The salt lifts the flavors and balances the richness. If you add cold dairy, the mash can seize and become dense, so always match temperatures for the smoothest result.
- Mix together until combined: As you fold the ingredients, listen for a gentle whisper of motion and watch the mash become glossy and uniform, indicating successful emulsification. The goal is a velvety texture, not soupy, so mix until ingredients are fully integrated. Overmixing is a common issue, particularly with vigorous mechanical beaters, which can make the mash gluey, so use gentle folding motions for the best mouthfeel.
- Give it a taste and adjust the salt according to your liking: Tasting at this stage lets you calibrate the seasoning to the potatoes and your palate; the right amount of salt will make the dairy sing and brighten the whole dish. Adjust slowly, tasting between additions, because it is easier to add than to remove. A typical mistake is oversalting early, so season incrementally and trust your palate.
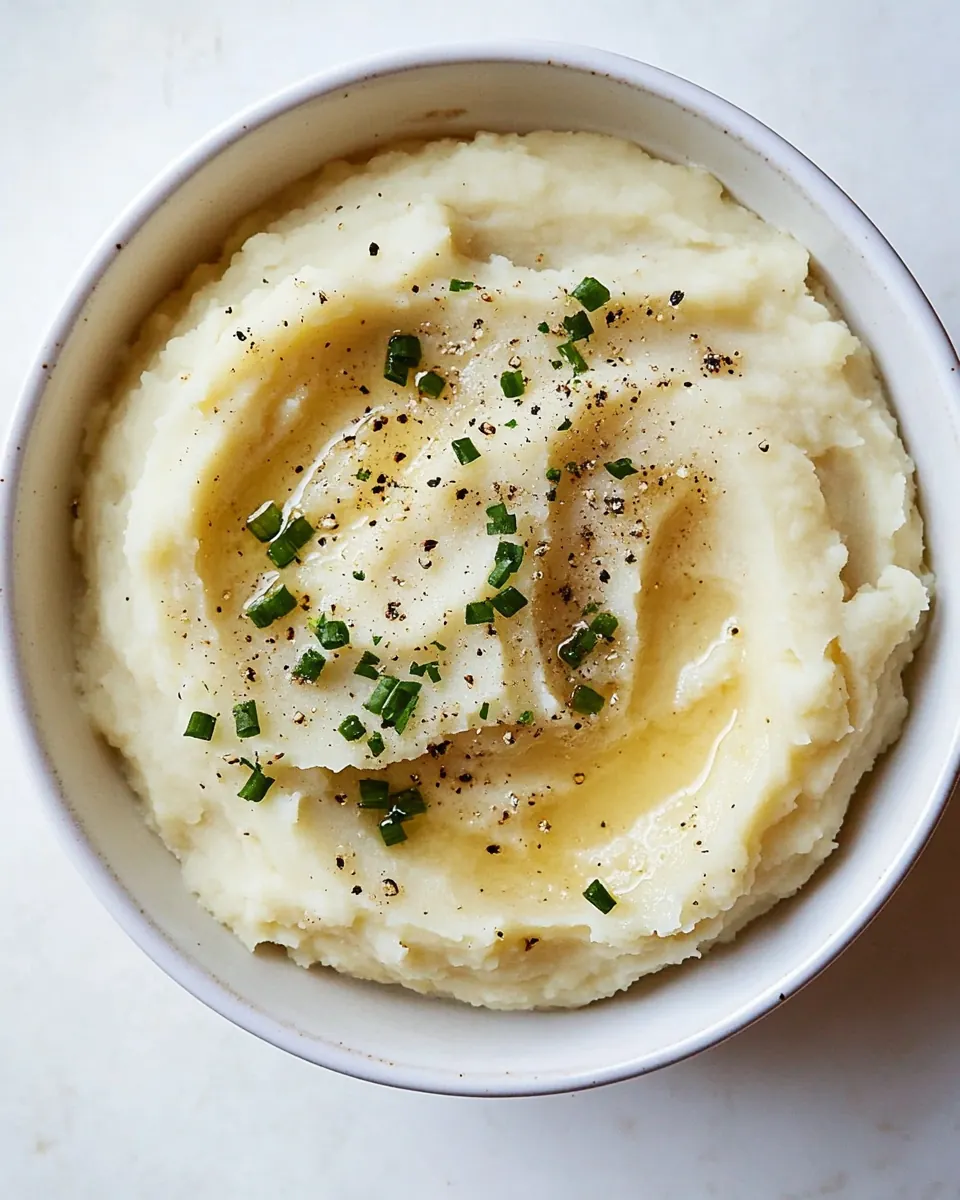
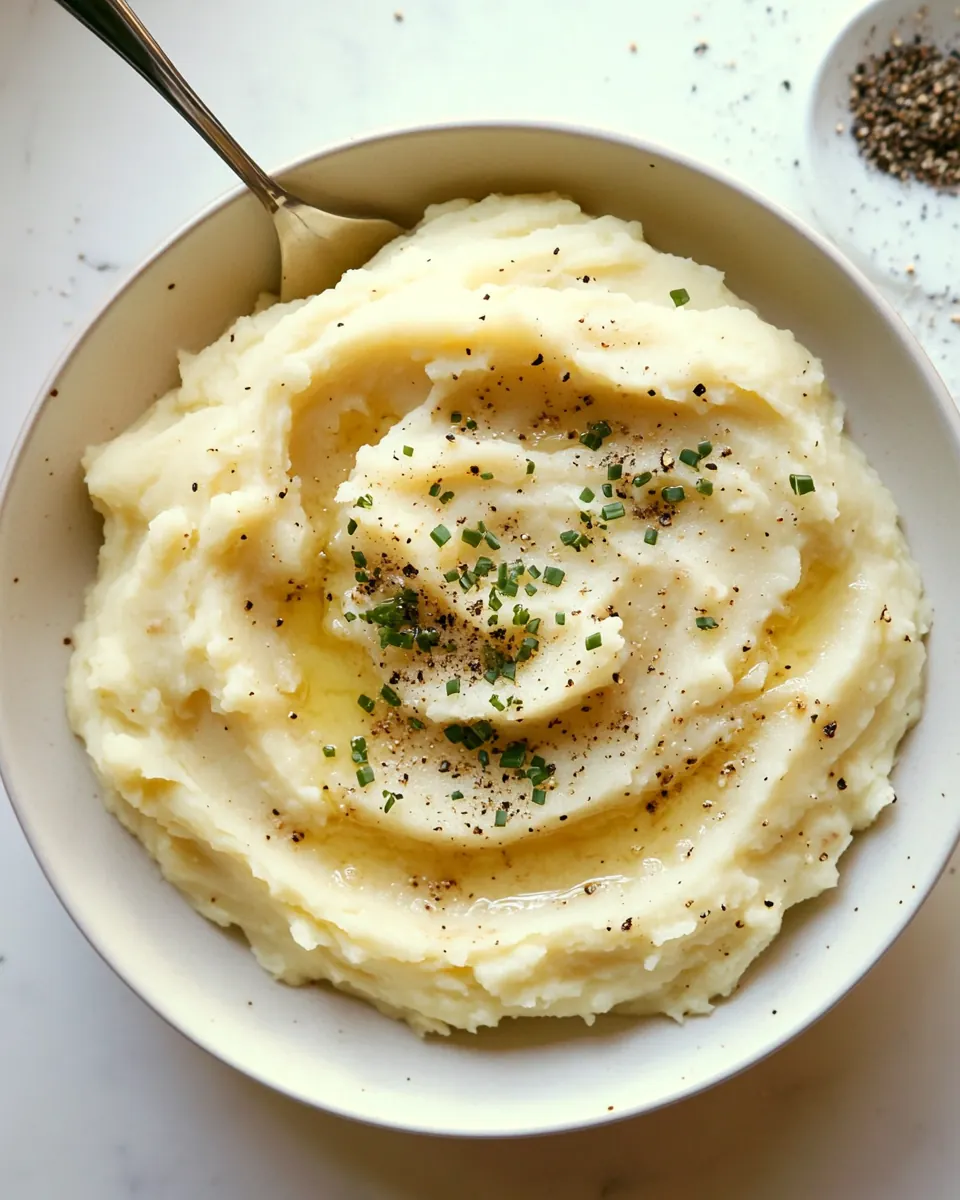
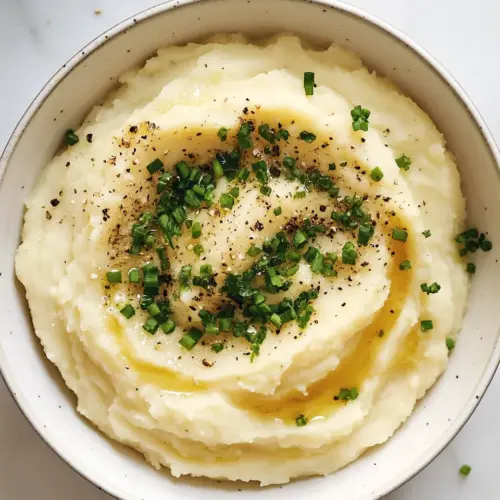
- Garnish with melted butter and some fresh chives and lots of black pepper: The final garnish brings visual contrast and fresh aromatics, with the melted butter pooling in soft ridges and the black pepper adding a lively finish. Sprinkle the chives just before serving so they stay bright and fragrant. Avoid garnishing too far in advance, which can cause the herbs to lose color and the pepper to lose its bite.
Make It Your Own
I like to tweak finishing touches depending on the meal and the mood. Small changes to garnish and temperature can shift these mashed potatoes from weekday comfort to holiday worthy.
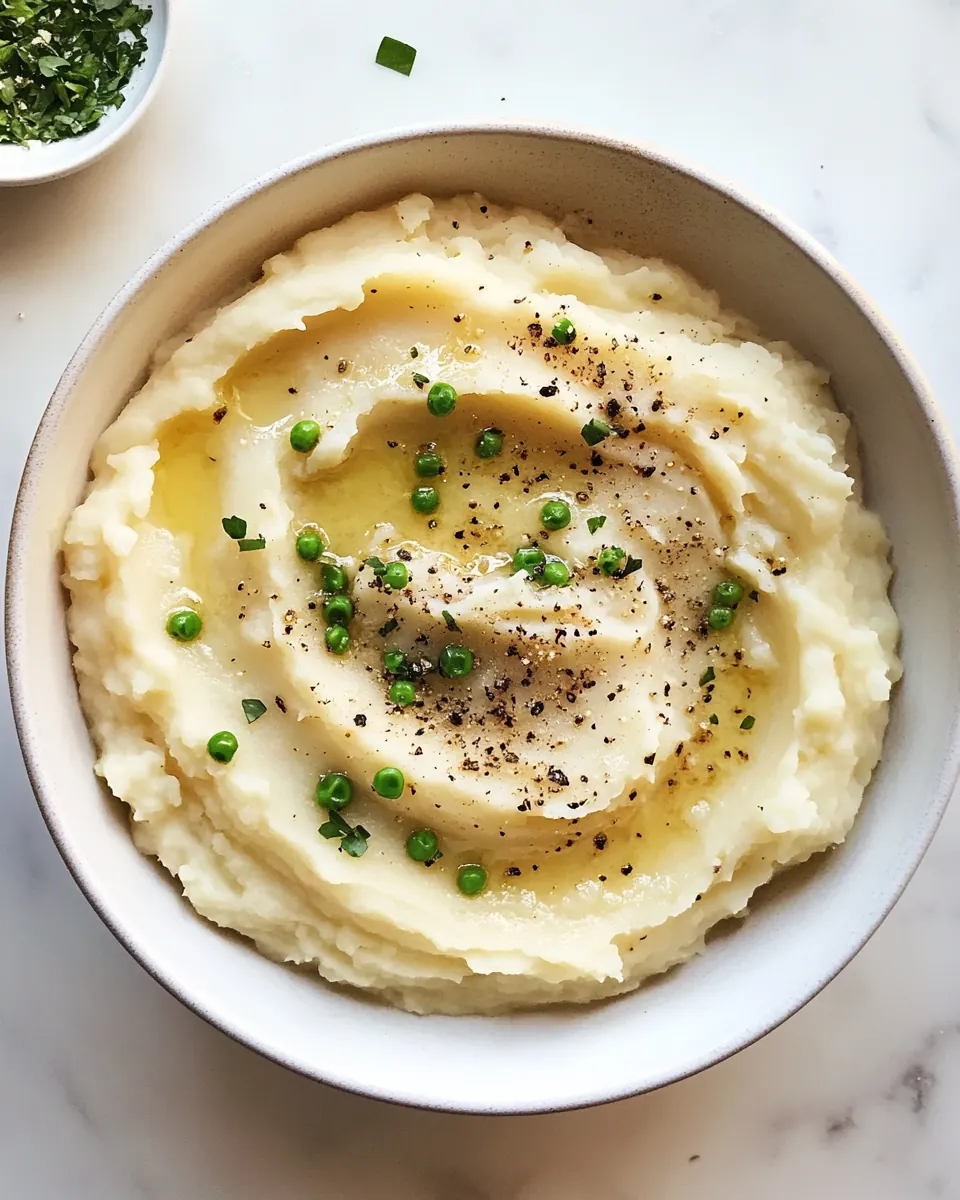
- Swap the garnish: Try scattering finely chopped fresh chives for brightness, or use a sprinkle of cracked black pepper for a lively finish, which adds visual contrast and an aromatic bite.
- Control richness: If you prefer a lighter version, reduce the heavy cream slightly and increase the amount of warmed butter cautiously, tasting as you go, to keep a pleasing mouthfeel without losing silkiness.
- Make ahead: You can cook the potatoes in the Instant Pot earlier and rewarm them with the dairy just before serving, which helps when timing a multi dish meal; add a splash of warmed heavy cream while reheating to restore creaminess.
- Adjust salt at the end: Because the absorption varies by potato size, season after mixing in the sour cream and dairy so you do not oversalt; small incremental additions are best.
- Texture check: Use a ricer for the lightest outcome, and if you only have a masher, warm the dairy thoroughly and fold gently to avoid a gummy result.
- Scale with confidence: When feeding a crowd, increase ingredients proportionally and keep the warmed dairy in a saucepan on the lowest heat so it is ready to blend in without cooling the mash.
What to Serve Alongside Instant Pot Creamy Mashed Potatoes
These mashed potatoes are versatile and pair with many mains, making them perfect for casual dinners and special occasions alike. I often plan the rest of the meal around their texture and richness to create balance on the plate.
- Classic roast or braise: Serve with a roast chicken or pot roast for a hearty dinner where the potatoes soak up pan juices, creating a satisfying combination for family meals and chilly evenings.
- Vegetarian mains: Pair with a rich mushroom ragout or a roasted vegetable gratin to bring earthy flavors that complement the creamy mash, great for meat free gatherings.
- Holiday spreads: Because these potatoes are crowd friendly, they work well for holiday feasts; keep a pot of warmed butter and extra chives nearby so guests can customize their portions.
- Weeknight dinners: For a quick weeknight pairing, serve alongside roasted sausages or pan seared fish, letting the mash act as the comforting anchor of the plate.
- Storage tips: Refrigerate leftovers in an airtight container for up to four days, and reheat gently with a splash of warmed heavy cream to restore silkiness, stirring occasionally over low heat.
- Seasonal pairings: In winter, pair the potatoes with braised greens or glazed root vegetables to create a warm, seasonal plate that highlights rustic flavors.
FAQ
Conclusion
What makes this recipe special is how it transforms simple ingredients into a creamy, soulful side with minimal fuss. The pressure cooking step delivers perfectly tender potatoes, while warmed butter and cream create a luxurious finish that feels indulgent without being complicated. Give it a try the next time you want a dependable, crowd pleasing mash; it’s a recipe that reliably elevates any meal and is easy to customize to your tastes. Enjoy serving it to family and friends, and take pride in a side dish that consistently brings comfort to the table.
Instant Pot Creamy Mashed Potatoes
Equipment
- Instant Pot
- Steamer wire rack
- Potato ricer
- Small Saucepan
- Tongs
Ingredients
- 15 -pound bag of russet potatoes Provide a starchy base that yields fluffy, absorbent mashed potatoes; choose russets for their high starch content and low moisture which produce a light, airy texture after pressure cooking. Peel and cut into uniform chunks so they cook evenly in the Instant Pot, and use the full 15-pound quantity as specified for large batches or multiple servings.
- 5 cloves of garlic, peeled Add a mellow garlic aroma and subtle savory depth when boiled with the potatoes; crush or leave whole cloves to infuse without overpowering the dish. Peel the cloves to ensure even flavor release and easy removal if a milder garlic presence is desired before mashing.
- 1 cup of water Create the steaming environment in the Instant Pot to ensure even, rapid cooking of the potatoes; add exactly 1 cup of water to generate sufficient steam without diluting flavors. Place the potatoes on a trivet above the water to prevent sogginess while allowing thorough steaming under pressure.
- 1/2 cup unsalted butter Introduce rich, silky fat that enhances mouthfeel and flavor; use unsalted butter to control overall seasoning and to create a luscious, creamy consistency when incorporated warm into the mashed potatoes. Cut into pieces so it melts quickly into the hot potatoes, yielding an even, glossy finish.
- 1 1/2 cups heavy cream Provide luxurious creaminess and a velvety texture while boosting richness and flavor; heavy cream helps loosen the mashed potatoes to the desired consistency and adds decadent body. Warm slightly before adding to preserve temperature and prevent cooling the potatoes during mixing.
- 1/2 cup sour cream Contribute tangy creaminess that brightens flavors and balances the richness of butter and cream; sour cream adds a subtle acidity that enhances overall taste and adds a smooth, slightly tangy finish. Fold in gently at the end to maintain a creamy texture without overworking the potatoes.
- 1 teaspoon salt, plus more to taste Season the dish to enhance and balance flavors; start with 1 teaspoon of salt in the cooking water or during mashing and adjust to taste to avoid over- or under-seasoning. Reserve additional salt for finishing so diners can tailor seasoning to preference.
Instructions
- To an instant pot, add the steamer wire rack. Pour in 1 cup of water and the garlic cloves. Add the peeled russet potatoes. Cover the Instant Pot with its lid and turn to 'seal.' Turn the machine to manual and set it to 12 minutes. When it’s done, use the quick release and carefully remove the lid.: The kitchen will fill with a soft hiss as the pressure builds, and that steady sound is your cue that the pot is doing its work. Placing the steamer wire rack keeps the potatoes out of direct contact with standing water , ensuring they steam evenly rather than boil. You want to see full steam at the vent before the cooker reaches pressure, which means the internal environment is correct for tender results. A common error is crowding the pot too tightly, which can slow pressure buildup and cause uneven cooking, so give the potatoes space on the rack.
- Using a pair of tongs, remove the potato, one at a time, and place it in a potato ricer. Push the potato ricer into a bowl. Repeat until you’ve worked through all of the potatoes. Add the garlic cloves to the potato ricer and push those through, too.: As the water warms, the aroma of the garlic will shift from sharp to subtly sweet, a sign that the flavors are marrying. The small volume of water creates steam quickly, preventing the potatoes from sitting in water and becoming waterlogged. If you accidentally add more water, cooking time increases and the texture can become gummy, so measure carefully to maintain the right steam balance.
- Add the butter and heavy cream to a small saucepan and set over medium heat. Warm just until the butter has melted. To the potatoes, add the butter and heavy cream mixture, along with the sour cream and salt.: When you add the prepared potatoes , arrange them so steam can circulate, which promotes consistent tenderness throughout each tuber. You should notice the surface of the potatoes becoming slightly glossy from the steam as they heat. Avoid stacking them too densely because that can lead to uneven centers, which will make ricing or mashing more work later.
- Mix together until combined. Give it a taste and adjust the salt according to your liking.: The lid will lock into place, and you will hear the mechanism click, signaling a sealed environment. This seal traps steam and raises pressure, which cooks the potatoes quickly and uniformly. If the lid is not sealed correctly, the cooker will not come to pressure, resulting in undercooked potatoes; double check the sealing ring and alignment before starting.
- Garnish with melted butter and some fresh chives and lots of black pepper.: Under pressure, the potatoes transform from starchy and firm to tender and yielding, and the 12 minute setting consistently nails the texture for medium to large pieces. You will notice a low hum as the cooker maintains pressure, which means the starches are breaking down evenly. A common pitfall is using a lower time setting for large potatoes, which can leave hard centers, so stick to this duration for reliable results.
- When it’s done, use the quick release and carefully remove the lid: Releasing pressure quickly lets you access the potatoes right away, and you will see a puff of steam as you open the lid, carrying roasted garlic notes. Be careful to tilt the lid away from you to avoid steam burns, and use an oven mitt if needed. If you forget to quick release and instead let pressure drop naturally, the potatoes may become overly saturated, changing the ideal texture for ricing.
- Using a pair of tongs, remove the potato, one at a time, and place it in a potato ricer: Handling the hot potatoes releases a warm, starchy scent that tells you they are perfectly cooked. Pressing through a ricer yields feather light strands that create a fluffy base, and the act of ricing also removes little lumps without overworking the starch. Avoid using a food processor or blender here because those tools can overwork the starch and result in gluey texture, a mistake I have seen many home cooks make.
- Push the potato ricer into a bowl: As the riced potato falls into the bowl, notice the fine, cloudlike texture forming, which is the ideal foundation for smooth mash. The bowl collects the riced potatoes and any small pockets of steam, so use a large enough vessel to avoid spills. One error is starting with too small a bowl, which makes stirring harder and increases the chance of splattering when you add warm dairy.
- Repeat until you’ve worked through all of the potatoes: Progress feels steady as the pile of riced potatoes grows, and you can already imagine the silky finish. Doing this in batches prevents the ricer from clogging and helps maintain a consistent texture throughout. If you rush this step and cram several potatoes at once, you risk uneven ricing and a few unwanted lumps.
- Add the garlic cloves to the potato ricer and push those through, too: When you press the cooked garlic through, it melts into the potatoes with a soft, sweet fragrance that blends seamlessly. This distributes the garlic flavor evenly without loud sharp notes, and its mellow profile becomes a subtle backbone. A common mistake is leaving the garlic whole or chopping it raw and adding it later, which can create harsh pockets of flavor instead of the integrated sweetness you want.
- Add the butter and heavy cream to a small saucepan and set over medium heat: As the butter melts into the heavy cream , the mixture will steam gently and take on a warm, glossy sheen, signaling that it is ready to marry with the potatoes. Warming them together ensures the dairy blends smoothly into the hot riced potatoes, preventing temperature shock that can stiffen the mash. Be careful not to let the mixture boil, because scalding can separate fats and change the silky texture you are aiming for.
- Warm just until the butter has melted: Once the butter has melted, the aroma becomes rich and inviting, and the tiny shimmering fat droplets should be fully incorporated. This step softens the dairy and ensures it disperses evenly through the starch. Overheating here is a risk, as it can alter the flavor and create a slight film on top, so remove from heat as soon as the butter is liquefied.
- To the potatoes, add the butter and heavy cream mixture, along with the sour cream and salt: The moment you add the warmed dairy and sour cream , the bowl fills with a heady creamy scent, and the texture begins to transform from fine strands to a lusciously cohesive mash. The salt lifts the flavors and balances the richness. If you add cold dairy, the mash can seize and become dense, so always match temperatures for the smoothest result.
- Mix together until combined: As you fold the ingredients, listen for a gentle whisper of motion and watch the mash become glossy and uniform, indicating successful emulsification. The goal is a velvety texture, not soupy, so mix until ingredients are fully integrated. Overmixing is a common issue, particularly with vigorous mechanical beaters, which can make the mash gluey, so use gentle folding motions for the best mouthfeel.
- Give it a taste and adjust the salt according to your liking: Tasting at this stage lets you calibrate the seasoning to the potatoes and your palate; the right amount of salt will make the dairy sing and brighten the whole dish. Adjust slowly, tasting between additions, because it is easier to add than to remove. A typical mistake is oversalting early, so season incrementally and trust your palate.
- Garnish with melted butter and some fresh chives and lots of black pepper: The final garnish brings visual contrast and fresh aromatics, with the melted butter pooling in soft ridges and the black pepper adding a lively finish. Sprinkle the chives just before serving so they stay bright and fragrant. Avoid garnishing too far in advance, which can cause the herbs to lose color and the pepper to lose its bite.
Notes
- Swap the garnish: Try scattering finely chopped fresh chives for brightness, or use a sprinkle of cracked black pepper for a lively finish, which adds visual contrast and an aromatic bite.
- Control richness: If you prefer a lighter version, reduce the heavy cream slightly and increase the amount of warmed butter cautiously, tasting as you go, to keep a pleasing mouthfeel without losing silkiness.
- Make ahead: You can cook the potatoes in the Instant Pot earlier and rewarm them with the dairy just before serving, which helps when timing a multi dish meal; add a splash of warmed heavy cream while reheating to restore creaminess.
- Adjust salt at the end: Because the absorption varies by potato size, season after mixing in the sour cream and dairy so you do not oversalt; small incremental additions are best.
- Texture check: Use a ricer for the lightest outcome, and if you only have a masher, warm the dairy thoroughly and fold gently to avoid a gummy result.
- Scale with confidence: When feeding a crowd, increase ingredients proportionally and keep the warmed dairy in a saucepan on the lowest heat so it is ready to blend in without cooling the mash.