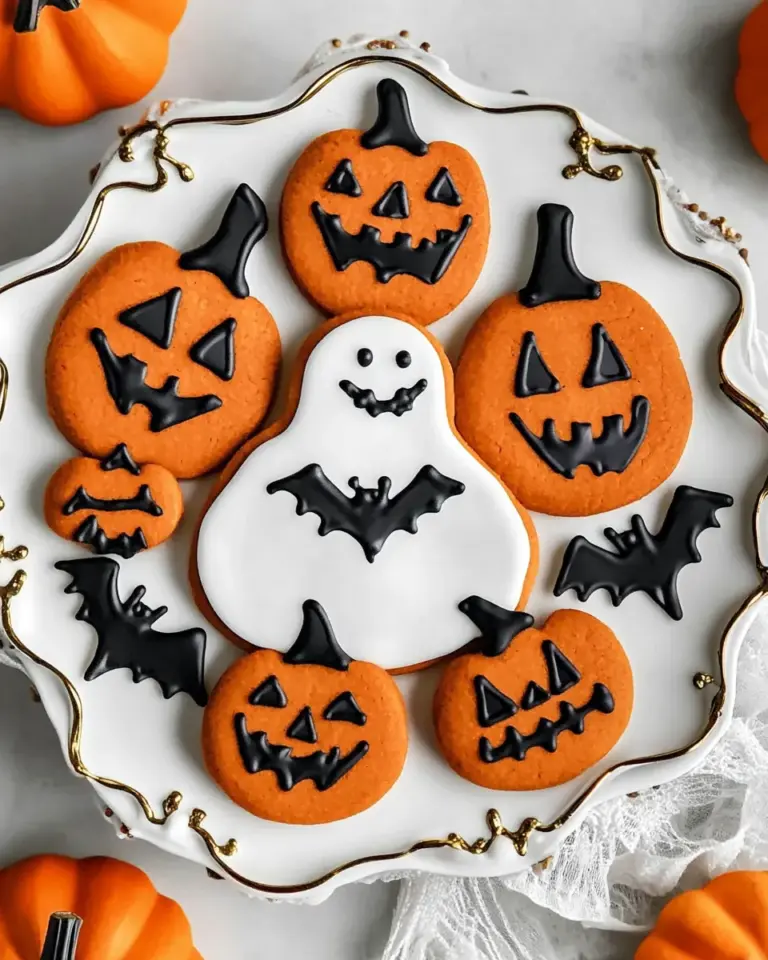
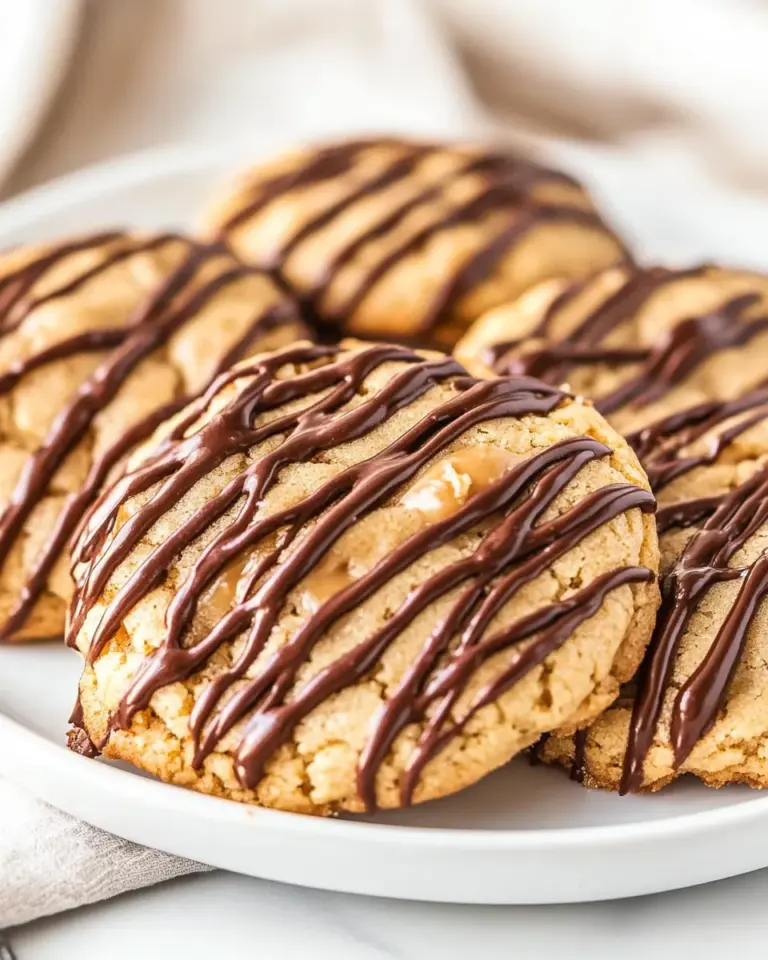
Homemade Twix Bars
Homemade Twix Bars began as my cozy answer to a candy craving that would not quit, a weekend project born from a pantry raid and a stubborn sweet tooth. I remember the afternoon light through my kitchen window as I pulled out a scant handful of ingredients and decided to recreate that perfect trio of crisp crust, buttery caramel, and glossy chocolate at home. The first bite reminded me of childhood summer sales at the corner store, but with a grown up balance of butter and salt that felt more like a hug than a sugar hit.
There is something both methodical and playful about making Homemade Twix Bars. Pressing the dough into the pan gives you a small moment of calm, while melting the caramel and chocolate invites a little bit of focus. As the bars chill and the chocolate sets, I like to steal a square and admire the clean layers. My friends have told me these bars taste like memory lane, which I take as a compliment, because they are reliably comforting and reliably shareable.
Recipe Snapshot
35 mins
20 mins
15 mins
Medium
250 kcal
American
Gluten-Free, Low FODMAP
Desserts
9 x 13 inch pan, Pastry blender, Small saucepan, Offset spatula, Refrigerator
Why This Homemade Twix Bars Hits Different
Layered Texture
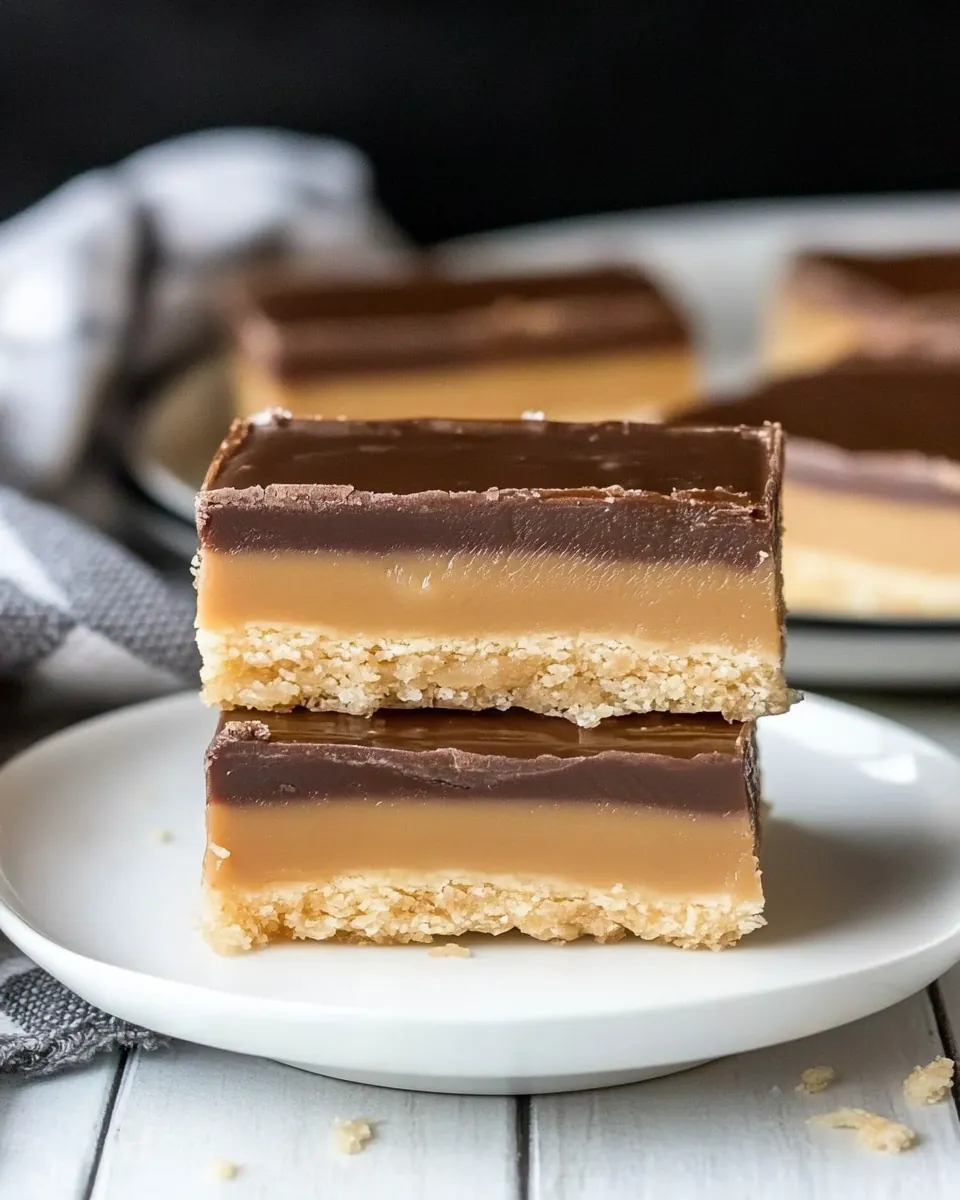
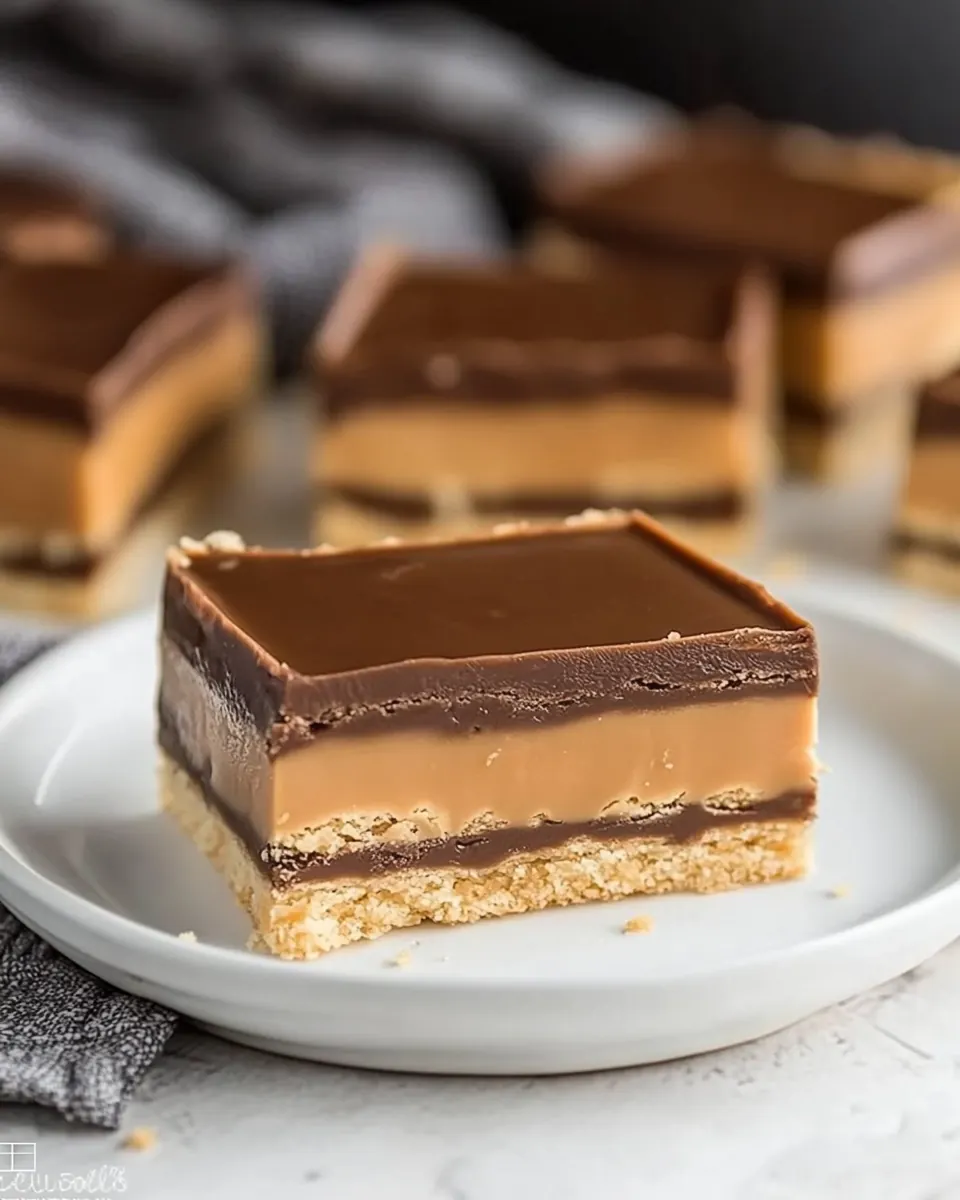
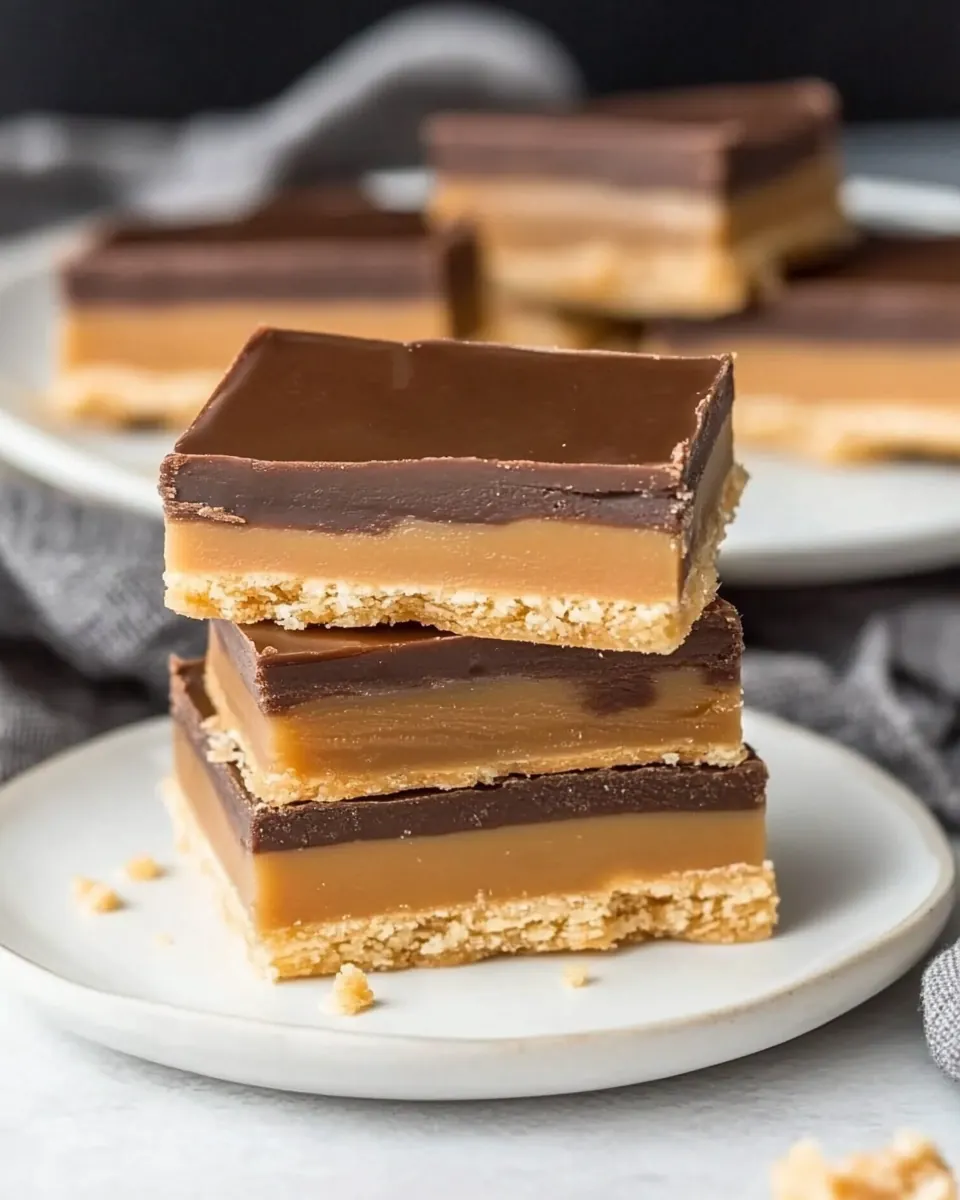
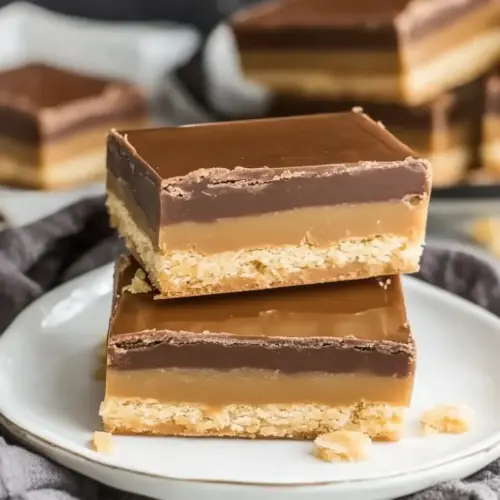
I love how Homemade Twix Bars are all about contrasts, and that is deliberate. The crust is crisp and slightly sandy, the caramel is decadently smooth, and the chocolate adds a clean snap. When I bite into one, I get a chorus of textures, and that keeps each mouthful interesting. You get a balance that neither overwhelms nor feels one note, which is why I keep coming back to this recipe.
Straightforward Technique
One of the reasons I trust this recipe is the simplicity of the steps. You do not need fancy tools to make these bars, and the methods are forgiving. I often use a food processor when I am short on time, but I have also made the crust by hand with a pastry cutter. The reliability of the approach makes it a great weekend bake when I want something impressive but not intimidating.
Customizable and Crowd Friendly
These bars scale well, so I make them for potlucks and small gatherings. I like that you can play with the chocolate finish, add striations, or just keep them smooth and glossy. I have found that chilling the caramel properly is the secret to keeping them neat, and that small change makes them easier to slice for serving to a crowd.
Comfort Food with Personality
There is a nostalgic quality to Homemade Twix Bars that I adore. They are a dessert you can gift, serve after dinner, or package for neighbors. Every time I make them someone asks for the recipe, which is probably the truest sign that they stand out. They feel homemade, but in the best way possible, like a special treat you made with intent.
Reliable Results
I value recipes that deliver consistent results, and these bars do. The methodical chilling, the attention to texture in the crust, and the patience with melting chocolate all add up to a finished bar that looks and tastes like a confectionary favorite. When I want dependable dessert success, this is one I reach for.
Recipe Ingredients for Homemade Twix Bars
These ingredients form the backbone of the recipe, each one playing a specific role. The crust relies on firm, cold butter to create that sandy, crisp base. Sugar lends sweetness and structure, while vanilla lifts the flavors with floral warmth. Flour binds everything and becomes the textural foundation. Together they create a straightforward, classic shortbread base that supports the caramel and chocolate layers without competing.
- 2 sticks cold butter, cut into small pieces: Provide a rich, flaky base by incorporating cold butter cut into small pieces so it creates tender layers when mixed into the dough. Ensure butter remains cold to prevent overworking the gluten and to achieve a shortbread-like texture once baked.
- 1/2 cup sugar: Add sweetness and structure by creaming sugar with butter to dissolve granules and help aerate the mixture for a lighter crumb. Adjust sugar amount carefully to balance caramel and biscuit flavors without overpowering the shortbread base.
- 2 teaspoons vanilla: Impart aromatic warmth and depth by adding vanilla; it enhances the overall flavor profile and rounds out the buttery and caramel notes. Use pure vanilla extract for a natural, nuanced flavor that blends smoothly into the dough and caramel.
- 2 cups flour: Bind and form the dough by folding in flour to absorb the butter and sugar, creating the proper consistency for rolling and baking. Measure flour accurately and mix gently to avoid toughness, aiming for a cohesive dough that bakes into a crisp, tender shortbread layer.
Recipe Directions for Homemade Twix Bars
These directions walk you through building each layer carefully, focusing on texture and timing so the finished bars slice cleanly and taste balanced. Follow the sensory cues and chilling steps, and you will be rewarded with neat bars that hold together and display distinct layers.
- For the crust: Preheat oven to 350°. Line 9" x 13" pan with nonstick foil. Set aside.: Preheat oven to 350° : As the oven warms, notice the change in the kitchen air, a faint warmth that primes the baking process. Preheating ensures the crust begins setting the moment it goes in, which helps create that tender yet crisp texture. A common mistake is putting the pan into an oven that is not fully hot, which can result in uneven baking and a denser crust.
- Using a pastry blender cut butter into the sugar. Use fingers to break up the butter, till the mixture resembles cornmeal.: Lining the pan provides a clean release and protects the crust edges from sticking, while the foil makes lifting the bars out for cutting much neater. Press the foil smoothly into corners to avoid air pockets, because trapped air can cause small uneven spots in the crust. If the foil is wrinkled, the crust surface may bake unevenly.
- Add vanilla. Add the flour.: You will feel the texture change under your hands from clumps to a sandy mixture, and you might hear the faint sound of granulated sugar shifting. This texture indicates the right distribution of fat for flakiness, and it is why we keep the butter cold. Overworking will warm the butter and make the dough greasy, so stop when you reach the coarse meal stage.
- Mix till flour is incorporated. The mixture will be crumbly. Alternatively, you can mix in the food processor.: When you sprinkle in the vanilla and flour , the aroma of the vanilla will bloom immediately, and the mixture will start to come together into a looser dough. The flour provides structure and once combined, it will hold the shape once pressed. A frequent error is adding too much flour, which leads to a dry, crumbly crust, so mix gently and check the texture.
- Press it evenly into the pan. Lightly flouring your fingertips will help with any sticking.: As you bring the dough together, expect a crumbly feel rather than a cohesive ball. That crumbliness is normal for a shortbread style crust, and it will compact when pressed. Using a food processor speeds the job, but watch closely, because processors can overwork the mixture and heat the butter .
- Prick the crust all over with a fork.: Pressing creates a uniform base that bakes at an even rate, and you will feel the mixture firm as you apply pressure. Aim for consistent thickness across the pan, because thin spots will brown faster. If you do not press firmly enough, the crust may crumble when cut, so use decisive, even pressure.
- Bake 15 minutes until the crust is lightly golden brown on top and the edges are deeper golden brown. Set it aside to cool completely.: These small holes let steam escape and keep the crust from puffing up, resulting in a flat, even surface for layering. You will see tiny pinpricks dotting the surface, and the crust will retain its shape during baking. Skipping this step risks little domes forming, which make layering the caramel more difficult.
- For the caramel layer: Melt the caramel and cream over low heat in a small saucepan. (or use the microwave, stopping and stirring at 30-60 second intervals till smooth and melted). Pour the caramel over the cooled crust and set in the refrigerator for 30 minutes to chill and firm up.: The smell of warm, toasty butter and sugar will fill the kitchen as the crust browns, and the color shift is your cue that the gluten has set and it is ready to support the caramel. Edges will darken first, so watch them to avoid overbrowning. If you underbake, the crust can be too soft and the finished bars will be hard to slice cleanly.
- For the Chocolate Layer: Melt the chocolate and shortening by microwaving using 30-second increments, stopping and stirring till melted and smooth. Spread over caramel with an offset spatula. I also used a plastic frosting tool to make optional striations while the chocolate was warm.: Melt the caramel and cream over low heat in a small saucepan. (or use the microwave, stopping and stirring at 30 to 60 second intervals till smooth and melted). Pour the caramel over the cooled crust and set in the refrigerator for 30 minutes to chill and firm up. : As the caramel melts and the cream blends in, you will notice steam rising and the mixture becoming glossy and fluid. Pouring it over the cooled crust, you should see it spread in a velvet layer, and chilling firms it to a sliceable state. Work slowly when heating to prevent scorching, and a common issue is not chilling long enough, which results in gooey bars that smear when cut.
- Let cool before cutting. Store in an airtight container in the refrigerator to minimize the caramel oozing.: Melt the chocolate and shortening by microwaving using 30 second increments, stopping and stirring till melted and smooth. Spread over caramel with an offset spatula. I also used a plastic frosting tool to make optional striations while the chocolate was warm. : When the chocolate melts with the shortening, it becomes glossy and silky, reflecting light as you stir. Spreading it creates a uniform, mirror like top that sets into a satisfying snap. If you skip stirring between intervals, the chocolate can seize or burn, so go slowly. Too thin a chocolate layer can break easily, while too thick may hide the caramel balance, so aim for a medium coating.
- Let cool before cutting. Store in an airtight container in the refrigerator to minimize the caramel oozing.: As the bars cool, the chocolate will firm and the caramel will become stable, producing clean edges when cut. You will hear a quiet, satisfying snap as you separate squares, and cold bars slice more neatly. Cutting too soon is the most common mistake, leaving you with sticky, messy pieces, so be patient and chill thoroughly.
Tips and Variations
These tips will help you refine texture and presentation, and offer little variations to suit your mood. Each item focuses on one practical change that gives you control over the final bars.
- Use cold butter: Keeping the butter cold until you actually cut it into the mixture preserves pockets of fat that create the crumbly, shortbread like texture we want in the crust.
- Chill between layers: Refrigerating the crust before pouring the caramel, and chilling again after adds structure so the bars cut cleanly without the layers mixing together.
- Microwave chocolate carefully: Melt the chocolate in 30 second bursts and stir thoroughly to reach a smooth, glossy finish and to avoid burning or seizing the chocolate.
- Flour your fingertips: Lightly flouring your fingertips when pressing the crust prevents sticking and helps you achieve an even, compact base.
- Use an offset spatula: Spreading the chocolate with an offset spatula produces a smooth top and gives you control for decorative striations or a perfectly even coat.
What Complements This Homemade Twix Bars
These serving ideas highlight occasions and pairings that make the bars shine. Think about temperature contrast, portioning, and company when presenting them.
- Casual dessert plate: Serve chilled squares on a small dessert plate after a casual weeknight meal, letting guests enjoy the crisp crust and creamy caramel in a manageable portion.
- Party platter: Arrange the bars on a large tray for gatherings, spacing the pieces so people can easily pick them up, and consider small paper liners for neat serving.
- Gift packaging: Wrap a stack of chilled bars in parchment and tie with string for a homemade edible gift that travels well when kept cool.
- Occasion pairings: These bars work well for afternoon tea, potlucks, or festive gatherings, and their familiar flavors make them widely appealing at events.
- Storage tips: Keep leftover bars refrigerated in an airtight container to maintain firm caramel and crisp chocolate, and bring to room temperature briefly before serving for the best mouthfeel.
- Seasonal ideas: Make a batch for holiday dessert tables or summer bake sales, and transport them chilled to ensure they hold their shape.
FAQ
Conclusion
These bars stand out because they combine a buttery shortbread crust, a silky caramel middle, and a glossy chocolate top into a simple, satisfying treat. I encourage you to give Homemade Twix Bars a try, because the method is approachable and the results are reliably crowd pleasing. Making them is a small, rewarding project that yields a giftable, shareable dessert, and they always spark warm conversation when I bring a plate to friends.
Homemade Twix Bars
Equipment
- 9 x 13-inch pan
- Pastry blender
- Small Saucepan
- Offset Spatula
- Refrigerator
Ingredients
- 2 sticks cold butter, cut into small pieces Provide a rich, flaky base by incorporating cold butter cut into small pieces so it creates tender layers when mixed into the dough. Ensure butter remains cold to prevent overworking the gluten and to achieve a shortbread-like texture once baked.
- 1/2 cup sugar Add sweetness and structure by creaming sugar with butter to dissolve granules and help aerate the mixture for a lighter crumb. Adjust sugar amount carefully to balance caramel and biscuit flavors without overpowering the shortbread base.
- 2 teaspoons vanilla Impart aromatic warmth and depth by adding vanilla; it enhances the overall flavor profile and rounds out the buttery and caramel notes. Use pure vanilla extract for a natural, nuanced flavor that blends smoothly into the dough and caramel.
- 2 cups flour Bind and form the dough by folding in flour to absorb the butter and sugar, creating the proper consistency for rolling and baking. Measure flour accurately and mix gently to avoid toughness, aiming for a cohesive dough that bakes into a crisp, tender shortbread layer.
Instructions
- For the crust: Preheat oven to 350°. Line 9" x 13" pan with nonstick foil. Set aside.: Preheat oven to 350° : As the oven warms, notice the change in the kitchen air, a faint warmth that primes the baking process. Preheating ensures the crust begins setting the moment it goes in, which helps create that tender yet crisp texture. A common mistake is putting the pan into an oven that is not fully hot, which can result in uneven baking and a denser crust.
- Using a pastry blender cut butter into the sugar. Use fingers to break up the butter, till the mixture resembles cornmeal.: Lining the pan provides a clean release and protects the crust edges from sticking, while the foil makes lifting the bars out for cutting much neater. Press the foil smoothly into corners to avoid air pockets, because trapped air can cause small uneven spots in the crust. If the foil is wrinkled, the crust surface may bake unevenly.
- Add vanilla. Add the flour.: You will feel the texture change under your hands from clumps to a sandy mixture, and you might hear the faint sound of granulated sugar shifting. This texture indicates the right distribution of fat for flakiness, and it is why we keep the butter cold. Overworking will warm the butter and make the dough greasy, so stop when you reach the coarse meal stage.
- Mix till flour is incorporated. The mixture will be crumbly. Alternatively, you can mix in the food processor.: When you sprinkle in the vanilla and flour , the aroma of the vanilla will bloom immediately, and the mixture will start to come together into a looser dough. The flour provides structure and once combined, it will hold the shape once pressed. A frequent error is adding too much flour, which leads to a dry, crumbly crust, so mix gently and check the texture.
- Press it evenly into the pan. Lightly flouring your fingertips will help with any sticking.: As you bring the dough together, expect a crumbly feel rather than a cohesive ball. That crumbliness is normal for a shortbread style crust, and it will compact when pressed. Using a food processor speeds the job, but watch closely, because processors can overwork the mixture and heat the butter .
- Prick the crust all over with a fork.: Pressing creates a uniform base that bakes at an even rate, and you will feel the mixture firm as you apply pressure. Aim for consistent thickness across the pan, because thin spots will brown faster. If you do not press firmly enough, the crust may crumble when cut, so use decisive, even pressure.
- Bake 15 minutes until the crust is lightly golden brown on top and the edges are deeper golden brown. Set it aside to cool completely.: These small holes let steam escape and keep the crust from puffing up, resulting in a flat, even surface for layering. You will see tiny pinpricks dotting the surface, and the crust will retain its shape during baking. Skipping this step risks little domes forming, which make layering the caramel more difficult.
- For the caramel layer: Melt the caramel and cream over low heat in a small saucepan. (or use the microwave, stopping and stirring at 30-60 second intervals till smooth and melted). Pour the caramel over the cooled crust and set in the refrigerator for 30 minutes to chill and firm up.: The smell of warm, toasty butter and sugar will fill the kitchen as the crust browns, and the color shift is your cue that the gluten has set and it is ready to support the caramel. Edges will darken first, so watch them to avoid overbrowning. If you underbake, the crust can be too soft and the finished bars will be hard to slice cleanly.
- For the Chocolate Layer: Melt the chocolate and shortening by microwaving using 30-second increments, stopping and stirring till melted and smooth. Spread over caramel with an offset spatula. I also used a plastic frosting tool to make optional striations while the chocolate was warm.: Melt the caramel and cream over low heat in a small saucepan. (or use the microwave, stopping and stirring at 30 to 60 second intervals till smooth and melted). Pour the caramel over the cooled crust and set in the refrigerator for 30 minutes to chill and firm up. : As the caramel melts and the cream blends in, you will notice steam rising and the mixture becoming glossy and fluid. Pouring it over the cooled crust, you should see it spread in a velvet layer, and chilling firms it to a sliceable state. Work slowly when heating to prevent scorching, and a common issue is not chilling long enough, which results in gooey bars that smear when cut.
- Let cool before cutting. Store in an airtight container in the refrigerator to minimize the caramel oozing.: Melt the chocolate and shortening by microwaving using 30 second increments, stopping and stirring till melted and smooth. Spread over caramel with an offset spatula. I also used a plastic frosting tool to make optional striations while the chocolate was warm. : When the chocolate melts with the shortening, it becomes glossy and silky, reflecting light as you stir. Spreading it creates a uniform, mirror like top that sets into a satisfying snap. If you skip stirring between intervals, the chocolate can seize or burn, so go slowly. Too thin a chocolate layer can break easily, while too thick may hide the caramel balance, so aim for a medium coating.
- Let cool before cutting. Store in an airtight container in the refrigerator to minimize the caramel oozing.: As the bars cool, the chocolate will firm and the caramel will become stable, producing clean edges when cut. You will hear a quiet, satisfying snap as you separate squares, and cold bars slice more neatly. Cutting too soon is the most common mistake, leaving you with sticky, messy pieces, so be patient and chill thoroughly.
Notes
- Use cold butter: Keeping the butter cold until you actually cut it into the mixture preserves pockets of fat that create the crumbly, shortbread like texture we want in the crust.
- Chill between layers: Refrigerating the crust before pouring the caramel, and chilling again after adds structure so the bars cut cleanly without the layers mixing together.
- Microwave chocolate carefully: Melt the chocolate in 30 second bursts and stir thoroughly to reach a smooth, glossy finish and to avoid burning or seizing the chocolate.
- Flour your fingertips: Lightly flouring your fingertips when pressing the crust prevents sticking and helps you achieve an even, compact base.
- Use an offset spatula: Spreading the chocolate with an offset spatula produces a smooth top and gives you control for decorative striations or a perfectly even coat.