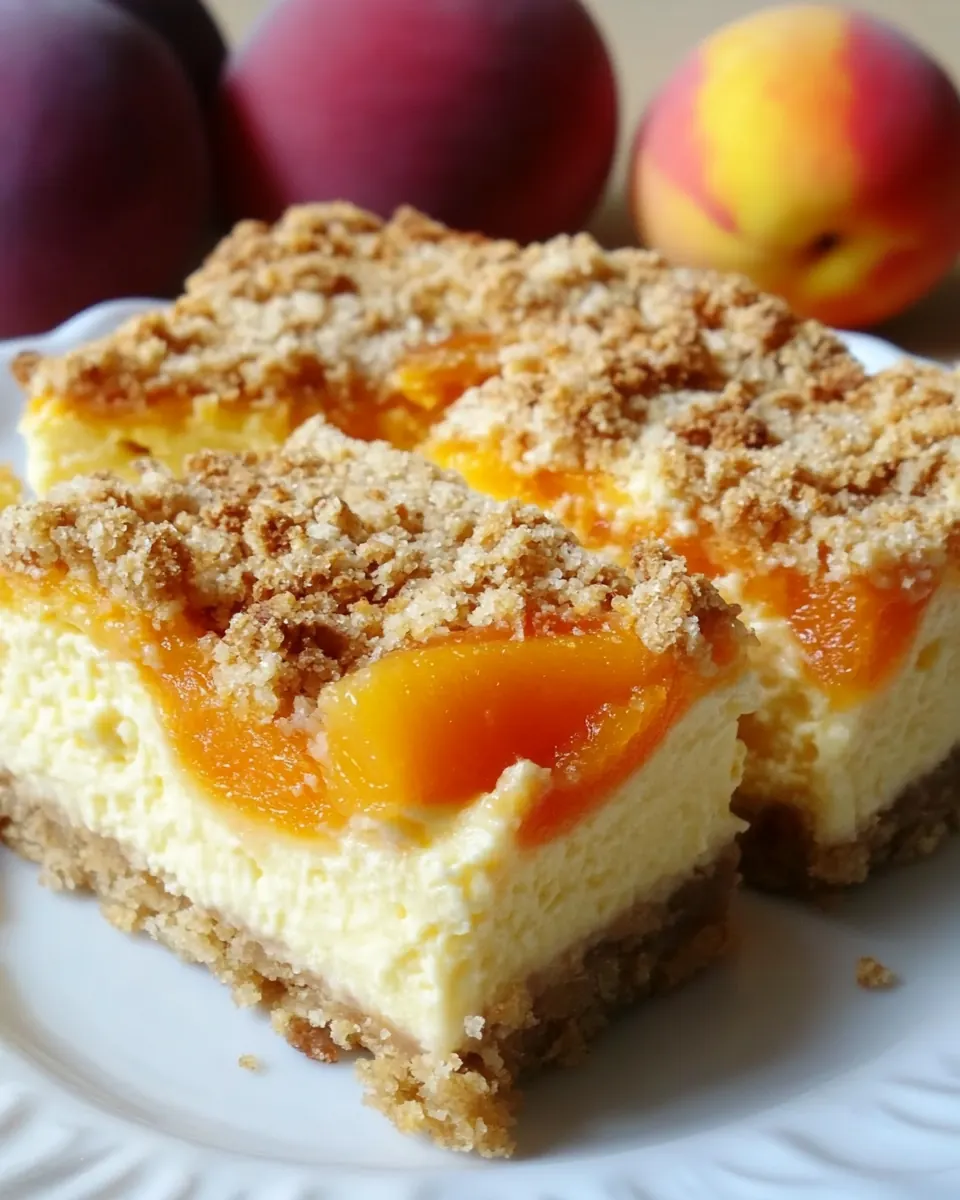
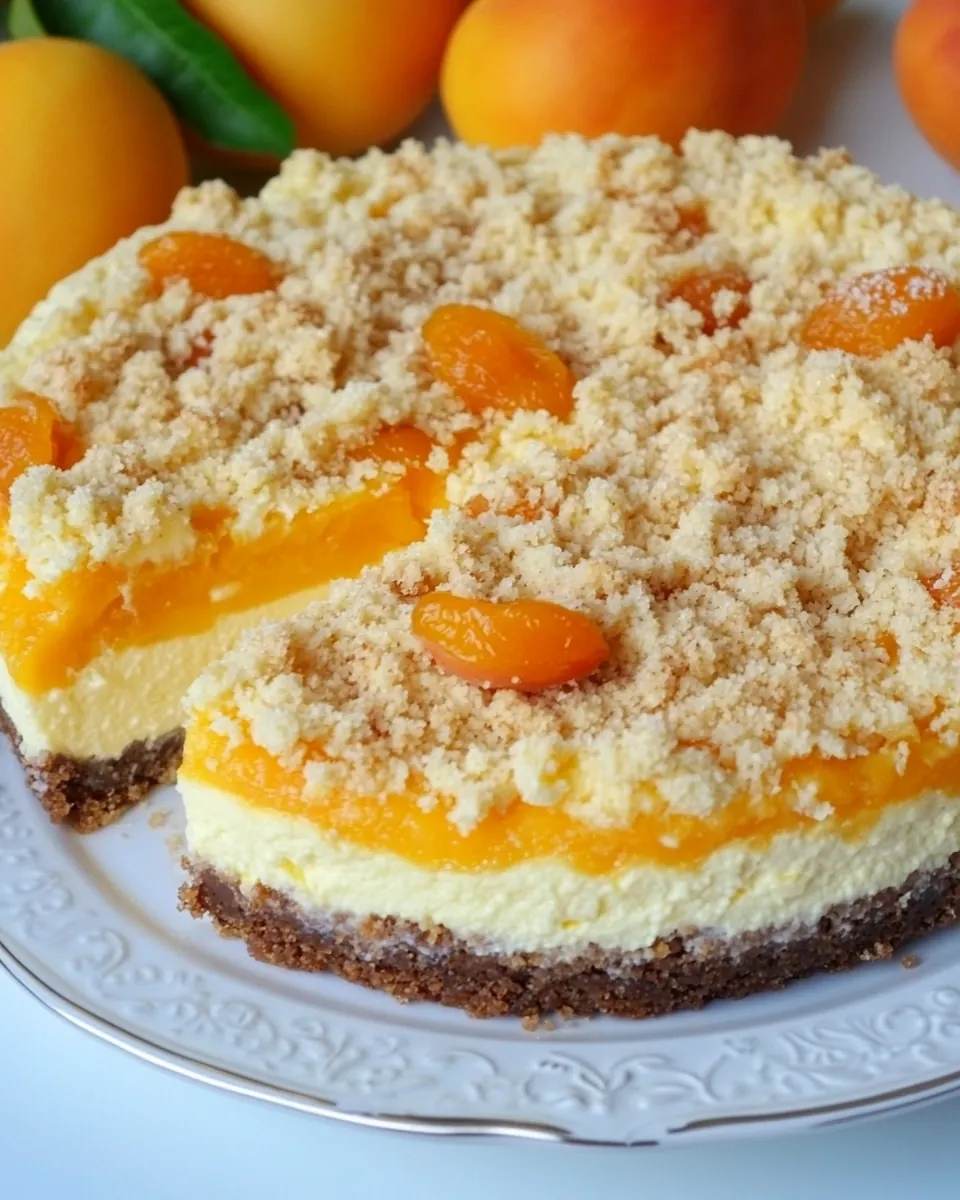
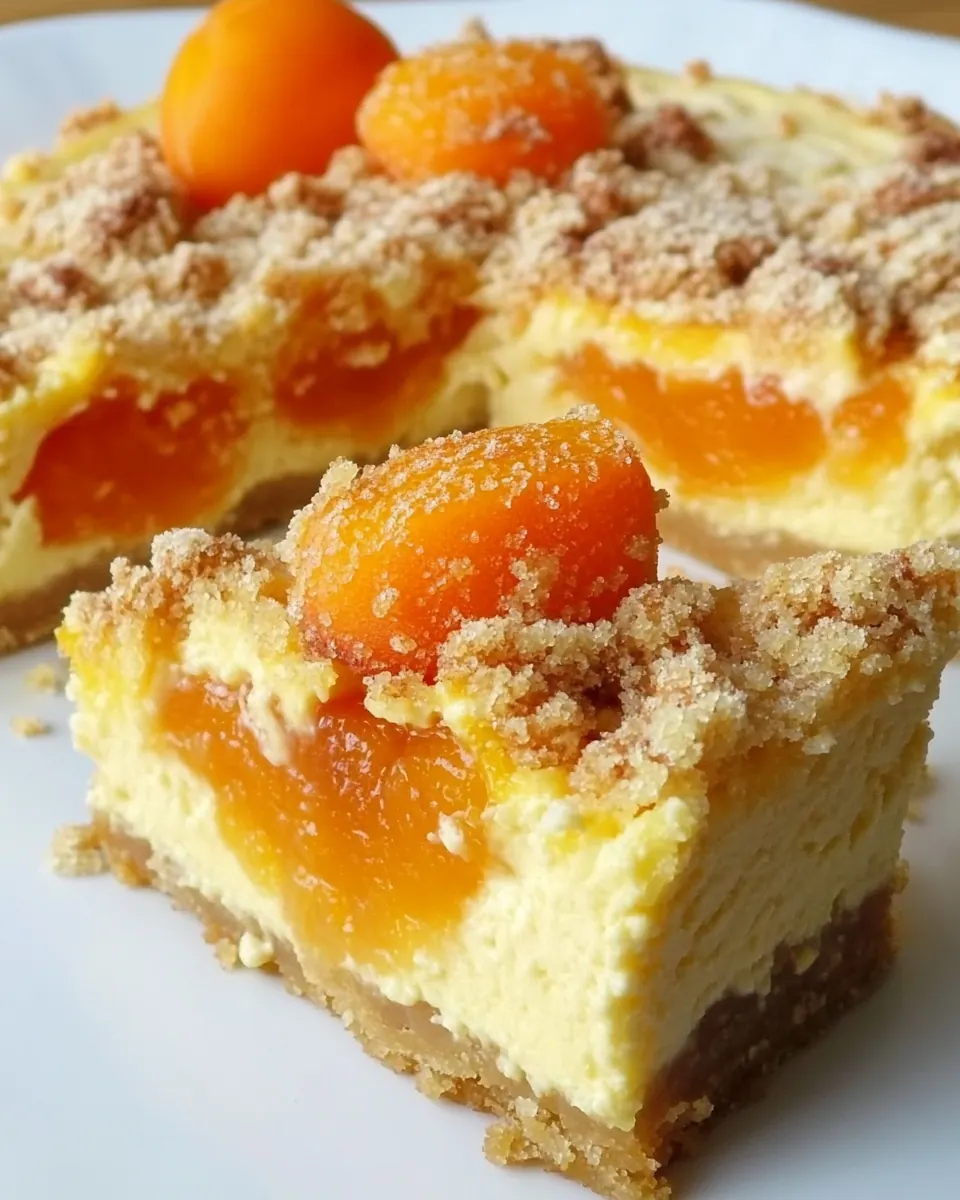
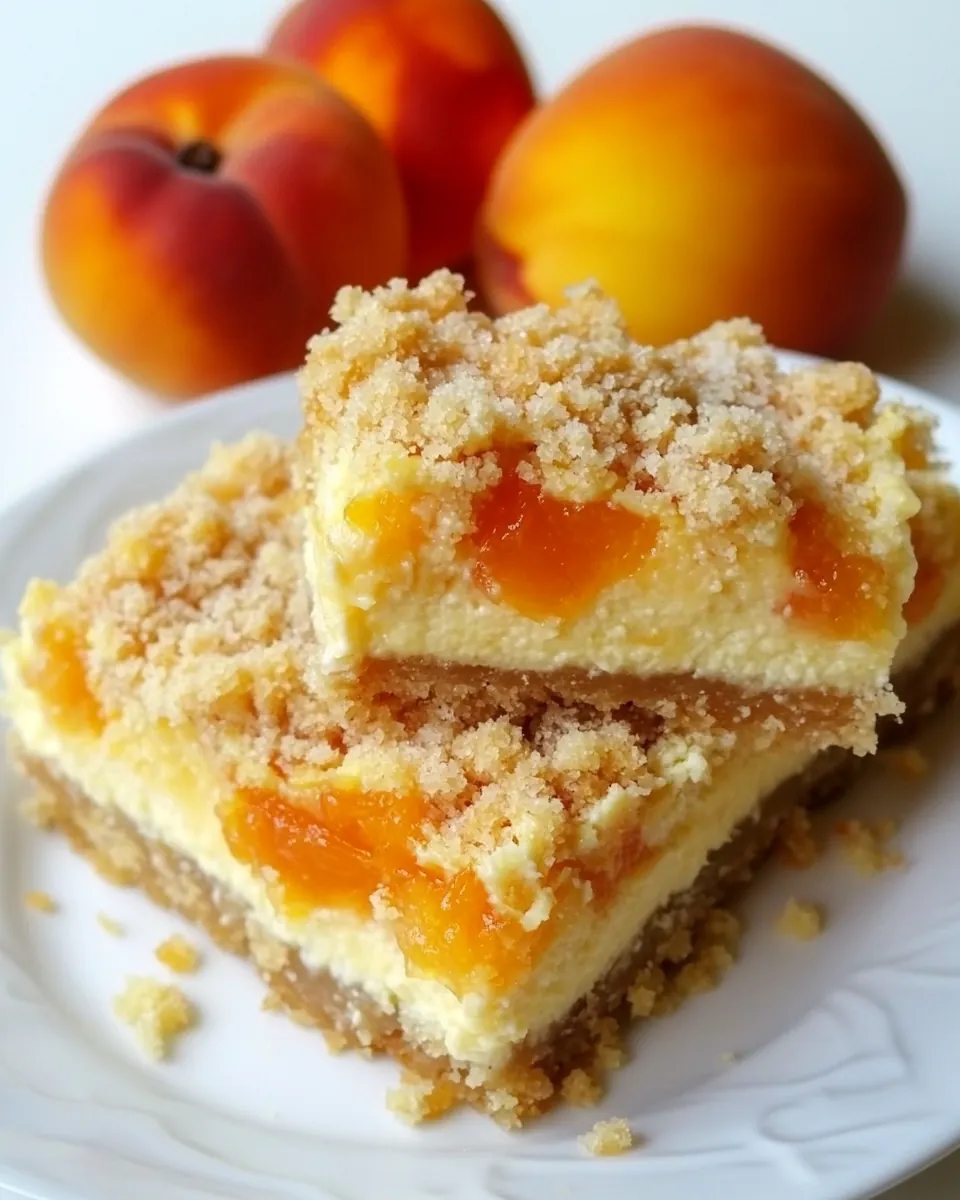
Apricot Crumble Cheesecake
Apricot Crumble Cheesecake remains one of those desserts that makes my kitchen smell like sunshine and warm afternoons.
I first made this cake on a sticky summer evening when the apricot tree in my neighbor’s yard was so heavy with fruit that he insisted I take a bag home. I wanted something that showcased the fruit yet felt indulgent, so I combined a creamy, tangy cream cheese filling with a buttery biscuit base and a crunchy, nutty crumble. While the first slice was still warm, I remember closing my eyes at the way the apricot pieces burst softly, their juices mingling with the custardy center. That first bite taught me that texture contrast is everything, and ever since I return to this recipe when I want to impress without fuss.
Over the years I tweaked the crumble to include ground walnuts for toastiness, and adjusted the baking to protect the delicate filling from cracking. Friends ask for this at summer dinners because the fruit adds brightness, while the cheesecake element feels comforting and familiar. When I serve it, I like to point out the little apricot chunks and the golden crumble, because people eat with their eyes first. This cake is also forgiving, which makes it perfect for holidays or casual gatherings when you want something showy yet manageable.
Recipe Snapshot
1 hr 25 mins
15 mins
70 mins
Hard
350 kcal
American
Gluten-Free, Low FODMAP
Desserts
Food processor, 25 to 35 cm Teflon tray, Oven, Mixing bowl, Spatula
Why We Love This Apricot Crumble Cheesecake
1. Balanced textures that sing together
I love how the crispy base, velvety center, and sandy crumble each have a role. The biscuits pressed into the pan create a firm anchor, the cream cheese filling offers a smooth, rich mouthfeel, and the crumble gives bursts of buttery crunch. That contrast keeps every bite interesting.
2. Bright fruit that cuts through richness
The apricots bring an acidic counterpoint that stops the cheesecake from feeling too heavy. I often use slightly underripe fruit so the natural tang complements the dairy. The lemon juice in the filling and tossed with the apricots is a tiny trick I use to keep flavors lively and the fruit from darkening.
3. Techniques that are forgiving
I value recipes that let you recover from small mistakes, and this one does that. Baking the crust first sets a stable foundation, and lowering the oven temperature for the filling prevents overcooking. If you peek too soon, the center may wobble a bit, but with the recommended cooling and refrigeration time it firms up predictably.
4. Simple pantry ingredients, impressive result
Most of these components are staples: butter, sugar, and flour plus nuts and fruit. That means you can pull this cake together even when you did not plan ahead. I often assemble parts a day early, which makes hosting feel calm rather than chaotic.
5. Versatility for occasions
This recipe is at home on a picnic table, a holiday spread, or a casual weeknight dessert. I adore how it transitions from rustic to elegant depending on how you plate it, and guests always appreciate the balance of creamy, fruity, and crunchy elements.
Essential Ingredients for Apricot Crumble Cheesecake
This short list of ingredients is designed to create a harmony of textures and flavors. The biscuit base supports the creamy filling, while the apricots contribute brightness. The crumble mixes nuts, flour, and butter to add toasty notes and a sandy contrast that keeps each bite lively. Together these components produce a dessert that feels layered yet cohesive.
- 250 g biscuits: Crushed finely to form the base layer and provide structure; binds with melted butter to create a crisp, crunchy crust. Adds texture contrast to the creamy filling and absorbs flavors from other ingredients. Works as the primary source of body for the cheesecake foundation.
- 120 g butter: Melted and mixed with crushed biscuits to bind the base and help it set firmly when chilled or baked. Contributes a rich, buttery flavor that complements the sweet and tangy filling. Also used later to enrich crumble bits for topping if needed.
- 600 g cream cheese: Softened and whipped to create the rich, creamy filling; supplies the characteristic smooth, dense texture of a cheesecake. Provides tangy, dairy richness that balances sugars and fruit components. Acts as the main protein and fat matrix for the custard-like interior.
- 3 large eggs: Beaten and incorporated into the cream cheese to help set the filling and provide structure when baked. Adds moisture and richness while contributing to a tender, custardy texture. Also helps emulsify and stabilize the mixture.
- 120 g sugar: Dissolved into the filling to sweeten and balance the tang of the cream cheese. Controls overall sweetness level and helps achieve a smooth mouthfeel when properly blended. Can also aid in gentle browning of the surface during baking.
- 1 teaspoon vanilla extract: Added for aromatic flavor and to enhance the overall sweetness profile with warm vanilla notes. Intensifies the dessert's fragrance and complements both fruit and dairy elements. Used sparingly to avoid overpowering delicate flavors.
- 1 pinch of salt: Sprinkled to enhance flavor balance and intensify other tastes by contrast; a small amount elevates sweetness and reduces flatness. Helps to bring out depth in both the filling and fruit components without being noticeable as salt. Plays a subtle role in overall flavor harmony.
- 500 g apricots: Pitted and sliced or halved to provide the primary fruit component; offers bright, juicy, slightly tart flavor that pairs with creamy cheese. Cooked down or arranged fresh to form a topping or layer, adding natural sweetness and texture. Contributes moisture and visual appeal to the finished cheesecake.
- 1 tablespoon lemon juice: Squeezed into the fruit or filling to add acidity, brighten flavors, and prevent fruit from oxidizing. Balances sweetness and enhances the apricot's natural tartness for a fresher taste. Helps set fruit preparations slightly when combined with sugar.
- 50 g flour: Folded into crumble or topping mixture to give structure and slight chewiness once baked. Provides a bit of bulk and helps absorb some moisture from fruit, preventing sogginess. Adds a mild, neutral flavor that supports nuts and butter in the crumble.
- 50 g ground walnuts: Ground and incorporated into the crumble topping to add nutty flavor and crunchy texture. Contributes richness and depth that complements the buttery elements and apricots. Enhances mouthfeel and offers a toasted, aromatic note when baked.
- 50 g butter: Cut into the topping mixture and rubbed with flour and sugar to form coarse crumbs that crisp in the oven. Supplies additional richness and helps brown the crumble for a pleasing crunchy finish. Works with walnuts and sugar to create a balanced texture contrast.
- 50 g sugar: Mixed into the crumble topping to sweeten and caramelize during baking, forming a golden, crunchy finish. Balances the tartness of the apricots and the richness of the cheese while encouraging pleasant browning. Helps bind crumble bits together for a cohesive topping.
Making This Apricot Crumble Cheesecake
These steps will walk you from a crumbly base to a chilled, sliceable cheesecake. The method asks for some patience during cooling, but the active work is straightforward. I recommend preparing some elements in advance to let the flavors settle and to make serving day easy.
- Prepare a 25-35 cm (9-12 inch) Teflon tray. Preheat the oven to 180° Celsius (356° Fahrenheit).: As you ready the pan, notice the slight perfume of butter and biscuit crumbs you will soon create, and preheating ensures the crust starts setting immediately when it hits the oven. This step matters because a properly warmed oven produces even heat which helps the crust toast without overbaking. A common mistake is skipping proper preheat time, which can leave the crust undercooked or soggy. Make sure the pan is lightly greased and lined if not nonstick, and confirm the oven has reached temperature before placing the crust inside.
- Put the biscuits in the food processor and grind them finely.: The sound here is a steady whir, and the resulting texture should look like damp sand. Finely ground crumbs compact better and yield a firm base that will hold the creamy filling. If the crumbs are too coarse you may get a fragile crust that crumbles when sliced, so aim for uniformity. If you do not have a food processor, use a rolling pin and a sealed bag to crush the biscuits to a similar consistency.
- Melt the butter over low heat, add it to the biscuits, and homogenize.: As the butter warms, it takes on a nutty aroma and binds the crumbs into a cohesive mixture. Combining the butter with the crumbs until evenly moistened ensures the crust bakes into a compact layer. Avoid overheating the butter which can brown and change flavor; low heat is gentler. A typical pitfall is adding too little moisture, leading to a dry base, so ensure the crumbs glisten slightly and hold together when pressed.
- Put the biscuits in the pan, pressing it well onto the bottom and around the edge.: Use a flat bottomed cup or measuring glass to press firmly and evenly, creating a uniform thickness. You should hear a soft compacting sound and see a smooth surface when done. Pressing firmly prevents the crust from disintegrating when you slice the cheesecake. If you press unevenly, some slices may be dense while others are crumbly, so take your time to level the crust carefully.
- Bake in the oven for 10 minutes, then set aside and move on to the filling.: A short bake helps the crust set and develop a faint toasted aroma without becoming hard. When you remove it, it should smell warm and slightly caramelized. Skipping this step can result in a soggy bottom once the filling is added. Cool the crust a bit before adding the filling to avoid melting the ingredients you will mix next.
- Turn the oven to 160° Celsius (320° Fahrenheit).: Lowering the temperature prepares a gentler environment for the delicate cheesecake filling, helping to prevent cracking and overbrowning. The oven will continue to radiate heat, so allow a couple minutes for the new temp to stabilize. A typical mistake is keeping the oven at too high a temperature which can produce an overly browned top and a dry texture.
- Mix the cream cheese with the sugar for 3 minutes, then add the eggs one at a time and mix well after each, until fully incorporated.: The mixing sound changes from resistance to silky smooth, and the mixture should look pale and glossy. Beating the cream cheese with sugar until smooth eliminates lumps and traps just enough air for a tender texture. Adding eggs gradually helps maintain stability so the custard does not split. Overmixing at this stage can introduce too much air, which may cause cracks, so stop once combined and smooth.
- Finally add the salt, vanilla essence, and lemon juice, mixing gently. Set aside.: At this point a bright scent of citrus and warm vanilla will lift the batter. Mixing gently prevents deflating the mixture and keeps the filling dense and creamy, which is key for a stable set. If you stir vigorously you risk incorporating too much air and creating bubbles that lead to a cracked surface, so fold these flavorings in carefully.
- Cut the apricots into small pieces and sprinkle with a little lemon juice to prevent them from oxidizing.: The sound of the knife is soft, and the fruit will glisten when tossed with lemon juice . This small step preserves the apricot color and brightens flavor, preventing dull brown spots. Cutting pieces uniformly helps the fruit distribute evenly in the filling; uneven pieces can sink or create sparse pockets, so aim for consistency.
- Mix the flour with the nuts, butter, and sugar until you get a sandy dough. Refrigerate for half an hour.: As you work the cold butter into the flour and ground walnuts , the mixture should resemble coarse sand with small pebbles of butter. Chilling firms the fat, which on baking creates a crumbly, crisp texture. Skipping refrigeration can yield a greasy, spread out crumble, so be patient and keep the mix cold.
- Put the cream cheese over the biscuit base. Then sprinkle on the apricot pieces and press them down gently.: Spreading the filling should feel smooth and slightly dense under your spatula, and the apricots will nestle into the custard. Pressing them gently ensures they do not float excessively while baking, which helps the fruit stay distributed. If you push too hard, you may create pockets or uneven layers, so aim for a light, even placement.
- Sprinkle the crumble over the top.: Scatter the chilled crumble in an even blanket so it forms small clusters during baking. The contrast between the golden crumble and the pale filling is satisfying visually and texturally. If the crumble is too fine or pressed flat it may not crisp up properly, so preserve some texture when sprinkling.
- Put the cake in the oven for no more than an hour.: During this bake the aromas will change from custardy sweetness to light caramel notes as the crumble browns. The center should still have a slight wobble when you gently jiggle the pan, which indicates a creamy set. Overbaking dries the filling and dulls the fruit, so check at around 50 minutes depending on your oven.
- The cheesecake should be slightly golden on top.: A thin golden halo across the surface signals caramelization without overbrowning. Visual cues are helpful here, because the internal temperature continues to rise slightly after you remove it. If it looks deeply browned you likely baked too long, so aim for a gentle golden color.
- Leave in the oven to cool for 2 hours, then refrigerate for at least 6 hours, or overnight.: Cooling inside the turned off oven prevents abrupt temperature shifts that can cause cracks, and the long chill time ensures the filling firms for neat slices. The patience pays off in clean cuts and a silky mouthfeel. Rushing this step is the most common error here; slicing too early yields a runny center.
- It slices easily once it has completely cooled. It's delicious. Enjoy!: When the cake is fully chilled, the knife will glide through with a satisfying, clean sound and the cross section will show distinct layers of base fruit filling and crumble. Serve at a slightly cool temperature so the filling is creamy and not icy. If slices fall apart, the cake needed more chill time, so return it to the fridge before serving.
Tips for Success
These focused tips will help you get the best texture and flavor from your Apricot Crumble Cheesecake. Read them before you start to save time and avoid common pitfalls. I expanded these into practical, kitchen ready suggestions based on years of testing.
- Room temperature dairy: Warm the cream cheese and even the eggs slightly before mixing to achieve a lump free, silky batter that whips smoothly without overworking.
- Measure ingredients carefully: Weigh the biscuits, butter, and sugar for consistent results, especially for the crust and crumble, where texture depends on ratios.
- Protect the crust: Parbake the base for the recommended 10 minutes so it sets and resists sogginess from the filling, ensuring neat slices later.
- Lower bake temp for filling: Baking the filling at 160 Celsius 320 Fahrenheit reduces cracking and keeps the center creamy, so monitor rather than relying on time alone.
- Chill thoroughly: Refrigerate the finished cheesecake for at least 6 hours or overnight to allow the filling to firm and flavors to meld for cleaner slicing and better texture.
- Use cold butter in crumble: Keep the butter cold when making the crumble so it creates small pockets that crisp up beautifully in the oven.
How to Enjoy Apricot Crumble Cheesecake
This cheesecake is versatile and works well for many occasions. Serve it slightly chilled so the filling is creamy and the crumble remains crisp. Below are ideas for plating, pairings, and storage that make the most of its texture and flavor.
- Serve chilled slices: Remove the cake from the refrigerator 15 to 20 minutes before serving so the texture is creamy but not cold locked, which allows aromas to bloom.
- Casual gatherings: Offer the cake on a rustic wooden board with a small spatula for self service, letting guests admire the golden crumble and apricot pieces before taking a slice.
- Special occasions: Plate individual slices with a light dusting of powdered sugar or a few halved fresh apricots for extra color and a refined presentation.
- Storage: Keep the cheesecake refrigerated, covered, for up to 4 days. For longer storage, freeze slices individually wrapped and thaw in the fridge overnight before serving.
- Occasions and seasonality: This is ideal for summer when apricots are ripe, and it also fits well on holiday dessert tables as a bright alternative to heavier cakes.
- Portioning tips: Use a hot, dry knife for clean slices; dip the blade in hot water and wipe between cuts to maintain smooth edges.
FAQ
Conclusion
This Apricot Crumble Cheesecake stands out because of its harmonious layers of crunchy base creamy filling and a toasty crumble that complements bright apricot pieces. It is a dessert that feels both special enough for company and approachable enough for a relaxed weeknight treat. Give it a try when apricots are in season; the simple steps reward you with vivid flavor contrasts and dependable texture. I hope you enjoy making it as much as I do and that it becomes one of those recipes you reach for when you want something memorable yet unfussy.
Apricot Crumble Cheesecake
Equipment
- Food Processor
- 25 to 35 cm Teflon tray
- Oven
- Mixing Bowl
- Spatula
Ingredients
- 250 g biscuits Crushed finely to form the base layer and provide structure; binds with melted butter to create a crisp, crunchy crust. Adds texture contrast to the creamy filling and absorbs flavors from other ingredients. Works as the primary source of body for the cheesecake foundation.
- 120 g butter Melted and mixed with crushed biscuits to bind the base and help it set firmly when chilled or baked. Contributes a rich, buttery flavor that complements the sweet and tangy filling. Also used later to enrich crumble bits for topping if needed.
- 600 g cream cheese Softened and whipped to create the rich, creamy filling; supplies the characteristic smooth, dense texture of a cheesecake. Provides tangy, dairy richness that balances sugars and fruit components. Acts as the main protein and fat matrix for the custard-like interior.
- 3 large eggs Beaten and incorporated into the cream cheese to help set the filling and provide structure when baked. Adds moisture and richness while contributing to a tender, custardy texture. Also helps emulsify and stabilize the mixture.
- 120 g sugar Dissolved into the filling to sweeten and balance the tang of the cream cheese. Controls overall sweetness level and helps achieve a smooth mouthfeel when properly blended. Can also aid in gentle browning of the surface during baking.
- 1 teaspoon vanilla extract Added for aromatic flavor and to enhance the overall sweetness profile with warm vanilla notes. Intensifies the dessert's fragrance and complements both fruit and dairy elements. Used sparingly to avoid overpowering delicate flavors.
- 1 pinch of salt Sprinkled to enhance flavor balance and intensify other tastes by contrast; a small amount elevates sweetness and reduces flatness. Helps to bring out depth in both the filling and fruit components without being noticeable as salt. Plays a subtle role in overall flavor harmony.
- 500 g apricots Pitted and sliced or halved to provide the primary fruit component; offers bright, juicy, slightly tart flavor that pairs with creamy cheese. Cooked down or arranged fresh to form a topping or layer, adding natural sweetness and texture. Contributes moisture and visual appeal to the finished cheesecake.
- 1 tablespoon lemon juice Squeezed into the fruit or filling to add acidity, brighten flavors, and prevent fruit from oxidizing. Balances sweetness and enhances the apricot's natural tartness for a fresher taste. Helps set fruit preparations slightly when combined with sugar.
- 50 g flour Folded into crumble or topping mixture to give structure and slight chewiness once baked. Provides a bit of bulk and helps absorb some moisture from fruit, preventing sogginess. Adds a mild, neutral flavor that supports nuts and butter in the crumble.
- 50 g ground walnuts Ground and incorporated into the crumble topping to add nutty flavor and crunchy texture. Contributes richness and depth that complements the buttery elements and apricots. Enhances mouthfeel and offers a toasted, aromatic note when baked.
- 50 g butter Cut into the topping mixture and rubbed with flour and sugar to form coarse crumbs that crisp in the oven. Supplies additional richness and helps brown the crumble for a pleasing crunchy finish. Works with walnuts and sugar to create a balanced texture contrast.
- 50 g sugar Mixed into the crumble topping to sweeten and caramelize during baking, forming a golden, crunchy finish. Balances the tartness of the apricots and the richness of the cheese while encouraging pleasant browning. Helps bind crumble bits together for a cohesive topping.
Instructions
- Prepare a 25-35 cm (9-12 inch) Teflon tray. Preheat the oven to 180° Celsius (356° Fahrenheit).: As you ready the pan, notice the slight perfume of butter and biscuit crumbs you will soon create, and preheating ensures the crust starts setting immediately when it hits the oven. This step matters because a properly warmed oven produces even heat which helps the crust toast without overbaking. A common mistake is skipping proper preheat time, which can leave the crust undercooked or soggy. Make sure the pan is lightly greased and lined if not nonstick, and confirm the oven has reached temperature before placing the crust inside.
- Put the biscuits in the food processor and grind them finely.: The sound here is a steady whir, and the resulting texture should look like damp sand. Finely ground crumbs compact better and yield a firm base that will hold the creamy filling. If the crumbs are too coarse you may get a fragile crust that crumbles when sliced, so aim for uniformity. If you do not have a food processor, use a rolling pin and a sealed bag to crush the biscuits to a similar consistency.
- Melt the butter over low heat, add it to the biscuits, and homogenize.: As the butter warms, it takes on a nutty aroma and binds the crumbs into a cohesive mixture. Combining the butter with the crumbs until evenly moistened ensures the crust bakes into a compact layer. Avoid overheating the butter which can brown and change flavor; low heat is gentler. A typical pitfall is adding too little moisture, leading to a dry base, so ensure the crumbs glisten slightly and hold together when pressed.
- Put the biscuits in the pan, pressing it well onto the bottom and around the edge.: Use a flat bottomed cup or measuring glass to press firmly and evenly, creating a uniform thickness. You should hear a soft compacting sound and see a smooth surface when done. Pressing firmly prevents the crust from disintegrating when you slice the cheesecake. If you press unevenly, some slices may be dense while others are crumbly, so take your time to level the crust carefully.
- Bake in the oven for 10 minutes, then set aside and move on to the filling.: A short bake helps the crust set and develop a faint toasted aroma without becoming hard. When you remove it, it should smell warm and slightly caramelized. Skipping this step can result in a soggy bottom once the filling is added. Cool the crust a bit before adding the filling to avoid melting the ingredients you will mix next.
- Turn the oven to 160° Celsius (320° Fahrenheit).: Lowering the temperature prepares a gentler environment for the delicate cheesecake filling, helping to prevent cracking and overbrowning. The oven will continue to radiate heat, so allow a couple minutes for the new temp to stabilize. A typical mistake is keeping the oven at too high a temperature which can produce an overly browned top and a dry texture.
- Mix the cream cheese with the sugar for 3 minutes, then add the eggs one at a time and mix well after each, until fully incorporated.: The mixing sound changes from resistance to silky smooth, and the mixture should look pale and glossy. Beating the cream cheese with sugar until smooth eliminates lumps and traps just enough air for a tender texture. Adding eggs gradually helps maintain stability so the custard does not split. Overmixing at this stage can introduce too much air, which may cause cracks, so stop once combined and smooth.
- Finally add the salt, vanilla essence, and lemon juice, mixing gently. Set aside.: At this point a bright scent of citrus and warm vanilla will lift the batter. Mixing gently prevents deflating the mixture and keeps the filling dense and creamy, which is key for a stable set. If you stir vigorously you risk incorporating too much air and creating bubbles that lead to a cracked surface, so fold these flavorings in carefully.
- Cut the apricots into small pieces and sprinkle with a little lemon juice to prevent them from oxidizing.: The sound of the knife is soft, and the fruit will glisten when tossed with lemon juice . This small step preserves the apricot color and brightens flavor, preventing dull brown spots. Cutting pieces uniformly helps the fruit distribute evenly in the filling; uneven pieces can sink or create sparse pockets, so aim for consistency.
- Mix the flour with the nuts, butter, and sugar until you get a sandy dough. Refrigerate for half an hour.: As you work the cold butter into the flour and ground walnuts , the mixture should resemble coarse sand with small pebbles of butter. Chilling firms the fat, which on baking creates a crumbly, crisp texture. Skipping refrigeration can yield a greasy, spread out crumble, so be patient and keep the mix cold.
- Put the cream cheese over the biscuit base. Then sprinkle on the apricot pieces and press them down gently.: Spreading the filling should feel smooth and slightly dense under your spatula, and the apricots will nestle into the custard. Pressing them gently ensures they do not float excessively while baking, which helps the fruit stay distributed. If you push too hard, you may create pockets or uneven layers, so aim for a light, even placement.
- Sprinkle the crumble over the top.: Scatter the chilled crumble in an even blanket so it forms small clusters during baking. The contrast between the golden crumble and the pale filling is satisfying visually and texturally. If the crumble is too fine or pressed flat it may not crisp up properly, so preserve some texture when sprinkling.
- Put the cake in the oven for no more than an hour.: During this bake the aromas will change from custardy sweetness to light caramel notes as the crumble browns. The center should still have a slight wobble when you gently jiggle the pan, which indicates a creamy set. Overbaking dries the filling and dulls the fruit, so check at around 50 minutes depending on your oven.
- The cheesecake should be slightly golden on top.: A thin golden halo across the surface signals caramelization without overbrowning. Visual cues are helpful here, because the internal temperature continues to rise slightly after you remove it. If it looks deeply browned you likely baked too long, so aim for a gentle golden color.
- Leave in the oven to cool for 2 hours, then refrigerate for at least 6 hours, or overnight.: Cooling inside the turned off oven prevents abrupt temperature shifts that can cause cracks, and the long chill time ensures the filling firms for neat slices. The patience pays off in clean cuts and a silky mouthfeel. Rushing this step is the most common error here; slicing too early yields a runny center.
- It slices easily once it has completely cooled. It's delicious. Enjoy!: When the cake is fully chilled, the knife will glide through with a satisfying, clean sound and the cross section will show distinct layers of base fruit filling and crumble. Serve at a slightly cool temperature so the filling is creamy and not icy. If slices fall apart, the cake needed more chill time, so return it to the fridge before serving.
Notes
- Room temperature dairy: Warm the cream cheese and even the eggs slightly before mixing to achieve a lump free, silky batter that whips smoothly without overworking.
- Measure ingredients carefully: Weigh the biscuits, butter, and sugar for consistent results, especially for the crust and crumble, where texture depends on ratios.
- Protect the crust: Parbake the base for the recommended 10 minutes so it sets and resists sogginess from the filling, ensuring neat slices later.
- Lower bake temp for filling: Baking the filling at 160 Celsius 320 Fahrenheit reduces cracking and keeps the center creamy, so monitor rather than relying on time alone.
- Chill thoroughly: Refrigerate the finished cheesecake for at least 6 hours or overnight to allow the filling to firm and flavors to meld for cleaner slicing and better texture.
- Use cold butter in crumble: Keep the butter cold when making the crumble so it creates small pockets that crisp up beautifully in the oven.