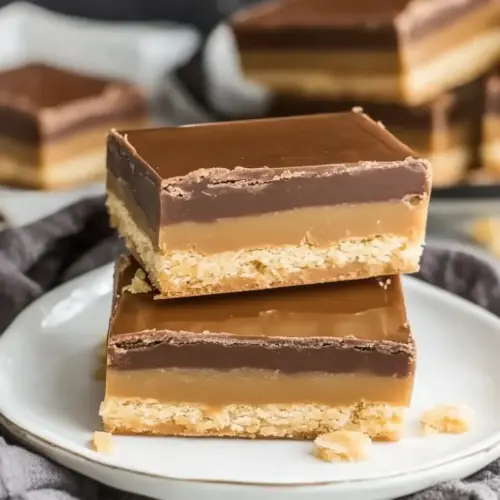
Homemade Twix Bars
Homemade Twix Bars are a nostalgic layered treat with a crisp shortbread crust, smooth buttery caramel, and a glossy chocolate top. These bars are easy to make and deliver a mix of textures that are both crispy and chewy, ideal for sharing at gatherings or gifting to friends. Make them for an easy weekend bake that always earns compliments.
Equipment
- 9 x 13-inch pan
- Pastry blender
- Small Saucepan
- Offset Spatula
- Refrigerator
Ingredients
- 2 sticks cold butter, cut into small pieces Provide a rich, flaky base by incorporating cold butter cut into small pieces so it creates tender layers when mixed into the dough. Ensure butter remains cold to prevent overworking the gluten and to achieve a shortbread-like texture once baked.
- 1/2 cup sugar Add sweetness and structure by creaming sugar with butter to dissolve granules and help aerate the mixture for a lighter crumb. Adjust sugar amount carefully to balance caramel and biscuit flavors without overpowering the shortbread base.
- 2 teaspoons vanilla Impart aromatic warmth and depth by adding vanilla; it enhances the overall flavor profile and rounds out the buttery and caramel notes. Use pure vanilla extract for a natural, nuanced flavor that blends smoothly into the dough and caramel.
- 2 cups flour Bind and form the dough by folding in flour to absorb the butter and sugar, creating the proper consistency for rolling and baking. Measure flour accurately and mix gently to avoid toughness, aiming for a cohesive dough that bakes into a crisp, tender shortbread layer.
Instructions
- For the crust: Preheat oven to 350°. Line 9" x 13" pan with nonstick foil. Set aside.: Preheat oven to 350° : As the oven warms, notice the change in the kitchen air, a faint warmth that primes the baking process. Preheating ensures the crust begins setting the moment it goes in, which helps create that tender yet crisp texture. A common mistake is putting the pan into an oven that is not fully hot, which can result in uneven baking and a denser crust.
- Using a pastry blender cut butter into the sugar. Use fingers to break up the butter, till the mixture resembles cornmeal.: Lining the pan provides a clean release and protects the crust edges from sticking, while the foil makes lifting the bars out for cutting much neater. Press the foil smoothly into corners to avoid air pockets, because trapped air can cause small uneven spots in the crust. If the foil is wrinkled, the crust surface may bake unevenly.
- Add vanilla. Add the flour.: You will feel the texture change under your hands from clumps to a sandy mixture, and you might hear the faint sound of granulated sugar shifting. This texture indicates the right distribution of fat for flakiness, and it is why we keep the butter cold. Overworking will warm the butter and make the dough greasy, so stop when you reach the coarse meal stage.
- Mix till flour is incorporated. The mixture will be crumbly. Alternatively, you can mix in the food processor.: When you sprinkle in the vanilla and flour , the aroma of the vanilla will bloom immediately, and the mixture will start to come together into a looser dough. The flour provides structure and once combined, it will hold the shape once pressed. A frequent error is adding too much flour, which leads to a dry, crumbly crust, so mix gently and check the texture.
- Press it evenly into the pan. Lightly flouring your fingertips will help with any sticking.: As you bring the dough together, expect a crumbly feel rather than a cohesive ball. That crumbliness is normal for a shortbread style crust, and it will compact when pressed. Using a food processor speeds the job, but watch closely, because processors can overwork the mixture and heat the butter .
- Prick the crust all over with a fork.: Pressing creates a uniform base that bakes at an even rate, and you will feel the mixture firm as you apply pressure. Aim for consistent thickness across the pan, because thin spots will brown faster. If you do not press firmly enough, the crust may crumble when cut, so use decisive, even pressure.
- Bake 15 minutes until the crust is lightly golden brown on top and the edges are deeper golden brown. Set it aside to cool completely.: These small holes let steam escape and keep the crust from puffing up, resulting in a flat, even surface for layering. You will see tiny pinpricks dotting the surface, and the crust will retain its shape during baking. Skipping this step risks little domes forming, which make layering the caramel more difficult.
- For the caramel layer: Melt the caramel and cream over low heat in a small saucepan. (or use the microwave, stopping and stirring at 30-60 second intervals till smooth and melted). Pour the caramel over the cooled crust and set in the refrigerator for 30 minutes to chill and firm up.: The smell of warm, toasty butter and sugar will fill the kitchen as the crust browns, and the color shift is your cue that the gluten has set and it is ready to support the caramel. Edges will darken first, so watch them to avoid overbrowning. If you underbake, the crust can be too soft and the finished bars will be hard to slice cleanly.
- For the Chocolate Layer: Melt the chocolate and shortening by microwaving using 30-second increments, stopping and stirring till melted and smooth. Spread over caramel with an offset spatula. I also used a plastic frosting tool to make optional striations while the chocolate was warm.: Melt the caramel and cream over low heat in a small saucepan. (or use the microwave, stopping and stirring at 30 to 60 second intervals till smooth and melted). Pour the caramel over the cooled crust and set in the refrigerator for 30 minutes to chill and firm up. : As the caramel melts and the cream blends in, you will notice steam rising and the mixture becoming glossy and fluid. Pouring it over the cooled crust, you should see it spread in a velvet layer, and chilling firms it to a sliceable state. Work slowly when heating to prevent scorching, and a common issue is not chilling long enough, which results in gooey bars that smear when cut.
- Let cool before cutting. Store in an airtight container in the refrigerator to minimize the caramel oozing.: Melt the chocolate and shortening by microwaving using 30 second increments, stopping and stirring till melted and smooth. Spread over caramel with an offset spatula. I also used a plastic frosting tool to make optional striations while the chocolate was warm. : When the chocolate melts with the shortening, it becomes glossy and silky, reflecting light as you stir. Spreading it creates a uniform, mirror like top that sets into a satisfying snap. If you skip stirring between intervals, the chocolate can seize or burn, so go slowly. Too thin a chocolate layer can break easily, while too thick may hide the caramel balance, so aim for a medium coating.
- Let cool before cutting. Store in an airtight container in the refrigerator to minimize the caramel oozing.: As the bars cool, the chocolate will firm and the caramel will become stable, producing clean edges when cut. You will hear a quiet, satisfying snap as you separate squares, and cold bars slice more neatly. Cutting too soon is the most common mistake, leaving you with sticky, messy pieces, so be patient and chill thoroughly.
Notes
- Use cold butter: Keeping the butter cold until you actually cut it into the mixture preserves pockets of fat that create the crumbly, shortbread like texture we want in the crust.
- Chill between layers: Refrigerating the crust before pouring the caramel, and chilling again after adds structure so the bars cut cleanly without the layers mixing together.
- Microwave chocolate carefully: Melt the chocolate in 30 second bursts and stir thoroughly to reach a smooth, glossy finish and to avoid burning or seizing the chocolate.
- Flour your fingertips: Lightly flouring your fingertips when pressing the crust prevents sticking and helps you achieve an even, compact base.
- Use an offset spatula: Spreading the chocolate with an offset spatula produces a smooth top and gives you control for decorative striations or a perfectly even coat.