Halloween Sugar Cookies
Halloween Sugar Cookies are the treat I reach for when I want a cozy, hands on baking day that ends with a plateful of smiles. I remember the first time I made these, the kitchen smelled like warm butter and sugar and my niece insisted on using the biggest cookie cutter she could find, which turned one batch into a parade of spooky shapes. That chaotic, joyful afternoon is exactly why I keep this recipe in my back pocket.
I tend to make a double batch when kids are coming over, because decorating becomes the actual activity and frosting disappears faster than I can refill the piping bags. The dough is forgiving, and the slightly chocolatey base here gives the cookies a more grown up flavor while still being perfectly approachable for little hands. I like how the recipe lets you control thickness and crispness, so you can make buttery thin cookies or thicker, cakier ones depending on your mood.
There is a rhythm to this cookie day that I adore. First comes the satisfying mixing of unsalted butter and granulated sugar until everything looks pale and airy. Then the dough chills and quietly firms up, making rolling a breeze. Decorating is where stories happen, when someone pipes a face that makes the whole room laugh. These are not just cookies, they are tiny canvases.
Recipe Snapshot
1 hr 15 mins
60 mins
15 mins
Medium
150 kcal
American
Gluten-Free, Low FODMAP
Desserts
Stand mixer, Paddle attachment, Rolling pin, Cookie cutters, Parchment paper, Baking sheet, Offset spatula, Piping bag and tips
Why We Love This Halloween Sugar Cookies
They are irresistibly festive
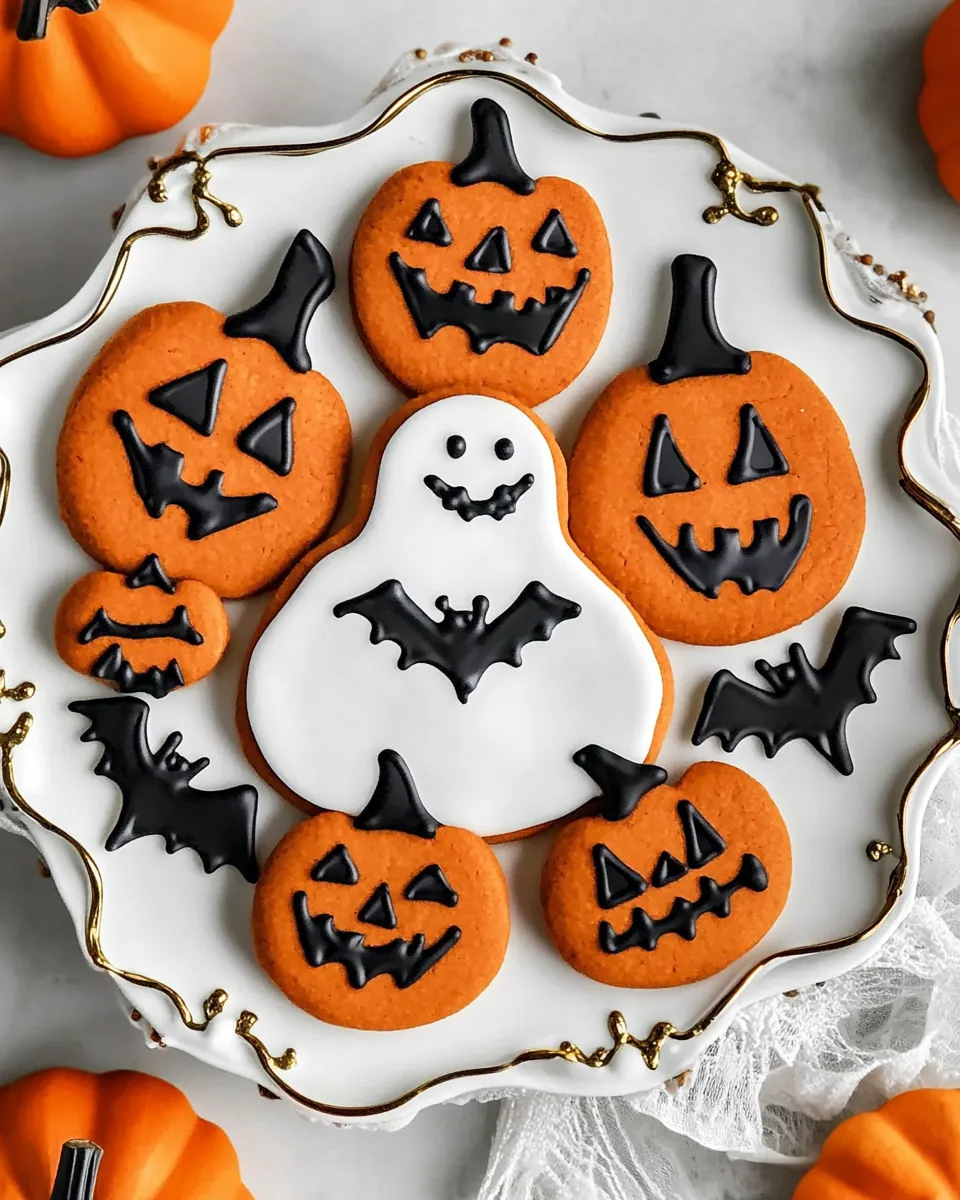
I love that Halloween Sugar Cookies let you create vivid characters, from ghosts to pumpkins, with simple tools. Decorating is an instant mood lifter, and I find the process turns a regular afternoon into an event. The crisp edges and soft centers make every bite interesting, and the cookies look like a party whether you plate them for neighbors or bring them to a classroom.
Flexible texture control
One of my favorite things about this recipe is how easy it is to change the texture. Roll thinner for delicate, crisp cookies, or keep them a bit thicker for a tender, cakier bite. I often tell friends to experiment with thickness on a small test batch to dial in their preferred mouthfeel. That small adjustment dramatically affects the final experience, and it’s something you can tweak without changing the recipe.
Reliable frosting for decorating
The buttercream here pipes beautifully, which matters if you want clean edges and bright fills. I appreciate having a frosting that crusts at room temperature so you can stack cookies later, and the consistency is forgiving enough that beginners won’t be frustrated. The frosting also holds color well, so your designs stay vivid through gifting and serving.
Kid friendly and crowd ready
From my years of hosting, I can say these cookies scale well. A single batch yields plenty for a small group, and doubling is straightforward. Kids love the hands on nature, and adults enjoy the slightly richer chocolate base when you include the cocoa. Whether you need a bake sale offering or a party platter, these cookies get the job done and look adorable doing it.
Practical storage and make ahead
I often bake a day ahead and store the cooled, unfrosted cookies in an airtight container. The dough also freezes well, letting you prep ahead of a busy holiday. That sense of ease is a real comfort when calendars fill up, and it means you can spend more time decorating and less time stressing at the last minute.
What to Gather for Halloween Sugar Cookies
These ingredients are simple, dependable, and work together to create a cookie that is easy to roll, cut, and decorate. The core players are unsalted butter for richness, granulated sugar for structure and sweetness, and all-purpose flour for tender crumb. The cocoa adds depth while the frosting ingredients transform the cookies into colorful, festive treats.
- 1 cup (226 g) unsalted butter, softened: Creamed to provide a rich, tender base and help incorporate air for light sugar cookies; softened texture ensures even mixing with sugar.
- 1 1/4 cup (250 g) granulated sugar: Granulated sweetness used to tenderize and give structure while contributing to spread and caramelization during baking.
- 1 large egg: Beaten to bind dough and add moisture while providing lift and slight richness for better crumb structure.
- 1 teaspoon vanilla extract: Added to impart sweet floral aroma and rounded flavor, enhancing the overall taste profile of the cookies.
- 1/2 teaspoon salt: Balanced to control flavor and strengthen gluten slightly while enhancing other flavors and preventing flat sweetness.
- 1 teaspoon baking powder: Leavened to introduce gentle lift and contribute to a slightly cakey, tender texture in the cookie dough.
- 1/2 cup (20 g) unsweetened cocoa powder (or Dutch Process for a deeper flavor): Hung to deepen chocolate flavor and add cocoa richness; offers a subtle bitterness that balances sweetness.
- 2 1/2 cups (310 g) all-purpose flour: Measured to provide the bulk and structure of the dough, forming the cookie matrix when hydrated and mixed.
- 1/2 cup (113 g) unsalted butter, softened: Creamed to enrich the frosting with a smooth, spreadable texture and enhance flavor while maintaining stability.
- 4 cups (452 g) powdered sugar: Sifted and whisked into the icing to sweeten, thicken, and create a silky, pipeable consistency for decorating.
- 1/4 teaspoon salt: Seasoned to balance and brighten the icing flavors while reducing cloying sweetness and rounding the taste.
- 1 teaspoon vanilla extract: Added to flavor and scent the icing, supplying depth and warmth to complement sweetness and decorations.
- 3 4 tablespoons milk: Poured to adjust the icing consistency, enabling spreading or piping; small amounts control thickness precisely.
- Food coloring if desired: Tinted sparingly to create festive colors in the icing or dough, enhancing visual appeal without altering flavor.
- Sprinkles if desired: Sprinkled for texture and visual interest, providing crunch and color to finish the decorated cookies beautifully.
Preparation Steps for Halloween Sugar Cookies

These steps guide you from mixing to decorating with detail and personality. I like to move methodically, keeping bowls and tools organized so the workflow stays calm and enjoyable. Follow the sensory cues and chill times for best results.
- Place butter and sugar in a large mixing bowl (or a stand mixer fitted with the paddle attachment). Cream until light and fluffy, 1-2 minutes.: When you begin you should hear the gentle hum of the mixer and see the butter and granulated sugar transform into a pale, airy mixture, which takes about one to two minutes at medium speed, depending on your mixer. This stage is crucial because the tiny air pockets created here help the cookies rise and develop tender texture; if you skip this step the cookies can end up dense. Pay attention to the visual cue, you want the mixture to look noticeably lighter and slightly ribbon when the paddle is lifted. A common pitfall is working with butter that is too warm; it will look glossy and may not trap air well, so chill briefly if needed. If the mixture seems greasy, stop and refrigerate for five to ten minutes, then continue to avoid overbeating the sugar into a liquid state.
- Add egg, vanilla, salt, baking powder, and cocoa and mix until combined, then mix in flour until smooth.: After adding the egg , vanilla , salt , baking powder , and cocoa powder , the batter will smell richer and slightly chocolatey, and you will notice it becoming thicker and creamier; this is why mixing each addition until incorporated is important for even flavor. The addition of all-purpose flour dries the dough and brings it together into a cohesive mass; mix just until you no longer see streaks of flour for tender results. Overmixing once the flour is added can develop too much gluten, making cookies tough, so stop as soon as combined. If the dough feels crumbly, a teaspoon of milk can help bring it together without making it sticky.
- Lay a sheet of wax or parchment paper on a work surface. Place half the cookie dough in the center and press to form a disk. Cover with another sheet of paper and roll to between 1/4-1/2 inch thickness (as desired). Repeat with the second half of the dough.: The dough should be cool and pliable when you press it into a disk, which makes rolling even and prevents sticking. Rolling between parchment sheets keeps cleanup simple and produces an even thickness; you can feel the dough firm slightly under the rolling pin as it evens out. The visual cue is a smooth surface free of deep cracks; if cracks appear, press with your hands and chill to rehydrate. Rolling directly on a counter without parchment often leads to tearing or uneven thickness, so avoid that to keep shapes crisp.
- Chill dough until firm, at least 30 minutes.: Chilling is one of the most important steps, because a firm dough holds cookie shapes and prevents spreading, so place both wrapped disks in the refrigerator for at least thirty minutes and check firmness before cutting. You will feel a noticeable difference when the dough is ready, it should be cool and slightly springy; if it feels soft the cookies may spread during baking. A frequent error is skimping on chill time; if you are short on time, pop the dough into the freezer for ten to fifteen minutes but watch closely to avoid freezing solid.
- Preheat oven to 350°F. Line cookie sheets with parchment paper or silicone baking mats.: Preheating is essential so the cookies begin baking immediately and set their edges; you should wait until the oven reaches 350°F and use an oven thermometer if your oven runs hot or cold. Lined sheets provide even contact and prevent sticking, and they also make transferring cookies easier. The oven will emit a dry, warm scent when at temperature, and the first batch will brown more predictably. Placing dough on a hot sheet is a common mistake that causes excessive spread, so always use a cooled, lined sheet.
- Remove half the dough from the refrigerator and use cookie cutters to cut desired shapes.: When you bring the dough out it should be cold but pliable, and the edges of the cut shapes will be clean and defined. Press the cutters straight down without twisting to avoid misshapen edges, then transfer shapes carefully. If the dough warms too much and becomes sticky, return it to the refrigerator for five to ten minutes to firm up. Twisting the cutter can distort the shape, so lift straight up for best results.
- Place 2 inches apart on cookie sheets. Chill for 15 minutes then bake cookies until no longer glossy, approximately 10-15 minutes (depending on thickness and size).: The dough will firm further on the cold sheet and the short chill helps prevent spreading; you can almost feel the surface tighten. Bake until the tops lose their glossy sheen and the edges are set, about ten to fifteen minutes depending on thickness and cookie size. You might hear a faint quiet as moisture evaporates and smell a warm, sweet, buttery aroma as they bake. Avoid overbaking, which causes dryness, so remove cookies as soon as edges set and transfer to cooling racks.
- Reroll leftover dough and chill while cutting shapes from the second half. Continue until all your cookie dough is cut into shapes.: Watch the texture as you reroll, it should still be cool and not sticky; if it becomes too soft, re-chill to maintain shape integrity. Rerolling a few times is fine, but excessive rerolling can make cookies tougher due to extra handling. A helpful tip is to press scraps into a disk and chill between rerolls, keeping dough consistent. If you notice cracks after cutting, press lightly to seal or chill again before baking.
- Once cookies are baked, cool completely before frosting.: Cooling fully is critical because warm cookies will cause the frosting to melt and lose detail; leave them on a rack until they are room temperature, which you can feel by touch. The surface will feel firm and not warm, and the smell will settle into a gentle, chocolate butter note rather than a hot aroma. Don’t rush this step, as frosting on warm cookies leads to runny designs and sticky stacking problems.
- To make the frosting, beat butter and sugar with a stand mixer until crumbly. Add salt and vanilla, then add 3 tablespoons of milk and mix until smooth, adding more milk 1 teaspoon at a time until you get a piping consistency.: When you begin creaming the frosting butter and powdered sugar will resemble coarse crumbs, and as you add milk and vanilla it will smooth into a glossy paste. The right piping consistency should hold peaks but still flow slightly when pressed through a bag. If frosting seems grainy, beat a bit longer; if it becomes too loose, add a touch more powdered sugar . A common mistake is adding too much milk at once, which makes the frosting runny and hard to pipe.
- Frost cookies as desired. Let sit at room temperature to crust, then you can stack them.: After piping, allow the frosting to sit undisturbed at room temperature until it forms a thin crust, which protects details and makes stacking possible without smudging. You will notice the surface change from glossy to matte as it sets. If you need to speed the process slightly, place them in a cool, dry spot but avoid the fridge which can cause condensation. Stacking too soon will smear your work, so be patient until the crust forms.
- To decorate as seen in the photos, use a Wilton round tip, #4 or #5. Pipe the edges of each cookie then fill in with the same tip. Use an offset spatula to smooth the frosting and then add any details.: Using a small round tip gives you control for crisp outlines and neat flooding, and an offset spatula helps push frosting into corners for smooth surfaces. After piping the outline, fill in and use the tip or spatula to level the surface before adding details or sprinkles. If you overfill an area, gently pull frosting back with the spatula rather than scraping, which can tear edges. Practice piping on a spare cookie to steady your hand before tackling a full tray.
- Store cookies in an airtight container at room temperature for up to 4 days or freeze for up to 2 months.: Proper storage keeps your cookies fresh and the frosting intact; place sheets of parchment between layers if stacking and use an airtight container to prevent staling. At room temperature the texture remains tender for up to four days, and frozen cookies keep for up to two months when wrapped tightly. A mistake to avoid is storing while frosting is still wet, which causes sticking; always wait until frosting is set.
Tips and Variations

These tips will help you get reliable results and make decorating easier, whether you are a first timer or a seasoned baker. I include small technique notes that have saved me time and improved consistency over many holiday seasons.
- Chill between rolls: If the dough begins to warm while you work, return it to the refrigerator for ten to fifteen minutes to keep edges sharp and prevent sticking.
- Sift powdered sugar: Sifting the powdered sugar before mixing helps produce a silky, lump free frosting that pipes smoothly and looks professional.
- Test bake one sheet first: Bake a small test batch to confirm oven temp and thickness, then adjust rolling thickness for subsequent trays to get consistent color and bake time.
- Use gel food coloring: Gel colors give vivid hues without watering down frosting, letting you maintain a firm piping consistency while achieving bright designs.
- Keep a cooled spare sheet: If you are baking multiple batches, allow sheets to cool fully before placing new dough; a hot sheet causes extra spread and uneven baking.
Accompaniments for Halloween Sugar Cookies
These cookies pair well with simple beverages and make a great addition to holiday dessert tables. Consider presentation and storage when serving, and choose accompaniments that let the cookies shine. Here are ideas to complete your spread and occasions where these cookies fit best.
- Serve with warm milk: A small glass of warm milk complements the slightly chocolate notes and is comforting for kids and adults alike, making it ideal for a cozy party.
- Package as gifts: Arrange in a box with parchment layers and a ribbon for neighborly treats or party favors, the decorated cookies look thoughtful and festive.
- Perfect for classroom parties: These cookies are easy to portion and decorate, making them a crowd pleasing option for school events or community gatherings.
- Store smartly: Keep cookies in an airtight container at room temperature for up to four days, or freeze unfrosted cookies for long term storage and frost when ready to serve.
- Seasonal table centerpiece: Arrange cookies on a platter with themed napkins and small pumpkins to create a festive display for Halloween gatherings or fall get togethers.
FAQ
Conclusion
These Halloween Sugar Cookies stand out because they are both playful and dependable, offering excellent texture and decorating potential. Try them when you want an activity that brings people together and results in delightful, shareable treats. Once you get comfortable with the chilling and piping rhythm, you will find these cookies become a seasonal favorite, easy to scale and customize for any spooky celebration. Have fun with shapes and colors, and enjoy the smiling faces that follow.
Halloween Sugar Cookies
Equipment
- Stand mixer
- Paddle attachment
- Rolling Pin
- Cookie cutters
- Parchment Paper
- Baking Sheet
- Offset Spatula
- Piping bag and tips
Ingredients
- 1 cup (226 g) unsalted butter, softened Creamed to provide a rich, tender base and help incorporate air for light sugar cookies; softened texture ensures even mixing with sugar.
- 1 1/4 cup (250 g) granulated sugar Granulated sweetness used to tenderize and give structure while contributing to spread and caramelization during baking.
- 1 large egg Beaten to bind dough and add moisture while providing lift and slight richness for better crumb structure.
- 1 teaspoon vanilla extract Added to impart sweet floral aroma and rounded flavor, enhancing the overall taste profile of the cookies.
- 1/2 teaspoon salt Balanced to control flavor and strengthen gluten slightly while enhancing other flavors and preventing flat sweetness.
- 1 teaspoon baking powder Leavened to introduce gentle lift and contribute to a slightly cakey, tender texture in the cookie dough.
- 1/2 cup (20 g) unsweetened cocoa powder (or Dutch Process for a deeper flavor) Hung to deepen chocolate flavor and add cocoa richness; offers a subtle bitterness that balances sweetness.
- 2 1/2 cups (310 g) all-purpose flour Measured to provide the bulk and structure of the dough, forming the cookie matrix when hydrated and mixed.
- 1/2 cup (113 g) unsalted butter, softened Creamed to enrich the frosting with a smooth, spreadable texture and enhance flavor while maintaining stability.
- 4 cups (452 g) powdered sugar Sifted and whisked into the icing to sweeten, thicken, and create a silky, pipeable consistency for decorating.
- 1/4 teaspoon salt Seasoned to balance and brighten the icing flavors while reducing cloying sweetness and rounding the taste.
- 1 teaspoon vanilla extract Added to flavor and scent the icing, supplying depth and warmth to complement sweetness and decorations.
- 3 -4 tablespoons milk Poured to adjust the icing consistency, enabling spreading or piping; small amounts control thickness precisely.
- Food coloring if desired Tinted sparingly to create festive colors in the icing or dough, enhancing visual appeal without altering flavor.
- Sprinkles if desired Sprinkled for texture and visual interest, providing crunch and color to finish the decorated cookies beautifully.
Instructions
- Place butter and sugar in a large mixing bowl (or a stand mixer fitted with the paddle attachment). Cream until light and fluffy, 1-2 minutes.: When you begin you should hear the gentle hum of the mixer and see the butter and granulated sugar transform into a pale, airy mixture, which takes about one to two minutes at medium speed, depending on your mixer. This stage is crucial because the tiny air pockets created here help the cookies rise and develop tender texture; if you skip this step the cookies can end up dense. Pay attention to the visual cue, you want the mixture to look noticeably lighter and slightly ribbon when the paddle is lifted. A common pitfall is working with butter that is too warm; it will look glossy and may not trap air well, so chill briefly if needed. If the mixture seems greasy, stop and refrigerate for five to ten minutes, then continue to avoid overbeating the sugar into a liquid state.
- Add egg, vanilla, salt, baking powder, and cocoa and mix until combined, then mix in flour until smooth.: After adding the egg , vanilla , salt , baking powder , and cocoa powder , the batter will smell richer and slightly chocolatey, and you will notice it becoming thicker and creamier; this is why mixing each addition until incorporated is important for even flavor. The addition of all-purpose flour dries the dough and brings it together into a cohesive mass; mix just until you no longer see streaks of flour for tender results. Overmixing once the flour is added can develop too much gluten, making cookies tough, so stop as soon as combined. If the dough feels crumbly, a teaspoon of milk can help bring it together without making it sticky.
- Lay a sheet of wax or parchment paper on a work surface. Place half the cookie dough in the center and press to form a disk. Cover with another sheet of paper and roll to between 1/4-1/2 inch thickness (as desired). Repeat with the second half of the dough.: The dough should be cool and pliable when you press it into a disk, which makes rolling even and prevents sticking. Rolling between parchment sheets keeps cleanup simple and produces an even thickness; you can feel the dough firm slightly under the rolling pin as it evens out. The visual cue is a smooth surface free of deep cracks; if cracks appear, press with your hands and chill to rehydrate. Rolling directly on a counter without parchment often leads to tearing or uneven thickness, so avoid that to keep shapes crisp.
- Chill dough until firm, at least 30 minutes.: Chilling is one of the most important steps, because a firm dough holds cookie shapes and prevents spreading, so place both wrapped disks in the refrigerator for at least thirty minutes and check firmness before cutting. You will feel a noticeable difference when the dough is ready, it should be cool and slightly springy; if it feels soft the cookies may spread during baking. A frequent error is skimping on chill time; if you are short on time, pop the dough into the freezer for ten to fifteen minutes but watch closely to avoid freezing solid.
- Preheat oven to 350°F. Line cookie sheets with parchment paper or silicone baking mats.: Preheating is essential so the cookies begin baking immediately and set their edges; you should wait until the oven reaches 350°F and use an oven thermometer if your oven runs hot or cold. Lined sheets provide even contact and prevent sticking, and they also make transferring cookies easier. The oven will emit a dry, warm scent when at temperature, and the first batch will brown more predictably. Placing dough on a hot sheet is a common mistake that causes excessive spread, so always use a cooled, lined sheet.
- Remove half the dough from the refrigerator and use cookie cutters to cut desired shapes.: When you bring the dough out it should be cold but pliable, and the edges of the cut shapes will be clean and defined. Press the cutters straight down without twisting to avoid misshapen edges, then transfer shapes carefully. If the dough warms too much and becomes sticky, return it to the refrigerator for five to ten minutes to firm up. Twisting the cutter can distort the shape, so lift straight up for best results.
- Place 2 inches apart on cookie sheets. Chill for 15 minutes then bake cookies until no longer glossy, approximately 10-15 minutes (depending on thickness and size).: The dough will firm further on the cold sheet and the short chill helps prevent spreading; you can almost feel the surface tighten. Bake until the tops lose their glossy sheen and the edges are set, about ten to fifteen minutes depending on thickness and cookie size. You might hear a faint quiet as moisture evaporates and smell a warm, sweet, buttery aroma as they bake. Avoid overbaking, which causes dryness, so remove cookies as soon as edges set and transfer to cooling racks.
- Reroll leftover dough and chill while cutting shapes from the second half. Continue until all your cookie dough is cut into shapes.: Watch the texture as you reroll, it should still be cool and not sticky; if it becomes too soft, re-chill to maintain shape integrity. Rerolling a few times is fine, but excessive rerolling can make cookies tougher due to extra handling. A helpful tip is to press scraps into a disk and chill between rerolls, keeping dough consistent. If you notice cracks after cutting, press lightly to seal or chill again before baking.
- Once cookies are baked, cool completely before frosting.: Cooling fully is critical because warm cookies will cause the frosting to melt and lose detail; leave them on a rack until they are room temperature, which you can feel by touch. The surface will feel firm and not warm, and the smell will settle into a gentle, chocolate butter note rather than a hot aroma. Don’t rush this step, as frosting on warm cookies leads to runny designs and sticky stacking problems.
- To make the frosting, beat butter and sugar with a stand mixer until crumbly. Add salt and vanilla, then add 3 tablespoons of milk and mix until smooth, adding more milk 1 teaspoon at a time until you get a piping consistency.: When you begin creaming the frosting butter and powdered sugar will resemble coarse crumbs, and as you add milk and vanilla it will smooth into a glossy paste. The right piping consistency should hold peaks but still flow slightly when pressed through a bag. If frosting seems grainy, beat a bit longer; if it becomes too loose, add a touch more powdered sugar . A common mistake is adding too much milk at once, which makes the frosting runny and hard to pipe.
- Frost cookies as desired. Let sit at room temperature to crust, then you can stack them.: After piping, allow the frosting to sit undisturbed at room temperature until it forms a thin crust, which protects details and makes stacking possible without smudging. You will notice the surface change from glossy to matte as it sets. If you need to speed the process slightly, place them in a cool, dry spot but avoid the fridge which can cause condensation. Stacking too soon will smear your work, so be patient until the crust forms.
- To decorate as seen in the photos, use a Wilton round tip, #4 or #5. Pipe the edges of each cookie then fill in with the same tip. Use an offset spatula to smooth the frosting and then add any details.: Using a small round tip gives you control for crisp outlines and neat flooding, and an offset spatula helps push frosting into corners for smooth surfaces. After piping the outline, fill in and use the tip or spatula to level the surface before adding details or sprinkles. If you overfill an area, gently pull frosting back with the spatula rather than scraping, which can tear edges. Practice piping on a spare cookie to steady your hand before tackling a full tray.
- Store cookies in an airtight container at room temperature for up to 4 days or freeze for up to 2 months.: Proper storage keeps your cookies fresh and the frosting intact; place sheets of parchment between layers if stacking and use an airtight container to prevent staling. At room temperature the texture remains tender for up to four days, and frozen cookies keep for up to two months when wrapped tightly. A mistake to avoid is storing while frosting is still wet, which causes sticking; always wait until frosting is set.
Notes
- Chill between rolls: If the dough begins to warm while you work, return it to the refrigerator for ten to fifteen minutes to keep edges sharp and prevent sticking.
- Sift powdered sugar: Sifting the powdered sugar before mixing helps produce a silky, lump free frosting that pipes smoothly and looks professional.
- Test bake one sheet first: Bake a small test batch to confirm oven temp and thickness, then adjust rolling thickness for subsequent trays to get consistent color and bake time.
- Use gel food coloring: Gel colors give vivid hues without watering down frosting, letting you maintain a firm piping consistency while achieving bright designs.
- Keep a cooled spare sheet: If you are baking multiple batches, allow sheets to cool fully before placing new dough; a hot sheet causes extra spread and uneven baking.