Healthier Homemade Nutter Butter Cookies
Healthier Homemade Nutter Butter Cookies came into my kitchen one rainy afternoon when I needed a compact comfort treat that felt familiar but lighter. I reached for pantry staples and started tinkering, remembering how the store-bought sandwich cookie always tasted like a peanut butter hug. I wanted that nostalgia, with cleaner ingredients and a texture that would still snap and give when you bite into the filling.
I kept returning to a simple idea, making every element approachable so you can bake these on a weekday evening and still feel good about it. I tested dough hydration, the balance of sweet versus salty, and a quick chocolate dip to elevate the cookies without weighing them down. Through trial and error I discovered a few tiny tricks that transform the humble ingredients into something delightfully moreish.
Recipe Snapshot
30 mins
20 mins
10 mins
Easy
150 kcal
American
Gluten-Free, Vegan
Desserts
Mixing bowl, Baking sheets, Parchment paper, Fork, Measuring cups, Spatula
Why This Healthier Homemade Nutter Butter Cookies Is So Good
Comfort without the compromise
I think what makes these Healthier Homemade Nutter Butter Cookies stand out is their ability to feel indulgent while using thoughtful swaps. Using whole wheat pastry flour and real maple syrup keeps the flavor rounded and the sweetness complex, so you get satisfaction without feeling overpowered.
Simple pantry chemistry
We rely on a few key players, like creamy peanut butter and a touch of salted butter, to build structure and mouthfeel. The combination creates a tender crumb in the cookie and a silky filling. I love how the ingredients interact, giving the cookies that classic snap and creamy center.
Texture plays the lead
These cookies marry a slightly crisp exterior with a soft interior and a spreadable filling, which keeps every bite interesting. I purposely keep the dough slightly forgiving so you can press and pattern the tops without overworking. That little crosshatch adds both character and bite.
Flexible and approachable
I appreciate recipes that bend to the home baker, and this one does. It tolerates small changes in humidity or slight measuring imprecision, and the dough is forgiving. You can make the chocolate dip optional, but I find it adds a glossy finish and a hint of bitter contrast that elevates the peanut butter center.
Everyday baking confidence
Finally, these cookies are practical, they store well for several days, and they travel easily. I often bake a batch to bring to friends, and they always disappear. For me, that reliable success feels like the true win.
Ingredients to Make Healthier Homemade Nutter Butter Cookies
I choose ingredients that work together to deliver texture, flavor, and familiarity. The philosophy here is straightforward: build a tender cookie base, a creamy filling, and an optional chocolate finish for contrast. Key players include the nutty richness of creamy peanut butter, the structure from whole wheat pastry flour, and the gentle sweetness of real maple syrup. Each item plays a defined role so the final cookie is balanced and satisfying.
- 4 tablespoons salted butter, at room temperature: Soften and cream to provide richness and tender texture; salted butter helps create a cohesive dough and contributes a mild savory balance to the cookies. Ensure it is at room temperature so it incorporates smoothly with the peanut butter and sweeteners. Properly creamed butter promotes lightness and helps determine final cookie spread during baking.
- 1/2 cup creamy peanut butter: Add creamy texture and concentrated peanut flavor to the dough while contributing fat that creates a tender, pliable cookie base. Use a smooth style to ensure even distribution and a uniform mouthfeel without crunchy bits. Balances with the butter to produce the classic nutty profile of Nutter Butter cookies.
- 1/4 cup real maple syrup: Sweeten naturally while adding moisture and subtle maple flavor that deepens the cookie profile compared to refined sugar. Use real maple syrup for its complexity and to help keep the dough slightly chewy. Syrup also aids in browning and contributes to a softer interior.
- 2 teaspoons vanilla extract: Provide aromatic warmth and enhance the overall flavor profile with rounded, sweet-vanilla notes. Use pure vanilla extract for best depth and to complement both peanut and maple flavors. A small amount goes a long way in balancing sweetness and masking any residual raw flour taste.
- 1 cup whole wheat pastry flour: Supply structure and whole-grain nutrition while keeping a tender crumb due to its finer grind compared with regular whole wheat flour. Whole wheat pastry flour offers a lighter texture and nutty flavor that complements the peanut butter. Measure gently to avoid dense cookies and mix just until combined to prevent toughness.
- 1/4 teaspoon baking powder: Act as a gentle leavening agent to give slight lift and prevent overly dense cookies, creating a tender bite without large air pockets. Use the small amount sparingly to maintain the desired texture and shape of sandwich cookies. Ensure even distribution by sifting or whisking into the flour before combining with wet ingredients.
- 3.2 ounces dark chocolate, melted: Coat, drizzle, or dip to add a bitter-sweet finishing layer that contrasts the sweet, nutty filling and enhances presentation. Melted dark chocolate firms up into a glossy shell that provides textural contrast and intensified chocolate flavor. Use a tempering or careful cooling process to achieve a smooth, non-grainy finish.
- flaky sea salt () (optional): Sprinkle sparingly to elevate flavor with delicate crunchy bursts and a briny counterpoint that highlights sweetness and chocolate. Flaky sea salt accentuates the nutty and maple notes while enhancing overall flavor complexity. Add to taste right before the chocolate sets to retain visible, flaky texture.
- 1/2 cup creamy peanut butter: Spread as a filling to deliver creamy peanut flavor and maintain sandwich cookie authenticity; this portion pairs with the butter-based cookie rounds. Use the same creamy peanut butter for consistency in taste and texture across both dough and filling. Provides moisture and richness that binds the sandwich together.
- 3 tablespoons salted butter, at room temperature: Cream and blend to contribute to the filling's fat content and mouthfeel while reinforcing buttery richness for a balanced sandwich. Room temperature salted butter helps the filling hold shape while remaining soft enough to pipe or spread. Salted butter also subtly intensifies the savory contrasts against sweet elements.
- 2 3 tablespoons real maple syrup: Sweeten and slightly thin the filling to achieve a spreadable consistency while adding depth via natural maple flavor. Use the specified amount to control sweetness and stickiness so the filling adheres without oozing. Adjust within the range for preferred softness and balance with the peanut butter and butter in the filling.
Directions for Healthier Homemade Nutter Butter Cookies
I like to walk through the process conversationally, so you know what to expect at each moment. Below I expand the original steps with sensory cues, reasons behind choices, and common pitfalls. Keep a bowl of water and a clean towel nearby, and enjoy the rhythm of baking these cookies.
- Preheat the oven to 350 degrees. Line 2 baking sheets with parchment paper. In a large bowl, cream together the butter, peanut butter, maple syrup, and vanilla until smooth. Add the flour and baking powder, beat until combined and the dough begins to form a ball. If the dough is crumbly, add 2-3 teaspoons water. If the dough feels moist, add 1-2 tablespoons flour. Roll the dough into tablespoon size balls. Cut each ball in half, press the 2 balls together, and place them on the prepared baking sheet. Gently flatten each cookie. Using a fork, create a crosshatch pattern (see above photos). Transfer to the oven and bake for 9-10 minutes. To make the filling, beat together the peanut butter, butter, and maple syrup until combined. Spread an even layer on one cookie and sandwich another on top. To make dipping easier, freeze the cookies for 10 minutes. Then drizzle or dip the cookies into chocolate. Sprinkle with salt if desired. Eat…or let the chocolate harden and store in an airtight container for up to 5 days. Enjoy!: You will notice the kitchen warming and the faint scent of anticipation as the oven reaches 350 degrees . This heat creates the ideal environment for the cookies to set and lightly brown. Lining two baking sheets with parchment paper ensures easy release and even browning. A common mistake is skipping the parchment, which can cause sticking and tearing, so always prepare your pans first.
- In a large bowl, cream together the butter, peanut butter, maple syrup, and vanilla until smooth.: As you beat the mixture, it should become glossy and homogenous, with the sweet aroma of real maple syrup and the warm scent of vanilla extract coming forward. This step folds air into the mix, producing a lighter finished cookie. Avoid under-creaming, which leaves the mixture grainy and affects texture, or over-creaming, which can make the dough too soft and cause spreading.
- Add the flour and baking powder, beat until combined and the dough begins to form a ball.: When the whole wheat pastry flour and baking powder are incorporated, you should see the dough gather into a cohesive mass with a slightly tacky feel. This signals enough structure to shape the cookies. If you keep mixing past this point, gluten development may make them tough, so stop once a ball forms.
- If the dough is crumbly, add 2-3 teaspoons water.: At this stage sniff and feel the dough; crumbly dough will look dusty and separate. Adding small amounts of water, 2 to 3 teaspoons , brings it together without making it slack. The dough should be pliable, not wet. Overwatering will make the cookies spread excessively during baking.
- If the dough feels moist, add 1-2 tablespoons flour.: Conversely, if the dough feels overly tacky and spreads on your hands, dust in 1 to 2 tablespoons of whole wheat pastry flour . This tightens the dough, helping it hold shape and preserving the crosshatch detail. Adding too much flour will dry the texture and make the cookie crumbly.
- Roll the dough into tablespoon size balls.: Rolling by tablespoon creates uniform cookies that bake evenly; you'll notice a smooth, slightly satiny surface on each ball. The rhythm of rolling is comforting, and consistent sizing avoids some cookies overbaking while others remain underdone. A frequent slip is inconsistent sizing, which leads to uneven bake times.
- Cut each ball in half, press the 2 balls together, and place them on the prepared baking sheet.: Pressing two halves together forms a slightly thicker disk that will hold the filling well, and you will hear a soft compression as they join. This technique also gives the right height so the center sets without drying out. Press too hard and you compress out any air that should help texture, press too lightly and the sandwich may fall apart.
- Gently flatten each cookie.: Use gentle pressure to flatten the cookies until they are about a quarter inch thick, watching for slight cracks at the edges that signal proper thickness. The surface will look matte and ready for patterning. Overflattening will remove the tender interior; underflattening can prevent even baking.
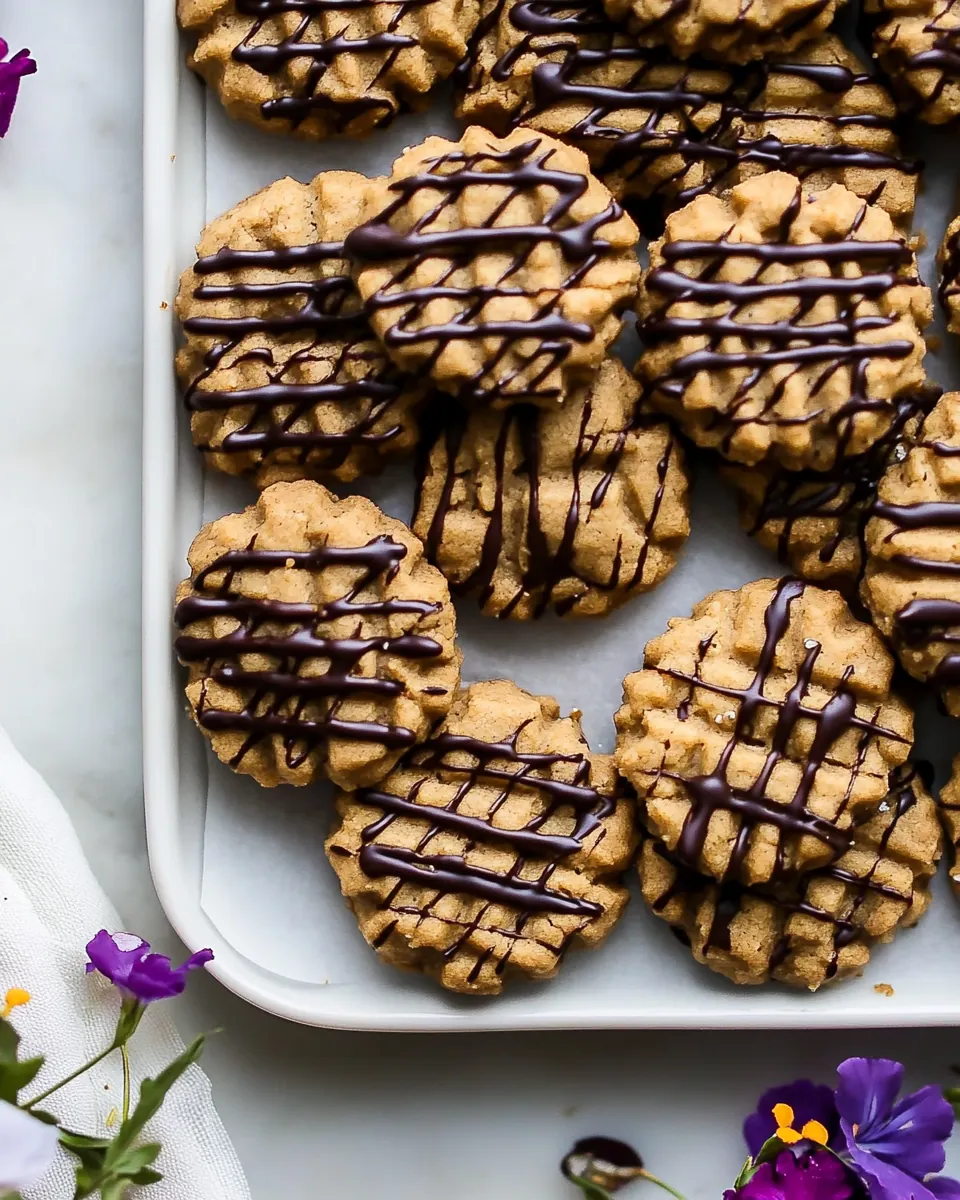
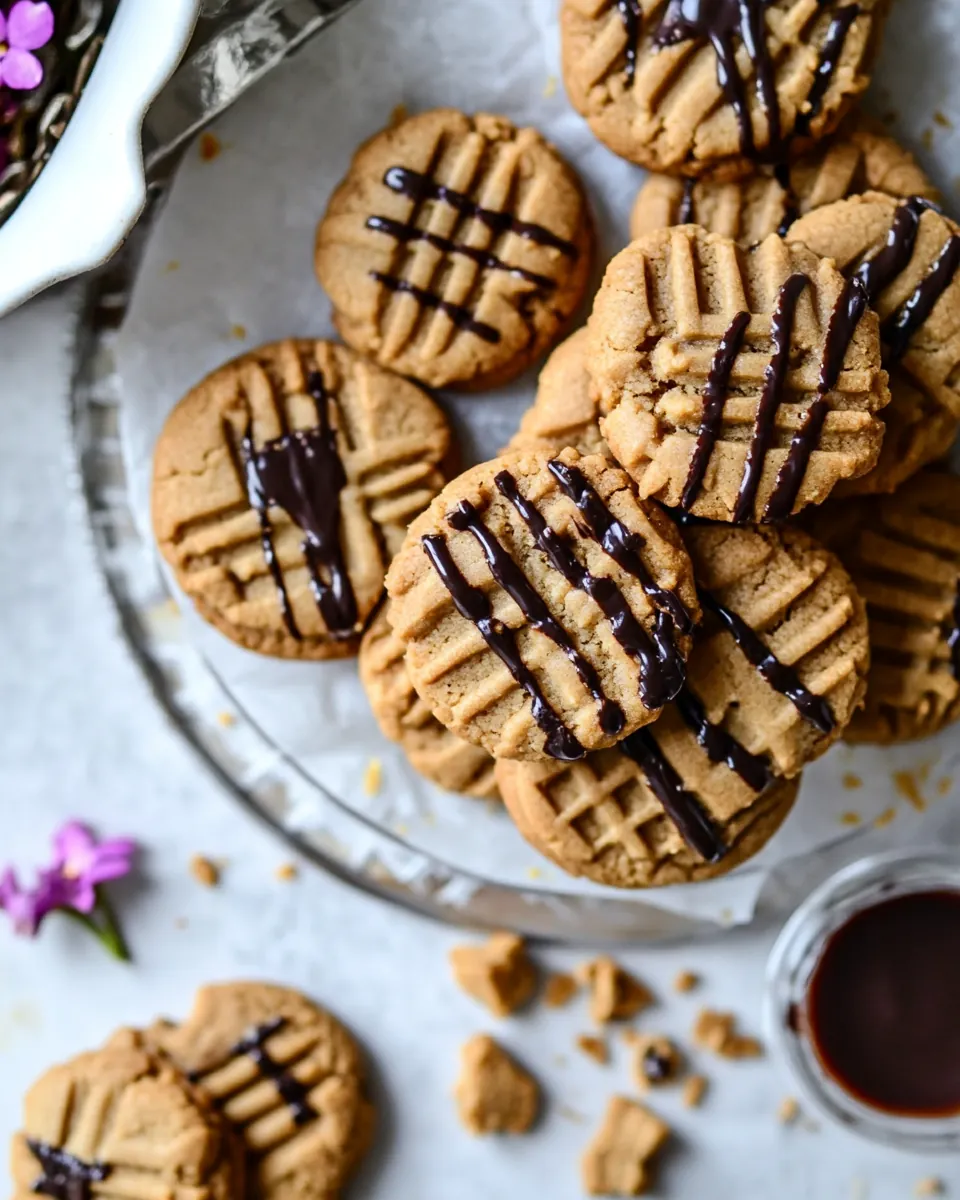
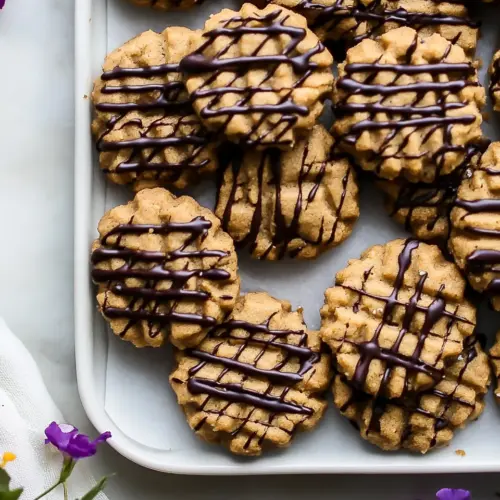
- Using a fork, create a crosshatch pattern (see above photos).: The crosshatch not only looks classic, it also creates extra surface area that crisps in the oven and helps the filling sit snugly. Press firmly but not through the cookie, and you will see defined ridges hold their shape. A common error is dragging the fork, which smears the pattern; press straight down and lift cleanly.
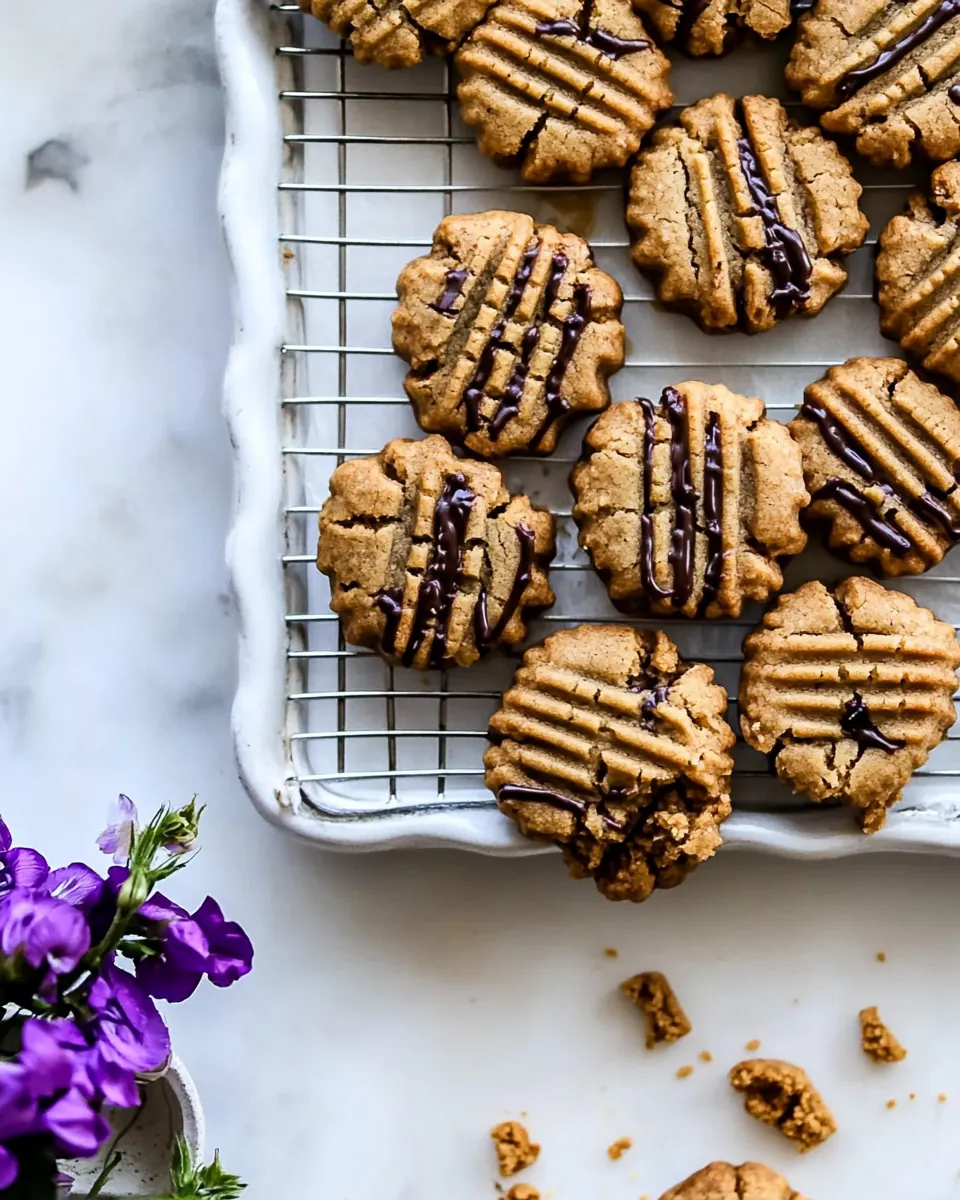
- Transfer to the oven and bake for 9-10 minutes.: As the cookies bake, they should develop a gentle toasty aroma and slightly darken at the edges; that is your cue they are nearly ready. The centers may still look a touch soft, which is okay since they continue to set off heat. Overbaking will make them dry and brittle, so stick to 9 to 10 minutes and rotate pans if your oven has hot spots.
- To make the filling, beat together the peanut butter, butter, and maple syrup until combined.: Your filling should come together into a creamy, spreadable paste with a glossy sheen and a lifted peanut fragrance. The combination of creamy peanut butter and salted butter creates a silky emulsion, and the maple syrup gives it a nuanced sweetness. If the filling feels grainy, beat it a bit longer; if it is too loose, chill briefly before using.
- Spread an even layer on one cookie and sandwich another on top.: Spread a moderate amount of filling so you get a neat, even layer that reaches the edges without spilling. The cookies should pair cleanly, and you will feel a satisfying gentle squeeze as they mate. Overfilling makes the sandwich unstable and messy when dipped.
- To make dipping easier, freeze the cookies for 10 minutes.: A quick chill firms the filling and helps the cookie maintain structure when you dip in warm melted dark chocolate . You will notice the cookies become pleasantly cool to the touch and the filling resists oozing. Skipping this step can cause the filling to soften and the chocolate to slip off.
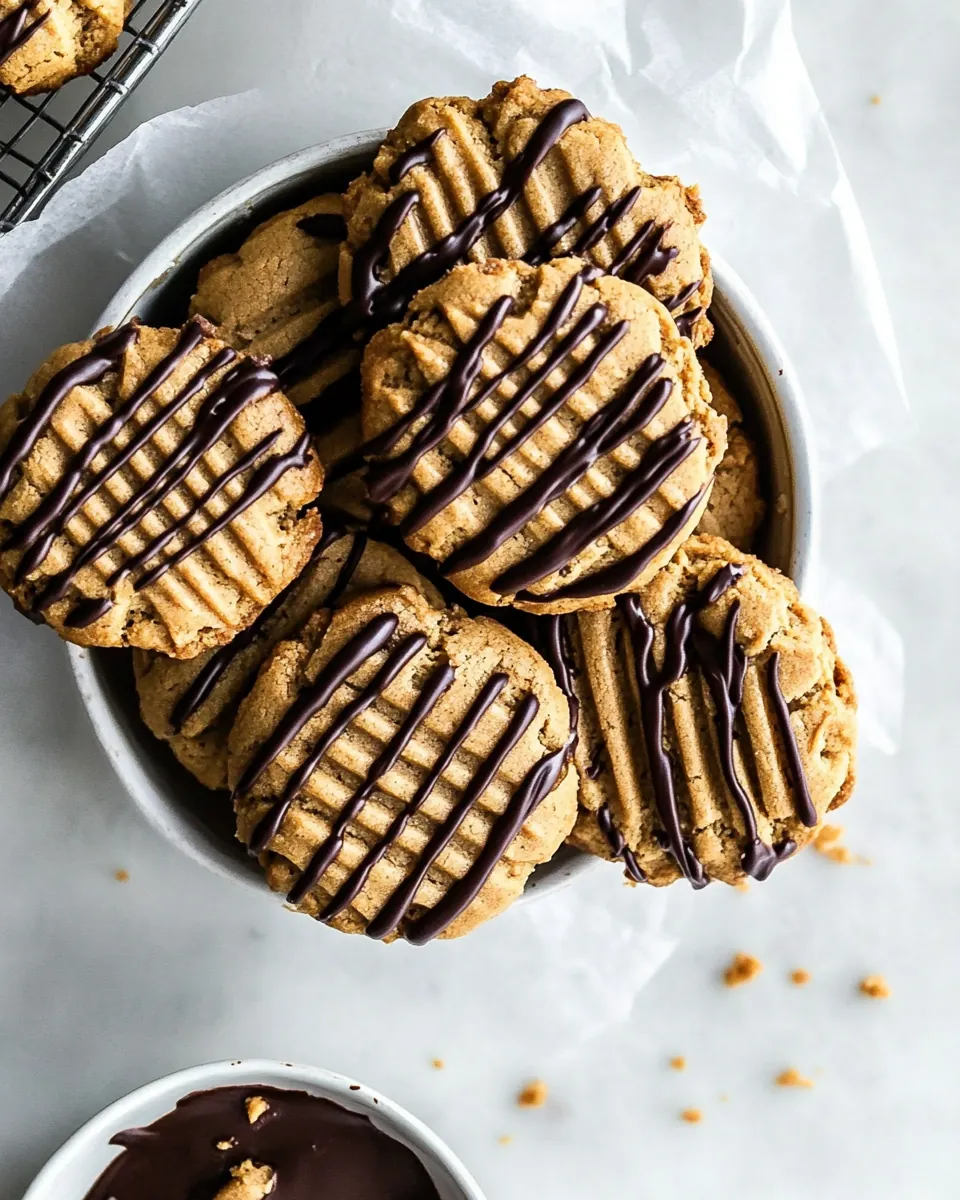
- Then drizzle or dip the cookies into chocolate.: When you introduce the warm melted dark chocolate , it should flow smoothly, coat the surface, and set with a glossy sheen. The chocolate adds a satisfying snap and bitter contrast. Be careful with heat, as chocolate can seize if any moisture gets in.
- Sprinkle with salt if desired.: A final dusting of flaky sea salt creates tiny bursts of salinity that lift the sweetness and highlight the peanut notes. The salt crystals should glisten on the chocolate and provide a satisfying crunch. Too much salt will overpower the cookie, so use sparingly.
- Eat…or let the chocolate harden and store in an airtight container for up to 5 days.: Once the chocolate firms, the cookies are ready to enjoy; they will keep well for several days with minimal loss of texture. Store in a single layer or separated by parchment to preserve the chocolate finish. Avoid stacking warm cookies, which can cause stickiness and smudging of the coating.
Variations to Try
I like to experiment with small changes that shift texture or flavor, keeping the cookie recognizable while adding new interest. Below are extended tips and variations to help you make the recipe your own, whether you want to adjust sweetness, swap textures, or change the finish.
- For a slightly firmer filling: Reduce the maple syrup in the filling by about one tablespoon and beat until smooth, which will produce a filling that holds shape better between cookies and when dipped.
- To boost the toasted flavor: Toast the whole wheat pastry flour lightly in a dry pan until fragrant before measuring; this deepens the nutty notes and gives the cookies a warm, toasty aroma.
- If you prefer less sweetness: Decrease the total maple syrup in both dough and filling by one to two tablespoons, tasting the filling as you go to maintain balance.
- For a firmer sandwich cookie: Use the lower end of the filling syrup range and chill the filled cookies longer before dipping, which prevents squishing and keeps a defined shape.
- To make dipping easier: Work with small batches, and keep a shallow bowl of melted dark chocolate at a moderate temperature; if it cools too much rewarm gently in short bursts to avoid seizing.
- To enhance presentation: Sprinkle a tiny pinch of flaky sea salt or press a few visible salt flakes onto the wet chocolate for an appealing contrast in color and texture.
Perfect Pairings for Healthier Homemade Nutter Butter Cookies
These cookies work well in many settings, from casual snack bowls to curated dessert plates. They pair nicely with simple accompaniments and adapt to a variety of occasions. Below I outline serving ideas, storage notes, and seasonal suggestions so you can present them with confidence.
- Casual snack: Arrange a stack of Healthier Homemade Nutter Butter Cookies on a small platter for afternoon coffee or tea; they pair well with a warm cup and make an easy pick me up.
- Giftable package: Layer cookies in a parchment lined box for a homemade present, adding a sprig of herbs or ribbon for a personal touch, perfect for neighborly gifting.
- Party dessert table: Offer them alongside fresh fruit and simple cookies on a dessert spread, where the peanut and chocolate contrast provides a crowd pleasing option.
- Storage tips: Keep cookies in an airtight container at room temperature for up to 5 days, or freeze in a single layer for longer storage, thawing at room temperature before serving.
- Seasonal pairing: In cooler months, serve warm with a mug of spiced beverage; in warmer months keep them chilled briefly to maintain the chocolate finish and a refreshing bite.
FAQ
Conclusion
These Healthier Homemade Nutter Butter Cookies capture the nostalgic peanut butter sandwich cookie in a cleaner, thoughtful form that still satisfies cravings. Give them a try the next time you want a homemade treat that travels well and still feels a little special. I hope you enjoy the texture contrast, the balanced sweetness, and the simple rituals of rolling, pressing, and assembling these cookies, they are a small, reliable treat that brightens ordinary days.
Healthier Homemade Nutter Butter Cookies
Equipment
- Mixing Bowl
- Baking Sheets
- Parchment Paper
- Fork
- Measuring Cups
- Spatula
Ingredients
- 4 tablespoons salted butter, at room temperature Soften and cream to provide richness and tender texture; salted butter helps create a cohesive dough and contributes a mild savory balance to the cookies. Ensure it is at room temperature so it incorporates smoothly with the peanut butter and sweeteners. Properly creamed butter promotes lightness and helps determine final cookie spread during baking.
- 1/2 cup creamy peanut butter Add creamy texture and concentrated peanut flavor to the dough while contributing fat that creates a tender, pliable cookie base. Use a smooth style to ensure even distribution and a uniform mouthfeel without crunchy bits. Balances with the butter to produce the classic nutty profile of Nutter Butter cookies.
- 1/4 cup real maple syrup Sweeten naturally while adding moisture and subtle maple flavor that deepens the cookie profile compared to refined sugar. Use real maple syrup for its complexity and to help keep the dough slightly chewy. Syrup also aids in browning and contributes to a softer interior.
- 2 teaspoons vanilla extract Provide aromatic warmth and enhance the overall flavor profile with rounded, sweet-vanilla notes. Use pure vanilla extract for best depth and to complement both peanut and maple flavors. A small amount goes a long way in balancing sweetness and masking any residual raw flour taste.
- 1 cup whole wheat pastry flour Supply structure and whole-grain nutrition while keeping a tender crumb due to its finer grind compared with regular whole wheat flour. Whole wheat pastry flour offers a lighter texture and nutty flavor that complements the peanut butter. Measure gently to avoid dense cookies and mix just until combined to prevent toughness.
- 1/4 teaspoon baking powder Act as a gentle leavening agent to give slight lift and prevent overly dense cookies, creating a tender bite without large air pockets. Use the small amount sparingly to maintain the desired texture and shape of sandwich cookies. Ensure even distribution by sifting or whisking into the flour before combining with wet ingredients.
- 3.2 ounces dark chocolate, melted Coat, drizzle, or dip to add a bitter-sweet finishing layer that contrasts the sweet, nutty filling and enhances presentation. Melted dark chocolate firms up into a glossy shell that provides textural contrast and intensified chocolate flavor. Use a tempering or careful cooling process to achieve a smooth, non-grainy finish.
- flaky sea salt (optional) Sprinkle sparingly to elevate flavor with delicate crunchy bursts and a briny counterpoint that highlights sweetness and chocolate. Flaky sea salt accentuates the nutty and maple notes while enhancing overall flavor complexity. Add to taste right before the chocolate sets to retain visible, flaky texture.
- 1/2 cup creamy peanut butter Spread as a filling to deliver creamy peanut flavor and maintain sandwich cookie authenticity; this portion pairs with the butter-based cookie rounds. Use the same creamy peanut butter for consistency in taste and texture across both dough and filling. Provides moisture and richness that binds the sandwich together.
- 3 tablespoons salted butter, at room temperature Cream and blend to contribute to the filling's fat content and mouthfeel while reinforcing buttery richness for a balanced sandwich. Room temperature salted butter helps the filling hold shape while remaining soft enough to pipe or spread. Salted butter also subtly intensifies the savory contrasts against sweet elements.
- 2 -3 tablespoons real maple syrup Sweeten and slightly thin the filling to achieve a spreadable consistency while adding depth via natural maple flavor. Use the specified amount to control sweetness and stickiness so the filling adheres without oozing. Adjust within the range for preferred softness and balance with the peanut butter and butter in the filling.
Instructions
- Preheat the oven to 350 degrees. Line 2 baking sheets with parchment paper. In a large bowl, cream together the butter, peanut butter, maple syrup, and vanilla until smooth. Add the flour and baking powder, beat until combined and the dough begins to form a ball. If the dough is crumbly, add 2-3 teaspoons water. If the dough feels moist, add 1-2 tablespoons flour. Roll the dough into tablespoon size balls. Cut each ball in half, press the 2 balls together, and place them on the prepared baking sheet. Gently flatten each cookie. Using a fork, create a crosshatch pattern (see above photos). Transfer to the oven and bake for 9-10 minutes. To make the filling, beat together the peanut butter, butter, and maple syrup until combined. Spread an even layer on one cookie and sandwich another on top. To make dipping easier, freeze the cookies for 10 minutes. Then drizzle or dip the cookies into chocolate. Sprinkle with salt if desired. Eat…or let the chocolate harden and store in an airtight container for up to 5 days. Enjoy!: You will notice the kitchen warming and the faint scent of anticipation as the oven reaches 350 degrees . This heat creates the ideal environment for the cookies to set and lightly brown. Lining two baking sheets with parchment paper ensures easy release and even browning. A common mistake is skipping the parchment, which can cause sticking and tearing, so always prepare your pans first.
- In a large bowl, cream together the butter, peanut butter, maple syrup, and vanilla until smooth.: As you beat the mixture, it should become glossy and homogenous, with the sweet aroma of real maple syrup and the warm scent of vanilla extract coming forward. This step folds air into the mix, producing a lighter finished cookie. Avoid under-creaming, which leaves the mixture grainy and affects texture, or over-creaming, which can make the dough too soft and cause spreading.
- Add the flour and baking powder, beat until combined and the dough begins to form a ball.: When the whole wheat pastry flour and baking powder are incorporated, you should see the dough gather into a cohesive mass with a slightly tacky feel. This signals enough structure to shape the cookies. If you keep mixing past this point, gluten development may make them tough, so stop once a ball forms.
- If the dough is crumbly, add 2-3 teaspoons water.: At this stage sniff and feel the dough; crumbly dough will look dusty and separate. Adding small amounts of water, 2 to 3 teaspoons , brings it together without making it slack. The dough should be pliable, not wet. Overwatering will make the cookies spread excessively during baking.
- If the dough feels moist, add 1-2 tablespoons flour.: Conversely, if the dough feels overly tacky and spreads on your hands, dust in 1 to 2 tablespoons of whole wheat pastry flour . This tightens the dough, helping it hold shape and preserving the crosshatch detail. Adding too much flour will dry the texture and make the cookie crumbly.
- Roll the dough into tablespoon size balls.: Rolling by tablespoon creates uniform cookies that bake evenly; you'll notice a smooth, slightly satiny surface on each ball. The rhythm of rolling is comforting, and consistent sizing avoids some cookies overbaking while others remain underdone. A frequent slip is inconsistent sizing, which leads to uneven bake times.
- Cut each ball in half, press the 2 balls together, and place them on the prepared baking sheet.: Pressing two halves together forms a slightly thicker disk that will hold the filling well, and you will hear a soft compression as they join. This technique also gives the right height so the center sets without drying out. Press too hard and you compress out any air that should help texture, press too lightly and the sandwich may fall apart.
- Gently flatten each cookie.: Use gentle pressure to flatten the cookies until they are about a quarter inch thick, watching for slight cracks at the edges that signal proper thickness. The surface will look matte and ready for patterning. Overflattening will remove the tender interior; underflattening can prevent even baking.
- Using a fork, create a crosshatch pattern (see above photos).: The crosshatch not only looks classic, it also creates extra surface area that crisps in the oven and helps the filling sit snugly. Press firmly but not through the cookie, and you will see defined ridges hold their shape. A common error is dragging the fork, which smears the pattern; press straight down and lift cleanly.
- Transfer to the oven and bake for 9-10 minutes.: As the cookies bake, they should develop a gentle toasty aroma and slightly darken at the edges; that is your cue they are nearly ready. The centers may still look a touch soft, which is okay since they continue to set off heat. Overbaking will make them dry and brittle, so stick to 9 to 10 minutes and rotate pans if your oven has hot spots.
- To make the filling, beat together the peanut butter, butter, and maple syrup until combined.: Your filling should come together into a creamy, spreadable paste with a glossy sheen and a lifted peanut fragrance. The combination of creamy peanut butter and salted butter creates a silky emulsion, and the maple syrup gives it a nuanced sweetness. If the filling feels grainy, beat it a bit longer; if it is too loose, chill briefly before using.
- Spread an even layer on one cookie and sandwich another on top.: Spread a moderate amount of filling so you get a neat, even layer that reaches the edges without spilling. The cookies should pair cleanly, and you will feel a satisfying gentle squeeze as they mate. Overfilling makes the sandwich unstable and messy when dipped.
- To make dipping easier, freeze the cookies for 10 minutes.: A quick chill firms the filling and helps the cookie maintain structure when you dip in warm melted dark chocolate . You will notice the cookies become pleasantly cool to the touch and the filling resists oozing. Skipping this step can cause the filling to soften and the chocolate to slip off.
- Then drizzle or dip the cookies into chocolate.: When you introduce the warm melted dark chocolate , it should flow smoothly, coat the surface, and set with a glossy sheen. The chocolate adds a satisfying snap and bitter contrast. Be careful with heat, as chocolate can seize if any moisture gets in.
- Sprinkle with salt if desired.: A final dusting of flaky sea salt creates tiny bursts of salinity that lift the sweetness and highlight the peanut notes. The salt crystals should glisten on the chocolate and provide a satisfying crunch. Too much salt will overpower the cookie, so use sparingly.
- Eat…or let the chocolate harden and store in an airtight container for up to 5 days.: Once the chocolate firms, the cookies are ready to enjoy; they will keep well for several days with minimal loss of texture. Store in a single layer or separated by parchment to preserve the chocolate finish. Avoid stacking warm cookies, which can cause stickiness and smudging of the coating.
Notes
- For a slightly firmer filling: Reduce the maple syrup in the filling by about one tablespoon and beat until smooth, which will produce a filling that holds shape better between cookies and when dipped.
- To boost the toasted flavor: Toast the whole wheat pastry flour lightly in a dry pan until fragrant before measuring; this deepens the nutty notes and gives the cookies a warm, toasty aroma.
- If you prefer less sweetness: Decrease the total maple syrup in both dough and filling by one to two tablespoons, tasting the filling as you go to maintain balance.
- For a firmer sandwich cookie: Use the lower end of the filling syrup range and chill the filled cookies longer before dipping, which prevents squishing and keeps a defined shape.
- To make dipping easier: Work with small batches, and keep a shallow bowl of melted dark chocolate at a moderate temperature; if it cools too much rewarm gently in short bursts to avoid seizing.
- To enhance presentation: Sprinkle a tiny pinch of flaky sea salt or press a few visible salt flakes onto the wet chocolate for an appealing contrast in color and texture.