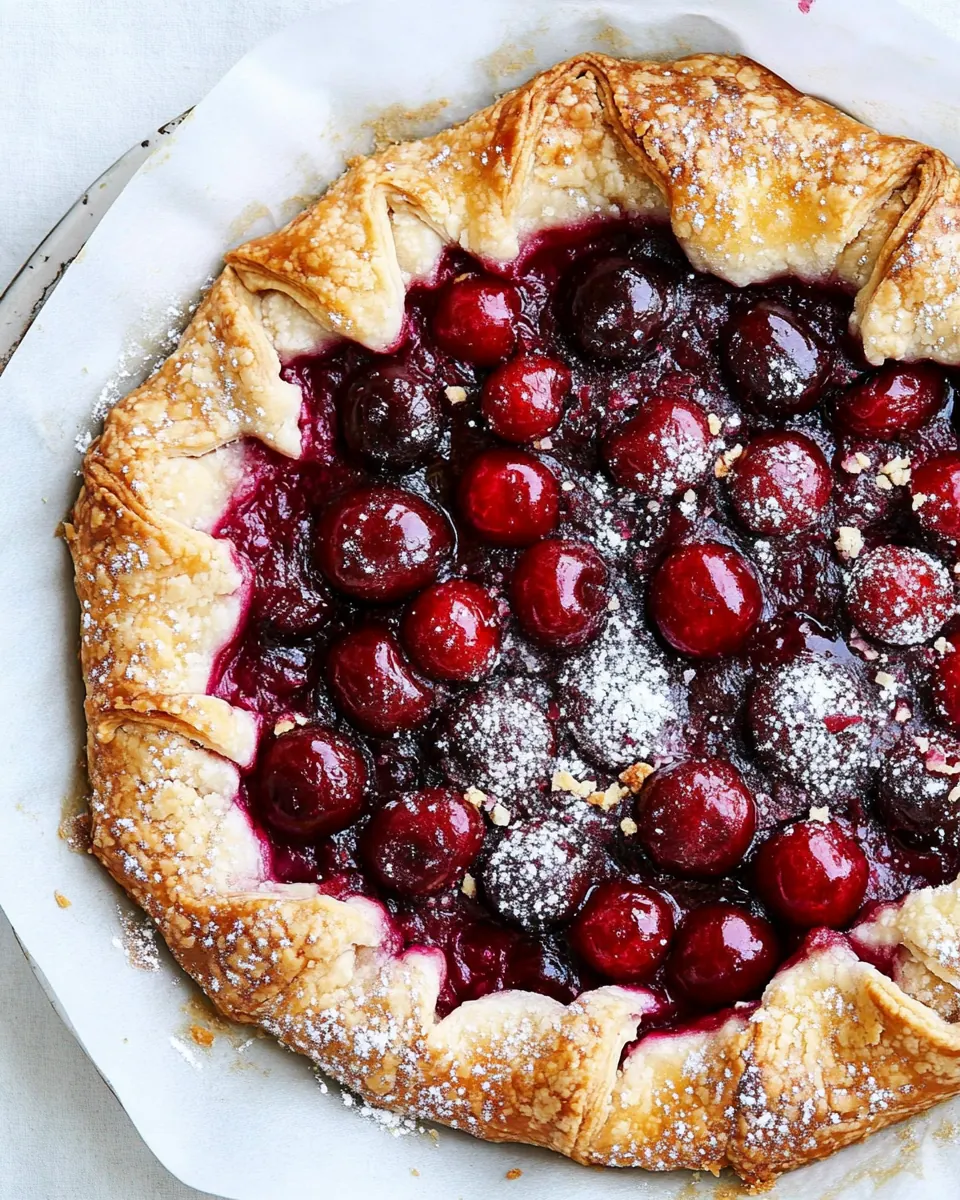
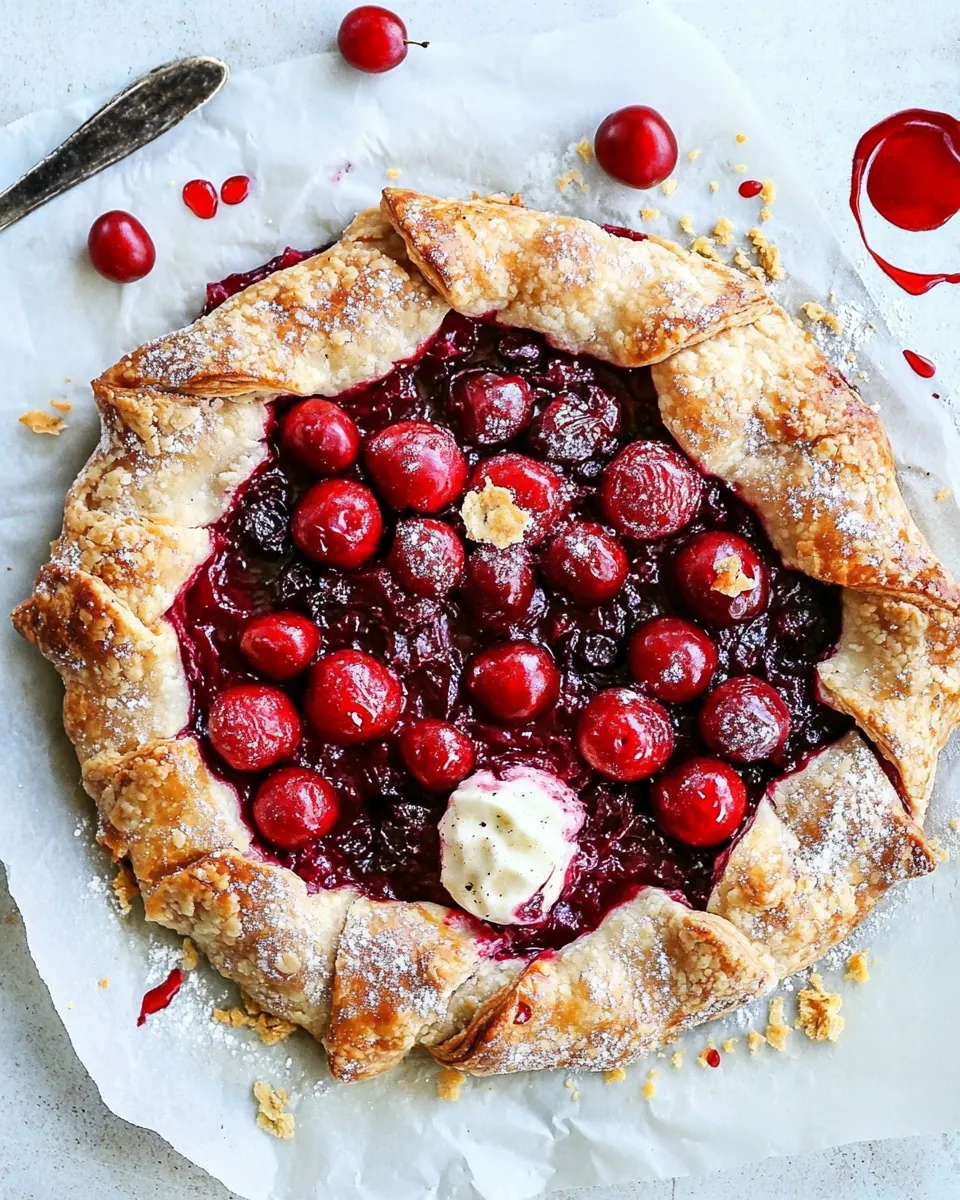
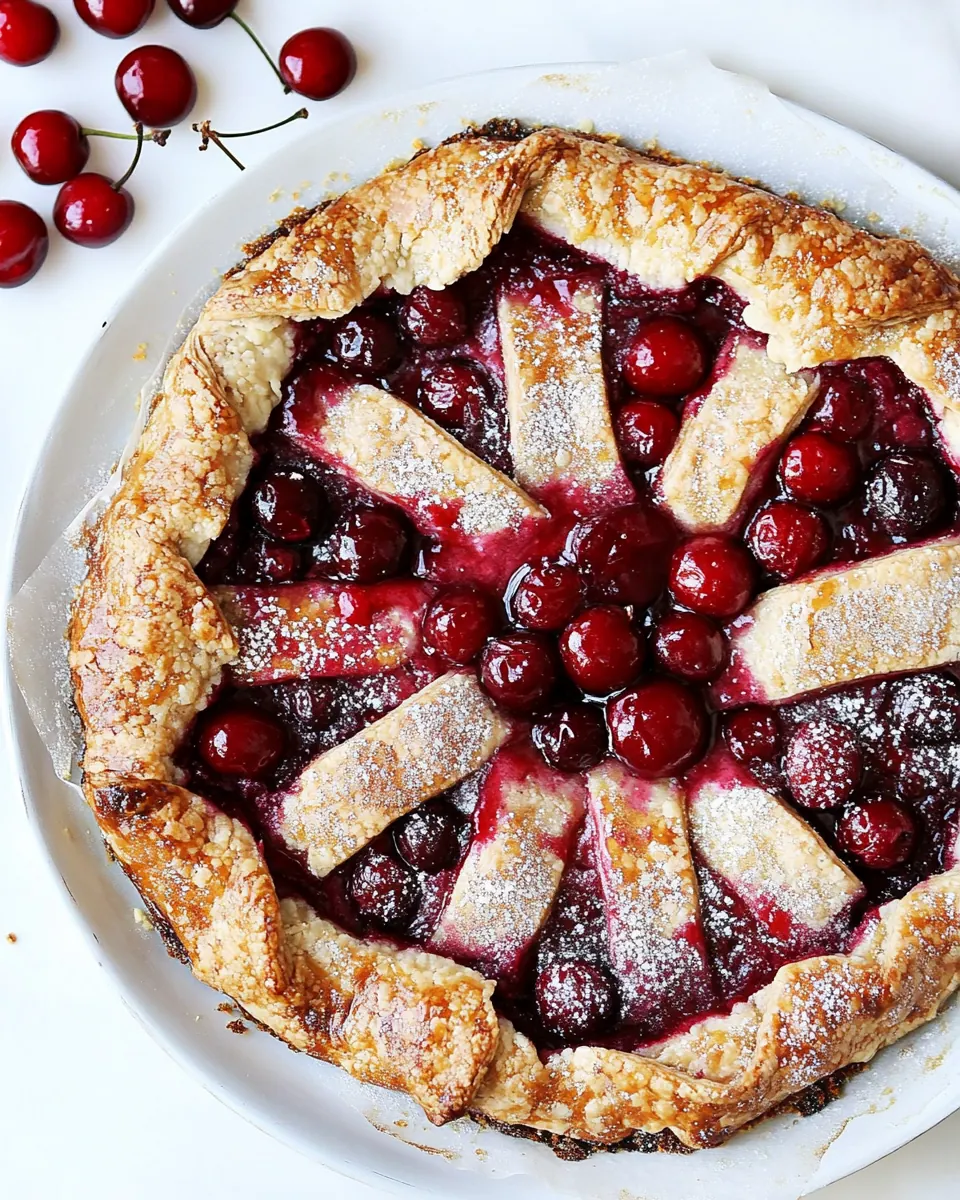
Sour Cherry Galette
Sour Cherry Galette is the kind of rustic, joyful dessert I reach for when summer delivers a bounty of tart cherries and I want a dessert that feels homemade but looks impressive.
I first made this Sour Cherry Galette on a sweltering July afternoon, windows open and the radio playing low in the kitchen. I remember pitting cherries with sticky fingers while my neighbor popped in with a bag of ripe tomatoes, and the kitchen slowly filled with the bright, fruity scent of fresh cherries. Rolling the buttery dough into a rough circle felt almost therapeutic, and folding the edges over the filling made the whole thing feel cozy, like wrapping a gift for friends who were joining for coffee that evening.
The first slice was still warm, the crust crackling under my fork, the filling bubbling and glossy, the combination of sweet and tart balanced by a fleck of melted butter. We sat on mismatched chairs in the backyard, and everyone insisted I make it again soon. That memory of sun, conversation, and sticky sweet cherries is exactly why I return to this recipe whenever sour cherries are in season.
Recipe Snapshot
1 hr 15 mins
30 mins
45 mins
Medium
350 kcal
American
Gluten-Free, Low FODMAP
Desserts
Food processor, Mixing bowls, Baking sheet, Parchment paper, Pastry brush
The Appeal of This Sour Cherry Galette
It celebrates seasonal fruit
I love how this Sour Cherry Galette puts the fruit front and center. Two pounds of pitted cherries sing when tossed with just a little sugar and cornstarch, so the filling stays bright and not cloying. When cherries are at their peak, that bright acidity is what makes the whole dessert sing.
Rustic charm meets simple technique
There is a comfort in the rough edges of a galette. You do not have to fuss over perfect lattice work, and the freeform crust has personality. Because the crust is made with cold, cubed butter and a quick pulse in a food processor, you get delightful flaky layers without complicated steps, and that minimalism is freeing.
Texture contrast is everything
The combination of a crisp, golden crust and a slightly thickened, juicy cherry filling offers a pleasing contrast. The cornstarch keeps the filling from running, while the raw sugar sprinkled on top gives a subtle crunch that catches the light and adds dimension.
Great for sharing and adaptable
I always appreciate recipes that travel well to picnics or potlucks. This Sour Cherry Galette is easy to halve or scale up, and one dough batch yields two crusts so you can freeze one for later. It is forgiving, so even if your edges are imperfect, the taste will still delight a crowd.
Comforting finish
Serving a warm slice with cold vanilla ice cream creates that perfect hot and cold interplay, which turns a simple dessert into a memorable one. That melting scoop softens the tartness and ties everything together into a nostalgic, shareable moment.
Essential Ingredients for Sour Cherry Galette
The ingredient list for this Sour Cherry Galette leans on a few dependable players. The crust relies on cold, cubed butter and sifted all purpose flour to build flakiness, while a touch of egg and ice cold water brings it together. For the filling, ripe cherries, sugar, and cornstarch create a filling that is glossy and set but still juicy.
- 4 cups sifted all-purpose flour: Provide structure and body to the dough by supplying gluten and starches, creating a tender but workable pastry when combined with fat and liquid. Sifted form helps ensure an even, lighter texture and prevents lumps for a smooth dough consistency.
- 1 tablespoon sugar: Add subtle sweetness to the crust, balancing savory notes and enhancing browning during baking while contributing to a slightly crisp surface. Used sparingly to avoid making the pastry overly sweet, preserving the galette’s rustic flavor profile.
- 1 teaspoon salt: Enhance overall flavor by balancing sweetness and strengthening gluten slightly, while also helping to control fermentation and dough handling. Dissolving salt into the dry ingredients ensures even distribution for consistent taste throughout the crust.
- 1 large egg lightly beaten: Bind dough ingredients and contribute richness and tenderness through fat and protein, aiding in structure and browning of the pastry surface. Beaten egg also helps create a pliable dough and contributes to the brushed egg wash if reserved.
- 1 teaspoon white vinegar: Brighten flavor and tenderize the pastry slightly by reacting with the egg and dough components, helping to stabilize the dough and improve crispness. Small acidic addition can subtly enhance the overall taste without adding noticeable sourness.
- 1/2 cup ice cold water: Moisten and bring dough together while controlling temperature to prevent butter from melting, resulting in flaky layers when rolled and handled. Ice cold water ensures the fat remains solid, producing a flakier, more tender crust.
- 1 1/2 cups cold unsalted butter cut into pieces (3 sticks or 24 tablespoons): Provide the primary fat that creates flakiness and rich flavor by forming layers in the dough as it is folded and rolled. Using cold, cubed unsalted butter allows precise control of salt levels and promotes steam pockets for a tender, airy crust.
- raw sugar for sprinkling: Offer a coarse, sparkling finish that enhances texture and adds a light caramelized crunch to the baked crust edge. Sprinkling raw sugar just before baking creates visual appeal and a pleasant contrast to the soft filling.
- for brushing: 1 egg + a few drops of water beaten together: Create a glossy, golden finish for the pastry edges when brushed on before baking, improving appearance and sealing folded dough layers. Combining egg with a few drops of water yields an easy-to-apply wash that enhances browning and sheen.
- 2 pounds sour cherries, pitted fresh or thawed: Provide the tart, juicy fruit base and primary flavor for the filling, offering bright acidity and natural sweetness that balance the pastry. Pitting cherries and using fresh or properly thawed fruit ensures even cooking and a jammy, saucy texture.
- 1/3 cup sugar: Sweeten and balance the tartness of the cherries while helping to build the filling’s syrup; quantity is moderate to keep fruit-forward flavor. Dissolving sugar with the fruit juices during cooking promotes a glossy, well-set filling.
- 3 tablespoons cornstarch: Thicken the cherry juices into a cohesive filling by absorbing excess liquid and creating a stable, sliceable texture when cooked or baked. Cornstarch yields a clear, smooth filling that prevents sogginess in the galette base.
- 1/4 teaspoon salt: Enhance and round out the fruit flavors while controlling excess moisture, contributing a subtle savory balance to the sweet filling. Small salt addition intensifies overall taste without being detectable as salty.
- 1 teaspoon vanilla extract: Infuse warm, aromatic notes that complement the cherries and deepen the dessert’s flavor profile while tying the filling components together. Adding vanilla at the end preserves its delicate fragrance for maximum impact.
- 2 tablespoons butter cut into pieces: Enrich the filling with concentrated butterfat that melts into the fruit, adding silkiness, mouthfeel, and a glossy finish to the cooked cherries. Small pieces of butter folded in at the end create richness and enhance flavor.
- vanilla ice cream for serving: Accompany the baked galette with a creamy, cold contrast that enhances the dessert’s richness and balances acidity and sweetness. Serving a scoop alongside warm slices elevates texture and temperature contrast for a classic presentation.
Making Sour Cherry Galette
I like to approach the process calmly, with everything laid out so I can move from dough to filling without rush. The steps are straightforward, but attention to small cues like the texture of the dough and the way the cherries glisten will keep the result impressive and satisfying.
- Add the flour, sugar and salt to a food processor and pulse just until combined. In a small bowl, whisk together the egg, vinegar and water. Add the cold butter pieces into the food processor and pulse until small coarse crumbs remain. Sprinkle the water/egg mixture over the flour and pulse again until the dough comes together.: The moment you pulse the mixture you should notice a faint, dry scent of flour and a uniform texture in the bowl, which signals that the base is ready for the butter; using short pulses prevents overworking the gluten, which keeps the crust tender. If the mixture looks uneven or has lumps, pulse a few more quick times but avoid creating a powdery flour cloud. A common mistake is blending too long so the mixture heats up and the butter begins to soften, which will ruin flakiness.
- Remove the dough with your hands and wrap it in plastic wrap. This dough makes enough for 2 galette crusts, so separate it into 2 sections now, or separate it after it's refrigerated. Refrigerate the dough for 30 minutes. Freeze one of the other balls of dough!: As you whisk, you'll see the egg lighten and the tiny ripples of liquid reflect light, indicating the wash is smooth; the vinegar will be invisible but its effect on tenderness is real. Chill this mixture if your kitchen is warm, because a cool wash helps keep the dough cold. A typical slip-up is using warm water which can make the dough sticky and difficult to handle.
- After 30 minutes, preheat the oven to 400 degrees F.: When the butter is properly cut in, the texture resembles coarse crumbs with pea sized pieces of butter visible, which is what creates flaky layers during baking. You should still see tiny flecks of white butter among the crumbs. If everything looks uniformly pasty, you pulsed too much; at that point chill the mixture and proceed cautiously.
- Place the cherries in a bowl. Toss with the sugar, cornstarch and salt, making sure to coat all the cherries. Drizzle in the vanilla extract and toss.: Watch for the dough to clump and hold together when pressed, a tactile cue that it is ready; it should not be sticky or wet, but cohesive and slightly tacky. If it seems dry, add a teaspoon of ice cold water at a time. Overmixing here will develop gluten and yield a tougher crust, so pulse sparingly and stop the moment pieces cling.
- Remove one of the crusts from the fridge. (The other is good for another week or so, or it can be frozen.) Roll one of the pie crusts into a rustic shape – no shape necessary really – until it is about 1/4 inch thick. Place the dough on a parchment-lined baking sheet. Place the cherries in the center leaving a 2-inch+ border of crust. Top with the butter cubes.: As you shape the dough into a disk by hand, you will feel the temperature change, and that warmth signals you should work quickly to avoid melting the butter . Wrap tightly to prevent drying out and label so you know it's one of two crusts; a common oversight is leaving it uncovered, which causes a dry skin on the dough that will crack when rolled.
- Once the cherries are placed, fold the crust over top of them. Brush the crust with the beaten egg wash. Sprinkle it with the raw sugar. Bake the galette until the crust is golden, about 40 to 45 minutes.: Dividing the dough ensures even chilling and easier rolling later; each piece should feel dense and slightly cool. If you plan to freeze one, flatten it into a disk first so it thaws evenly. A mistake people make is freezing a very thick lump, which takes too long to thaw and increases the chance the butter will soften unevenly.
- Remove it and let cool slightly, then slice. Serve warm with vanilla ice cream.: Chilling firms up the butter , making it easier to roll and resulting in flakier layers when baked; you will notice the dough becoming less tacky and easier to handle. Do not skip this rest, since rolling warm dough often tears and sticks. A shortcut some take is briefly freezing, but that can make the dough brittle and prone to cracking while rolling.
- Freeze one of the other balls of dough: Freezing preserves a second crust for future use and will keep its texture intact if wrapped well; flash freeze on a tray before bagging to avoid the pieces sticking together. Make sure to write the date, because frozen dough is best used within a month. People sometimes forget to wrap tightly, which leads to freezer burn and dried out dough.
- After 30 minutes, preheat the oven to 400 degrees F: Preheating sets the stage so the crust begins to brown and the butter creates steam pockets right away; the oven should feel fully hot when you slide the galette in, which helps achieve that crisp, golden finish. An oven that is not fully heated will lengthen bake time and may yield a soggy bottom. Always use an oven thermometer if your oven's accuracy is uncertain.
- Place the cherries in a bowl: Handling the cherries now you will see their vibrant color and feel their plumpness; a light squeeze should release juice if they are ripe. This tactile check helps you judge sugar needs; underripe fruit may need a touch more sweetness. A common misstep is adding too much sugar and overpowering the cherries' natural brightness.
- Toss with the sugar, cornstarch and salt, making sure to coat all the cherries: As you toss, the sugar will begin to draw out juices and the cornstarch will cloak the fruit, its powdery sheen disappearing into glossy fruit juice. Proper coating ensures the filling thickens evenly during baking. If some berries are missed, pockets of runny juice can form, so be thorough but gentle to avoid breaking fruit prematurely.
- Drizzle in the vanilla extract and toss: The aroma of vanilla extract will lift the fruit, adding warmth and depth; a light hand is all you need to complement the tartness. Stir until the vanilla is evenly distributed and the cherries glisten. Overdoing flavorings can mask the primary star, which here is the cherry, so less is more.
- Remove one of the crusts from the fridge: The chilled dough should feel firm but pliable; let it sit for a minute if it is rock hard so it is easier to roll. If it is too cold, it can crack while rolling, and if too warm, it will stick, so timing is key. A common misstep is forcing a cold disk, which results in uneven thickness.
- Roll one of the pie crusts into a rustic shape until it is about 1/4 inch thick: As you roll, the dough should unfurl smoothly, and you will see small flecks of butter in the sheet; stop when the thickness is even and you can still lift it without tearing. The rough edges are part of the charm. Rolling too thin risks a soggy base, so aim for that quarter inch thickness for a sturdy, flaky crust.
- Place the dough on a parchment lined baking sheet: The parchment prevents sticking and makes it easy to transfer the galette into and out of the oven, plus it helps promote even browning underneath. Centering the dough on the sheet gives you room to fold. Skipping parchment often leads to clean up headaches and possible sticking.
- Place the cherries in the center leaving a 2 inch plus border of crust: Piling the filling centrally avoids seepage and keeps the edges free for folding, and you will notice the fruit mounding slightly, signaling a generous filling. Leaving a proper border prevents overflow and ensures a neat fold. A too thin border will cause filling to spill and burn on the sheet.
- Top with the butter cubes: Dotting pieces of butter across the cherries creates pockets of richness that melt into the fruit, producing glossy flavor bursts. The butter will sizzle and meld with fruit juices during baking. Do not substitute with melted butter at this point because it will make the filling greasy and overly runny.
- Once the cherries are placed, fold the crust over top of them: Folding creates the characteristic rustic rim and traps the filling slightly so it does not wander; the edges should overlap intermittently for a pleasing, uneven border. Press lightly where folds meet to secure them. Over folding or pressing too firmly can compress the fruit and cause an uneven bake.
- Brush the crust with the beaten egg wash: The egg wash will immediately give the crust a sheen and encourage deep golden color, and a light, even coat prevents pooling which can burn. Use a pastry brush and gentle strokes for an even finish. A common mistake is applying too much, which can create a sticky, browned patch rather than a delicate gloss.
- Sprinkle it with the raw sugar: The raw sugar will catch the oven light and become slightly crunchy, creating an attractive contrast to the soft filling; it also enhances sweetness on the first bite. Use just enough to sparkle without turning gritty. Over-sugaring can leave an unpleasantly crunchy surface.
- Bake the galette until the crust is golden, about 40 to 45 minutes: During baking the kitchen will fill with the scent of warm fruit and butter, and you will see the juices bubble at the center while the crust turns a rich golden brown, all cues that it is nearly done. Rotating the sheet midway ensures even browning. Removing it too soon results in a runny filling, while overbaking dries the crust and dulls the cherry flavor.
- Remove it and let cool slightly, then slice: Letting the galette rest helps the filling set so slices hold together, and you will notice the bubbling quiet as the juices thicken, an important sign that it is time to cut. A short rest also prevents burns when serving warm. Cutting immediately often causes the filling to spill and loose presentation.
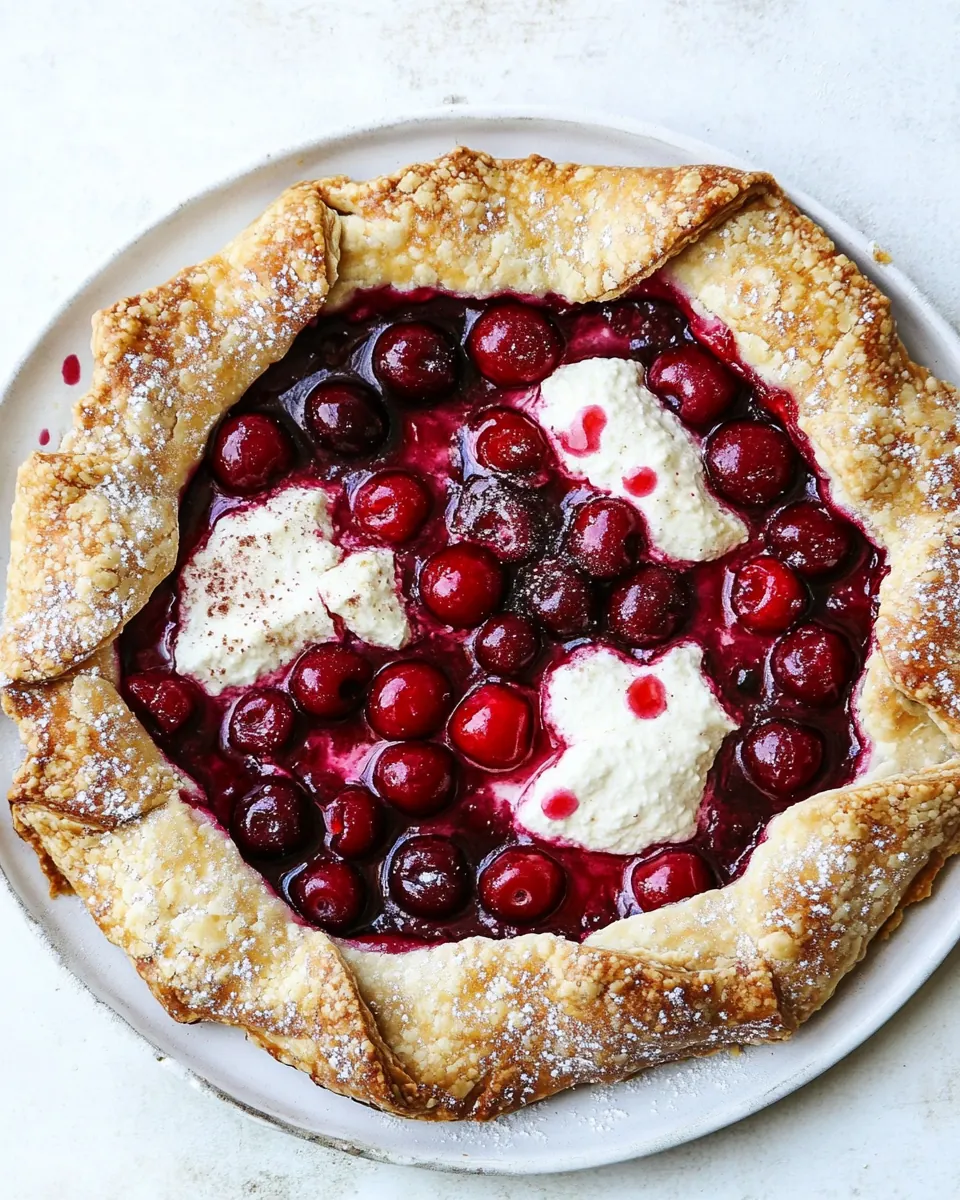
- Serve warm with vanilla ice cream: The contrast of warm, jammy cherries and cold vanilla ice cream creates a perfect balance of temperature and texture, with the ice cream slowly melting into the fruit for an indulgent finish. Garnish if desired, but the simple pairing is usually best. Serving it stone cold masks the aroma and reduces the sensory impact.
Variations to Try
These variations are small changes that can elevate the Sour Cherry Galette while keeping the heart of the recipe intact. Try one to match the occasion or your pantry.
- Spiced touch: Add a pinch of cinnamon or cardamom to the filling to bring warm, aromatic notes that play well with the tart cherries.
- Citrus brightness: Stir in a teaspoon of finely grated lemon zest with the cherries to brighten the filling and highlight the fruit’s natural acidity.
- Nutty finish: Scatter chopped toasted almonds or hazelnuts around the filling edge before folding to add crunch and a toasty counterpoint to the soft fruit.
- Butter swap: Use European style butter if available for a richer, slightly tangier crust thanks to its higher fat content, which deepens flavor and flakiness.
- Make ahead: Freeze one disk of dough for a future galette, or prepare the filling and store it refrigerated for a day to save time on baking day.
Serving This Sour Cherry Galette
The right presentation makes this Sour Cherry Galette feel special, yet it remains relaxed enough for casual gatherings. Here are ways to serve it for different occasions, plus storage ideas so nothing goes to waste.
- Classic pairing: Serve warm slices with a scoop of cold vanilla ice cream to contrast temperature and texture for an always popular combination.
- Afternoon tea: Present modest wedges with small spoons for guests, pairing with light tea or coffee to let the tart fruit shine as a refined treat.
- Potluck friendly: Transport the galette on its baking sheet and slice on arrival; the rustic edges make it forgiving to slice and serve to a crowd.
- Seasonal occasion: This galette is perfect for summer gatherings and makes a lovely dessert for holiday brunches where fresh fruit is celebrated.
- Storage tips: Keep leftover slices covered in the fridge for up to two days, and rewarm briefly in a 350 degree F oven to restore crispness before serving again.
- Make ahead: Freeze an extra crust or prepared filling for an easy bake later in the season, then assemble and bake as needed for a fresh tasting dessert.
FAQ
Conclusion
What makes this recipe special is how it showcases bright, tart cherries inside a flaky, buttery crust that feels both elegant and homey. Try this Sour Cherry Galette the next time you have fresh cherries or a craving for a simple, soulful dessert, and you will likely find it becomes a summer staple. It is forgiving, shareable, and rewarding to bake, offering warm fruit and crisp pastry in every forkful.
Sour Cherry Galette
Equipment
- Food Processor
- Mixing Bowls
- Baking Sheet
- Parchment Paper
- Pastry Brush
Ingredients
- 4 cups sifted all-purpose flour Provide structure and body to the dough by supplying gluten and starches, creating a tender but workable pastry when combined with fat and liquid. Sifted form helps ensure an even, lighter texture and prevents lumps for a smooth dough consistency.
- 1 tablespoon sugar Add subtle sweetness to the crust, balancing savory notes and enhancing browning during baking while contributing to a slightly crisp surface. Used sparingly to avoid making the pastry overly sweet, preserving the galette’s rustic flavor profile.
- 1 teaspoon salt Enhance overall flavor by balancing sweetness and strengthening gluten slightly, while also helping to control fermentation and dough handling. Dissolving salt into the dry ingredients ensures even distribution for consistent taste throughout the crust.
- 1 large egg lightly beaten Bind dough ingredients and contribute richness and tenderness through fat and protein, aiding in structure and browning of the pastry surface. Beaten egg also helps create a pliable dough and contributes to the brushed egg wash if reserved.
- 1 teaspoon white vinegar Brighten flavor and tenderize the pastry slightly by reacting with the egg and dough components, helping to stabilize the dough and improve crispness. Small acidic addition can subtly enhance the overall taste without adding noticeable sourness.
- 1/2 cup ice cold water Moisten and bring dough together while controlling temperature to prevent butter from melting, resulting in flaky layers when rolled and handled. Ice cold water ensures the fat remains solid, producing a flakier, more tender crust.
- 1 1/2 cups cold unsalted butter cut into pieces (3 sticks or 24 tablespoons) Provide the primary fat that creates flakiness and rich flavor by forming layers in the dough as it is folded and rolled. Using cold, cubed unsalted butter allows precise control of salt levels and promotes steam pockets for a tender, airy crust.
- raw sugar for sprinkling Offer a coarse, sparkling finish that enhances texture and adds a light caramelized crunch to the baked crust edge. Sprinkling raw sugar just before baking creates visual appeal and a pleasant contrast to the soft filling.
- for brushing: 1 egg + a few drops of water beaten together Create a glossy, golden finish for the pastry edges when brushed on before baking, improving appearance and sealing folded dough layers. Combining egg with a few drops of water yields an easy-to-apply wash that enhances browning and sheen.
- 2 pounds sour cherries, pitted fresh or thawed Provide the tart, juicy fruit base and primary flavor for the filling, offering bright acidity and natural sweetness that balance the pastry. Pitting cherries and using fresh or properly thawed fruit ensures even cooking and a jammy, saucy texture.
- 1/3 cup sugar Sweeten and balance the tartness of the cherries while helping to build the filling’s syrup; quantity is moderate to keep fruit-forward flavor. Dissolving sugar with the fruit juices during cooking promotes a glossy, well-set filling.
- 3 tablespoons cornstarch Thicken the cherry juices into a cohesive filling by absorbing excess liquid and creating a stable, sliceable texture when cooked or baked. Cornstarch yields a clear, smooth filling that prevents sogginess in the galette base.
- 1/4 teaspoon salt Enhance and round out the fruit flavors while controlling excess moisture, contributing a subtle savory balance to the sweet filling. Small salt addition intensifies overall taste without being detectable as salty.
- 1 teaspoon vanilla extract Infuse warm, aromatic notes that complement the cherries and deepen the dessert’s flavor profile while tying the filling components together. Adding vanilla at the end preserves its delicate fragrance for maximum impact.
- 2 tablespoons butter cut into pieces Enrich the filling with concentrated butterfat that melts into the fruit, adding silkiness, mouthfeel, and a glossy finish to the cooked cherries. Small pieces of butter folded in at the end create richness and enhance flavor.
- vanilla ice cream for serving Accompany the baked galette with a creamy, cold contrast that enhances the dessert’s richness and balances acidity and sweetness. Serving a scoop alongside warm slices elevates texture and temperature contrast for a classic presentation.
Instructions
- Add the flour, sugar and salt to a food processor and pulse just until combined. In a small bowl, whisk together the egg, vinegar and water. Add the cold butter pieces into the food processor and pulse until small coarse crumbs remain. Sprinkle the water/egg mixture over the flour and pulse again until the dough comes together.: The moment you pulse the mixture you should notice a faint, dry scent of flour and a uniform texture in the bowl, which signals that the base is ready for the butter; using short pulses prevents overworking the gluten, which keeps the crust tender. If the mixture looks uneven or has lumps, pulse a few more quick times but avoid creating a powdery flour cloud. A common mistake is blending too long so the mixture heats up and the butter begins to soften, which will ruin flakiness.
- Remove the dough with your hands and wrap it in plastic wrap. This dough makes enough for 2 galette crusts, so separate it into 2 sections now, or separate it after it's refrigerated. Refrigerate the dough for 30 minutes. Freeze one of the other balls of dough!: As you whisk, you'll see the egg lighten and the tiny ripples of liquid reflect light, indicating the wash is smooth; the vinegar will be invisible but its effect on tenderness is real. Chill this mixture if your kitchen is warm, because a cool wash helps keep the dough cold. A typical slip-up is using warm water which can make the dough sticky and difficult to handle.
- After 30 minutes, preheat the oven to 400 degrees F.: When the butter is properly cut in, the texture resembles coarse crumbs with pea sized pieces of butter visible, which is what creates flaky layers during baking. You should still see tiny flecks of white butter among the crumbs. If everything looks uniformly pasty, you pulsed too much; at that point chill the mixture and proceed cautiously.
- Place the cherries in a bowl. Toss with the sugar, cornstarch and salt, making sure to coat all the cherries. Drizzle in the vanilla extract and toss.: Watch for the dough to clump and hold together when pressed, a tactile cue that it is ready; it should not be sticky or wet, but cohesive and slightly tacky. If it seems dry, add a teaspoon of ice cold water at a time. Overmixing here will develop gluten and yield a tougher crust, so pulse sparingly and stop the moment pieces cling.
- Remove one of the crusts from the fridge. (The other is good for another week or so, or it can be frozen.) Roll one of the pie crusts into a rustic shape – no shape necessary really – until it is about 1/4 inch thick. Place the dough on a parchment-lined baking sheet. Place the cherries in the center leaving a 2-inch+ border of crust. Top with the butter cubes.: As you shape the dough into a disk by hand, you will feel the temperature change, and that warmth signals you should work quickly to avoid melting the butter . Wrap tightly to prevent drying out and label so you know it's one of two crusts; a common oversight is leaving it uncovered, which causes a dry skin on the dough that will crack when rolled.
- Once the cherries are placed, fold the crust over top of them. Brush the crust with the beaten egg wash. Sprinkle it with the raw sugar. Bake the galette until the crust is golden, about 40 to 45 minutes.: Dividing the dough ensures even chilling and easier rolling later; each piece should feel dense and slightly cool. If you plan to freeze one, flatten it into a disk first so it thaws evenly. A mistake people make is freezing a very thick lump, which takes too long to thaw and increases the chance the butter will soften unevenly.
- Remove it and let cool slightly, then slice. Serve warm with vanilla ice cream.: Chilling firms up the butter , making it easier to roll and resulting in flakier layers when baked; you will notice the dough becoming less tacky and easier to handle. Do not skip this rest, since rolling warm dough often tears and sticks. A shortcut some take is briefly freezing, but that can make the dough brittle and prone to cracking while rolling.
- Freeze one of the other balls of dough: Freezing preserves a second crust for future use and will keep its texture intact if wrapped well; flash freeze on a tray before bagging to avoid the pieces sticking together. Make sure to write the date, because frozen dough is best used within a month. People sometimes forget to wrap tightly, which leads to freezer burn and dried out dough.
- After 30 minutes, preheat the oven to 400 degrees F: Preheating sets the stage so the crust begins to brown and the butter creates steam pockets right away; the oven should feel fully hot when you slide the galette in, which helps achieve that crisp, golden finish. An oven that is not fully heated will lengthen bake time and may yield a soggy bottom. Always use an oven thermometer if your oven's accuracy is uncertain.
- Place the cherries in a bowl: Handling the cherries now you will see their vibrant color and feel their plumpness; a light squeeze should release juice if they are ripe. This tactile check helps you judge sugar needs; underripe fruit may need a touch more sweetness. A common misstep is adding too much sugar and overpowering the cherries' natural brightness.
- Toss with the sugar, cornstarch and salt, making sure to coat all the cherries: As you toss, the sugar will begin to draw out juices and the cornstarch will cloak the fruit, its powdery sheen disappearing into glossy fruit juice. Proper coating ensures the filling thickens evenly during baking. If some berries are missed, pockets of runny juice can form, so be thorough but gentle to avoid breaking fruit prematurely.
- Drizzle in the vanilla extract and toss: The aroma of vanilla extract will lift the fruit, adding warmth and depth; a light hand is all you need to complement the tartness. Stir until the vanilla is evenly distributed and the cherries glisten. Overdoing flavorings can mask the primary star, which here is the cherry, so less is more.
- Remove one of the crusts from the fridge: The chilled dough should feel firm but pliable; let it sit for a minute if it is rock hard so it is easier to roll. If it is too cold, it can crack while rolling, and if too warm, it will stick, so timing is key. A common misstep is forcing a cold disk, which results in uneven thickness.
- Roll one of the pie crusts into a rustic shape until it is about 1/4 inch thick: As you roll, the dough should unfurl smoothly, and you will see small flecks of butter in the sheet; stop when the thickness is even and you can still lift it without tearing. The rough edges are part of the charm. Rolling too thin risks a soggy base, so aim for that quarter inch thickness for a sturdy, flaky crust.
- Place the dough on a parchment lined baking sheet: The parchment prevents sticking and makes it easy to transfer the galette into and out of the oven, plus it helps promote even browning underneath. Centering the dough on the sheet gives you room to fold. Skipping parchment often leads to clean up headaches and possible sticking.
- Place the cherries in the center leaving a 2 inch plus border of crust: Piling the filling centrally avoids seepage and keeps the edges free for folding, and you will notice the fruit mounding slightly, signaling a generous filling. Leaving a proper border prevents overflow and ensures a neat fold. A too thin border will cause filling to spill and burn on the sheet.
- Top with the butter cubes: Dotting pieces of butter across the cherries creates pockets of richness that melt into the fruit, producing glossy flavor bursts. The butter will sizzle and meld with fruit juices during baking. Do not substitute with melted butter at this point because it will make the filling greasy and overly runny.
- Once the cherries are placed, fold the crust over top of them: Folding creates the characteristic rustic rim and traps the filling slightly so it does not wander; the edges should overlap intermittently for a pleasing, uneven border. Press lightly where folds meet to secure them. Over folding or pressing too firmly can compress the fruit and cause an uneven bake.
- Brush the crust with the beaten egg wash: The egg wash will immediately give the crust a sheen and encourage deep golden color, and a light, even coat prevents pooling which can burn. Use a pastry brush and gentle strokes for an even finish. A common mistake is applying too much, which can create a sticky, browned patch rather than a delicate gloss.
- Sprinkle it with the raw sugar: The raw sugar will catch the oven light and become slightly crunchy, creating an attractive contrast to the soft filling; it also enhances sweetness on the first bite. Use just enough to sparkle without turning gritty. Over-sugaring can leave an unpleasantly crunchy surface.
- Bake the galette until the crust is golden, about 40 to 45 minutes: During baking the kitchen will fill with the scent of warm fruit and butter, and you will see the juices bubble at the center while the crust turns a rich golden brown, all cues that it is nearly done. Rotating the sheet midway ensures even browning. Removing it too soon results in a runny filling, while overbaking dries the crust and dulls the cherry flavor.
- Remove it and let cool slightly, then slice: Letting the galette rest helps the filling set so slices hold together, and you will notice the bubbling quiet as the juices thicken, an important sign that it is time to cut. A short rest also prevents burns when serving warm. Cutting immediately often causes the filling to spill and loose presentation.
- Serve warm with vanilla ice cream: The contrast of warm, jammy cherries and cold vanilla ice cream creates a perfect balance of temperature and texture, with the ice cream slowly melting into the fruit for an indulgent finish. Garnish if desired, but the simple pairing is usually best. Serving it stone cold masks the aroma and reduces the sensory impact.
Notes
- Spiced touch: Add a pinch of cinnamon or cardamom to the filling to bring warm, aromatic notes that play well with the tart cherries.
- Citrus brightness: Stir in a teaspoon of finely grated lemon zest with the cherries to brighten the filling and highlight the fruit's natural acidity.
- Nutty finish: Scatter chopped toasted almonds or hazelnuts around the filling edge before folding to add crunch and a toasty counterpoint to the soft fruit.
- Butter swap: Use European style butter if available for a richer, slightly tangier crust thanks to its higher fat content, which deepens flavor and flakiness.
- Make ahead: Freeze one disk of dough for a future galette, or prepare the filling and store it refrigerated for a day to save time on baking day.