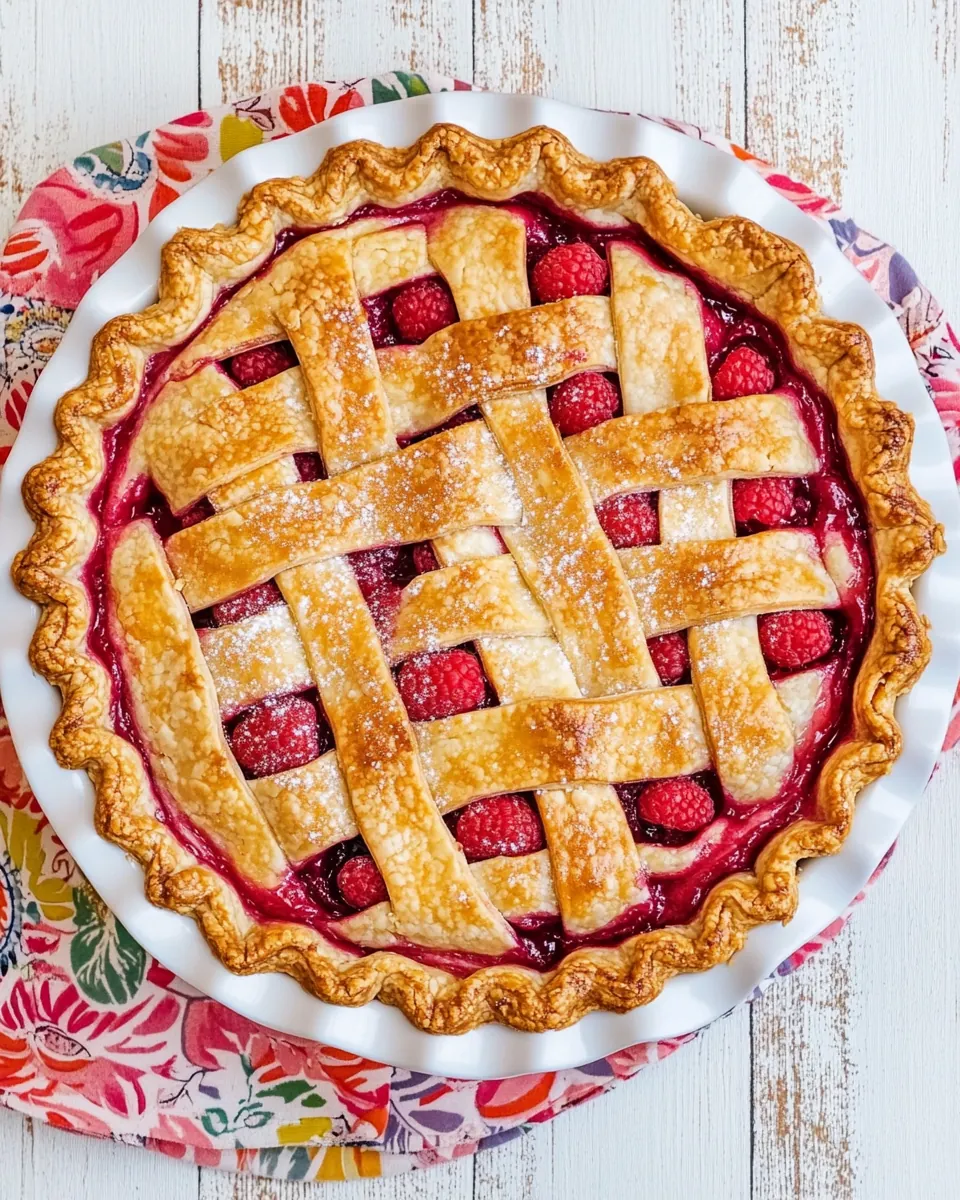
Apple Raspberry Pie
Apple Raspberry Pie is one of those desserts that always brings people together around the table, and the first time I baked it I remember the whole kitchen smelling like warm orchard afternoons. I had a basket of crisp apples and a box of raspberries that were begging to be paired, so I rolled up my sleeves and set to work, humming an old tune while the crust chilled. The moment the fruit began to bubble and the aroma filled the house, a neighbor popped in and offered to set the oven timer for me, which felt oddly comforting and cooperative.
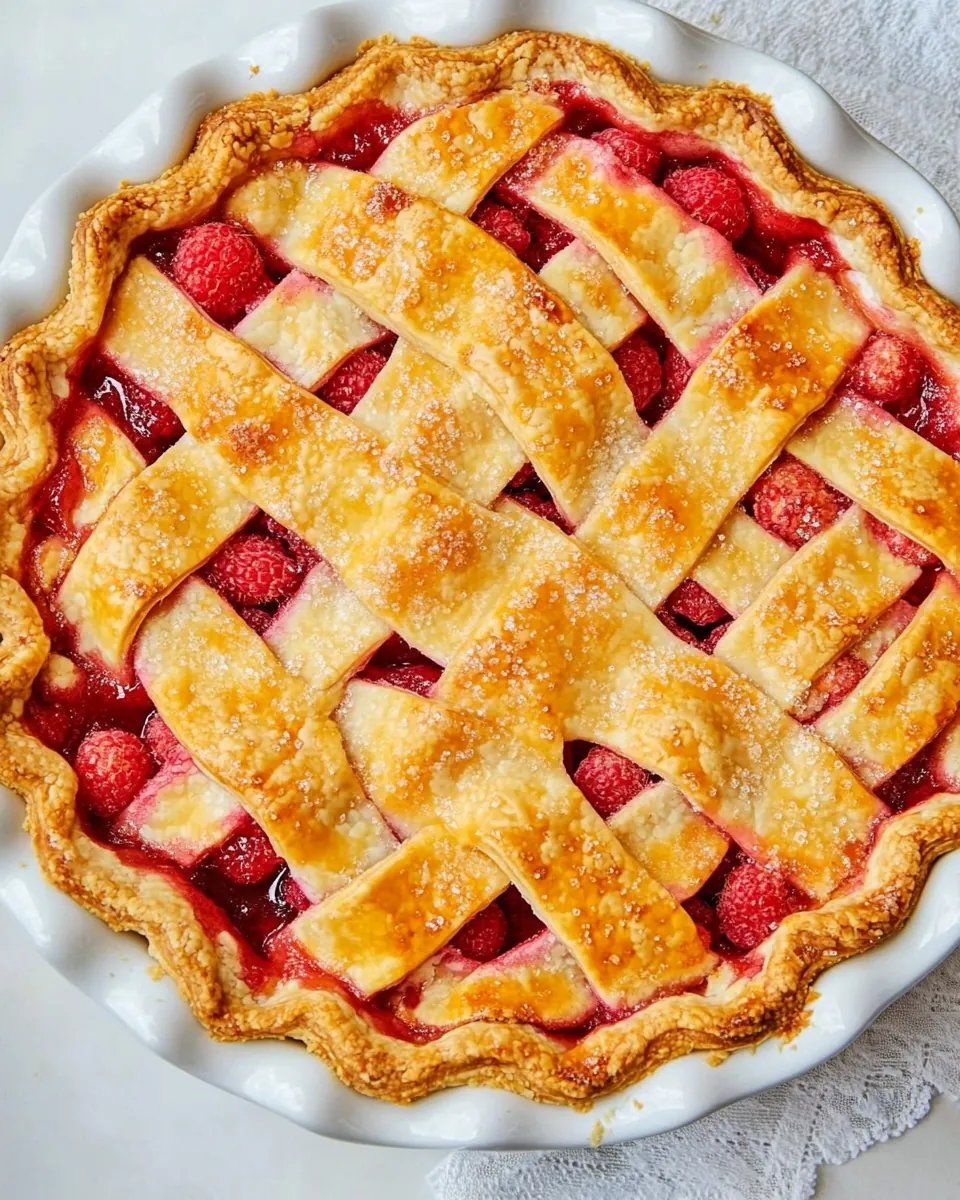
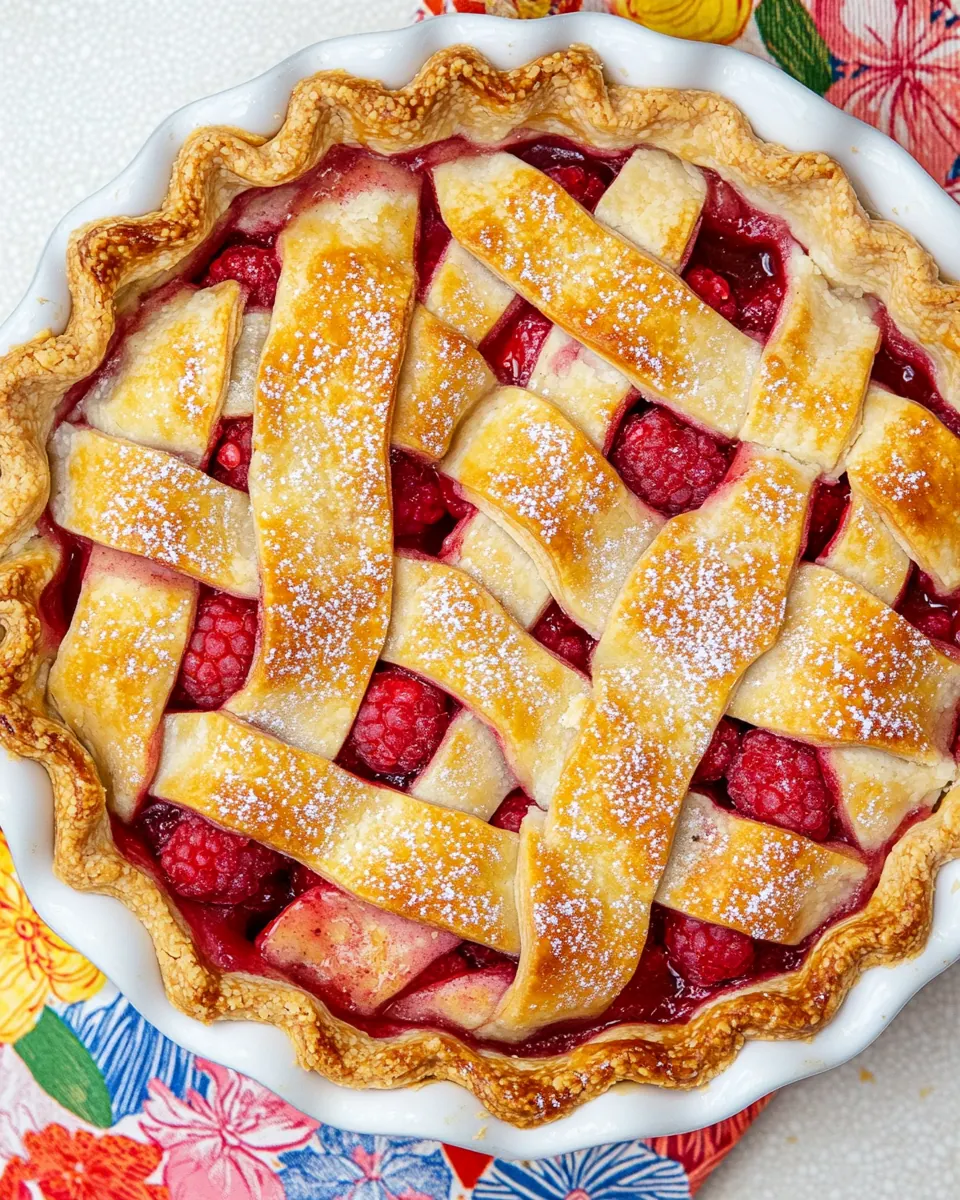
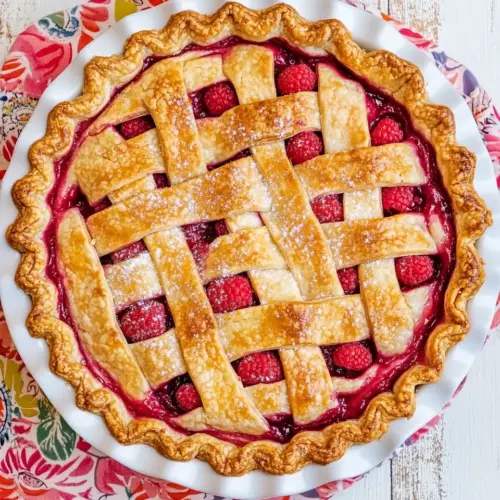
What I love about Apple Raspberry Pie is how the textures play off each other, the way the tart raspberries cut through the sweetened apples, and that buttery crust that flakes with every forkful. When I slice into it after it has cooled, the filling holds but still gives slightly, and serving it is a small act of generosity. Once, after a long rainy day, this pie turned an ordinary evening into a cozy memory for my family, everyone leaning in to sample the warm, fragrant slices while we chatted about trivial things and lingered longer than usual.
Recipe Snapshot
1 hr 50 mins
30 mins
80 mins
Medium
300 kcal
American
Gluten-Free, Vegan
Desserts
9 inch deep dish pie pan, Rolling pin, Large bowl, Whisk
The Charm of This Apple Raspberry Pie
Perfect balance of sweet and tart
I adore how Apple Raspberry Pie layers flavors, the tartness from the raspberries brightening the mellow sweetness of the apples. I find that contrast keeps each bite interesting and prevents the filling from feeling cloying. When I want a dessert that feels sophisticated without being fussy, this combination is my go to.
Textural harmony
The idea of a flaky, golden pie crust holding a bubbling fruit filling is something I come back to again and again. I love the way the crust gives a satisfying break, while the filling is tender yet slightly jammy. That interplay makes serving this pie feel like presenting a complete experience, not just a sweet ending.
Comfortful and seasonal
I make Apple Raspberry Pie mostly in the cooler months, when firm apples are at their peak. There is something about the rustic look and the warming spices that makes it an instant fall favorite. It’s the sort of dessert I bring to potlucks because it reads as both homey and a little special.
Simple techniques, impressive results
The steps are straightforward, yet when you pay attention to small details, like tossing the sliced apples with lemon juice and using cornstarch for thickening, the outcome is reliably excellent. I always remind myself that gentle handling and watching for bubbling juices are the things that make the difference.
Flexible for gatherings
Whether I’m serving a few friends or a larger crowd, this pie scales well and travels decently. I’ve learned that letting it cool fully before slicing is the golden rule, and patience always pays off when you want neat, beautiful slices on the plate.
Ingredient List for Apple Raspberry Pie
These ingredients are chosen to create a classic fruit pie with a bright edge. I focus on a few key players: a sturdy pie crust for structure, crisp apples for texture, and juicy raspberries for tang. The sweeteners and thickener help the filling set while the spices lift the fruit flavors without overpowering them.
- Homemade pie crust or two 9-inch rollout pie crusts: Provide a flaky, buttery base that holds the filling together and browns during baking; use homemade or store-bought rollout crusts to ensure an even thickness and a sturdy edge for crimping or lattice work.
- 3 1/2 pounds firm apples I used Honey Crisps: Offer a crisp, tart-sweet core for the pie when peeled, cored, and sliced; select firm apples like Honey Crisps to retain texture and release balanced juice during baking.
- 1 tablespoon lemon juice: Brighten and prevent oxidation of the apple slices by tossing them with lemon juice; also add a subtle citrus note that balances the pie’s sweetness.
- 12 ounces Driscoll’s Raspberries two 6-ounce packages: Contribute bright color and tart berry flavor when folded into the apple mixture; use two 6-ounce packages for even distribution and to maintain berry texture after baking.
- 2/3 cup granulated sugar: Sweeten the filling and help balance the tartness of apples and raspberries; dissolve into the fruit mixture to control overall sweetness without overpowering the fresh flavors.
- 1/4 cup raspberry preserves: Enhance raspberry intensity and add a glossy finish to the filling; stir into the fruit mixture to boost jammy texture and concentrated flavor.
- 3 tablespoons cornstarch: Thicken the combined juices released during baking so the filling sets properly; whisk with a little sugar or cold liquid first to prevent lumps and ensure even thickening.
- 1/2 teaspoon cinnamon: Add warm, aromatic depth that complements both apples and raspberries; measure carefully to enhance flavor without dominating the fruit.
- 1/2 teaspoon nutmeg: Provide a warm, nutty spice note that rounds out the pie’s flavor profile; use sparingly to avoid overwhelming the delicate raspberry taste.
- 1/2 teaspoons ea salt: Season the filling to enhance overall flavor and balance sweetness; sprinkle evenly to bring out fruit complexity and reduce flatness.
- 1 large egg + 1 tablespoon water: Create an egg wash when beaten with water to brush over the crust for a golden, glossy finish; also can be used to seal edges or adhere decorative pieces.
- 1 2 tablespoons brown sugar: Sprinkle over the crust or lattice before baking to add a touch of caramelized sweetness and a slight crunch that contrasts with the tender filling.
Cooking Instructions for Apple Raspberry Pie
These instructions walk you through each stage with a conversational, hands on approach. I like to keep my workspace tidy, line things up, and take small pauses to check the filling and crust as I go. Trust your senses and be patient; the results reward careful attention.
- Preheat the oven to 450 degrees F and place the rack in the lowest position. Place a piece of plastic wrap (or foil) out on the counter. Flour the plastic wrap and place the pie crust dough on the floured work surface. Flour a rolling pin and roll one dough disk out into a large round circle approximately 12 inches across. Carefully lift the plastic wrap and flip the dough circle over into a 9-inch deep-dish pie pan. Gently fit the pie dough down into the pie pan—don't stretch it. Then fold the rough edges under and pinch-crimp the edges with your fingers.: The kitchen will fill with an anticipatory warmth as the oven climbs, and starting at a high temperature gives the pie crust an initial lift and flake. You should hear the faint hum of the oven stabilizing as it reaches temperature, and visually the heating element may glow before it settles. This early blast helps set the bottom crust so it absorbs less filling liquid. A frequent mistake is skipping the preheat which leads to a soggy bottom crust, so always wait until the oven reaches the proper temperature.
- Place the lemon juice in a large bowl. Peel and thinly slice all the apples (1/8- to 1/4-inch thick) tossing in the lemon juice as you add them to the bowl.: When you flour the surface and roll the dough, you want a dusting that prevents sticking but does not dry the dough out. The soft, cool dough will feel tacky at first, and the gentle pressure of the rolling pin should spread it evenly. Rolling on plastic wrap also makes transferring the dough simpler, and you will notice less tearing when you pick it up. Avoid pressing too hard, as overworked dough loses its lightness and can become tough.
- Add the Driscoll’s Raspberries, granulated sugar, raspberry preserves, corn starch, spices, and salt to the apples. Gently toss the mixture by hand to coat. Scoop the raspberry apple filling into the pie crust. Shake a little so the filling settles into place.: The flour creates a thin barrier so the dough slides instead of sticking, which makes achieving an even circle easier. As you move the rolling pin outward, the dough should unstick and shift smoothly; if it resists, dust a touch more flour. The dough will be slightly chill to the touch and should not feel greasy. Overflouring can dry the edges, so use the minimum needed to work comfortably.
- Roll out the second pie crust and use a cookie cutter to cut fun shapes for the top crust. (I used a heart cookie cutter.) Lay the pie crust shapes over the filling, overlapping on the edges. Then whisk the egg and water to create an eggwash. Brush the eggwash over the top of the pie crust, then sprinkle the top of the crust with coarse Demerara sugar.: Rolling from the center outward produces an even thickness, and you will see faint flour lines blending into a uniform surface. The dough should have a consistent translucence when thin enough, but still hold its shape when lifted. If the edges crack, a quick dab of cold water smooths them. A common error is rolling too thin near the edges, which can tear during transfer, so aim for steady, even pressure.
- Place the pie in the oven, and LOWER THE TEMPERATURE TO 375 DEGREES F. The extra heat from the beginning gives the crust a little head start in baking. Bake the pie for 70-80 minutes, until golden and bubbly. If the crust starts to get dark, loosely cover with foil while baking. *Make sure you see the juices bubbling – otherwise the filling will be runny.: The flip feels a little theatrical, and watching the dough drape into the pan is satisfying as it settles. Use the plastic wrap to support the dough, then gently ease it down so the bottom sits flat. If air pockets appear, press them out with your fingertips. Don’t stretch the dough while fitting it in, as stretched dough springs back while baking and can shrink awkwardly.
- This is the hard part… DO NOT cut the pie until it has cooled down to room temperature. I know it smells amazing and is very hard to resist, but the filling needs time to settle and set, so it’s not soupy. If you cut your pie too soon, it will fall apart. I suggest making the pie in evening before you need it and let it rest overnight.: Press the dough into the corners and up the sides, coaxing it into place without tugging. The surface should be smooth and unstrained, with a neat seam where the edge meets the rim. Folding under the rough edges creates a thicker rim for crimping. If you stretch, the dough will pull away and create gaps that fill with juice, so take care to ease it in.
- Then fold the rough edges under and pinch-crimp the edges with your fingers: Crimping seals the edge and gives the pie an attractive border. Use your thumb and forefinger to pinch consistent scallops or press with a fork for a simpler finish. The crust edge will feel firmer than the base, which is desirable for a sturdy rim. Overhandling the edge can warm the butter in the dough too much, reducing flakiness, so work quickly and return the pan to the fridge if needed.
- Place the lemon juice in a large bowl: The bowl will be the staging area for the fruit, and the citrus will coat the apples to prevent browning while contributing a subtle lift. Pouring the lemon juice first makes it easy to add slices directly into an acidic bath. Avoid using bottled juices with added flavors, as they can alter the profile of the filling.
- Peel and thinly slice all the apples one eighth to one quarter inch thick tossing in the lemon juice as you add them to the bowl: As you slice, the fresh scent of the apples releases, a crisp aroma that signals freshness. Thin, uniform slices cook evenly, softening without collapsing, and tossing them immediately in the lemon juice keeps color vibrant. A common slip is uneven slicing which leads to some pieces overcooking while others remain firm, so aim for consistency.
- Add the Driscoll’s Raspberries granulated sugar raspberry preserves corn starch spices and salt to the apples: When you add the raspberries and sweeteners, the bowl fills with a bright fruity smell, and you can see the sugar begin to draw juice from the fruit. The addition of cornstarch is critical because it will thicken those juices during baking into a luscious, sliceable filling. Mix gently to avoid crushing the raspberries , as you want some texture in the final pie. Over mixing can turn everything into a uniform mush, so toss with care.
- Gently toss the mixture by hand to coat: Using your hands gives you control and a tactile sense of how the mixture is coming together, feeling the weight of the fruit and the slight tackiness from the preserves. The goal is even distribution so every slice has both apple and raspberry notes. If you press too hard, the fragile berries will break down, leading to a less interesting texture.
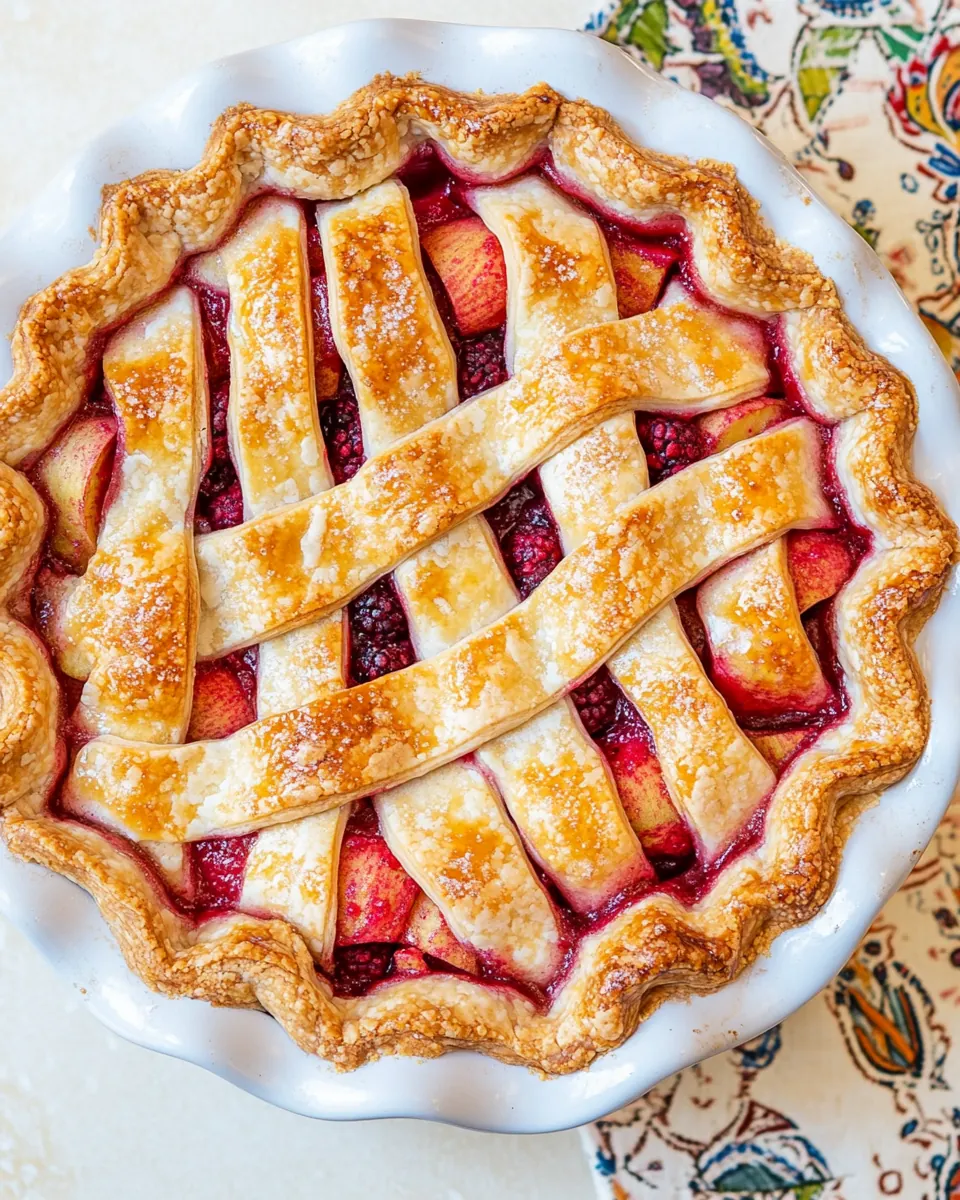
- Scoop the raspberry apple filling into the pie crust: As you transfer the filling, the pan will take on a colorful mound of fruit. Shake the pan a little so the filling settles into place and fills any gaps, leaving a small dome in the center which will sink slightly as it bakes. The visual cue you want is an even top with no large empty pockets. Overfilling can cause spillage, so leave a modest border for the top crust.
- Roll out the second pie crust and use a cookie cutter to cut fun shapes for the top crust: Rolling the second disk evenly ensures your decorative shapes are consistent, and cutting shapes like hearts creates a charming top that vents while looking pretty. The shapes will brown and crisp, creating both form and function. If shapes are too thin they may burn, so aim for moderate thickness.
- Lay the pie crust shapes over the filling overlapping on the edges: Layering the shapes creates an artisanal look and allows steam to escape while holding in most of the juices. As you arrange them, the contrast between the golden crust and the jewel toned filling becomes striking. Be mindful to overlap enough to seal the edges, but not so much that steam cannot vent properly.
- Then whisk the egg and water to create an eggwash: The rhythmic motion of whisking produces a smooth glossy emulsion that will form a beautiful sheen on the crust. This wash enhances color and helps any sprinkling sugar adhere. If the wash pools, dab lightly with a brush to distribute it evenly and avoid soggy patches on the dough.
- Brush the eggwash over the top of the pie crust then sprinkle the top of the crust with coarse Demerara sugar: As you brush the wash, the surface becomes glossy and ready to caramelize, and the coarse sugar adds texture and a delicate crackle once baked. The sugar's molasses notes deepen the crust flavor, making each bite more complex. Too much sugar can burn, so apply a modest sprinkle for the best balance.
- Place the pie in the oven and lower the temperature to 375 degrees F: That initial high heat jump starts the crust, and lowering to 375 degrees F allows the filling to cook through without burning the top. You will notice the kitchen filling with a richer, spiced fruit aroma as juices begin to bubble. If the crust edges brown too quickly, tent loosely with foil to prevent overbrowning. A common oversight is leaving the pie too close to the top element, so ensure the rack remains in the lowest position.
- Bake the pie for 70 to 80 minutes until golden and bubbly: During baking you should see active bubbling near the vents or edges, a sign the cornstarch is doing its job and the filling is thickening. The crust will turn a deep golden brown and the sugar will glint on top. If bubbling is absent, the filling may remain runny, so peek through the glass to confirm. If the crust starts to get dark, loosely cover with foil to prevent burning.
- Make sure you see the juices bubbling otherwise the filling will be runny: The bubbling indicates proper thickening and that the interior reached a high enough temperature to activate the cornstarch . You will also smell a warm, cooked fruit sweetness that signals doneness. Cutting too soon is the main mistake, as it prevents the filling from setting and yields a sloppy slice.
- This is the hard part do not cut the pie until it has cooled down to room temperature: Cooling lets the filling set into a sliceable consistency, and the aromas will become more settled and composed. If you slice while hot, the filling will flow and the structure collapses, so patience yields cleaner presentation. I recommend making the pie a few hours or even the evening before serving to give it ample time to rest.
- I suggest making the pie in evening before you need it and let it rest overnight: Allowing the pie to rest overnight deepens the flavors and firms the filling for neater slices the next day. The crust remains pleasantly crisp and the fruit continues to meld, producing a more harmonious bite. The main caution is storing it uncovered too long in humid conditions, which can soften the crust, so tent lightly with foil if necessary.
Substitutions and Tips
I like to present practical, hands on tips that actually improve your baking experience. These expanded notes dig into texture, timing, and small adjustments that can elevate the pie from good to memorable. Below are focused tips you can use while making Apple Raspberry Pie.
- Chill the dough: Keep your pie crust cold until the moment you roll it, it helps the butter remain solid and produces flakier layers when baked. If the dough warms while you work, pop it into the fridge for 10 to 15 minutes to firm up again. Cold dough reduces shrinkage and yields a tender crust rather than a dense one.
- Slice apples evenly: Aim for uniform slices about one eighth to one quarter inch thick, it ensures each piece softens at the same rate in the oven. Use a mandoline or a sharp knife and steady hand for consistency. Inconsistent slices can leave some parts undercooked while others become mushy.
- Handle raspberries gently: Fold the raspberries into the mixture with a light touch to maintain pleasant bursts of texture, they will release juice as they warm but will still offer bright pockets of flavor. Crushing them too early can make the filling too soupy, so combine with care.
- Adjust sweetness mindfully: The combination of granulated sugar and raspberry preserves should balance tartness; taste the filling before adding too much sugar, especially if your apples are very sweet. You can nudge the sugar up or down but remember the filling concentrates as it bakes.
- Watch for bubbling: Visible bubbling is the best indicator the filling has thickened, if you do not see it near the vents or edges by the end of baking, increase the time in five to ten minute increments and keep an eye on crust color. Lack of bubbling often leads to a runny filling.
What Goes Well With This Apple Raspberry Pie
Serving this pie can be as casual or as composed as you like, and the right accompaniment will highlight its bright fruit notes and warm spices. Below are thoughtful pairings, occasions, and storage suggestions to help you present it beautifully.
- Classic scoop of ice cream: A modest scoop of plain vanilla ice cream adds a creamy contrast to the warm, fruity slices, making each bite both cool and comforting, perfect for dessert after dinner.
- Whipped cream or crème fraîche: Lightly sweetened whipped cream or tangy crème fraîche complements the tart raspberries and tender apples, offering a smooth, silky mouthfeel that balances the flaky crust.
- Occasions to serve: This pie suits fall gatherings, holiday tables, or a relaxed weekend coffee, it reads as both seasonal and celebratory without being fussy, ideal for potlucks or family dinners.
- Storage tips: Once cooled, cover the pie loosely with foil and store at room temperature for up to two days, or refrigerate for up to five days to preserve the filling. To maintain crust texture, reheat individual slices briefly in a warm oven rather than the microwave.
- Seasonal pairings: Pair with warm beverages like spiced tea or coffee when serving in cooler months to accentuate the pie’s spice notes, creating a cozy finish to a meal.
FAQ
Conclusion
What makes this pie special is the marriage of crisp apples and bright raspberries in a flaky crust that browns to a lovely golden finish. I encourage you to give it a try, because the technique is honest and the results are reliably crowd pleasing. Take your time with the crust, be gentle with the fruit, and let the baked pie cool fully before slicing. You will be rewarded with beautiful, sliceable pieces that balance tartness, sweetness, and texture in every bite.
Apple Raspberry Pie
Equipment
- 9 inch deep dish pie pan
- Rolling Pin
- Large Bowl
- Whisk
Ingredients
- Homemade pie crust or two 9-inch rollout pie crusts Provide a flaky, buttery base that holds the filling together and browns during baking; use homemade or store-bought rollout crusts to ensure an even thickness and a sturdy edge for crimping or lattice work.
- 3 1/2 pounds firm apples I used Honey Crisps Offer a crisp, tart-sweet core for the pie when peeled, cored, and sliced; select firm apples like Honey Crisps to retain texture and release balanced juice during baking.
- 1 tablespoon lemon juice Brighten and prevent oxidation of the apple slices by tossing them with lemon juice; also add a subtle citrus note that balances the pie’s sweetness.
- 12 ounces Driscoll’s Raspberries two 6-ounce packages Contribute bright color and tart berry flavor when folded into the apple mixture; use two 6-ounce packages for even distribution and to maintain berry texture after baking.
- 2/3 cup granulated sugar Sweeten the filling and help balance the tartness of apples and raspberries; dissolve into the fruit mixture to control overall sweetness without overpowering the fresh flavors.
- 1/4 cup raspberry preserves Enhance raspberry intensity and add a glossy finish to the filling; stir into the fruit mixture to boost jammy texture and concentrated flavor.
- 3 tablespoons cornstarch Thicken the combined juices released during baking so the filling sets properly; whisk with a little sugar or cold liquid first to prevent lumps and ensure even thickening.
- 1/2 teaspoon cinnamon Add warm, aromatic depth that complements both apples and raspberries; measure carefully to enhance flavor without dominating the fruit.
- 1/2 teaspoon nutmeg Provide a warm, nutty spice note that rounds out the pie’s flavor profile; use sparingly to avoid overwhelming the delicate raspberry taste.
- 1/2 teaspoons ea salt Season the filling to enhance overall flavor and balance sweetness; sprinkle evenly to bring out fruit complexity and reduce flatness.
- 1 large egg + 1 tablespoon water Create an egg wash when beaten with water to brush over the crust for a golden, glossy finish; also can be used to seal edges or adhere decorative pieces.
- 1 -2 tablespoons brown sugar Sprinkle over the crust or lattice before baking to add a touch of caramelized sweetness and a slight crunch that contrasts with the tender filling.
Instructions
- Preheat the oven to 450 degrees F and place the rack in the lowest position. Place a piece of plastic wrap (or foil) out on the counter. Flour the plastic wrap and place the pie crust dough on the floured work surface. Flour a rolling pin and roll one dough disk out into a large round circle approximately 12 inches across. Carefully lift the plastic wrap and flip the dough circle over into a 9-inch deep-dish pie pan. Gently fit the pie dough down into the pie pan—don't stretch it. Then fold the rough edges under and pinch-crimp the edges with your fingers.: The kitchen will fill with an anticipatory warmth as the oven climbs, and starting at a high temperature gives the pie crust an initial lift and flake. You should hear the faint hum of the oven stabilizing as it reaches temperature, and visually the heating element may glow before it settles. This early blast helps set the bottom crust so it absorbs less filling liquid. A frequent mistake is skipping the preheat which leads to a soggy bottom crust, so always wait until the oven reaches the proper temperature.
- Place the lemon juice in a large bowl. Peel and thinly slice all the apples (1/8- to 1/4-inch thick) tossing in the lemon juice as you add them to the bowl.: When you flour the surface and roll the dough, you want a dusting that prevents sticking but does not dry the dough out. The soft, cool dough will feel tacky at first, and the gentle pressure of the rolling pin should spread it evenly. Rolling on plastic wrap also makes transferring the dough simpler, and you will notice less tearing when you pick it up. Avoid pressing too hard, as overworked dough loses its lightness and can become tough.
- Add the Driscoll’s Raspberries, granulated sugar, raspberry preserves, corn starch, spices, and salt to the apples. Gently toss the mixture by hand to coat. Scoop the raspberry apple filling into the pie crust. Shake a little so the filling settles into place.: The flour creates a thin barrier so the dough slides instead of sticking, which makes achieving an even circle easier. As you move the rolling pin outward, the dough should unstick and shift smoothly; if it resists, dust a touch more flour. The dough will be slightly chill to the touch and should not feel greasy. Overflouring can dry the edges, so use the minimum needed to work comfortably.
- Roll out the second pie crust and use a cookie cutter to cut fun shapes for the top crust. (I used a heart cookie cutter.) Lay the pie crust shapes over the filling, overlapping on the edges. Then whisk the egg and water to create an eggwash. Brush the eggwash over the top of the pie crust, then sprinkle the top of the crust with coarse Demerara sugar.: Rolling from the center outward produces an even thickness, and you will see faint flour lines blending into a uniform surface. The dough should have a consistent translucence when thin enough, but still hold its shape when lifted. If the edges crack, a quick dab of cold water smooths them. A common error is rolling too thin near the edges, which can tear during transfer, so aim for steady, even pressure.
- Place the pie in the oven, and LOWER THE TEMPERATURE TO 375 DEGREES F. The extra heat from the beginning gives the crust a little head start in baking. Bake the pie for 70-80 minutes, until golden and bubbly. If the crust starts to get dark, loosely cover with foil while baking. *Make sure you see the juices bubbling – otherwise the filling will be runny.: The flip feels a little theatrical, and watching the dough drape into the pan is satisfying as it settles. Use the plastic wrap to support the dough, then gently ease it down so the bottom sits flat. If air pockets appear, press them out with your fingertips. Don’t stretch the dough while fitting it in, as stretched dough springs back while baking and can shrink awkwardly.
- This is the hard part… DO NOT cut the pie until it has cooled down to room temperature. I know it smells amazing and is very hard to resist, but the filling needs time to settle and set, so it’s not soupy. If you cut your pie too soon, it will fall apart. I suggest making the pie in evening before you need it and let it rest overnight.: Press the dough into the corners and up the sides, coaxing it into place without tugging. The surface should be smooth and unstrained, with a neat seam where the edge meets the rim. Folding under the rough edges creates a thicker rim for crimping. If you stretch, the dough will pull away and create gaps that fill with juice, so take care to ease it in.
- Then fold the rough edges under and pinch-crimp the edges with your fingers: Crimping seals the edge and gives the pie an attractive border. Use your thumb and forefinger to pinch consistent scallops or press with a fork for a simpler finish. The crust edge will feel firmer than the base, which is desirable for a sturdy rim. Overhandling the edge can warm the butter in the dough too much, reducing flakiness, so work quickly and return the pan to the fridge if needed.
- Place the lemon juice in a large bowl: The bowl will be the staging area for the fruit, and the citrus will coat the apples to prevent browning while contributing a subtle lift. Pouring the lemon juice first makes it easy to add slices directly into an acidic bath. Avoid using bottled juices with added flavors, as they can alter the profile of the filling.
- Peel and thinly slice all the apples one eighth to one quarter inch thick tossing in the lemon juice as you add them to the bowl: As you slice, the fresh scent of the apples releases, a crisp aroma that signals freshness. Thin, uniform slices cook evenly, softening without collapsing, and tossing them immediately in the lemon juice keeps color vibrant. A common slip is uneven slicing which leads to some pieces overcooking while others remain firm, so aim for consistency.
- Add the Driscoll’s Raspberries granulated sugar raspberry preserves corn starch spices and salt to the apples: When you add the raspberries and sweeteners, the bowl fills with a bright fruity smell, and you can see the sugar begin to draw juice from the fruit. The addition of cornstarch is critical because it will thicken those juices during baking into a luscious, sliceable filling. Mix gently to avoid crushing the raspberries , as you want some texture in the final pie. Over mixing can turn everything into a uniform mush, so toss with care.
- Gently toss the mixture by hand to coat: Using your hands gives you control and a tactile sense of how the mixture is coming together, feeling the weight of the fruit and the slight tackiness from the preserves. The goal is even distribution so every slice has both apple and raspberry notes. If you press too hard, the fragile berries will break down, leading to a less interesting texture.
- Scoop the raspberry apple filling into the pie crust: As you transfer the filling, the pan will take on a colorful mound of fruit. Shake the pan a little so the filling settles into place and fills any gaps, leaving a small dome in the center which will sink slightly as it bakes. The visual cue you want is an even top with no large empty pockets. Overfilling can cause spillage, so leave a modest border for the top crust.
- Roll out the second pie crust and use a cookie cutter to cut fun shapes for the top crust: Rolling the second disk evenly ensures your decorative shapes are consistent, and cutting shapes like hearts creates a charming top that vents while looking pretty. The shapes will brown and crisp, creating both form and function. If shapes are too thin they may burn, so aim for moderate thickness.
- Lay the pie crust shapes over the filling overlapping on the edges: Layering the shapes creates an artisanal look and allows steam to escape while holding in most of the juices. As you arrange them, the contrast between the golden crust and the jewel toned filling becomes striking. Be mindful to overlap enough to seal the edges, but not so much that steam cannot vent properly.
- Then whisk the egg and water to create an eggwash: The rhythmic motion of whisking produces a smooth glossy emulsion that will form a beautiful sheen on the crust. This wash enhances color and helps any sprinkling sugar adhere. If the wash pools, dab lightly with a brush to distribute it evenly and avoid soggy patches on the dough.
- Brush the eggwash over the top of the pie crust then sprinkle the top of the crust with coarse Demerara sugar: As you brush the wash, the surface becomes glossy and ready to caramelize, and the coarse sugar adds texture and a delicate crackle once baked. The sugar's molasses notes deepen the crust flavor, making each bite more complex. Too much sugar can burn, so apply a modest sprinkle for the best balance.
- Place the pie in the oven and lower the temperature to 375 degrees F: That initial high heat jump starts the crust, and lowering to 375 degrees F allows the filling to cook through without burning the top. You will notice the kitchen filling with a richer, spiced fruit aroma as juices begin to bubble. If the crust edges brown too quickly, tent loosely with foil to prevent overbrowning. A common oversight is leaving the pie too close to the top element, so ensure the rack remains in the lowest position.
- Bake the pie for 70 to 80 minutes until golden and bubbly: During baking you should see active bubbling near the vents or edges, a sign the cornstarch is doing its job and the filling is thickening. The crust will turn a deep golden brown and the sugar will glint on top. If bubbling is absent, the filling may remain runny, so peek through the glass to confirm. If the crust starts to get dark, loosely cover with foil to prevent burning.
- Make sure you see the juices bubbling otherwise the filling will be runny: The bubbling indicates proper thickening and that the interior reached a high enough temperature to activate the cornstarch . You will also smell a warm, cooked fruit sweetness that signals doneness. Cutting too soon is the main mistake, as it prevents the filling from setting and yields a sloppy slice.
- This is the hard part do not cut the pie until it has cooled down to room temperature: Cooling lets the filling set into a sliceable consistency, and the aromas will become more settled and composed. If you slice while hot, the filling will flow and the structure collapses, so patience yields cleaner presentation. I recommend making the pie a few hours or even the evening before serving to give it ample time to rest.
- I suggest making the pie in evening before you need it and let it rest overnight: Allowing the pie to rest overnight deepens the flavors and firms the filling for neater slices the next day. The crust remains pleasantly crisp and the fruit continues to meld, producing a more harmonious bite. The main caution is storing it uncovered too long in humid conditions, which can soften the crust, so tent lightly with foil if necessary.
Notes
- Chill the dough: Keep your pie crust cold until the moment you roll it, it helps the butter remain solid and produces flakier layers when baked. If the dough warms while you work, pop it into the fridge for 10 to 15 minutes to firm up again. Cold dough reduces shrinkage and yields a tender crust rather than a dense one.
- Slice apples evenly: Aim for uniform slices about one eighth to one quarter inch thick, it ensures each piece softens at the same rate in the oven. Use a mandoline or a sharp knife and steady hand for consistency. Inconsistent slices can leave some parts undercooked while others become mushy.
- Handle raspberries gently: Fold the raspberries into the mixture with a light touch to maintain pleasant bursts of texture, they will release juice as they warm but will still offer bright pockets of flavor. Crushing them too early can make the filling too soupy, so combine with care.
- Adjust sweetness mindfully: The combination of granulated sugar and raspberry preserves should balance tartness; taste the filling before adding too much sugar, especially if your apples are very sweet. You can nudge the sugar up or down but remember the filling concentrates as it bakes.
- Watch for bubbling: Visible bubbling is the best indicator the filling has thickened, if you do not see it near the vents or edges by the end of baking, increase the time in five to ten minute increments and keep an eye on crust color. Lack of bubbling often leads to a runny filling.