Grinch Cookies
Grinch Cookies have been my go to for holiday cookie swaps ever since a neighbor handed me a warm tray and a crooked grin. The first bite was nostalgic, playful, and impossibly festive, with a soft sugar cookie crumb and that pop of green that somehow makes every gathering feel like a celebration. I still remember the way the kitchen smelled the first time I baked them, sugar and butter warming into something comforting while my kids debated whether the heart sprinkles made them look more mischievous or magical.
Over the years I have tweaked how I handle the dough and the rolling, learning little shortcuts that keep these cookies thick and tender without adding fuss. I love that Grinch Cookies are friendly to busy days when you want something fun but not complicated. They also travel well, so I often bring a tin to neighbors, and they disappear faster than I expect. When someone asks for the recipe I tell them the secret is not so secret at all, it is in keeping the dough cool, not over baking, and letting that single heart sprinkle land on each cookie right after the oven so it gently sinks in.
These cookies are great to make with kids, because they can measure, press the food coloring, and top each ball with a sprinkle. But I also enjoy making them alone with a cup of tea, savoring the repetitive, calming motions of scooping and rolling. The result is reliably cheerful, and they always bring a little theatrical joy to a holiday spread. I hope when you bake Grinch Cookies you find a pinch of whimsy and a whole lot of buttery comfort in every bite.
Recipe Snapshot
19 mins
10 mins
9 mins
Medium
150 kcal
American
Gluten-Free, Low FODMAP
Desserts
Mixing bowl, Cookie scoop, Baking sheet, Parchment paper
The Beauty of This Grinch Cookies
They are impossibly festive
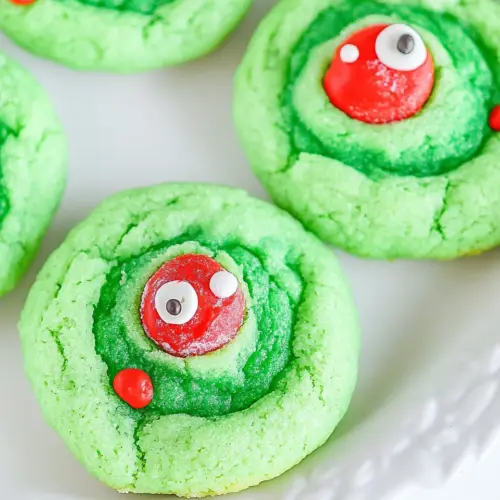
I adore how Grinch Cookies instantly lift the mood. The green color is playful, and decorating with a simple heart sprinkles turns a basic sugar cookie into a holiday statement piece. I find guests smile before they even taste one, and that kind of joyful presentation matters when you want to make memories.
They are quick to pull together
These cookies come from a convenient base mix, so prep moves fast. If I am short on time I can have dough ready within minutes, and that simplicity makes them perfect for last minute parties or for baking with kids. Fast does not mean flimsy though, these cookies still feel homemade and comforting.
Texture is reliably soft and thick
I love how the recipe produces a tender center while keeping a pillowy exterior. When I use a heaping scoop the cookies stay tall and cakey, which is exactly what I want for a cozy bite. The little contrast between the soft interior and slightly set exterior gives a pleasant mouthfeel every time.
They travel and store well
One reason I reach for Grinch Cookies for exchanges is their portability. Stored in an airtight container they hold their shape and flavor for days, and freezing works brilliantly if I want to bake ahead. That flexibility helps me plan my holiday spread without stress.
Kid friendly and fun to decorate
I like that children can safely join the process. They can mix, add gel green food coloring, and roll dough without complicated steps. Watching their faces as they press the heart sprinkles on top is always worth the flour on the countertops.
What to Gather for Grinch Cookies
These ingredients are about joyful simplicity. The cookie mix gives structure and convenience, while the butter and egg add richness and binding. The green dye is all about personality, and the heart sprinkles provide that final festive touch. Together, these elements create cookies that are both easy and charming, with a soft texture and a playful look.
- 21 ounce package of Betty Crocker Sugar Cookie Mix: Provides the pre-mixed dry base for the cookies, bringing flour, leaveners, and vanilla together for consistent texture. Simplifies preparation by reducing measuring and ensures uniform results across batches. Serves as the foundation to which wet ingredients are added to form the dough.
- 1/2 cup unsalted butter (1 stick), softened: Adds richness and moisture to the dough while contributing tender crumb and flavor when creamed with sugar or mix. Supplies fat that helps with spreading and a soft bite after baking. Also improves mouthfeel and color of the finished cookie.
- 1 egg: Binds the dough by providing structure and moisture while helping to leaven slightly during baking. Contributes to tenderness and helps create a cohesive dough that holds together for shaping. Adds a bit of gloss and color to the cookie surface.
- 1 tablespoon water: Loosens the dough and hydrates dry ingredients to achieve proper consistency when mixed. Helps control dough firmness so cookies roll and shape easily, contributing slight steam during baking for texture. Can also aid in dissolving sugar if used.
- 1/4 cups sugar to roll cookies in – (optional): Creates an optional sweet outer coating that adds crunchy texture and extra sweetness when cookies are rolled in it before baking. Enhances visual contrast and can highlight colored dough for festive presentation. Allows control over how sweet the exterior becomes.
- gel green food coloring: Colors the dough a vibrant green to create a playful theme and festive appearance for the cookies. Small amounts achieve intense color without altering flavor, and gel form minimizes added moisture to preserve dough consistency. Allows precise coloring control for a uniform look.
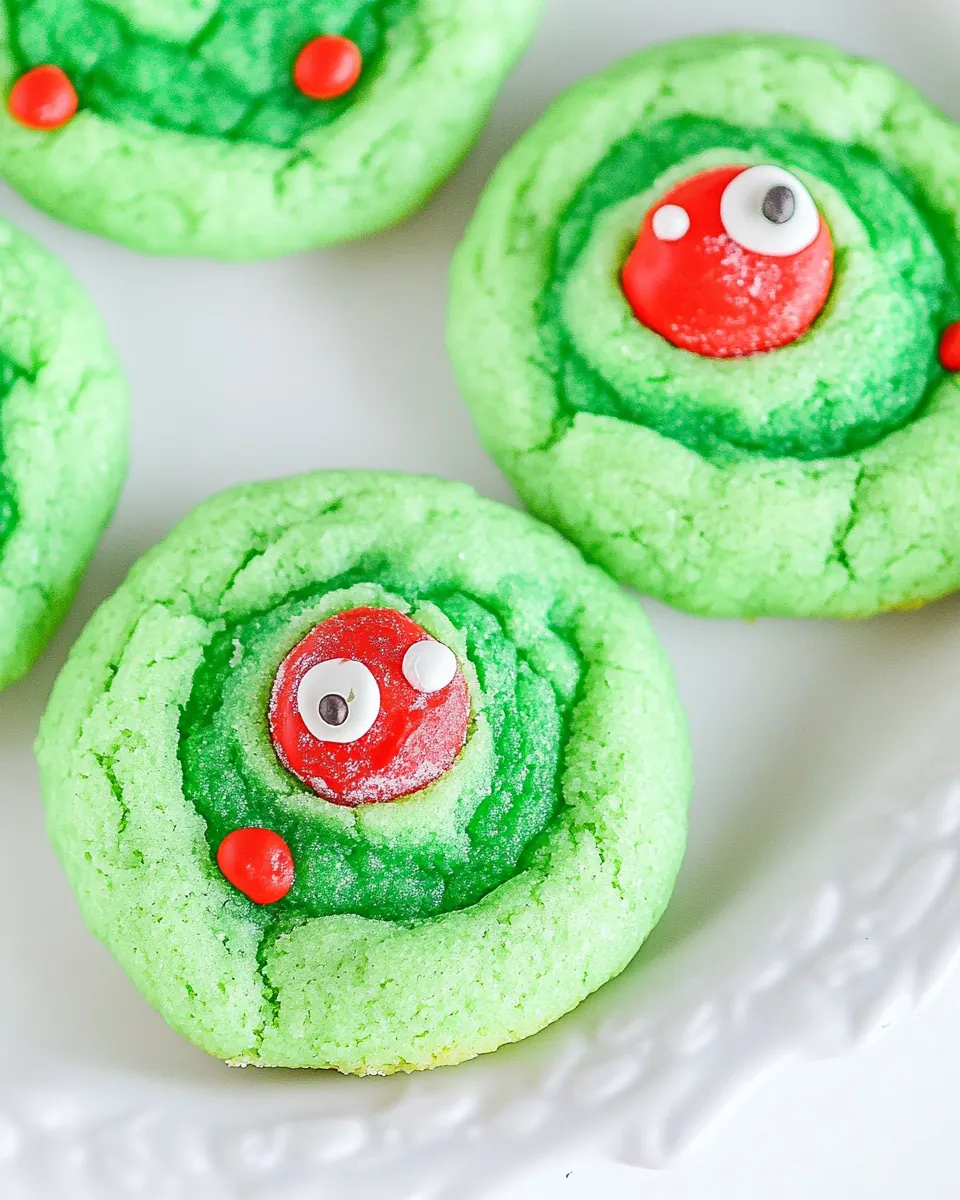
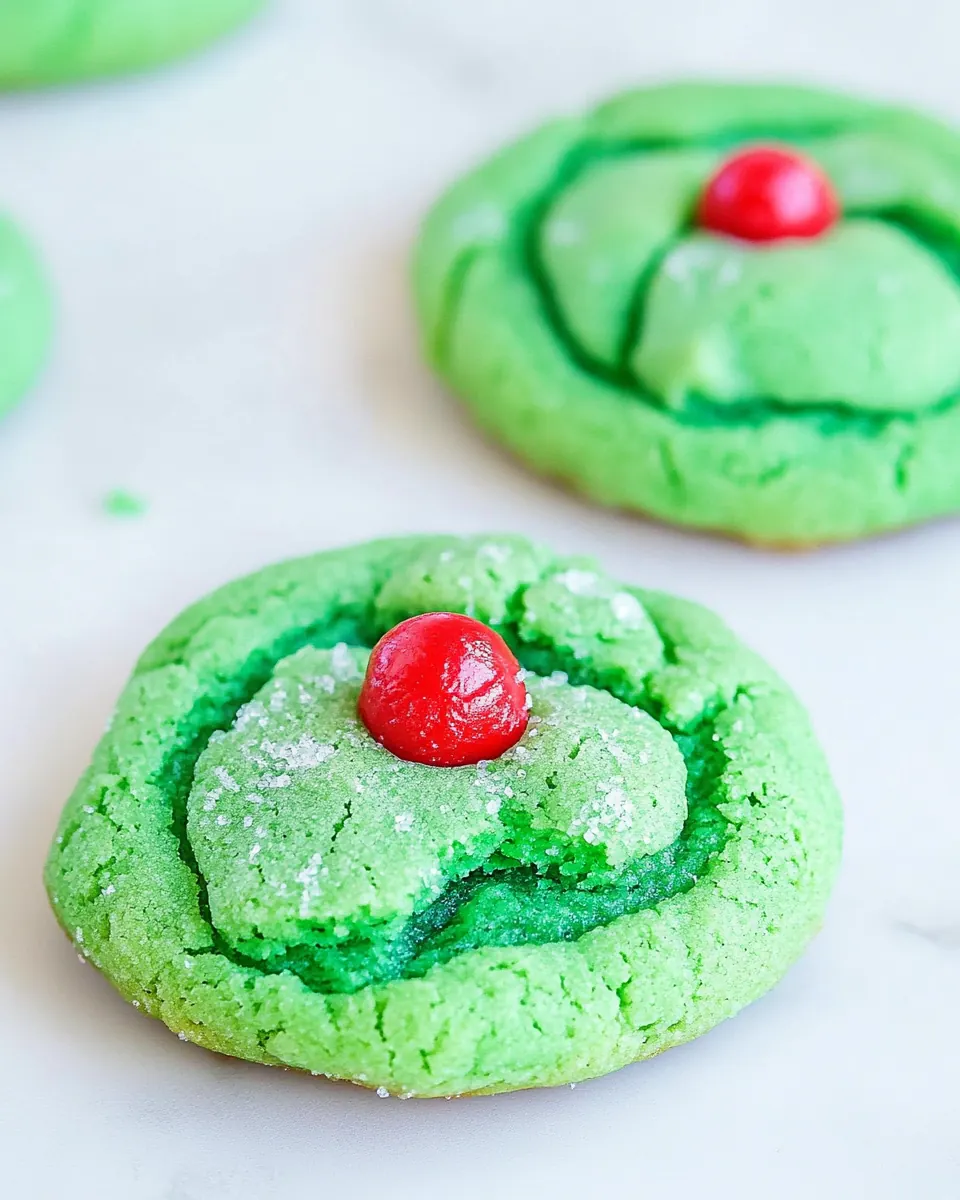
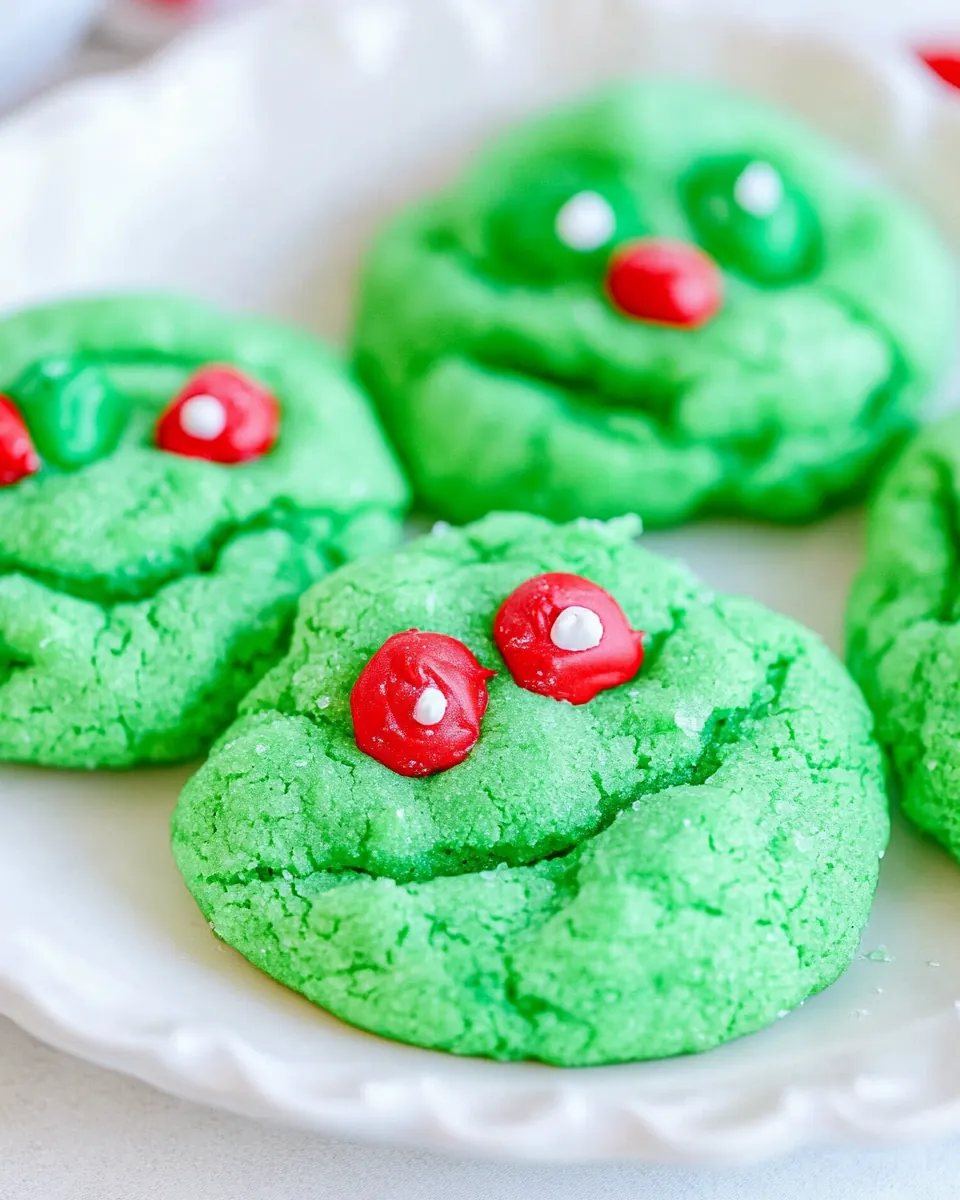
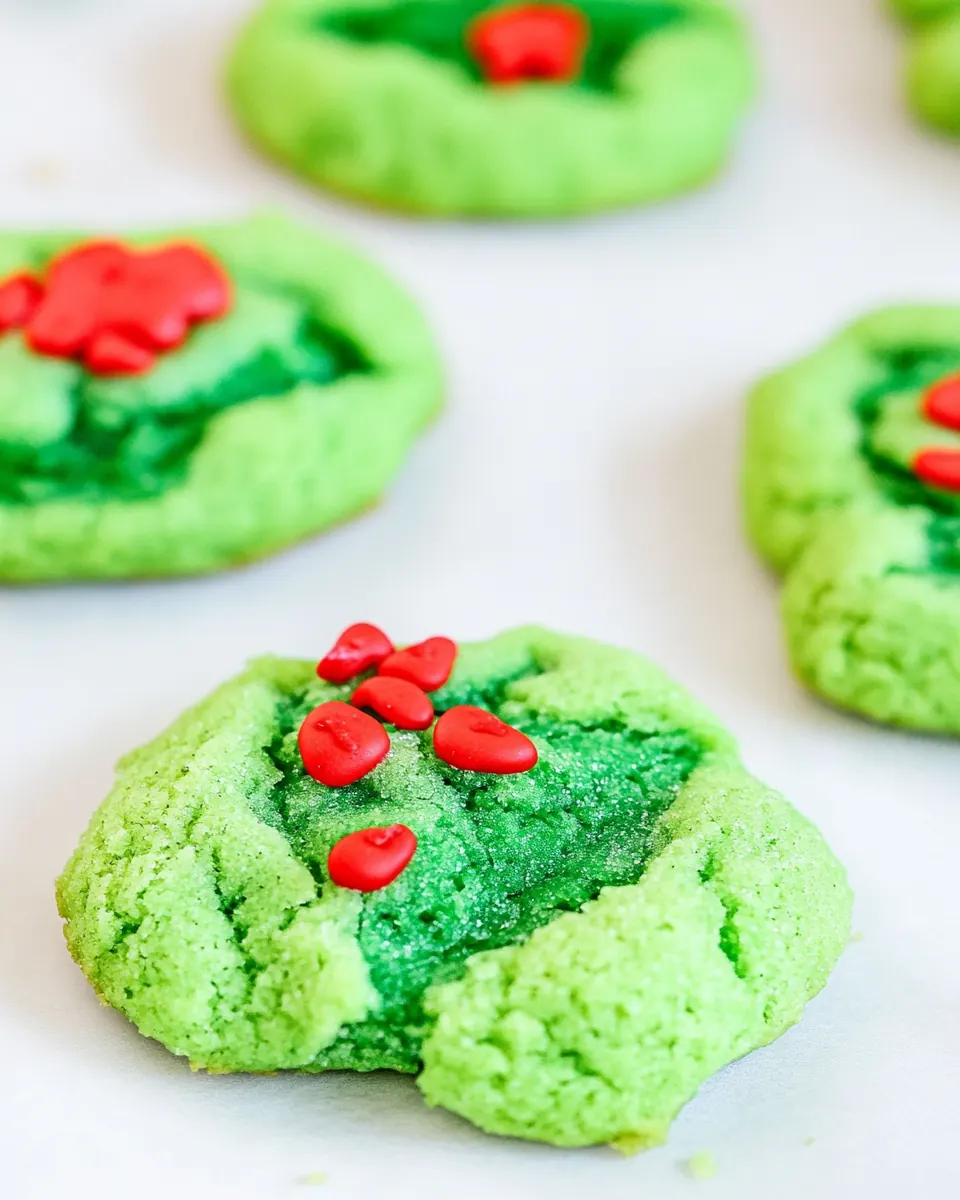
- 13 Heart sprinkles: Provides decorative topping that adds visual charm and a contrasting shape to each cookie. Offers a sweet, crunchy element and helps convey the holiday or themed design when pressed gently into dough before baking. Creates focal points that elevate presentation.
The Process for Making Grinch Cookies
Follow these steps with a relaxed focus on sensory cues and timing, and you will end up with tall, tender cookies that feel homemade. I like to keep my tools ready and my baking sheet lined so each step flows into the next without scrambling for parchment.
- Preheat the oven to 350 degrees Fahrenheit. Line a baking sheet with parchment paper and set aside.: The kitchen should start to smell faintly warm as the oven comes up to temperature, signaling you are ready for the dough. I listen for the oven click and feel the heat near the door while I prepare the baking sheet to avoid delays. This step matters because a properly preheated oven ensures even rise and predictable bake times. A common mistake is placing the tray in too early, which can lead to underbaked centers or uneven spreading, so wait until the oven reaches the full temperature before baking.
- In a large mixing bowl combine sugar cookie mix, softened butter, egg, and water together. Mix until crumbly.: As you mix, you will notice the texture change from dry granules to a coarse, sandy crumb, and you might hear the soft scrape of a spatula as the ingredients come together. The crumbly stage is important because it indicates the dry mix has absorbed the butter and egg , keeping the dough from getting too wet. If you overwork it now you can develop a dense texture, so stop once the mixture forms pea sized crumbs. One mistake to watch for is using melted butter instead of softened, which makes the mix greasy and can change how the cookies spread.
- Once crumbly, add about 40 drops of green food dye (or until the color green of your preference).: Adding gel green food coloring transforms the crumbly dough with dramatic visual change, and you may see the color concentrate in streaks at first before fully blending. I usually add dye gradually and fold in small amounts to gauge the shade, because gels are concentrated and too much can make the color overly intense. This matters because color affects presentation, and a balanced green keeps the cookies cheerful rather than artificial. Avoid adding liquid food color instead of gel, as that could make the dough looser and harder to shape.
- Mix well until the color is fully combined and creates a soft dough. I used my hands to finish mixing the cookie dough to help it come together.: As you mix, warmth from your hands helps the dough bind, and you will feel it shift from crumbly to pliable and slightly tacky. The smell of butter becomes more noticeable at this stage, and the dough should hold together without being sticky. This tactile check is important because it tells you when to stop mixing; over kneading can toughen the cookies. A common error is leaving streaks of color unmixed, which leads to unevenly colored cookies, so be thorough but gentle.
- Use a 2 tablespoon cookie scoop to create heaping scoops of cookie dough (you can do level scoops and create more cookies, I just wanted my cookies thick).: Scooping produces uniform sizes that bake consistently, and heaping scoops yield thick, cake like cookies with a soft middle. I love the visual of perfectly rounded balls dropping onto the sheet, and you may hear a faint thump as each scoop lands. This sizing matters for bake time and texture, so if you want more cookies make level scoops, but for that tall, tender result stick with heaping ones. A frequent mistake is not spacing them far enough apart, which can cause edges to merge during baking.
- Gently roll dough balls in the sugar and place them on the prepared baking sheet (do not press cookies down, keep them in balls so they bake thick).: Rolling the dough in sugar gives a sparkling coating that crisps slightly in the oven, while leaving them as balls preserves height and yields that soft center. You should feel a light grainy texture from the sugar, and visually the balls will gleam under kitchen light. This technique preserves the intended texture, because pressing down flattens them and leads to thinner, crisper cookies. One mistake is pressing them flat too early, which removes the lovely domed profile I prefer.
- Bake for 8-9 minutes. Immediately remove cookies from the oven and add 1 heart sprinkle to each cookie.: While baking you will notice a faint sugar aroma and the cookies will set around the edges while the centers still look slightly soft, which is your cue to pull them. I remove them promptly and press a heart sprinkles into the warm center so it nestles in without melting fully. Timing is key for texture, because baking a minute or two longer will firm up the center, changing the mouthfeel. A typical mistake is leaving them in until fully browned, which results in drier crumbs instead of tender centers.
- Let the cookies cool on the baking sheet for 10 minutes before transferring to a cooling rack.: Cooling on the sheet allows the cookies to finish setting gently, so the centers firm without becoming hard. You will sense the residual heat as they rest, and the bottoms will feel slightly firmer to the touch after about ten minutes. This pause is important to prevent breaking when moving them, and it preserves their soft texture. Avoid grabbing them too soon, which can cause them to fall apart or lose their shape.
Making Adjustments
If you want to adapt these Grinch Cookies without changing the core method, small tweaks can make a big difference. Below are expanded tips that keep texture and fun intact while allowing for storage and presentation choices.
- Storage tip: Place Grinch Cookies in an airtight container at room temperature and they will keep for about a week, which makes them perfect for gifting throughout the holiday season; separate layers with parchment to prevent sticking.
- Freezing tip: Freeze baked cookies in a single layer then stack with parchment between layers in an airtight container, they will keep for months and thaw quickly at room temperature when you want a ready treat.
- Color control: Add gel green food coloring gradually; mix thoroughly between additions to avoid overshooting your preferred shade and to prevent having to compensate with more dye that could affect the dough.
- Size variation: For taller, cakier cookies use heaping 2 tablespoon scoops; for more cookies and a slightly crisper profile use level scoops and reduce baking time slightly.
- Sugar coating option: Rolling dough in sugar before baking adds a delicate crunch to the exterior while keeping the interior soft, try it when you want a little sparkle and contrast in texture.
Perfect Matches for Grinch Cookies
These cookies pair well with simple beverages and make a festive addition to parties or care packages. Below are serving ideas, occasions, and storage notes to help you present and preserve them beautifully.
- Holiday cookie trays: Arrange Grinch Cookies with an assortment of other colored cookies for a visually striking holiday platter that works for parties or potluck contributions.
- Seasonal gifting: Pack in airtight tins with parchment layers and tie with ribbon for neighborly gifts that travel well and stay fresh for several days.
- Party pairings: Serve alongside simple hot drinks or flavored milks to balance sweetness and to offer guests a cozy treat during cold weather gatherings.
- Kid friendly gatherings: These cookies are ideal for classroom parties or family baking days since they are easy to scoop, color, and decorate with minimal supervision.
- Storage guidance: Keep at room temperature in an airtight container for up to a week, or freeze for longer storage and thaw at room temperature before serving to preserve texture and flavor.
- Occasions: Perfect for holiday cookie swaps, Christmas morning baking, or anytime you want a festive, colorful treat to share with friends and family.
FAQ
Conclusion
These Grinch Cookies are special because they combine simplicity with holiday flair, delivering soft, green sugar cookies topped with a single heart sprinkle that feels both playful and nostalgic. Give them a try next time you need a cheerful treat for gifting, a cookie swap, or a cozy baking afternoon with family. They are quick to prepare, forgiving in technique, and reliably joyous on the table, so bake a batch and share the fun.
Grinch Cookies
Equipment
- Mixing Bowl
- Cookie Scoop
- Baking Sheet
- Parchment Paper
Ingredients
- 21 ounce package of Betty Crocker Sugar Cookie Mix Provides the pre-mixed dry base for the cookies, bringing flour, leaveners, and vanilla together for consistent texture. Simplifies preparation by reducing measuring and ensures uniform results across batches. Serves as the foundation to which wet ingredients are added to form the dough.
- 1/2 cup unsalted butter (1 stick), softened Adds richness and moisture to the dough while contributing tender crumb and flavor when creamed with sugar or mix. Supplies fat that helps with spreading and a soft bite after baking. Also improves mouthfeel and color of the finished cookie.
- 1 egg Binds the dough by providing structure and moisture while helping to leaven slightly during baking. Contributes to tenderness and helps create a cohesive dough that holds together for shaping. Adds a bit of gloss and color to the cookie surface.
- 1 tablespoon water Loosens the dough and hydrates dry ingredients to achieve proper consistency when mixed. Helps control dough firmness so cookies roll and shape easily, contributing slight steam during baking for texture. Can also aid in dissolving sugar if used.
- 1/4 cups sugar to roll cookies in – optional Creates an optional sweet outer coating that adds crunchy texture and extra sweetness when cookies are rolled in it before baking. Enhances visual contrast and can highlight colored dough for festive presentation. Allows control over how sweet the exterior becomes.
- gel green food coloring Colors the dough a vibrant green to create a playful theme and festive appearance for the cookies. Small amounts achieve intense color without altering flavor, and gel form minimizes added moisture to preserve dough consistency. Allows precise coloring control for a uniform look.
- 13 Heart sprinkles Provides decorative topping that adds visual charm and a contrasting shape to each cookie. Offers a sweet, crunchy element and helps convey the holiday or themed design when pressed gently into dough before baking. Creates focal points that elevate presentation.
Instructions
- Preheat the oven to 350 degrees Fahrenheit. Line a baking sheet with parchment paper and set aside.: The kitchen should start to smell faintly warm as the oven comes up to temperature, signaling you are ready for the dough. I listen for the oven click and feel the heat near the door while I prepare the baking sheet to avoid delays. This step matters because a properly preheated oven ensures even rise and predictable bake times. A common mistake is placing the tray in too early, which can lead to underbaked centers or uneven spreading, so wait until the oven reaches the full temperature before baking.
- In a large mixing bowl combine sugar cookie mix, softened butter, egg, and water together. Mix until crumbly.: As you mix, you will notice the texture change from dry granules to a coarse, sandy crumb, and you might hear the soft scrape of a spatula as the ingredients come together. The crumbly stage is important because it indicates the dry mix has absorbed the butter and egg , keeping the dough from getting too wet. If you overwork it now you can develop a dense texture, so stop once the mixture forms pea sized crumbs. One mistake to watch for is using melted butter instead of softened, which makes the mix greasy and can change how the cookies spread.
- Once crumbly, add about 40 drops of green food dye (or until the color green of your preference).: Adding gel green food coloring transforms the crumbly dough with dramatic visual change, and you may see the color concentrate in streaks at first before fully blending. I usually add dye gradually and fold in small amounts to gauge the shade, because gels are concentrated and too much can make the color overly intense. This matters because color affects presentation, and a balanced green keeps the cookies cheerful rather than artificial. Avoid adding liquid food color instead of gel, as that could make the dough looser and harder to shape.
- Mix well until the color is fully combined and creates a soft dough. I used my hands to finish mixing the cookie dough to help it come together.: As you mix, warmth from your hands helps the dough bind, and you will feel it shift from crumbly to pliable and slightly tacky. The smell of butter becomes more noticeable at this stage, and the dough should hold together without being sticky. This tactile check is important because it tells you when to stop mixing; over kneading can toughen the cookies. A common error is leaving streaks of color unmixed, which leads to unevenly colored cookies, so be thorough but gentle.
- Use a 2 tablespoon cookie scoop to create heaping scoops of cookie dough (you can do level scoops and create more cookies, I just wanted my cookies thick).: Scooping produces uniform sizes that bake consistently, and heaping scoops yield thick, cake like cookies with a soft middle. I love the visual of perfectly rounded balls dropping onto the sheet, and you may hear a faint thump as each scoop lands. This sizing matters for bake time and texture, so if you want more cookies make level scoops, but for that tall, tender result stick with heaping ones. A frequent mistake is not spacing them far enough apart, which can cause edges to merge during baking.
- Gently roll dough balls in the sugar and place them on the prepared baking sheet (do not press cookies down, keep them in balls so they bake thick).: Rolling the dough in sugar gives a sparkling coating that crisps slightly in the oven, while leaving them as balls preserves height and yields that soft center. You should feel a light grainy texture from the sugar, and visually the balls will gleam under kitchen light. This technique preserves the intended texture, because pressing down flattens them and leads to thinner, crisper cookies. One mistake is pressing them flat too early, which removes the lovely domed profile I prefer.
- Bake for 8-9 minutes. Immediately remove cookies from the oven and add 1 heart sprinkle to each cookie.: While baking you will notice a faint sugar aroma and the cookies will set around the edges while the centers still look slightly soft, which is your cue to pull them. I remove them promptly and press a heart sprinkles into the warm center so it nestles in without melting fully. Timing is key for texture, because baking a minute or two longer will firm up the center, changing the mouthfeel. A typical mistake is leaving them in until fully browned, which results in drier crumbs instead of tender centers.
- Let the cookies cool on the baking sheet for 10 minutes before transferring to a cooling rack.: Cooling on the sheet allows the cookies to finish setting gently, so the centers firm without becoming hard. You will sense the residual heat as they rest, and the bottoms will feel slightly firmer to the touch after about ten minutes. This pause is important to prevent breaking when moving them, and it preserves their soft texture. Avoid grabbing them too soon, which can cause them to fall apart or lose their shape.
Notes
- Storage tip: Place Grinch Cookies in an airtight container at room temperature and they will keep for about a week, which makes them perfect for gifting throughout the holiday season; separate layers with parchment to prevent sticking.
- Freezing tip: Freeze baked cookies in a single layer then stack with parchment between layers in an airtight container, they will keep for months and thaw quickly at room temperature when you want a ready treat.
- Color control: Add gel green food coloring gradually; mix thoroughly between additions to avoid overshooting your preferred shade and to prevent having to compensate with more dye that could affect the dough.
- Size variation: For taller, cakier cookies use heaping 2 tablespoon scoops; for more cookies and a slightly crisper profile use level scoops and reduce baking time slightly.
- Sugar coating option: Rolling dough in sugar before baking adds a delicate crunch to the exterior while keeping the interior soft, try it when you want a little sparkle and contrast in texture.