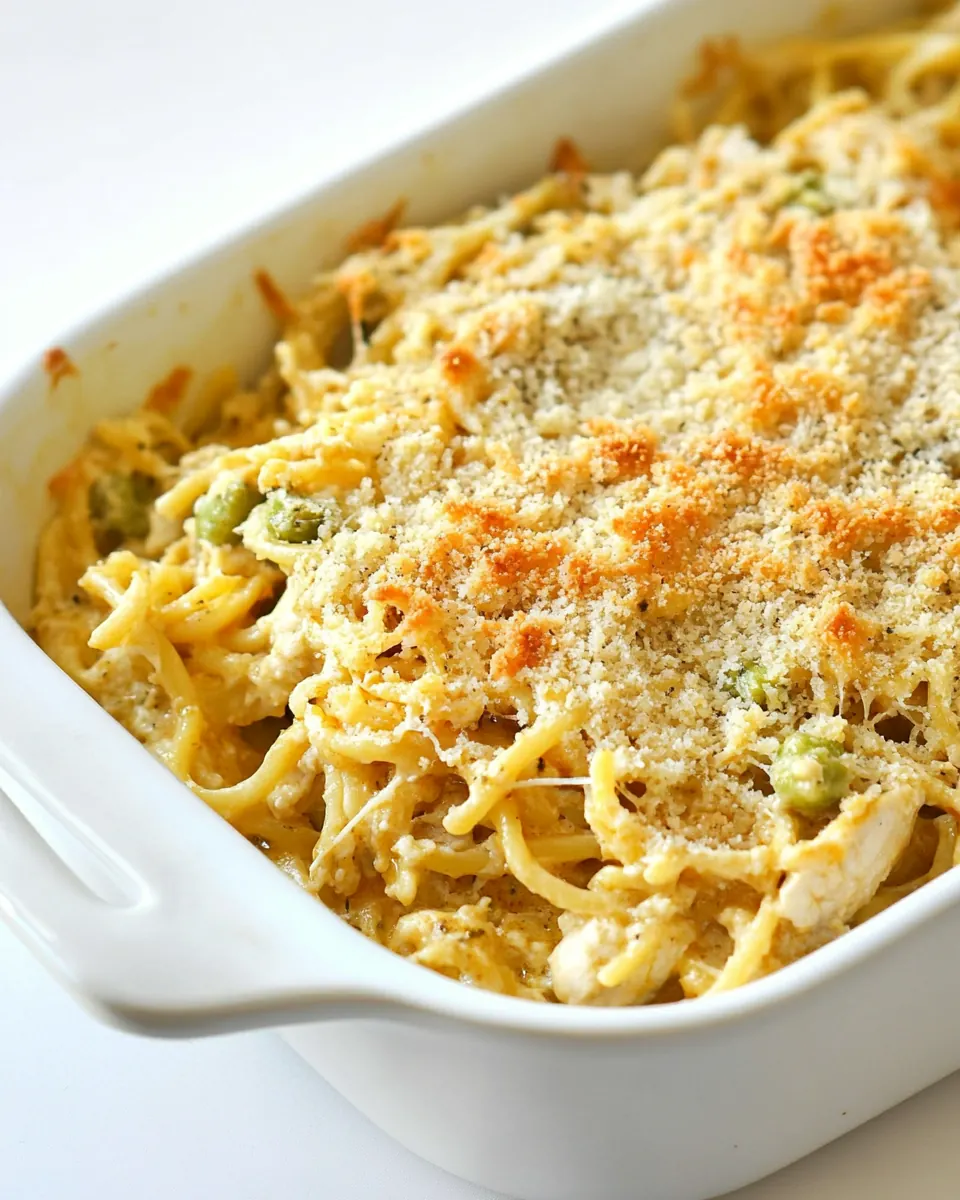
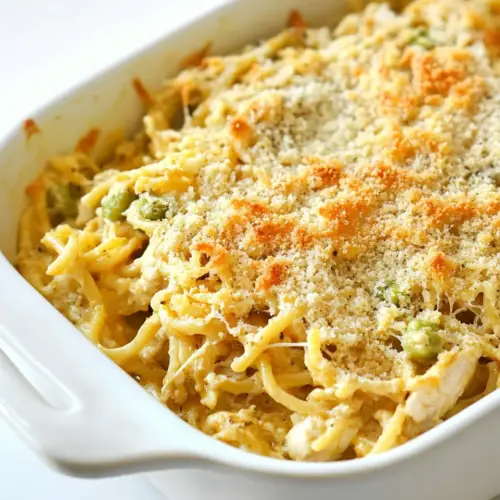
Chicken Tetrazzini
Chicken Tetrazzini is one of those casseroles I come back to when I want comfort and ease in the same pan. The first time I made it I was juggling a busy week and a fridge full of bits that needed using, and this dish rescued dinner with creamy sauce, tender chicken, and tender noodles all in one scoop. I still remember the warm, buttery smell that filled the kitchen, and how everyone went back for seconds without hesitation.
Over the years I’ve learned little adjustments that make a big difference, like choosing the right noodle and not overcooking so the final bake stays silky rather than gluey. When I pull this from the oven the top is golden, the center bubbling gently, and that mix of textures always earns a satisfied silence at the table. I love how forgiving the recipe is, so it’s become my go to for potlucks and simple family dinners when I want comfort without stress.
Recipe Snapshot
35 mins
10 mins
25 mins
Medium
350 kcal
American
Gluten-Free, Low FODMAP
Dinner
Large pot, 8 inch casserole dish, Small bowl, Colander
The Charm of This Chicken Tetrazzini
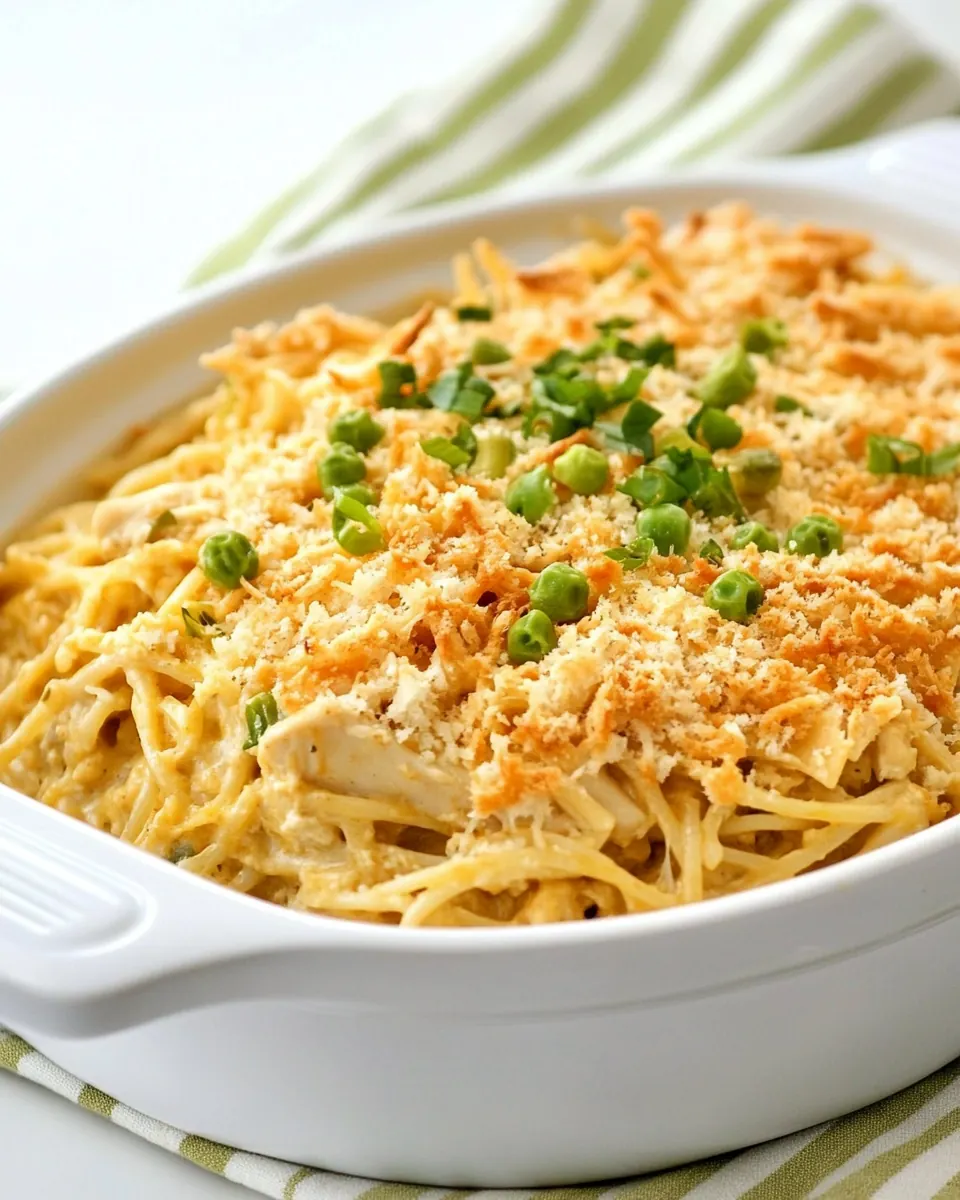
Comforting Creamy Texture
I adore how Chicken Tetrazzini balances a lush, creamy sauce with tender noodles and a slight crisp on top. The creamy element comes from the combination of soup and milk, which creates a rich mouthfeel that feels indulgent without being fussy. I often say this dish hits that cozy comfort note when you need it most, and it stays pleasingly saucy after baking.
Speed and Simplicity
One reason I reach for this recipe is how straightforward it is. With basic pantry items like canned soup, dried noodles, and frozen peas, I can assemble a full casserole fast. The simplicity means you can focus on timing and texture rather than complicated steps. I appreciate recipes that respect my evening rhythm, and this one certainly does.
Flexible Protein
I love that chicken can be swapped between canned or cooked pieces, letting you use leftovers without losing flavor. I’ve used shredded roast, rotisserie, and even poached chicken when I wanted a lighter finish. That flexibility makes it practical on a weeknight or for feeding a crowd, because you can scale without changing technique.
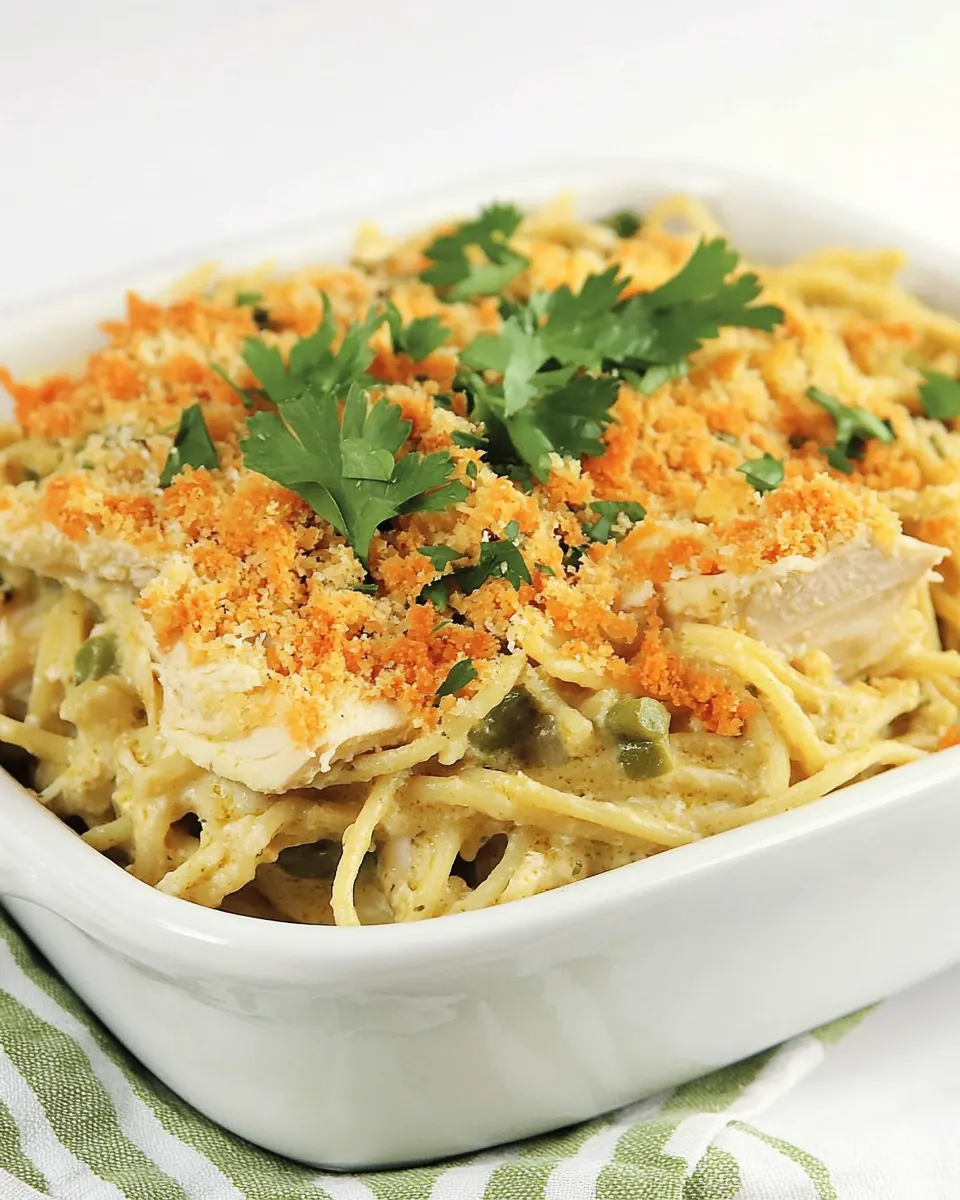
Textural Contrast
The breadcrumb and butter topping is a small step that yields a big payoff. The buttery crumbs crisp in the oven, adding a crunchy counterpoint to the creamy base. I always stir the crumbs with melted butter to ensure even browning, and I find that this contrast keeps each bite interesting and balanced.
Family Friendly and Nostalgic
This dish often sparks memories at our table, and I love serving it at casual gatherings. It appeals to picky eaters and those who want something familiar and filling. Because it uses familiar flavors and textures, Chicken Tetrazzini often becomes an instant favorite, and I find that makes dinner easier and more joyful.
Ingredients Overview for Chicken Tetrazzini

These ingredients form a simple but effective assembly for a cozy, home style casserole. The mix leans on pantry staples and a few fresh elements to build a creamy sauce, tender pasta, and a crunchy finish. Each item plays a clear role, from the liquid that cooks the pasta to the topping that gives texture.
The list below follows the recipe exactly and then explains why each item matters in the final dish.
- 4 cups water: Boil water to create the cooking medium that softens the noodles and helps blend flavors; maintain a rolling boil for pasta to ensure even texture. Use as base for poaching or rehydrating other components if needed, and reserve a little pasta water to adjust sauce consistency. Monitor evaporation and add more if necessary to prevent scorching.
- 1 teaspoons salt: Season pot water with salt to enhance the noodles' internal flavor and to bring out the savory notes in the dish; dissolve completely before adding pasta. Use a measured amount to avoid over-salting the finished casserole. Adjust slightly if using salted broth or canned chicken.
- 1 cup noodles: Cook noodles until al dente so they hold up during baking and absorb the sauce without becoming mushy; drain well to avoid excess water in the casserole. Choose a shape that holds sauce, and rinse only if you want to stop cooking quickly. Toss briefly with a bit of butter to prevent sticking before combining with the sauce.
- 1 can cream of mushroom soup: Add cream of mushroom soup to provide a rich, creamy base and concentrated umami that binds the casserole components together. Use straight from the can to simplify preparation, and Stir it thoroughly to a smooth consistency before combining. Slightly thinning with milk creates a more cohesive sauce.
- 1 cup milk: Pour milk to thin the condensed soup into a pourable sauce and to add creaminess and mild dairy flavor; warm slightly for easier incorporation. Adjust amount to reach desired sauce thickness, balancing creaminess with bakeability. Use whole or low-fat milk depending on richness preference.
- 1 can chicken or 1 cup cooked chicken: Include canned or cooked chicken as the primary protein to give the casserole substance, savory flavor, and texture contrast to the noodles and sauce. Shred or chop evenly to distribute throughout the dish, and drain canned chicken well. Taste for seasoning after adding, as canned chicken can be lightly seasoned already.
- 1 can (15 ounces) peas drained: Stir in drained peas to introduce bright color, subtle sweetness, and a tender bite that complements the creamy sauce and chicken. Drain thoroughly to avoid watering down the casserole, and fold in near the end to maintain pea integrity. Frozen thawed peas can be used as an alternative with similar effect.
- 1/2 cup breadcrumbs: Top with breadcrumbs to add a crispy, golden crust that contrasts with the creamy interior when baked; distribute evenly for consistent browning. Mix with a bit of melted butter or seasoning to enhance flavor and accelerate crisping. Use stale or panko crumbs for extra crunch.
- 3 tablespoons butter melted, plus more for the dish: Melt butter to incorporate into both the sauce and the breadcrumb topping for added richness, silkiness, and browning. Use additional butter to grease the baking dish to prevent sticking and impart buttery flavor to the casserole edges. Control saltiness by using salted or unsalted butter appropriately.
Step by Step Guide for Chicken Tetrazzini
This plan walks you through the assembly and bake in a comfortable, conversational way. Follow the sensory cues and timing to get a creamy interior and a crisp golden top. I like to keep a watchful eye during the final minutes of baking so the crumbs brown evenly.
- Preheat the oven to 375°F. Butter an 8-inch casserole dish.: As the oven warms, you should notice the dry heat building and the kitchen beginning to feel cozy, which sets the stage for a steady bake. Preheating ensures even cooking from the moment the casserole goes in, preventing the sauce from over reducing while the interior finishes. Buttering the dish provides a slippery surface so the casserole releases cleanly after baking, and it imparts a touch of flavor to the underside. A common mistake is putting a cold dish into a warm oven, which can cause uneven browning on top, so always wait until the oven reaches temperature. If you smell faint caramel or hear no sound, that's normal during preheat.
- Bring the water and salt to a boil in a large pot.: Listen for a rolling boil, the lively sound that tells you the water is at the right energy to cook pasta. The salted water seasons the noodles as they absorb liquid, so this step impacts the final depth of flavor. Use a wide pot so the water returns to boil quickly when you add pasta. A common pitfall is under salting the water, which results in bland pasta; taste the water if unsure, it should be mildly salty. You'll see bubbles break furiously across the surface when it's ready.
- Gradually add the noodles so that the water continues to boil. Cook for 8 to 10 minutes.: When you add the noodles , they should slide into the boiling water without clumping, and the boil should quickly resume. Stir gently at the start to separate strands or pieces, then let them cook until just tender with a slight bite. The timing here controls final texture, because the casserole will continue to cook in the oven. Overcooking is a frequent error that leads to mushy results, so taste a noodle at the lower end of the time window. The surface will shimmer and the pot may hiss softly as moisture evaporates.
- Drain the noodles and return them to the pot.: After draining, the noodles may steam for a moment, releasing a faint, toasty starch aroma. Returning them to the pot prevents carryover cooking in a hot colander, and it keeps everything together for mixing. Gently toss to release trapped steam and to prevent clumps. A common mistake is letting them sit long enough to cool and stick; work efficiently to keep them pliable. The noodles should look glossy but not watery.
- Mix the soup and milk together in a bowl until blended.: Combining the canned soup with milk produces a smooth, pourable sauce that will coat the noodles evenly. Whisk until there are no lumps and the texture is silky; you'll notice a creamy sheen when it's well mixed. This step ensures even distribution of flavor and prevents pockets of concentrated soup. Avoid over thinning with too much milk, which can leave the casserole soupy after baking. The bowl may feel cool to the touch, and the sauce should glide off a spoon.
- Add the soup mixture to the pot with the noodles, along with the chicken and peas, and stir to combine.: As you fold the sauce into the noodles you'll smell savory mushroom notes and a gentle dairy sweetness. The chicken and peas should be dispersed so every scoop contains protein and vegetable. Stirring distributes heat and sauce, creating a uniform casserole base. One common error is vigorous stirring that breaks the noodles; instead fold gently to keep strands intact. The mixture should look homogenous and glossy without pools of liquid.
- Pour the noodle mixture into the buttered casserole dish.: When transferring, you should see the mixture settle evenly in the dish and a soft steam rise from the warm components. Spreading the mixture flat helps the topping brown uniformly during baking. Pressing gently ensures there are no air pockets that could create dry hot spots. A slip to avoid is overpacking, which inhibits bubbling and reduces topping crispness. The casserole should look smooth on top and fill the dish without spilling.
- Place the breadcrumbs in a small bowl with the melted butter, and stir to combine.: Tossing the breadcrumbs with melted butter creates that toasty, crisp topping that contrasts the creamy interior. The crumbs should be moist but not saturated, and they will scent nutty and warm when mixed. This coating ensures even browning and adds a desirable crunch. Don't skimp on coating, or the breadcrumbs will brown unevenly. If the crumbs clump, break them up with a fork so they scatter across the surface.
- Sprinkle the breadcrumbs evenly over the noodles.: An even spread yields consistent browning and crunch in every bite, so take a moment to distribute the crumbs across the surface. The scatter should cover the casserole without leaving thick mounds. A final light press helps crumbs adhere slightly to the sauce beneath. A common mistake is piling breadcrumbs in the center, which creates uneven crisping; aim for a uniform layer. You'll notice the top looks matte now, but will turn glossy and golden as it bakes.
- Bake for 15 minutes.: As the casserole bakes, listen for a gentle bubbling and watch the breadcrumbs transform to a golden hue. The oven's heat melds flavors, warms the filling through, and crisps the topping. This relatively short bake is just enough to heat everything evenly and brown the crumbs without drying the interior. A key misstep is leaving it too long, which dries the sauce and toughens the chicken . When ready, the edges will bubble and the top will be evenly toasted to a light golden brown.
Expert Tips about Chicken Tetrazzini
I like to think of these tips as shortcuts and quality boosters that keep the casserole creamy and reliably delicious. They focus on timing, texture, and small techniques that make a big difference when you want consistent results.
- Salt the boiling water: Seasoning the water is the simplest way to ensure the noodles carry flavor. Pasta cooked in well salted water tastes brighter and more balanced in the finished casserole, so don’t skip this small but impactful step.
- Cook noodles al dente: Aim for just tender so the noodles hold their shape after baking. Overcooked pasta will become soft and lose structure, making the casserole feel heavy rather than light and comforting.
- Drain ingredients well: Excess moisture from canned peas or wet chicken can thin the sauce and make the bake soggy. Pat or drain additions thoroughly to maintain a creamy but not watery texture.
- Even breadcrumb coating: Mix crumbs with melted butter until uniformly moistened so they toast evenly. Uneven butter distribution leads to spotty browning where some crumbs burn while others remain pale.
- Use a shallow dish: An 8 inch casserole ensures an even layer that bakes uniformly. If the dish is too deep, the center may take longer to heat through and the topping might overbrown before the middle is hot.
- Check for bubbling edges: A gentle bubble at the edges signals the filling is hot and set. If there is no bubbling after the recommended time, tent with foil and give it a few extra minutes rather than cranking up the heat.
Best Served With
This casserole shines when served with simple sides that add freshness and texture. I often pair it with crisp vegetables and a light salad to cut through the richness. It works well for family dinners and casual gatherings, and it travels nicely when you need to bring a dish to share.
- Light green salad with vinaigrette: A simple leafy salad offers acidity that balances the creamy casserole, adding a bright contrast to the rich mouthfeel.
- Steamed green vegetables: Vegetables like green beans or broccoli add color and a tender snap that complements the soft noodles and chicken.
- Crusty bread or rolls: Warm bread soaks up any extra sauce and provides a chewy textural contrast to the crunchy breadcrumb topping.
- Weeknight family dinners: This dish is ideal for busy evenings when you want something filling and straightforward to prepare without fuss.
- Potluck or holiday casual table: Because it scales and travels well, it is a dependable option for gatherings where comfort food is appreciated.
- Storage tips: Cool completely before covering and refrigerate up to three days, or freeze in portions for up to two months. Reheat gently to preserve creaminess rather than drying out the casserole.
FAQ
Conclusion
This Chicken Tetrazzini brings together creamy sauce, tender chicken, and a buttery breadcrumb topping for a satisfying, nostalgia tinged meal. It is forgiving, straightforward, and perfect for evenings when you want something homey without fuss. Give it a try on a busy night or when you want to feed a small crowd, and enjoy how quickly it becomes a comforting staple in your rotation. Share the leftovers or freeze portions for later, and I hope this recipe becomes one you reach for again and again.
Chicken Tetrazzini
Equipment
- Large Pot
- 8 inch casserole dish
- Small Bowl
- Colander
Ingredients
- 4 cups water Boil water to create the cooking medium that softens the noodles and helps blend flavors; maintain a rolling boil for pasta to ensure even texture. Use as base for poaching or rehydrating other components if needed, and reserve a little pasta water to adjust sauce consistency. Monitor evaporation and add more if necessary to prevent scorching.
- 1 teaspoons salt Season pot water with salt to enhance the noodles' internal flavor and to bring out the savory notes in the dish; dissolve completely before adding pasta. Use a measured amount to avoid over-salting the finished casserole. Adjust slightly if using salted broth or canned chicken.
- 1 cup noodles Cook noodles until al dente so they hold up during baking and absorb the sauce without becoming mushy; drain well to avoid excess water in the casserole. Choose a shape that holds sauce, and rinse only if you want to stop cooking quickly. Toss briefly with a bit of butter to prevent sticking before combining with the sauce.
- 1 can cream of mushroom soup Add cream of mushroom soup to provide a rich, creamy base and concentrated umami that binds the casserole components together. Use straight from the can to simplify preparation, and Stir it thoroughly to a smooth consistency before combining. Slightly thinning with milk creates a more cohesive sauce.
- 1 cup milk Pour milk to thin the condensed soup into a pourable sauce and to add creaminess and mild dairy flavor; warm slightly for easier incorporation. Adjust amount to reach desired sauce thickness, balancing creaminess with bakeability. Use whole or low-fat milk depending on richness preference.
- 1 can chicken or 1 cup cooked chicken Include canned or cooked chicken as the primary protein to give the casserole substance, savory flavor, and texture contrast to the noodles and sauce. Shred or chop evenly to distribute throughout the dish, and drain canned chicken well. Taste for seasoning after adding, as canned chicken can be lightly seasoned already.
- 1 can (15 ounces) peas drained Stir in drained peas to introduce bright color, subtle sweetness, and a tender bite that complements the creamy sauce and chicken. Drain thoroughly to avoid watering down the casserole, and fold in near the end to maintain pea integrity. Frozen thawed peas can be used as an alternative with similar effect.
- 1/2 cup breadcrumbs Top with breadcrumbs to add a crispy, golden crust that contrasts with the creamy interior when baked; distribute evenly for consistent browning. Mix with a bit of melted butter or seasoning to enhance flavor and accelerate crisping. Use stale or panko crumbs for extra crunch.
- 3 tablespoons butter melted, plus more for the dish Melt butter to incorporate into both the sauce and the breadcrumb topping for added richness, silkiness, and browning. Use additional butter to grease the baking dish to prevent sticking and impart buttery flavor to the casserole edges. Control saltiness by using salted or unsalted butter appropriately.
Instructions
- Preheat the oven to 375°F. Butter an 8-inch casserole dish.: As the oven warms, you should notice the dry heat building and the kitchen beginning to feel cozy, which sets the stage for a steady bake. Preheating ensures even cooking from the moment the casserole goes in, preventing the sauce from over reducing while the interior finishes. Buttering the dish provides a slippery surface so the casserole releases cleanly after baking, and it imparts a touch of flavor to the underside. A common mistake is putting a cold dish into a warm oven, which can cause uneven browning on top, so always wait until the oven reaches temperature. If you smell faint caramel or hear no sound, that's normal during preheat.
- Bring the water and salt to a boil in a large pot.: Listen for a rolling boil, the lively sound that tells you the water is at the right energy to cook pasta. The salted water seasons the noodles as they absorb liquid, so this step impacts the final depth of flavor. Use a wide pot so the water returns to boil quickly when you add pasta. A common pitfall is under salting the water, which results in bland pasta; taste the water if unsure, it should be mildly salty. You'll see bubbles break furiously across the surface when it's ready.
- Gradually add the noodles so that the water continues to boil. Cook for 8 to 10 minutes.: When you add the noodles , they should slide into the boiling water without clumping, and the boil should quickly resume. Stir gently at the start to separate strands or pieces, then let them cook until just tender with a slight bite. The timing here controls final texture, because the casserole will continue to cook in the oven. Overcooking is a frequent error that leads to mushy results, so taste a noodle at the lower end of the time window. The surface will shimmer and the pot may hiss softly as moisture evaporates.
- Drain the noodles and return them to the pot.: After draining, the noodles may steam for a moment, releasing a faint, toasty starch aroma. Returning them to the pot prevents carryover cooking in a hot colander, and it keeps everything together for mixing. Gently toss to release trapped steam and to prevent clumps. A common mistake is letting them sit long enough to cool and stick; work efficiently to keep them pliable. The noodles should look glossy but not watery.
- Mix the soup and milk together in a bowl until blended.: Combining the canned soup with milk produces a smooth, pourable sauce that will coat the noodles evenly. Whisk until there are no lumps and the texture is silky; you'll notice a creamy sheen when it's well mixed. This step ensures even distribution of flavor and prevents pockets of concentrated soup. Avoid over thinning with too much milk, which can leave the casserole soupy after baking. The bowl may feel cool to the touch, and the sauce should glide off a spoon.
- Add the soup mixture to the pot with the noodles, along with the chicken and peas, and stir to combine.: As you fold the sauce into the noodles you'll smell savory mushroom notes and a gentle dairy sweetness. The chicken and peas should be dispersed so every scoop contains protein and vegetable. Stirring distributes heat and sauce, creating a uniform casserole base. One common error is vigorous stirring that breaks the noodles; instead fold gently to keep strands intact. The mixture should look homogenous and glossy without pools of liquid.
- Pour the noodle mixture into the buttered casserole dish.: When transferring, you should see the mixture settle evenly in the dish and a soft steam rise from the warm components. Spreading the mixture flat helps the topping brown uniformly during baking. Pressing gently ensures there are no air pockets that could create dry hot spots. A slip to avoid is overpacking, which inhibits bubbling and reduces topping crispness. The casserole should look smooth on top and fill the dish without spilling.
- Place the breadcrumbs in a small bowl with the melted butter, and stir to combine.: Tossing the breadcrumbs with melted butter creates that toasty, crisp topping that contrasts the creamy interior. The crumbs should be moist but not saturated, and they will scent nutty and warm when mixed. This coating ensures even browning and adds a desirable crunch. Don't skimp on coating, or the breadcrumbs will brown unevenly. If the crumbs clump, break them up with a fork so they scatter across the surface.
- Sprinkle the breadcrumbs evenly over the noodles.: An even spread yields consistent browning and crunch in every bite, so take a moment to distribute the crumbs across the surface. The scatter should cover the casserole without leaving thick mounds. A final light press helps crumbs adhere slightly to the sauce beneath. A common mistake is piling breadcrumbs in the center, which creates uneven crisping; aim for a uniform layer. You'll notice the top looks matte now, but will turn glossy and golden as it bakes.
- Bake for 15 minutes.: As the casserole bakes, listen for a gentle bubbling and watch the breadcrumbs transform to a golden hue. The oven's heat melds flavors, warms the filling through, and crisps the topping. This relatively short bake is just enough to heat everything evenly and brown the crumbs without drying the interior. A key misstep is leaving it too long, which dries the sauce and toughens the chicken . When ready, the edges will bubble and the top will be evenly toasted to a light golden brown.
Notes
- Salt the boiling water: Seasoning the water is the simplest way to ensure the noodles carry flavor. Pasta cooked in well salted water tastes brighter and more balanced in the finished casserole, so don't skip this small but impactful step.
- Cook noodles al dente: Aim for just tender so the noodles hold their shape after baking. Overcooked pasta will become soft and lose structure, making the casserole feel heavy rather than light and comforting.
- Drain ingredients well: Excess moisture from canned peas or wet chicken can thin the sauce and make the bake soggy. Pat or drain additions thoroughly to maintain a creamy but not watery texture.
- Even breadcrumb coating: Mix crumbs with melted butter until uniformly moistened so they toast evenly. Uneven butter distribution leads to spotty browning where some crumbs burn while others remain pale.
- Use a shallow dish: An 8 inch casserole ensures an even layer that bakes uniformly. If the dish is too deep, the center may take longer to heat through and the topping might overbrown before the middle is hot.
- Check for bubbling edges: A gentle bubble at the edges signals the filling is hot and set. If there is no bubbling after the recommended time, tent with foil and give it a few extra minutes rather than cranking up the heat.