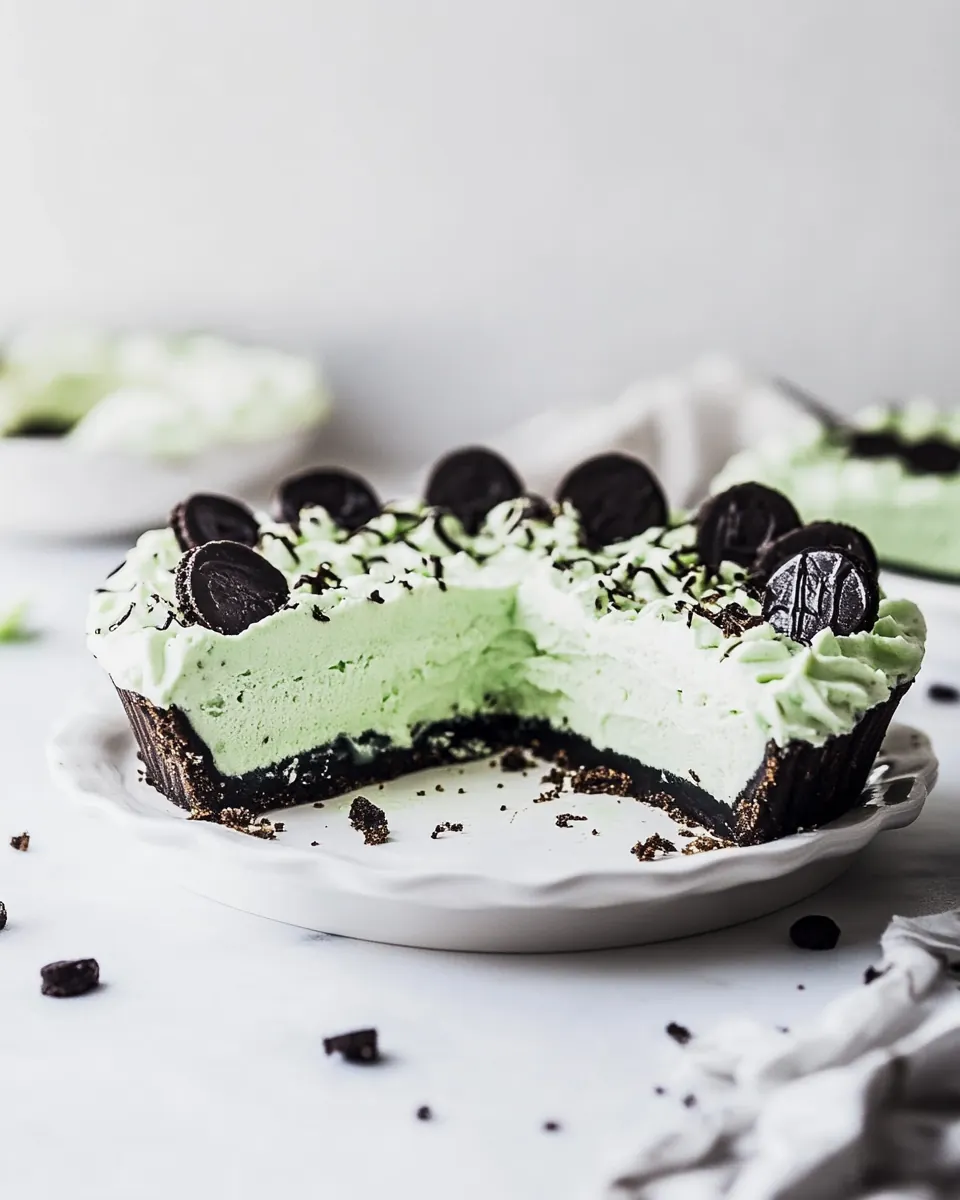
Grasshopper Pie
Grasshopper Pie has been one of those nostalgic desserts that I keep returning to whenever I crave a cool, minty finish to a meal.
I first tasted a version of Grasshopper Pie at a summer potluck when I was a teenager, and the way the mint chip ice cream met the crunchy cookie crust felt like a little celebration in every bite. Over the years I adapted the method to make it easier at home, swapping complicated steps for simple, reliable ones that deliver that same bright mint and chocolate harmony. When I make this pie now, I think about that first summer evening, the laughter around the table, and how dessert can bring people together without any fuss.
Every time I pull a frozen pie from the freezer I remember a particular trick that changed everything for me, and I love to share those small refinements. The blend of cookie crumbs and melted butter gives a perfect base for the softened ice cream, and taking a moment to chill layers between steps keeps the textures clean and satisfying. I usually make this for gatherings because it holds well in the freezer and slices look festive when garnished with cookie pieces.
Recipe Snapshot
50 mins
20 mins
30 mins
Medium
350 kcal
American
Keto, Gluten-Free
Desserts
Blender or food processor, Pie pan
The Beauty of This Grasshopper Pie
Minty Fresh Flavor
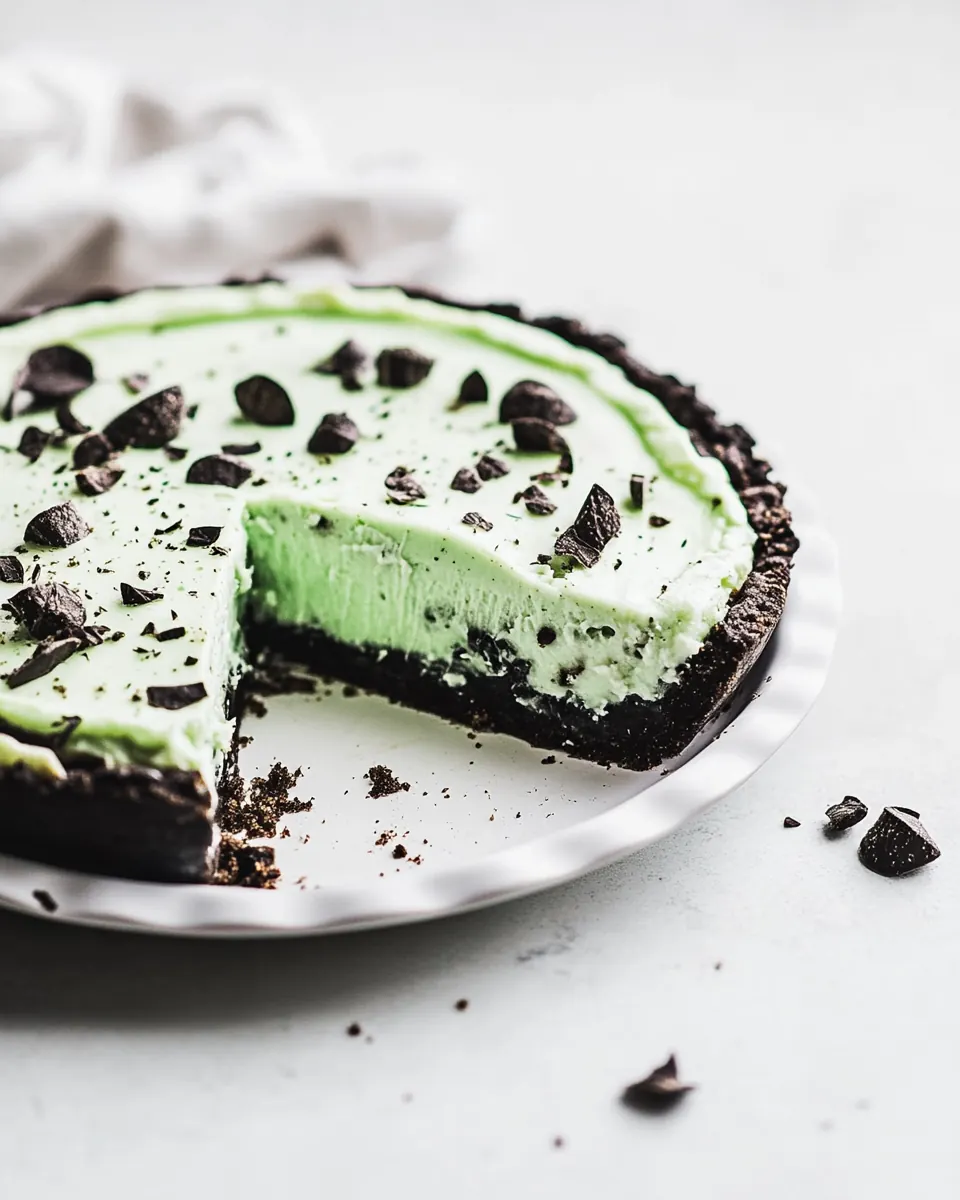
I adore how Grasshopper Pie balances refreshing mint and rich chocolate. The mint chip ice cream offers gentle mint flecks that brighten each bite, while the hot fudge introduces a deep chocolate counterpoint. I find that this flavor pairing keeps the pie from feeling too sweet, making it easy to enjoy more than one slice.
Effortless Assembly
One of the reasons I keep coming back to Grasshopper Pie is the ease. With a simple crust made from crushed sandwich cookies and melted butter, and layers that freeze solid, you can assemble everything without turning on the oven. I like that it frees up oven space for the rest of the meal and lets you focus on presentation rather than complicated techniques.
Make-Ahead Friendly
I often prepare Grasshopper Pie the day before an event. Freezing the assembled pie overnight actually improves the texture, giving clean slices and a firm bite. This make-ahead quality reduces last-minute stress, and I love that I can transport it straight from my freezer to a cooler if I need to take it somewhere.
Playful Texture Contrast
The pie thrives on contrasts. The crunchy cookie crust, the creamy softened mint chip ice cream, the glossy hot fudge, and the light whipped topping play against each other. I enjoy how each forkful moves from crisp to creamy to airy, and that variety keeps the experience interesting from the first to the last slice.
Great for Sharing
Grasshopper Pie is reliably crowd-pleasing. It serves a group easily, and because it stores well in the freezer, you can make extra without worrying about waste. I like serving it at casual get-togethers or on holidays when a make-ahead dessert helps the host relax and enjoy the day with guests.
Key Ingredients for Grasshopper Pie
These ingredients work together to create a satisfying frozen dessert that is both simple and festive. The cookie crumbs form a sturdy, flavorful base; the melted butter binds them and adds richness. The softened mint chip ice cream provides the signature cooling mint flavor, while the hot fudge adds a luxurious chocolate layer. Finally, the whipped topping lightens the overall mouthfeel and makes the pie look polished. Each player complements the others, creating contrast in texture and temperature.
- 1 3/4 cups Mint Oreos about 24 cookies, plus more cookies for garnish! Any chocolate-mint sandwich cookie works.: Crushes into fine crumbs to form a crunchy, chocolate–mint crust; press firmly into a pie pan to provide structure and flavor; can be garnished whole or crushed for visual appeal.
- 4 tablespoons unsalted butter melted: Melts to bind the cookie crumbs, creating a cohesive crust that holds its shape when chilled; adds a subtle richness and helps set the base for the pie.
- 1/8 teaspoons salt: Balances sweetness and enhances the other flavors in the crust and filling; a small amount rounds out the taste and can help stabilize melted butter.
- 1 (48-ounce) container mint chip ice cream or mint brownie ice cream, slightly softened: Softens to a scoopable, spoonable consistency that becomes the creamy, minty filling once spread into the crust; contributes texture, chill, and the primary mint flavor to the pie.
- 1 (8-ounce) container frozen whipped topping completely thawed, see note 1: Whips to a light, airy texture that folds into the softened ice cream to lighten the filling and create a smooth, fluffy mouthfeel; also helps the pie hold a sliceable yet tender structure.
- 1 (11.5-ounce) container hot fudge topping see note 2: Drizzles as a rich, warm or room-temperature chocolate sauce that creates a decadent topping or swirl; adds glossy contrast and intense chocolate flavor when spooned over the finished pie.
Cooking Instructions for Grasshopper Pie
These instructions guide you through building the layers for a showstopping frozen pie. Work with slightly softened ice cream and cooled melted butter to get clean layers, and use the freezer to firm everything up between stages. I suggest laying out your tools and ingredients before you begin to keep the process smooth and relaxed.
- Start by melting the butter in a microwave-safe bowl. Once melted, set aside to cool for 5 minutes. (Hot butter causes a greasy crust.): The scent of warm butter is comforting and signals the start of assembly, and using a microwave gives quick, even melting. After melting, allow the butter to cool for about 5 minutes so it is warm but not piping; if the butter is too hot, it will make the crust greasy and loose rather than cohesive. While the butter cools, you can prep the cookie crumbs. A common mistake is adding hot butter to crumbs, so take the extra minute to set it aside.
- In a powerful blender or food processor, blend whole Oreos (cookie and creme) until they are all crumbs. Re-blend any large chunks so the crust will cut nicely. Measure once fully crumbled, then transfer the crumbs to a bowl. Save any remaining crumbs for a garnish. Add the melted (and slightly cooled) butter and a tiny pinch of salt. Stir until a thick dough forms and press that mixture into a pie pan. Use the bottom of a 1/4-cup measuring cup to press the crust firmly into the bottom of the pan and up the sides. Place the crust in the freezer while preparing the filling.: When the machine whirs, the cookies transform into fine, sandy crumbs that smell intensely of chocolate and mint. Re-blend any larger chunks to ensure uniformity, which helps the crust cut smoothly when serving. Measure the crumbs after processing so you use the right amount, then transfer them to a bowl. If any large pieces remain, pulse them again; uneven crumbs can lead to fragile spots in the crust.
- Scoop in the entire container of softened ice cream into the chilled crust. Smooth the top of the ice cream evenly with the back of a large spoon or spatula. Freeze for 30 minutes or until solid.: The measured crumbs mixed with cooled butter should form a texture like damp sand, holding together when pressed. Stir in the cooled butter and a pinch of salt to develop flavor and cohesion. If the mixture feels too dry, a touch more melted butter helps, but too much will make it greasy, so add sparingly and test by pressing a small amount into a cup to see if it holds.
- Remove from the freezer and smooth the chocolate fudge sauce evenly over the ice cream. (This is a tricky step—I like to dollop scoops evenly all over the top, then gradually press the fudge and coax it across the top with the back of a spoon). Loosely cover and return to freezer for another 30 minutes.: Use the bottom of a 1 4 cup measuring cup to press the crumb mixture firmly into the bottom and up the sides of a pie pan, creating an even, compact crust. The pressure creates a crisp edge that will stand up to slicing. Place the crust in the freezer while you prepare the filling to set it quickly; forgetting to chill the crust can cause it to crumble when you add the ice cream.
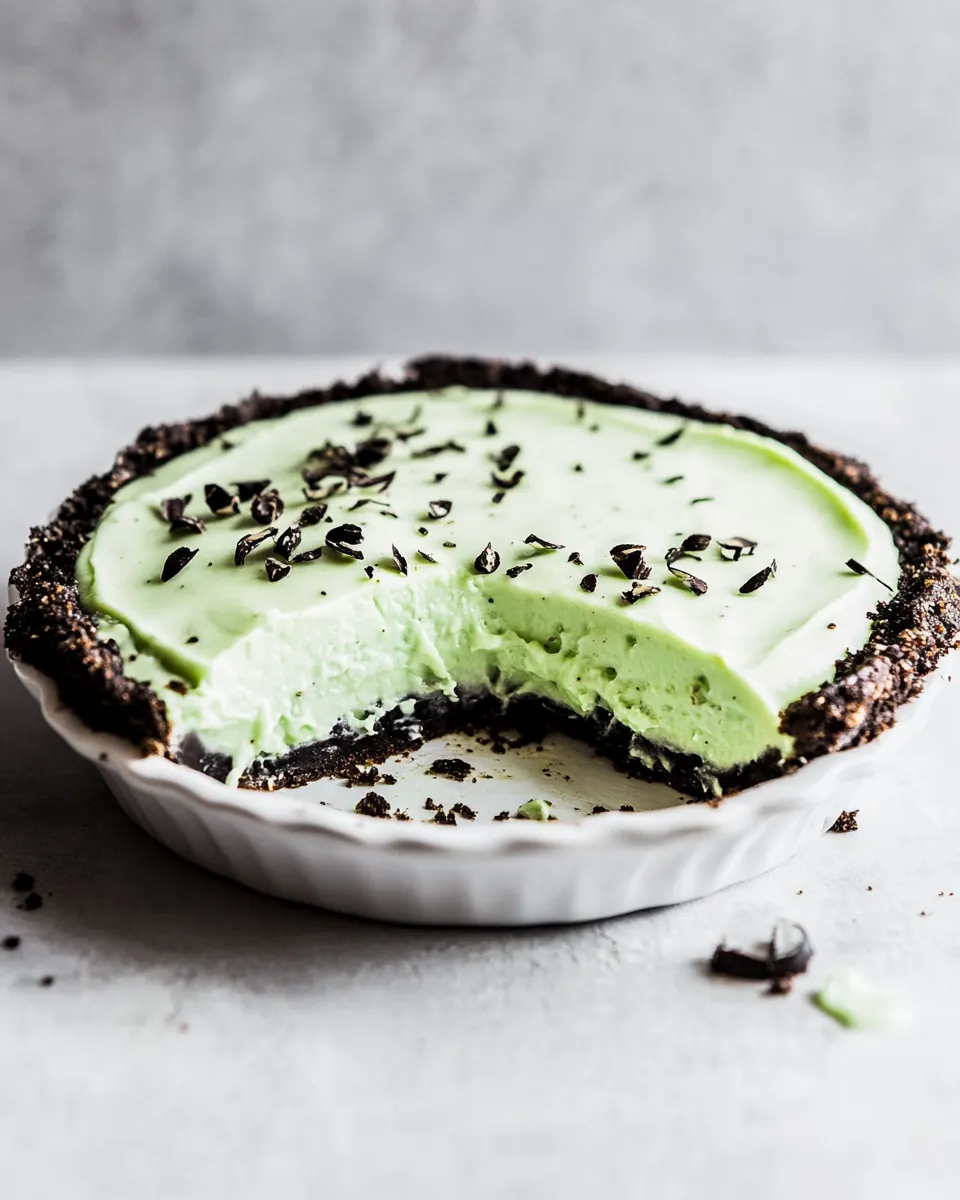
- Remove pie from freezer and smooth the whipped cream over the chocolate fudge layer. You can add as little or as much of the whipped cream. (I usually use most of the container!) Sprinkle with any remaining cookie crumbs, if desired. Return to the freezer and freeze until very solid, about 4–8 hours.: The softened mint chip ice cream should spread smoothly into the chilled crust, leaving a level top when smoothed with the back of a large spoon or spatula. The smell is cool and minty, and you should see flecks of chocolate throughout. Freeze for about 30 minutes or until solid; if you rush this step the layers can merge and become messy when you add the fudge.
- Coarsely chop 3–5 leftover mint Oreos and sprinkle over the pie. Cut the pie into slices. If the pie is especially firm, let it stand for 5 minutes at room temperature before cutting and serving. Use a hot, sharp knife (run it under hot water, dry with a towel) to make cuts into the pie. This will take some muscle! Enjoy promptly and return any leftovers to the freezer.: Dollop spoonfuls of the hot fudge topping over the firm ice cream and coax it across the surface with the back of a spoon until it forms an even layer. The glossy fudge will set slightly when chilled, creating a thin barrier that adds richness and structure. If the fudge is too warm it will soften the ice cream below, so let it cool a touch before spreading. A common error is spreading while the fudge is too hot, which creates uneven layers.
- Loosely cover and return to freezer for another 30 minutes: Chilling the pie again allows the fudge to firm and prevents the whipped topping from melting when applied. The pie will start to feel more solid and quieter to the touch, with the fudge developing a slightly firmer sheen. Avoid skipping this freeze; applying the whipped topping too soon will cause it to slump or melt into the fudge layer.
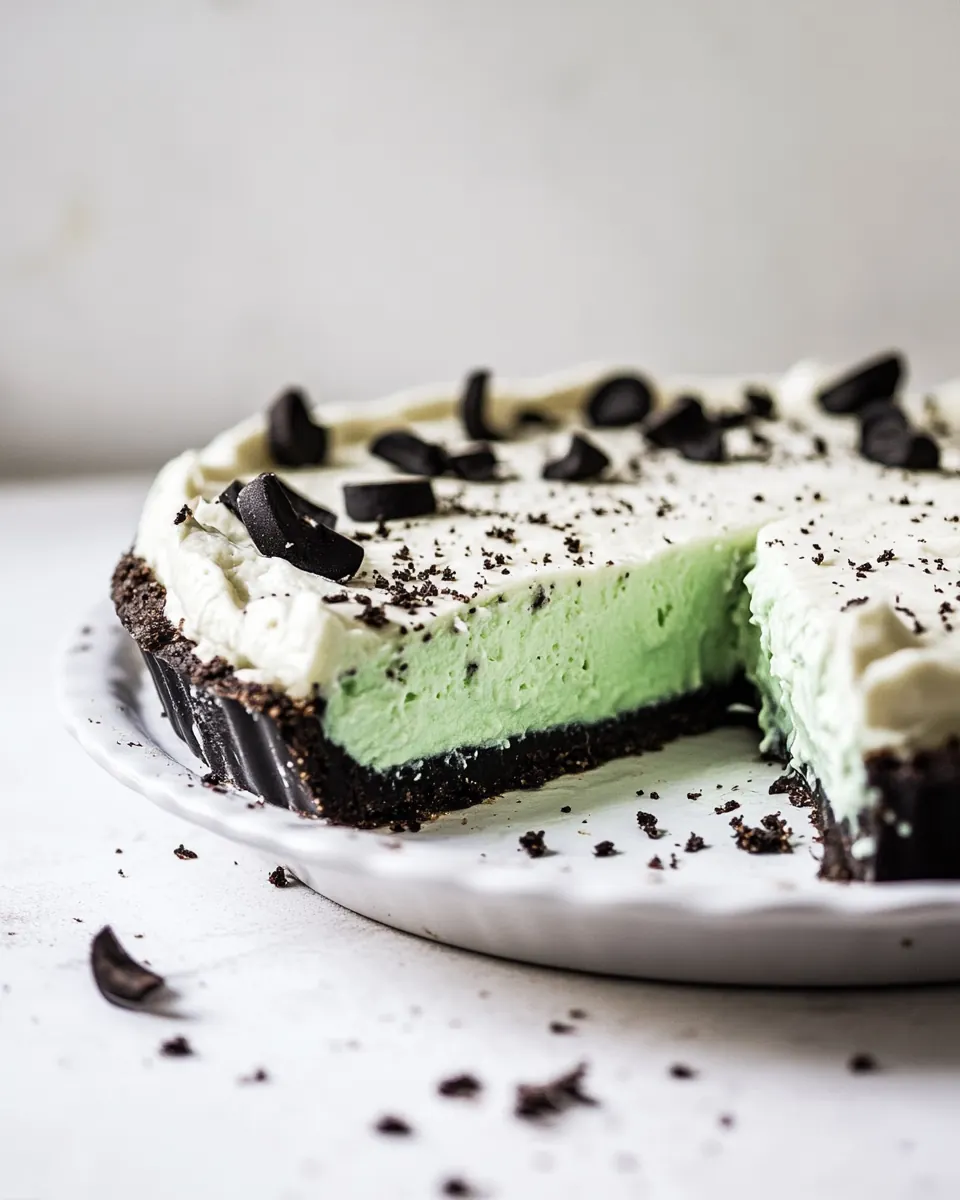
- Remove pie from freezer and smooth the whipped cream over the chocolate fudge layer: The thawed frozen whipped topping spreads like a cloud, and smoothing it gently gives the pie a bright, inviting finish. You can add as little or as much as you like; most of the container yields a thick, bakery style topping. Work quickly so the whipped topping does not warm, and stop when the surface looks uniform; overworking can deflate the topping and make it dense.
- Sprinkle with any remaining cookie crumbs if desired: Adding reserved crumb pieces gives a rustic, decorative touch and adds contrast to the smooth whipped surface. Coarsely chopping several leftover mint Oreos and scattering them over the pie creates texture and visual appeal. Be mindful not to press the crumbs into the topping or they will sink; a light dusting looks best.
- Return to the freezer and freeze until very solid about 4 to 8 hours: This longer freeze time ensures the entire pie is firm and ready to slice cleanly, with layers set into defined strata. The pie will feel weighty and solid when ready, and clean slices are achievable with a warmed sharp knife. A common mistake is trying to slice too soon which results in ragged pieces, so be patient for the best presentation.
- Cut the pie into slices: If the pie is especially firm, let it stand for about 5 minutes at room temperature before cutting; this softens the outer layer just enough to make slicing manageable. Run a hot sharp knife under warm water, dry it, and then slice through the pie for smooth cuts. If you rush without warming the knife, the pie can crack or crumble, so use controlled, steady strokes and reheat the knife between cuts as needed.
- Enjoy promptly and return any leftovers to the freezer: Serve each slice chilled and encourage guests to savor the contrast of cool mint and glossy chocolate. Return any uneaten portions to the freezer in an airtight container so the texture stays pristine. Leaving slices out too long will cause the pie to soften and lose its structure, so store promptly for the best quality.
Customization Ideas
If you want to make small changes that amplify flavor or presentation, a few adjustments can have big results. Below are practical, tested ideas to customize Grasshopper Pie while preserving the structure and delightful mint chocolate interplay. Each tip focuses on a single change so you can mix and match safely.
- Crust texture Try pulsing the cookie crumbs to a slightly coarser texture for a crunchier bite, then adjust the butter to ensure the crust holds together.
- Ice cream choice Swap to mint brownie ice cream if you prefer more chocolate chunks dispersed through the filling, which boosts decadence without extra steps.
- Whipped topping Make your own whipped topping using chilled heavy cream and powdered sugar for a fresher, less sweet finish than store frozen versions.
- Fudge application Dollop cooled hot fudge in scoops and spread gently to create a marbled effect instead of a uniform layer, for a rustic look.
- Garnish Coarsely chop additional mint sandwich cookies and sprinkle them just before serving to keep them crisp and visually striking.
- Make ahead timing Assemble the pie up to three days in advance and store it well wrapped to let flavors meld while remaining freezer friendly.
Serving Options for Grasshopper Pie
Presentation and pairing make a difference when serving Grasshopper Pie. Below are ideas to guide how and when to present the pie, storage notes, and occasions where it shines. Use these suggestions to serve with confidence for gatherings big or small.
- Occasion pairing Serve this pie for celebrations like birthdays or casual summer parties where a chilled dessert is welcome and guests can enjoy slices straight from the freezer.
- Portioning Because this pie serves about ten, consider slicing into smaller wedges for large gatherings so everyone can have a taste without committing to a large piece.
- Accompaniments Pair slices with a simple cup of coffee for adults or a small scoop of additional mint chip ice cream for extra indulgence. The contrasts make the dessert feel more complete.
- Presentation tips Garnish each slice with a few crushed mint sandwich cookies for a polished look, and serve on chilled plates to keep the pie firm while guests enjoy it.
- Storage guidance Store leftovers tightly wrapped in the freezer; I recommend eating within a week for the best texture and flavor, though it will remain safe longer if well sealed.
- Seasonal suitability This dessert is great All Year, especially in warm months when a cold, minty finish is most appreciated; it also brightens holiday menus as a lighter post meal option.
FAQ
Conclusion
Grasshopper Pie stands out because it combines nostalgic mint and chocolate flavors with simple, reliable assembly that anyone can handle. The make ahead nature and striking layers mean you can serve an elegant dessert with minimal stress. I encourage you to give it a try, whether you are feeding a crowd or treating yourself; the mix of crunchy crust, creamy mint ice cream, glossy fudge, and airy whipped topping is worth the small investment of time. Enjoy the process, and don’t forget to save a piece for later by wrapping it tightly and returning it to the freezer.
Grasshopper Pie
Equipment
- Blender or food processor
- Pie Pan
Ingredients
- 1 -3/4 cups Mint Oreos about 24 cookies, plus more cookies for garnish! Any chocolate-mint sandwich cookie works. Crushes into fine crumbs to form a crunchy, chocolate-mint crust; press firmly into a pie pan to provide structure and flavor; can be garnished whole or crushed for visual appeal.
- 4 tablespoons unsalted butter melted Melts to bind the cookie crumbs, creating a cohesive crust that holds its shape when chilled; adds a subtle richness and helps set the base for the pie.
- 1/8 teaspoons salt Balances sweetness and enhances the other flavors in the crust and filling; a small amount rounds out the taste and can help stabilize melted butter.
- 1 (48-ounce) container mint chip ice cream or mint brownie ice cream, slightly softened Softens to a scoopable, spoonable consistency that becomes the creamy, minty filling once spread into the crust; contributes texture, chill, and the primary mint flavor to the pie.
- 1 (8-ounce) container frozen whipped topping completely thawed, see note 1 Whips to a light, airy texture that folds into the softened ice cream to lighten the filling and create a smooth, fluffy mouthfeel; also helps the pie hold a sliceable yet tender structure.
- 1 (11.5-ounce) container hot fudge topping see note 2 Drizzles as a rich, warm or room-temperature chocolate sauce that creates a decadent topping or swirl; adds glossy contrast and intense chocolate flavor when spooned over the finished pie.
Instructions
- Start by melting the butter in a microwave-safe bowl. Once melted, set aside to cool for 5 minutes. (Hot butter causes a greasy crust.): The scent of warm butter is comforting and signals the start of assembly, and using a microwave gives quick, even melting. After melting, allow the butter to cool for about 5 minutes so it is warm but not piping; if the butter is too hot, it will make the crust greasy and loose rather than cohesive. While the butter cools, you can prep the cookie crumbs. A common mistake is adding hot butter to crumbs, so take the extra minute to set it aside.
- In a powerful blender or food processor, blend whole Oreos (cookie and creme) until they are all crumbs. Re-blend any large chunks so the crust will cut nicely. Measure once fully crumbled, then transfer the crumbs to a bowl. Save any remaining crumbs for a garnish. Add the melted (and slightly cooled) butter and a tiny pinch of salt. Stir until a thick dough forms and press that mixture into a pie pan. Use the bottom of a 1/4-cup measuring cup to press the crust firmly into the bottom of the pan and up the sides. Place the crust in the freezer while preparing the filling.: When the machine whirs, the cookies transform into fine, sandy crumbs that smell intensely of chocolate and mint. Re-blend any larger chunks to ensure uniformity, which helps the crust cut smoothly when serving. Measure the crumbs after processing so you use the right amount, then transfer them to a bowl. If any large pieces remain, pulse them again; uneven crumbs can lead to fragile spots in the crust.
- Scoop in the entire container of softened ice cream into the chilled crust. Smooth the top of the ice cream evenly with the back of a large spoon or spatula. Freeze for 30 minutes or until solid.: The measured crumbs mixed with cooled butter should form a texture like damp sand, holding together when pressed. Stir in the cooled butter and a pinch of salt to develop flavor and cohesion. If the mixture feels too dry, a touch more melted butter helps, but too much will make it greasy, so add sparingly and test by pressing a small amount into a cup to see if it holds.
- Remove from the freezer and smooth the chocolate fudge sauce evenly over the ice cream. (This is a tricky step—I like to dollop scoops evenly all over the top, then gradually press the fudge and coax it across the top with the back of a spoon). Loosely cover and return to freezer for another 30 minutes.: Use the bottom of a 1 4 cup measuring cup to press the crumb mixture firmly into the bottom and up the sides of a pie pan, creating an even, compact crust. The pressure creates a crisp edge that will stand up to slicing. Place the crust in the freezer while you prepare the filling to set it quickly; forgetting to chill the crust can cause it to crumble when you add the ice cream.
- Remove pie from freezer and smooth the whipped cream over the chocolate fudge layer. You can add as little or as much of the whipped cream. (I usually use most of the container!) Sprinkle with any remaining cookie crumbs, if desired. Return to the freezer and freeze until very solid, about 4–8 hours.: The softened mint chip ice cream should spread smoothly into the chilled crust, leaving a level top when smoothed with the back of a large spoon or spatula. The smell is cool and minty, and you should see flecks of chocolate throughout. Freeze for about 30 minutes or until solid; if you rush this step the layers can merge and become messy when you add the fudge.
- Coarsely chop 3–5 leftover mint Oreos and sprinkle over the pie. Cut the pie into slices. If the pie is especially firm, let it stand for 5 minutes at room temperature before cutting and serving. Use a hot, sharp knife (run it under hot water, dry with a towel) to make cuts into the pie. This will take some muscle! Enjoy promptly and return any leftovers to the freezer.: Dollop spoonfuls of the hot fudge topping over the firm ice cream and coax it across the surface with the back of a spoon until it forms an even layer. The glossy fudge will set slightly when chilled, creating a thin barrier that adds richness and structure. If the fudge is too warm it will soften the ice cream below, so let it cool a touch before spreading. A common error is spreading while the fudge is too hot, which creates uneven layers.
- Loosely cover and return to freezer for another 30 minutes: Chilling the pie again allows the fudge to firm and prevents the whipped topping from melting when applied. The pie will start to feel more solid and quieter to the touch, with the fudge developing a slightly firmer sheen. Avoid skipping this freeze; applying the whipped topping too soon will cause it to slump or melt into the fudge layer.
- Remove pie from freezer and smooth the whipped cream over the chocolate fudge layer: The thawed frozen whipped topping spreads like a cloud, and smoothing it gently gives the pie a bright, inviting finish. You can add as little or as much as you like; most of the container yields a thick, bakery style topping. Work quickly so the whipped topping does not warm, and stop when the surface looks uniform; overworking can deflate the topping and make it dense.
- Sprinkle with any remaining cookie crumbs if desired: Adding reserved crumb pieces gives a rustic, decorative touch and adds contrast to the smooth whipped surface. Coarsely chopping several leftover mint Oreos and scattering them over the pie creates texture and visual appeal. Be mindful not to press the crumbs into the topping or they will sink; a light dusting looks best.
- Return to the freezer and freeze until very solid about 4 to 8 hours: This longer freeze time ensures the entire pie is firm and ready to slice cleanly, with layers set into defined strata. The pie will feel weighty and solid when ready, and clean slices are achievable with a warmed sharp knife. A common mistake is trying to slice too soon which results in ragged pieces, so be patient for the best presentation.
- Cut the pie into slices: If the pie is especially firm, let it stand for about 5 minutes at room temperature before cutting; this softens the outer layer just enough to make slicing manageable. Run a hot sharp knife under warm water, dry it, and then slice through the pie for smooth cuts. If you rush without warming the knife, the pie can crack or crumble, so use controlled, steady strokes and reheat the knife between cuts as needed.
- Enjoy promptly and return any leftovers to the freezer: Serve each slice chilled and encourage guests to savor the contrast of cool mint and glossy chocolate. Return any uneaten portions to the freezer in an airtight container so the texture stays pristine. Leaving slices out too long will cause the pie to soften and lose its structure, so store promptly for the best quality.
Notes
- Crust texture Try pulsing the cookie crumbs to a slightly coarser texture for a crunchier bite, then adjust the butter to ensure the crust holds together.
- Ice cream choice Swap to mint brownie ice cream if you prefer more chocolate chunks dispersed through the filling, which boosts decadence without extra steps.
- Whipped topping Make your own whipped topping using chilled heavy cream and powdered sugar for a fresher, less sweet finish than store frozen versions.
- Fudge application Dollop cooled hot fudge in scoops and spread gently to create a marbled effect instead of a uniform layer, for a rustic look.
- Garnish Coarsely chop additional mint sandwich cookies and sprinkle them just before serving to keep them crisp and visually striking.
- Make ahead timing Assemble the pie up to three days in advance and store it well wrapped to let flavors meld while remaining freezer friendly.