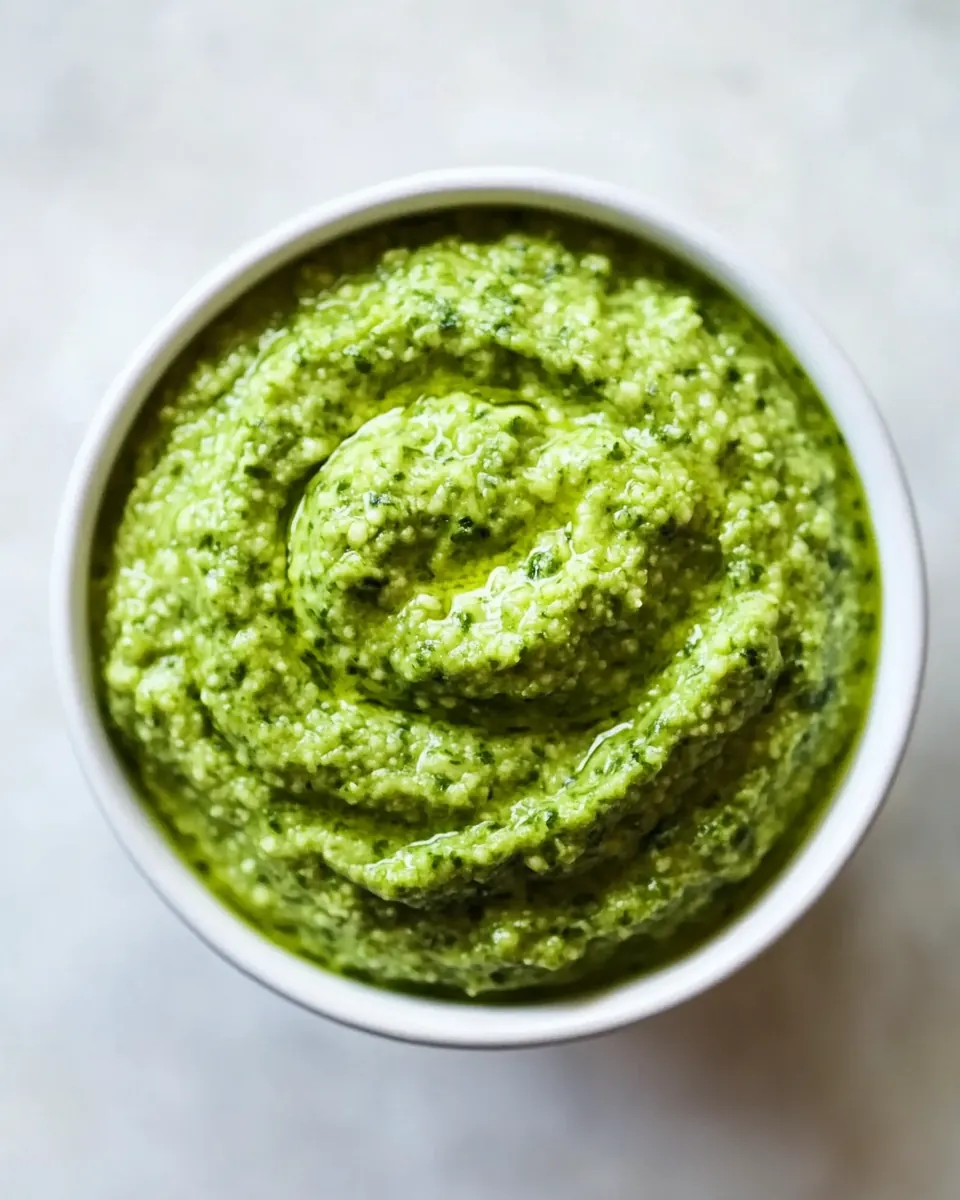
Garlic Scape Pesto
Garlic Scape Pesto has been one of those discoveries that changed the way I think about spring produce. The first time I made it, I brought a jar to a neighbor who had a spare lemon tree and came home with a bag full of freshly trimmed garlic scapes. From the first whiff I knew this was going to be a staple: bright, green, and herbaceous with that familiar garlic bite turned floral and sweet. I remember standing at my counter, the blender humming, and feeling a small thrill as the mixture transformed into a silky, verdant sauce that seemed to carry the season in its aroma.
Over the years I have adapted the proportions, learned how long to pulse the blades, and discovered that a splash of water can turn a sturdy spread into a glossy sauce perfect for pasta. If you are the sort of cook who loves small adjustments and tasting as you go, you will enjoy how forgiving and flexible Garlic Scape Pesto is. I like to keep it rustic but smooth, balancing the grassy basil with toasted pine nuts and the salty punch of Parmigiano Reggiano. Each jar I make becomes a little memory, whether it goes on toast for a late breakfast or folds into warm pasta for a quick weeknight dinner.
Recipe Snapshot
15 mins
15 mins
Easy
350 kcal
Italian
Keto, Gluten-Free
Appetizers
Food Processor, Vitamix Blender, Pine Nuts
What Makes This Garlic Scape Pesto Special
Bright seasonal flavor
I love how Garlic Scape Pesto captures the essence of spring. The garlic scapes bring a milder, fresher garlic note than raw cloves, so the sauce tastes lively rather than overpowering. This makes it perfect for brightening simple dishes, and I often reach for it when I want a quick flavor upgrade.
Ultra versatile
We can use this pesto as a spread, a sauce, or a finishing drizzle. I often stir it into hot pasta, fold it into warm vegetables, or smear it on sandwiches. That flexibility means one batch stretches across breakfasts, lunches, and dinners, and that practical quality always wins me over.
Easy and fast
I appreciate recipes that reward a little attention, and this one does just that. With just a few pulses in a blender or food processor you get a smooth texture without fuss. The technique is forgiving, so it’s great for cooks who like to taste and tweak as they go, which I do almost every time.
Textural balance
The combination of toasted pine nuts and grated Parmigiano Reggiano creates a creamy mouthfeel while still maintaining a pleasant grip on bread or pasta. I especially enjoy how a tiny amount of water or extra olive oil can change the texture from a dense spread to a silky sauce in seconds.
Freshness and shelf life
We get concentrated flavor that lasts. When stored properly, this pesto keeps its character for several days in the fridge. I like making a double batch when scapes are abundant, freezing small portions to have that fresh spring taste all year.
Essential Ingredients for Garlic Scape Pesto
These ingredients are simple, seasonal, and focused on freshness. The garlic scapes provide the central aromatic note, while basil and pine nuts round out the herbal and nutty foundation. Parmigiano Reggiano adds savory depth, and lemon, olive oil, and seasoning balance brightness, fat, and salt so the flavors pop together. Each element plays a clear role, and together they create a lively, cohesive pesto.
- 18 g garlic scapes, ends trimmed and cut into 2-inch pieces (about 1-1/2 cup): Trimmed and cut into pieces, provide the bright, garlicky foundation and crunchy texture for the pesto; selecting tender scapes ensures a mild, fresh allium flavor that melds well with herbs and nuts.
- 3/4 cup lightly packed fresh basil leaves: Lightly packed and fresh, contribute aromatic herbal brightness and green color to balance the garlic scapes; choose vibrant leaves and avoid bruising to preserve essential oils for optimal flavor.
- 1/2 cup toasted pine nuts: Toasted to enhance nuttiness and depth, supply rich, buttery notes and body to the pesto; toast gently until golden to bring out aromas without bitterness.
- 1/2 cup Parmigiano-Reggiano cheese, grated: Grated finely, adds savory umami, salty complexity, and a smooth creamy mouthfeel that helps bind the pesto; use freshly grated cheese for best melting and flavor distribution.
- 1 lemon, juiced: Juiced to provide bright acidity and freshness that cuts through richness, enhancing and balancing the pesto's flavors; strain if seeds are a concern to keep texture smooth.
- 1/2 cup olive oil: Used as the emulsifying fat, creates a glossy, spreadable consistency and carries flavor throughout the pesto; choose a good-quality extra-virgin olive oil for pronounced fruitiness.
- 1 lemon, juiced: Juiced again to reinforce acidity and brightness, further balancing richness and accentuating herbaceous and nutty notes; adjust amount to taste for desired tang.
- Water, desired amount: Added as needed to adjust consistency and loosen the pesto to desired spreadable or saucy thickness; use cool water sparingly to avoid diluting flavors too much.
- Kosher salt: Measured to taste, provides essential seasoning that enhances and harmonizes all flavors in the pesto; add gradually and taste as you blend to avoid oversalting.
- Fresh cracked pepper: Freshly cracked for finishing, contributes subtle heat and aromatic lift that brightens the overall flavor profile; add a few grinds at a time and taste for balance.
Making This Garlic Scape Pesto
Creating this pesto is straightforward and satisfying, and a food processor or blender does most of the work. I like to move through the steps with intention, listening to the texture change as the blades work and tasting between adjustments. Keep your tools nearby, and be ready to scrape and tweak so the final sauce feels balanced.
- Combine chopped garlic scapes, basil leaves, and toasted pine nuts into a Vitamix, regular blender, or food processor.: The moment you add these ingredients together you notice a fresh, green aroma that hints at the final flavor. The sound will be a soft thud as leaves meet nuts and scapes, and that initial texture will be chunky. This combination is crucial because it sets the structural base, both for flavor layering and for how the blades will break things down. One common mistake is overpacking the bowl which causes uneven processing, so leave a bit of headspace to allow movement.
- Pulse a few times just to help break up the nuts and garlic scapes.: Pulsing creates intermittent bursts that prevent overheating, preserving bright color and volatile aromatics. You will hear staccato bursts from the machine; stop and open to check the texture, it should look coarsely chopped rather than pureed. Pulsing first avoids a pasty result, and prevents releasing too much oil from the nuts. Avoid the urge to run continuously at this stage, as that can lead to a gummy texture and loss of vibrancy.
- Add in grated cheese and lemon juice.: Once the solids are uniformly cut, add the Parmigiano Reggiano and lemon juice to introduce savory depth and bright acid. The smell will become richer and slightly tangy, giving balance to the herb and nut flavors. The cheese helps emulsify while the lemon cuts through the fat of the nuts and oil. A frequent error here is using too much lemon at once, so add partially, then taste and adjust to avoid overpowering the pesto with acidity.
- Turn on your Vitamix/blender/food processor and while it's running drizzle in the olive oil and blend until combined.: As you drizzle olive oil in, watch the mixture take on a glossy sheen and smoother texture. The steady sound becomes a higher pitch hum as it homogenizes, and visually you will see the color deepen into a unified green. This step matters because emulsifying the oil properly yields silkiness and helps the pesto cling to foods. A common pitfall is pouring oil too fast which prevents proper emulsification and can separate the mixture.
- At this point take off the lid and scrape down the sides. Put the lid back on and drizzle in some water while the Vitamix/blender/food processor is running until you have reached your desired consistency.: After the main emulsion forms, scraping ensures no pockets of unincorporated cheese or nuts remain. When you drizzle in small amounts of water you can transform the pesto from thick spread to a pourable sauce. The sound will soften and the color will even out further. This technique matters because a controlled addition of water prevents over watering while giving you precise control over texture. Avoid adding large amounts at once, because it can make the pesto watery and dilute its flavor.
- Season with the desired amount of kosher salt and black pepper.: Finishing with kosher salt and fresh cracked pepper brings all the flavors into focus. Taste for balance and add seasoning incrementally; you will notice how salt heightens the nuttiness and the pepper adds a faint warmth that lingers. Seasoning at the end matters because other ingredients like Parmigiano Reggiano already contain salt, so adjust carefully. A common mistake is over-salting early, which is hard to correct without diluting the pesto.
Tips and Tricks about Garlic Scape Pesto
These tips reflect how I make this pesto regularly, focusing on texture, timing, and storage. They will help you achieve consistent results whether you prefer a spreadable paste or a thin sauce for noodles.
- Use a high speed blender when you want a very smooth, almost pourable pesto, because the sustained power breaks down fibers and emulsifies oils thoroughly.
- Toast nuts lightly to avoid bitter notes; watch them closely and remove as soon as they smell fragrant and turn golden brown.
- Add acid gradually so the lemon brightens without stealing the show; start with half the juice, then adjust after tasting.
- Keep extra oil on hand for when the pesto clings too tightly, a teaspoon at a time loosens the texture without changing flavor balance drastically.
- Freeze in small portions to preserve freshness, using ice cube trays or small jars so you can defrost just what you need.
- Brighten up after chilling by stirring and adding a splash of water or oil, since refrigerated pesto can thicken and settle.
Perfect Pairings for Garlic Scape Pesto
This pesto pairs beautifully with simple, fresh foods where its bright flavor can shine. Below are serving ideas, occasions, and storage tips to help you get the most from each batch. Each suggestion is practical and tested over many meals.
- With pasta Toss warm pasta with a few spoonfuls of pesto and a splash of pasta cooking water for a quick weeknight meal that tastes sophisticated with minimal effort.
- On toast Spread on crusty bread for breakfast or snacks, finishing with a light drizzle of olive oil and a few cracks of black pepper for a rustic bite.
- As a sandwich spread Use it in place of mayo on sandwiches to add acidity and herbal depth, pairing especially well with roasted vegetables or grilled cheese alternatives.
- With roasted vegetables Toss roasted seasonal vegetables with a spoonful of pesto after cooking to keep the herbs fresh and vibrant against the caramelized surfaces.
- For entertaining Serve as part of a mezze board alongside olives and fresh vegetables, offering a bright, green option that guests can dollop on bread or veggies.
- Storage tips Refrigerate in an airtight jar with a thin film of olive oil on top to slow oxidation, or freeze in small portions for up to three months for quick access to spring flavor.
FAQ
Conclusion
This recipe shines because it turns seasonal garlic scapes into a vibrant, multipurpose pesto that elevates simple meals. It is quick to make, adaptable in texture, and full of fresh herbal and nutty flavors that pair with a wide range of dishes. Give it a try the next time you find scapes at the market, and treat yourself to the ease of a sauce that can dress up pasta, bread, or roasted vegetables. I find making a batch feels like bottling a little bit of spring to use whenever I need a burst of brightness in a meal.
Garlic Scape Pesto
Equipment
- Food Processor
- Vitamix Blender
- Pine Nuts
Ingredients
- 18 g garlic scapes, ends trimmed and cut into 2-inch pieces (about 1-1/2 cup) Trimmed and cut into pieces, provide the bright, garlicky foundation and crunchy texture for the pesto; selecting tender scapes ensures a mild, fresh allium flavor that melds well with herbs and nuts.
- 3/4 cup lightly packed fresh basil leaves Lightly packed and fresh, contribute aromatic herbal brightness and green color to balance the garlic scapes; choose vibrant leaves and avoid bruising to preserve essential oils for optimal flavor.
- 1/2 cup toasted pine nuts Toasted to enhance nuttiness and depth, supply rich, buttery notes and body to the pesto; toast gently until golden to bring out aromas without bitterness.
- 1/2 cup Parmigiano-Reggiano cheese, grated Grated finely, adds savory umami, salty complexity, and a smooth creamy mouthfeel that helps bind the pesto; use freshly grated cheese for best melting and flavor distribution.
- 1 lemon, juiced Juiced to provide bright acidity and freshness that cuts through richness, enhancing and balancing the pesto's flavors; strain if seeds are a concern to keep texture smooth.
- 1/2 cup olive oil Used as the emulsifying fat, creates a glossy, spreadable consistency and carries flavor throughout the pesto; choose a good-quality extra-virgin olive oil for pronounced fruitiness.
- 1 lemon, juiced Juiced again to reinforce acidity and brightness, further balancing richness and accentuating herbaceous and nutty notes; adjust amount to taste for desired tang.
- Water, desired amount Added as needed to adjust consistency and loosen the pesto to desired spreadable or saucy thickness; use cool water sparingly to avoid diluting flavors too much.
- Kosher salt Measured to taste, provides essential seasoning that enhances and harmonizes all flavors in the pesto; add gradually and taste as you blend to avoid oversalting.
- Fresh cracked pepper Freshly cracked for finishing, contributes subtle heat and aromatic lift that brightens the overall flavor profile; add a few grinds at a time and taste for balance.
Instructions
- Combine chopped garlic scapes, basil leaves, and toasted pine nuts into a Vitamix, regular blender, or food processor.: The moment you add these ingredients together you notice a fresh, green aroma that hints at the final flavor. The sound will be a soft thud as leaves meet nuts and scapes, and that initial texture will be chunky. This combination is crucial because it sets the structural base, both for flavor layering and for how the blades will break things down. One common mistake is overpacking the bowl which causes uneven processing, so leave a bit of headspace to allow movement.
- Pulse a few times just to help break up the nuts and garlic scapes.: Pulsing creates intermittent bursts that prevent overheating, preserving bright color and volatile aromatics. You will hear staccato bursts from the machine; stop and open to check the texture, it should look coarsely chopped rather than pureed. Pulsing first avoids a pasty result, and prevents releasing too much oil from the nuts. Avoid the urge to run continuously at this stage, as that can lead to a gummy texture and loss of vibrancy.
- Add in grated cheese and lemon juice.: Once the solids are uniformly cut, add the Parmigiano Reggiano and lemon juice to introduce savory depth and bright acid. The smell will become richer and slightly tangy, giving balance to the herb and nut flavors. The cheese helps emulsify while the lemon cuts through the fat of the nuts and oil. A frequent error here is using too much lemon at once, so add partially, then taste and adjust to avoid overpowering the pesto with acidity.
- Turn on your Vitamix/blender/food processor and while it's running drizzle in the olive oil and blend until combined.: As you drizzle olive oil in, watch the mixture take on a glossy sheen and smoother texture. The steady sound becomes a higher pitch hum as it homogenizes, and visually you will see the color deepen into a unified green. This step matters because emulsifying the oil properly yields silkiness and helps the pesto cling to foods. A common pitfall is pouring oil too fast which prevents proper emulsification and can separate the mixture.
- At this point take off the lid and scrape down the sides. Put the lid back on and drizzle in some water while the Vitamix/blender/food processor is running until you have reached your desired consistency.: After the main emulsion forms, scraping ensures no pockets of unincorporated cheese or nuts remain. When you drizzle in small amounts of water you can transform the pesto from thick spread to a pourable sauce. The sound will soften and the color will even out further. This technique matters because a controlled addition of water prevents over watering while giving you precise control over texture. Avoid adding large amounts at once, because it can make the pesto watery and dilute its flavor.
- Season with the desired amount of kosher salt and black pepper.: Finishing with kosher salt and fresh cracked pepper brings all the flavors into focus. Taste for balance and add seasoning incrementally; you will notice how salt heightens the nuttiness and the pepper adds a faint warmth that lingers. Seasoning at the end matters because other ingredients like Parmigiano Reggiano already contain salt, so adjust carefully. A common mistake is over-salting early, which is hard to correct without diluting the pesto.
Notes
- Use a high speed blender when you want a very smooth, almost pourable pesto, because the sustained power breaks down fibers and emulsifies oils thoroughly.
- Toast nuts lightly to avoid bitter notes; watch them closely and remove as soon as they smell fragrant and turn golden brown.
- Add acid gradually so the lemon brightens without stealing the show; start with half the juice, then adjust after tasting.
- Keep extra oil on hand for when the pesto clings too tightly, a teaspoon at a time loosens the texture without changing flavor balance drastically.
- Freeze in small portions to preserve freshness, using ice cube trays or small jars so you can defrost just what you need.
- Brighten up after chilling by stirring and adding a splash of water or oil, since refrigerated pesto can thicken and settle.