
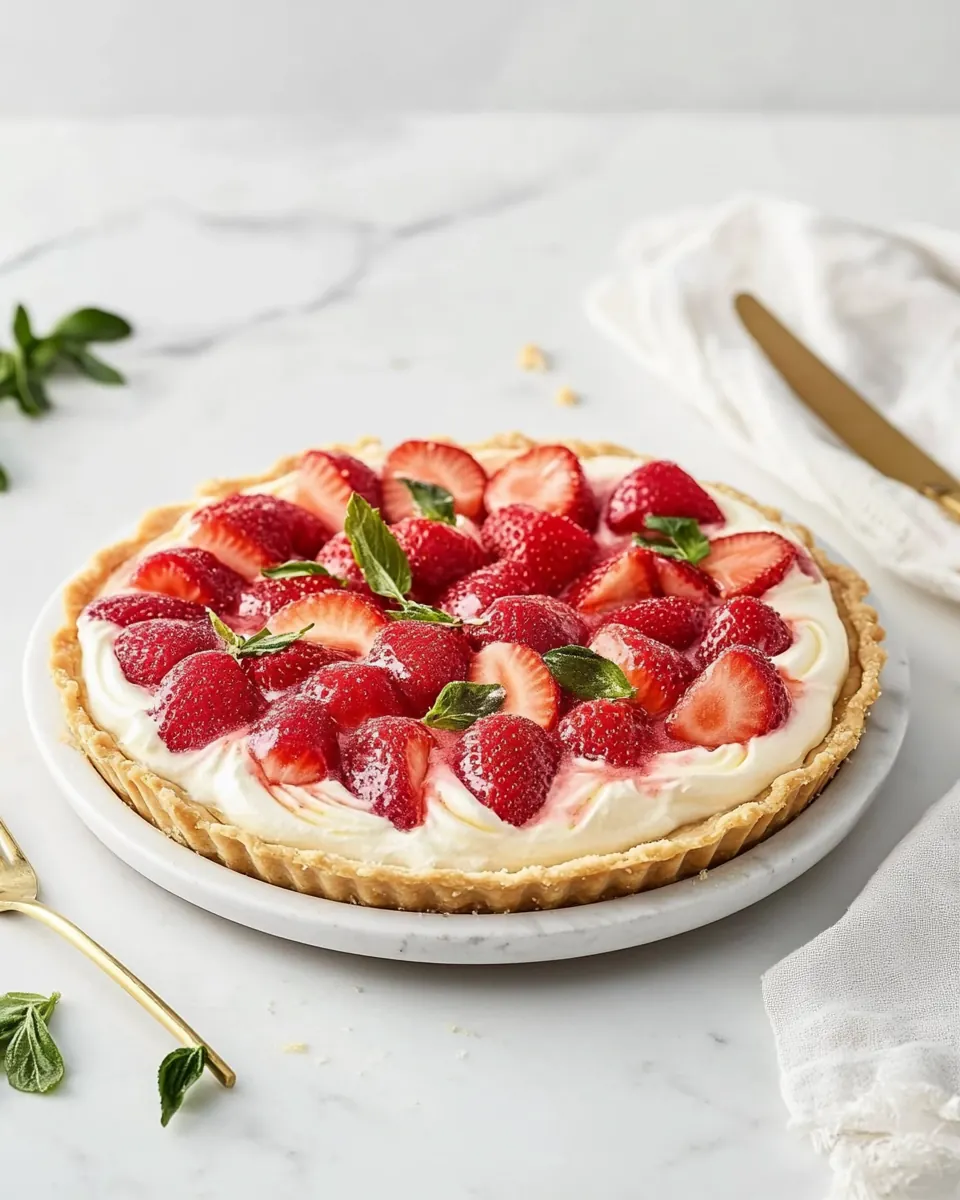
No Bake Strawberry Pie
No Bake Strawberry Pie is one of those recipes I reach for when the sun lingers late and I want something bright, simple, and utterly satisfying. The first time I made it I was racing home from a farmers market with a crate of strawberries, cheeks flushed from carrying too many bags, and an insistence that the fruit not be wasted. That urgency became a joyful experiment, and what emerged was a glossy, fruit forward pie that felt like summer on a plate.
Weeks later I find myself making this pie for neighborhood potlucks, quiet Sunday afternoons, and the occasional midweek treat when I need a quick win without turning on the oven. I love how the sweet tang of strawberries plays against the crisp, buttery texture of a ready made crust, and how the simple glaze transforms the berries into a jewel toned filling. Each bite gives a contrast of textures and a clean, fruity finish that keeps people coming back for one more slice.
Recipe Snapshot
11 mins
10 mins
1 mins
Easy
200 kcal
American
Gluten-Free, Low FODMAP
Desserts
Saucepan, Refrigerator, Mixing spoon
Why Try This No Bake Strawberry Pie
Fresh Fruit That Shines
I adore how the recipe lets the natural flavor of strawberries lead. When you use ripe berries, the glaze simply amplifies their sweetness and aroma, instead of masking it. I always pick berries that smell fragrant at the stem, because that scent is the first hint of the flavor you will taste.
Speed and Ease
There is real comfort in a dessert you can assemble quickly. I love that this No Bake Strawberry Pie comes together with a handful of pantry staples and minimal fuss. For busy weeknights or last minute gatherings, I can have a beautiful dessert chilling in the fridge while I finish other dishes.
Textural Contrast
The pre baked crust provides a satisfying crunch beneath the tender, glazed strawberries. That contrast is what makes every forkful feel complete, and it turns a simple fruit pie into something you want to savor slowly. I pay attention to the crust edges when serving, because that crispness is the reward for not overfilling or sogging it down.
Customizable Presentation
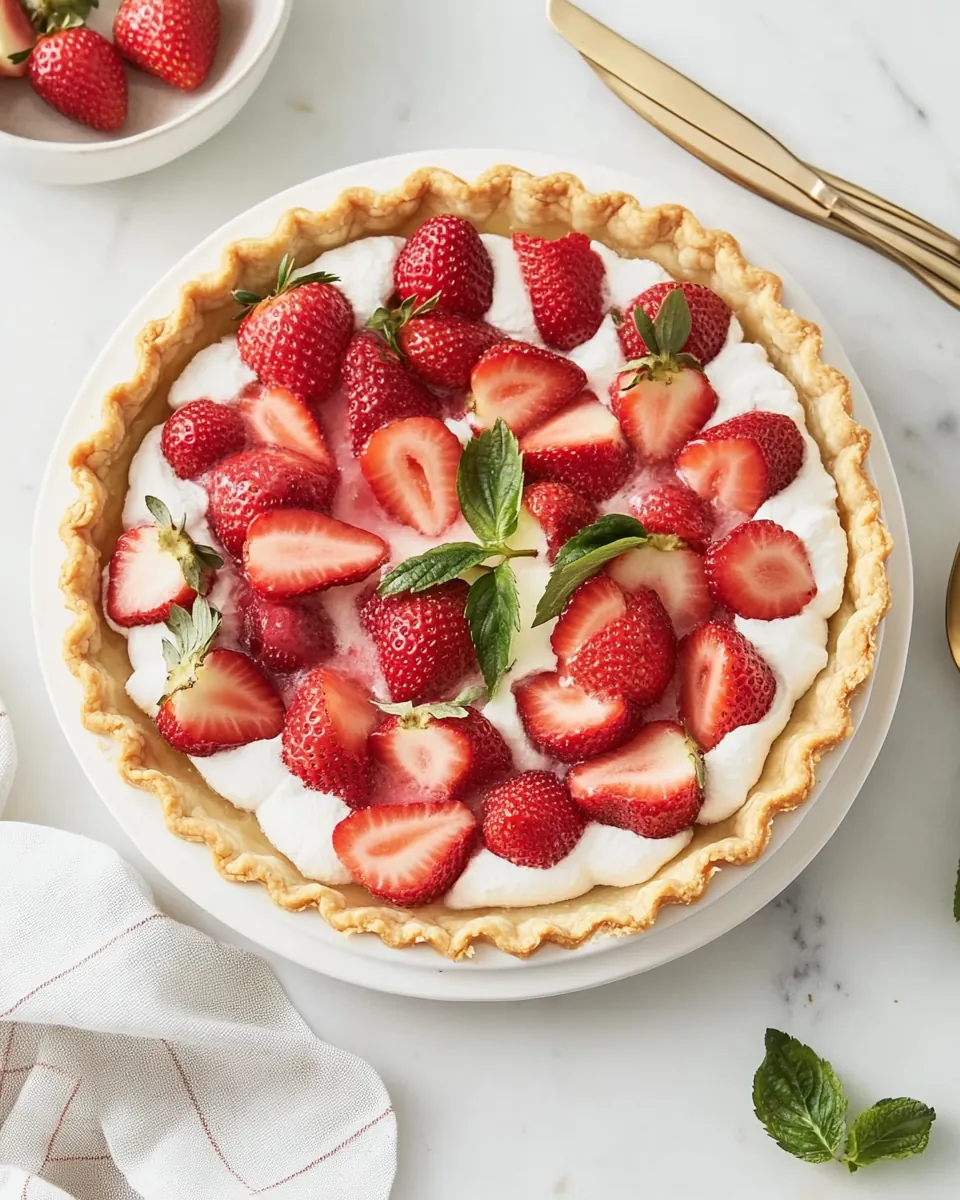
I often change how I finish the pie depending on the occasion. For a casual gathering I will keep it minimal, letting the glossy filling speak for itself. When I want to make it feel festive, a dollop of whipped cream brightens each slice and adds a cloud like lift that guests really notice.
Reliable Results
This recipe is forgiving, which I appreciate when I am multitasking in the kitchen. The glaze sets predictably, and chilling does most of the work. Over the years I have learned a few small timing tricks that help guarantee a neat slice when serving, and they make this pie a dependable choice for my entertaining rotation.
Ingredients for No Bake Strawberry Pie
These ingredients are chosen for clarity and harmony. The list combines a simple sweetener, a thickening agent, acid for brightness, pure water to hydrate the glaze, vibrant strawberries, and a ready made crust to provide texture. Each component has a clear role, and together they produce a shiny, sliceable filling that highlights fresh fruit with minimal fuss.
- 1/2 cup granulated sugar: Provide sweetness and structure to the filling while helping to balance the tartness of the strawberries; dissolve fully in the cooking liquid to create a cohesive, palatable texture. Measure precisely to avoid an overly sweet or runny filling, and adjust slightly for very ripe berries.
- 3 tablespoons cornstarch: Act as a thickening agent that transforms the strawberry liquid into a glossy, sliceable gel; mix with sugar first to prevent clumping when added to water. Cook until the mixture thickens and becomes translucent to ensure a stable no-bake filling.
- 1/4 cup water: Contribute necessary moisture to hydrate the cornstarch and create the cooking medium for the thickener to activate; add gradually and mix thoroughly to avoid lumps. Use at room temperature for best incorporation and to control the consistency of the filling.
- 1 tablespoon lemon juice: Add bright acidity to lift and balance the sweetness while enhancing the fresh strawberry flavor; stir in near the end of cooking to preserve its fresh tang. Use freshly squeezed for the cleanest flavor and to prevent any metallic or bottled aftertaste.
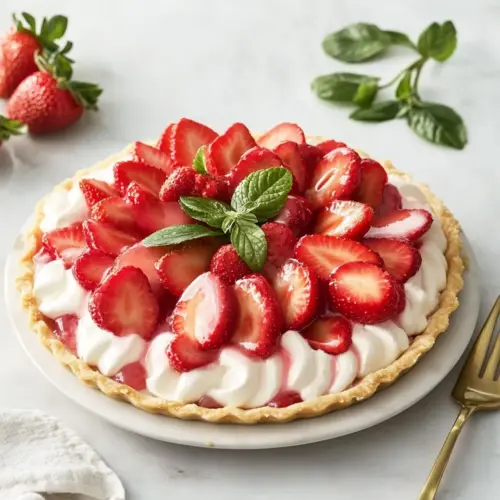
- 4 cups fresh strawberries hulled and halved: Provide the primary fresh fruit component, delivering texture, natural sweetness, and vibrant flavor; hull and halve so they release some juices while retaining attractive pieces for the pie. Toss gently into the cooled filling to keep fruit intact and to create a pleasing presentation.
- 1 pre-baked 9-inch pie crust: Serve as the foundation and vessel for the filling, providing crisp edges and a buttery contrast to the sweet, glossy strawberry topping; use a prebaked crust to avoid sogginess and to save time. Press filling evenly into the crust and chill to set before slicing for clean portions.
- Whipped cream for garnish (optional): Offer an optional light, airy garnish that adds creaminess and visual appeal; dollop or pipe just before serving to prevent weeping. Keep chilled until use to maintain structure and complement the chilled pie.
Recipe Steps for No Bake Strawberry Pie
These steps are straightforward, and the technique centers on making a smooth, clear glaze before folding in the fruit and chilling. Take your time with the glaze so the texture is perfect, and be patient when the pie chills, because that final set makes slicing neat and satisfying.
- Prepare the strawberry filling by combining sugar, cornstarch, water, and lemon juice in a saucepan over medium heat. Stir until the mixture thickens and becomes clear.: The moment the glaze starts to change from cloudy to clear, you will notice its texture shift from watery to silky, and the kitchen will pick up a faint sweet citrus scent. This transformation matters because it indicates the cornstarch has fully gelatinized, giving the filling body so it will hold the strawberries without running. Keep the heat moderate so the mixture does not boil aggressively, and stir constantly to prevent scorching at the pan bottom. A common mistake is rushing the heat, which can cause the glaze to break or taste starchy. If small lumps form, whisk vigorously off the heat and return to low heat briefly, watching carefully until smooth.
- Remove the saucepan from heat and gently fold in the fresh strawberries until they are evenly coated with the glaze.: As you fold, you will feel the berries give slightly under the spoon, releasing a bright aroma of fruit. The tactile sensation should be gentle, because overworking the berries can cause them to release too much juice and thin the glaze. Folding rather than stirring preserves the shape and integrity of the pieces, which helps the pie keep a pleasing texture. One trouble to avoid is adding berries that are overly ripe, as they will break down and make the filling watery. If that happens, chill briefly to firm up, and handle more delicately next time.
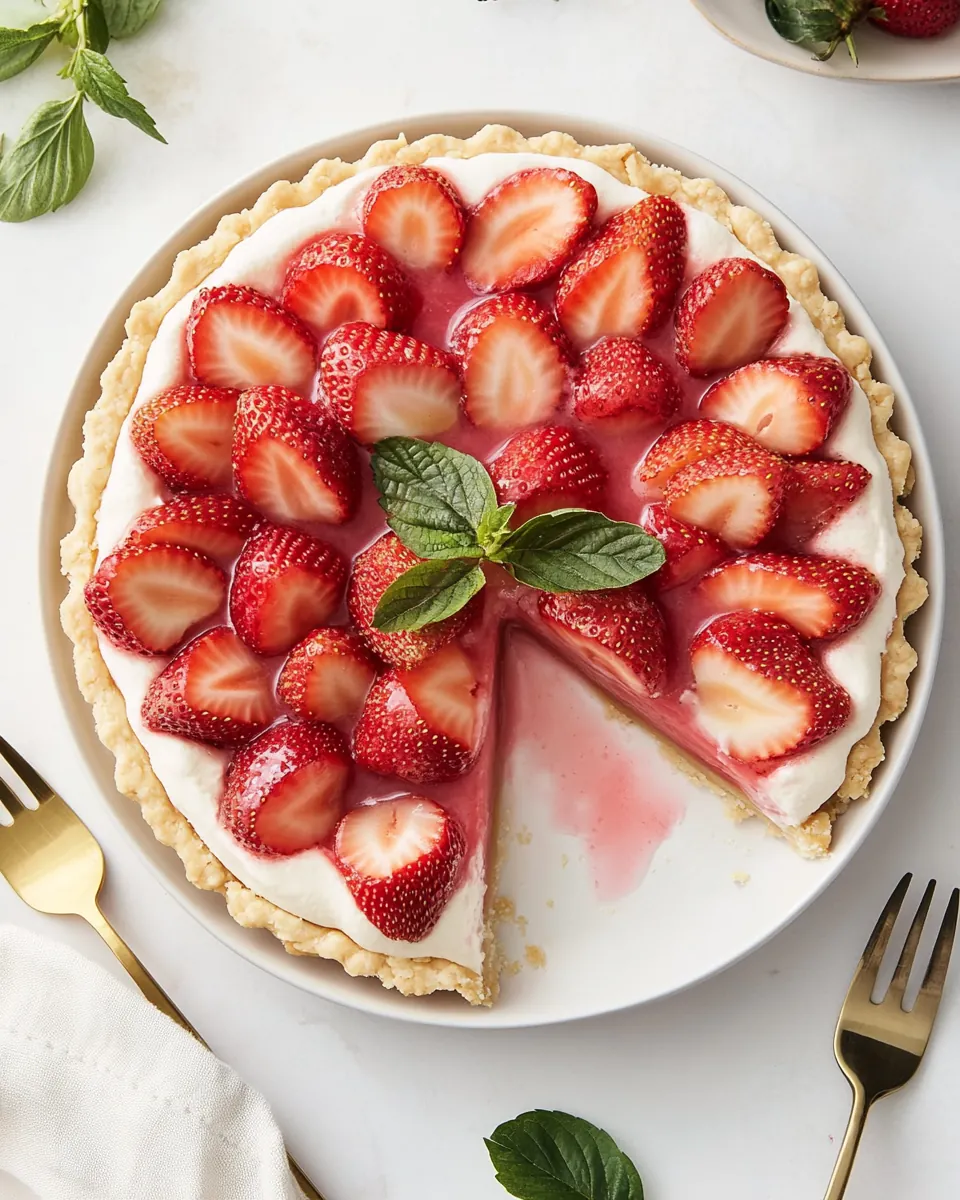
- Pour the strawberry mixture into the pre-baked pie crust, spreading evenly. Refrigerate for at least 3 hours to set.: When you pour, watch how the filling settles into the crust; it should spread smoothly and gloss over the surface with a jewel like sheen. Use a gentle, even motion to avoid trapping air pockets or creating an uneven top. The sound is subtle, a soft settling rather than a splash, and visually you want an even layer so each slice looks balanced. A typical error is overfilling the crust, which can cause spillage as it chills, so leave a small margin at the edge for neat serving. Smooth with the back of a spoon if needed, but avoid pressing the berries down flat.
- Once set, garnish with whipped cream if desired, and serve chilled.: During refrigeration you will notice the glaze firm slightly and become sliceable, and the flavors have time to marry. The cool scent of refrigerated fruit is different from warm fruit, more concentrated and clean. Chilling matters because it stabilizes the cornstarch network and keeps the crust crisp when cutting. Placing the pie on a flat surface in the fridge prevents wobbling and ensures an even set. A common oversight is trying to cut before the glaze is fully chilled, which yields messy slices; patience here results in tidy presentation.
- Once set, garnish with whipped cream if desired, and serve chilled.: The final flourish of whipped cream adds a soft, creamy contrast and a light vanilla aroma if the cream is sweetened. When serving, the first forkful should reveal distinct layers, a crisp crust, a glossy fruit body, and a cloud like dollop of cream when used. This contrast is what makes the pie memorable. Avoid leaving the pie at room temperature for too long, since the filling will soften and the crust may lose its crispness. If you need to transport the pie, keep it chilled until just before serving to maintain structure and flavor.
How to Switch It Up
There are a few simple ways to vary this pie while keeping its core character intact. Small changes in garnish, fruit arrangement, or crust style make the dessert feel new without adding complexity. Below are practical ideas I often use to adapt the pie for different occasions.
- Use different crust textures — Swap a standard pre baked crust for a nut based crust if you want more crunch and a slightly toasted flavor. This change adjusts the mouthfeel while keeping assembly identical.
- Swap presentation styles — Instead of pouring the filling, arrange halved strawberries in a pattern in the crust and gently spoon the glaze over, for a decorative, magazine worthy top.
- Finish with flavored cream — Fold a little citrus zest into the whipped cream for an aromatic lift that complements the lemon in the glaze.
- Make mini versions — Use tartlet shells to create individual pies that chill faster and are perfect for parties, with the same technique scaled down.
- Control sweetness — If your berries are exceptionally sweet, reduce the sugar by a tablespoon to keep the overall profile balanced and let the natural fruit flavor lead.
Serving Options for No Bake Strawberry Pie
This pie is wonderfully versatile for casual family meals or more formal gatherings. Serve it chilled and slice with a warm, clean knife for neat portions. Below are specific serving suggestions, pairings, and storage notes that I rely on when planning menus.
- Casual outdoor gatherings — Bring the pie chilled in a cooler and top with whipped cream just before serving so it stays firm in warm weather.
- Festive brunch — Serve slices alongside light pastries and fresh fruit for a colorful spread that leans toward springtime flavors.
- After dinner dessert — Present with a small spoonful of extra glaze on the plate for an elegant finish, and serve chilled for a refreshing end to the meal.
- Storage — Keep leftover pie covered in the refrigerator for up to three days; the crust will gradually soften but the filling stays flavorful if chilled promptly.
- Seasonal pairing — This pie feels especially appropriate for spring and early summer menus when strawberries are at their peak; pair with a simple green salad for a light lunch or with tea for an afternoon treat.
FAQ
Conclusion
This No Bake Strawberry Pie stands out for its bright fruit flavor, glossy presentation, and effortless assembly. It rewards a little patience while chilling and delivers a delightful contrast of crisp crust and tender, glazed strawberries. Try it when you want an impressive dessert with minimal hands on time, and enjoy how a few simple ingredients come together to create a memorable, shareable sweet.
No Bake Strawberry Pie
Equipment
- Saucepan
- Refrigerator
- Mixing Spoon
Ingredients
- 1/2 cup granulated sugar Provide sweetness and structure to the filling while helping to balance the tartness of the strawberries; dissolve fully in the cooking liquid to create a cohesive, palatable texture. Measure precisely to avoid an overly sweet or runny filling, and adjust slightly for very ripe berries.
- 3 tablespoons cornstarch Act as a thickening agent that transforms the strawberry liquid into a glossy, sliceable gel; mix with sugar first to prevent clumping when added to water. Cook until the mixture thickens and becomes translucent to ensure a stable no-bake filling.
- 1/4 cup water Contribute necessary moisture to hydrate the cornstarch and create the cooking medium for the thickener to activate; add gradually and mix thoroughly to avoid lumps. Use at room temperature for best incorporation and to control the consistency of the filling.
- 1 tablespoon lemon juice Add bright acidity to lift and balance the sweetness while enhancing the fresh strawberry flavor; stir in near the end of cooking to preserve its fresh tang. Use freshly squeezed for the cleanest flavor and to prevent any metallic or bottled aftertaste.
- 4 cups fresh strawberries hulled and halved Provide the primary fresh fruit component, delivering texture, natural sweetness, and vibrant flavor; hull and halve so they release some juices while retaining attractive pieces for the pie. Toss gently into the cooled filling to keep fruit intact and to create a pleasing presentation.
- 1 pre-baked 9-inch pie crust Serve as the foundation and vessel for the filling, providing crisp edges and a buttery contrast to the sweet, glossy strawberry topping; use a prebaked crust to avoid sogginess and to save time. Press filling evenly into the crust and chill to set before slicing for clean portions.
- Whipped cream for garnish optional Offer an optional light, airy garnish that adds creaminess and visual appeal; dollop or pipe just before serving to prevent weeping. Keep chilled until use to maintain structure and complement the chilled pie.
Instructions
- Prepare the strawberry filling by combining sugar, cornstarch, water, and lemon juice in a saucepan over medium heat. Stir until the mixture thickens and becomes clear.: The moment the glaze starts to change from cloudy to clear, you will notice its texture shift from watery to silky, and the kitchen will pick up a faint sweet citrus scent. This transformation matters because it indicates the cornstarch has fully gelatinized, giving the filling body so it will hold the strawberries without running. Keep the heat moderate so the mixture does not boil aggressively, and stir constantly to prevent scorching at the pan bottom. A common mistake is rushing the heat, which can cause the glaze to break or taste starchy. If small lumps form, whisk vigorously off the heat and return to low heat briefly, watching carefully until smooth.
- Remove the saucepan from heat and gently fold in the fresh strawberries until they are evenly coated with the glaze.: As you fold, you will feel the berries give slightly under the spoon, releasing a bright aroma of fruit. The tactile sensation should be gentle, because overworking the berries can cause them to release too much juice and thin the glaze. Folding rather than stirring preserves the shape and integrity of the pieces, which helps the pie keep a pleasing texture. One trouble to avoid is adding berries that are overly ripe, as they will break down and make the filling watery. If that happens, chill briefly to firm up, and handle more delicately next time.
- Pour the strawberry mixture into the pre-baked pie crust, spreading evenly. Refrigerate for at least 3 hours to set.: When you pour, watch how the filling settles into the crust; it should spread smoothly and gloss over the surface with a jewel like sheen. Use a gentle, even motion to avoid trapping air pockets or creating an uneven top. The sound is subtle, a soft settling rather than a splash, and visually you want an even layer so each slice looks balanced. A typical error is overfilling the crust, which can cause spillage as it chills, so leave a small margin at the edge for neat serving. Smooth with the back of a spoon if needed, but avoid pressing the berries down flat.
- Once set, garnish with whipped cream if desired, and serve chilled.: During refrigeration you will notice the glaze firm slightly and become sliceable, and the flavors have time to marry. The cool scent of refrigerated fruit is different from warm fruit, more concentrated and clean. Chilling matters because it stabilizes the cornstarch network and keeps the crust crisp when cutting. Placing the pie on a flat surface in the fridge prevents wobbling and ensures an even set. A common oversight is trying to cut before the glaze is fully chilled, which yields messy slices; patience here results in tidy presentation.
- Once set, garnish with whipped cream if desired, and serve chilled.: The final flourish of whipped cream adds a soft, creamy contrast and a light vanilla aroma if the cream is sweetened. When serving, the first forkful should reveal distinct layers, a crisp crust, a glossy fruit body, and a cloud like dollop of cream when used. This contrast is what makes the pie memorable. Avoid leaving the pie at room temperature for too long, since the filling will soften and the crust may lose its crispness. If you need to transport the pie, keep it chilled until just before serving to maintain structure and flavor.
Notes
- Use different crust textures — Swap a standard pre baked crust for a nut based crust if you want more crunch and a slightly toasted flavor. This change adjusts the mouthfeel while keeping assembly identical.
- Swap presentation styles — Instead of pouring the filling, arrange halved strawberries in a pattern in the crust and gently spoon the glaze over, for a decorative, magazine worthy top.
- Finish with flavored cream — Fold a little citrus zest into the whipped cream for an aromatic lift that complements the lemon in the glaze.
- Make mini versions — Use tartlet shells to create individual pies that chill faster and are perfect for parties, with the same technique scaled down.
- Control sweetness — If your berries are exceptionally sweet, reduce the sugar by a tablespoon to keep the overall profile balanced and let the natural fruit flavor lead.