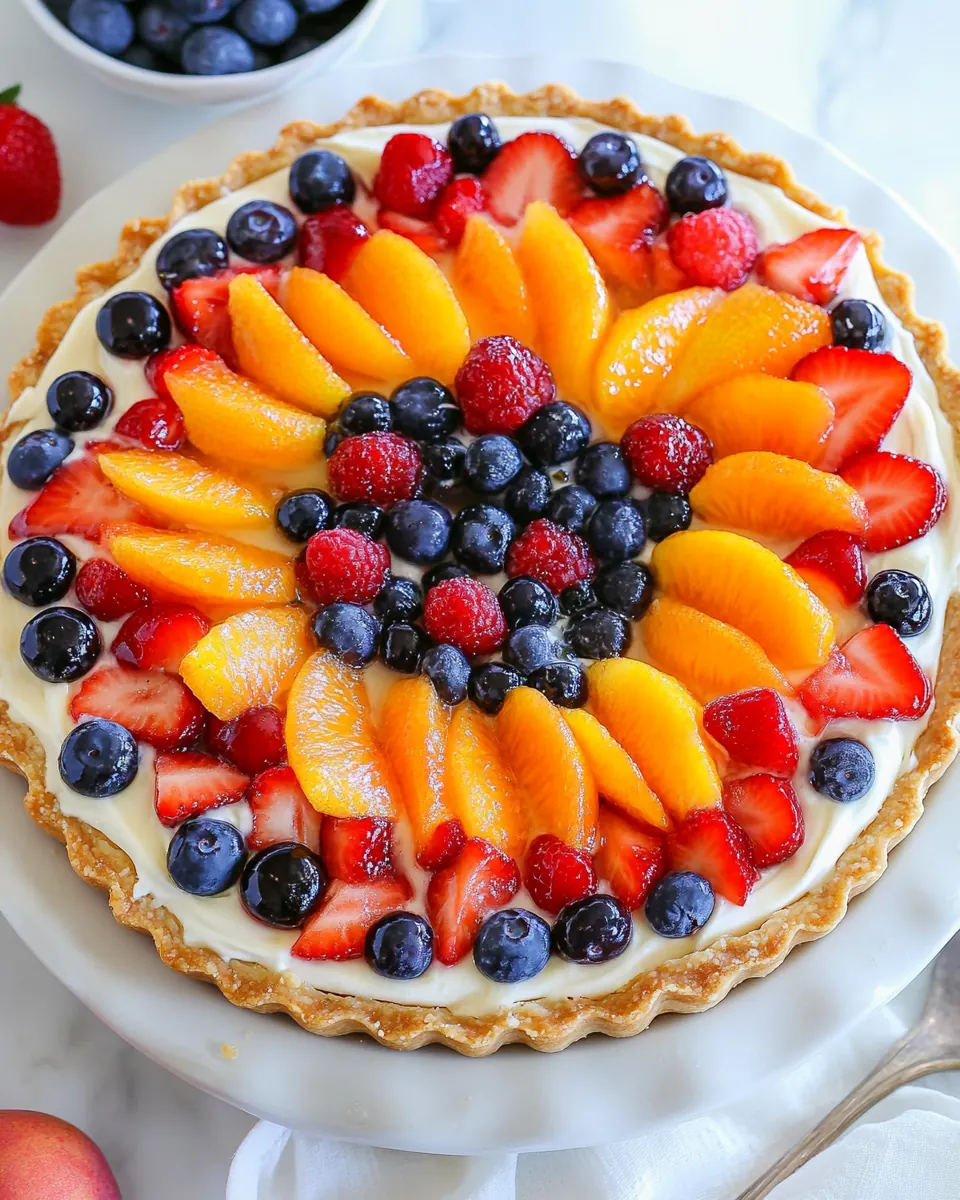
Fruit Tart Recipe
Fruit Tart Recipe is one of those desserts I fall back on whenever I want a showstopping dessert that still feels fresh and approachable. I remember the first time I assembled one for a summer gathering, standing at the counter with a bowl of glossy berries and a cool bowl of pastry cream, thinking about how simple elements come together to create something elegant. That first bite, buttery crust giving way to creamy filling and bright fruit, convinced me this was a recipe to keep in heavy rotation.
Over the years I have tweaked the assembly order and the way I glaze the fruit so the tart stays vibrant for hours on a warm afternoon. I like to make the pastry cream a day ahead, so it chills firm and develops flavor, and I always choose a mix of textures with soft berries and firmer citrus segments. Friends often ask how I get the fruit to look so glossy, and it is usually the final brush of apricot preserves that does the trick. I also learned that arranging the fruit is as much a creative exercise as it is practical, and swapping patterns or scattering fruit changes the whole mood of the tart.
Recipe Snapshot
45 mins
20 mins
25 mins
Medium
250 kcal
American
Keto, Gluten-Free
Desserts
10 to 11 inch tart pan, Wire rack, Offset spatula, Pastry brush, Heat safe bowl
Why This Fruit Tart Recipe Stands Out
Perfect balance of textures
When I bite into this tart I notice the contrast right away. The Sweet Tart Dough Recipe, Pate Sucre provides a crisp, tender base that supports the silky Pastry Cream Recipe without getting soggy. That contrast of crisp crust, smooth cream, and juicy fruit is what keeps people coming back for another slice.
Bright seasonal fruit makes it sing
I love that this recipe invites you to use whatever fresh fruit is at its peak. Summer berries and citrus segments bring acidity, sweetness, and color, making the tart both visually striking and balanced on the palate. I often lean into seasonal mixes to highlight local produce and flavor nuances.
Make ahead friendly
I appreciate recipes that let me spread the work across days. The Pastry Cream Recipe can be made ahead and chilled, and the tart crust can be baked earlier in the day. This flexibility reduces last minute stress and makes plating easy when guests arrive.
Easy to customize and scale
I often use different fruit combinations to match the season or occasion. A few swaps here and there, like focusing on stone fruit instead of berries, dramatically changes the tart while keeping the same reliable technique. It is a great canvas for creativity.
Finishing touches elevate the result
The simple glaze of Apricot Preserves thinned with a bit of water is a small step with a big payoff. It adds shine, seals in freshness, and gives the tart a professional look. It is one of those finishing moves that makes the recipe feel worth the effort.
Main Ingredients for Fruit Tart Recipe

These ingredients form a classic framework where each component plays a clear role. The crust gives structure and a buttery edge, the pastry cream adds richness and a silky mouthfeel, while the assorted fruit brings acidity, sweetness, and color. The apricot glaze ties everything together by sealing the fruit and adding a glossy finish. Together they make the tart stable, flavorful, and visually appealing.
- 1 Sweet Tart Dough Recipe, Pate Sucre: Provides a sturdy, sweet pastry base to hold fillings and fruit; creates a crisp, tender shell when blind-baked and cooled. Enhances texture contrast with its buttery flavor and supports slicing for attractive presentation.
- 1 Pastry Cream Recipe: Supplies a smooth, creamy custard layer that anchors the fruit and adds rich vanilla flavor; thickens properly when cooked and chilled to maintain structure. Balances sweetness and adds a luscious mouthfeel between crust and fruit.
- 4 cups fresh fruit or berries, strawberries, blueberries, raspberries, blackberries, clementine segments, etc: Offers bright, fresh seasonal flavor and varied textures that crown the tart; contributes color, juiciness, and natural sweetness or tartness depending on selection. Allows customization and visual appeal while providing contrast to the pastry cream and crust.
- 1/3 cup Apricot Preserves with 1 Tbsp water: Creates a glossy finish and light sweetness when warmed and brushed over the assembled fruit; thins with water to a spreadable glaze that seals in freshness. Adds shine, helps hold fruit in place, and extends shelf life by preventing drying.
Recipe Directions for Fruit Tart Recipe
I find that a calm, methodical approach makes the assembly satisfying rather than stressful. Work in stages so the Pastry Cream Recipe has time to set and the tart crust is fully cooled. Keep your fruit prepped and within reach for smooth assembly.
- Make Pastry Cream Recipe first since it needs time to set. Place a sheet of plastic wrap directly over the surface and cool the cream to room temperature then refrigerate for 2 hours to set. You can make the cream a few days ahead.: The custard will feel velvety and fragrant as you whisk it, with a gentle steam rising while you thicken it on the stovetop; this aroma is a comforting cue that things are going well. Cooling the cream with plastic wrap pressed to the surface keeps a glossy, smooth top and prevents a skin from forming, which would create an unattractive texture under the fruit. I always taste a small spoonful once it is cool to check seasoning, because the cold cream reveals flavors differently than when warm. A useful tip is to stir occasionally as it cools to distribute any remaining warmth evenly so it chills uniformly in the refrigerator. If you skip the wrap, you may get a skin that leaves lumps when you spread the cream, which is the main mistake to avoid here.
- Make the Tart Crust Recipe in a 10 to 11-inch round tart pan. Once baked, remove from the oven and transfer the pan to a wire rack to cool completely to room temperature then carefully release the tart from the pan. You can leave the bottom of the pan on if you prefer.: When the custard has a satin sheen and no steam escapes, it is time to cover it and let it come down to room temperature before chilling. This step ensures the center firms and develops a custardy mouthfeel rather than staying loose and runny, which would make assembly messy. During refrigeration the cream tightens slightly and becomes easier to spread, yielding clean slices. Keep the bowl level in the fridge so the texture sets evenly. A common misstep is putting hot cream directly into a cold fridge which can raise the fridge temperature and compromise safety, so cool briefly on the counter first.
- Set the tart pan over your serving platter (it will be hard to transfer once the crust is filled). Spread the pastry cream evenly into the tart pan.: Allowing the custard to rest in the fridge for a day or two deepens the flavor and makes day of service straightforward. The cream will smell a touch sweeter as it rests, and its body will feel denser to the spoon, which helps the tart hold its shape. Before using, give it a gentle whisk to restore a silky texture if it has stiffened slightly. Store it tightly covered to avoid absorbing other fridge aromas. Avoid leaving it out for extended periods when serving, as long exposure can soften the cream and make slicing messy.
- Arrange your fruit to your preference. You can either arrange fruit in rings or scatter it randomly over the top.: As the dough bakes, the kitchen fills with a warm, buttery scent and the edges turn a pale golden brown; these visual cues indicate the crust is done. Cooling the shell on a wire rack prevents steam buildup underneath, which would soften the bottom. Press the dough evenly into the pan to avoid thin spots that can burn, and dock the base lightly to prevent large air pockets. If the crust is underbaked it will feel doughy and compromise the structural integrity of the tart, which is a mistake I have seen many cooks make when they pull it out too early.
- Make the Glaze: In a heat-safe bowl, combine apricot preserves and 1 Tbsp water and microwave for 30 seconds just enough to soften and loosen up the preserves. If preserves have a lot of fruit pieces, you can strain those out. Use a pastry brush to brush preserves over the fruit, applying an even coating over all the fruit.: As it cools, the crust firms up and stops crisping, making it safe to unmold without cracking. If you leave the bottom in, the tart will still be easy to serve and you reduce the risk of breaking the shell while transferring. The cooled crust should sound slightly hollow if tapped gently, which signals it is dry enough to hold the filling. A common error is attempting to fill a warm crust, which causes the pastry cream to loosen and soak into the base, sacrificing texture.
- Set the tart pan over your serving platter: Positioning the pan on the serving plate before filling avoids the risky maneuver of moving a filled tart. The weight and placement will feel stable as you work, and it allows you to align the finished tart on the platter exactly where you want it. I find this step reduces stress because you can adjust the edge and presentation while the tart is still accessible. The mistake to avoid is trying to slide a filled tart onto a platter after assembling, which often results in spills.
- Spread the pastry cream evenly into the tart pan: The cream should spread like satin under your spatula, settling into the shell without gaps or air pockets. Use a small offset spatula to coax the cream close to the edges and maintain an even thickness so every slice has a satisfying ratio of crust to filling. Smooth the surface with light strokes to remove air and create a glossy plane for the fruit. If you apply the cream unevenly, fruit will rock on top and slices will be inconsistent, which is the common presentation error to watch for.
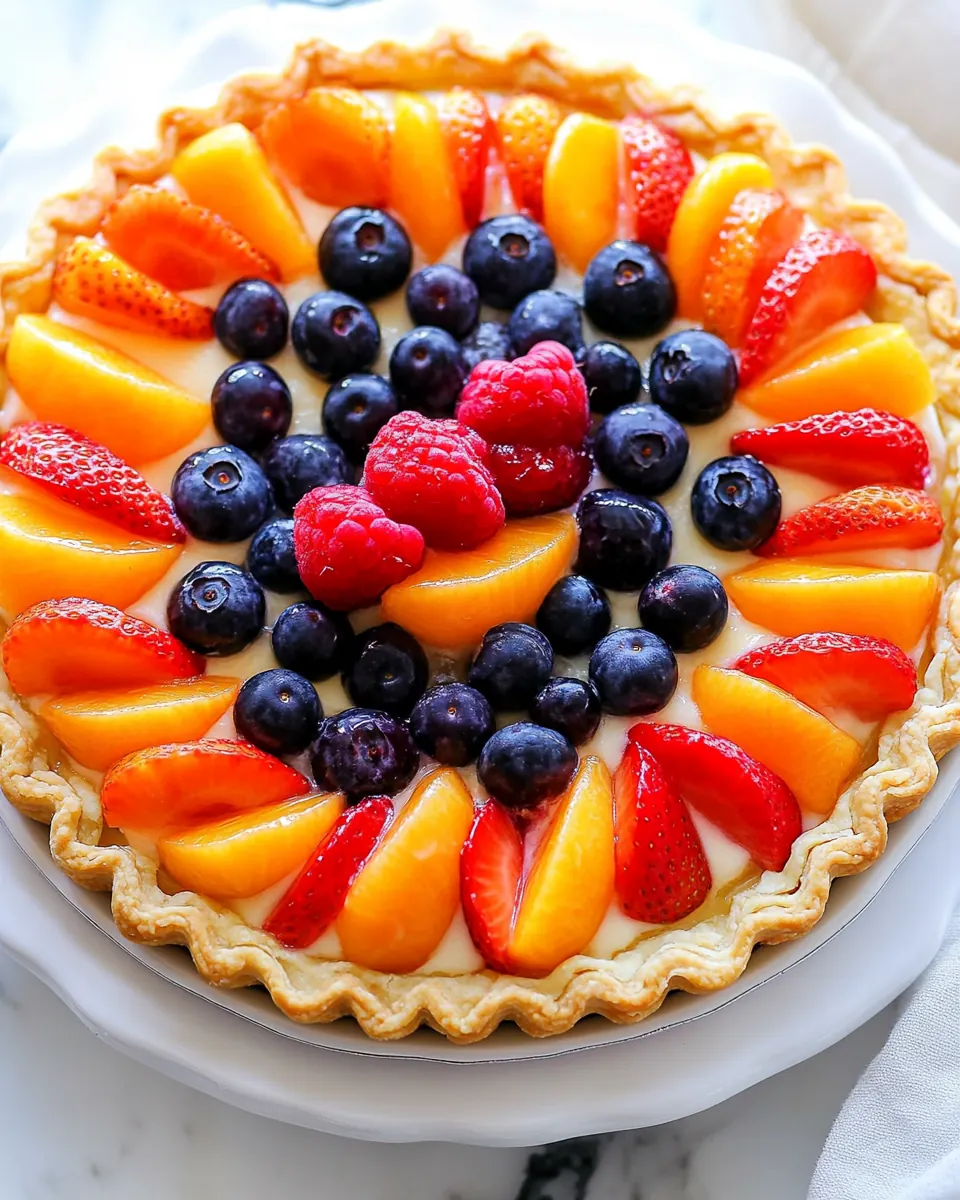
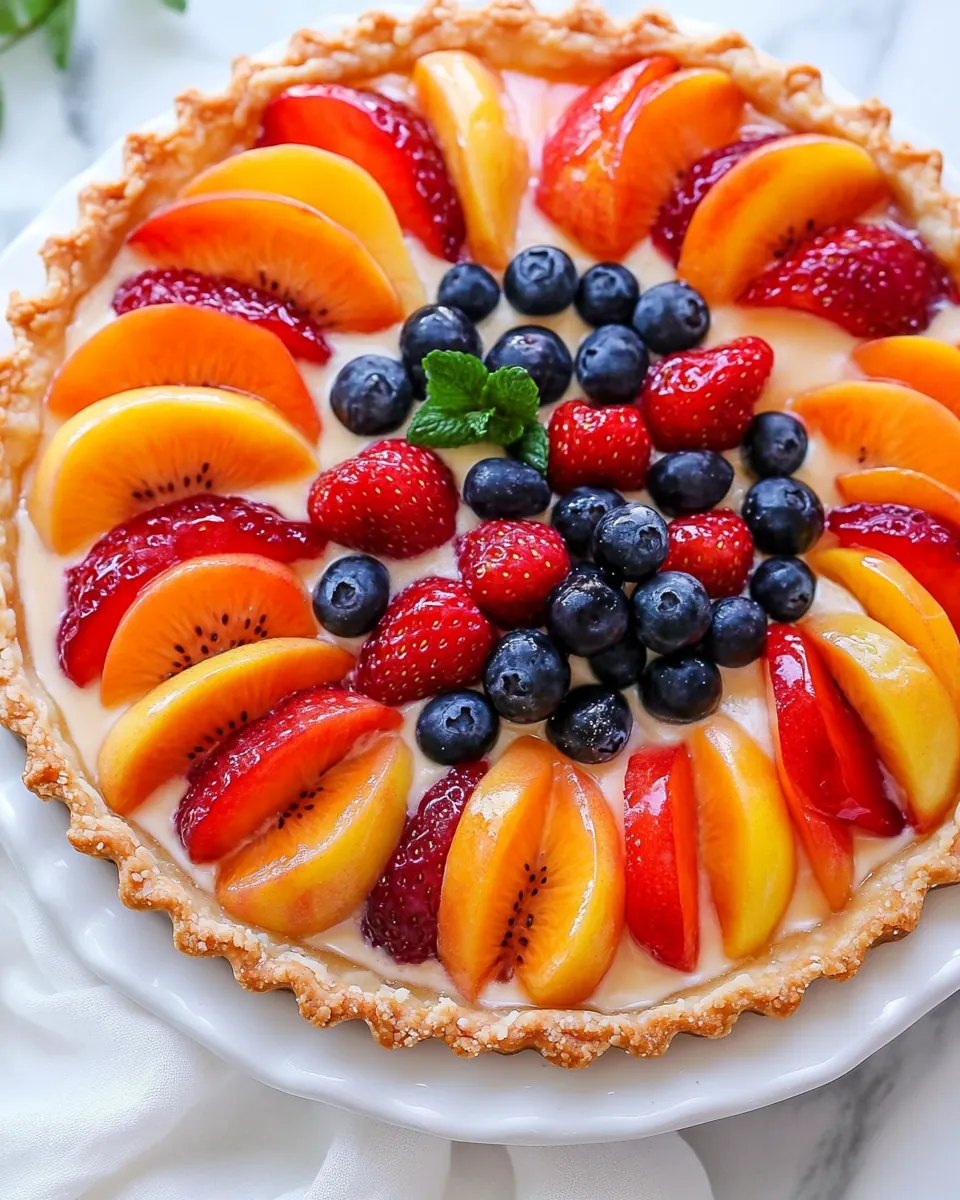
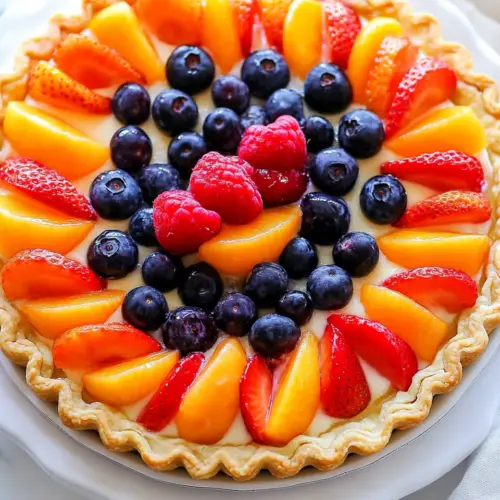
- Arrange your fruit to your preference: The sound of berries nudging together and the bright colors coming into a pattern is part of the pleasure of assembling the tart. Whether you create concentric rings or scatter the fruit freely, aim for balance in color and texture so each slice looks attractive. Place firmer pieces first to anchor the design and then nestle softer berries in between to prevent crushing. A mistake I see is overcrowding the surface, which can cause fruit juices to pool and make the tart wet, so leave a little breathing room between pieces.
- You can either arrange fruit in rings or scatter it randomly over the top: Rings produce a formal, classic look while a scattered approach feels rustic and lively. As you arrange, step back and view the tart from different angles to ensure visual harmony; sometimes moving one berry changes the whole composition. Think about height and contrast, placing taller pieces near the center or edges to create depth. Avoid adding fruit that is too soft or overripe since it will break down and affect the clean presentation, which is a common pitfall.
- Make the Glaze: The process of warming the preserves releases a sweet, slightly jammy aroma and thins the mixture so it brushes on smoothly without clumping. Warm gently until the preserves loosen, then strain if you prefer a clearer finish; the warm glaze will seep into crevices and highlight colors. Apply with a light hand so you get a uniform sheen that also acts as a protective coat to keep the fruit fresh. Overheating will make the glaze thin and runny, and too thick an application leaves sticky patches, both mistakes to avoid.
- In a heat safe bowl, combine apricot preserves and 1 Tbsp water and microwave for 30 seconds just enough to soften and loosen up the preserves: The microwave will make the preserves glossy and pourable, and the small amount of water prevents them from getting scorched while heating. If you prefer, warm the preserves gently on the stovetop so you can control the temperature more precisely. Straining out large fruit pieces will create a smooth finish that enhances the tart's presentation. Watch carefully while warming to avoid boiling, which can alter the flavor and texture.
- If preserves have a lot of fruit pieces, you can strain those out: Straining produces a clearer, more professional glaze that reflects light and makes the fruit pop. Use a fine mesh sieve and press gently to extract the liquid, discarding large solids. The resulting glaze should coat the fruit thinly and evenly, which helps keep the surface tidy. Leaving large pieces in the glaze can lead to lumps and uneven shine, which detracts from the final appearance.
- Use a pastry brush to brush preserves over the fruit, applying an even coating over all the fruit: The brushing step feels almost meditative as the tart goes from natural to polished, and the shine it creates is immediate and satisfying. Work quickly while the glaze is warm so it spreads easily and seals the fruit, but be gentle to avoid dislodging delicate berries. Allow the glaze to set briefly before serving so it forms a subtle, tacky layer rather than running off the fruit. A typical error is overbrushing one area and leaving others dry, so aim for consistent, light strokes.
Change It Up
These ideas help you personalize the tart while keeping the core technique intact. Small changes in fruit, presentation, or minor process tweaks can dramatically alter the final mood without complicating the workflow.
- Swap the fruit for seasonality Try stone fruit in late summer or pears in early fall for a different flavor profile while keeping the same assembly method.
- Use a mix of textures Combine soft berries with firmer citrus segments to add bite and visual contrast across slices.
- Thin the glaze with different liquids If you want a slightly less sweet finish, thin the preserves with a splash of water or citrus juice for a brighter note.
- Make individual tarts Use tartlet pans to turn the recipe into portable, single serving desserts perfect for parties.
- Finish with a dusting Lightly dusting the edge of the crust with powdered sugar gives a delicate, bakery style flourish without altering taste.
What to Pair With Fruit Tart Recipe
This tart shines at summer gatherings but also adapts well to many occasions. I like serving it after a light lunch, for an afternoon tea, or as a centerpiece dessert at holiday brunches. Pairings can be simple and complementary, and storage tips help the tart stay fresh between serving times.
- Light beverages Serve alongside herbal tea or a chilled nonalcoholic sparkling drink to complement the fruit without overpowering it.
- Cheese board For a brunch spread, offer a small cheese selection and breads so guests can alternate savory and sweet bites.
- Occasions This tart is ideal for summer picnics, brunches, and special gatherings where a visually appealing dessert is welcome.
- Storage Keep the tart refrigerated covered loosely with plastic wrap for up to two days, brushing a fresh coat of warm glaze before serving if needed to revive shine.
- Seasonal pairings In summer focus on berries and stone fruit, in fall incorporate firmer fruit like pears, and adjust the glaze to complement the chosen fruit.
FAQ
Conclusion
This Fruit Tart Recipe stands out for its harmonious combination of a tender, buttery crust, silky pastry cream, and bright seasonal fruit finished with a glossy apricot glaze. It is both elegant and forgiving, allowing you to prepare components ahead of time and assemble the tart just before serving. Give it a try when you want a dessert that looks special yet remains approachable, and enjoy how a few high quality ingredients elevate the whole experience.
Fruit Tart Recipe
Equipment
- 10 to 11 inch tart pan
- Wire Rack
- Offset Spatula
- Pastry Brush
- Heat safe bowl
Ingredients
- 1 Sweet Tart Dough Recipe, Pate Sucre Provides a sturdy, sweet pastry base to hold fillings and fruit; creates a crisp, tender shell when blind-baked and cooled. Enhances texture contrast with its buttery flavor and supports slicing for attractive presentation.
- 1 Pastry Cream Recipe Supplies a smooth, creamy custard layer that anchors the fruit and adds rich vanilla flavor; thickens properly when cooked and chilled to maintain structure. Balances sweetness and adds a luscious mouthfeel between crust and fruit.
- 4 cups fresh fruit or berries, strawberries, blueberries, raspberries, blackberries, clementine segments, etc Offers bright, fresh seasonal flavor and varied textures that crown the tart; contributes color, juiciness, and natural sweetness or tartness depending on selection. Allows customization and visual appeal while providing contrast to the pastry cream and crust.
- 1/3 cup Apricot Preserves with 1 Tbsp water Creates a glossy finish and light sweetness when warmed and brushed over the assembled fruit; thins with water to a spreadable glaze that seals in freshness. Adds shine, helps hold fruit in place, and extends shelf life by preventing drying.
Instructions
- Make Pastry Cream Recipe first since it needs time to set. Place a sheet of plastic wrap directly over the surface and cool the cream to room temperature then refrigerate for 2 hours to set. You can make the cream a few days ahead.: The custard will feel velvety and fragrant as you whisk it, with a gentle steam rising while you thicken it on the stovetop; this aroma is a comforting cue that things are going well. Cooling the cream with plastic wrap pressed to the surface keeps a glossy, smooth top and prevents a skin from forming, which would create an unattractive texture under the fruit. I always taste a small spoonful once it is cool to check seasoning, because the cold cream reveals flavors differently than when warm. A useful tip is to stir occasionally as it cools to distribute any remaining warmth evenly so it chills uniformly in the refrigerator. If you skip the wrap, you may get a skin that leaves lumps when you spread the cream, which is the main mistake to avoid here.
- Make the Tart Crust Recipe in a 10 to 11-inch round tart pan. Once baked, remove from the oven and transfer the pan to a wire rack to cool completely to room temperature then carefully release the tart from the pan. You can leave the bottom of the pan on if you prefer.: When the custard has a satin sheen and no steam escapes, it is time to cover it and let it come down to room temperature before chilling. This step ensures the center firms and develops a custardy mouthfeel rather than staying loose and runny, which would make assembly messy. During refrigeration the cream tightens slightly and becomes easier to spread, yielding clean slices. Keep the bowl level in the fridge so the texture sets evenly. A common misstep is putting hot cream directly into a cold fridge which can raise the fridge temperature and compromise safety, so cool briefly on the counter first.
- Set the tart pan over your serving platter (it will be hard to transfer once the crust is filled). Spread the pastry cream evenly into the tart pan.: Allowing the custard to rest in the fridge for a day or two deepens the flavor and makes day of service straightforward. The cream will smell a touch sweeter as it rests, and its body will feel denser to the spoon, which helps the tart hold its shape. Before using, give it a gentle whisk to restore a silky texture if it has stiffened slightly. Store it tightly covered to avoid absorbing other fridge aromas. Avoid leaving it out for extended periods when serving, as long exposure can soften the cream and make slicing messy.
- Arrange your fruit to your preference. You can either arrange fruit in rings or scatter it randomly over the top.: As the dough bakes, the kitchen fills with a warm, buttery scent and the edges turn a pale golden brown; these visual cues indicate the crust is done. Cooling the shell on a wire rack prevents steam buildup underneath, which would soften the bottom. Press the dough evenly into the pan to avoid thin spots that can burn, and dock the base lightly to prevent large air pockets. If the crust is underbaked it will feel doughy and compromise the structural integrity of the tart, which is a mistake I have seen many cooks make when they pull it out too early.
- Make the Glaze: In a heat-safe bowl, combine apricot preserves and 1 Tbsp water and microwave for 30 seconds just enough to soften and loosen up the preserves. If preserves have a lot of fruit pieces, you can strain those out. Use a pastry brush to brush preserves over the fruit, applying an even coating over all the fruit.: As it cools, the crust firms up and stops crisping, making it safe to unmold without cracking. If you leave the bottom in, the tart will still be easy to serve and you reduce the risk of breaking the shell while transferring. The cooled crust should sound slightly hollow if tapped gently, which signals it is dry enough to hold the filling. A common error is attempting to fill a warm crust, which causes the pastry cream to loosen and soak into the base, sacrificing texture.
- Set the tart pan over your serving platter: Positioning the pan on the serving plate before filling avoids the risky maneuver of moving a filled tart. The weight and placement will feel stable as you work, and it allows you to align the finished tart on the platter exactly where you want it. I find this step reduces stress because you can adjust the edge and presentation while the tart is still accessible. The mistake to avoid is trying to slide a filled tart onto a platter after assembling, which often results in spills.
- Spread the pastry cream evenly into the tart pan: The cream should spread like satin under your spatula, settling into the shell without gaps or air pockets. Use a small offset spatula to coax the cream close to the edges and maintain an even thickness so every slice has a satisfying ratio of crust to filling. Smooth the surface with light strokes to remove air and create a glossy plane for the fruit. If you apply the cream unevenly, fruit will rock on top and slices will be inconsistent, which is the common presentation error to watch for.
- Arrange your fruit to your preference: The sound of berries nudging together and the bright colors coming into a pattern is part of the pleasure of assembling the tart. Whether you create concentric rings or scatter the fruit freely, aim for balance in color and texture so each slice looks attractive. Place firmer pieces first to anchor the design and then nestle softer berries in between to prevent crushing. A mistake I see is overcrowding the surface, which can cause fruit juices to pool and make the tart wet, so leave a little breathing room between pieces.
- You can either arrange fruit in rings or scatter it randomly over the top: Rings produce a formal, classic look while a scattered approach feels rustic and lively. As you arrange, step back and view the tart from different angles to ensure visual harmony; sometimes moving one berry changes the whole composition. Think about height and contrast, placing taller pieces near the center or edges to create depth. Avoid adding fruit that is too soft or overripe since it will break down and affect the clean presentation, which is a common pitfall.
- Make the Glaze: The process of warming the preserves releases a sweet, slightly jammy aroma and thins the mixture so it brushes on smoothly without clumping. Warm gently until the preserves loosen, then strain if you prefer a clearer finish; the warm glaze will seep into crevices and highlight colors. Apply with a light hand so you get a uniform sheen that also acts as a protective coat to keep the fruit fresh. Overheating will make the glaze thin and runny, and too thick an application leaves sticky patches, both mistakes to avoid.
- In a heat safe bowl, combine apricot preserves and 1 Tbsp water and microwave for 30 seconds just enough to soften and loosen up the preserves: The microwave will make the preserves glossy and pourable, and the small amount of water prevents them from getting scorched while heating. If you prefer, warm the preserves gently on the stovetop so you can control the temperature more precisely. Straining out large fruit pieces will create a smooth finish that enhances the tart's presentation. Watch carefully while warming to avoid boiling, which can alter the flavor and texture.
- If preserves have a lot of fruit pieces, you can strain those out: Straining produces a clearer, more professional glaze that reflects light and makes the fruit pop. Use a fine mesh sieve and press gently to extract the liquid, discarding large solids. The resulting glaze should coat the fruit thinly and evenly, which helps keep the surface tidy. Leaving large pieces in the glaze can lead to lumps and uneven shine, which detracts from the final appearance.
- Use a pastry brush to brush preserves over the fruit, applying an even coating over all the fruit: The brushing step feels almost meditative as the tart goes from natural to polished, and the shine it creates is immediate and satisfying. Work quickly while the glaze is warm so it spreads easily and seals the fruit, but be gentle to avoid dislodging delicate berries. Allow the glaze to set briefly before serving so it forms a subtle, tacky layer rather than running off the fruit. A typical error is overbrushing one area and leaving others dry, so aim for consistent, light strokes.
Notes
- Swap the fruit for seasonality Try stone fruit in late summer or pears in early fall for a different flavor profile while keeping the same assembly method.
- Use a mix of textures Combine soft berries with firmer citrus segments to add bite and visual contrast across slices.
- Thin the glaze with different liquids If you want a slightly less sweet finish, thin the preserves with a splash of water or citrus juice for a brighter note.
- Make individual tarts Use tartlet pans to turn the recipe into portable, single serving desserts perfect for parties.
- Finish with a dusting Lightly dusting the edge of the crust with powdered sugar gives a delicate, bakery style flourish without altering taste.