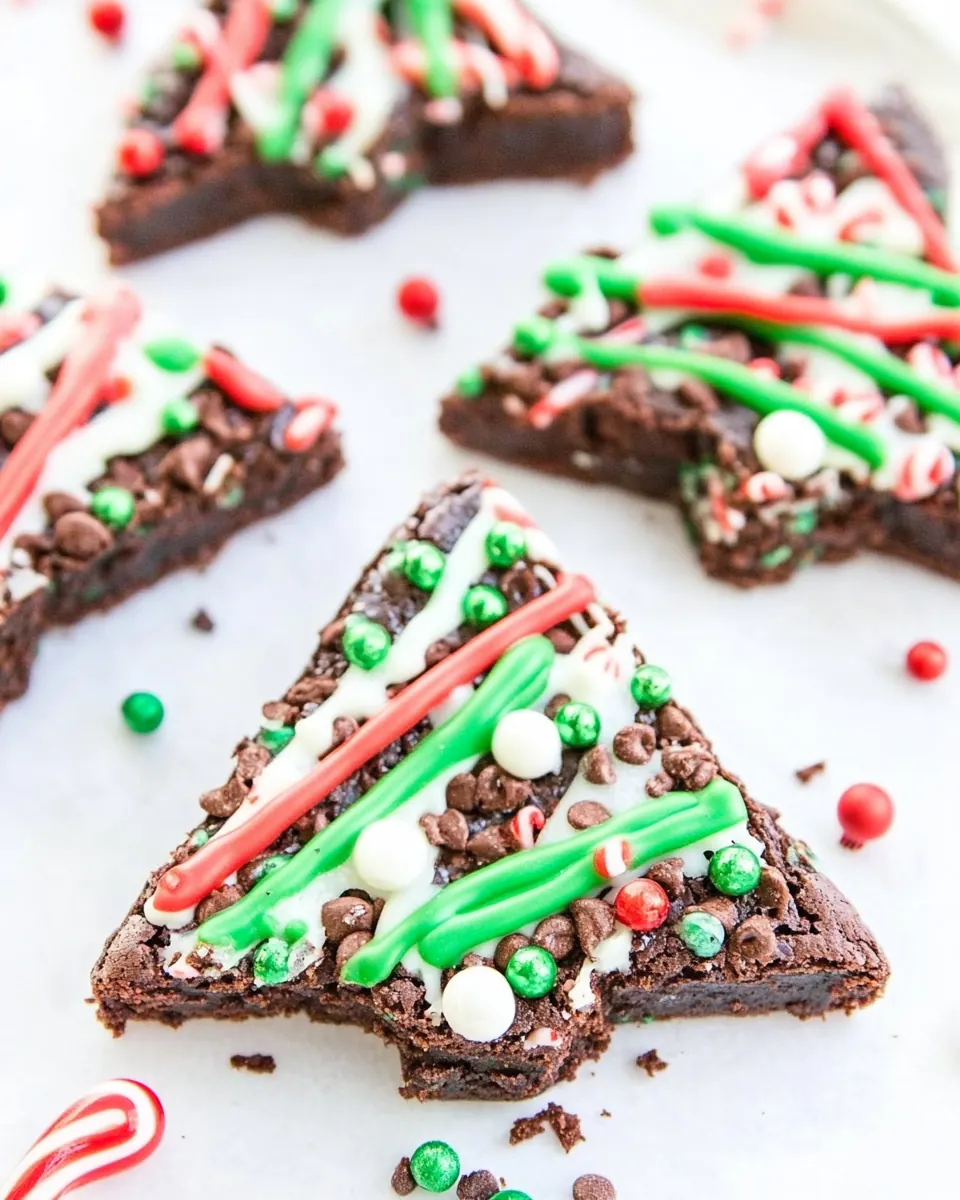
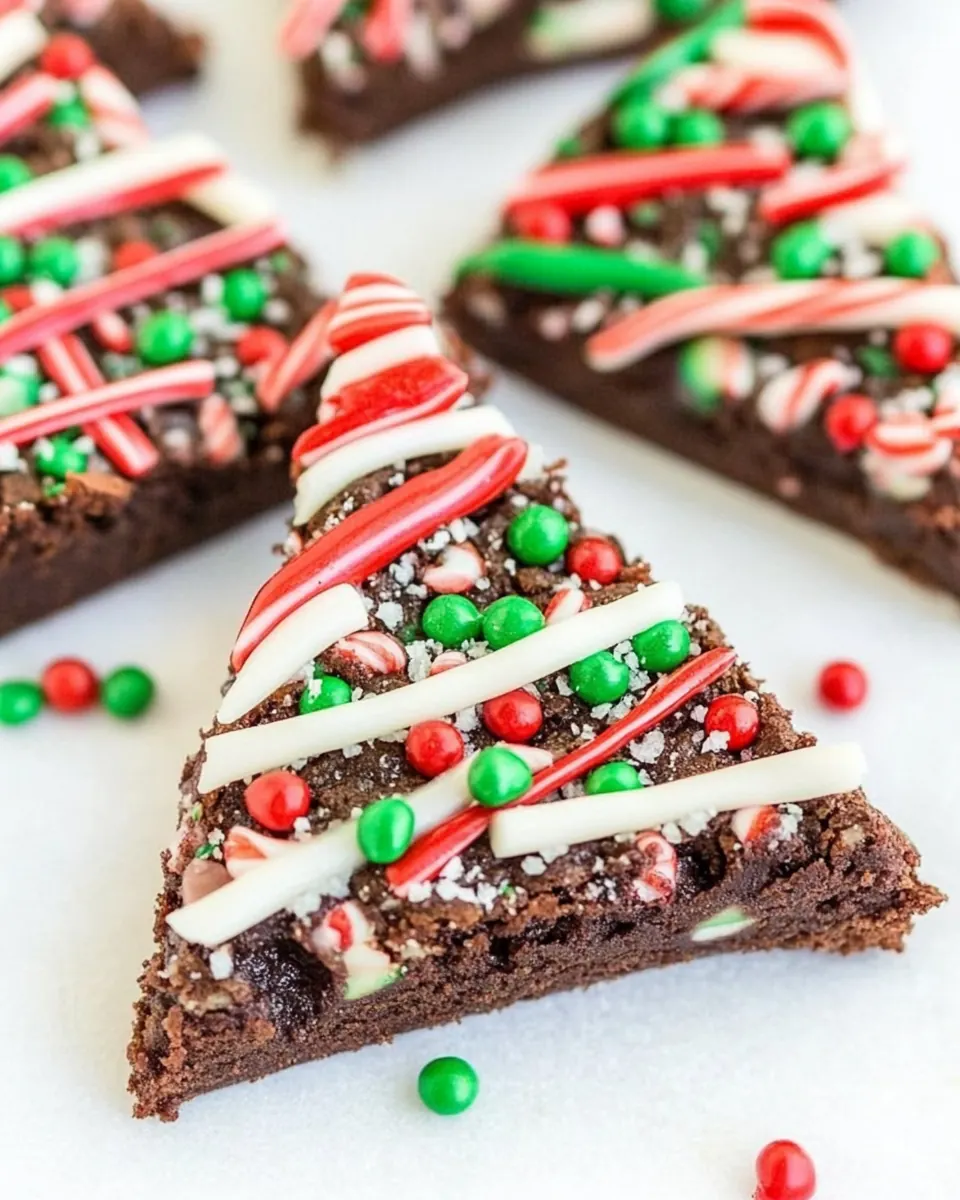
Brownie Christmas Trees
Brownie Christmas Trees have been one of my favorite holiday projects since I first tried them at a chaotic family cookie swap years ago.
That afternoon I found a quiet corner in the kitchen to turn a simple boxed mix into something that felt festive and handmade. I remember the sound of the oven door closing, and how the warm chocolate aroma wrapped around me like a cozy sweater. Decorating the little tree shapes became a calm, joyful ritual amid the bustle, and I loved how a few simple touches could make a tray of brownies look like a holiday centerpiece.
Kids hovered nearby, eager to taste, while grown ups admired the whimsical shapes and bright decorations. I learned small tricks that made assembly faster and neater, and I adjusted the piping technique so the frosting lays on like garlands rather than a flat smear. Over the years I’ve scaled the project up for potlucks and wrapped them individually as hostess gifts. These sweet treats always spark a handful of compliments and a few requests for the recipe.
Recipe Snapshot
45 mins
10 mins
35 mins
Medium
150 kcal
American
Keto, Vegan
Desserts
9×9 inch pan, Mixing bowl, Knife, Piping bag or small baggie
Why This Brownie Christmas Trees Shines
They are fast and festive
I love how Brownie Christmas Trees turn a quick baking session into something special. Using a boxed brownie mix keeps the process approachable, and the transformation into tiny trees makes them feel handcrafted. When time is tight, this recipe gives you a big visual payoff for minimal extra effort.
Kid friendly and interactive
We often invite kids to help decorate, and they respond to the piping and sprinkling with delight. The hands on element means you get a moment of shared creativity, plus you can easily adjust the level of involvement for younger decorators. It is a great way to keep little hands busy while adults chat.
Adaptable and portable
Because the components are simple, I’ve packed these for potlucks, holiday gatherings, and casual family nights. The finished trees travel well when set, and they store nicely at room temperature for a day or two. That portability makes them a reliable option for any festive spread.
Great texture contrast
The fudgy brownie base contrasts with creamy frosting and crunchy candies, giving a satisfying bite. I like that each mouthful mixes chewy chocolate with bright pops from the sprinkles and red hot candies, so the experience stays interesting from the first to the last piece.
Decorative impact with little fuss
From a distance these look like tiny edible trees, which always gets a reaction. Simple piping and a few candies create high visual appeal without complicated techniques. I appreciate recipes that let me focus on presentation without sacrificing taste.
Brownie Christmas Trees Ingredients

I treat the ingredient list as a toolkit of textures and color. The boxed brownie mix gives structure and a fudgy base, while the container of vanilla frosting acts as both glue and decorative canvas. Green food coloring transforms the frosting into a festive hue, and the sprinkles and red hot candies provide bright contrast. Candy canes become the trunk, adding a whimsical, crunchy handle you can hold. Together, these parts are designed to be simple to assemble and visually striking.
- 1 (18.3-ounce) box brownie mix: Provides the base batter for the brownies and supplies most of the dry mix and leavening. Use according to package directions to create a sturdy, fudgy cake that will be cooled and cut into tree shapes for decorating. Enhances texture and structure so the brownies hold up when stacked or frosted.
- 1 (16-ounce) container vanilla frosting: Creates a smooth, spreadable topping that doubles as adhesive and decorative icing for the trees. Tint with coloring to achieve a vivid green and apply evenly for a festive finish. Adds sweetness and a contrasting creamy texture to the dense brownie.
- green food coloring: Tint the frosting to a festive green hue to mimic evergreen branches and provide uniform color. A few drops go a long way; mix thoroughly until the shade is even and vibrant. Adjust intensity gradually to avoid over-coloring while preserving flavor.
- sprinkles and red hots: Provide colorful accents and small, sparkling details that emulate ornaments and garlands on each tree. Sprinkle generously over frosted brownie trees to add texture, crunch, and visual interest. Combine varieties for varied shapes and sizes that catch the eye.
- 6 candy canes: Serve as edible tree trunks or hanging decorations when placed at the base or top of each brownie tree. Break or use whole depending on desired presentation; they add peppermint flavor and structural contrast. Arrange thoughtfully so they complement the iced design and provide a crunchy bite.
- 12 red hot candies: Function as small round ornaments that can be pressed into the frosting to mimic classic red baubles. Place individually across each tree to create a balanced, colorful look and a burst of cinnamon flavor. Use sparingly so the candies don't overwhelm the sweet frosting.
How to Prepare Brownie Christmas Trees
These directions are straightforward and satisfying, turning a baked pan into whimsical tree shapes. I like to work in stages, baking first, then cooling completely before cutting, and finally decorating with colored frosting and candies. Tidy setup and patience at the decorating stage make the final presentation much neater.
- Line a 9×9 brownie pan with foil then coat with vegetable spray.: The moment you place the lined pan on the counter you should notice how the foil shine makes the pan look clean and ready; lining ensures easy lift out later, which preserves the edges of your brownie when you cut shapes. Use a light coat of vegetable spray so the foil does not stick, and smooth the foil carefully to avoid air pockets. A typical mistake is to skip lining, which makes removal messy and can tear brownies; take the extra minute to line and spray.
- In a large bowl, prepare the brownie mix as directed on the box and bake as directed for a 9×9-inch pan.: As you mix, pay attention to the batter texture, which should be glossy and thick but pourable; this influences the fudgy crumb. While the brownies bake, the kitchen will fill with a warm chocolate perfume, a good cue the oven is doing its job. Avoid overmixing which can make the brownie cakier instead of fudgy, and resist opening the oven too often which drops temperature and affects rise.
- Remove from oven, let cool completely, and then lift out.: Cooling fully is critical because warm brownie will crumble when cut and the frosting will melt on contact. You should feel a firm surface and only a faint give when pressed lightly. If you try to cut or decorate too soon, edges will crumble and frosting will slide, so be patient and let it cool until set.
- Cut into three equal strips and then cut each strip into 4 triangles.: When you begin cutting you will hear a soft slicing sound and see neat chocolate edges form, which is the right visual sign. Cutting into strips first gives uniformity, and triangles create the tree silhouette everyone recognizes. Use a sharp knife wiped between cuts to prevent dragging crumbs across slices; a dull knife often causes ragged edges.
- Cut candy canes into about 2-inch pieces and place them in the end of a triangle brownie.: As you snap the candy canes you will notice a crisp crack and the sugary scent of peppermint; these short pieces serve as the trunk and make the trees handheld. Press them gently into the base of each triangle so they anchor without splitting the brownie. A common error is forcing the candy too deep which can fracture the brownie, so insert with measured pressure.
- Mix 1/2 can of frosting with green food coloring (about 20-25 drops).: The moment color touches the frosting you will see it transform into a vibrant green, which is satisfying and helps set the mood. Stir until the color is even and the frosting retains a thick pipeable consistency; if it gets too loose, chill briefly. Too much coloring or stirring can thin the frosting, so adjust in small increments.
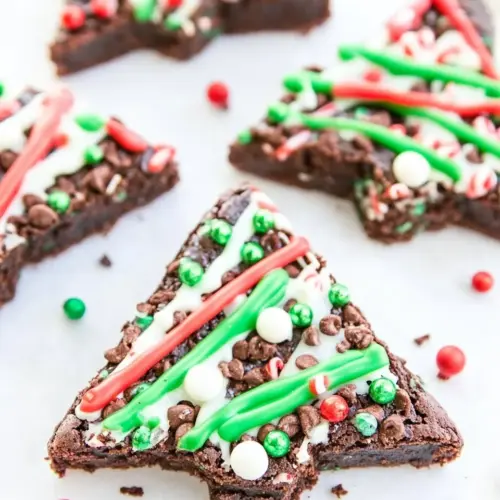
- Place frosting in a small baggie and snip the end. Starting at the top of the brownie triangle, pipe on frosting garland moving from side to side as you work down to the bottom.: When you squeeze the bag you want a steady ribbon of frosting that holds shape, not a liquid stream. The small snip controls the thickness of garlands, and practicing a bit on parchment helps you find the right amount of pressure. Cutting too large a hole results in blobs rather than delicate garlands, so start small and widen if needed.
- Sprinkle as desired and top with a red hot candy.: As you pipe each curve, notice how the frosting settles, holding a ribbon like a tiny garland; that texture is the satisfying payoff and creates the tree layers. Work steadily from top to bottom so the design flows and you can space ornaments evenly. A frequent mistake is piping too fast which creates uneven lines, so take deliberate, even squeezes to maintain control.
- Sprinkle as desired and top with a red hot candy.: The final touch of sprinkles and a single red hot candy at the top provides color contrast and a festive focal point. Lightly tap the tray so any loose bits settle into the frosting, then let the trees rest to set. Adding decorations while the frosting is too soft will cause them to sink or slide, so wait until the garlands hold their shape.
Tips for Success

These tips will help you produce neat, stable Brownie Christmas Trees that look as good as they taste. A few adjustments in texture control and timing make decorating smoother and storage easier. Read through them and pick the ones that fit your rhythm in the kitchen.
- Prep ahead: Bake the brownies a day in advance and fully cool them wrapped to make cutting and decorating less rushed on the day you plan to serve.
- Use gel coloring: Gel green food coloring gives vivid color without thinning the frosting, so you keep a pipeable texture.
- Practice piping: Try a few strokes on parchment to get comfortable with pressure and tip size before decorating the actual trees.
- Slice with care: Cut slowly with a sharp knife, wiping the blade after each pass to maintain clean edges on the triangle shapes.
- Set time: Let decorated trees rest for 20 to 30 minutes so the frosting firms and the candies adhere firmly before storing or transporting.
Pairing Suggestions for Brownie Christmas Trees
These handheld treats work across many festive occasions and pair well with simple beverages and complementary sweets. Below are ideas for serving, storage, and occasions where they shine. Use the list to plan presentation, whether for a casual get together or a formal holiday table.
- Casual parties: Arrange on a platter with varying heights so each Brownie Christmas Trees stands out; they are ideal for a cookie exchange or potluck where guests can grab and go.
- Gift giving: Wrap individual trees in clear cellophane and tie with ribbon for a homemade hostess gift that travels well for short distances.
- Holiday dessert table: Place near a bowl of complementary candies and a sign so guests know these are handheld; include a small stack of napkins for convenience.
- Storage tips: Allow decorated pieces to set, then store in an airtight container at room temperature for two to three days, or freeze in a freezer bag for up to three months.
- Occasions: Perfect for Christmas gatherings, school holiday parties, or any festive event where portable, decorative sweets are welcome.
FAQ
Conclusion
What makes these Brownie Christmas Trees special is how simple pantry items become a festive, shareable treat with minimal effort. They bring together a fudgy chocolate base, creamy green frosting, and bright candy accents for a joyful holiday bite. I encourage you to try them the next time you need a quick party dessert or a homemade gift; the process is playful and the results are undeniably charming. Enjoy the decorating, and feel free to put your own spin on the ornament choices to match your celebration.
Brownie Christmas Trees
Equipment
- 9x9 inch pan
- Mixing Bowl
- Knife
- Piping bag or small baggie
Ingredients
- 1 (18.3-ounce) box brownie mix Provides the base batter for the brownies and supplies most of the dry mix and leavening. Use according to package directions to create a sturdy, fudgy cake that will be cooled and cut into tree shapes for decorating. Enhances texture and structure so the brownies hold up when stacked or frosted.
- 1 (16-ounce) container vanilla frosting Creates a smooth, spreadable topping that doubles as adhesive and decorative icing for the trees. Tint with coloring to achieve a vivid green and apply evenly for a festive finish. Adds sweetness and a contrasting creamy texture to the dense brownie.
- green food coloring Tint the frosting to a festive green hue to mimic evergreen branches and provide uniform color. A few drops go a long way; mix thoroughly until the shade is even and vibrant. Adjust intensity gradually to avoid over-coloring while preserving flavor.
- sprinkles and red hots Provide colorful accents and small, sparkling details that emulate ornaments and garlands on each tree. Sprinkle generously over frosted brownie trees to add texture, crunch, and visual interest. Combine varieties for varied shapes and sizes that catch the eye.
- 6 candy canes Serve as edible tree trunks or hanging decorations when placed at the base or top of each brownie tree. Break or use whole depending on desired presentation; they add peppermint flavor and structural contrast. Arrange thoughtfully so they complement the iced design and provide a crunchy bite.
- 12 red hot candies Function as small round ornaments that can be pressed into the frosting to mimic classic red baubles. Place individually across each tree to create a balanced, colorful look and a burst of cinnamon flavor. Use sparingly so the candies don't overwhelm the sweet frosting.
Instructions
- Line a 9×9 brownie pan with foil then coat with vegetable spray.: The moment you place the lined pan on the counter you should notice how the foil shine makes the pan look clean and ready; lining ensures easy lift out later, which preserves the edges of your brownie when you cut shapes. Use a light coat of vegetable spray so the foil does not stick, and smooth the foil carefully to avoid air pockets. A typical mistake is to skip lining, which makes removal messy and can tear brownies; take the extra minute to line and spray.
- In a large bowl, prepare the brownie mix as directed on the box and bake as directed for a 9×9-inch pan.: As you mix, pay attention to the batter texture, which should be glossy and thick but pourable; this influences the fudgy crumb. While the brownies bake, the kitchen will fill with a warm chocolate perfume, a good cue the oven is doing its job. Avoid overmixing which can make the brownie cakier instead of fudgy, and resist opening the oven too often which drops temperature and affects rise.
- Remove from oven, let cool completely, and then lift out.: Cooling fully is critical because warm brownie will crumble when cut and the frosting will melt on contact. You should feel a firm surface and only a faint give when pressed lightly. If you try to cut or decorate too soon, edges will crumble and frosting will slide, so be patient and let it cool until set.
- Cut into three equal strips and then cut each strip into 4 triangles.: When you begin cutting you will hear a soft slicing sound and see neat chocolate edges form, which is the right visual sign. Cutting into strips first gives uniformity, and triangles create the tree silhouette everyone recognizes. Use a sharp knife wiped between cuts to prevent dragging crumbs across slices; a dull knife often causes ragged edges.
- Cut candy canes into about 2-inch pieces and place them in the end of a triangle brownie.: As you snap the candy canes you will notice a crisp crack and the sugary scent of peppermint; these short pieces serve as the trunk and make the trees handheld. Press them gently into the base of each triangle so they anchor without splitting the brownie. A common error is forcing the candy too deep which can fracture the brownie, so insert with measured pressure.
- Mix 1/2 can of frosting with green food coloring (about 20-25 drops).: The moment color touches the frosting you will see it transform into a vibrant green, which is satisfying and helps set the mood. Stir until the color is even and the frosting retains a thick pipeable consistency; if it gets too loose, chill briefly. Too much coloring or stirring can thin the frosting, so adjust in small increments.
- Place frosting in a small baggie and snip the end. Starting at the top of the brownie triangle, pipe on frosting garland moving from side to side as you work down to the bottom.: When you squeeze the bag you want a steady ribbon of frosting that holds shape, not a liquid stream. The small snip controls the thickness of garlands, and practicing a bit on parchment helps you find the right amount of pressure. Cutting too large a hole results in blobs rather than delicate garlands, so start small and widen if needed.
- Sprinkle as desired and top with a red hot candy.: As you pipe each curve, notice how the frosting settles, holding a ribbon like a tiny garland; that texture is the satisfying payoff and creates the tree layers. Work steadily from top to bottom so the design flows and you can space ornaments evenly. A frequent mistake is piping too fast which creates uneven lines, so take deliberate, even squeezes to maintain control.
- Sprinkle as desired and top with a red hot candy.: The final touch of sprinkles and a single red hot candy at the top provides color contrast and a festive focal point. Lightly tap the tray so any loose bits settle into the frosting, then let the trees rest to set. Adding decorations while the frosting is too soft will cause them to sink or slide, so wait until the garlands hold their shape.
Notes
- Prep ahead: Bake the brownies a day in advance and fully cool them wrapped to make cutting and decorating less rushed on the day you plan to serve.
- Use gel coloring: Gel green food coloring gives vivid color without thinning the frosting, so you keep a pipeable texture.
- Practice piping: Try a few strokes on parchment to get comfortable with pressure and tip size before decorating the actual trees.
- Slice with care: Cut slowly with a sharp knife, wiping the blade after each pass to maintain clean edges on the triangle shapes.
- Set time: Let decorated trees rest for 20 to 30 minutes so the frosting firms and the candies adhere firmly before storing or transporting.