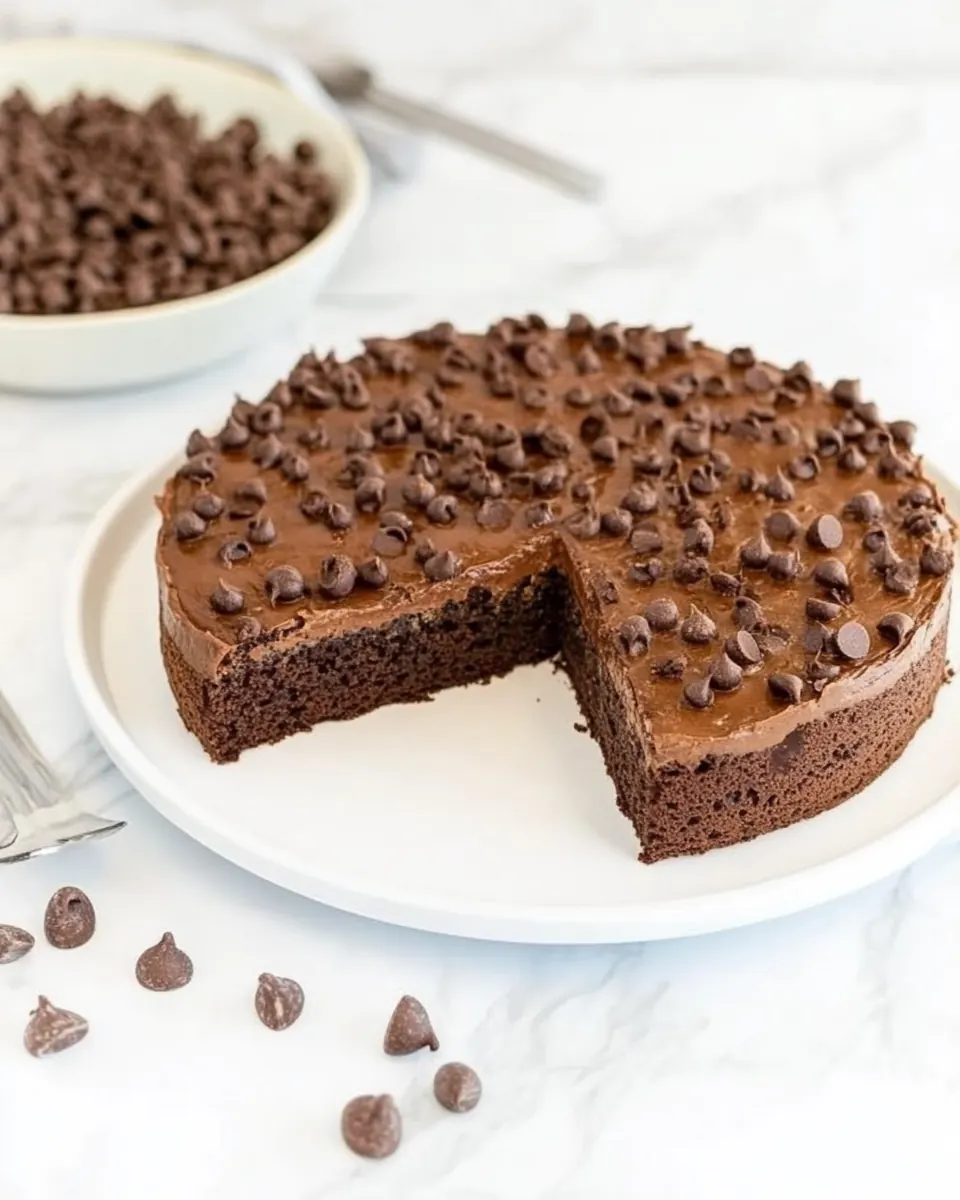
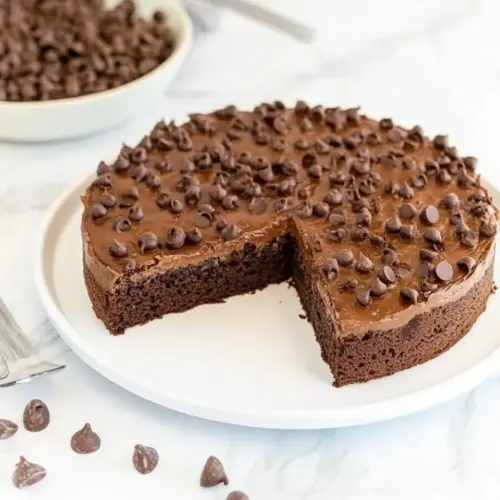
Chocolate Ricotta Cake
Chocolate Ricotta Cake has been one of those recipes that sneaks into my weeknights and weekend celebrations alike, showing up whenever I want something comforting yet a little elegant. I first made this cake on a rainy afternoon when I had a partially used tub of ricotta cheese and a bar of dark chocolate begging to be used. The result felt like a cozy cross between a cheesecake and a brownie, with a tender crumb and a deep chocolate note that lingered after every bite.
Over time I learned how tiny adjustments change everything, from the way the batter smells as the eggs and sugar are whisked into the ricotta, to the comforting crackle when the outer edge sets in the oven. Each attempt taught me a small secret, like why sifting the all purpose flour with the cocoa powder creates a lighter texture, or how cooling the cake completely makes it slice more cleanly. Friends began asking for the recipe, saying it tasted fancy yet was surprisingly simple.
Recipe Snapshot
50 mins
10 mins
40 mins
Medium
300 kcal
Italian
Gluten-Free, Low FODMAP
Desserts
9-inch springform pan, Mixing bowls, Whisk, Spatula, Sieve, Microwave-safe bowl
The Appeal of This Chocolate Ricotta Cake
Rich, Creamy Texture Without Fuss
I love that Chocolate Ricotta Cake delivers a silky, almost custardy crumb from the simple addition of ricotta cheese. The ricotta keeps the cake moist and lends a subtle tang, which balances the deep cocoa and dark chocolate flavors. You get complexity without complicated steps.
Deep Chocolate Flavor
The combination of melted dark chocolate and sifted cocoa powder gives the cake an intense chocolate profile that is more sophisticated than a standard chocolate cake. I always notice how the aroma fills the kitchen when the batter hits the oven, and guests comment on that rich, satisfying chocolate note.
Simple Pantry Ingredients
What makes me reach for this recipe is how approachable the ingredient list is. Basic staples like eggs, sugar, and all purpose flour come together with a few extras like lemon zest to create something special. It’s a pantry-friendly dessert that feels elevated.
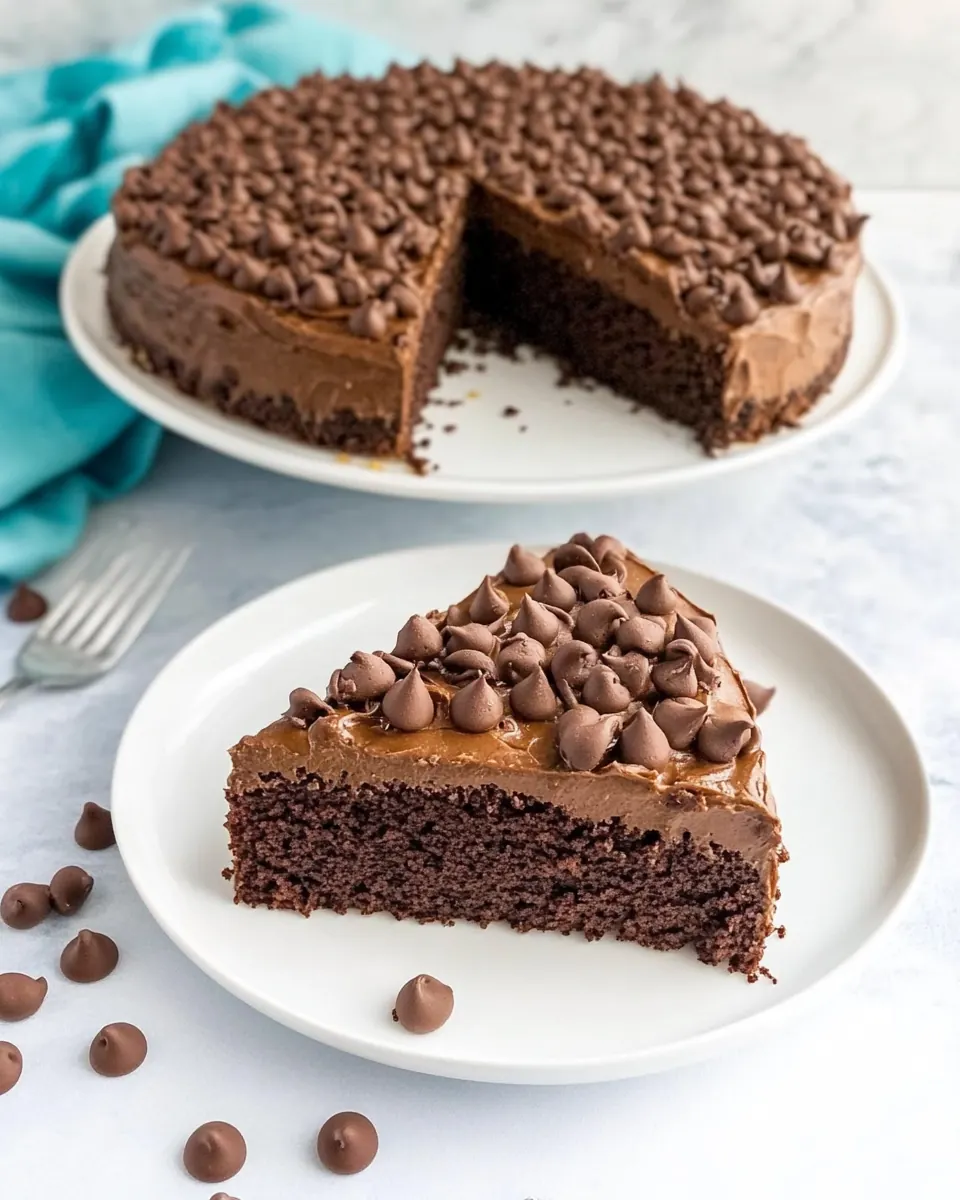
Flexible Serving Options
I appreciate how versatile Chocolate Ricotta Cake is. Serve it room temperature dusted with powdered sugar for coffee, or pair it with a scoop of vanilla ice cream for a celebration. It’s equally at home on a casual afternoon table or as the finishing touch to a dinner party.
Easy To Get Right
The method is forgiving, especially if you pay attention to a few small techniques like draining the ricotta cheese well and folding the dry ingredients gently. That means fewer disasters and more consistent wins, which is exactly what I want on busy days.
Key Ingredients for Chocolate Ricotta Cake
This is a cake that trusts quality more than frills. Each ingredient plays a precise role: the dark chocolate offers depth, the ricotta cheese brings moisture and tenderness, and the dry components like all purpose flour and cocoa powder provide structure and chocolate intensity. Together they create a balance of creaminess, density, and lift that makes this cake unique.
- 150 g dark chocolate, or dark chocolate chips: Melted and rich, provides the primary chocolate flavor and structure when tempered into the batter; contribute to moistness and cocoa intensity and pair well with ricotta for a fudgy crumb. Choose good-quality dark chocolate or chips for consistent melting and deeper taste.
- 300 g ricotta cheese, well drained: Well drained and creamy, adds moisture, tenderness, and a light, slightly tangy richness that balances the chocolate; helps create a dense but soft texture in the cake. Press out excess liquid to avoid thinning the batter and ensure proper crumb.
- 3 eggs: Beaten and aerating, bind the ingredients, add lift, and contribute to the cake’s structure and silkiness; yolks add fat and richness while whites provide protein for setting. Room-temperature eggs incorporate more evenly and improve volume.
- 180 g sugar: Granulated and sweetening, provides bulk sweetness, helps with browning and moisture retention, and contributes to tender crumb through interaction with eggs and fats. Adjust amount marginally for sweetness preference but keep proportions for texture.
- 1 tablespoon fresh lemon zest, or orange zest: Finely grated and brightening, adds a fragrant citrus aroma and a subtle acidic contrast that lifts the rich chocolate and ricotta flavors; zest oils enhance overall complexity without adding liquid. Use fresh lemon or orange depending on desired citrus note.
- a pinch of sea salt: Pinched and balancing, enhances overall flavor by heightening sweetness and reducing blandness while emphasizing chocolate depth; a small amount is sufficient to improve taste perception. Use sea salt for a cleaner mineral note.
- 185 g all-purpose flour: Sifted and structural, supplies the bulk of dry mass and forms the gluten network that supports the cake while combining with cocoa and ricotta for proper crumb; contributes to texture and chew. Measure accurately and avoid overmixing to prevent toughness.
- 30 g cocoa powder: Dutifully sifted and chocolaty, intensifies cocoa flavor without adding extra fat and helps darken the cake; absorbs some moisture so it must be balanced with wet ingredients. Use unsweetened cocoa powder for concentrated chocolate taste.
- 1 tablespoon baking powder, approx 15 gram: Leavening and measured, releases gases to help the cake rise and lighten the dense batter while contributing approximately 15 grams of chemical lift; works best when fresh to ensure predictable rise. Level the tablespoon and mix evenly into dry ingredients.
Recipe Steps for Chocolate Ricotta Cake
I like to keep the process relaxed yet precise, so you end up with a reliably tender cake. Follow each step with attention to the texture and scent of the batter, and you will be rewarded with a dessert that feels both rustic and refined. The following steps expand the original directions into detailed, sensory guidance.
- Preheat oven to 180°C/360°F and adjust a baking rack onto the middle shelf. Grease and line with parchment paper a 9-inch springform cake pan and set it aside.: As the oven warms the kitchen fills with a gentle heat that signals baking is coming, and placing the rack in the middle encourages even circulation so the cake cooks uniformly. You'll want the oven at an even temperature for consistent rise, so allow a few minutes after the indicator light goes off before inserting the cake. A common mistake is placing the rack too high, which browens the top too quickly while the center remains underbaked.
- Break the chocolate into small pieces, then place it in a microwave-safe bowl. Microwave on medium power (50%) for 15-30 second intervals. Stir after each interval until smooth and fully melted, set aside and let it cool slightly.: Preparing your pan this way prevents sticking and makes unmolding simple, revealing clean edges and preserving the cake's delicate texture. The parchment also helps you lift the cake out without scraping the sides. If you skip lining, the cake can cling and tear when removed, which affects presentation.
- In a large bowl whisk the ricotta cheese, eggs and sugar until you reach a creamy and lump-free mixture, about 4 minutes. Then add the melted dark chocolate, lemon zest and a pinch of sea salt.: Small pieces melt evenly, reducing the risk of hot spots and grainy texture, and you'll notice a glossy sheen as it becomes fluid. Stirring in short intervals helps distribute heat and keeps the chocolate smooth. Overheating is the main hazard here, so stop microwaving as soon as most pieces are melted and finish stirring to blend residual bits.
- Place a sieve/strainer over the bowl. Add the flour, cocoa powder and baking powder, and sift into the cake batter. Whisk until just combined (do not overmix).: The aroma of warm chocolate will fill the air and provide an immediate cue that you're on the right track, while cooling slightly protects the batter from cooking the eggs when combined. Cooling also helps the chocolate incorporate evenly into the batter. If it's too hot, you risk scrambling some of the eggs when mixed.
- Pour the cake batter into the prepared baking pan. The batter will be thick, similar to brownie batter, so use a spatula to smooth the top evenly. If desired, sprinkle extra chocolate chips or chopped dark chocolate over the top for added richness.: The motion of whisking aerates the mixture slightly, producing a lighter texture and smoothing out the ricotta cheese . You should see a uniform, glossy batter forming, and the rhythm of the whisk will give the mixture a pleasing sound as it thickens. If lumps remain, briefly pulse in a food processor instead of overworking by hand.
- Bake in the oven for approximately 40 minutes. During the last 10 minutes of baking time, cover the top of the cake with foil to prevent it from browning too much. To check if the cake is ready, insert a toothpick in the center, if it comes out clean, the cake is ready.: At this point the scent deepens, and you will notice the mixture turn luxuriously dark and silky, with citrus notes brightening the chocolate. Salt amplifies the chocolate flavors while the zest provides aromatic lift. If the melted chocolate is still hot, let it cool a bit more to protect the structure of the combined batter.
- Remove the ricotta chocolate cake from the oven, allow to cool completely, then gently remove the cake from the pan and serve.: Using a sieve ensures the dry ingredients fall in as a light dusting, which reduces clumps and encourages gentle incorporation for a tender crumb. The sifting action also helps distribute the baking powder evenly. Avoid tapping too hard which can cause an uneven cascade of flour and create pockets instead of a smooth blend.
- Dust the cake with powdered sugar and serve at room temperature. It's lovely topped with vanilla ice cream, fresh cream, or Greek yogurt.: As the fine dust of all purpose flour and cocoa powder drifts into the wet mix, you will see the batter thicken and take on a matte finish. Sifting prevents lumps and helps the leavening activate consistently. A common pitfall is adding all dry ingredients without sifting, which can lead to uneven pockets of unmixed flour.
- Whisk until just combined do not overmix: The batter should look homogenous but still slightly dense, similar to brownie batter, with no visible streaks of flour. Overmixing develops gluten and yields a chewier, less tender cake, so stop as soon as the last streak disappears. If you overwork the batter, the texture will be firmer and less delicate.
- Pour the cake batter into the prepared baking pan the batter will be thick similar to brownie batter so use a spatula to smooth the top evenly: The action of smoothing gives the cake a neat top and helps prevent high ridges that can crack. You will feel the batter's weight under the spatula, and it should settle to an even surface. If the batter is too sticky to smooth, a quick dampening of the spatula helps control the surface without adding water.
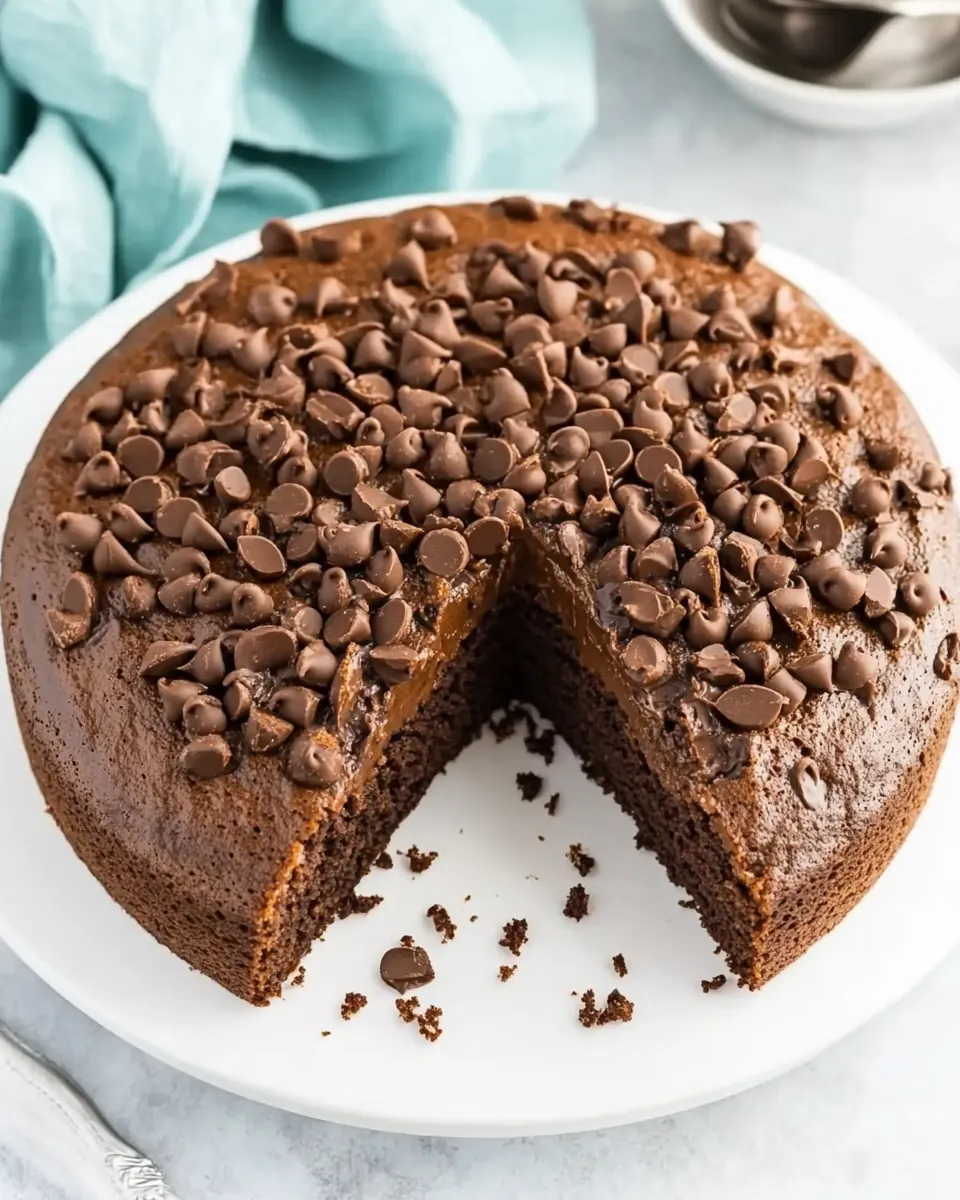
- If desired sprinkle extra chocolate chips or chopped dark chocolate over the top for added richness: These additions melt into little pockets, creating bursts of gooey chocolate and enhancing texture contrast. They also make the top look irresistible when they sheen after baking. Avoid adding too many or they may weigh the top down and affect rise.
- Bake in the oven for approximately 40 minutes during the last 10 minutes of baking time cover the top of the cake with foil to prevent it from browning too much: As the cake bakes you will notice a gentle dome and a crackled edge forming while the center sets; the aroma will become deeper and slightly toasted. Covering with foil late in baking preserves the color while allowing the center to finish cooking. If you leave it uncovered the top can overbrown and become dry while the center remains underdone.
- To check if the cake is ready insert a toothpick in the center if it comes out clean the cake is ready: The toothpick test gives a tactile confirmation of doneness, indicating the interior is set. The top should spring slightly when pressed and the edges will have pulled away from the pan. If the toothpick shows wet batter, return the cake to the oven for a few more minutes, as underbaking leaves a gummy texture.
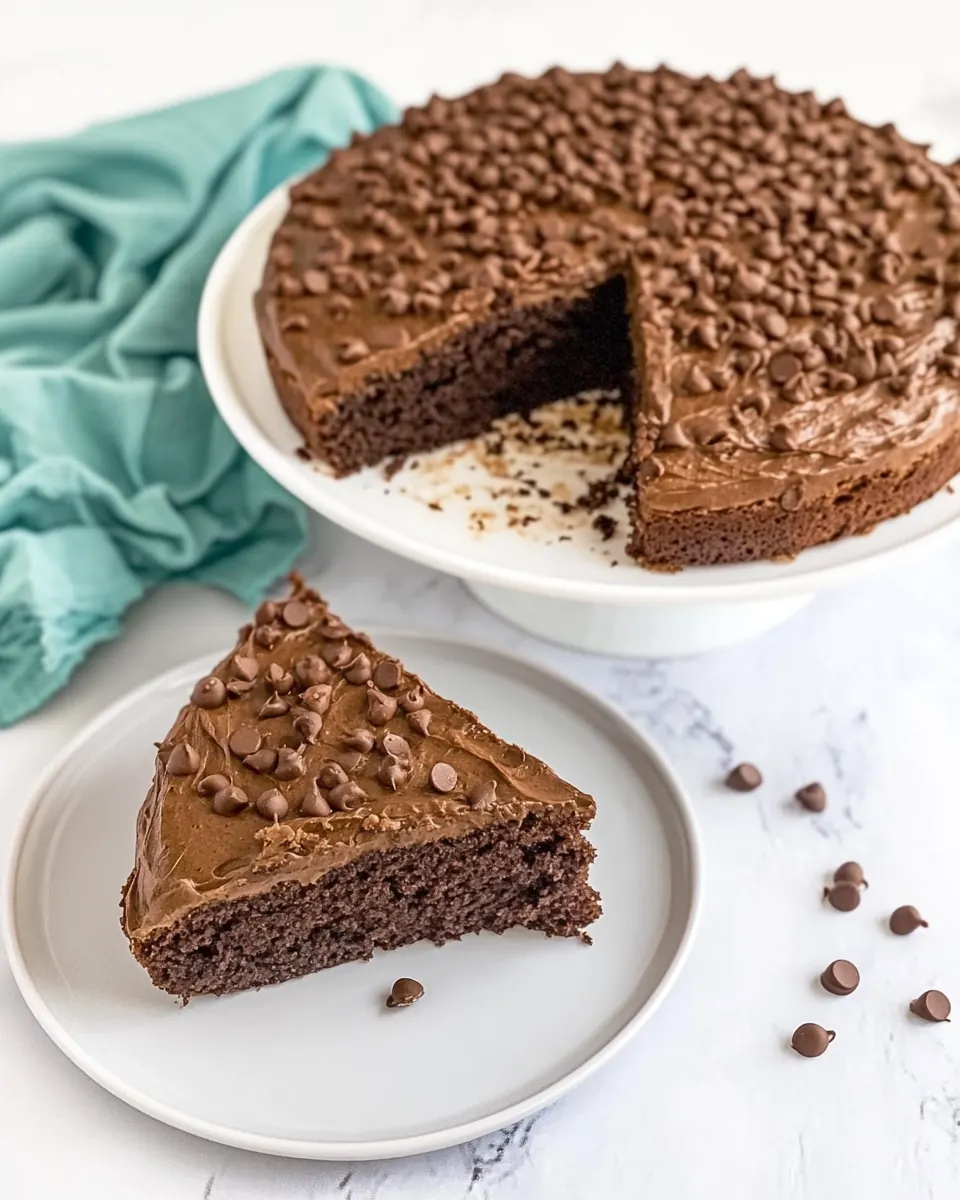
- Remove the ricotta chocolate cake from the oven allow to cool completely then gently remove the cake from the pan and serve: Cooling stabilizes the crumb, making slicing cleaner and preserving the delicate interior. The cake will relax and finish setting as it cools, and the scent mellows into a comforting chocolate perfume. Cutting it warm can make slices crumble, so patience here improves presentation.
- Dust the cake with powdered sugar and serve at room temperature: A light dusting adds a pretty contrast and a hint of sweetness on the surface, while serving at room temperature allows the flavors and texture to be fully appreciated. The suggestion to accompany with vanilla ice cream fresh cream or Greek yogurt brings complementary creaminess and tang. Avoid refrigerating immediately if you want the best texture, chilling can firm the crumb excessively.
Ways to Customize
This cake adapts well to small tweaks that change texture and presentation. Below are practical ideas you can try, each with a clear starting point so you can customize without guesswork.
- Swap citrus zest — Use either the lemon zest or orange zest listed to shift the aroma profile, lemon for bright contrast and orange for a warmer citrus note.
- Chocolate texture — Add chopped dark chocolate chunks on top before baking to create molten pockets that give bursts of rich, gooey texture in every slice.
- Sweetness balance — If you prefer a less sweet cake, reduce the sugar by up to 10 percent, which preserves chocolate intensity while letting it feel more grown up.
- Presentation tweak — Dust with powdered sugar and add a light dollop of Greek yogurt or a spoonful of fresh cream when serving for a simple, elegant finish.
- Make-ahead and freezing — Cool completely then slice and freeze in individual portions for up to three months, which is handy for quick desserts later.
- Texture adjustment — For a firmer crumb, fold the dry ingredients a touch more, but do so sparingly to avoid developing too much gluten which would make the cake tough.
Best Served With
This cake can be dressed up or down depending on the occasion, offering many ways to serve that highlight different aspects of its flavor. Below are practical serving suggestions and pairing ideas to suit casual coffee time or a more formal dessert course.
- Room temperature slices — Serve the cake at room temperature to showcase its tender, slightly creamy interior, which is ideal for afternoon tea or coffee.
- With vanilla ice cream — A scoop of vanilla ice cream contrasts the warm chocolate notes with cool creaminess, making it a favorite for celebratory desserts.
- Fresh cream or Greek yogurt — A spoonful alongside a slice adds tang and richness without overpowering the chocolate, suitable for a lighter finish.
- Occasion pairing — This cake works well for birthdays, casual dinner parties, or holiday tables where a rich yet approachable dessert is desired.
- Storage advice — Store in an airtight container in the fridge for up to three days, or freeze individual slices for up to three months to keep on hand for unexpected guests.
- Seasonal pairing — During cooler months pair with a warm beverage, while in warmer seasons serve chilled with fresh fruit to lighten the experience.
FAQ
Conclusion
This cake stands out because it marries deep chocolate with a tender, creamy crumb from ricotta, delivering a dessert that feels both rustic and refined. Give it a try when you want a reliably impressive sweet that does not demand complicated techniques. Share it with friends or keep a slice for yourself, either way it’s a comforting, crowd pleasing treat that rewards a little patience and simple, quality ingredients.
Chocolate Ricotta Cake
Equipment
- 9-inch Springform Pan
- Mixing Bowls
- Whisk
- Spatula
- Sieve
- Microwave-safe Bowl
Ingredients
- 150 g dark chocolate, or dark chocolate chips Melted and rich, provides the primary chocolate flavor and structure when tempered into the batter; contribute to moistness and cocoa intensity and pair well with ricotta for a fudgy crumb. Choose good-quality dark chocolate or chips for consistent melting and deeper taste.
- 300 g ricotta cheese, well drained Well drained and creamy, adds moisture, tenderness, and a light, slightly tangy richness that balances the chocolate; helps create a dense but soft texture in the cake. Press out excess liquid to avoid thinning the batter and ensure proper crumb.
- 3 eggs Beaten and aerating, bind the ingredients, add lift, and contribute to the cake’s structure and silkiness; yolks add fat and richness while whites provide protein for setting. Room-temperature eggs incorporate more evenly and improve volume.
- 180 g sugar Granulated and sweetening, provides bulk sweetness, helps with browning and moisture retention, and contributes to tender crumb through interaction with eggs and fats. Adjust amount marginally for sweetness preference but keep proportions for texture.
- 1 tablespoon fresh lemon zest, or orange zest Finely grated and brightening, adds a fragrant citrus aroma and a subtle acidic contrast that lifts the rich chocolate and ricotta flavors; zest oils enhance overall complexity without adding liquid. Use fresh lemon or orange depending on desired citrus note.
- a pinch of sea salt Pinched and balancing, enhances overall flavor by heightening sweetness and reducing blandness while emphasizing chocolate depth; a small amount is sufficient to improve taste perception. Use sea salt for a cleaner mineral note.
- 185 g all-purpose flour Sifted and structural, supplies the bulk of dry mass and forms the gluten network that supports the cake while combining with cocoa and ricotta for proper crumb; contributes to texture and chew. Measure accurately and avoid overmixing to prevent toughness.
- 30 g cocoa powder Dutifully sifted and chocolaty, intensifies cocoa flavor without adding extra fat and helps darken the cake; absorbs some moisture so it must be balanced with wet ingredients. Use unsweetened cocoa powder for concentrated chocolate taste.
- 1 tablespoon baking powder, approx 15 gram Leavening and measured, releases gases to help the cake rise and lighten the dense batter while contributing approximately 15 grams of chemical lift; works best when fresh to ensure predictable rise. Level the tablespoon and mix evenly into dry ingredients.
Instructions
- Preheat oven to 180°C/360°F and adjust a baking rack onto the middle shelf. Grease and line with parchment paper a 9-inch springform cake pan and set it aside.: As the oven warms the kitchen fills with a gentle heat that signals baking is coming, and placing the rack in the middle encourages even circulation so the cake cooks uniformly. You'll want the oven at an even temperature for consistent rise, so allow a few minutes after the indicator light goes off before inserting the cake. A common mistake is placing the rack too high, which browens the top too quickly while the center remains underbaked.
- Break the chocolate into small pieces, then place it in a microwave-safe bowl. Microwave on medium power (50%) for 15-30 second intervals. Stir after each interval until smooth and fully melted, set aside and let it cool slightly.: Preparing your pan this way prevents sticking and makes unmolding simple, revealing clean edges and preserving the cake's delicate texture. The parchment also helps you lift the cake out without scraping the sides. If you skip lining, the cake can cling and tear when removed, which affects presentation.
- In a large bowl whisk the ricotta cheese, eggs and sugar until you reach a creamy and lump-free mixture, about 4 minutes. Then add the melted dark chocolate, lemon zest and a pinch of sea salt.: Small pieces melt evenly, reducing the risk of hot spots and grainy texture, and you'll notice a glossy sheen as it becomes fluid. Stirring in short intervals helps distribute heat and keeps the chocolate smooth. Overheating is the main hazard here, so stop microwaving as soon as most pieces are melted and finish stirring to blend residual bits.
- Place a sieve/strainer over the bowl. Add the flour, cocoa powder and baking powder, and sift into the cake batter. Whisk until just combined (do not overmix).: The aroma of warm chocolate will fill the air and provide an immediate cue that you're on the right track, while cooling slightly protects the batter from cooking the eggs when combined. Cooling also helps the chocolate incorporate evenly into the batter. If it's too hot, you risk scrambling some of the eggs when mixed.
- Pour the cake batter into the prepared baking pan. The batter will be thick, similar to brownie batter, so use a spatula to smooth the top evenly. If desired, sprinkle extra chocolate chips or chopped dark chocolate over the top for added richness.: The motion of whisking aerates the mixture slightly, producing a lighter texture and smoothing out the ricotta cheese . You should see a uniform, glossy batter forming, and the rhythm of the whisk will give the mixture a pleasing sound as it thickens. If lumps remain, briefly pulse in a food processor instead of overworking by hand.
- Bake in the oven for approximately 40 minutes. During the last 10 minutes of baking time, cover the top of the cake with foil to prevent it from browning too much. To check if the cake is ready, insert a toothpick in the center, if it comes out clean, the cake is ready.: At this point the scent deepens, and you will notice the mixture turn luxuriously dark and silky, with citrus notes brightening the chocolate. Salt amplifies the chocolate flavors while the zest provides aromatic lift. If the melted chocolate is still hot, let it cool a bit more to protect the structure of the combined batter.
- Remove the ricotta chocolate cake from the oven, allow to cool completely, then gently remove the cake from the pan and serve.: Using a sieve ensures the dry ingredients fall in as a light dusting, which reduces clumps and encourages gentle incorporation for a tender crumb. The sifting action also helps distribute the baking powder evenly. Avoid tapping too hard which can cause an uneven cascade of flour and create pockets instead of a smooth blend.
- Dust the cake with powdered sugar and serve at room temperature. It's lovely topped with vanilla ice cream, fresh cream, or Greek yogurt.: As the fine dust of all purpose flour and cocoa powder drifts into the wet mix, you will see the batter thicken and take on a matte finish. Sifting prevents lumps and helps the leavening activate consistently. A common pitfall is adding all dry ingredients without sifting, which can lead to uneven pockets of unmixed flour.
- Whisk until just combined do not overmix: The batter should look homogenous but still slightly dense, similar to brownie batter, with no visible streaks of flour. Overmixing develops gluten and yields a chewier, less tender cake, so stop as soon as the last streak disappears. If you overwork the batter, the texture will be firmer and less delicate.
- Pour the cake batter into the prepared baking pan the batter will be thick similar to brownie batter so use a spatula to smooth the top evenly: The action of smoothing gives the cake a neat top and helps prevent high ridges that can crack. You will feel the batter's weight under the spatula, and it should settle to an even surface. If the batter is too sticky to smooth, a quick dampening of the spatula helps control the surface without adding water.
- If desired sprinkle extra chocolate chips or chopped dark chocolate over the top for added richness: These additions melt into little pockets, creating bursts of gooey chocolate and enhancing texture contrast. They also make the top look irresistible when they sheen after baking. Avoid adding too many or they may weigh the top down and affect rise.
- Bake in the oven for approximately 40 minutes during the last 10 minutes of baking time cover the top of the cake with foil to prevent it from browning too much: As the cake bakes you will notice a gentle dome and a crackled edge forming while the center sets; the aroma will become deeper and slightly toasted. Covering with foil late in baking preserves the color while allowing the center to finish cooking. If you leave it uncovered the top can overbrown and become dry while the center remains underdone.
- To check if the cake is ready insert a toothpick in the center if it comes out clean the cake is ready: The toothpick test gives a tactile confirmation of doneness, indicating the interior is set. The top should spring slightly when pressed and the edges will have pulled away from the pan. If the toothpick shows wet batter, return the cake to the oven for a few more minutes, as underbaking leaves a gummy texture.
- Remove the ricotta chocolate cake from the oven allow to cool completely then gently remove the cake from the pan and serve: Cooling stabilizes the crumb, making slicing cleaner and preserving the delicate interior. The cake will relax and finish setting as it cools, and the scent mellows into a comforting chocolate perfume. Cutting it warm can make slices crumble, so patience here improves presentation.
- Dust the cake with powdered sugar and serve at room temperature: A light dusting adds a pretty contrast and a hint of sweetness on the surface, while serving at room temperature allows the flavors and texture to be fully appreciated. The suggestion to accompany with vanilla ice cream fresh cream or Greek yogurt brings complementary creaminess and tang. Avoid refrigerating immediately if you want the best texture, chilling can firm the crumb excessively.
Notes
- Swap citrus zest — Use either the lemon zest or orange zest listed to shift the aroma profile, lemon for bright contrast and orange for a warmer citrus note.
- Chocolate texture — Add chopped dark chocolate chunks on top before baking to create molten pockets that give bursts of rich, gooey texture in every slice.
- Sweetness balance — If you prefer a less sweet cake, reduce the sugar by up to 10 percent, which preserves chocolate intensity while letting it feel more grown up.
- Presentation tweak — Dust with powdered sugar and add a light dollop of Greek yogurt or a spoonful of fresh cream when serving for a simple, elegant finish.
- Make-ahead and freezing — Cool completely then slice and freeze in individual portions for up to three months, which is handy for quick desserts later.
- Texture adjustment — For a firmer crumb, fold the dry ingredients a touch more, but do so sparingly to avoid developing too much gluten which would make the cake tough.