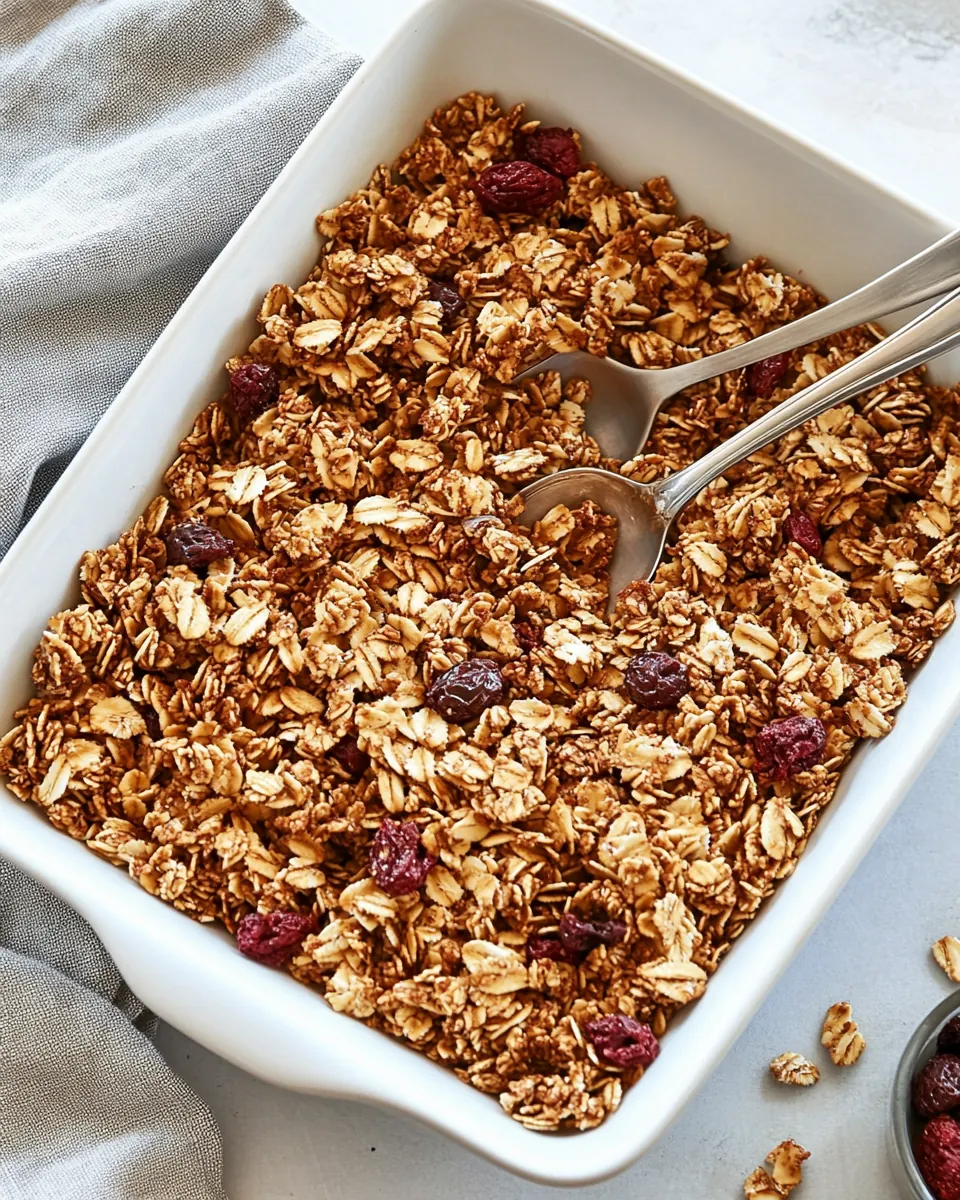
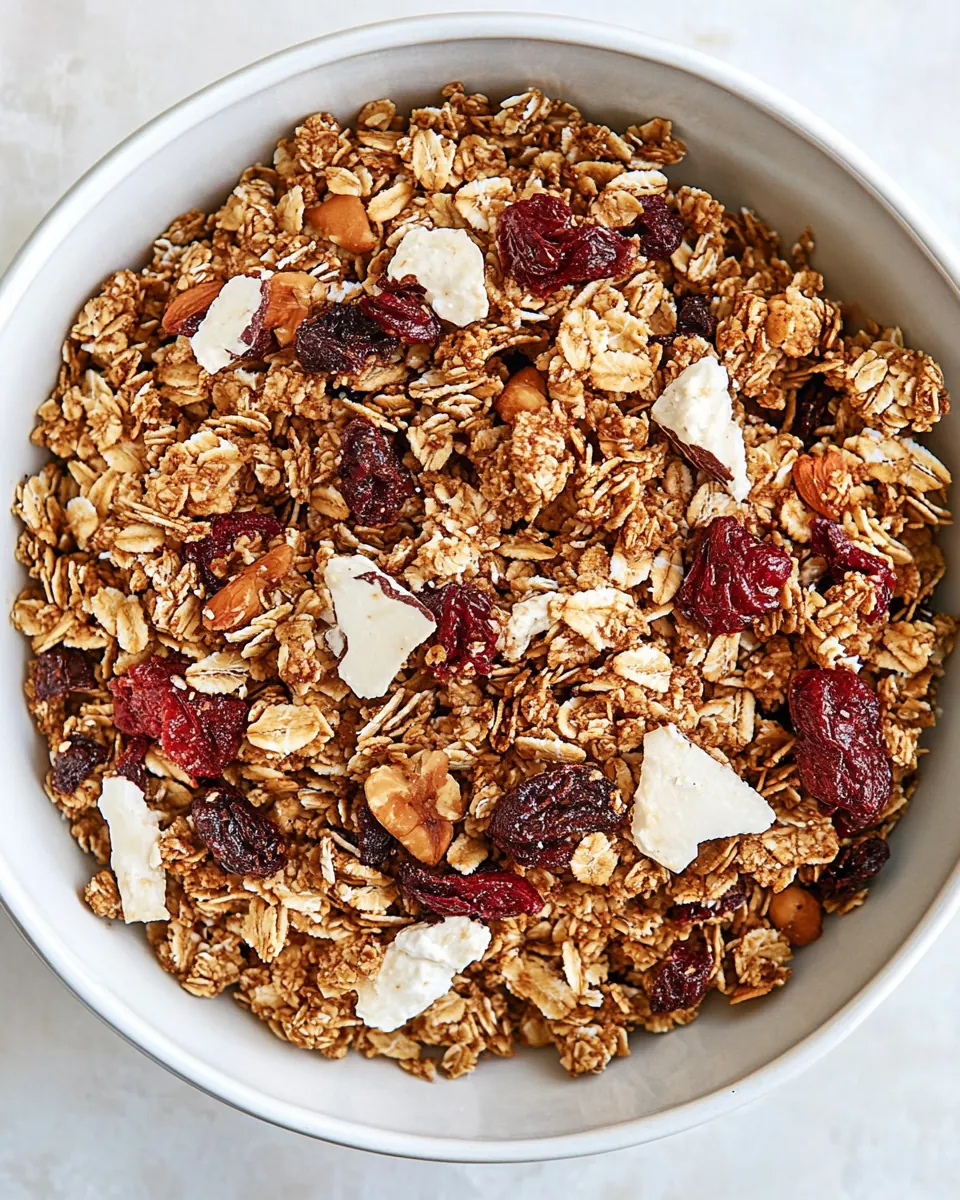
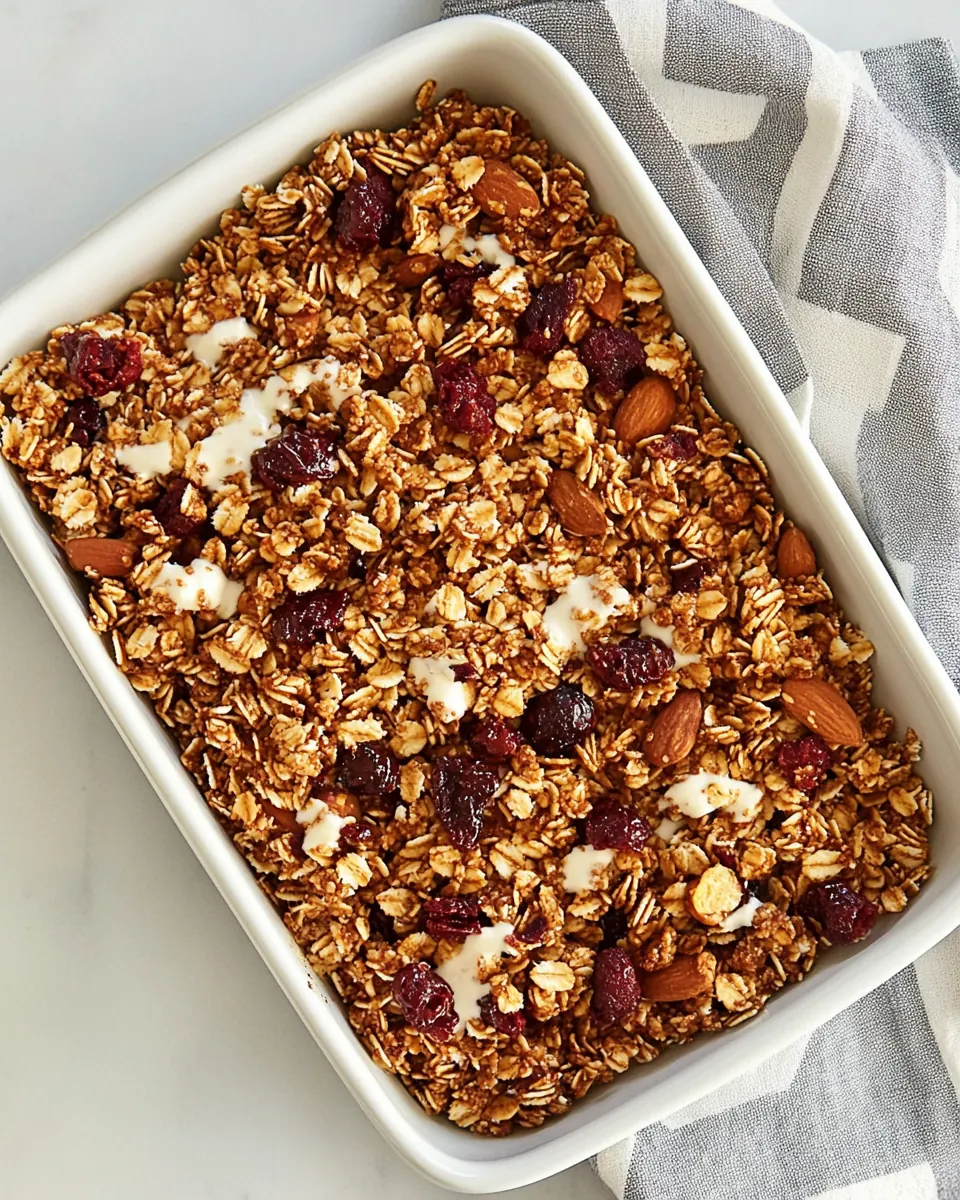
Homemade Granola
Homemade Granola has been my morning secret for years, a crunchy ritual that starts my day with warmth and a little ceremony.
I first learned to make Homemade Granola on a chilly weekend when I wanted something wholesome and portable, something I could sprinkle on yogurt or grab straight from a jar. I remember the sound of oats toasting in the oven, the aroma of cinnamon weaving through the house, and how proud I felt when the first batch clumped together into golden clusters. That small success convinced me to keep tweaking the ratios until it felt just right.
Over time, I began tailoring this mix to whatever I had on hand, swapping nuts or adding dried fruit, but the core comfort stayed the same. Making Homemade Granola became my way to prep for busy mornings, and guests always ask for the recipe after a weekend brunch. I like that it feels both rustic and intentional, like a little gift you can make for yourself. Each time I stir the bowl I remember why I started: the texture, the fragrant spices, the way it holds up under milk without going soggy too fast.
Recipe Snapshot
40 mins
10 mins
30 mins
Easy
200 kcal
American
Gluten-Free, Vegan
Breakfast
Baking sheet, Parchment paper, Large bowl, Spoon or spatula
What Makes This Homemade Granola Special
Crunch and Texture
I love that Homemade Granola delivers a satisfying crunch that holds up in milk, yogurt, or just by the handful. The combination of whole rolled oats and chopped walnuts creates a varied mouthfeel, some pieces tender, others pleasantly crisp. I pay attention to how long it toasts so the clusters brown evenly, which is what gives it that addicting bite.
Customizable Flavor
One reason I keep coming back to this recipe is how easily it adapts. With a base of oats and warm cinnamon, you can nudge the profile toward nutty and rich with extra walnuts or toward tropical with the optional coconut flakes. I often tweak the maple syrup and almond butter amounts to find the sweetness and chew that I want.
Simple, Honest Ingredients
I appreciate recipes that rely on real pantry staples, and Homemade Granola uses items I always have. The ingredient list reads like a friendly reminder of good food, from natural sweeteners like maple syrup to wholesome fats like melted coconut oil. This transparency makes it easy to trust what you are eating.
Great for Meal Prep
Making a batch of Homemade Granola means breakfasts are solved for days. I like to make a double batch when I have time, storing portions in jars for quick breakfasts or snacks. It saves decision fatigue on busy mornings and feels like a tiny act of self care.
Balanced Sweetness and Warm Spice
The gentle sweetness from maple syrup paired with toasty cinnamon hits a comforting balance that is not overpowering. I find the teaspoon of salt crucial, it brightens the flavors and prevents the mix from tasting flat. That balance is why this granola feels both wholesome and indulgent.
What to Buy for Homemade Granola
These ingredients form a simple, harmonious foundation. The oats provide structure and bulk, the nuts add crunch and richness, and the small additions like coconut oil and almond butter bind clusters together while contributing flavor. Each item plays a role in texture or taste, so I stick with quality staples for the best outcome.
- 2 cups whole rolled oats: Provide a hearty, chewy base that soaks up sweeteners and binds other mix-ins, giving granola its classic texture and bulk. Toast evenly in the oven to develop a nutty aroma and deepen flavor while creating crisp clusters. Pair seamlessly with nuts, seeds, and dried fruit to form the granola’s main body.
- 1/2 cup chopped walnuts, or almonds, or a mix of both: Add crunchy texture and rich, toasty flavor while contributing healthy fats and protein to the mix. Chop finely or leave in larger pieces depending on desired bite size, and stir into oats before baking for even distribution. Complement other mix-ins and enhance overall mouthfeel and satiety.
- 1/2 cup coconut flakes (optional): Contribute a light tropical sweetness and chewy contrast that enhances flavor complexity when included. Scatter lightly through the oat mixture or reserve some to add after baking to preserve delicate texture. Provide aromatic coconut notes that balance the warm spices and sweeteners.
- 2 teaspoons cinnamon: Impart warm, fragrant spice that elevates the overall flavor profile and pairs well with sweet maple and coconut notes. Sprinkle into the wet ingredients to ensure even distribution and to prevent clumping of the spice. Enhance perceived sweetness while adding a cozy, aromatic character.
- 1/2 teaspoons ea salt: Enhance and balance sweetness by accentuating other flavors and preventing flatness in the finished granola. Dissolve with the wet ingredients to distribute evenly throughout the oat mixture and to highlight the natural nuttiness of toasted oats. Use sparingly to avoid overpowering delicate flavors.
- 2 tablespoons melted coconut oil: Bind dry ingredients and add a silky mouthfeel while contributing a subtle coconut aroma when melted. Mix thoroughly with maple syrup and almond butter to create clusters and help oats stick together as they bake. Offer a source of stable, plant-based fat that crisps during oven time.
- 1/4 cup maple syrup: Sweeten naturally while helping to bind the oat clusters and promote browning for an attractive golden color. Whisk together with oils and nut butter so it coats the oats evenly and caramelizes during baking. Provide a complex sweetness with notes of caramel and wood that complement spices.
- 2 tablespoons creamy almond butter: Create creamy richness and additional stickiness that helps form cohesive clusters among the dry ingredients. Warm slightly to thin for easier mixing and to coat oats and nuts uniformly before baking. Contribute nutty flavor and plant-based protein that enhances texture and mouthfeel.
- 1/3 cup dried cranberries (optional): Add bright, concentrated bursts of fruity sweetness and a chewy contrast when stirred in after baking or during the last minutes of cooling. Provide pleasant tartness that balances the overall sweetness and adds visual interest in the finished granola. Opt for unsweetened varieties to control overall sugar content.
Cooking Instructions for Homemade Granola
This method is straightforward and forgiving, but I like to walk you through the little details that make the difference. Expect to engage your senses as the oats brown and meld with the syrup, and do take a moment to rotate the pan for even color. The directions below expand each step into practical cues and troubleshooting pointers.
- Preheat the oven to 300°F and line a baking sheet with parchment paper.: When you open the oven, notice the warm, dry air that signals a good toasting environment. A lower temperature like 300°F allows the oats to toast evenly without burning, producing a gentle aroma of toasted grain rather than acrid smoke. Line the baking sheet with parchment so the granola releases easily and you avoid scraping, which can break clusters. A common mistake is using a too hot oven which yields uneven browning; if your oven runs hot, consider dropping the temperature by 10 to 15 degrees. Also, ensure the rack is centered for balanced heat circulation. You'll want the surface to feel warm when you place the sheet in, not blistering, and the parchment should sit flat to help the mixture spread uniformly.
- In a large bowl, combine the oats, walnuts, coconut flakes, if using, cinnamon, and salt. Drizzle in the coconut oil and maple syrup and add the almond butter. Stir until combined. Scoop the granola onto the baking sheet and press the mixture into a 1-inch-thick oval. This will encourage clumping.: As you stir these dry ingredients together, inhale the warm scent of cinnamon mingling with raw oats and nut oils, which hints at the finished aroma. Mixing dry components first ensures spices and salt are evenly distributed so each bite has balanced flavor. Use a wide bowl so you can toss without spillage, and check the walnuts for uniform pieces to avoid a few overly large chunks that bake unevenly. A typical pitfall is under-mixing which leads to clumps that are only sweet in pockets; take the time to fold gently until the color and texture look consistent.
- Bake for 15 minutes, rotate the pan halfway, and use a fork to gently break the granola apart just a bit. Bake for 15 minutes more, or until golden brown. Sprinkle with dried cranberries, if desired. Let cool for 15 minutes before serving.: When you pour in the melted coconut oil and maple syrup and add the almond butter , you'll see the oats begin to glisten and bind. Stirring these wet elements with the dry creates the tacky coating that helps clusters form during baking. If the almond butter is stiff, warm it slightly so it blends smoothly; otherwise you may end up with pockets of unmixed nut butter. Watch the mixture for even sheen, and scrape the bowl sides to incorporate every bit. Overly wet mixes can spread too thin on the pan and not clump, so if it looks soggy, you can add a little more oats to balance.
- Stir until combined.: The mixture should feel evenly coated and slightly sticky to the touch, hinting at how it will coalesce into clusters. The tactile cue is important—you want cohesion but not wetness. Listen for the soft scrape of the spoon across the bowl which changes as the maple syrup binds the ingredients. If some bits remain dry, fold them in thoroughly; conversely, if everything is dripping, add a touch more oats. A common mistake is stopping too soon, leaving dry pockets that will bake blandly, so take a few extra turns of the spoon to ensure uniformity.
- Scoop the granola onto the baking sheet and press the mixture into a 1 inch thick oval.: Pressing the granola into a compact shape encourages pleasing clusters as it bakes and cools. When you press, you should feel slight resistance and see the mixture hold together rather than crumble. The surface will look glossy from the syrup, and compacting helps create large shards as you break it later. Avoid pressing too thin, which yields mostly crumbs rather than satisfying chunks. A mistake I sometimes make is pressing unevenly; aim for consistent thickness so it bakes uniformly across the pan.
- Bake for 15 minutes, rotate the pan halfway, and use a fork to gently break the granola apart just a bit.: During the first stage of baking the kitchen fills with a warm, toasty scent as the sugars bubble and the nuts begin to brown. Rotating the pan ensures even heat exposure, and breaking the granola lightly with a fork exposes interior pieces to the hot air so they crisp. The sound will change from soft to a subtle crackle as moisture leaves. Avoid over-stirring here, or you will lose those large clusters. A frequent error is not rotating the pan, which can cause one side to darken too fast; set a timer so you do this at the right moment.
- Bake for 15 minutes more, or until golden brown.: In this final bake the color deepens and the aroma reaches its peak: caramelized maple and toasted oats. Watch for a golden hue, not a deep brown, which signals the difference between perfect toast and bitterness. You may notice small popping or sizzling as the syrup continues to caramelize; that is normal. If pieces look very dark before the time is up, reduce the temperature and extend baking to avoid burning. Remove the tray when the overall color is even and pleasing, keeping in mind the granola will continue to firm as it cools.
- Sprinkle with dried cranberries, if desired.: Adding dried cranberries after baking keeps them plump and chewy, offering tart bursts against the toasted matrix. The contrast of temperature and texture is delightful, with juicy chew against crisp flakes. If you add them while hot, they can dry out or sink into the mixture, so scatter them once the granola is off the heat. A mistake to avoid is mixing heat sensitive add ins before cooling, as they may lose their ideal texture.
- Let cool for 15 minutes before serving.: Cooling is crucial because it lets the granola set into firm clusters; warm granola will be soft and may crumble. As it cools you'll notice the sound shift to a crisper snap when you break a piece. Patience here is rewarded with satisfying shards that hold together. If you try to jar it while still warm, condensation can make it soggy, so allow the full resting time. Break it into pieces with your hands or a fork after cooling for the best texture.
Change It Up
I like to offer simple swaps and serving variations so you can make Homemade Granola your own. These practical tips are based on things I have tried in my kitchen, each starting with a bold note to help you scan quickly.
- Swap the nuts: If you prefer a different crunch, try swapping walnuts for almonds or a mix. Each nut changes the flavor profile and the oil content, so you may notice slightly different browning characteristics. Chop the nuts to varied sizes to maintain textural interest, and toast them briefly for added depth.
- Play with sweeteners: While this recipe uses maple syrup, you can experiment with a milder runny honey or a blend, keeping in mind that darker syrups add a deeper caramel note. Adjust volume slightly if the consistency of the sweetener differs, aiming for a tacky coating that binds well in the oven.
- Make it oil free: For a lower fat option, reduce the coconut oil and increase the maple syrup slightly to maintain clumping, though clusters will be denser. Expect a chewier texture and monitor baking closely since less fat changes browning behavior.
- Add seeds for nutrition: Stir in a few tablespoons of chia or flax seeds after baking for extra texture and nutrients. They will not change the cooking process, but they add tiny crunchy pops and a nutritional boost to each serving without overpowering the flavor.
- Create granola bars: Press the mixture firmly into a lined pan before baking and let cool fully, then slice into bars. This yields portable snacks that travel well, but be sure to compress evenly and allow extra cooling time to ensure the bars hold together.
- Store smartly: Keep your batch in an airtight jar at room temperature for up to two weeks, or freeze portions for longer storage. I label jars with the date so I use the oldest first and maintain the freshest crunch.
Serve This Homemade Granola With
Homemade Granola is wonderfully versatile, so I like to consider different pairings for breakfast, snacks, and gatherings. Below I outline ideas ranging from quick everyday bowls to more celebratory presentations.
- Yogurt parfaits: Layer Homemade Granola with plain or vanilla yogurt and fresh fruit for a balanced breakfast. The crunchy granola contrasts with creamy yogurt, and the tartness of fruit brightens the bowl. I assemble parfaits in clear glasses for visual appeal and portion control.
- Milk or non dairy milk: Pour chilled milk over a bowl of granola for an instant cereal. The granola holds up well without becoming soggy too quickly, offering a hearty morning option. Try almond or oat milk to complement the nutty flavors.
- Topping for baked fruit: Sprinkle granola over warm baked apples or pears just before serving for added texture and caramel notes. The residual heat softens the fruit while the granola adds contrast, making a quick, rustic dessert or brunch centerpiece.
- Snack jars for guests: Portion granola into small jars or bags as easy favors at brunch or gatherings. They travel well and are appreciated as a thoughtful, homemade touch. Add a small label with ingredients if you are sharing with others.
- Seasonal gifting: Pack jars of Homemade Granola for holiday or seasonal gifts, pairing them with a note and a spoon. It feels personal and homemade, and recipients can enjoy it over several breakfasts. Store in cool, dry places for best shelf life.
- Storage tips: Keep granola in an airtight container at room temperature for up to two weeks, or freeze for longer storage. If you notice any loss of crunch, spread it on a tray and warm briefly in a low oven to refresh the texture before serving.
FAQ
Conclusion
This Homemade Granola stands out for its balanced crunch, warm cinnamon notes, and simple pantry ingredients that come together to make mornings easier and more enjoyable. Try it because it stores well, adapts to your taste, and elevates a plain bowl of yogurt or milk into something special. I hope you have fun customizing the nuts and add ins, and that this recipe becomes a small ritual in your week, bringing a little homemade comfort to your breakfasts.
Homemade Granola
Equipment
- Baking Sheet
- Parchment Paper
- Large Bowl
- Spoon or spatula
Ingredients
- 2 cups whole rolled oats Provide a hearty, chewy base that soaks up sweeteners and binds other mix-ins, giving granola its classic texture and bulk. Toast evenly in the oven to develop a nutty aroma and deepen flavor while creating crisp clusters. Pair seamlessly with nuts, seeds, and dried fruit to form the granola’s main body.
- 1/2 cup chopped walnuts, or almonds, or a mix of both Add crunchy texture and rich, toasty flavor while contributing healthy fats and protein to the mix. Chop finely or leave in larger pieces depending on desired bite size, and stir into oats before baking for even distribution. Complement other mix-ins and enhance overall mouthfeel and satiety.
- 1/2 cup coconut flakes, optional Contribute a light tropical sweetness and chewy contrast that enhances flavor complexity when included. Scatter lightly through the oat mixture or reserve some to add after baking to preserve delicate texture. Provide aromatic coconut notes that balance the warm spices and sweeteners.
- 2 teaspoons cinnamon Impart warm, fragrant spice that elevates the overall flavor profile and pairs well with sweet maple and coconut notes. Sprinkle into the wet ingredients to ensure even distribution and to prevent clumping of the spice. Enhance perceived sweetness while adding a cozy, aromatic character.
- 1/2 teaspoons ea salt Enhance and balance sweetness by accentuating other flavors and preventing flatness in the finished granola. Dissolve with the wet ingredients to distribute evenly throughout the oat mixture and to highlight the natural nuttiness of toasted oats. Use sparingly to avoid overpowering delicate flavors.
- 2 tablespoons melted coconut oil Bind dry ingredients and add a silky mouthfeel while contributing a subtle coconut aroma when melted. Mix thoroughly with maple syrup and almond butter to create clusters and help oats stick together as they bake. Offer a source of stable, plant-based fat that crisps during oven time.
- 1/4 cup maple syrup Sweeten naturally while helping to bind the oat clusters and promote browning for an attractive golden color. Whisk together with oils and nut butter so it coats the oats evenly and caramelizes during baking. Provide a complex sweetness with notes of caramel and wood that complement spices.
- 2 tablespoons creamy almond butter Create creamy richness and additional stickiness that helps form cohesive clusters among the dry ingredients. Warm slightly to thin for easier mixing and to coat oats and nuts uniformly before baking. Contribute nutty flavor and plant-based protein that enhances texture and mouthfeel.
- 1/3 cup dried cranberries, optional Add bright, concentrated bursts of fruity sweetness and a chewy contrast when stirred in after baking or during the last minutes of cooling. Provide pleasant tartness that balances the overall sweetness and adds visual interest in the finished granola. Opt for unsweetened varieties to control overall sugar content.
Instructions
- Preheat the oven to 300°F and line a baking sheet with parchment paper.: When you open the oven, notice the warm, dry air that signals a good toasting environment. A lower temperature like 300°F allows the oats to toast evenly without burning, producing a gentle aroma of toasted grain rather than acrid smoke. Line the baking sheet with parchment so the granola releases easily and you avoid scraping, which can break clusters. A common mistake is using a too hot oven which yields uneven browning; if your oven runs hot, consider dropping the temperature by 10 to 15 degrees. Also, ensure the rack is centered for balanced heat circulation. You'll want the surface to feel warm when you place the sheet in, not blistering, and the parchment should sit flat to help the mixture spread uniformly.
- In a large bowl, combine the oats, walnuts, coconut flakes, if using, cinnamon, and salt. Drizzle in the coconut oil and maple syrup and add the almond butter. Stir until combined. Scoop the granola onto the baking sheet and press the mixture into a 1-inch-thick oval. This will encourage clumping.: As you stir these dry ingredients together, inhale the warm scent of cinnamon mingling with raw oats and nut oils, which hints at the finished aroma. Mixing dry components first ensures spices and salt are evenly distributed so each bite has balanced flavor. Use a wide bowl so you can toss without spillage, and check the walnuts for uniform pieces to avoid a few overly large chunks that bake unevenly. A typical pitfall is under-mixing which leads to clumps that are only sweet in pockets; take the time to fold gently until the color and texture look consistent.
- Bake for 15 minutes, rotate the pan halfway, and use a fork to gently break the granola apart just a bit. Bake for 15 minutes more, or until golden brown. Sprinkle with dried cranberries, if desired. Let cool for 15 minutes before serving.: When you pour in the melted coconut oil and maple syrup and add the almond butter , you'll see the oats begin to glisten and bind. Stirring these wet elements with the dry creates the tacky coating that helps clusters form during baking. If the almond butter is stiff, warm it slightly so it blends smoothly; otherwise you may end up with pockets of unmixed nut butter. Watch the mixture for even sheen, and scrape the bowl sides to incorporate every bit. Overly wet mixes can spread too thin on the pan and not clump, so if it looks soggy, you can add a little more oats to balance.
- Stir until combined.: The mixture should feel evenly coated and slightly sticky to the touch, hinting at how it will coalesce into clusters. The tactile cue is important—you want cohesion but not wetness. Listen for the soft scrape of the spoon across the bowl which changes as the maple syrup binds the ingredients. If some bits remain dry, fold them in thoroughly; conversely, if everything is dripping, add a touch more oats. A common mistake is stopping too soon, leaving dry pockets that will bake blandly, so take a few extra turns of the spoon to ensure uniformity.
- Scoop the granola onto the baking sheet and press the mixture into a 1 inch thick oval.: Pressing the granola into a compact shape encourages pleasing clusters as it bakes and cools. When you press, you should feel slight resistance and see the mixture hold together rather than crumble. The surface will look glossy from the syrup, and compacting helps create large shards as you break it later. Avoid pressing too thin, which yields mostly crumbs rather than satisfying chunks. A mistake I sometimes make is pressing unevenly; aim for consistent thickness so it bakes uniformly across the pan.
- Bake for 15 minutes, rotate the pan halfway, and use a fork to gently break the granola apart just a bit.: During the first stage of baking the kitchen fills with a warm, toasty scent as the sugars bubble and the nuts begin to brown. Rotating the pan ensures even heat exposure, and breaking the granola lightly with a fork exposes interior pieces to the hot air so they crisp. The sound will change from soft to a subtle crackle as moisture leaves. Avoid over-stirring here, or you will lose those large clusters. A frequent error is not rotating the pan, which can cause one side to darken too fast; set a timer so you do this at the right moment.
- Bake for 15 minutes more, or until golden brown.: In this final bake the color deepens and the aroma reaches its peak: caramelized maple and toasted oats. Watch for a golden hue, not a deep brown, which signals the difference between perfect toast and bitterness. You may notice small popping or sizzling as the syrup continues to caramelize; that is normal. If pieces look very dark before the time is up, reduce the temperature and extend baking to avoid burning. Remove the tray when the overall color is even and pleasing, keeping in mind the granola will continue to firm as it cools.
- Sprinkle with dried cranberries, if desired.: Adding dried cranberries after baking keeps them plump and chewy, offering tart bursts against the toasted matrix. The contrast of temperature and texture is delightful, with juicy chew against crisp flakes. If you add them while hot, they can dry out or sink into the mixture, so scatter them once the granola is off the heat. A mistake to avoid is mixing heat sensitive add ins before cooling, as they may lose their ideal texture.
- Let cool for 15 minutes before serving.: Cooling is crucial because it lets the granola set into firm clusters; warm granola will be soft and may crumble. As it cools you'll notice the sound shift to a crisper snap when you break a piece. Patience here is rewarded with satisfying shards that hold together. If you try to jar it while still warm, condensation can make it soggy, so allow the full resting time. Break it into pieces with your hands or a fork after cooling for the best texture.
Notes
- Swap the nuts: If you prefer a different crunch, try swapping walnuts for almonds or a mix. Each nut changes the flavor profile and the oil content, so you may notice slightly different browning characteristics. Chop the nuts to varied sizes to maintain textural interest, and toast them briefly for added depth.
- Play with sweeteners: While this recipe uses maple syrup, you can experiment with a milder runny honey or a blend, keeping in mind that darker syrups add a deeper caramel note. Adjust volume slightly if the consistency of the sweetener differs, aiming for a tacky coating that binds well in the oven.
- Make it oil free: For a lower fat option, reduce the coconut oil and increase the maple syrup slightly to maintain clumping, though clusters will be denser. Expect a chewier texture and monitor baking closely since less fat changes browning behavior.
- Add seeds for nutrition: Stir in a few tablespoons of chia or flax seeds after baking for extra texture and nutrients. They will not change the cooking process, but they add tiny crunchy pops and a nutritional boost to each serving without overpowering the flavor.
- Create granola bars: Press the mixture firmly into a lined pan before baking and let cool fully, then slice into bars. This yields portable snacks that travel well, but be sure to compress evenly and allow extra cooling time to ensure the bars hold together.
- Store smartly: Keep your batch in an airtight jar at room temperature for up to two weeks, or freeze portions for longer storage. I label jars with the date so I use the oldest first and maintain the freshest crunch.