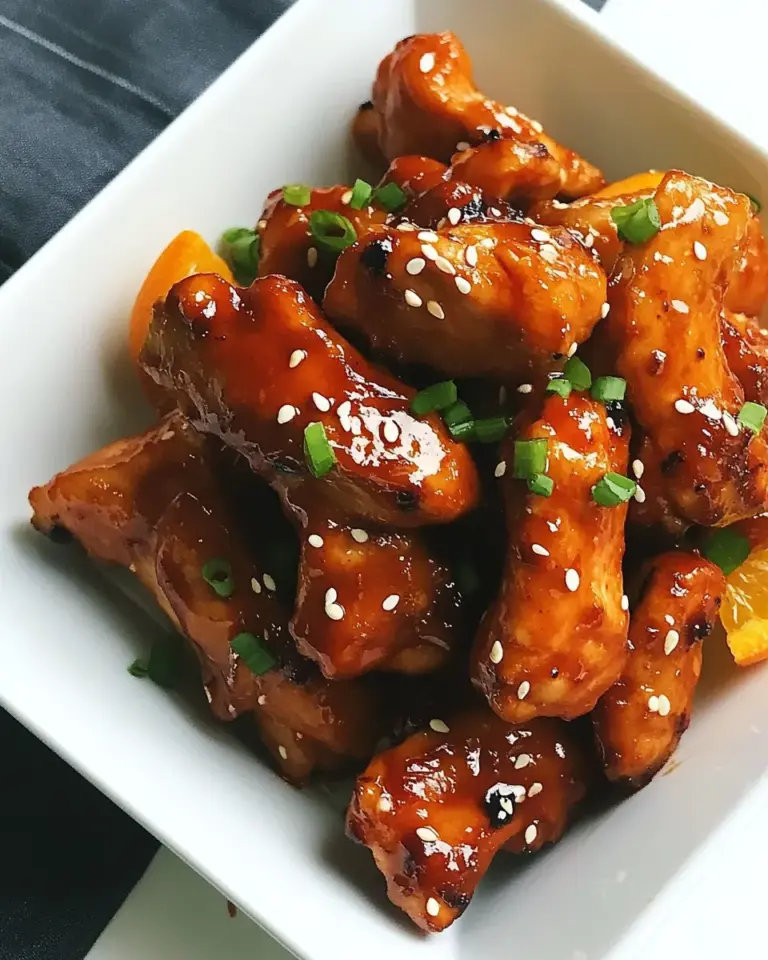
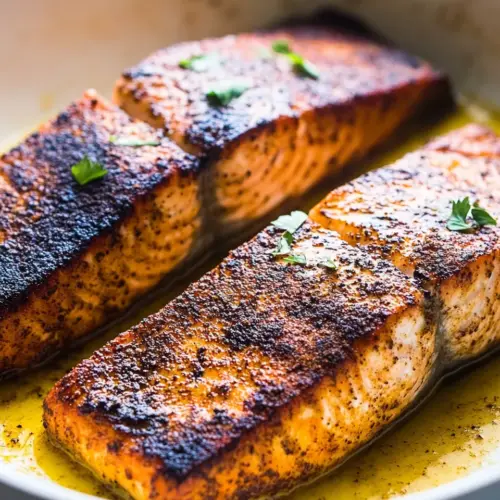
Easy 10 Minute Crispy Skin Salmon
Easy 10 Minute Crispy Skin Salmon changed how I think about weeknight supper the first time I seared a fillet so the skin crackled under my fork. I remember rushing home from a long day and wanting something fast, satisfying, and a little fancy, and this recipe delivered exactly that. The heat of the pan, the quick seasoning, and the confident flip felt like a small ritual, and the result was a flaky interior paired with that irresistible crisp edge.
Over the following months I kept returning to this dish whenever I wanted an impressive plate without the fuss. I learned little tricks that made the skin reliably crisp and the flesh perfectly moist, and I found myself sharing it with friends who assumed it took much longer than it did. Each time I cook Easy 10 Minute Crispy Skin Salmon I think about how simple choices, like patting the salmon dry and using a hot pan, reward you with texture and flavor that feel elevated.
Recipe Snapshot
12 mins
2 mins
10 mins
Easy
350 kcal
American
Keto, Paleo
Dinner
Heavy duty pan, Spatula, Paper towels
What You’ll Enjoy About This Easy 10 Minute Crispy Skin Salmon
Speed that Doesnt Sacrifice Quality
I love that Easy 10 Minute Crispy Skin Salmon comes together in minutes, yet tastes like something from a restaurant. The short cooking time preserves the natural succulence of the salmon, so you get flaky, tender bites without a long prep. When Im pressed for time, this recipe lets me serve something wholesome and elegant, which is why it often makes my short-lane dinner rotation.
Textural Contrast
The combination of a crunchy exterior and a soft, buttery interior is what keeps me coming back. Crisp skin gives a satisfying crackle against the fork, while the salmon flesh remains tender. That contrast is what makes every serving memorable, and it’s also a reason guests always compliment the dish.
Flexible Seasoning
I appreciate how forgiving the flavors are. The base of salt and pepper highlights the salmon, and optional spices like cumin or taco-style seasonings add personality if I want it. This adaptability means I can tailor the dish to the mood of the meal without altering technique.
Minimal Equipment, Maximum Impact
There is something satisfying about producing an impressive main course with just a heavy pan and a spatula. The technique is straightforward, and because the method is simple, it’s easy to teach to friends who want to learn quick, confident cooking moves.
Reliably Delicious for Any Occasion
Whether Im feeding family on a weeknight or plating for company, Easy 10 Minute Crispy Skin Salmon feels appropriate. Its elegant enough for a casual dinner party, yet quick enough for a busy evening. The repeatability of the result makes it a dependable choice in my recipe toolbox.
Ingredients for Easy 10 Minute Crispy Skin Salmon
These ingredients are intentionally tight and purposeful. I like to think of the list as a small team where each player has a clear job: the salmon is star, the spices bring personality, and the olive oil is the enabler for that sizzling sear. With minimal components you retain control over texture and flavor, letting the natural richness of the salmon shine.
- 4 skin-on salmon fillets, 5-6 ounce pieces: Cooked with skin-on to achieve a crispy exterior while keeping the flesh moist; provides the main protein and centerpiece of the dish. Pat dry before seasoning to ensure optimal skin crisping and even cooking. Aim for fillets of similar thickness so they finish at the same time.
- 1/2 teaspoon cumin (optional): Added sparingly to introduce a warm, earthy note that complements the salmon's flavor; optional for those who enjoy a slight smokiness. Mix with other spices to create a subtle background layer rather than an overpowering taste. Use cautiously if following a different spice profile.
- 1/2 teaspoon taco seasoning (optional): Sprinkled optionally to give a ready-made blend of chilies, cumin, and other spices for a quick, familiar taco-like flavor. Enhances overall seasoning with minimal effort and pairs well with citrus or herbs. Can be omitted for a simpler, more delicate salmon taste.
- 1/4 teaspoon oregano (optional): Used optionally to impart a mild Mediterranean herbiness that brightens the seasoning blend; adds a slightly floral, savory touch. Works well when combined with garlic powder and salt for balanced flavor. Use dried oregano for convenience and shelf stability.
- 1/4 teaspoon garlic powder: Used to add a savory, roasted pungency that deepens the overall seasoning; helps create a flavorful crust on the salmon. Sprinkle evenly over fillets before cooking to ensure consistent taste. Pairs well with the optional spices and salt.
- salt and pepper to taste: Used to adjust and enhance the natural flavors of the salmon and seasonings; balances sweetness and rounds out spices. Apply to taste, salting before cooking to help extract moisture and improve skin crisping. Pepper adds mild heat and aromatic bite.
- 1 tablespoon olive oil: Used to prevent sticking and assist in transferring heat for even browning of the skin; contributes a subtle fruity richness. Heat the oil until shimmering before adding fillets to promote a crisp skin and quick sear. Use just enough to coat the pan surface without excess.
How to Cook Easy 10 Minute Crispy Skin Salmon
I like to keep the instruction flow calm and conversational, because quick sears can feel intense. The steps below expand on the three core actions from the original directions and walk you through sensory cues and practical troubleshooting so you feel confident at the stove.
- Heat a large heavy-duty pan on high heat for about 2 minutes.: When the pan starts to shimmer and you can feel heat rising, that s the cue it s ready. You should hear a faint whoosh when you hover your hand above the surface, and if you sprinkle a drop of water it should skitter and evaporate quickly. The goal is a very hot cooking surface that sears on contact, creating a caramelized crust on the salmon skin. Using a heavy pan helps hold steady heat, which prevents the surface temperature from collapsing when the fish hits the pan. A common mistake here is not allowing the pan enough time to preheat, which leads to sticking and a lackluster crust.
- While the pan is heating up, rub spices onto dry salmon. Pour oil into pre-heated pan (be sure pan is super hot). Place salmon into pan, flesh side down and allow to sear for approximately 5 minutes then flip and sear the other side for 4-5 minutes or until center is cooked.: Patting the fillets completely dry first makes a huge difference in texture. The drier the surface, the faster it browns rather than steams. After drying, sprinkle the measured spices evenly across the flesh and skin, pressing gently so they adhere. You should notice the aroma of the garlic powder and any optional spices becoming more present as you rub them in. This step is about building surface flavor that will toast in the pan, so be mindful not to clump seasonings in one spot. A common misstep is seasoning too early and letting salt draw moisture out, which can impede browning.
- Turn off heat and allow salmon to rest in the same pan for 5 minutes (it will continue cooking as it rests.): Add the tablespoon of olive oil to the hot pan and watch it thin and become glossy immediately. If it smokes heavily right away, the pan may be hotter than you need, so briefly remove it from heat to lower the temperature. The oil is your mediator for heat transfer and helps the skin to release cleanly from the pan. Tilt the pan so the oil forms an even layer; you want a smooth, sizzling contact surface when the fish lands. A frequent error is adding oil to a cold pan, which soaks into any seasonings and prevents the immediate sizzle required for a good sear.
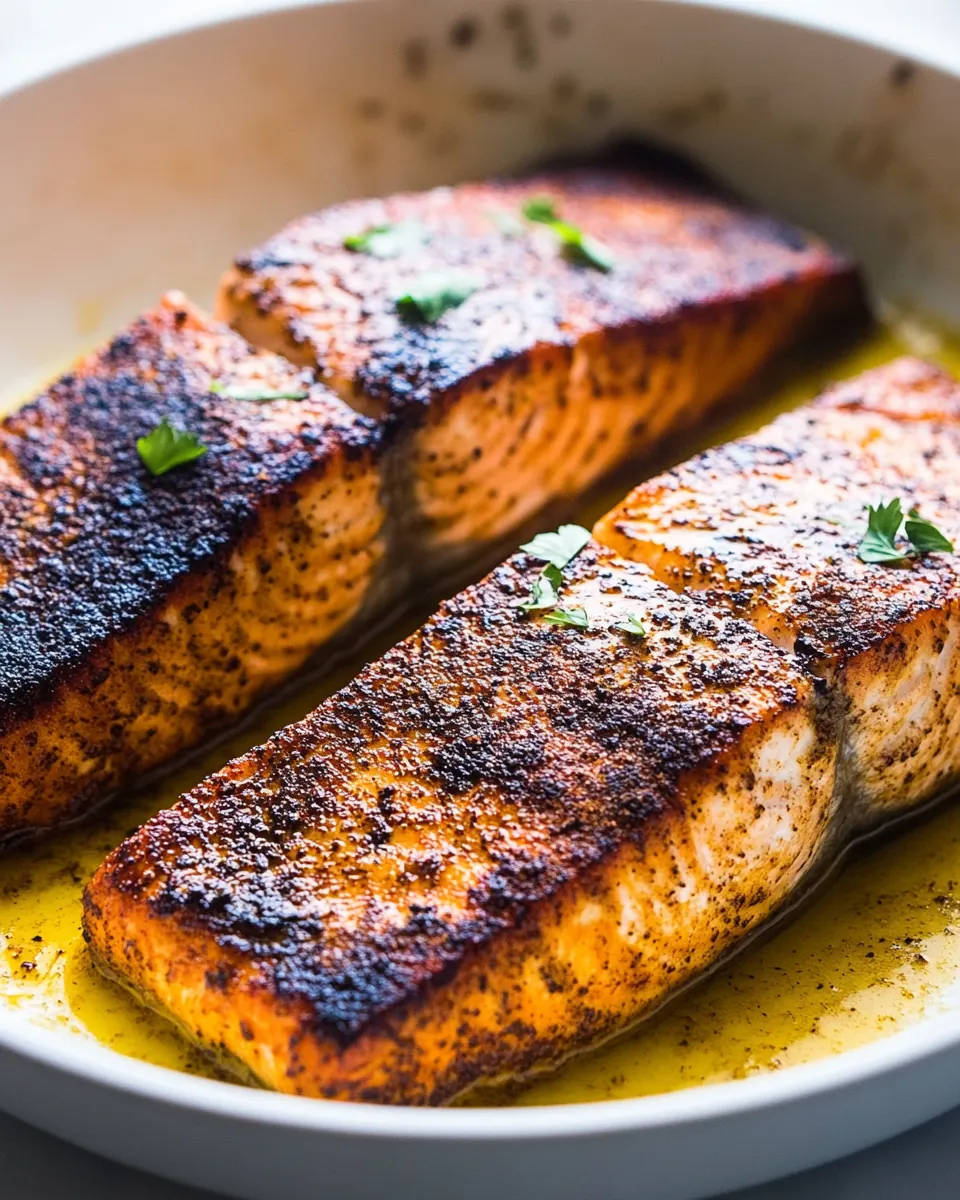
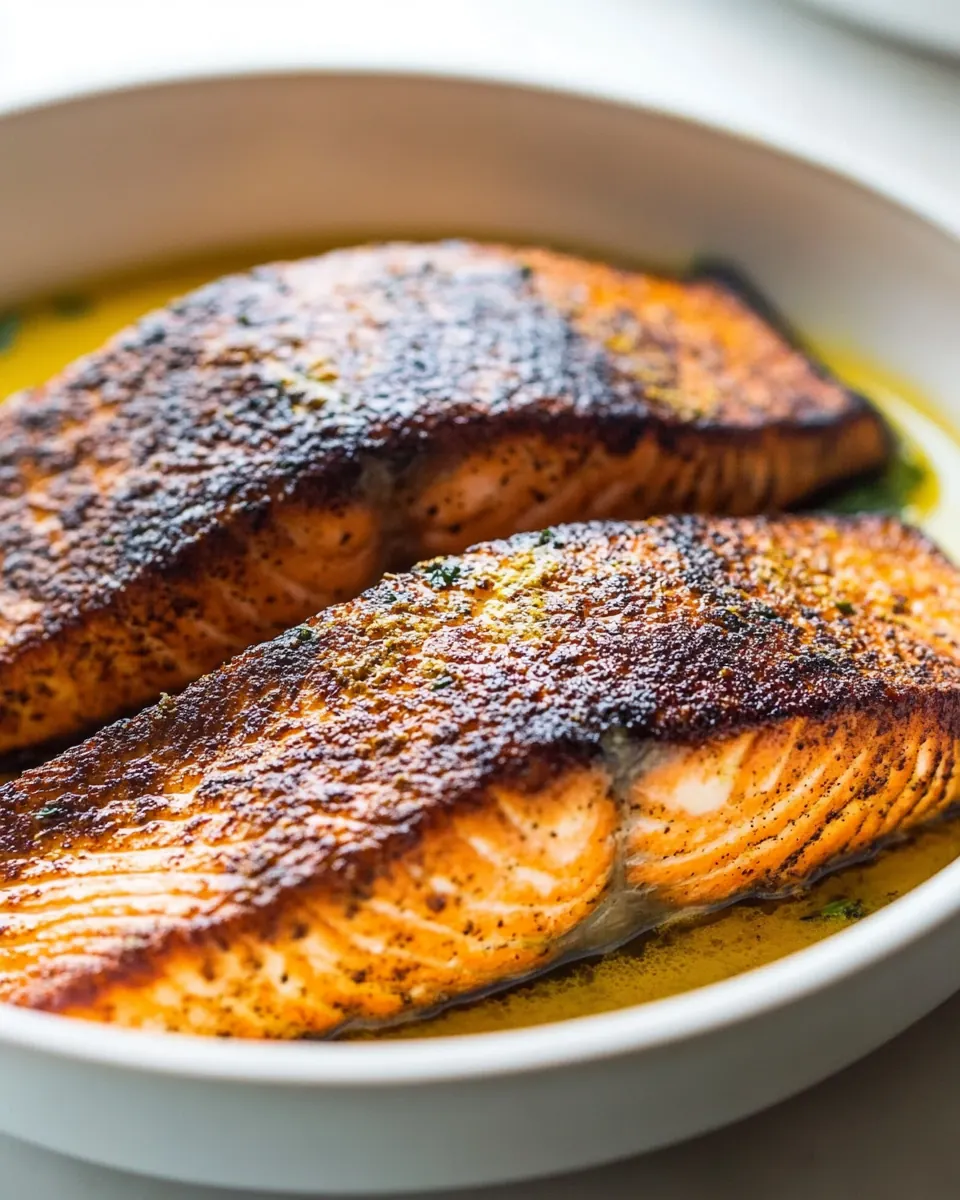
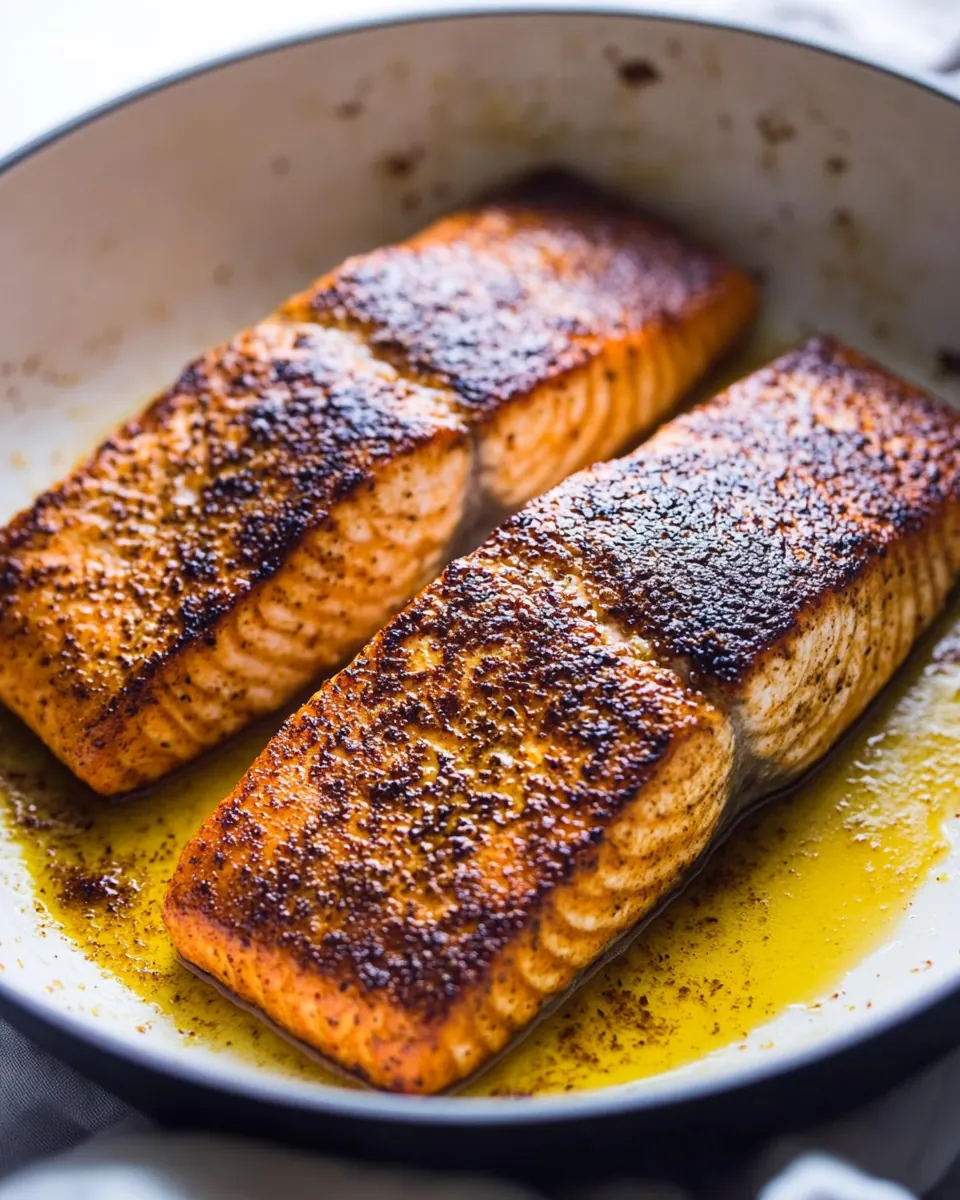
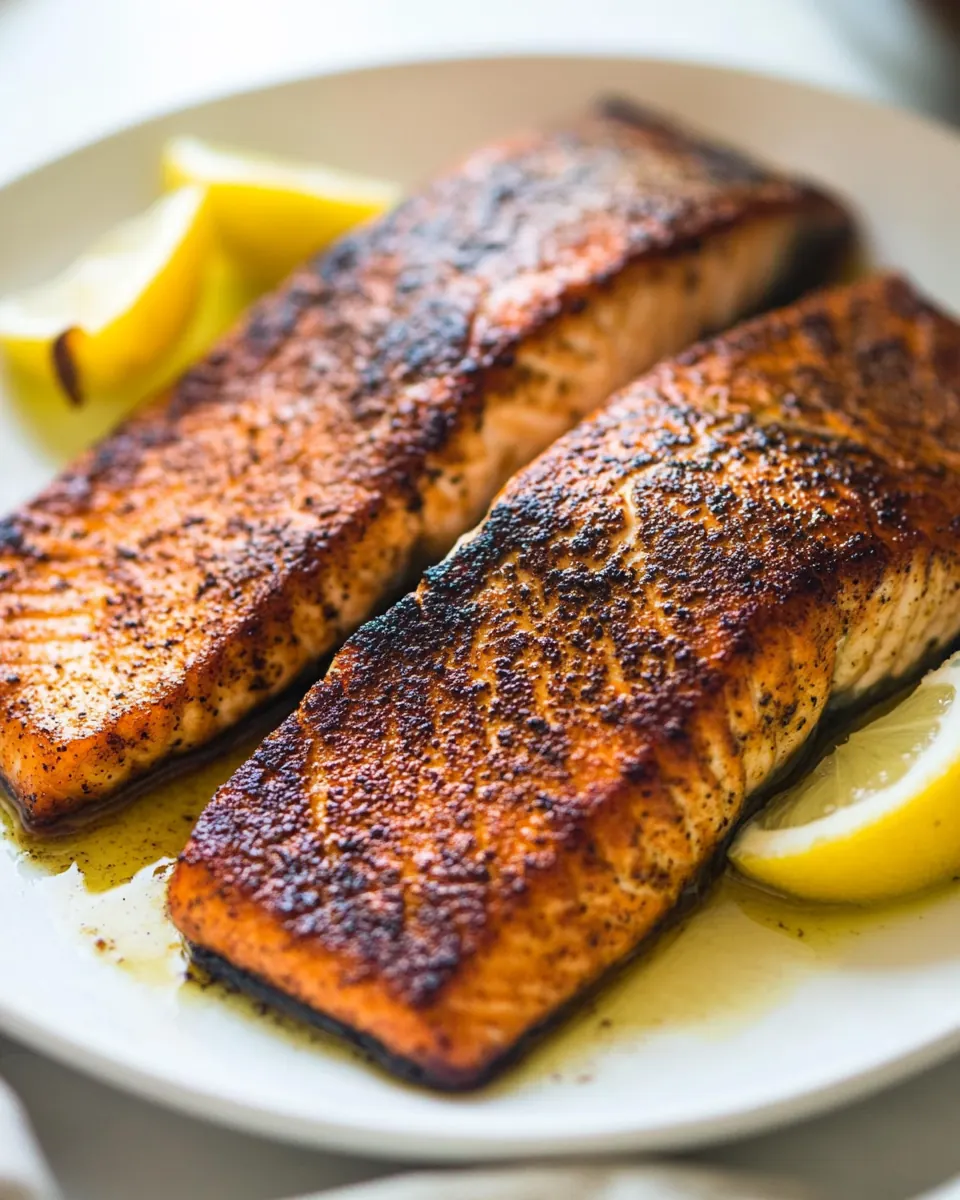
- Place salmon into pan, flesh side down and allow to sear for approximately 5 minutes then flip and sear the other side for 4 to 5 minutes or until center is cooked: As the fillets hit the hot oil you should hear a bright, steady sizzle and see the edges of the flesh start to turn opaque. Searing flesh side down first helps form a golden crust and lets the heat penetrate gently. Resist the urge to move the fish; it needs contact to develop crust. When the edge has a golden band and the fillet releases easily from the pan, that s time to flip. On the second side you ll notice a deeper fragrance, and the skin should be crisp and browned. Cook until the center reaches a tender flake and the flesh is opaque, testing with a fork at the thickest point. Overcooking dries the salmon , so aim for a moist finish. A typical problem is flipping too early, which tears the skin and prevents proper caramelization.
- Turn off heat and allow salmon to rest in the same pan for 5 minutes: Resting lets residual heat finish the gentle cooking while juices redistribute, giving a silky texture inside. You may hear a faint continued sizzle as carryover heat works, and the layers of the fillet will firm slightly while staying moist. Resting in the pan preserves the crust and captures any flavorful juices underneath for a quick spooning at serving. Avoid cutting immediately, because uncaptured juices can spill and make the flesh seem drier than it is. A common oversight is skipping this step, which can leave the center unevenly set and less tender.
Helpful Hints
I like to offer practical tips that anticipate small problems and boost results. These notes expand on the technique and flavor ideas so you can cook with confidence. Below are actionable pointers shaped by repeated testing and real kitchen moments.
- Preheat properly A heavy pan must be very hot to create a sear, so allow at least two minutes over high heat before adding oil. Youll know its ready when the surface shimmers.
- Dry the fish Use paper towels to remove moisture from both sides of each fillet. This small step prevents steaming and is critical for crisp skin.
- Season just before cooking Salt draws moisture, so apply it shortly before the fillets hit the pan to preserve dryness on the surface.
- Use a stable oil Choose an oil that tolerates heat, like olive oil in moderate amounts, and watch for smoke as a signal to slightly lower the temperature.
- Space the fillets Give each piece room in the pan so hot air can circulate and a crisp crust forms rather than the fish steaming together.
What to Serve With Easy 10 Minute Crispy Skin Salmon
This dish is versatile, so I often pair it with simple sides that echo its clean flavors. Think light, bright accompaniments that offer contrast in texture and temperature. Below are detailed serving suggestions and ideas for occasions or storage.
- Light vegetable sides Steamed greens or a quick sauté of seasonal vegetables complement the rich salmon while keeping the plate balanced. Vegetables add freshness and color, and they are great for weeknight dinners.
- Starchy companions Rice, couscous, or roasted potatoes provide a comforting base that absorbs pan juices. These sides are especially welcome when serving family style or for a casual dinner.
- Serving styles For a formal sit down, plate the fillet over a smear of a simple sauce, finishing with a spritz of citrus. For relaxed meals, serve family style on a platter so everyone can help themselves.
- Occasions This recipe works for weeknight dinners, light weekend lunches, or a small dinner party. Its quick timing makes it ideal for busy evenings when you still want a polished plate.
- Storage tips Store leftover cooked salmon in an airtight container in the refrigerator for up to two days. Reheat gently in a low oven or enjoy cold flaked over a salad the next day.
- Seasonal pairings In warmer months I pair it with bright salads and citrus. In cooler weather, I favor roasted root vegetables and a heartier grain side to add warmth.
FAQ
Conclusion
What makes Easy 10 Minute Crispy Skin Salmon special is its combination of speed and sophisticated texture, delivering a crisp exterior and silky interior with minimal fuss. You can easily make an impressive, healthy dinner in the time it takes to set the table, so I encourage you to give it a go tonight or on your next busy evening. This recipe rewards simple technique and attention to a few key details, and once youve tried it youll likely find it becoming a dependable favorite.
Easy 10 Minute Crispy Skin Salmon
Equipment
- Heavy duty pan
- Spatula
- Paper towels
Ingredients
- 4 skin-on salmon fillets, 5-6 ounce pieces Cooked with skin-on to achieve a crispy exterior while keeping the flesh moist; provides the main protein and centerpiece of the dish. Pat dry before seasoning to ensure optimal skin crisping and even cooking. Aim for fillets of similar thickness so they finish at the same time.
- 1/2 teaspoon cumin, optional Added sparingly to introduce a warm, earthy note that complements the salmon's flavor; optional for those who enjoy a slight smokiness. Mix with other spices to create a subtle background layer rather than an overpowering taste. Use cautiously if following a different spice profile.
- 1/2 teaspoon taco seasoning, optional Sprinkled optionally to give a ready-made blend of chilies, cumin, and other spices for a quick, familiar taco-like flavor. Enhances overall seasoning with minimal effort and pairs well with citrus or herbs. Can be omitted for a simpler, more delicate salmon taste.
- 1/4 teaspoon oregano, optional Used optionally to impart a mild Mediterranean herbiness that brightens the seasoning blend; adds a slightly floral, savory touch. Works well when combined with garlic powder and salt for balanced flavor. Use dried oregano for convenience and shelf stability.
- 1/4 teaspoon garlic powder Used to add a savory, roasted pungency that deepens the overall seasoning; helps create a flavorful crust on the salmon. Sprinkle evenly over fillets before cooking to ensure consistent taste. Pairs well with the optional spices and salt.
- salt and pepper to taste Used to adjust and enhance the natural flavors of the salmon and seasonings; balances sweetness and rounds out spices. Apply to taste, salting before cooking to help extract moisture and improve skin crisping. Pepper adds mild heat and aromatic bite.
- 1 tablespoon olive oil Used to prevent sticking and assist in transferring heat for even browning of the skin; contributes a subtle fruity richness. Heat the oil until shimmering before adding fillets to promote a crisp skin and quick sear. Use just enough to coat the pan surface without excess.
Instructions
- Heat a large heavy-duty pan on high heat for about 2 minutes.: When the pan starts to shimmer and you can feel heat rising, that s the cue it s ready. You should hear a faint whoosh when you hover your hand above the surface, and if you sprinkle a drop of water it should skitter and evaporate quickly. The goal is a very hot cooking surface that sears on contact, creating a caramelized crust on the salmon skin. Using a heavy pan helps hold steady heat, which prevents the surface temperature from collapsing when the fish hits the pan. A common mistake here is not allowing the pan enough time to preheat, which leads to sticking and a lackluster crust.
- While the pan is heating up, rub spices onto dry salmon. Pour oil into pre-heated pan (be sure pan is super hot). Place salmon into pan, flesh side down and allow to sear for approximately 5 minutes then flip and sear the other side for 4-5 minutes or until center is cooked.: Patting the fillets completely dry first makes a huge difference in texture. The drier the surface, the faster it browns rather than steams. After drying, sprinkle the measured spices evenly across the flesh and skin, pressing gently so they adhere. You should notice the aroma of the garlic powder and any optional spices becoming more present as you rub them in. This step is about building surface flavor that will toast in the pan, so be mindful not to clump seasonings in one spot. A common misstep is seasoning too early and letting salt draw moisture out, which can impede browning.
- Turn off heat and allow salmon to rest in the same pan for 5 minutes (it will continue cooking as it rests.): Add the tablespoon of olive oil to the hot pan and watch it thin and become glossy immediately. If it smokes heavily right away, the pan may be hotter than you need, so briefly remove it from heat to lower the temperature. The oil is your mediator for heat transfer and helps the skin to release cleanly from the pan. Tilt the pan so the oil forms an even layer; you want a smooth, sizzling contact surface when the fish lands. A frequent error is adding oil to a cold pan, which soaks into any seasonings and prevents the immediate sizzle required for a good sear.
- Place salmon into pan, flesh side down and allow to sear for approximately 5 minutes then flip and sear the other side for 4 to 5 minutes or until center is cooked: As the fillets hit the hot oil you should hear a bright, steady sizzle and see the edges of the flesh start to turn opaque. Searing flesh side down first helps form a golden crust and lets the heat penetrate gently. Resist the urge to move the fish; it needs contact to develop crust. When the edge has a golden band and the fillet releases easily from the pan, that s time to flip. On the second side you ll notice a deeper fragrance, and the skin should be crisp and browned. Cook until the center reaches a tender flake and the flesh is opaque, testing with a fork at the thickest point. Overcooking dries the salmon , so aim for a moist finish. A typical problem is flipping too early, which tears the skin and prevents proper caramelization.
- Turn off heat and allow salmon to rest in the same pan for 5 minutes: Resting lets residual heat finish the gentle cooking while juices redistribute, giving a silky texture inside. You may hear a faint continued sizzle as carryover heat works, and the layers of the fillet will firm slightly while staying moist. Resting in the pan preserves the crust and captures any flavorful juices underneath for a quick spooning at serving. Avoid cutting immediately, because uncaptured juices can spill and make the flesh seem drier than it is. A common oversight is skipping this step, which can leave the center unevenly set and less tender.
Notes
- Preheat properly A heavy pan must be very hot to create a sear, so allow at least two minutes over high heat before adding oil. Youll know its ready when the surface shimmers.
- Dry the fish Use paper towels to remove moisture from both sides of each fillet. This small step prevents steaming and is critical for crisp skin.
- Season just before cooking Salt draws moisture, so apply it shortly before the fillets hit the pan to preserve dryness on the surface.
- Use a stable oil Choose an oil that tolerates heat, like olive oil in moderate amounts, and watch for smoke as a signal to slightly lower the temperature.
- Space the fillets Give each piece room in the pan so hot air can circulate and a crisp crust forms rather than the fish steaming together.