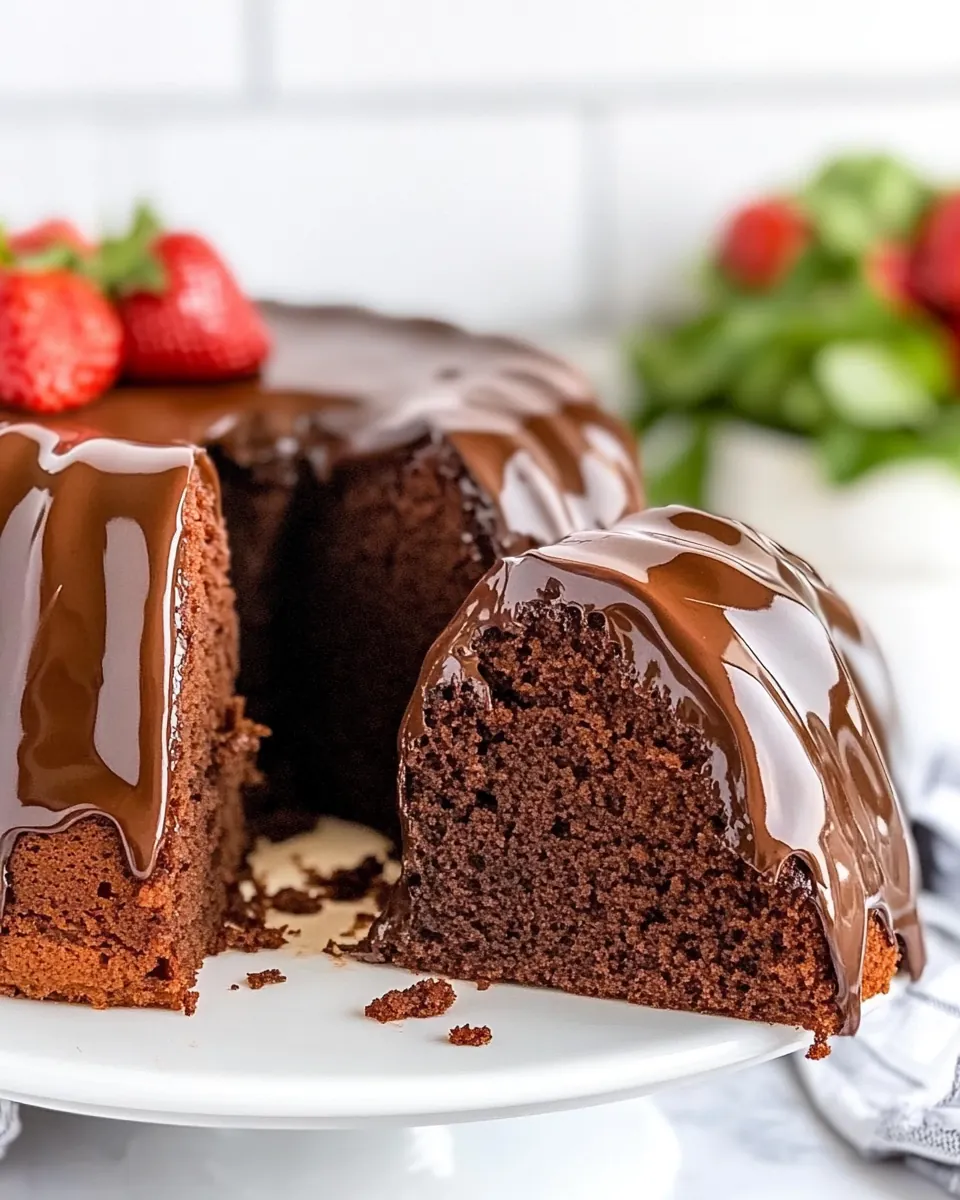
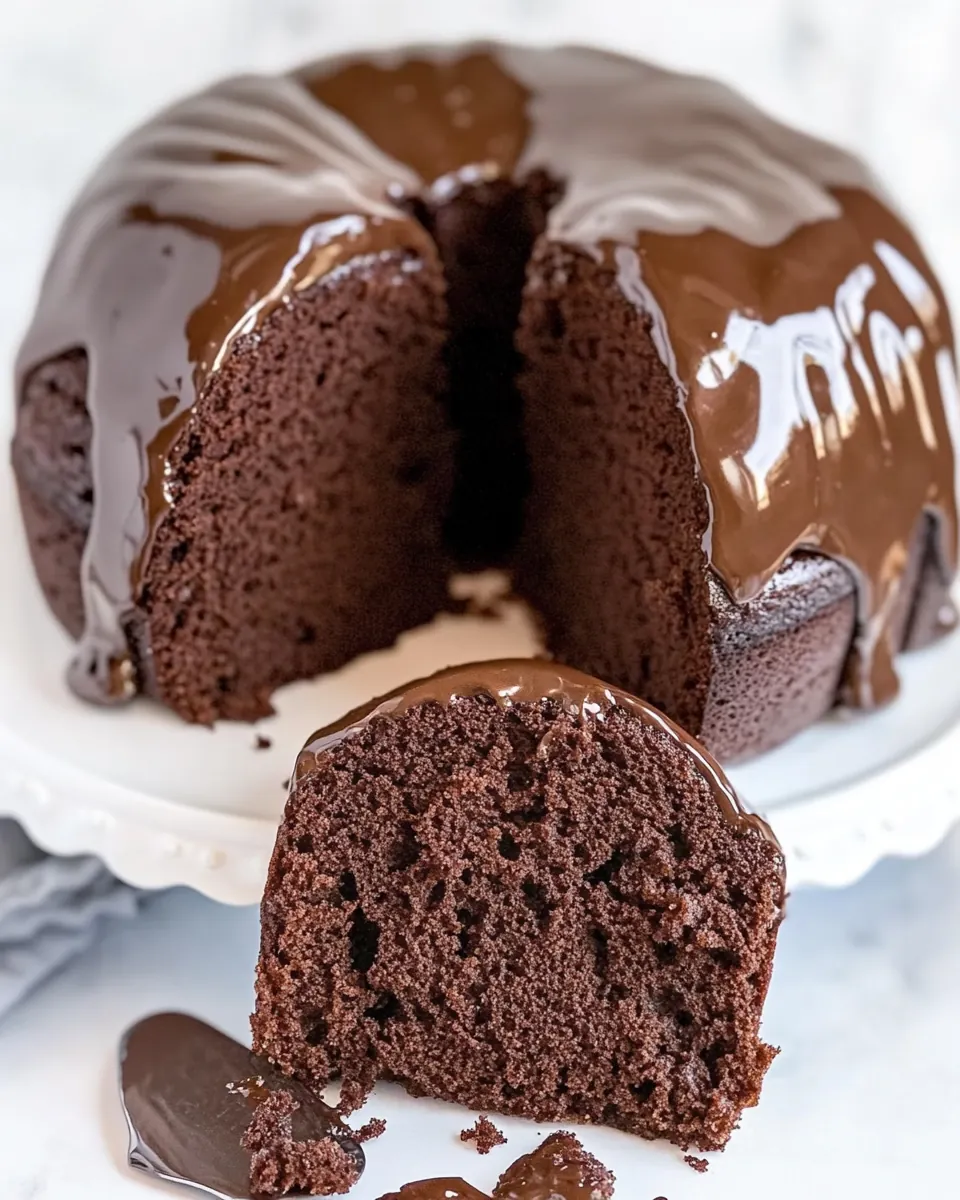
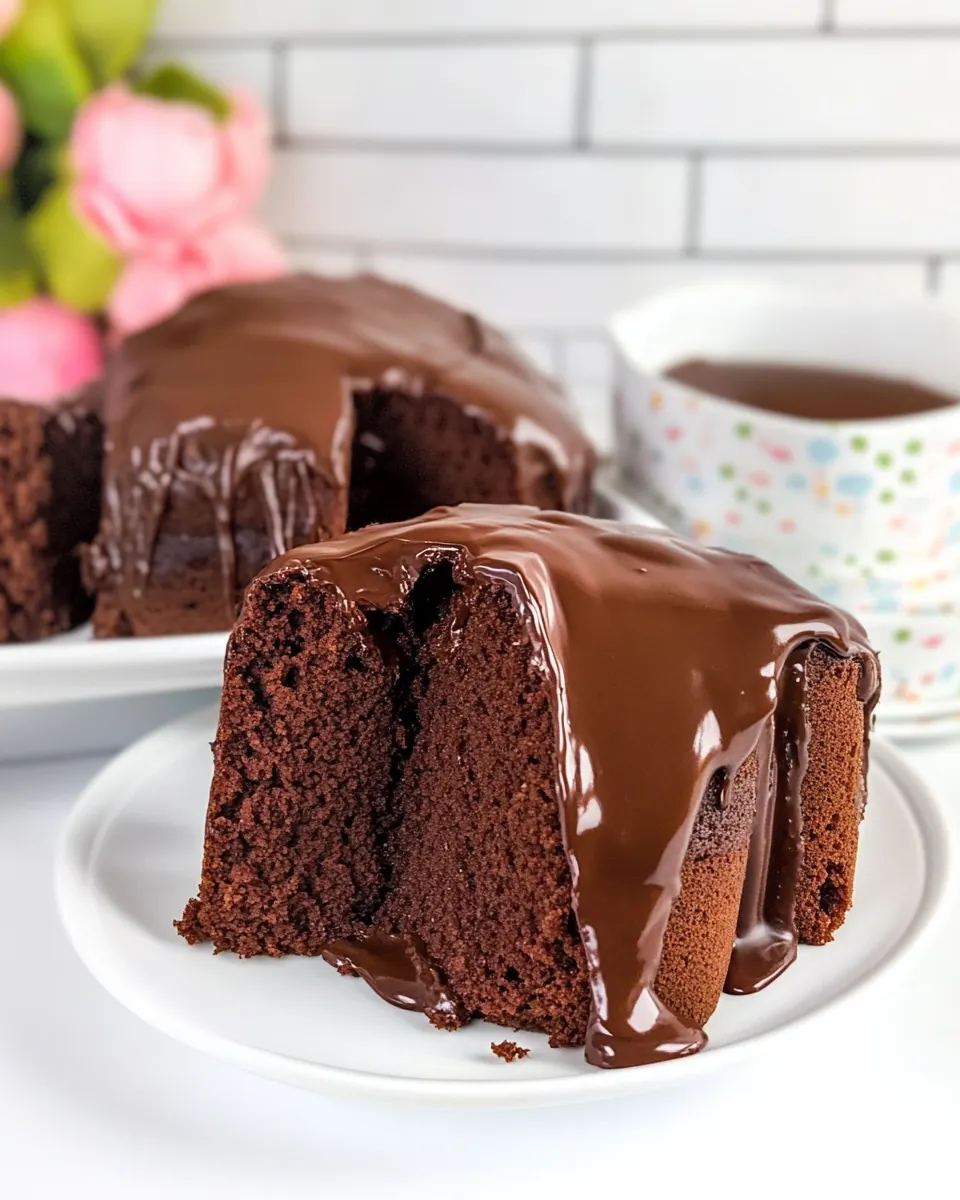
Chocolate Pound Cake
Chocolate Pound Cake has been my go to when I need a cozy, confident dessert to bring to a friend or to slice for a slow Sunday afternoon. The first time I baked this loaf I remember the way the kitchen filled with a warm, cocoa scented hush while I waited for the crumb to set, and how that initial slice steamed softly as I cut it. From that afternoon onward I kept coming back to the recipe, because it somehow balances richness and approachability in a way few desserts do.
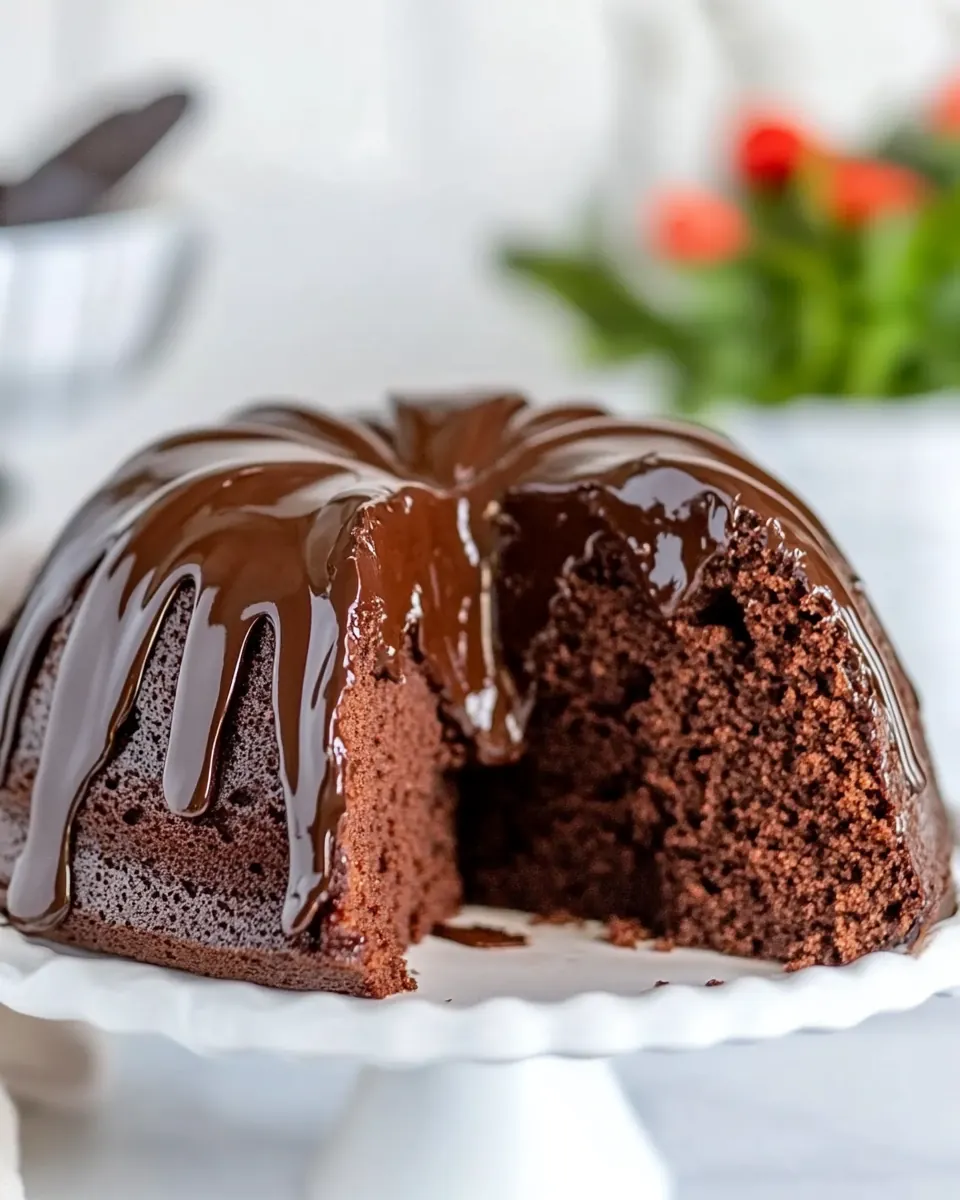
Over the years I have tweaked tiny things, but the heart of the loaf stays the same: a tender crumb from the generous amount of butter and sour cream, an intense chocolate backbone from both Dutch and unsweetened cocoa powder, and a glossy glaze that makes each slice feel a little celebratory. I love how a simple loaf can anchor conversations, whether it is shared after a long walk or offered with coffee for guests who linger. Baking this has become a ritual I return to when I want something reliably satisfying.
Recipe Snapshot
1 hr 20 mins
15 mins
65 mins
Medium
400 kcal
American
Gluten-Free, Low FODMAP
Desserts
Loaf pan, Stand mixer or hand mixer, Mixing bowls, Wire cooling rack, Microwave safe bowl
What Makes This Chocolate Pound Cake Special
Deep chocolate flavor without heaviness
I love that Chocolate Pound Cake uses both Dutch process and unsweetened cocoa powder. That combination gives a layered chocolate profile, with the Dutch powder adding depth and the unsweetened powder contributing clean cocoa bite. This keeps the loaf from tasting flat, and it feels indulgent without being cloying.
Reliable, tender crumb
The generous amount of room temperature butter beaten with granulated sugar, plus the addition of sour cream, yields a tender, moist texture. I find that this formula reduces crumbling and delivers a slice that holds together yet melts in your mouth. The technique of alternating dry ingredients with wet helps keep the crumb fine and consistent.
Simple glaze elevates the loaf
The quick chocolate glaze made from heavy cream and chocolate chips gives a shiny finish that looks professional but takes minutes to make. I like that it adds a silky mouthfeel and a glossy top that makes the loaf look gift ready, without adding heaviness to each bite.
Accessible technique for bakers of all levels
Whether you are new to baking or confident with a stand mixer, this recipe guides you through manageable steps. The instructions teach small skills like dissolving espresso in hot water to amplify chocolate notes, and how to avoid over mixing, which are useful beyond this loaf. I always tell friends this is a great practice cake that also rewards patience.
Flexible and forgiving
This pound cake is forgiving with timing, pan types, and minor ingredient swaps. It tolerates slight variations in oven temperatures and still delivers, and the loaf keeps well at room temperature, which makes planning ahead stress free. For gatherings, I usually bake it the day before and the flavors seem to knit together beautifully overnight.
Ingredients for Chocolate Pound Cake
These ingredients were chosen to build a compact, velvety loaf where texture and chocolate intensity are both priorities. The dry components create structure, while the fats and dairy bring tenderness. Key players like butter and sour cream yield moisture and richness, and the combination of two cocoa powders layers the chocolate profile so the cake tastes complex rather than one note.
- 1 cup all-purpose flour: Measure accurately and provide structure and bulk to the cake; all-purpose flour forms the base of the crumb and supports leavening. Sift or whisk to aerate and ensure even mixing with cocoa and leaveners for a tender pound cake.
- 1/4 cup Dutch process cocoa: Add depth and a smooth chocolate flavor while contributing darker color; Dutch process cocoa reacts less with baking soda so balance pH carefully. Incorporate evenly with dry ingredients to avoid clumps and promote uniform chocolate intensity.
- 1/4 cup unsweetened cocoa powder: Blend for additional chocolate flavor and a slightly brighter, acidic cocoa note that enhances overall chocolate complexity. Use alongside Dutch process cocoa to layer chocolate taste and maintain proper dry-to-wet ratios.
- 1/4 teaspoon baking soda: Provide alkaline leavening to help the cake rise and counteract acidity from some cocoa or sour cream; baking soda contributes to tender crumb when used in small amounts. Dissolve or mix thoroughly with dry ingredients to activate properly during baking.
- 1/4 teaspoon baking powder: Offer acidic leavening to produce lift and fine texture by releasing carbon dioxide when heated; baking powder complements baking soda for balanced rise. Ensure even distribution in the flour to prevent uneven pockets of leavening.
- 1/2 teaspoon kosher salt: Season subtly and enhance overall flavor balance while strengthening gluten slightly; kosher salt rounds out sweetness and intensifies chocolate notes. Use measured amount to avoid over-salting and distribute uniformly in dry mix.
- 2 teaspoons espresso powder or instant coffee: Boost chocolate aroma and intensify flavor; espresso powder or instant coffee enhances cocoa's depth without making the cake taste like coffee. Dissolve in hot water for even incorporation and a concentrated flavor lift.
- 2 tablespoons hot water: Dissolve coffee or espresso powder quickly and release flavors into the batter; hot water ensures instant powders hydrate and integrate seamlessly. Allow to cool slightly if needed before combining with butter or eggs to avoid curdling.
- 1 cup unsalted butter room temperature (2 sticks): Cream until light and fluffy to incorporate air, provide fat for tenderness, and carry flavor; room–temperature unsalted butter helps create a fine, even crumb. Adjust salt separately if using unsalted butter to control seasoning.
- 1 cup granulated sugar: Sweeten the batter and contribute to texture and moisture by dissolving into creamed butter; granulated sugar aids in aeration when beaten, improving rise. Measure precisely to maintain balance between sweetness and structure.
- 3 large eggs room temperature: Emulsify and enrich the batter while adding moisture and structure; room–temperature eggs help trap air when beaten with sugar for lift. Add gradually to avoid curdling and ensure smooth, cohesive batter.
- 2/3 cup sour cream room temperature: Add tang, richness, and acidity to tenderize the crumb and complement cocoa flavors; room–temperature sour cream contributes moisture and a soft texture. Fold in gently to preserve air incorporated during creaming for a light pound cake.
- 2 teaspoons vanilla extract: Enhance overall flavor profile with floral and sweet aromatic notes; vanilla extract rounds out chocolate and dairy elements. Stir in with wet ingredients to distribute flavor evenly throughout the batter.
- 1/2 cup heavy cream or heavy whipping cream: Increase richness and add silky mouthfeel to ganache or glaze; heavy cream provides fat that melts chocolate smoothly for finishing. Warm gently before combining with chocolate chips to form a glossy, pourable topping.
- 1/2 cup bittersweet chocolate chips or dark chocolate chips: Melt into warm cream to create a rich chocolate ganache; bittersweet or dark chocolate chips contribute intense chocolate flavor and structure to the glaze. Choose higher-quality chips for better shine and smoother texture when combined with cream.
- 1 teaspoon butter: Enrich the ganache and impart a glossy finish while adding a hint of buttery flavor; butter helps stabilize and soften the final glaze. Add at the end of melting to emulsify and create a smooth, silky consistency.
- 1/2 teaspoon vanilla extract: Round out the glaze with sweet, aromatic notes and complement chocolate depth; vanilla extract enhances perceived sweetness and complexity. Stir in after removing ganache from heat to preserve delicate aroma.
How to Cook Chocolate Pound Cake
This loaf rewards patience and attention more than speed. I like to gather everything before starting, then move through the steps deliberately so the batter develops properly. Below I expand each direction with sensory cues, rationale, and common pitfalls to watch for.
- Preheat oven to 325°F.: When the oven begins to warm you will notice a faint dry heat that promises even baking, and setting it to 325°F ensures the loaf cooks through without overbrowning on the edges. This moderate temperature produces a tender interior and controlled rise. A common mistake is delaying preheating until after mixing the batter, which can shorten the time the cake spends at the correct temperature and lead to undercooked centers.
- Lightly grease a 8.5 x 4.5” (1 pound) loaf pan (or grease and line with parchment paper).: The smell of melted butter or nonstick spray as you coat the pan is comforting, and lining with parchment gives you clean removal later. Greasing the pan evenly helps the loaf release and prevents jagged edges. Avoid under-greasing or skipping the parchment, as the cake can stick and tear when being removed.
- In a medium bowl, whisk together flour, both cocoa powders, baking soda, baking powder and salt. Set aside.: As you whisk, the cocoa and flour will take on a uniform, darker hue and you will feel any lumps break up. Sifting or vigorous whisking ensures even distribution of leaveners and salt so there are no pockets of bitter cocoa or uneven rise. A typical error is to eyeball measurements and not fully combine dry ingredients, which can cause dense patches in the finished loaf.
- In a small bowl, dissolve the espresso powder or instant coffee in the hot water. Stir until completely dissolved. Set aside.: The aroma of the dissolved espresso will be strong and aromatic, amplifying the chocolate scent when added to the batter. Dissolving fully prevents gritty specks and ensures the coffee integrates smoothly. Do not use boiling water, as it can scorch delicate flavor; hot but not scalding is best.
- Add butter and sugar to the bowl of a stand mixer (or a large mixing bowl if using a hand mixer) and mix on medium high speed for approximately 5 minutes, scraping down the sides and bottom of the bowl regularly, until the mixture is very light in color and fluffy.: As the butter and granulated sugar cream together you will hear a soft whir and see the mixture transform from pale to pale and billowy, with a texture like whipped cream. This aeration is critical for a tender crumb and lift. Stop several times to scrape so you don’t leave pockets of unmixed butter. Overworking after eggs are added can break the emulsion, so keep an eye on timing.
- Scrape down the bowl again and then add one egg at a time to the mixer on medium speed, making sure the egg is fully incorporated before adding the next egg. Scrape down the bowl with each additional egg.: After each egg goes in you will notice the mixture smooth slightly and regain volume, as the protein helps structure the batter. Adding eggs slowly maintains a stable emulsion and avoids curdling. A common misstep is dumping all eggs at once, which can separate the mixture and cause a lumpy batter.
- Add the sour cream, vanilla extract and espresso or coffee to the bowl and mix on medium-low speed until completely incorporated. Scrape down the bowl as needed.: When the sour cream and dissolved espresso are incorporated, the batter will look glossy and feel slightly denser, which is what you want for a moist loaf. Mix just long enough for homogeneity, because over mixing can activate gluten in the flour and lead to toughness. If you see streaks of sour cream, scrape and mix briefly to blend.
- Add half of the dry ingredients and mix on the lowest setting just until incorporated. Add remaining half and mix just until incorporated. Do NOT over mix. If you need to, use a spatula to fold in the flour mixture. Make sure the sides and bottom of the bowl have been scraped down during this process.: The batter will thicken and darken as the dry mix disappears, and you should stop mixing as soon as you no longer see streaks of flour. Folding by hand prevents over development of gluten, preserving a tender crumb. The most common error here is over mixing, which produces a tight, rubbery texture rather than tender slices.
- Carefully transfer batter to the prepared loaf pan and bake for 50 to 65 minutes. Each oven is different. Check halfway through to make sure the cake isn't browning too quickly. If you see some dark spots, tent with foil.: As the loaf bakes you will smell richer chocolate and the surface will set with a gentle sheen. The edges will pull slightly from the pan and the center will spring back when touched lightly. Tent with foil if the top darkens too fast, because direct heat can burn the sugar and make a bitter crust. Avoid opening the oven too often, as that can cause the center to sink.
- To determine when the cake is done, insert a skewer or toothpick into the thickest part of the cake. There should be a few moist crumbs on the skewer. Let cool in pan for 20 to 30 minutes before transferring to a wire cooling rack. Let cool before glazing.: The skewer test gives an accurate cue, and when you see a few moist crumbs rather than raw batter you know the loaf reached the right tenderness. Cooling in the pan lets internal steam redistribute, preventing collapse. A frequent mistake is removing the loaf too soon from the pan, which can make it fall apart when transferred.
- Place chocolate chips in a small heat proof bowl.: The pile of chips will look glossy and promise richness, and using a heat proof bowl ensures safe melting. This setup lets you make a smooth glaze quickly and control the final consistency. Avoid using wet or damp bowls, as water can seize chocolate and ruin the glaze.
- Heat heavy cream in a microwave safe bowl on low heat in the microwave in 15 second increments until the cream just begins to simmer and bubbles form at the edges.: As the heavy cream warms you will see tiny bubbles form at the rim and scent will turn creamy and faintly sweet. Heating gently prevents boiling over and maintains a silky texture for the glaze. Overheating can scald the cream and alter taste, so watch carefully between increments.
- Pour the hot cream over the chocolate chips and let sit for 5 minutes.: The heat will coax the chips into melting, and after a short rest you will see the chocolate soften and the mixture become glossy. This rest time allows the chocolate to melt evenly without excessive stirring, giving a smooth ganache. Stirring too early can create an uneven texture and streaks.
- Add the teaspoon of butter and vanilla extract and whisk until smooth and shiny. Allow to cool slightly, about 10 to 20 minutes. Drizzle the glaze over the top of the cake or serve with the glaze on the side.: Whisking brings the glaze to a satin sheen, and as it cools it will thicken to a pourable consistency that clings to the loaf. The final aroma will be deeper chocolate with buttery warmth. If the glaze is too hot it will sink into the cake rather than coat it, so cool just enough for a thick drizzle. A common error is glazing while the cake is still too warm, which can make the topping run off and pool on the plate.
Recipe Tips about Chocolate Pound Cake
I like to share practical tips that help the loaf turn out reliably every time. Below are focused pointers that expand on the reasoning behind the method and offer small adjustments that can make a big difference.
- Bring dairy to room temperature: Allowing sour cream and eggs to sit at room temperature for about 30 minutes helps them combine seamlessly into the batter, preventing lumps and encouraging even rise.
- Sift cocoa powders if clumpy: If your Dutch or unsweetened cocoa powder looks compacted, sift it into the dry mix to avoid dry pockets in the loaf and ensure a smooth texture.
- Use a light colored pan: A light colored metal loaf pan bakes more evenly and reduces the chance of overbrowning, preserving the ideal crust to crumb balance.
- Rotate the pan once: Rotate the loaf pan gently at the halfway point for even browning, but avoid opening the oven too often to maintain steady temperature.
- Test doneness with skewer: Insert a skewer into the center and expect a few moist crumbs to cling to it, indicating the cake is done yet still tender, rather than a completely dry skewer which means it may be overbaked.
Accompaniments for Chocolate Pound Cake
This loaf pairs well with simple, thoughtful accompaniments that accentuate its chocolate profile. Whether serving at a casual coffee break or a small celebration, pairing choices can shift the mood and offer contrast in texture and temperature.
- Serve warm with coffee: A fresh slice warmed briefly and paired with a cup of coffee or espresso is classic; the steaming slice softens the glaze and heightens aroma, making it ideal for morning or mid afternoon.
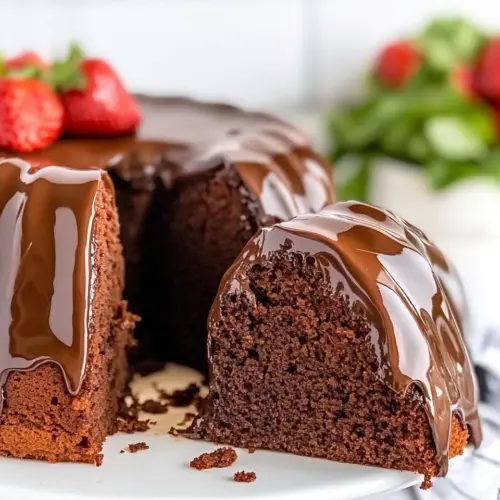
- Plate with fresh fruit: Bright berries provide acidity that balances the rich chocolate, making the loaf suitable for brunch or a light dessert after dinner.
- Offer whipped cream or mascarpone: A dollop of lightly sweetened whipped cream or a spoonful of mascarpone adds a creamy counterpoint that complements the dense crumb and glossy glaze.
- Pack for picnics or potlucks: This loaf travels well at room temperature, making it a strong option for gatherings, where you can slice and serve without reheating.
- Storage advice: Store the loaf at room temperature in an airtight container for up to three days for best texture, as refrigeration can dry it out; this makes planning ahead for events easy and reliable.
FAQ
Conclusion
This Chocolate Pound Cake stands out for its deep chocolate character and reliably tender crumb, making it both comforting and impressive. I encourage you to try it when you want a dessert that feels special but is straightforward to make, whether for a weekend treat or to share with friends. Enjoy the process of mixing, baking, and glazing, and savor the simple pleasure of a well made slice.
Chocolate Pound Cake
Equipment
- Loaf Pan
- Stand mixer or hand mixer
- Mixing Bowls
- wire cooling rack
- Microwave-safe Bowl
Ingredients
- 1 cup all-purpose flour Measure accurately and provide structure and bulk to the cake; all-purpose flour forms the base of the crumb and supports leavening. Sift or whisk to aerate and ensure even mixing with cocoa and leaveners for a tender pound cake.
- 1/4 cup Dutch process cocoa Add depth and a smooth chocolate flavor while contributing darker color; Dutch process cocoa reacts less with baking soda so balance pH carefully. Incorporate evenly with dry ingredients to avoid clumps and promote uniform chocolate intensity.
- 1/4 cup unsweetened cocoa powder Blend for additional chocolate flavor and a slightly brighter, acidic cocoa note that enhances overall chocolate complexity. Use alongside Dutch process cocoa to layer chocolate taste and maintain proper dry-to-wet ratios.
- 1/4 teaspoon baking soda Provide alkaline leavening to help the cake rise and counteract acidity from some cocoa or sour cream; baking soda contributes to tender crumb when used in small amounts. Dissolve or mix thoroughly with dry ingredients to activate properly during baking.
- 1/4 teaspoon baking powder Offer acidic leavening to produce lift and fine texture by releasing carbon dioxide when heated; baking powder complements baking soda for balanced rise. Ensure even distribution in the flour to prevent uneven pockets of leavening.
- 1/2 teaspoon kosher salt Season subtly and enhance overall flavor balance while strengthening gluten slightly; kosher salt rounds out sweetness and intensifies chocolate notes. Use measured amount to avoid over-salting and distribute uniformly in dry mix.
- 2 teaspoons espresso powder or instant coffee Boost chocolate aroma and intensify flavor; espresso powder or instant coffee enhances cocoa's depth without making the cake taste like coffee. Dissolve in hot water for even incorporation and a concentrated flavor lift.
- 2 tablespoons hot water Dissolve coffee or espresso powder quickly and release flavors into the batter; hot water ensures instant powders hydrate and integrate seamlessly. Allow to cool slightly if needed before combining with butter or eggs to avoid curdling.
- 1 cup unsalted butter room temperature (2 sticks) Cream until light and fluffy to incorporate air, provide fat for tenderness, and carry flavor; room-temperature unsalted butter helps create a fine, even crumb. Adjust salt separately if using unsalted butter to control seasoning.
- 1 cup granulated sugar Sweeten the batter and contribute to texture and moisture by dissolving into creamed butter; granulated sugar aids in aeration when beaten, improving rise. Measure precisely to maintain balance between sweetness and structure.
- 3 large eggs room temperature Emulsify and enrich the batter while adding moisture and structure; room-temperature eggs help trap air when beaten with sugar for lift. Add gradually to avoid curdling and ensure smooth, cohesive batter.
- 2/3 cup sour cream room temperature Add tang, richness, and acidity to tenderize the crumb and complement cocoa flavors; room-temperature sour cream contributes moisture and a soft texture. Fold in gently to preserve air incorporated during creaming for a light pound cake.
- 2 teaspoons vanilla extract Enhance overall flavor profile with floral and sweet aromatic notes; vanilla extract rounds out chocolate and dairy elements. Stir in with wet ingredients to distribute flavor evenly throughout the batter.
- 1/2 cup heavy cream or heavy whipping cream Increase richness and add silky mouthfeel to ganache or glaze; heavy cream provides fat that melts chocolate smoothly for finishing. Warm gently before combining with chocolate chips to form a glossy, pourable topping.
- 1/2 cup bittersweet chocolate chips or dark chocolate chips Melt into warm cream to create a rich chocolate ganache; bittersweet or dark chocolate chips contribute intense chocolate flavor and structure to the glaze. Choose higher-quality chips for better shine and smoother texture when combined with cream.
- 1 teaspoon butter Enrich the ganache and impart a glossy finish while adding a hint of buttery flavor; butter helps stabilize and soften the final glaze. Add at the end of melting to emulsify and create a smooth, silky consistency.
- 1/2 teaspoon vanilla extract Round out the glaze with sweet, aromatic notes and complement chocolate depth; vanilla extract enhances perceived sweetness and complexity. Stir in after removing ganache from heat to preserve delicate aroma.
Instructions
- Preheat oven to 325°F.: When the oven begins to warm you will notice a faint dry heat that promises even baking, and setting it to 325°F ensures the loaf cooks through without overbrowning on the edges. This moderate temperature produces a tender interior and controlled rise. A common mistake is delaying preheating until after mixing the batter, which can shorten the time the cake spends at the correct temperature and lead to undercooked centers.
- Lightly grease a 8.5 x 4.5” (1 pound) loaf pan (or grease and line with parchment paper).: The smell of melted butter or nonstick spray as you coat the pan is comforting, and lining with parchment gives you clean removal later. Greasing the pan evenly helps the loaf release and prevents jagged edges. Avoid under-greasing or skipping the parchment, as the cake can stick and tear when being removed.
- In a medium bowl, whisk together flour, both cocoa powders, baking soda, baking powder and salt. Set aside.: As you whisk, the cocoa and flour will take on a uniform, darker hue and you will feel any lumps break up. Sifting or vigorous whisking ensures even distribution of leaveners and salt so there are no pockets of bitter cocoa or uneven rise. A typical error is to eyeball measurements and not fully combine dry ingredients, which can cause dense patches in the finished loaf.
- In a small bowl, dissolve the espresso powder or instant coffee in the hot water. Stir until completely dissolved. Set aside.: The aroma of the dissolved espresso will be strong and aromatic, amplifying the chocolate scent when added to the batter. Dissolving fully prevents gritty specks and ensures the coffee integrates smoothly. Do not use boiling water, as it can scorch delicate flavor; hot but not scalding is best.
- Add butter and sugar to the bowl of a stand mixer (or a large mixing bowl if using a hand mixer) and mix on medium high speed for approximately 5 minutes, scraping down the sides and bottom of the bowl regularly, until the mixture is very light in color and fluffy.: As the butter and granulated sugar cream together you will hear a soft whir and see the mixture transform from pale to pale and billowy, with a texture like whipped cream. This aeration is critical for a tender crumb and lift. Stop several times to scrape so you don’t leave pockets of unmixed butter. Overworking after eggs are added can break the emulsion, so keep an eye on timing.
- Scrape down the bowl again and then add one egg at a time to the mixer on medium speed, making sure the egg is fully incorporated before adding the next egg. Scrape down the bowl with each additional egg.: After each egg goes in you will notice the mixture smooth slightly and regain volume, as the protein helps structure the batter. Adding eggs slowly maintains a stable emulsion and avoids curdling. A common misstep is dumping all eggs at once, which can separate the mixture and cause a lumpy batter.
- Add the sour cream, vanilla extract and espresso or coffee to the bowl and mix on medium-low speed until completely incorporated. Scrape down the bowl as needed.: When the sour cream and dissolved espresso are incorporated, the batter will look glossy and feel slightly denser, which is what you want for a moist loaf. Mix just long enough for homogeneity, because over mixing can activate gluten in the flour and lead to toughness. If you see streaks of sour cream, scrape and mix briefly to blend.
- Add half of the dry ingredients and mix on the lowest setting just until incorporated. Add remaining half and mix just until incorporated. Do NOT over mix. If you need to, use a spatula to fold in the flour mixture. Make sure the sides and bottom of the bowl have been scraped down during this process.: The batter will thicken and darken as the dry mix disappears, and you should stop mixing as soon as you no longer see streaks of flour. Folding by hand prevents over development of gluten, preserving a tender crumb. The most common error here is over mixing, which produces a tight, rubbery texture rather than tender slices.
- Carefully transfer batter to the prepared loaf pan and bake for 50 to 65 minutes. Each oven is different. Check halfway through to make sure the cake isn't browning too quickly. If you see some dark spots, tent with foil.: As the loaf bakes you will smell richer chocolate and the surface will set with a gentle sheen. The edges will pull slightly from the pan and the center will spring back when touched lightly. Tent with foil if the top darkens too fast, because direct heat can burn the sugar and make a bitter crust. Avoid opening the oven too often, as that can cause the center to sink.
- To determine when the cake is done, insert a skewer or toothpick into the thickest part of the cake. There should be a few moist crumbs on the skewer. Let cool in pan for 20 to 30 minutes before transferring to a wire cooling rack. Let cool before glazing.: The skewer test gives an accurate cue, and when you see a few moist crumbs rather than raw batter you know the loaf reached the right tenderness. Cooling in the pan lets internal steam redistribute, preventing collapse. A frequent mistake is removing the loaf too soon from the pan, which can make it fall apart when transferred.
- Place chocolate chips in a small heat proof bowl.: The pile of chips will look glossy and promise richness, and using a heat proof bowl ensures safe melting. This setup lets you make a smooth glaze quickly and control the final consistency. Avoid using wet or damp bowls, as water can seize chocolate and ruin the glaze.
- Heat heavy cream in a microwave safe bowl on low heat in the microwave in 15 second increments until the cream just begins to simmer and bubbles form at the edges.: As the heavy cream warms you will see tiny bubbles form at the rim and scent will turn creamy and faintly sweet. Heating gently prevents boiling over and maintains a silky texture for the glaze. Overheating can scald the cream and alter taste, so watch carefully between increments.
- Pour the hot cream over the chocolate chips and let sit for 5 minutes.: The heat will coax the chips into melting, and after a short rest you will see the chocolate soften and the mixture become glossy. This rest time allows the chocolate to melt evenly without excessive stirring, giving a smooth ganache. Stirring too early can create an uneven texture and streaks.
- Add the teaspoon of butter and vanilla extract and whisk until smooth and shiny. Allow to cool slightly, about 10 to 20 minutes. Drizzle the glaze over the top of the cake or serve with the glaze on the side.: Whisking brings the glaze to a satin sheen, and as it cools it will thicken to a pourable consistency that clings to the loaf. The final aroma will be deeper chocolate with buttery warmth. If the glaze is too hot it will sink into the cake rather than coat it, so cool just enough for a thick drizzle. A common error is glazing while the cake is still too warm, which can make the topping run off and pool on the plate.
Notes
- Bring dairy to room temperature: Allowing sour cream and eggs to sit at room temperature for about 30 minutes helps them combine seamlessly into the batter, preventing lumps and encouraging even rise.
- Sift cocoa powders if clumpy: If your Dutch or unsweetened cocoa powder looks compacted, sift it into the dry mix to avoid dry pockets in the loaf and ensure a smooth texture.
- Use a light colored pan: A light colored metal loaf pan bakes more evenly and reduces the chance of overbrowning, preserving the ideal crust to crumb balance.
- Rotate the pan once: Rotate the loaf pan gently at the halfway point for even browning, but avoid opening the oven too often to maintain steady temperature.
- Test doneness with skewer: Insert a skewer into the center and expect a few moist crumbs to cling to it, indicating the cake is done yet still tender, rather than a completely dry skewer which means it may be overbaked.