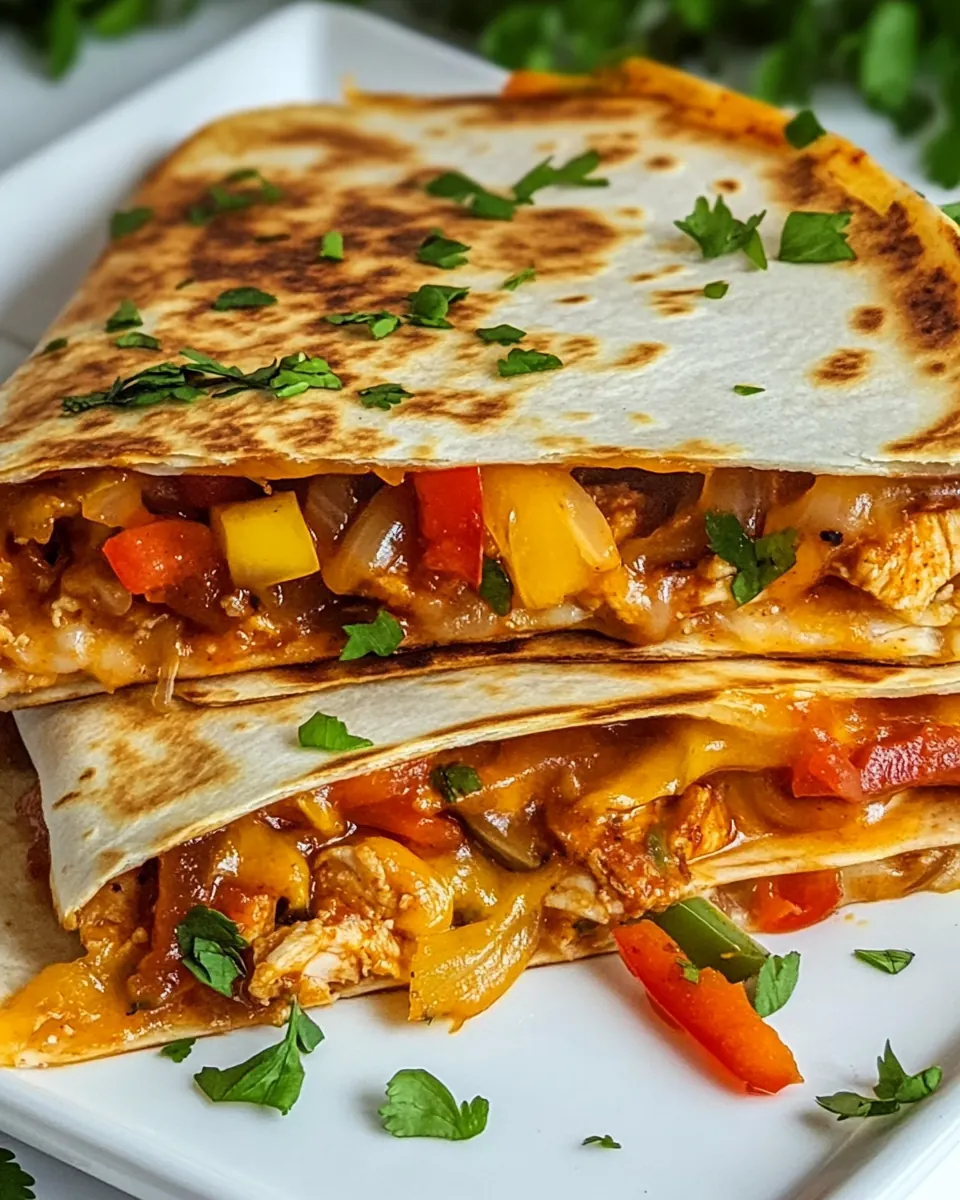
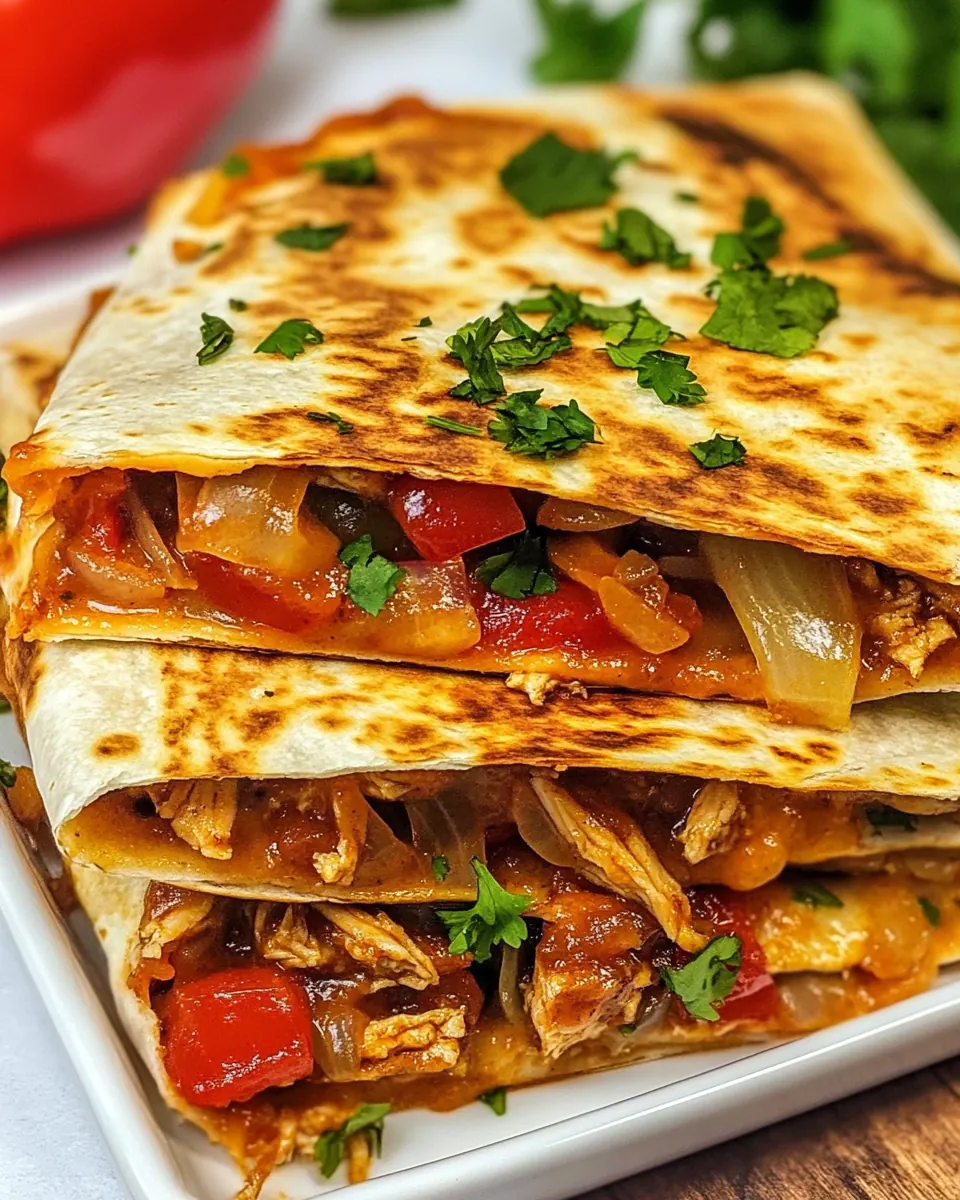
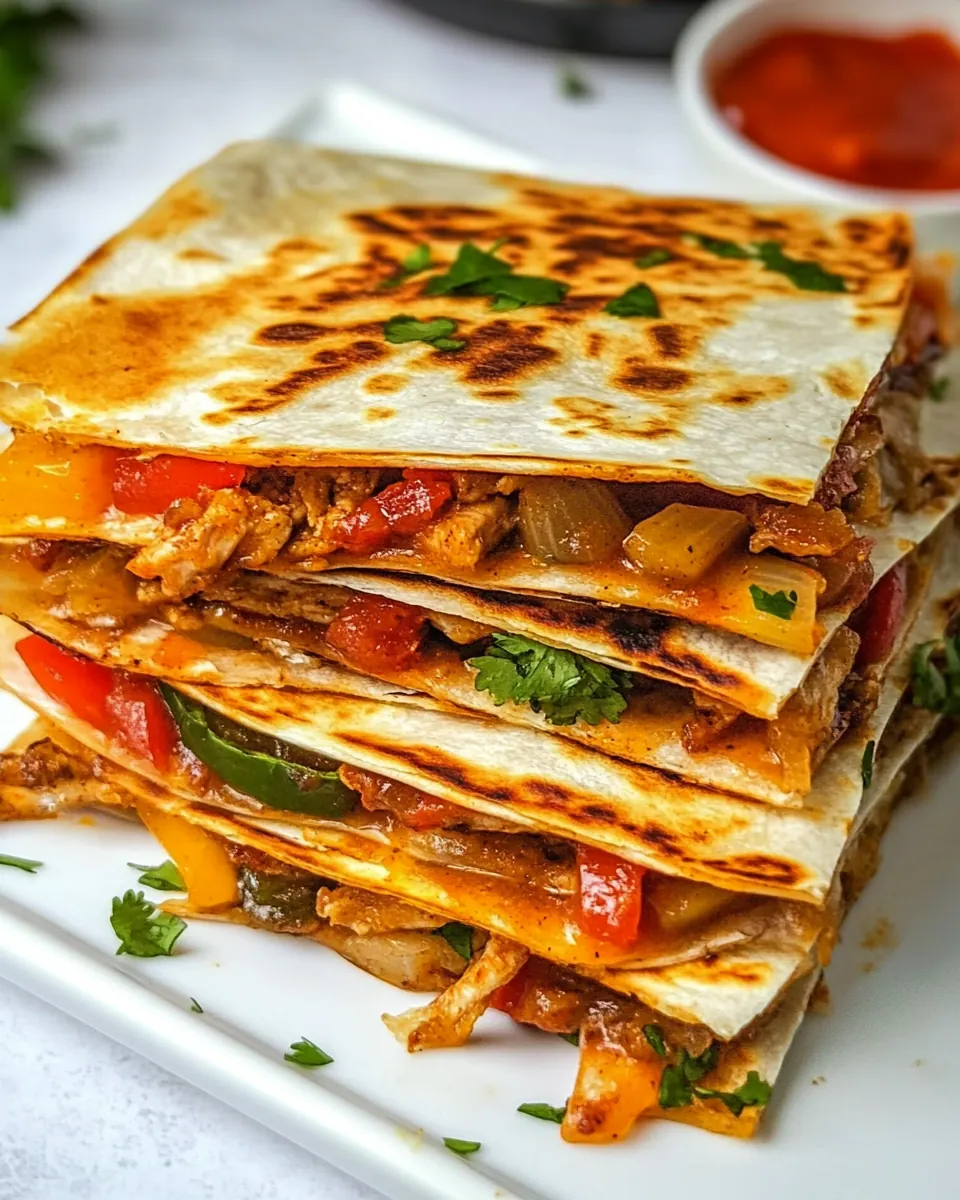
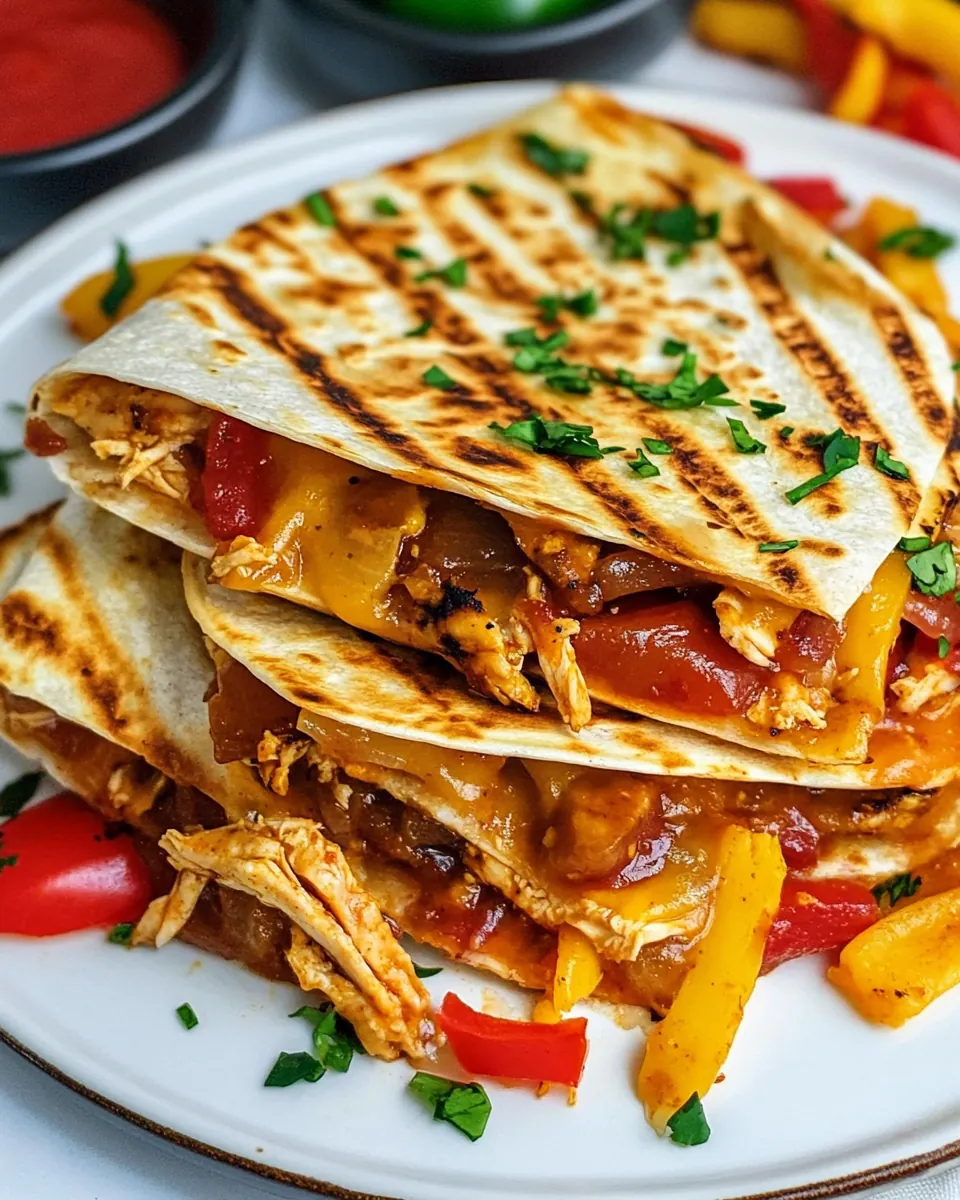
Chicken Fajita Quesadillas
Chicken Fajita Quesadillas are the kind of weeknight hero I turn to when I want something fast, satisfying, and a little bit nostalgic.
I remember the first time I made these, juggling a handful of things on the stove while my kitchen smelled like toasted tortillas and sizzling onions, and thinking that comfort can come together in one skillet. I like how the combination of warm, slightly crisp tortillas and the juicy, seasoned filling brings people to the table with hungry smiles. Over time I tuned the balance between the peppers, onions, and chicken so every bite has a savory hit and a gentle spice. I often make them when friends drop by unexpectedly, because they assemble quickly and everyone always wants seconds. There is a rhythm to the process, from the first sizzle of olive oil to the satisfying squeak of melted Tex Mex cheese as you pull a quartered wedge apart. These quesadillas have become my easy weeknight fallback, the recipe I reach for when I want something crowd pleasing but not fussy.
Recipe Snapshot
30 mins
10 mins
20 mins
Easy
400 kcal
Mexican
Gluten-Free, Low FODMAP
Dinner
12-inch Cast Iron Skillet
Why This Chicken Fajita Quesadillas Is So Good
They are wildly simple to pull together
I love how Chicken Fajita Quesadillas demand very little finesse, yet reward you with big flavors. A quick sear of the chicken and a short cook of the peppers and onions means you can have dinner on the table in about half an hour. I appreciate recipes that respect a busy evening, and this one fits that bill perfectly.
Texture contrast that keeps you coming back
I always point out the satisfying contrast between the warm, slightly crisp tortilla and the melty, gooey Tex Mex cheese. The juicy strips of chicken and the tender bite of the peppers create a mouthfeel that feels indulgent without being heavy. When I serve these, people notice the layers immediately, and that makes the experience more memorable.
Versatility is a big win
What I adore is how forgiving the recipe is. You can scale it up for a crowd or make it for two. I often switch cheeses or try different tortillas, and it still sings. That adaptability makes it a go to for casual dinners, game nights, or feeding hungry kids after activities.
Comfort food with a fresh twist
These quesadillas capture the smoky, savory notes of fajitas in a handheld form, which feels both comforting and fun. I find that serving them with simple sides like salsa and sour cream elevates the whole meal without adding work. For me, that balance between ease and flavor is why I keep this recipe in heavy rotation.
Reliable crowd pleaser
I trust Chicken Fajita Quesadillas because they please a range of tastes. From picky eaters to spice lovers, everyone finds something to enjoy. That reliability means I can focus on enjoying company, not fretting over dinner.
Ingredients You’ll Need for Chicken Fajita Quesadillas
These ingredients are the foundation of what makes these quesadillas sing. I always think of the recipe as a trio of key players: the seasoned chicken for protein and savory depth, the peppers and onions for sweet and aromatic contrast, and the cheese and tortillas to bind everything into that irresistible melty handheld form.
- 2 tablespoons olive oil: Heat and coat the pan with a neutral-flavored oil to prevent sticking and promote even browning; olive oil also adds a subtle fruity aroma that complements the peppers and chicken. Use at medium-high heat to sear the chicken strips quickly for juicy interior and caramelized edges.
- 2 tablespoons fajita seasoning: Season and flavor the chicken and vegetables with a concentrated blend of spices; fajita seasoning brings cumin, chili, garlic, and paprika notes that define the dish. Sprinkle evenly while cooking to build layered savory and slightly smoky flavors throughout the filling.
- 3 chicken breasts (boneless and skinless, cut into long strips): Prepare and slice lean protein into long strips for quick, uniform cooking and easy folding into tortillas; boneless, skinless breasts provide a mild base that soaks up seasoning. Cook until just done to keep the meat tender for the quesadilla assembly.
- 1 medium red bell pepper (cut into long strips): Slice into long strips to add sweet, bright color and crisp texture; red bell pepper contributes a mild fruity sweetness that balances the spice. Sauté with onions until slightly softened to maintain some bite and enhance overall visual appeal.
- 1 medium green bell pepper (cut into long strips): Cut into matching long strips for balanced texture and color contrast; green bell pepper brings a slightly grassy, peppery note that complements the red pepper. Cook with the other vegetables to meld flavors while retaining a pleasant crunch.
- 2 large onions (sliced): Slice thinly to caramelize and impart natural sweetness and depth; onions create a savory base that ties the chicken and peppers together. Cook slowly until translucent or lightly browned to develop richer flavor in the quesadilla filling.
- 2 tablespoons butter: Melt in the skillet to add richness and help crisp the tortilla edges while cooking; butter provides a nutty, creamy flavor that enhances browning. Use sparingly when toasting the assembled quesadillas for a golden, flaky exterior.
- 1 cup Tex Mex cheese (or cheddar cheese): Shred or grate to create a cohesive, melty filling that binds the ingredients; Tex Mex or cheddar delivers a creamy, tangy profile and good melting characteristics. Sprinkle evenly so each bite has cheesy stretch and flavor.
- 8 tortillas: Warm or toast to serve as the vessel for the filling; tortillas should be flexible enough to fold without cracking and sturdy enough to hold the ingredients. Lightly heat before assembling for easier folding and better texture when grilled.
- salsa: Serve as a bright, tangy condiment to cut through richness and add fresh flavor; salsa provides acidity, heat, and texture that complements the savory quesadilla. Offer on the side for dipping or spooning over sliced quesadilla pieces.
- sour cream: Chill and spoon as a cool, creamy accompaniment to balance heat and add richness; sour cream smooths spicy flavors and adds a pleasant tang. Dollop on top or serve alongside for dipping to enhance mouthfeel and flavor contrast.
Step by Step Guide for Chicken Fajita Quesadillas
These directions are straightforward, and I like to read them through once before starting. Think of the process as three parts: searing the chicken, cooking the vegetables, and assembling and toasting the quesadillas. Keep your skillet hot and your attention focused on color and aroma.
- Season the chicken breasts strips with 1 tablespoon of the fajita mix.: The spices should cling to the surface of the chicken , releasing fragrance as they hit the hot skillet. You want a light, even coating so each strip picks up flavor without being overwhelmed. When the seasoned meat hits the pan the scent of cumin and chili lifts immediately, which is a good signal your skillet is ready. A common mistake is over seasoning at this stage, which can mask the peppers and cheese, so use the measured tablespoon and save the remaining mix for the vegetables.
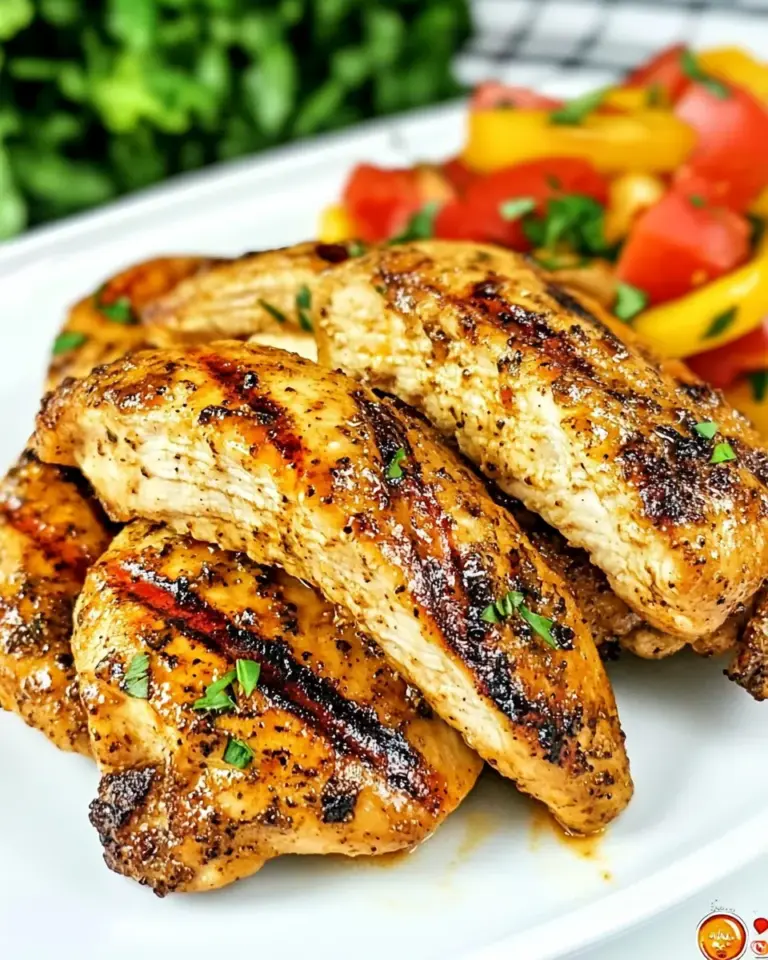
- In a large skillet, heat 1 tablespoon of the olive oil and add the chicken to it. Cook the chicken for 5 to 10 minutes until it's fully cooked and no longer pink, and it's slightly charred, but not burned.: As the oil shimmers, lay the chicken strips down so they sizzle on contact, creating a golden sear. You should hear a steady sizzle and see the edges turn opaque; this means the Maillard reaction is working to build flavor. Cook until the chicken is no longer pink and has a slight char, which gives a smoky note. A pitfall here is overcrowding the pan, which steams rather than sears the meat, so give the strips room and work in batches if needed.
- Remove chicken from skillet, and wipe the skillet clean.: Lifting the chicken off at the right moment keeps it juicy and prevents overcooking. After removing it, quickly wipe the skillet so residual browned bits do not burn when you cook the vegetables. Those browned bits can add flavor, but if left they may scorch and become bitter. Take care not to leave the skillet wet, as trapped moisture can prevent the peppers and onions from caramelizing.
- Add another tbsp of olive oil to the skillet and heat it up. Add the onion and cook for a couple minutes until it’s slightly translucent. Add the peppers and the fajita mix and mix well. Cook for a couple more minutes so the peppers cook slightly. Add the chicken to the skillet, mix with peppers and onions and cook for a minute.: When the new oil heats, the onions will begin to sing with sweet aroma as they soften and release moisture. Adding the peppers and the remaining fajita seasoning ensures the flavors marry, and the sizzling melds their scents. Reintroducing the chicken allows the meat to absorb the pepper and onion juices, creating cohesion. Watch for softened edges and a slight char on the vegetables, and avoid overcooking which makes them floppy instead of pleasantly tender crisp.
- In a clean skillet, add a bit of the butter and melt. Add a tortilla and move it around until it's buttery. Add a little bit of the chicken and onion mixture on top of the tortilla, and about 1/4 cup of cheese, depending on how you like it. Add another tortilla on top and pat it down.: The butter should foam gently and give off a nutty aroma as it melts, which helps the tortilla brown evenly. Moving the tortilla around coats it so no spot remains dry. Layer the filling in the center so the cheese melts into the chicken and veggies, and the heat seals the two tortillas together. Pressing down helps the ingredients compact into a cohesive wedge. A typical misstep is overfilling, which prevents proper toasting and makes flipping messy, so keep portions moderate.
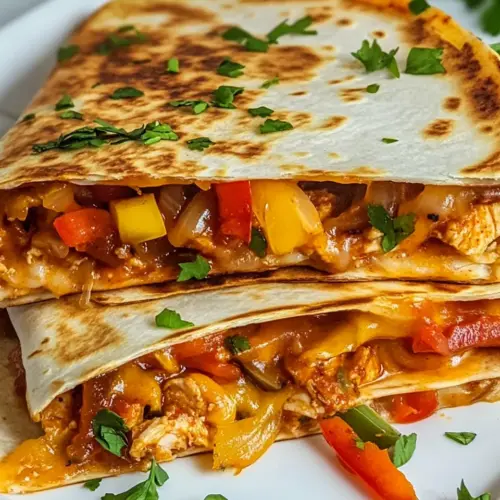
- Now flip it over and cook on the other side until the other side is nice and golden. Remove from skillet and cut into quarters. Repeat these steps with the remaining tortillas. Serve this with some sour cream and salsa.: When you flip, listen for a firm sizzle and watch for a deepening golden color around the edges, that tells you the cheese is melting and the tortilla is crisping. The aroma will be buttery, tangy from the cheese, and savory from the filling. Cutting into quarters should reveal stretchy strands of melted Tex Mex cheese and a tidy layered interior. Serve while hot so the contrast between crisp exterior and molten interior is at its best. Avoid sitting too long before serving or the tortillas will soften and lose their satisfying crunch.
Tips and Tricks about Chicken Fajita Quesadillas
I like to keep a few practical tricks up my sleeve when making these quesadillas so they turn out consistently great. Below are focused, usable tips that will improve cooking flow, texture, and final flavor.
- Control the heat: Keep the skillet between medium and medium high so the chicken browns without drying out.
- Even slices matter: Cut the peppers and chicken into uniform strips so everything cooks evenly and you avoid chewy bits.
- Butter for browning: A touch of butter in the skillet adds flavor and helps tortillas develop a golden, crisp surface.
- Reserve seasoning: Split the fajita seasoning so some flavors season the chicken and some season the vegetables for balance.
- Toast before filling: Warm the tortillas briefly before assembly to prevent sogginess and improve pliability when folding.
- Serve hot: These are best right off the skillet so the cheese is melty and the tortillas remain crisp.
Serving Suggestions
These quesadillas are incredibly versatile, making them suitable for many occasions from casual lunches to relaxed dinners. I like to provide a few simple accompaniments so guests can customize each bite. Below are detailed serving ideas and storage notes to help you plan a meal.
- Classic dip trio: Serve with bowls of salsa, sour cream, and sliced avocado or guacamole so guests can add brightness, creaminess, and richness as they like.
- Side salad: A crisp green salad with a light vinaigrette balances the richness of the cheese and butter, bringing freshness to the plate and making the meal feel lighter for lunch or dinner.
- Family style platter: Stack the quartered wedges on a large board with lime wedges, extra seasoning, and warm tortillas for a communal, relaxed presentation great for game nights or casual gatherings.
- Storage tips: Cool leftovers quickly, then refrigerate in an airtight container for up to two days. Reheat in a skillet to restore crispness rather than microwaving, which can make the tortillas limp.
- Occasions: These are perfect for weeknight dinners, informal parties, or Ramadan iftar meals where you want something hearty yet easy to share. They also work well for packed lunches if kept warm in an insulated container.
- Seasonal pairing: In summer, pair with a bright corn salad; in cooler months, serve alongside a warm bean soup to create a comforting, balanced meal.
FAQ
Conclusion
What makes Chicken Fajita Quesadillas special is their balance of speedy prep, layered flavors, and a texture contrast that people instinctively love. They turn simple ingredients into a meal that feels both nostalgic and fresh. Give them a try on a busy weeknight or for a casual gathering, and you will likely find they become one of your trusted go to recipes. I hope you enjoy the sizzle and the melty satisfaction as much as I do.
Chicken Fajita Quesadillas
Equipment
- 12-inch Cast Iron Skillet
Ingredients
- 2 tablespoons olive oil Heat and coat the pan with a neutral-flavored oil to prevent sticking and promote even browning; olive oil also adds a subtle fruity aroma that complements the peppers and chicken. Use at medium-high heat to sear the chicken strips quickly for juicy interior and caramelized edges.
- 2 tablespoons fajita seasoning Season and flavor the chicken and vegetables with a concentrated blend of spices; fajita seasoning brings cumin, chili, garlic, and paprika notes that define the dish. Sprinkle evenly while cooking to build layered savory and slightly smoky flavors throughout the filling.
- 3 chicken breasts (boneless and skinless, cut into long strips) Prepare and slice lean protein into long strips for quick, uniform cooking and easy folding into tortillas; boneless, skinless breasts provide a mild base that soaks up seasoning. Cook until just done to keep the meat tender for the quesadilla assembly.
- 1 medium red bell pepper (cut into long strips) Slice into long strips to add sweet, bright color and crisp texture; red bell pepper contributes a mild fruity sweetness that balances the spice. Sauté with onions until slightly softened to maintain some bite and enhance overall visual appeal.
- 1 medium green bell pepper (cut into long strips) Cut into matching long strips for balanced texture and color contrast; green bell pepper brings a slightly grassy, peppery note that complements the red pepper. Cook with the other vegetables to meld flavors while retaining a pleasant crunch.
- 2 large onions (sliced) Slice thinly to caramelize and impart natural sweetness and depth; onions create a savory base that ties the chicken and peppers together. Cook slowly until translucent or lightly browned to develop richer flavor in the quesadilla filling.
- 2 tablespoons butter Melt in the skillet to add richness and help crisp the tortilla edges while cooking; butter provides a nutty, creamy flavor that enhances browning. Use sparingly when toasting the assembled quesadillas for a golden, flaky exterior.
- 1 cup Tex Mex cheese (or cheddar cheese) Shred or grate to create a cohesive, melty filling that binds the ingredients; Tex Mex or cheddar delivers a creamy, tangy profile and good melting characteristics. Sprinkle evenly so each bite has cheesy stretch and flavor.
- 8 tortillas Warm or toast to serve as the vessel for the filling; tortillas should be flexible enough to fold without cracking and sturdy enough to hold the ingredients. Lightly heat before assembling for easier folding and better texture when grilled.
- salsa Serve as a bright, tangy condiment to cut through richness and add fresh flavor; salsa provides acidity, heat, and texture that complements the savory quesadilla. Offer on the side for dipping or spooning over sliced quesadilla pieces.
- sour cream Chill and spoon as a cool, creamy accompaniment to balance heat and add richness; sour cream smooths spicy flavors and adds a pleasant tang. Dollop on top or serve alongside for dipping to enhance mouthfeel and flavor contrast.
Instructions
- Season the chicken breasts strips with 1 tablespoon of the fajita mix.: The spices should cling to the surface of the chicken , releasing fragrance as they hit the hot skillet. You want a light, even coating so each strip picks up flavor without being overwhelmed. When the seasoned meat hits the pan the scent of cumin and chili lifts immediately, which is a good signal your skillet is ready. A common mistake is over seasoning at this stage, which can mask the peppers and cheese, so use the measured tablespoon and save the remaining mix for the vegetables.
- In a large skillet, heat 1 tablespoon of the olive oil and add the chicken to it. Cook the chicken for 5 to 10 minutes until it's fully cooked and no longer pink, and it's slightly charred, but not burned.: As the oil shimmers, lay the chicken strips down so they sizzle on contact, creating a golden sear. You should hear a steady sizzle and see the edges turn opaque; this means the Maillard reaction is working to build flavor. Cook until the chicken is no longer pink and has a slight char, which gives a smoky note. A pitfall here is overcrowding the pan, which steams rather than sears the meat, so give the strips room and work in batches if needed.
- Remove chicken from skillet, and wipe the skillet clean.: Lifting the chicken off at the right moment keeps it juicy and prevents overcooking. After removing it, quickly wipe the skillet so residual browned bits do not burn when you cook the vegetables. Those browned bits can add flavor, but if left they may scorch and become bitter. Take care not to leave the skillet wet, as trapped moisture can prevent the peppers and onions from caramelizing.
- Add another tbsp of olive oil to the skillet and heat it up. Add the onion and cook for a couple minutes until it’s slightly translucent. Add the peppers and the fajita mix and mix well. Cook for a couple more minutes so the peppers cook slightly. Add the chicken to the skillet, mix with peppers and onions and cook for a minute.: When the new oil heats, the onions will begin to sing with sweet aroma as they soften and release moisture. Adding the peppers and the remaining fajita seasoning ensures the flavors marry, and the sizzling melds their scents. Reintroducing the chicken allows the meat to absorb the pepper and onion juices, creating cohesion. Watch for softened edges and a slight char on the vegetables, and avoid overcooking which makes them floppy instead of pleasantly tender crisp.
- In a clean skillet, add a bit of the butter and melt. Add a tortilla and move it around until it's buttery. Add a little bit of the chicken and onion mixture on top of the tortilla, and about 1/4 cup of cheese, depending on how you like it. Add another tortilla on top and pat it down.: The butter should foam gently and give off a nutty aroma as it melts, which helps the tortilla brown evenly. Moving the tortilla around coats it so no spot remains dry. Layer the filling in the center so the cheese melts into the chicken and veggies, and the heat seals the two tortillas together. Pressing down helps the ingredients compact into a cohesive wedge. A typical misstep is overfilling, which prevents proper toasting and makes flipping messy, so keep portions moderate.
- Now flip it over and cook on the other side until the other side is nice and golden. Remove from skillet and cut into quarters. Repeat these steps with the remaining tortillas. Serve this with some sour cream and salsa.: When you flip, listen for a firm sizzle and watch for a deepening golden color around the edges, that tells you the cheese is melting and the tortilla is crisping. The aroma will be buttery, tangy from the cheese, and savory from the filling. Cutting into quarters should reveal stretchy strands of melted Tex Mex cheese and a tidy layered interior. Serve while hot so the contrast between crisp exterior and molten interior is at its best. Avoid sitting too long before serving or the tortillas will soften and lose their satisfying crunch.
Notes
- Control the heat: Keep the skillet between medium and medium high so the chicken browns without drying out.
- Even slices matter: Cut the peppers and chicken into uniform strips so everything cooks evenly and you avoid chewy bits.
- Butter for browning: A touch of butter in the skillet adds flavor and helps tortillas develop a golden, crisp surface.
- Reserve seasoning: Split the fajita seasoning so some flavors season the chicken and some season the vegetables for balance.
- Toast before filling: Warm the tortillas briefly before assembly to prevent sogginess and improve pliability when folding.
- Serve hot: These are best right off the skillet so the cheese is melty and the tortillas remain crisp.