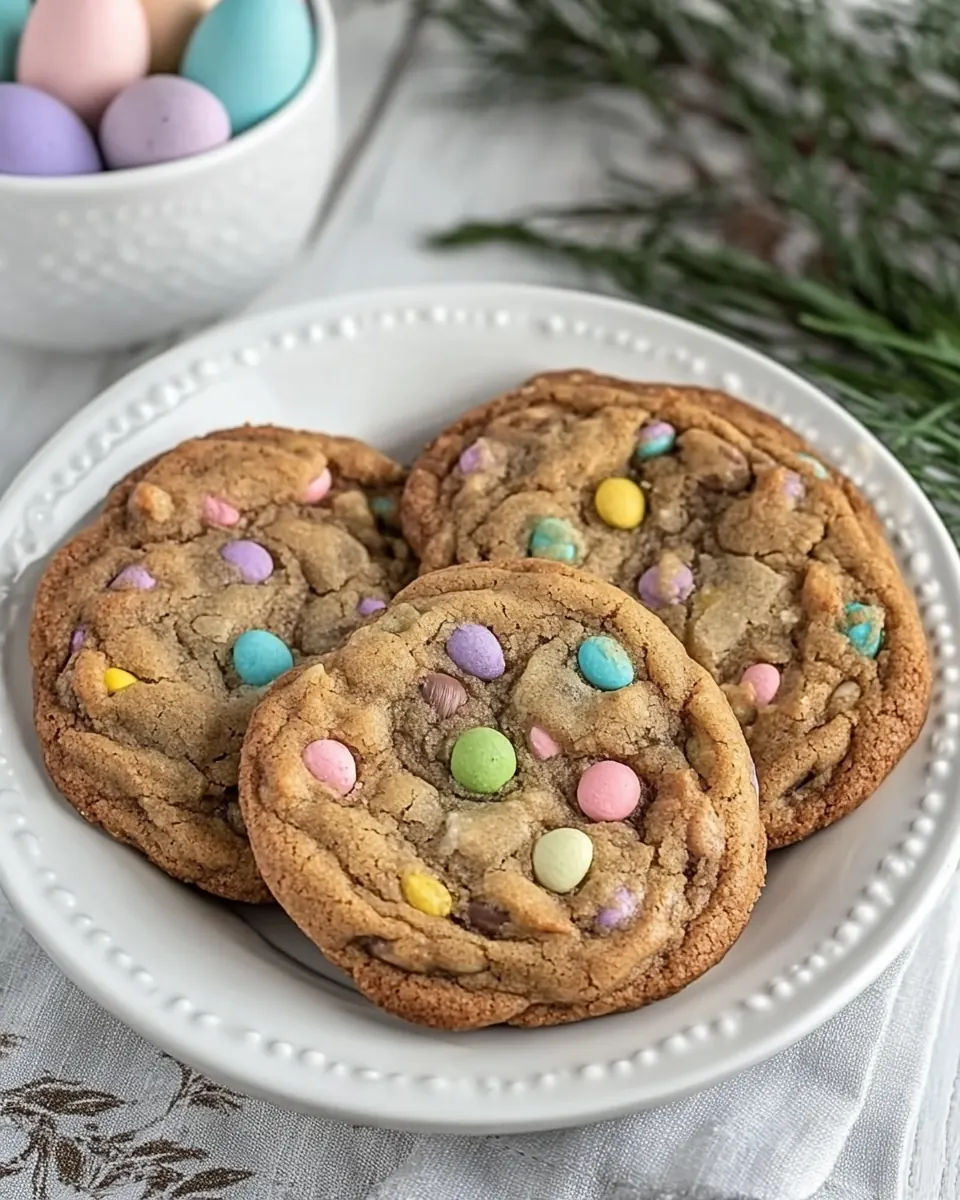
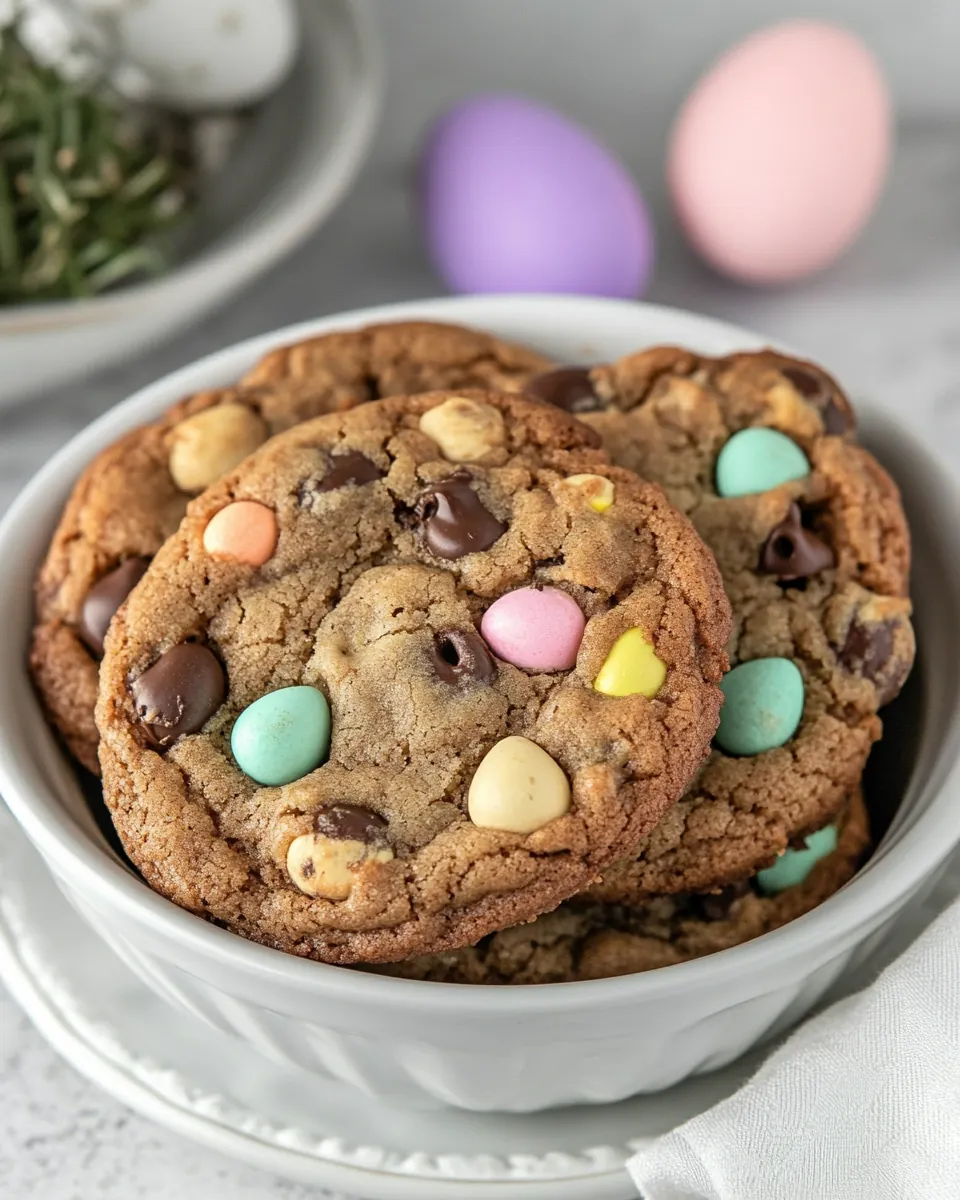
Brown Butter Easter Cookies
Brown Butter Easter Cookies began as a kitchen experiment one spring afternoon when I wanted to make something festive without fuss. I remember standing at the stove, the room filling with the warm, nutty scent of browned butter, and feeling like I was carrying on a small, joyful tradition. The first batch came out with crisp edges and tender centers, dotted with colorful candy that made everyone at the table grin.
I have a few memories tied to these cookies, like licking the spatula while my neighbor told a story about her childhood cookie swaps. We shared plates, compared notes, and I tweaked the recipe in small ways until it felt just right. Now when I bake Brown Butter Easter Cookies, it feels like an invitation to slow down, chat, and celebrate simple pleasures. They are not fussy, yet they feel special, perfect for a spring brunch or a holiday cookie exchange.
Recipe Snapshot
27 mins
15 mins
12 mins
Easy
150 kcal
American
Gluten-Free, Low FODMAP
Desserts
Saucepan, Heat-proof bowl, Mixing spoon, Measuring cups, Cookie scoop, Baking sheet, Parchment paper, Wire cooling rack
Why We Love This Brown Butter Easter Cookies
1. Irresistible brown butter flavor
I adore the way browning the butter transforms its flavor, adding a toasty, caramel note that makes these cookies sing. It elevates a simple cookie into something richer, and I always find people commenting on that deep, nutty aroma.
2. Festive and fun to customize
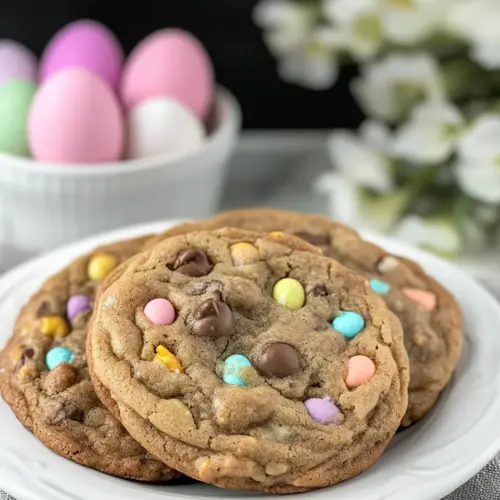
These cookies are a canvas, thanks to the colorful M and M’s and chocolate chunks. I love pressing extra candies on top as a finishing touch because it looks so cheerful for Easter, and guests always smile when they see the pastel colors.
3. Texture balance
The combination of crisp edges and soft centers comes from browning some of the butter and the right ratio of sugars and flour. I appreciate recipes that teach you the small techniques that create that perfect chew, and this one delivers every time.
4. Straightforward technique
There is nothing intimidating here, just a few clear steps like melting and browning butter, mixing, scooping, and baking. I like that novice bakers can achieve consistent results, and I often bring this recipe to potlucks because it travels well.
5. Crowd pleasing
These cookies vanish quickly at gatherings. The blend of white chocolate candies and semi sweet chocolate chunks gives multiple flavor hits in each bite, so they appeal to kids and adults alike. I find they are perfect for spring celebrations and holiday cookie swaps.
Essential Ingredients for Brown Butter Easter Cookies
I think of this ingredient list like a small orchestra, where each player has a clear role. The browned butter provides depth and a toasty backbone, the sugars fuel caramelization and chew, and the flour gives structure. The eggs bind and enrich, while the candies and chopped chocolate add bursts of sweetness and texture. Together they create a cookie that is both nostalgic and special.
- 14 tablespoons butter, divided: Melted and browned to develop a nutty, toasty flavor that deepens the cookie profile; use most for dough and reserve a small portion for brushing or finishing to enhance richness and aroma.
- 1/2 cup sugar: Creamed with sugars to incorporate air and provide tenderness; adds sweetness and helps dissolve other dry ingredients for an even texture.
- 3/4 cup dark brown sugar (to make your own, check the blog post): Added for molasses-rich sweetness and moisture, offering deeper caramel notes than white sugar; balances the cookie’s buttery and chocolate flavors while contributing chewiness.
- 2 teaspoons vanilla extract: Stirred in to round out flavors and lift the sweetness; imparts a warm, aromatic note that complements browned butter and chocolate.
- 1 egg: Beaten to provide structure and leavening through protein coagulation; contributes moisture and helps bind ingredients for a tender crumb.
- 1 egg yolk: Folded in to enrich texture, increase fat content, and add silkiness; helps maintain softness while contributing to a richer mouthfeel.
- 1/2 teaspoon salt: Sprinkled to balance sweetness and enhance overall flavor; helps strengthen gluten slightly and highlights other flavors when well-distributed.
- 1/2 teaspoon baking soda: Combined to react with acidic components and create gentle lift; ensures cookies spread and rise correctly while maintaining a tender interior.
- 1 3/4 cup flour: Whisked in to form the bulk of the cookie matrix; provides structure, absorbs moisture, and determines chewiness versus cakiness depending on mixing.
- 3/4 cup white chocolate M and M's (or favorite flavor), pastel-colored, plus more to garnish: Stirred into the dough to add pockets of sweet, colored candy and creamy white chocolate flavor; provides visual appeal and bursts of texture, with extra pieces reserved to garnish the tops.
- 4 ounces semi-sweet chocolate, chopped into small chunks: Folded throughout as chopped chunks to deliver concentrated semi–sweet chocolate pockets; contributes contrast to the white chocolate candies and melts into gooey ribbons when baked.
Recipe Steps for Brown Butter Easter Cookies
These steps walk you through the dough from browned butter to warm, candy dotted cookies. Take your time with the browning and pay attention to sensory cues, because that is where the flavor develops. Read each step fully before acting, and try to enjoy the process as the aromas evolve.
- Preheat oven to 375º.: As soon as you set the oven to 375º , you will notice a steady hum of anticipation, and it ensures the cookies bake evenly once they hit the sheet. The warm air sets the stage for crisp edges, and an oven thermometer can confirm accuracy. Avoid placing the sheet in immediately after mixing because the dough benefits from a brief rest, and opening the oven frequently will drop the temperature, causing uneven baking.
- Melt 10 tablespoons of the butter in a saucepan over medium-high heat till melted. Continue cooking for a couple more minutes till the butter is golden brown with a nutty fragrance. Pour into a heat-proof bowl, and add the remaining 4 tablespoons of butter. Stir till melted.: The sizzling begins subtly, then the liquid will foam, and you will see tiny milk solids darken to amber. That sizzling aroma turns from grassy to toasty, and the sound quiets as moisture evaporates. This technique concentrates flavor, creating the brown butter that makes these cookies special. A common pitfall is walking away, which can lead to burnt solids and a bitter taste; stir gently and watch closely.
- Add sugars, then vanilla. Mix in egg and egg yolk. Add baking soda, then flour, and mix till just combined. Add M and M's and chocolate chunks.: As the butter browns, you will spot golden flecks and smell a nutty, caramel scent that signals readiness. Removing it at this exact moment preserves those complex flavors without burning. The reason this matters is that browned butter adds depth and helps create a slightly toffee like finish in the cookie. If you continue too long the butter can taste acrid, so transfer it promptly to a heat proof bowl.
- Use a 4-tablespoon (1/4 cup) scoop to make dough balls. Place about 2 inches apart on parchment-lined cookie sheets.: Adding the cold butter pieces cools the mixture and adds richness, creating a balance between melted and softened fats. The visual contrast between golden liquid and solid chunks is reassuring, and gentle stirring will melt the pieces without overheating. This step helps control dough temperature so the M and M's do not melt prematurely. A frequent error is not stirring enough, leaving unmelted chunks that affect dough consistency.
- Bake for 10-14 minutes or till the cookies are golden. Press a few extra M and M's into warm cookies to garnish. Cool on rack.: When you stir in the granulated and dark brown sugar , the mixture becomes glossy and slightly thickened, carrying that toasty aroma. The vanilla integrates as a fragrant lift, and folding rather than vigorously whisking keeps the texture tender. This combination fuels caramelization during baking, giving you golden edges. Overmixing here can incorporate too much air, causing excessive spread, so combine gently.
- Mix in egg and egg yolk: As the egg and extra egg yolk are incorporated, the batter becomes silkier and more cohesive, transitioning from thick syrup to a scoopable dough. The proteins set during baking, giving structure, while the extra yolk lends chew. Be mindful not to scramble the eggs by adding them to very hot butter, which can curdle; let the mixture cool slightly before adding.
- Add baking soda, then flour, and mix till just combined: Sprinkling the baking soda and folding in the flour forms the backbone of the dough. You will feel the texture go from wet to more dough like, and small streaks of flour should disappear with minimal mixing. This restraint prevents gluten overdevelopment, which would make cookies tough. A common mistake is vigorous mixing that yields dense, cake like cookies.
- Add M and M's and chocolate chunks: Folding in the pastel M and M's and chopped semi sweet chocolate adds bursts of color and melty pockets. The candies remain mostly intact, offering crunchy contrast, while the chocolate creates gooey bites. Distribute them evenly so each cookie has a pleasing mix, and avoid smashing the candies during folding, which can create streaks of color in the dough.
- Use a 4-tablespoon (1/4 cup) scoop to make dough balls: Scooping uniform dough balls ensures even bake times and consistent size, creating a tidy batch. You will notice slight stickiness and that the balls hold shape when rounded; chilling briefly can help if the dough is too soft. Consistent sizing avoids some cookies baking faster than others, and uneven scooping is a frequent reason for inconsistent doneness.
- Place about 2 inches apart on parchment-lined cookie sheets: Spacing is important because the cookies spread as they bake, forming golden edges and slightly domed centers. The parchment keeps bottoms from overbrowning and helps with cleanup. Arrange them evenly so hot spots in the oven do not affect just a few cookies, and avoid crowding the sheet which can cause merging and uneven textures.
- Bake for 10 to 14 minutes or till the cookies are golden: During baking you will see edges turn golden and centers set while a toasty aroma fills the kitchen. The sound is quiet, but the visual cue of golden margins is key. Removing them when the centers still look slightly soft yields tender cookies as they finish on the sheet. A common mistake is leaving them until fully firm in the oven, which produces a drier texture.
- Press a few extra M and M's into warm cookies to garnish: Gently pressing extra candies into the warm surface creates a polished look and prevents the candies from cracking as they cool. The visual pop is worth this small step, and the contrast between browned edges and colorful tops is charming. Avoid pressing too hard, which can flatten the cookie or embed the candies too deeply.
- Cool on rack: Transferring the cookies to a wire cooling rack allows air to circulate, preserving crisp edges and preventing sogginess. The cookies continue to set as they cool, and you can sample them once they reach lukewarm to enjoy melty chocolate. Leaving them too long on a hot baking sheet may overcook the bottoms, so move them promptly.
Ways to Customize

If you want to make these cookies your own, there are small, thoughtful changes you can make without losing the essence. Below are practical tips that keep the technique front and center while offering creative variations for flavor, texture, and presentation.
- Swap candy varieties Replace the pastel M and M’s with other coated candies or colorful chocolate chips for a different look while keeping the same texture contrast.
- Adjust chocolate balance Use more or less semi sweet chocolate chunks depending on whether you prefer pockets of intense chocolate or scattered sweetness.
- Brown butter depth Brown the butter a touch longer for a deeper toffee note, but stop before it smells burnt to avoid bitterness.
- Firm dough option Chill scooped dough for 15 to 30 minutes if you want taller cookies with less spread, especially in warm kitchens.
- Presentation tweak Press a few fresh M and M’s on top of each warm cookie for glossy, colorful garnish that makes them look professionally finished.
- Texture control For chewier cookies, replace a small portion of flour with an extra yolk, which adds fat and tenderness.
Pairing Suggestions for Brown Butter Easter Cookies
These cookies are playful and versatile, fitting many occasions from holiday brunches to casual coffee dates. Below I outline pairing ideas, serving styles, and storage notes to help you present them beautifully and keep them tasting fresh.
- Spring brunch Serve a platter of warm Brown Butter Easter Cookies alongside light pastries and a bowl of fresh fruit for a cheerful spring spread that balances sweet and fresh flavors.
- Holiday dessert table Arrange them on a tiered stand with other small treats, using extra pastel candies for visual cohesion during Easter gatherings.
- Casual coffee break Pair the cookies with hot coffee or tea, the brown butter notes play nicely with roasted coffee and mild black teas.
- Gift idea Pack cooled cookies in a box with tissue, and include a small card noting they contain browned butter for a thoughtful homemade gift.
- Storage short term Store in an airtight container at room temperature for up to three days, placing parchment between layers to prevent sticking and preserve crisp edges.
- Freezing Freeze unbaked scooped dough balls on a tray, then transfer to a bag for up to three months; bake from frozen adding a minute or two to the bake time for fresh cookies on demand.
FAQ
Conclusion
These Brown Butter Easter Cookies stand out because of their nutty browned butter base, chewy centers, and playful pastel candies that make them perfect for spring gatherings. Try them once and you will likely find they become a go to for holiday cookie trays and casual get togethers, offering both nostalgic flavor and a special homemade touch. I encourage you to enjoy the browning step, savor the aroma, and share the results with friends or family, because these cookies are simple to make yet impressive to serve. Baking them is a small ritual that rewards patience with warm, buttery bites that bring smiles.
Brown Butter Easter Cookies
Equipment
- Saucepan
- heat proof bowl
- Mixing Spoon
- Measuring Cups
- Cookie Scoop
- Baking Sheet
- Parchment Paper
- wire cooling rack
Ingredients
- 14 tablespoons butter, divided Melted and browned to develop a nutty, toasty flavor that deepens the cookie profile; use most for dough and reserve a small portion for brushing or finishing to enhance richness and aroma.
- 1/2 cup sugar Creamed with sugars to incorporate air and provide tenderness; adds sweetness and helps dissolve other dry ingredients for an even texture.
- 3/4 cup dark brown sugar (to make your own, check the blog post) Added for molasses-rich sweetness and moisture, offering deeper caramel notes than white sugar; balances the cookie’s buttery and chocolate flavors while contributing chewiness.
- 2 teaspoons vanilla extract Stirred in to round out flavors and lift the sweetness; imparts a warm, aromatic note that complements browned butter and chocolate.
- 1 egg Beaten to provide structure and leavening through protein coagulation; contributes moisture and helps bind ingredients for a tender crumb.
- 1 egg yolk Folded in to enrich texture, increase fat content, and add silkiness; helps maintain softness while contributing to a richer mouthfeel.
- 1/2 teaspoon salt Sprinkled to balance sweetness and enhance overall flavor; helps strengthen gluten slightly and highlights other flavors when well-distributed.
- 1/2 teaspoon baking soda Combined to react with acidic components and create gentle lift; ensures cookies spread and rise correctly while maintaining a tender interior.
- 1 3/4 cup flour Whisked in to form the bulk of the cookie matrix; provides structure, absorbs moisture, and determines chewiness versus cakiness depending on mixing.
- 3/4 cup white chocolate M and M's (or favorite flavor), pastel-colored, plus more to garnish Stirred into the dough to add pockets of sweet, colored candy and creamy white chocolate flavor; provides visual appeal and bursts of texture, with extra pieces reserved to garnish the tops.
- 4 ounces semi-sweet chocolate, chopped into small chunks Folded throughout as chopped chunks to deliver concentrated semi-sweet chocolate pockets; contributes contrast to the white chocolate candies and melts into gooey ribbons when baked.
Instructions
- Preheat oven to 375º.: As soon as you set the oven to 375º , you will notice a steady hum of anticipation, and it ensures the cookies bake evenly once they hit the sheet. The warm air sets the stage for crisp edges, and an oven thermometer can confirm accuracy. Avoid placing the sheet in immediately after mixing because the dough benefits from a brief rest, and opening the oven frequently will drop the temperature, causing uneven baking.
- Melt 10 tablespoons of the butter in a saucepan over medium-high heat till melted. Continue cooking for a couple more minutes till the butter is golden brown with a nutty fragrance. Pour into a heat-proof bowl, and add the remaining 4 tablespoons of butter. Stir till melted.: The sizzling begins subtly, then the liquid will foam, and you will see tiny milk solids darken to amber. That sizzling aroma turns from grassy to toasty, and the sound quiets as moisture evaporates. This technique concentrates flavor, creating the brown butter that makes these cookies special. A common pitfall is walking away, which can lead to burnt solids and a bitter taste; stir gently and watch closely.
- Add sugars, then vanilla. Mix in egg and egg yolk. Add baking soda, then flour, and mix till just combined. Add M and M's and chocolate chunks.: As the butter browns, you will spot golden flecks and smell a nutty, caramel scent that signals readiness. Removing it at this exact moment preserves those complex flavors without burning. The reason this matters is that browned butter adds depth and helps create a slightly toffee like finish in the cookie. If you continue too long the butter can taste acrid, so transfer it promptly to a heat proof bowl.
- Use a 4-tablespoon (1/4 cup) scoop to make dough balls. Place about 2 inches apart on parchment-lined cookie sheets.: Adding the cold butter pieces cools the mixture and adds richness, creating a balance between melted and softened fats. The visual contrast between golden liquid and solid chunks is reassuring, and gentle stirring will melt the pieces without overheating. This step helps control dough temperature so the M and M's do not melt prematurely. A frequent error is not stirring enough, leaving unmelted chunks that affect dough consistency.
- Bake for 10-14 minutes or till the cookies are golden. Press a few extra M and M's into warm cookies to garnish. Cool on rack.: When you stir in the granulated and dark brown sugar , the mixture becomes glossy and slightly thickened, carrying that toasty aroma. The vanilla integrates as a fragrant lift, and folding rather than vigorously whisking keeps the texture tender. This combination fuels caramelization during baking, giving you golden edges. Overmixing here can incorporate too much air, causing excessive spread, so combine gently.
- Mix in egg and egg yolk: As the egg and extra egg yolk are incorporated, the batter becomes silkier and more cohesive, transitioning from thick syrup to a scoopable dough. The proteins set during baking, giving structure, while the extra yolk lends chew. Be mindful not to scramble the eggs by adding them to very hot butter, which can curdle; let the mixture cool slightly before adding.
- Add baking soda, then flour, and mix till just combined: Sprinkling the baking soda and folding in the flour forms the backbone of the dough. You will feel the texture go from wet to more dough like, and small streaks of flour should disappear with minimal mixing. This restraint prevents gluten overdevelopment, which would make cookies tough. A common mistake is vigorous mixing that yields dense, cake like cookies.
- Add M and M's and chocolate chunks: Folding in the pastel M and M's and chopped semi sweet chocolate adds bursts of color and melty pockets. The candies remain mostly intact, offering crunchy contrast, while the chocolate creates gooey bites. Distribute them evenly so each cookie has a pleasing mix, and avoid smashing the candies during folding, which can create streaks of color in the dough.
- Use a 4-tablespoon (1/4 cup) scoop to make dough balls: Scooping uniform dough balls ensures even bake times and consistent size, creating a tidy batch. You will notice slight stickiness and that the balls hold shape when rounded; chilling briefly can help if the dough is too soft. Consistent sizing avoids some cookies baking faster than others, and uneven scooping is a frequent reason for inconsistent doneness.
- Place about 2 inches apart on parchment-lined cookie sheets: Spacing is important because the cookies spread as they bake, forming golden edges and slightly domed centers. The parchment keeps bottoms from overbrowning and helps with cleanup. Arrange them evenly so hot spots in the oven do not affect just a few cookies, and avoid crowding the sheet which can cause merging and uneven textures.
- Bake for 10 to 14 minutes or till the cookies are golden: During baking you will see edges turn golden and centers set while a toasty aroma fills the kitchen. The sound is quiet, but the visual cue of golden margins is key. Removing them when the centers still look slightly soft yields tender cookies as they finish on the sheet. A common mistake is leaving them until fully firm in the oven, which produces a drier texture.
- Press a few extra M and M's into warm cookies to garnish: Gently pressing extra candies into the warm surface creates a polished look and prevents the candies from cracking as they cool. The visual pop is worth this small step, and the contrast between browned edges and colorful tops is charming. Avoid pressing too hard, which can flatten the cookie or embed the candies too deeply.
- Cool on rack: Transferring the cookies to a wire cooling rack allows air to circulate, preserving crisp edges and preventing sogginess. The cookies continue to set as they cool, and you can sample them once they reach lukewarm to enjoy melty chocolate. Leaving them too long on a hot baking sheet may overcook the bottoms, so move them promptly.
Notes
- Swap candy varieties Replace the pastel M and M's with other coated candies or colorful chocolate chips for a different look while keeping the same texture contrast.
- Adjust chocolate balance Use more or less semi sweet chocolate chunks depending on whether you prefer pockets of intense chocolate or scattered sweetness.
- Brown butter depth Brown the butter a touch longer for a deeper toffee note, but stop before it smells burnt to avoid bitterness.
- Firm dough option Chill scooped dough for 15 to 30 minutes if you want taller cookies with less spread, especially in warm kitchens.
- Presentation tweak Press a few fresh M and M's on top of each warm cookie for glossy, colorful garnish that makes them look professionally finished.
- Texture control For chewier cookies, replace a small portion of flour with an extra yolk, which adds fat and tenderness.