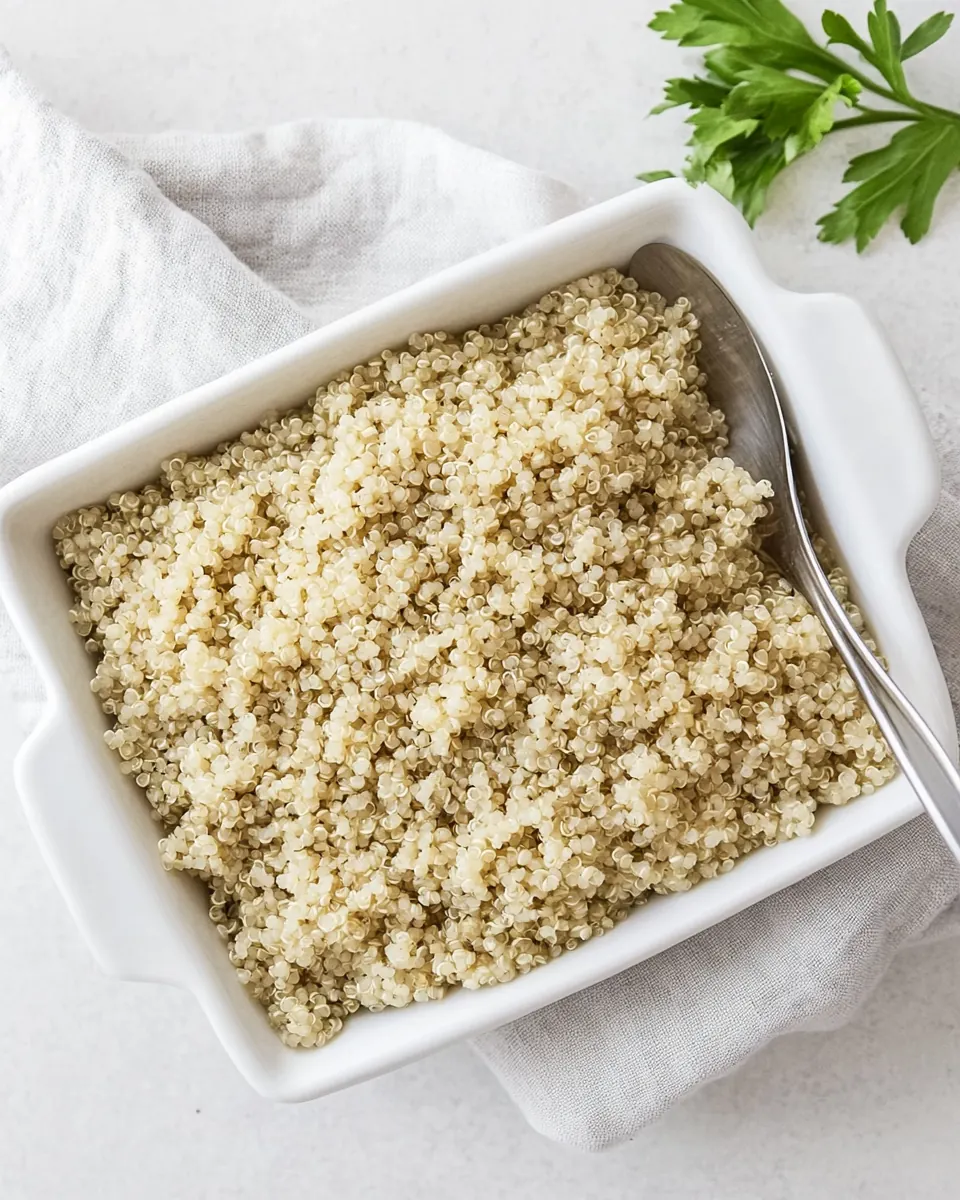
How to Cook Quinoa on the Stove
How to Cook Quinoa on the Stove has been my quiet kitchen secret for weeknight dinners and lazy weekend brunches, the one grain I turn to when I want something nourishing, adaptable, and reliably comforting. The first time I learned to make it on the stove I was juggling a fussy toddler and a ringing phone, yet the simple rhythm of rinsing, boiling, and fluffing brought me a calm I did not expect. Over the years I have played with small tweaks, and each little change taught me more about texture and timing.
When I make How to Cook Quinoa on the Stove now, I treat it like a small ritual. I like the sound of water bubbling up in the pot, the sight of tiny grains turning translucent, and the way a bit of butter or a squeeze of lemon juice brightens the whole pot. You can make it plain, or you can fold in bold flavors later, and that flexibility is why I keep a bag of quinoa in the pantry at all times. I also remember a friend who served it with a vibrant pesto and a drizzle of olive oil, transforming the humble grain into something celebratory.
Recipe Snapshot
20 mins
5 mins
15 mins
Easy
220 kcal
Mediterranean
Gluten-Free, Low FODMAP
Dinner
Calphalon 5-Quart Pot, Storage Containers
Why You Need This How to Cook Quinoa on the Stove
Versatility you can count on
I love that How to Cook Quinoa on the Stove adapts to almost any mood or meal. It can be the base of a hearty salad, a gentle bed for roasted vegetables, or a simple side to your favorite protein. I often switch up the add ins depending on what is in the fridge, and the grain handles flavors beautifully without taking over.
Speed and reliability
This method is quick, and that matters on busy nights. From rinsing to fluffing, the whole process fits into a short window, so you get tender, fluffy quinoa in about 20 minutes. I appreciate recipes that feel forgiving, and this one rarely punishes a slight timing slip.
Texture and mouthfeel
The small, light grains create a pleasant, slightly nutty bite that is different from rice or couscous. When cooked properly the kernels separate into a delicate fluff, offering both comfort and an interesting chew. I always aim for translucence rather than a soggy mash, and that is where this stovetop technique shines.
Customizable flavor
You can keep things minimalist with butter and salt, or swirl in vibrant sauces like pesto or pizza sauce for a fast flavor boost. I like that you can dial the intensity of flavors easily, so the dish works for picky eaters and adventurous palates alike.
Healthful and pantry friendly
Quinoa is packed with protein and fiber, and it holds well in the fridge for leftovers. I turn it into lunches, bowls, and even breakfast bowls with a few thoughtful pairings. For me, this recipe is a dependable foundation that encourages creativity without fuss.
Ingredients to Make How to Cook Quinoa on the Stove
I choose ingredients that are simple, pantry friendly, and designed to highlight the natural nuttiness of quinoa. The list below includes the essentials for perfectly cooked grains, plus a few flavor components you can stir in after cooking. Together these items create balance: the liquid hydrates, the fat adds silkiness, and the salty elements sharpen the flavor.
- 1 cup quinoa (of any color or variety): Rinse thoroughly and toast briefly to enhance nutty flavor before simmering; provides the primary grain base and texture for the dish. Absorbs liquid and becomes fluffy when cooked, forming the foundation for sauces and mix-ins.
- 2 cups water: Bring to a gentle boil and maintain a steady simmer to cook the quinoa evenly; supplies the moisture necessary for the grains to swell and soften. Controls final consistency and helps release starches that influence fluffiness.
- 2 tablespoons unsalted butter (you can also use olive oil here): Melt at the start of cooking to coat the quinoa and add richness, or use olive oil for a lighter, fruitier flavor. Contributes fat for mouthfeel and helps carry aromatic notes throughout the finished dish.
- 1/4 teaspoon salt: Season early to ensure even distribution of savory flavor during cooking; helps balance the natural bitterness of quinoa. Enhances overall taste and brings out subtle grain flavors when dissolved in the cooking water.
- 1/4 1/2 cup prepared pesto: Fold in after cooking to introduce bright herbal and oily flavor, creating a creamy, aromatic coating. Acts as a concentrated flavor booster that can turn plain quinoa into a vibrant side or base for other components.
- 1/4 cup grated Parmesan cheese: Stir in for salty, umami richness and a smooth finish; grated texture melts into the hot quinoa for creamy pockets of flavor. Contributes depth and a savory counterpoint that complements herbs and sauces.
- 1/4 1/2 cup pizza (or marinara) sauce: Warm and swirl through cooked quinoa to add tangy tomato notes and a saucy coating for a more rustic preparation. Provides a contrasting acid and sweetness that pairs well with herbs and cheeses.
- 1/4 cup grated Parmesan cheese: Sprinkle or stir in to enhance savory, nutty undertones and encourage a cohesive, cheesy texture when melted into warm quinoa. Adds a familiar Italian flavor profile and a salty bite that balances other seasonings.
- 2 tablespoons unsalted butter: Melt for added richness and gloss when finishing the dish; can be used to create a silky mouthfeel that binds ingredients. Supplies fat for flavor and helps emulsify sauces or dressings into the quinoa.
- 2 tablespoons fresh lemon juice: Squeeze in just before serving to brighten and lift overall flavors with vibrant acidity; balances richness from butter and cheese. Offers a fresh, citrusy counterpoint that enhances aromatic herbs and olive oils.
- 1 teaspoon fresh lemon zest: Zest to infuse concentrated citrus oils and fragrant brightness without extra liquid; intensifies lemon character. Provides aromatic lift and a subtle, lingering citrus note that complements herbs and seafood if used.
- 1 teaspoon cumin: Toast briefly or add ground to lend warm, earthy, slightly smoky notes that enhance savory blends. Works as a spice backbone in Mexican, Middle Eastern, or Southwestern preparations to deepen flavor complexity.
- 1/4 teaspoon salt: Season during or after cooking to adjust and refine overall savoriness; helps bring together all components harmoniously. Small amounts prevent under-seasoning and allow fine-tuning of the final taste.
- 1 3/4 cups reduced sodium chicken broth: Simmer the quinoa in this flavorful broth to impart savory depth and reduce the need for additional salt; enhances overall taste profile. Adds body and complexity through vegetables and spices present in the stock.
- 2 tablespoons unsalted butter () (optional): Finish with a small pat melted over hot quinoa for extra silkiness and richness; optional for those wanting a more indulgent texture. Can be used to round out flavors and create a smooth mouthfeel when mixed in.
- 1/4 teaspoon salt () (optional): Optionally season at the end to fine-tune saltiness to personal preference and the flavors already present. Allows for careful control over final seasoning without over-salting delicate ingredients.
How to Make How to Cook Quinoa on the Stove
Getting to a fluffy pot of How to Cook Quinoa on the Stove is straightforward, but the small details change the result significantly. Below I expand each step so you can sense the cues and avoid common pitfalls.
- Add the quinoa to a fine mesh sieve and rinse under cold water, stirring slightly, for about 1 minute. This helps to remove the saponins that can make quinoa taste bitter.: When you begin, you will feel the tiny grains move under your fingers as you stir them in the sieve, and the water will run cloudy at first from residual dust and saponins. This rinsing removes the bitter coating that can make quinoa taste soapy, and you will notice the rinse water become clearer within about a minute. If you skip this step you risk a faint bitterness; a common mistake is rushing rinsing, which leaves residue. Take time to agitate gently, and smell the grain when finished, it should have a mild, nutty aroma not a soapy scent.
- Add the water to a medium pot over high heat and bring to a boil. Add the quinoa and reduce the heat to medium. Simmer for 12-15 minutes, or until the water is completely absorbed and the quinoa is very soft. (You will see that each grain will look more translucent versus opaque.): As the pot heats, you'll hear the water move from quiet to energetic bubbling, and soon larger rolling bubbles will signal a boil. The visual cue is clear bubbling across the surface. Using a medium pot gives room for the grains to expand and for steam to circulate. Avoid using a pot that is too small which can cause boil overs. Heat matters because a proper boil before adding grain sets the cooking action, and a too gentle simmer can prolong cooking time and create uneven texture.
- Turn off the heat and cover. Let sit for 5-10 minutes.: When you pour in the rinsed quinoa , you may hear a soft hiss as the colder grain meets hot water. Stir once to distribute, then reduce to medium so the water gently simmers, indicated by small steady bubbles rather than a furious boil. This gentler simmer helps cook the grains evenly without violent movement that could make them break apart. A frequent error is leaving the heat too high which can evaporate liquid too quickly and leave undercooked centers, so adjust to maintain a steady simmer.
- Add desired flavorings, stirring well, and serve.: During this window watch for two signs: the pot surface will look drier as liquid is taken up, and individual grains will turn more translucent with a small curled tail appearing. You will hear a softer, less vigorous bubbling as the water level drops. This is the time to trust sight over a clock; check for translucence and a tender bite. Overcooking can make the grains mushy, while undercooking leaves them chalky, so taste a little at 12 minutes and decide. If you see sandy, opaque cores, give it another minute or two.
- Turn off the heat and cover: When you shut off the stove, the pot will move from simmer to a gentler settling, and steam trapped under the lid will finish the cooking. Covering allows residual heat to equalize the texture and prevents rapid cooling that can make grains firm on the surface. One mistake is uncovering too soon, which releases steam and halts the carryover cooking. Let it sit covered so the grains become uniformly tender, and you will notice a plump, slightly glossy appearance once it is ready.
- Let sit for 5 to 10 minutes: This resting period is a quiet, essential finish where steam finishes softening the kernels. You will feel the pot warm to the touch and hear almost nothing, but the internal steam is active. The range allows you to control firmness, with 5 minutes giving a slightly toothsome bite and 10 minutes yielding a tender, plush texture. Resist the urge to fluff too early, as that can release steam and reduce the final tenderness. Resting also helps flavors meld when you add butter or sauces later.
- Add desired flavorings, stirring well, and serve: After resting, the aroma will be richer and the grains separated, ready for finishing touches. Stir in unsalted butter , a squeeze of lemon juice , or a spoonful of pesto and you will notice the steam carry flavors into each kernel. Start with modest amounts, taste, then adjust; a common slip is over seasoning too early. Use a fork to gently fluff and distribute additions evenly, and serve warm for the best texture and aroma.
Change It Up
I keep these variation ideas on hand to adapt How to Cook Quinoa on the Stove for different meals and moods. Below are practical tweaks and serving suggestions you can mix and match depending on what is in your pantry.
- Boost with pesto – Stir in 1 quarter to 1 half cup of prepared pesto after cooking for an herby, savory bowl. Start with a smaller amount and taste, since pesto can be assertive, and the oil also adds silk to the texture.
- Make it cheesy – Fold in a quarter cup of grated Parmesan cheese while the quinoa is warm so it melts and creates a creamy coating. Use freshly grated cheese for the best mouthfeel and avoid pregrated powders.
- Tomato twist – For a quick tomato infused side, add a quarter to half cup of pizza or marinara sauce and warm through. Keep the ratio light to preserve the grain’s delicate texture.
- Citrus lift – Brighten with two tablespoons fresh lemon juice and one teaspoon zest, stirring at the end for an aromatic finish that balances butter and cheese.
- Spice it gently – Add one teaspoon of cumin for an earthy background note that pairs especially well with roasted vegetables or warm proteins.
- Cook in broth – Swap water for one and three quarter cups reduced sodium chicken broth to infuse depth during cooking, but reduce added salt to avoid over seasoning.
What Goes Well With This How to Cook Quinoa on the Stove
How to Cook Quinoa on the Stove pairs beautifully with a wide range of sides and occasions, from casual lunches to holiday spreads. Below are serving ideas, storage notes, and practical pairings to help you plan the meal.
- Simple lunch bowls – Serve warm quinoa with a spoonful of pesto and a sprinkle of Parmesan cheese for an effortless midday bowl, adding raw vegetables or a dollop of sauce if desired.
- Weeknight side – Treat it like rice by offering a small scoop beside roasted vegetables and a protein for an easy weeknight dinner. The texture plays nicely with sautéed or grilled mains.
- Meal prep staple – Cool fully before storing in air tight storage containers, then refrigerate for up to four days. Reheat gently with a splash of water or broth to revive moisture.
- Potluck or buffet – Make a large bowl and fold in tasty additions like pesto or pizza sauce so guests can spoon it as a base; it travels well and keeps its texture when warm.
- Seasonal pairing – In spring and summer pair with fresh herbs and lemon for brightness, while in cooler months swap to warm spices like cumin and finish with extra butter for a cozy profile.
- Serving tips – Fluff with a fork before plating to keep grains separate, and finish with a tiny pat of unsalted butter or a final pinch of salt to enhance aroma right before serving.
FAQ
Conclusion
This version of How to Cook Quinoa on the Stove is special because it turns a quick, humble grain into a reliably tender, flavorful foundation for many meals. The straightforward stovetop method, paired with small finishing touches like butter, lemon, or Parmesan cheese, produces a versatile result you can use for lunches, weeknight dinners, or make ahead sides. Give it a try the next time you want a simple, nourishing base that adapts to what you have on hand, and enjoy how a few small steps elevate everyday pantry ingredients into something warm and satisfying.

How to Cook Quinoa on the Stove
Equipment
- Calphalon 5-Quart Pot
- Storage Containers
Ingredients
- 1 cup quinoa (of any color or variety) Rinse thoroughly and toast briefly to enhance nutty flavor before simmering; provides the primary grain base and texture for the dish. Absorbs liquid and becomes fluffy when cooked, forming the foundation for sauces and mix-ins.
- 2 cups water Bring to a gentle boil and maintain a steady simmer to cook the quinoa evenly; supplies the moisture necessary for the grains to swell and soften. Controls final consistency and helps release starches that influence fluffiness.
- 2 tablespoons unsalted butter (you can also use olive oil here) Melt at the start of cooking to coat the quinoa and add richness, or use olive oil for a lighter, fruitier flavor. Contributes fat for mouthfeel and helps carry aromatic notes throughout the finished dish.
- 1/4 teaspoon salt Season early to ensure even distribution of savory flavor during cooking; helps balance the natural bitterness of quinoa. Enhances overall taste and brings out subtle grain flavors when dissolved in the cooking water.
- 1/4 -1/2 cup prepared pesto Fold in after cooking to introduce bright herbal and oily flavor, creating a creamy, aromatic coating. Acts as a concentrated flavor booster that can turn plain quinoa into a vibrant side or base for other components.
- 1/4 cup grated Parmesan cheese Stir in for salty, umami richness and a smooth finish; grated texture melts into the hot quinoa for creamy pockets of flavor. Contributes depth and a savory counterpoint that complements herbs and sauces.
- 1/4 -1/2 cup pizza (or marinara) sauce Warm and swirl through cooked quinoa to add tangy tomato notes and a saucy coating for a more rustic preparation. Provides a contrasting acid and sweetness that pairs well with herbs and cheeses.
- 1/4 cup grated Parmesan cheese Sprinkle or stir in to enhance savory, nutty undertones and encourage a cohesive, cheesy texture when melted into warm quinoa. Adds a familiar Italian flavor profile and a salty bite that balances other seasonings.
- 2 tablespoons unsalted butter Melt for added richness and gloss when finishing the dish; can be used to create a silky mouthfeel that binds ingredients. Supplies fat for flavor and helps emulsify sauces or dressings into the quinoa.
- 2 tablespoons fresh lemon juice Squeeze in just before serving to brighten and lift overall flavors with vibrant acidity; balances richness from butter and cheese. Offers a fresh, citrusy counterpoint that enhances aromatic herbs and olive oils.
- 1 teaspoon fresh lemon zest Zest to infuse concentrated citrus oils and fragrant brightness without extra liquid; intensifies lemon character. Provides aromatic lift and a subtle, lingering citrus note that complements herbs and seafood if used.
- 1 teaspoon cumin Toast briefly or add ground to lend warm, earthy, slightly smoky notes that enhance savory blends. Works as a spice backbone in Mexican, Middle Eastern, or Southwestern preparations to deepen flavor complexity.
- 1/4 teaspoon salt Season during or after cooking to adjust and refine overall savoriness; helps bring together all components harmoniously. Small amounts prevent under-seasoning and allow fine-tuning of the final taste.
- 1 3/4 cups reduced sodium chicken broth Simmer the quinoa in this flavorful broth to impart savory depth and reduce the need for additional salt; enhances overall taste profile. Adds body and complexity through vegetables and spices present in the stock.
- 2 tablespoons unsalted butter (optional) Finish with a small pat melted over hot quinoa for extra silkiness and richness; optional for those wanting a more indulgent texture. Can be used to round out flavors and create a smooth mouthfeel when mixed in.
- 1/4 teaspoon salt (optional) Optionally season at the end to fine-tune saltiness to personal preference and the flavors already present. Allows for careful control over final seasoning without over-salting delicate ingredients.
Instructions
- Add the quinoa to a fine mesh sieve and rinse under cold water, stirring slightly, for about 1 minute. This helps to remove the saponins that can make quinoa taste bitter.: When you begin, you will feel the tiny grains move under your fingers as you stir them in the sieve, and the water will run cloudy at first from residual dust and saponins. This rinsing removes the bitter coating that can make quinoa taste soapy, and you will notice the rinse water become clearer within about a minute. If you skip this step you risk a faint bitterness; a common mistake is rushing rinsing, which leaves residue. Take time to agitate gently, and smell the grain when finished, it should have a mild, nutty aroma not a soapy scent.
- Add the water to a medium pot over high heat and bring to a boil. Add the quinoa and reduce the heat to medium. Simmer for 12-15 minutes, or until the water is completely absorbed and the quinoa is very soft. (You will see that each grain will look more translucent versus opaque.): As the pot heats, you'll hear the water move from quiet to energetic bubbling, and soon larger rolling bubbles will signal a boil. The visual cue is clear bubbling across the surface. Using a medium pot gives room for the grains to expand and for steam to circulate. Avoid using a pot that is too small which can cause boil overs. Heat matters because a proper boil before adding grain sets the cooking action, and a too gentle simmer can prolong cooking time and create uneven texture.
- Turn off the heat and cover. Let sit for 5-10 minutes.: When you pour in the rinsed quinoa , you may hear a soft hiss as the colder grain meets hot water. Stir once to distribute, then reduce to medium so the water gently simmers, indicated by small steady bubbles rather than a furious boil. This gentler simmer helps cook the grains evenly without violent movement that could make them break apart. A frequent error is leaving the heat too high which can evaporate liquid too quickly and leave undercooked centers, so adjust to maintain a steady simmer.
- Add desired flavorings, stirring well, and serve.: During this window watch for two signs: the pot surface will look drier as liquid is taken up, and individual grains will turn more translucent with a small curled tail appearing. You will hear a softer, less vigorous bubbling as the water level drops. This is the time to trust sight over a clock; check for translucence and a tender bite. Overcooking can make the grains mushy, while undercooking leaves them chalky, so taste a little at 12 minutes and decide. If you see sandy, opaque cores, give it another minute or two.
- Turn off the heat and cover: When you shut off the stove, the pot will move from simmer to a gentler settling, and steam trapped under the lid will finish the cooking. Covering allows residual heat to equalize the texture and prevents rapid cooling that can make grains firm on the surface. One mistake is uncovering too soon, which releases steam and halts the carryover cooking. Let it sit covered so the grains become uniformly tender, and you will notice a plump, slightly glossy appearance once it is ready.
- Let sit for 5 to 10 minutes: This resting period is a quiet, essential finish where steam finishes softening the kernels. You will feel the pot warm to the touch and hear almost nothing, but the internal steam is active. The range allows you to control firmness, with 5 minutes giving a slightly toothsome bite and 10 minutes yielding a tender, plush texture. Resist the urge to fluff too early, as that can release steam and reduce the final tenderness. Resting also helps flavors meld when you add butter or sauces later.
- Add desired flavorings, stirring well, and serve: After resting, the aroma will be richer and the grains separated, ready for finishing touches. Stir in unsalted butter , a squeeze of lemon juice , or a spoonful of pesto and you will notice the steam carry flavors into each kernel. Start with modest amounts, taste, then adjust; a common slip is over seasoning too early. Use a fork to gently fluff and distribute additions evenly, and serve warm for the best texture and aroma.
Notes
- Boost with pesto - Stir in 1 quarter to 1 half cup of prepared pesto after cooking for an herby, savory bowl. Start with a smaller amount and taste, since pesto can be assertive, and the oil also adds silk to the texture.
- Make it cheesy - Fold in a quarter cup of grated Parmesan cheese while the quinoa is warm so it melts and creates a creamy coating. Use freshly grated cheese for the best mouthfeel and avoid pregrated powders.
- Tomato twist - For a quick tomato infused side, add a quarter to half cup of pizza or marinara sauce and warm through. Keep the ratio light to preserve the grain’s delicate texture.
- Citrus lift - Brighten with two tablespoons fresh lemon juice and one teaspoon zest, stirring at the end for an aromatic finish that balances butter and cheese.
- Spice it gently - Add one teaspoon of cumin for an earthy background note that pairs especially well with roasted vegetables or warm proteins.
- Cook in broth - Swap water for one and three quarter cups reduced sodium chicken broth to infuse depth during cooking, but reduce added salt to avoid over seasoning.