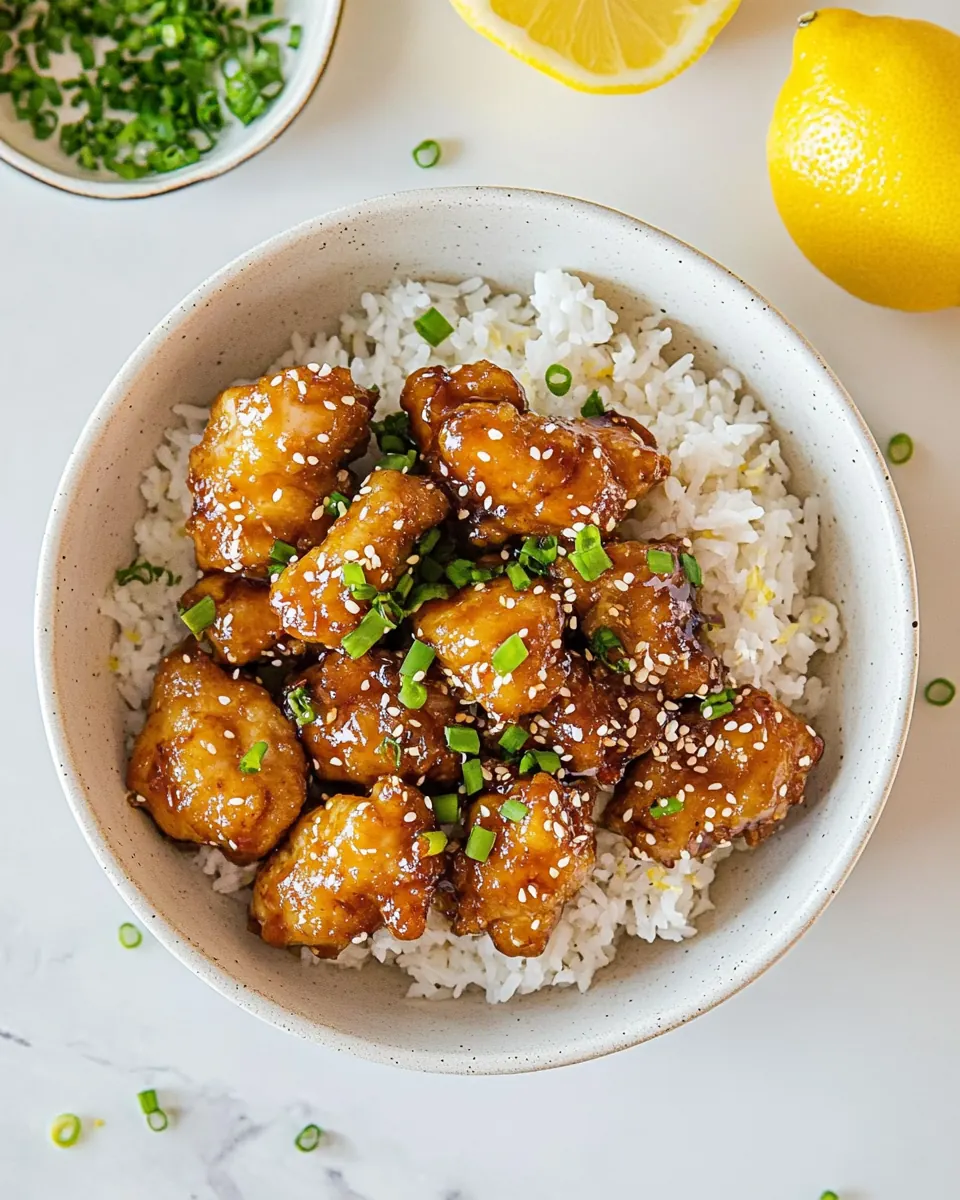
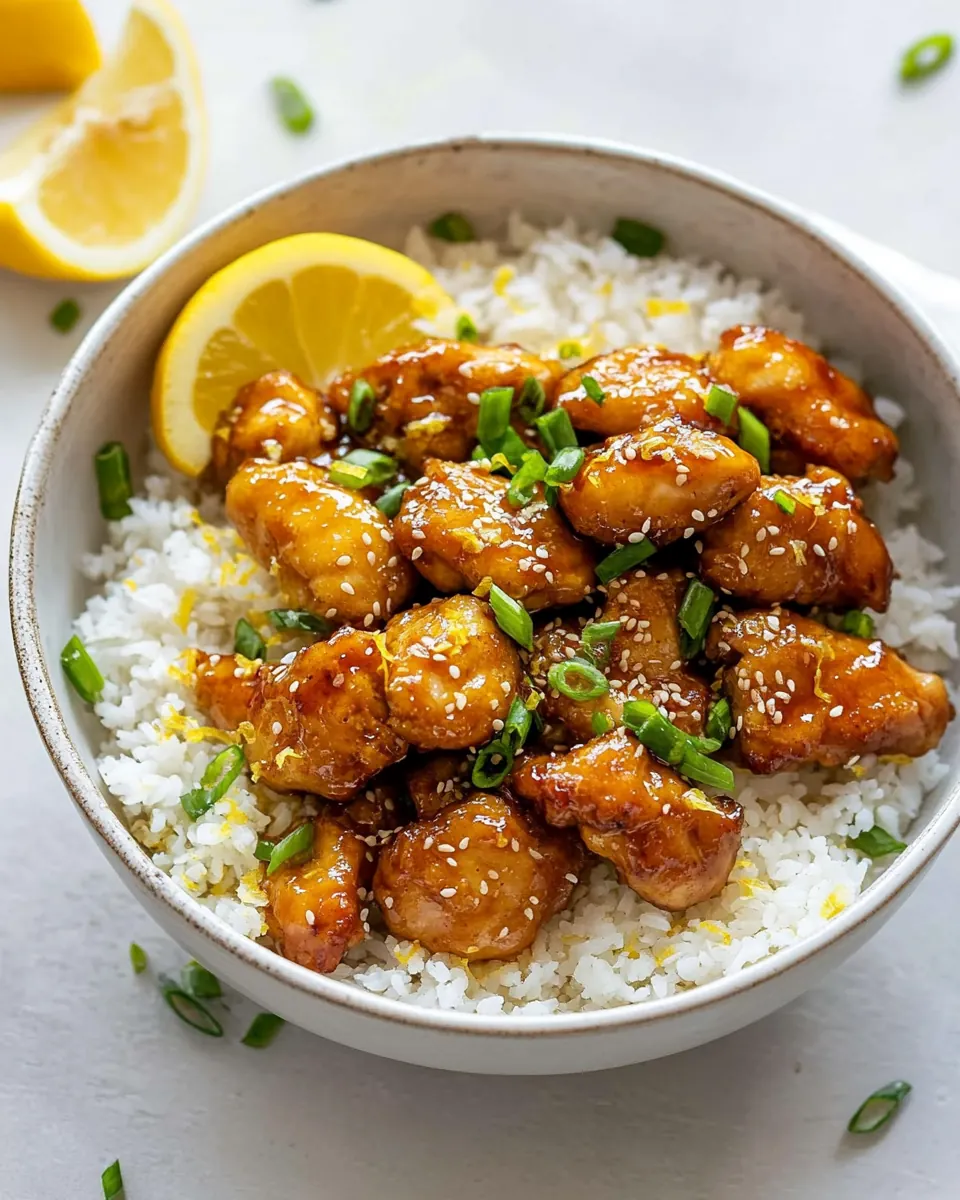
Chinese Lemon Chicken
Chinese Lemon Chicken is one of those dishes I fall back on when I want something bright, satisfying, and a little nostalgic. I first tasted a version of this at a neighborhood takeout spot as a teenager, the citrus tang cutting through the fried coating in a way that made every bite sing. Over the years I played with the balance of sweet and sour, the crisp factor of the exterior, and the patience the sauce requires to shine, and this version became my go to when friends asked for comfort food with a sunny twist.
The memory that sticks with me is piling bowls of steaming rice around a kitchen table after a long Sunday afternoon, everyone dunking hunks of golden chicken into glossy lemon sauce and arguing over who got the last piece. I like recipes that invite conversation, and this one always does. It also taught me a basic lesson about technique, that the way you coat and brown the chicken matters more than fancy tools; a good sear and a careful bake let the sauce cling and caramelize just right.
When I make Chinese Lemon Chicken now, I do it with a small ritual: I zest the lemons first, taste the sauce as it comes together, and watch as the kitchen fills with a sweet sharp aroma that makes everyone slow down. It is not about speed, it is about layering texture and flavor so each forkful is both crisp and saucy. If you enjoy recipes that are both approachable and showpiece worthy, you will find this one rewarding and downright addictive.
Recipe Snapshot
1 hr 15 mins
15 mins
60 mins
Medium
550 kcal
Chinese
Gluten-Free, Low FODMAP
Dinner
Large skillet, 9 x 13 baking dish, Mixing bowls
Why This Chinese Lemon Chicken Hits Different
Bright, Balanced Flavor
I love how Chinese Lemon Chicken brings a clean citrus note to a classic fried texture. The lemon juice and zest cut through the sugar so the sauce never feels cloying, it tastes lively and fresh. Whenever I serve it, people comment on how the sauce feels homemade and lively, not overly sweet like some takeout versions.
Textural Contrast
The combination of the cornstarch coating, the initial pan browning, and the bake gives a wonderful contrast. The exterior crisps in the skillet and finishes in the oven while the inside stays tender. I find that this method keeps the chicken juicy, and the occasional sticky bits of sauce on the edges add an irresistible chew and caramelization.
Make Ahead Friendly
I appreciate that most of the work can be prepped ahead. You can cut and coat the chicken and mix the sauce, then finish when guests arrive. It reduces last minute stress, so I can enjoy company rather than being stuck at the stove. It is a big reason I reach for this recipe for casual gatherings.
Kid Approved but Grown Up Enough
The sweet and tangy profile makes it a hit with kids while the lemon zest and soy sauce give depth that adults enjoy. I often get requests for this one from picky eaters and foodies alike, which is a rare and wonderful mix. You can plate it simply or make it the centerpiece of a larger meal.
Simple, Pantry Friendly Ingredients
There is comfort in knowing you likely have most of what you need on hand. Staples like cornstarch, eggs, and pantry condiments form the backbone of the sauce. That practicality combined with memorable flavor keeps this recipe in my regular rotation.
What You’ll Need for Chinese Lemon Chicken
The ingredient list for Chinese Lemon Chicken is straightforward, and each item plays a clear role. The key players are the chicken, which is the canvas, cornstarch for crisping, and the lemon components that provide brightness. The sauce balances sugar and acidity, while simple seasonings make everything sing without masking the main flavors.
- 3 4 boneless, skinless chicken breasts cut into 1-inch pieces: Cut into 1-inch pieces to ensure even cooking and quick frying; provides the primary protein and texture for the dish. Pound slightly if needed for uniform thickness to achieve tender, juicy bites after frying and saucing.
- salt and pepper to taste: Season to taste to enhance overall flavor and bring out the natural taste of the chicken; use sparingly and adjust during cooking. Balance salt with pepper for depth without overpowering the lemon-sweet sauce.
- 1 1/2 cups cornstarch: Coat pieces thoroughly to create a crisp, golden exterior when fried; acts as the main dry batter for frying. Shake off excess before dredging through beaten eggs to help the batter adhere and produce a crunchy crust.
- 3 eggs beaten: Beat until smooth to bind the cornstarch coating to the chicken and create a light, airy fried crust; helps achieve a golden finish. Use cold eggs for a slightly crisper texture and ensure even coverage on each piece.
- 1/2 cup canola oil: Heat for shallow frying to achieve a crispy, evenly browned coating; neutral oil like canola withstands high frying temperatures. Maintain medium-high heat so chicken cooks through without absorbing excess oil.
- 2/3 cup granulated sugar: Add to the sauce to provide primary sweetness and balance the tartness of lemon; dissolve over low heat for a smooth glaze. Adjust quantity slightly if preferring a tarter or sweeter final sauce.
- 1/2 cup lemon juice: Squeeze fresh for bright acidity and citrus flavor that defines the dish; contributes both flavor and liquid for the glaze. Use freshly juiced lemon for the best aromatic profile and vibrant tartness.
- 2 tablespoons soy sauce: Contribute savory umami depth to the sauce, balancing sweet and sour elements; stir in with other liquids for even distribution. Use low-sodium soy sauce if you need better control over overall saltiness.
- 3 tablespoons white vinegar: Introduce acidity and a sharp tang to complement lemon and sugar, enhancing the sweet-and-sour profile of the sauce. Add gradually and taste to avoid excessive sourness while building complexity.
- 1/4 teaspoon garlic salt: Season the sauce with a subtle garlic-salty note that layers with soy and lemon; provides mild savory depth without fresh garlic texture. Use sparingly to prevent overpowering the citrus flavors.
- 1 tablespoon lemon zest: Zest to release essential oils and intense lemon aroma that amplify the citrus profile without extra acidity. Sprinkle into the sauce or toss with chicken right before serving for a fragrant finish.
- 1 teaspoon cornstarch: Mix with sauce liquids to thicken and give the glaze a glossy, clingy texture that coats the fried chicken evenly. Dissolve in a small amount of liquid first to prevent lumps before incorporating into the hot sauce.
The Method for Chinese Lemon Chicken
This method blends stovetop technique and oven finishing to give you crispy, sauced chicken with a glossy lemon coating. Read each step slowly, trust your senses, and don’t rush the browning or the saucing. The following steps capture the original directions and expand them so you know exactly what to watch for.
- Preheat the oven to 350 degrees Fahrenheit. Cut 3-4 boneless, skinless chicken breasts into bite-sized pieces and season with salt and pepper.: As the aroma of warm air fills the kitchen, you should feel the quiet assurance that the oven is ready to finish the dish. The ambient heat will finish cooking the interior of the chicken while the sauce melts and glazes the exterior. You will notice a gentle, dry warmth when you open the oven, and the consistent temperature helps the sauce reduce evenly. A common mistake is not preheating, which leads to uneven cooking and soggy coating, so always set the oven early.
- Add 1 1/2 cups cornstarch to one bowl and the slightly beaten 3 eggs to another bowl. Dip each chicken piece into the cornstarch, then coat it in the egg mixture.: When you slice the chicken , listen for the clean sound of your knife on the cutting board, and take a moment to make pieces as uniform as possible so they cook at the same rate. Seasoning now lets the salt begin to penetrate, improving flavor from the inside out. You should be able to see even, well coated bits on the board. Avoid cutting pieces that are too large because they will take longer to cook and may dry out.
- Heat the 1/2 cup canola oil in a large skillet over medium-high heat and cook the chicken until browned.: The tactile contrast is satisfying, the dry powder clinging to fingers before the egg gives a slick film. This two bowl setup ensures each piece gets a dry dredge then a wet coating for optimal crispness. If the cornstarch becomes clumpy, sift it or shake the bowl to even it out; clumps lead to uneven coating and spotty browning.
- Place the chicken in a 9 x 13 greased baking dish.: As you dip, you will feel the cornstarch form a fine dusting, then the egg creates a glossy layer that binds the coating. Place pieces on a plate in a single layer so they do not stick together. If pieces clump, separate them immediately, because stuck areas will steam instead of crisping during frying.
- Mix 2/3 cup granulated sugar, 1/2 cup lemon juice, 2 tablespoons soy sauce, 3 tablespoons white vinegar, 1 tablespoon lemon zest, 1/4 teaspoon garlic salt, and 1 teaspoon cornstarch in a medium-sized mixing bowl.: When the oil shimmers and you hear a confident sizzle, add a few pieces and watch them brown to a golden color, that sound and color are your signals. Browning imparts flavor through the Maillard reaction and creates the texture contrast we want. Do not overcrowd the pan or the oil temperature will drop, resulting in greasy, soft coating instead of crisp crusts.
- Pour the sauce over the chicken and bake for 1 hour.: Transfer the browned pieces in a single layer, leaving any sticky browned bits in the pan if you prefer to deglaze later. The dish should be roomy so sauce can circulate and coat each piece evenly. If the dish is too small the chicken will steam and lose crispness, so choose the right sized pan.
- Stir the chicken every 15 minutes so that it is coated in the sauce.: Whisk until the sugar dissolves and the cornstarch is fully dispersed, the mixture will go from grainy to smooth and slightly glossy. The scent will shift from syrupy sweet to a bright citrus tang as the lemon zest releases oils. If you notice any gritty texture, whisk longer or dissolve the cornstarch in a tablespoon of water first, because lumps will create uneven thickness in the sauce.
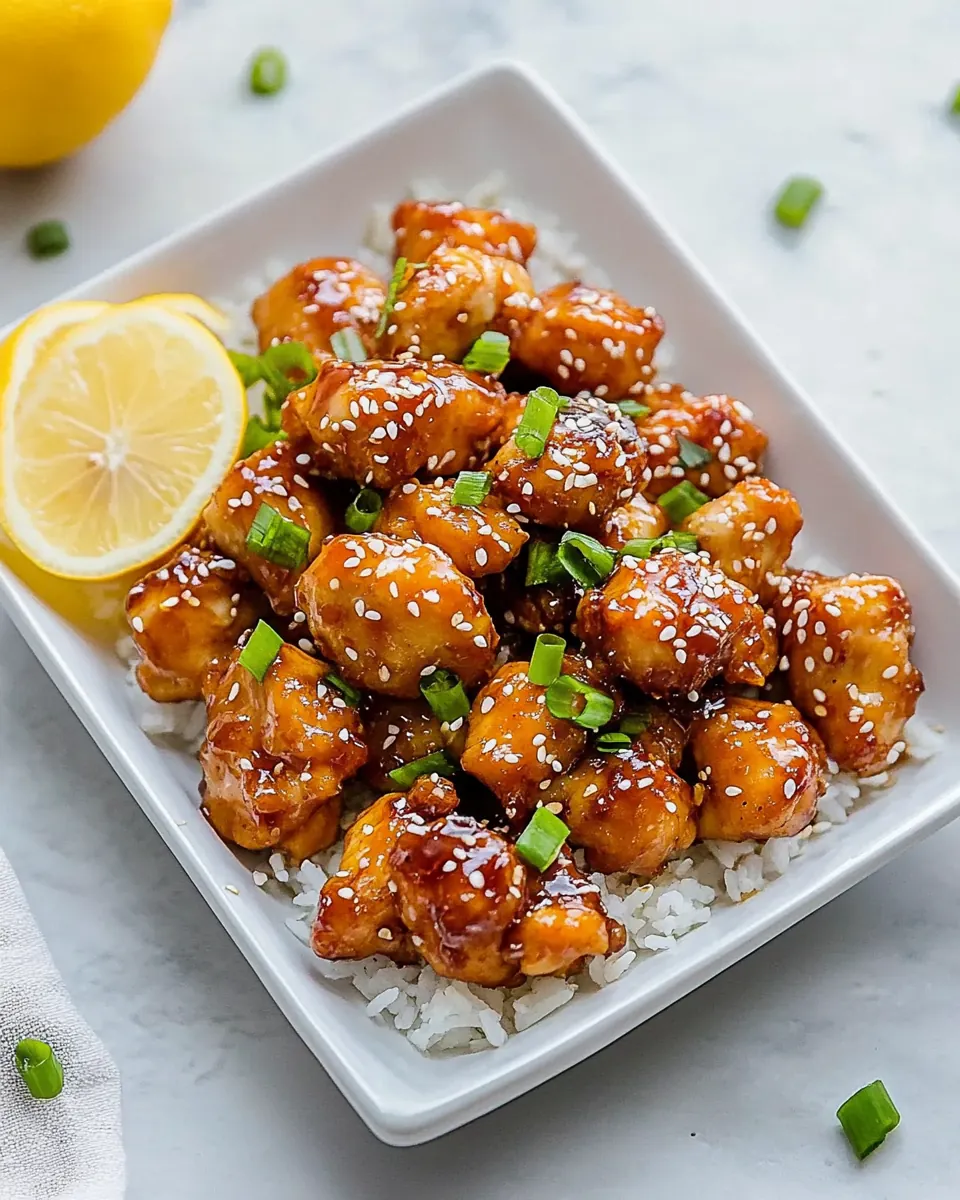
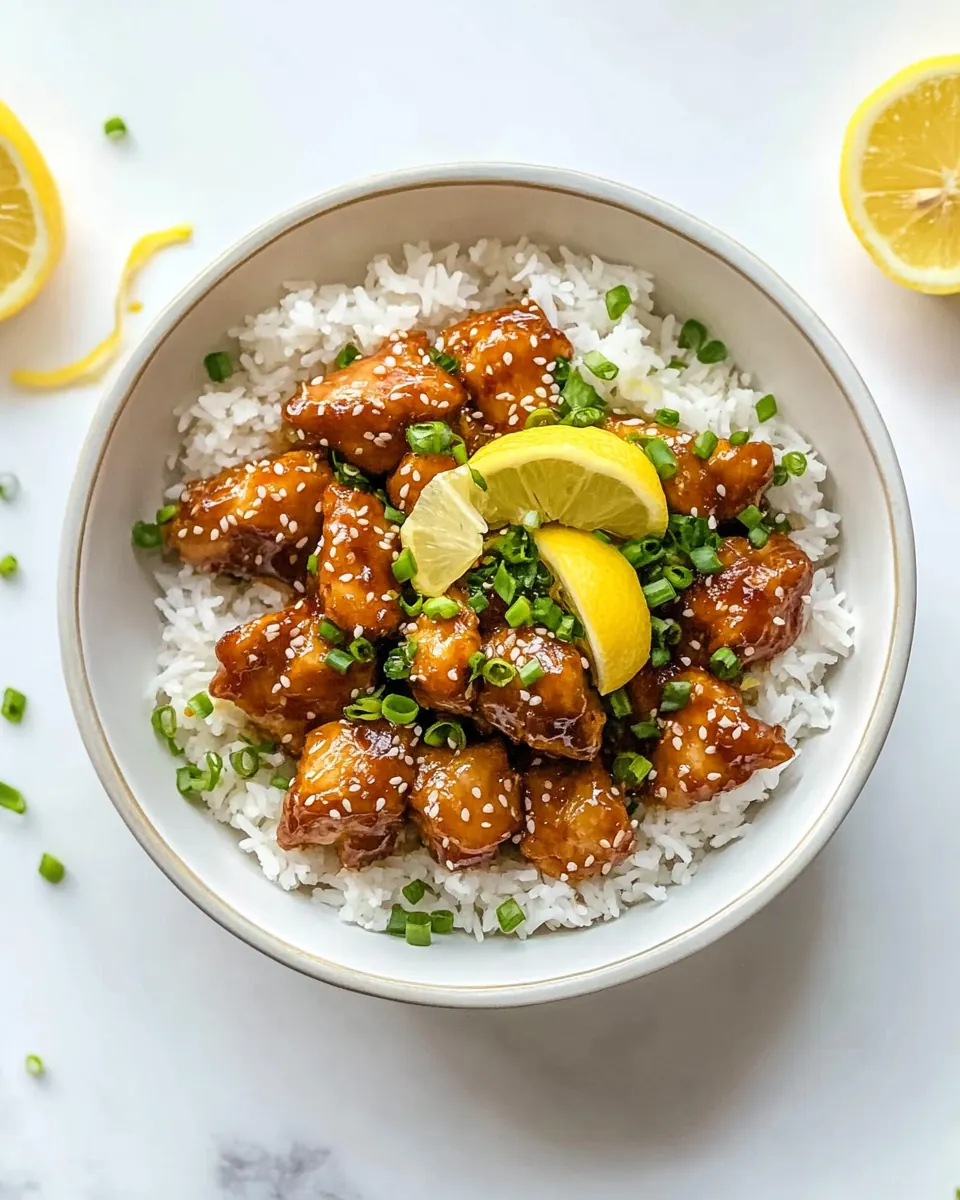
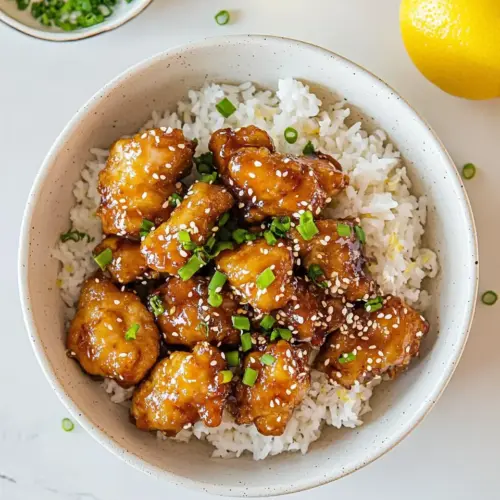
- Serve over rice and enjoy!: As the sauce heats, it will begin to bubble gently and the aroma of lemon and caramelizing sugar will fill the kitchen, signaling that the flavors are marrying. The oven heat allows the sauce to thicken and cling to the chicken , creating a glossy finish. A common issue is baking at too high a temperature which can burn the sauce edges, so keep the temperature steady and check visually through the oven window.
- Stir the chicken every 15 minutes so that it is coated in the sauce: Use a spoon to gently turn pieces, ensuring the sauce reaches every bite and the coating remains moist and shiny. You will see the sauce thicken and darken slightly, and the surface will glisten with a syrupy sheen. Avoid vigorous stirring which can tear the coating off the chicken ; gentle turns are enough to redistribute the sauce and promote even glazing.
- Serve over rice and enjoy: The final moment is all about contrast, place the sauced pieces over steaming rice so each forkful combines crisp texture and saucy brightness. You will hear the satisfying fork against the bowl and taste sweetness, tang, and savory notes in one bite. If the sauce seems too thin, let it rest a few minutes to set, and if it is overly thick, loosen with a splash of warm water. Avoid serving straight from a cold oven because the sauce is best when warm and glossy.
Make It Your Own
I like to tweak small details to make the dish feel personal while keeping the core technique intact. Here are practical ways to adapt and elevate Chinese Lemon Chicken without changing the heart of the recipe.
- Toast the cornstarch in a dry pan briefly before dredging to add a subtle nutty aroma and extra depth to the crust.
- Double the lemon zest if you want a more aromatic finish, adding it right before baking to preserve the essential oils.
- Use a neutral high smoke point oil like canola for frying to avoid imparting extra flavors and to maintain crispness.
- Let the sauce rest for a few minutes after baking so it thickens slightly and clings to the chicken better when serving.
- Serve with steamed rice to soak up the sauce, or pair with a light vegetable side for a balanced plate.
Best Served With
Chinese Lemon Chicken pairs well with simple, neutral sides that let the sauce shine. Consider assembling a small spread where each element complements the bright, sweet and tangy profile of the main dish.
- Steamed white rice is the classic base, absorbing the lemon sauce and balancing the sweet tang with neutral starch.
- Jasmine rice adds a fragrant dimension that plays nicely with the citrus notes without overpowering them.
- Lightly steamed green vegetables such as broccoli or snap peas provide a fresh, crisp counterpoint and bright color on the plate.
- Simple salad with a light vinaigrette can offer freshness and acidity, matching the lemon flavors while adding textural contrast.
- Family dinners and casual gatherings are ideal occasions, as the dish is shareable and approachable for diverse palates.
- Storage tips include refrigerating leftovers in an airtight container for up to three days; reheat gently to preserve texture, and consider refreshing the glaze if it thickens too much.
FAQ
Conclusion
This version of Chinese Lemon Chicken stands out for its bright citrus sauce, crisp cornstarch coating, and approachable technique. It brings satisfying textures and a lively sweet and tangy profile that works for family dinners and casual gatherings alike. Give it a try the next time you want a comforting yet vibrant main dish, and enjoy the way the lemon lifts every bite in a simple, memorable way.
Chinese Lemon Chicken
Equipment
- Large Skillet
- 9 X 13 baking dish
- Mixing Bowls
Ingredients
- 3 -4 boneless, skinless chicken breasts cut into 1-inch pieces Cut into 1-inch pieces to ensure even cooking and quick frying; provides the primary protein and texture for the dish. Pound slightly if needed for uniform thickness to achieve tender, juicy bites after frying and saucing.
- salt and pepper to taste Season to taste to enhance overall flavor and bring out the natural taste of the chicken; use sparingly and adjust during cooking. Balance salt with pepper for depth without overpowering the lemon-sweet sauce.
- 1 1/2 cups cornstarch Coat pieces thoroughly to create a crisp, golden exterior when fried; acts as the main dry batter for frying. Shake off excess before dredging through beaten eggs to help the batter adhere and produce a crunchy crust.
- 3 eggs beaten Beat until smooth to bind the cornstarch coating to the chicken and create a light, airy fried crust; helps achieve a golden finish. Use cold eggs for a slightly crisper texture and ensure even coverage on each piece.
- 1/2 cup canola oil Heat for shallow frying to achieve a crispy, evenly browned coating; neutral oil like canola withstands high frying temperatures. Maintain medium-high heat so chicken cooks through without absorbing excess oil.
- 2/3 cup granulated sugar Add to the sauce to provide primary sweetness and balance the tartness of lemon; dissolve over low heat for a smooth glaze. Adjust quantity slightly if preferring a tarter or sweeter final sauce.
- 1/2 cup lemon juice Squeeze fresh for bright acidity and citrus flavor that defines the dish; contributes both flavor and liquid for the glaze. Use freshly juiced lemon for the best aromatic profile and vibrant tartness.
- 2 tablespoons soy sauce Contribute savory umami depth to the sauce, balancing sweet and sour elements; stir in with other liquids for even distribution. Use low-sodium soy sauce if you need better control over overall saltiness.
- 3 tablespoons white vinegar Introduce acidity and a sharp tang to complement lemon and sugar, enhancing the sweet-and-sour profile of the sauce. Add gradually and taste to avoid excessive sourness while building complexity.
- 1/4 teaspoon garlic salt Season the sauce with a subtle garlic-salty note that layers with soy and lemon; provides mild savory depth without fresh garlic texture. Use sparingly to prevent overpowering the citrus flavors.
- 1 tablespoon lemon zest Zest to release essential oils and intense lemon aroma that amplify the citrus profile without extra acidity. Sprinkle into the sauce or toss with chicken right before serving for a fragrant finish.
- 1 teaspoon cornstarch Mix with sauce liquids to thicken and give the glaze a glossy, clingy texture that coats the fried chicken evenly. Dissolve in a small amount of liquid first to prevent lumps before incorporating into the hot sauce.
Instructions
- Preheat the oven to 350 degrees Fahrenheit. Cut 3-4 boneless, skinless chicken breasts into bite-sized pieces and season with salt and pepper.: As the aroma of warm air fills the kitchen, you should feel the quiet assurance that the oven is ready to finish the dish. The ambient heat will finish cooking the interior of the chicken while the sauce melts and glazes the exterior. You will notice a gentle, dry warmth when you open the oven, and the consistent temperature helps the sauce reduce evenly. A common mistake is not preheating, which leads to uneven cooking and soggy coating, so always set the oven early.
- Add 1 1/2 cups cornstarch to one bowl and the slightly beaten 3 eggs to another bowl. Dip each chicken piece into the cornstarch, then coat it in the egg mixture.: When you slice the chicken , listen for the clean sound of your knife on the cutting board, and take a moment to make pieces as uniform as possible so they cook at the same rate. Seasoning now lets the salt begin to penetrate, improving flavor from the inside out. You should be able to see even, well coated bits on the board. Avoid cutting pieces that are too large because they will take longer to cook and may dry out.
- Heat the 1/2 cup canola oil in a large skillet over medium-high heat and cook the chicken until browned.: The tactile contrast is satisfying, the dry powder clinging to fingers before the egg gives a slick film. This two bowl setup ensures each piece gets a dry dredge then a wet coating for optimal crispness. If the cornstarch becomes clumpy, sift it or shake the bowl to even it out; clumps lead to uneven coating and spotty browning.
- Place the chicken in a 9 x 13 greased baking dish.: As you dip, you will feel the cornstarch form a fine dusting, then the egg creates a glossy layer that binds the coating. Place pieces on a plate in a single layer so they do not stick together. If pieces clump, separate them immediately, because stuck areas will steam instead of crisping during frying.
- Mix 2/3 cup granulated sugar, 1/2 cup lemon juice, 2 tablespoons soy sauce, 3 tablespoons white vinegar, 1 tablespoon lemon zest, 1/4 teaspoon garlic salt, and 1 teaspoon cornstarch in a medium-sized mixing bowl.: When the oil shimmers and you hear a confident sizzle, add a few pieces and watch them brown to a golden color, that sound and color are your signals. Browning imparts flavor through the Maillard reaction and creates the texture contrast we want. Do not overcrowd the pan or the oil temperature will drop, resulting in greasy, soft coating instead of crisp crusts.
- Pour the sauce over the chicken and bake for 1 hour.: Transfer the browned pieces in a single layer, leaving any sticky browned bits in the pan if you prefer to deglaze later. The dish should be roomy so sauce can circulate and coat each piece evenly. If the dish is too small the chicken will steam and lose crispness, so choose the right sized pan.
- Stir the chicken every 15 minutes so that it is coated in the sauce.: Whisk until the sugar dissolves and the cornstarch is fully dispersed, the mixture will go from grainy to smooth and slightly glossy. The scent will shift from syrupy sweet to a bright citrus tang as the lemon zest releases oils. If you notice any gritty texture, whisk longer or dissolve the cornstarch in a tablespoon of water first, because lumps will create uneven thickness in the sauce.
- Serve over rice and enjoy!: As the sauce heats, it will begin to bubble gently and the aroma of lemon and caramelizing sugar will fill the kitchen, signaling that the flavors are marrying. The oven heat allows the sauce to thicken and cling to the chicken , creating a glossy finish. A common issue is baking at too high a temperature which can burn the sauce edges, so keep the temperature steady and check visually through the oven window.
- Stir the chicken every 15 minutes so that it is coated in the sauce: Use a spoon to gently turn pieces, ensuring the sauce reaches every bite and the coating remains moist and shiny. You will see the sauce thicken and darken slightly, and the surface will glisten with a syrupy sheen. Avoid vigorous stirring which can tear the coating off the chicken ; gentle turns are enough to redistribute the sauce and promote even glazing.
- Serve over rice and enjoy: The final moment is all about contrast, place the sauced pieces over steaming rice so each forkful combines crisp texture and saucy brightness. You will hear the satisfying fork against the bowl and taste sweetness, tang, and savory notes in one bite. If the sauce seems too thin, let it rest a few minutes to set, and if it is overly thick, loosen with a splash of warm water. Avoid serving straight from a cold oven because the sauce is best when warm and glossy.
Notes
- Toast the cornstarch in a dry pan briefly before dredging to add a subtle nutty aroma and extra depth to the crust.
- Double the lemon zest if you want a more aromatic finish, adding it right before baking to preserve the essential oils.
- Use a neutral high smoke point oil like canola for frying to avoid imparting extra flavors and to maintain crispness.
- Let the sauce rest for a few minutes after baking so it thickens slightly and clings to the chicken better when serving.
- Serve with steamed rice to soak up the sauce, or pair with a light vegetable side for a balanced plate.